
Part 11 covered the conceptual map of the three device join types. This guide is the procedure — the actual click-by-click of joining a Windows 11 PC to Microsoft Entra ID, both via Settings (existing OS) and via OOBE (fresh install), then verifying the join three different ways.
Common confusion: “adding a work account” in Settings looks similar but produces a Registered device (lighter). The difference is one easy-to-miss link at the bottom of the dialog. Get that wrong and you have an Entra Registered device pretending to be Joined — no Intune enrollment, no full management.
Section 1 — prerequisites (skip this and the join fails)
Windows edition

Settings > System > About > Windows specifications. Must be Windows 11 Pro / Enterprise / Education. Windows 11 Home does NOT support Entra Join. Home users get only Entra Registered.
Internet
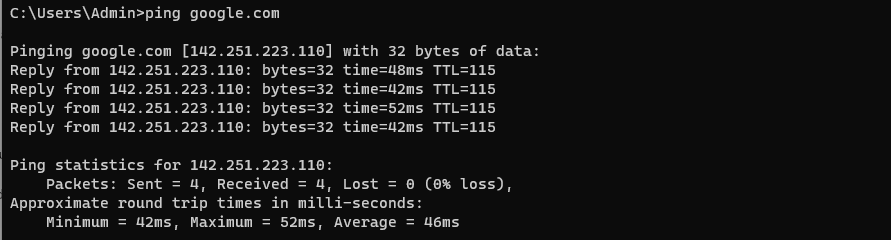
The join talks directly to Microsoft’s cloud servers. Active connection required throughout.
A valid Entra account
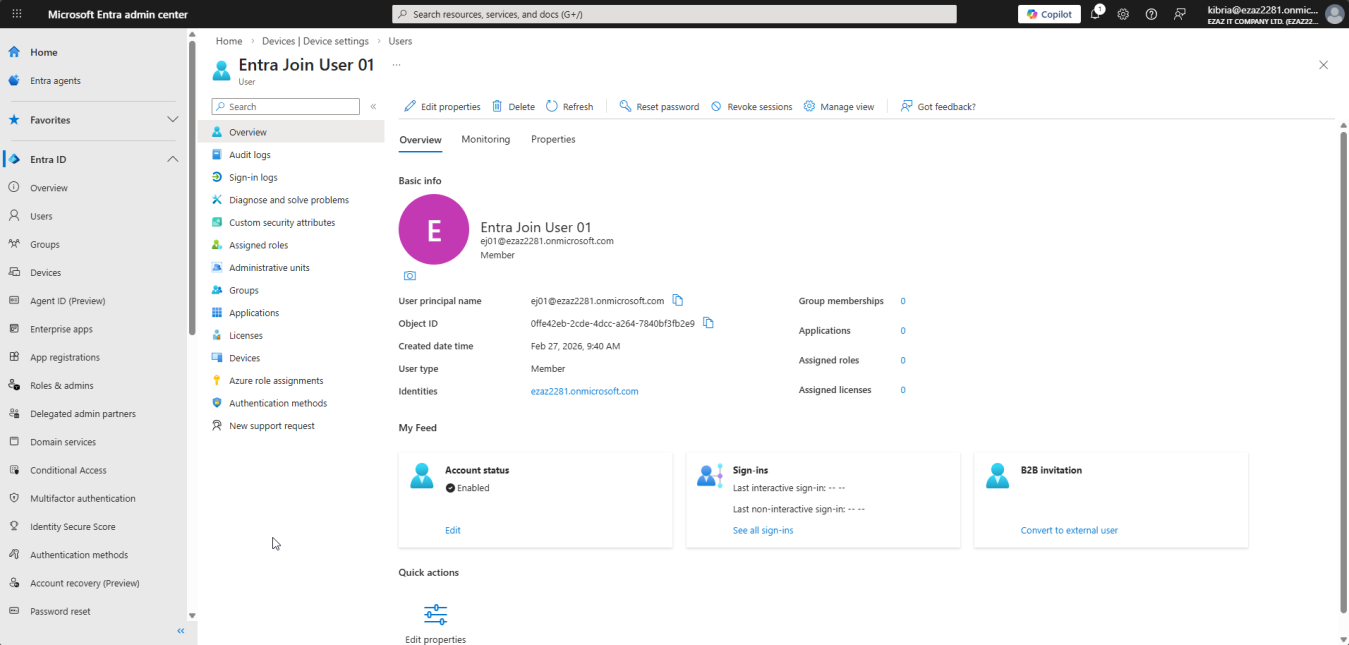
You need a user account in your tenant (e.g. jdoe@yourcompany.com). Know the password and have your MFA method ready.
Device-join permission enabled
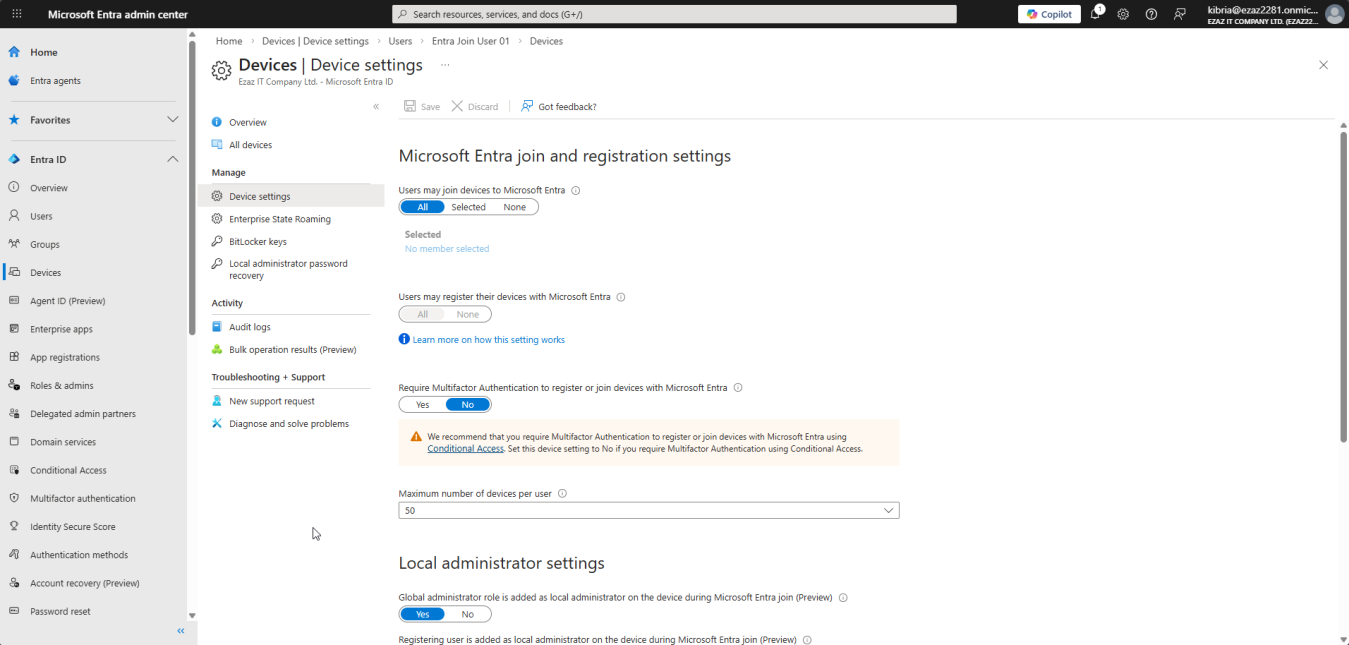
Admin verifies (or sets) this in entra.microsoft.com > Identity > Devices > Overview > Device Settings:
- Users may join devices to Microsoft Entra = All (default)
- If Selected: include the joining user in the configured group
- Default per-user limit: 50 devices. One user joining a laptop, desktop, and a VM = 3 of their 50 quota.
Method 1 — join via Windows Settings (post-OOBE, most common)
Step 1 — navigate to Access work or school
- Start > Settings (gear) or Win + I
- Accounts (left sidebar) > Access work or school
Step 2 — the easy-to-miss link
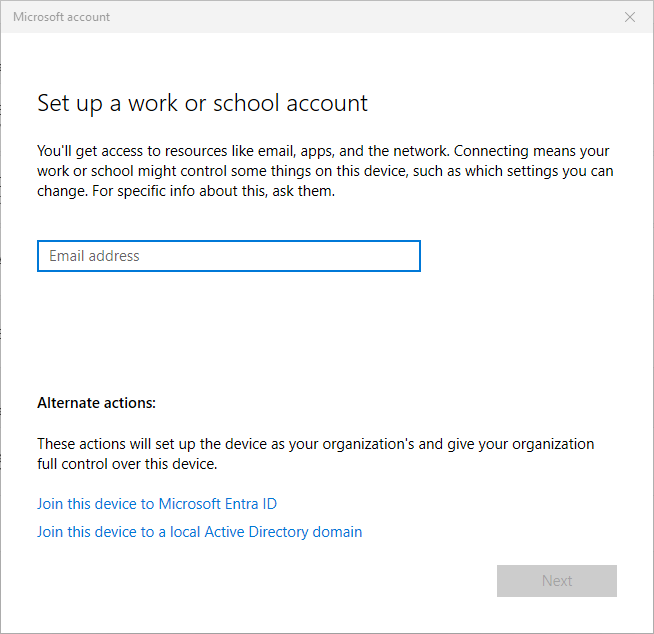
Click Connect. The “Set up a work or school account” dialog appears with a text box asking for an email.
DO NOT type the email and click Next. That creates a Registered (lighter) device. Look at the bottom of the dialog for the link “Join this device to Microsoft Entra ID”. Click it.
Step 3 — sign in with Entra credentials
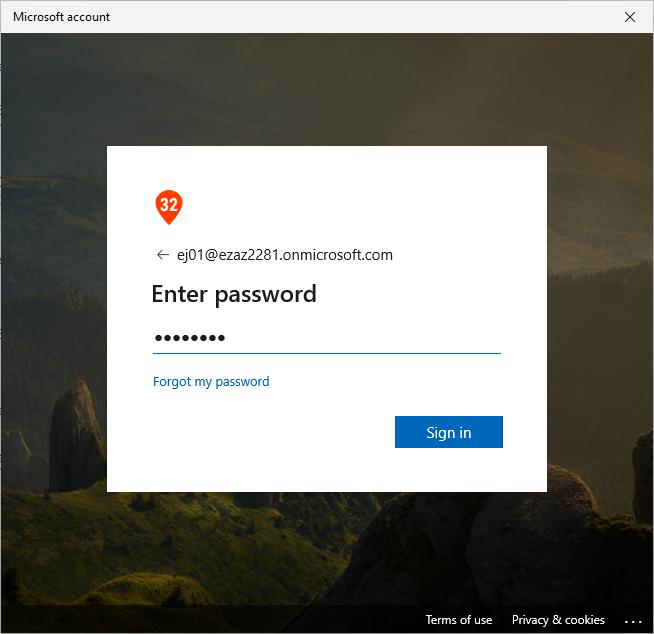
jdoe@yourcompany.com) > password > MFA prompt > complete verification.Sign-in screen: full UPN (jdoe@yourcompany.com) > Next > password > Sign in. If MFA is enforced, complete the prompt (Authenticator push, SMS, phone call).
Step 4 — confirm and complete
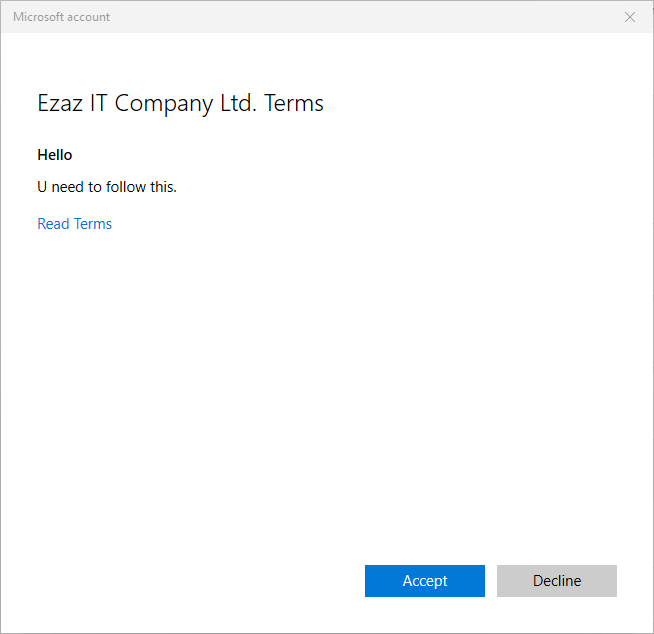
Screen shows the org name + domain. Verify it’s the right tenant.
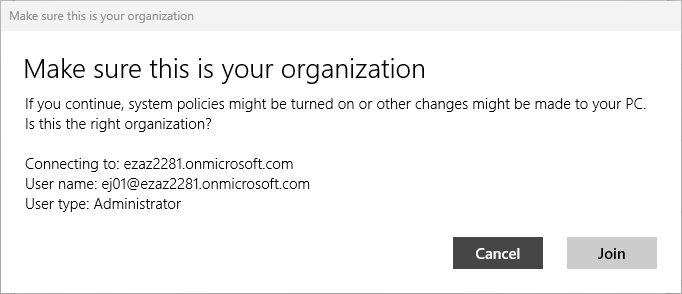
Click Join.
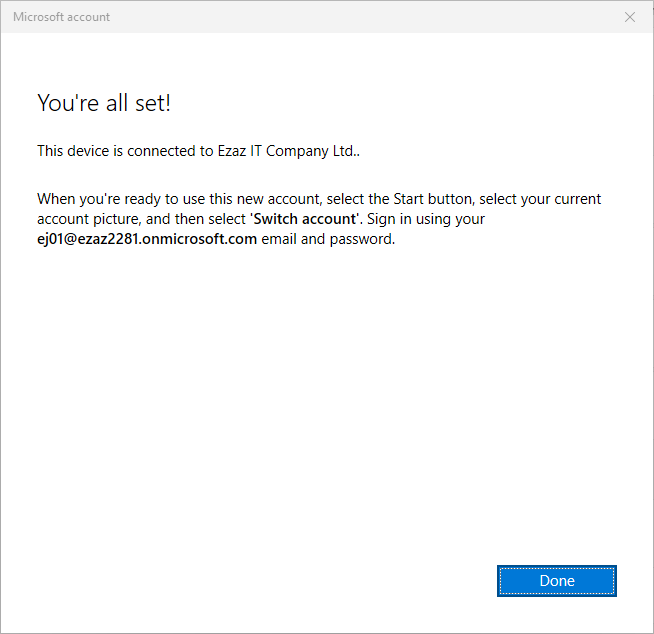
Wait for completion (a few seconds). Confirmation: device successfully joined > Done.
Step 5 — restart and sign in with the Entra account
After the join, restart the device and sign in with the Entra account for the first time — this creates the user profile.
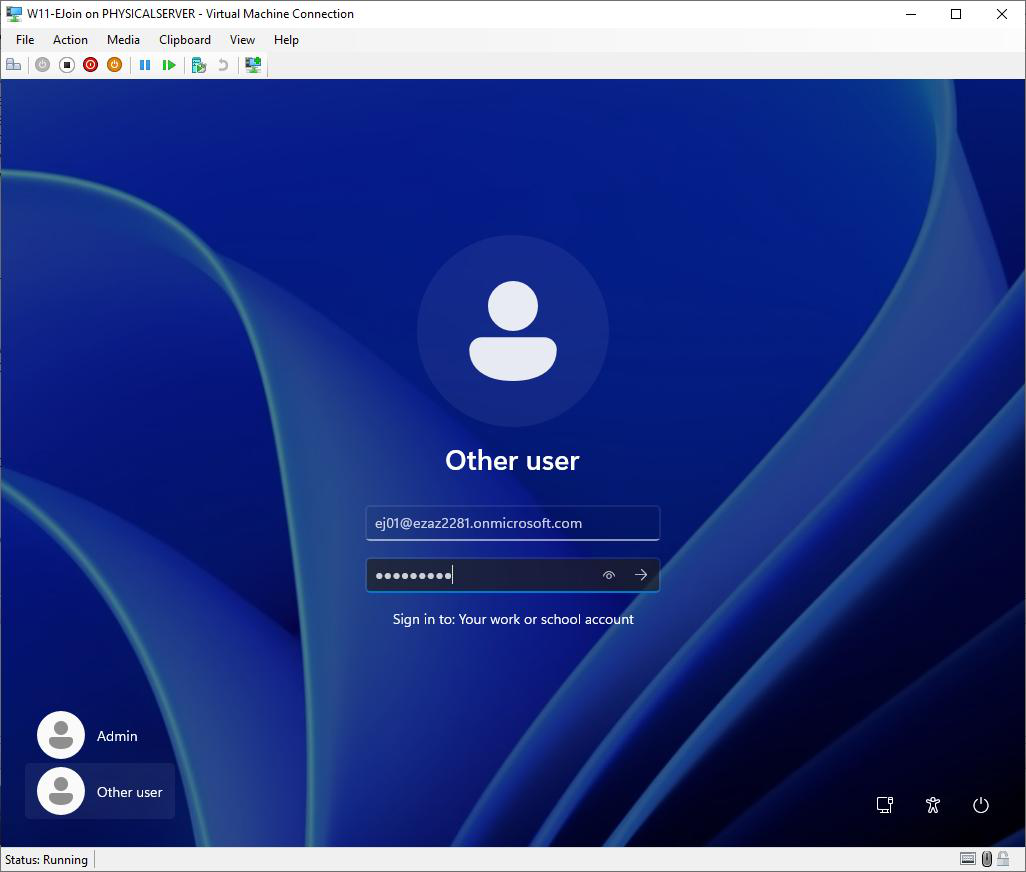
At the login screen, click Other user (bottom left). Enter your Entra credentials.
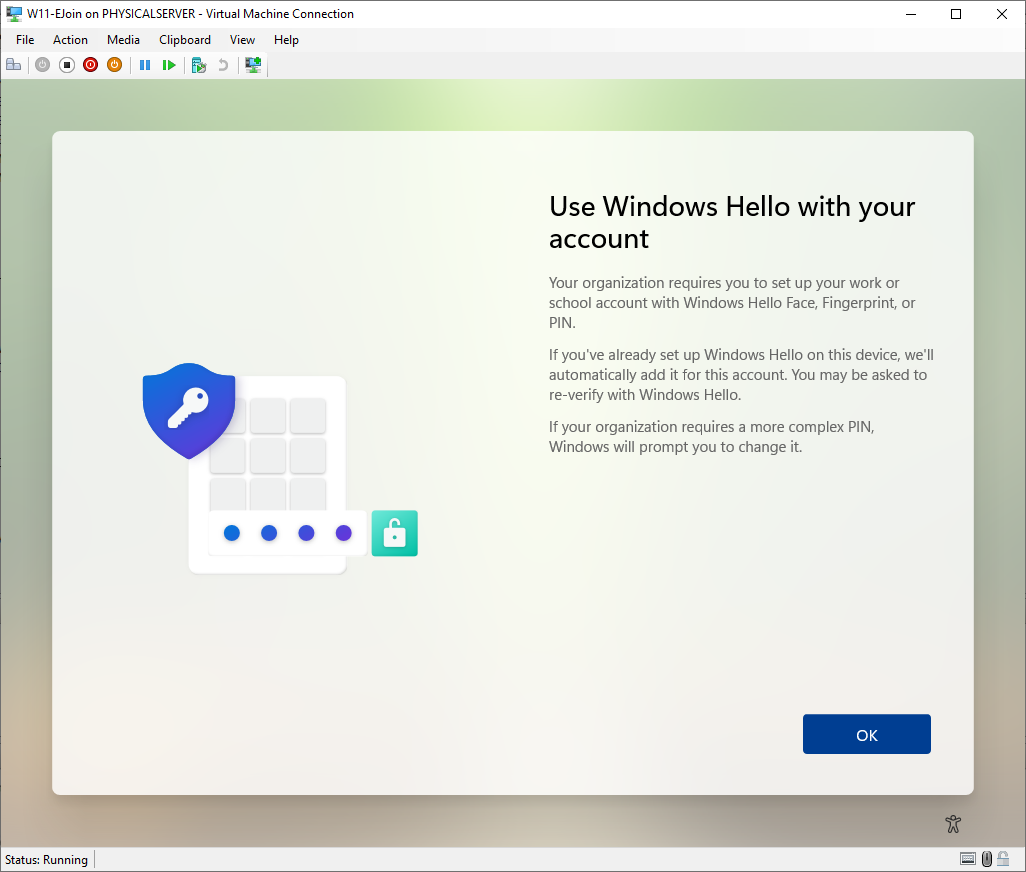
Windows builds the user profile (~1 min). Windows Hello prompt > OK.
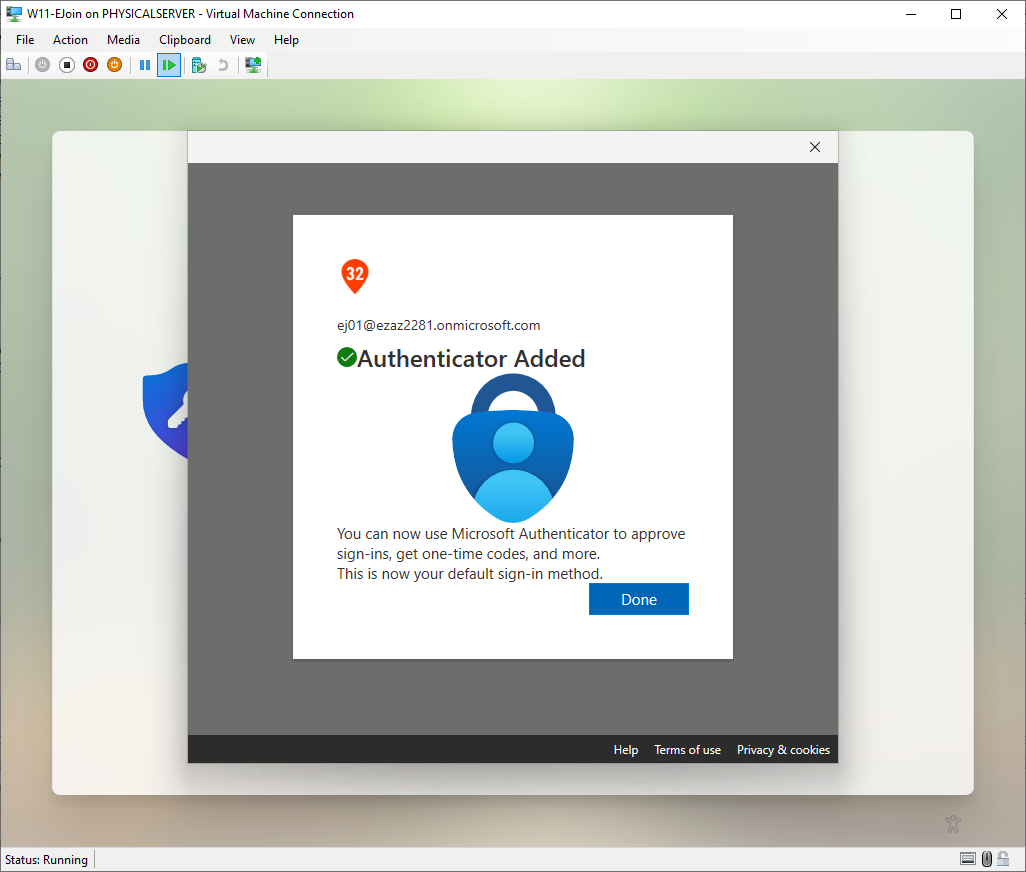
If MFA is configured, verify again. After this first interactive sign-in, the PRT handles re-auth and MFA prompts reduce.
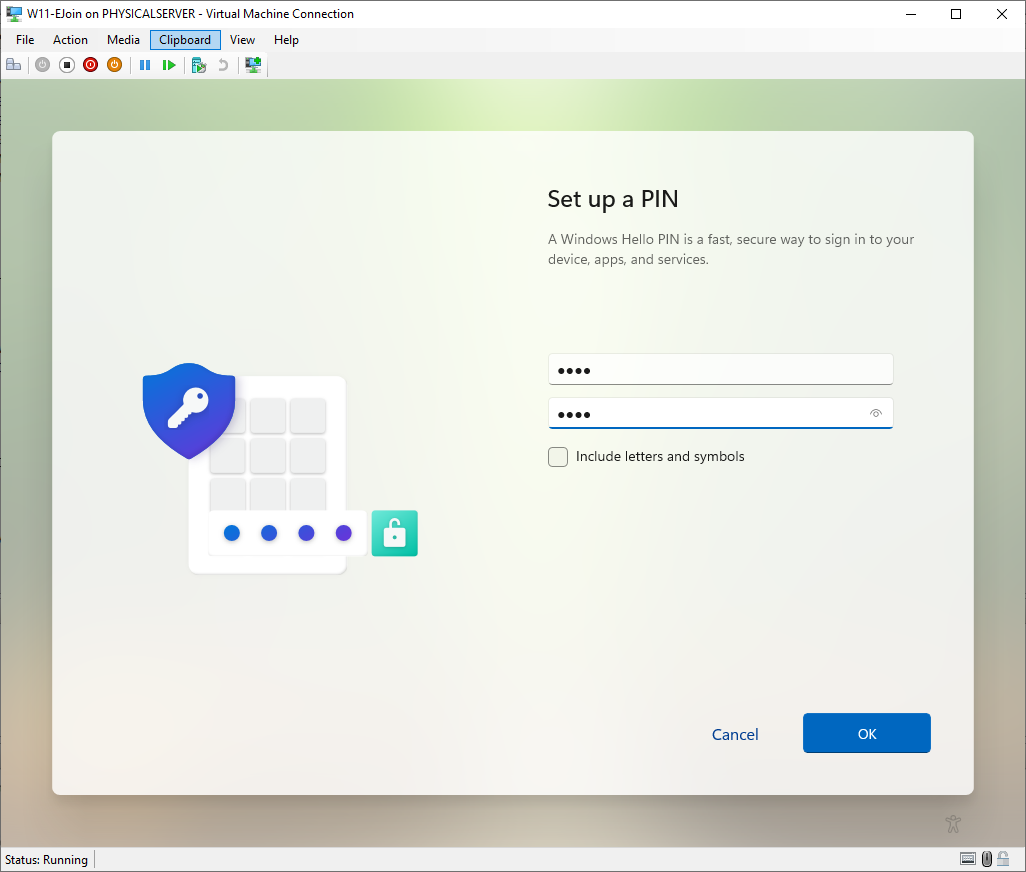
Set up a PIN. The PIN replaces your password for local sign-in. More secure because it’s device-bound — even if leaked, it only works on this PC.
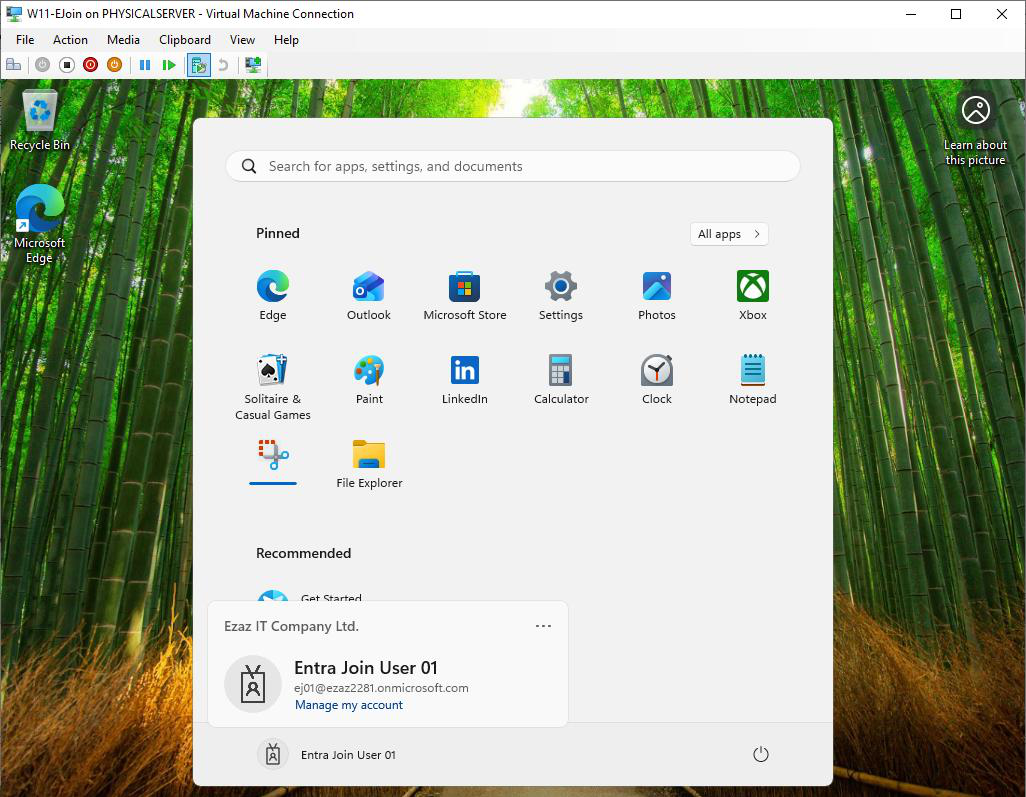
Click OK to finish. Logged in with your Entra account.
Method 2 — join during OOBE (fresh install)
Out-of-Box Experience: the initial setup wizard on a brand-new Windows install. Use this when setting up a new corporate device from scratch.
- Power on. Windows setup begins automatically.
- Country/Region + Keyboard layout. Yes > Skip.
- “How would you like to set up this device?” — pick Set up for an organization (NOT personal use). Next.
- Sign in with the Entra work account > Next > password > MFA.
- Set up Windows Hello > OK.
- Set up a second auth factor (Authenticator, SMS, phone call).
- Set up Windows PIN > OK.
- Setup completes. Device is now Entra Joined as part of OOBE — no separate Settings step needed.
Section 5 — verify the join (3 ways)
Verify #1 — Windows Settings
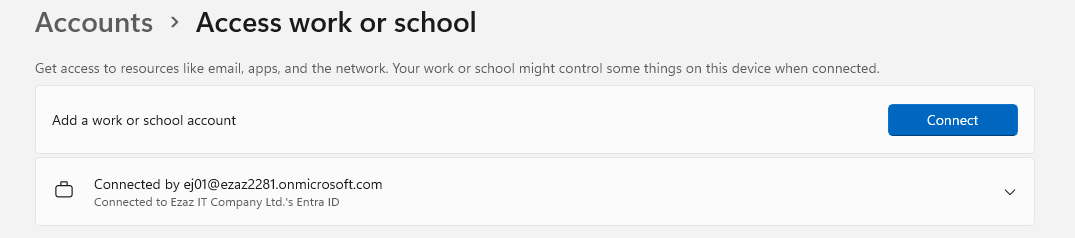
Settings > Accounts > Access work or school. Should show Connected to [Org] Entra ID.
Verify #2 — dsregcmd /status (most detailed)
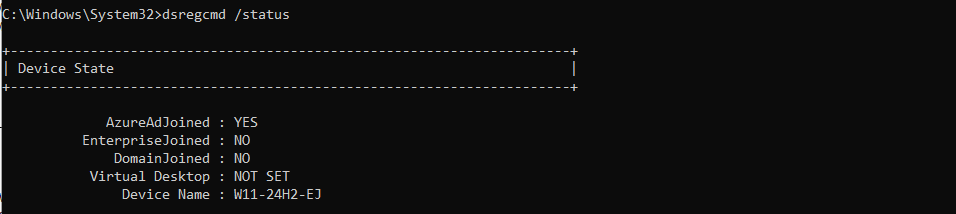
cmd > dsregcmd /status. Look in Device State for AzureAdJoined: YES and AzureAdPrt: YES.Win + R > cmd > dsregcmd /status. In the Device State section look for:
AzureAdJoined : YES
AzureAdPrt    : YES
AzureAdJoined: YES — device is Entra Joined. AzureAdPrt: YES — Primary Refresh Token is active, SSO works.
Verify #3 — Entra Admin Center (cloud-side)
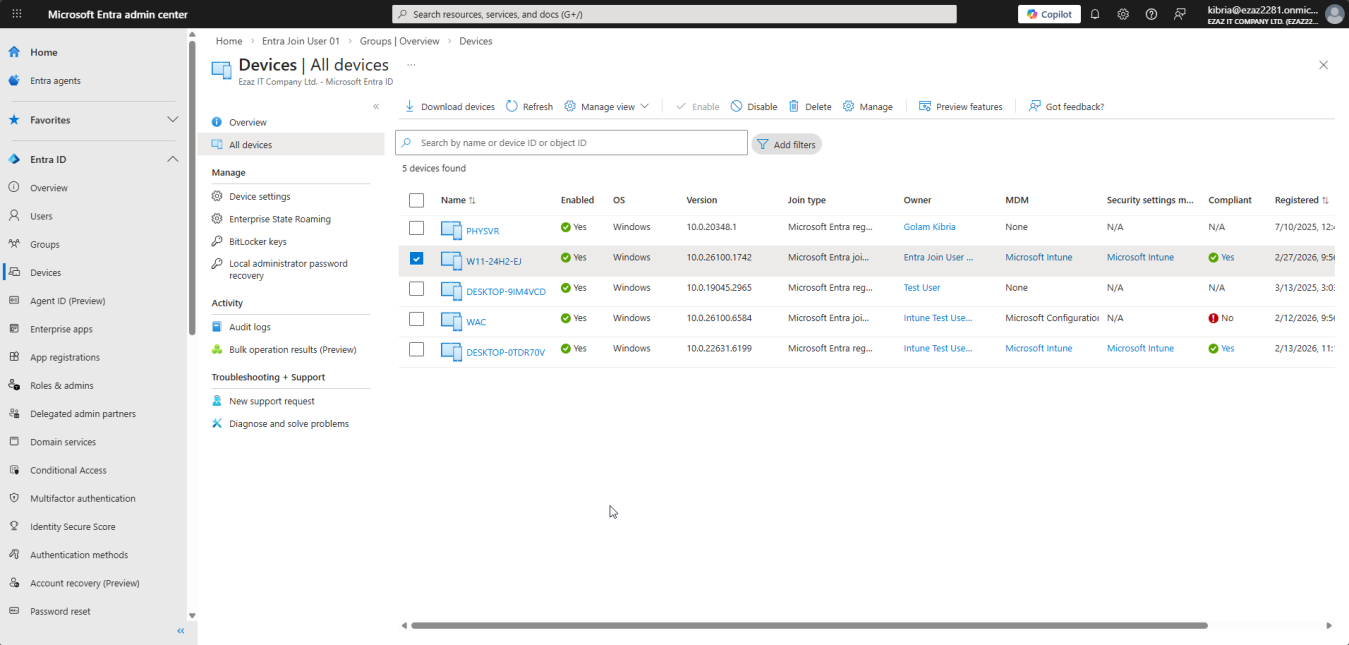
Admin only: entra.microsoft.com > Identity > Devices > All Devices. Search by hostname. Should show:
- Join Type: Microsoft Entra Joined
- Owner: the user who joined
The Primary Refresh Token (PRT)
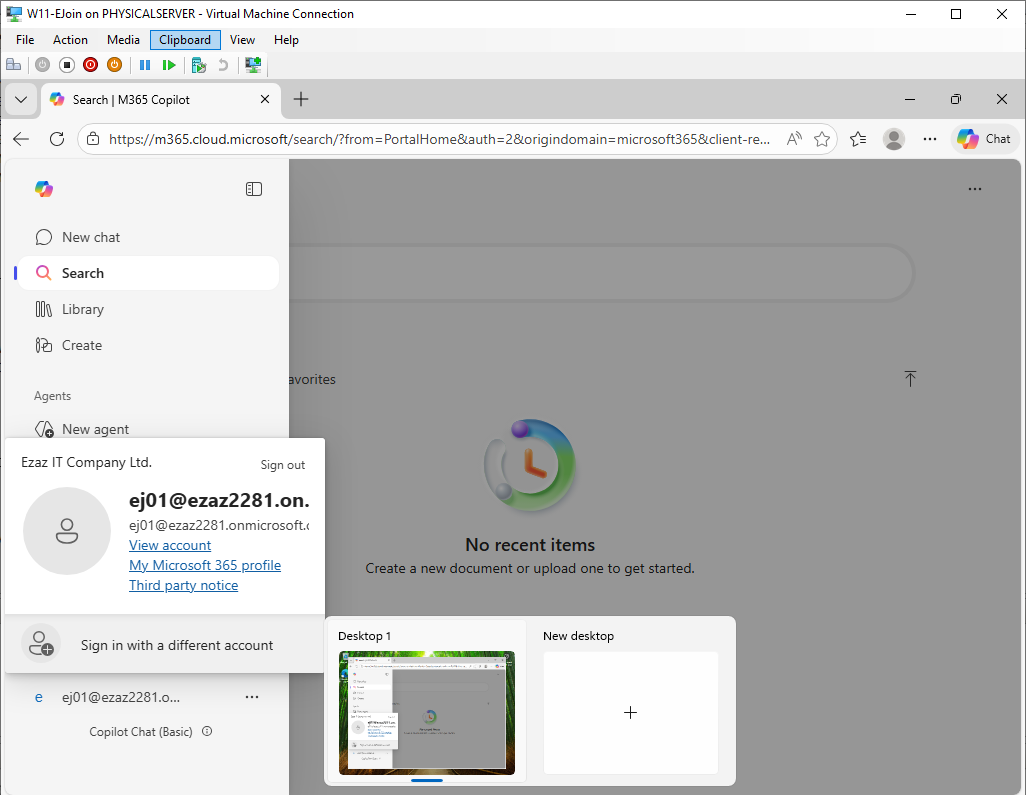
portal.office.com — you’re signed in automatically, no credentials prompt. PRT valid 14 days, auto-renews on use.The PRT is a special token issued to the device when a user signs in with their Entra account. It enables Single Sign-On across all Microsoft 365 services. Properties:
- Valid for 14 days
- Auto-renews as long as the user actively uses the device within those 14 days
- Without typing credentials again, the user is auto-signed in to portal.office.com, Outlook, Teams, SharePoint, anything Microsoft 365
Test it: after login, open a browser and go to portal.office.com. If you land in the inbox without being prompted, the PRT is working.
Section 6 — the device certificate (what happens behind the scenes)
During the join, Microsoft pushes a security certificate to the device. The cert is tied to the device’s unique Device ID and is used for device-level authentication. View it:
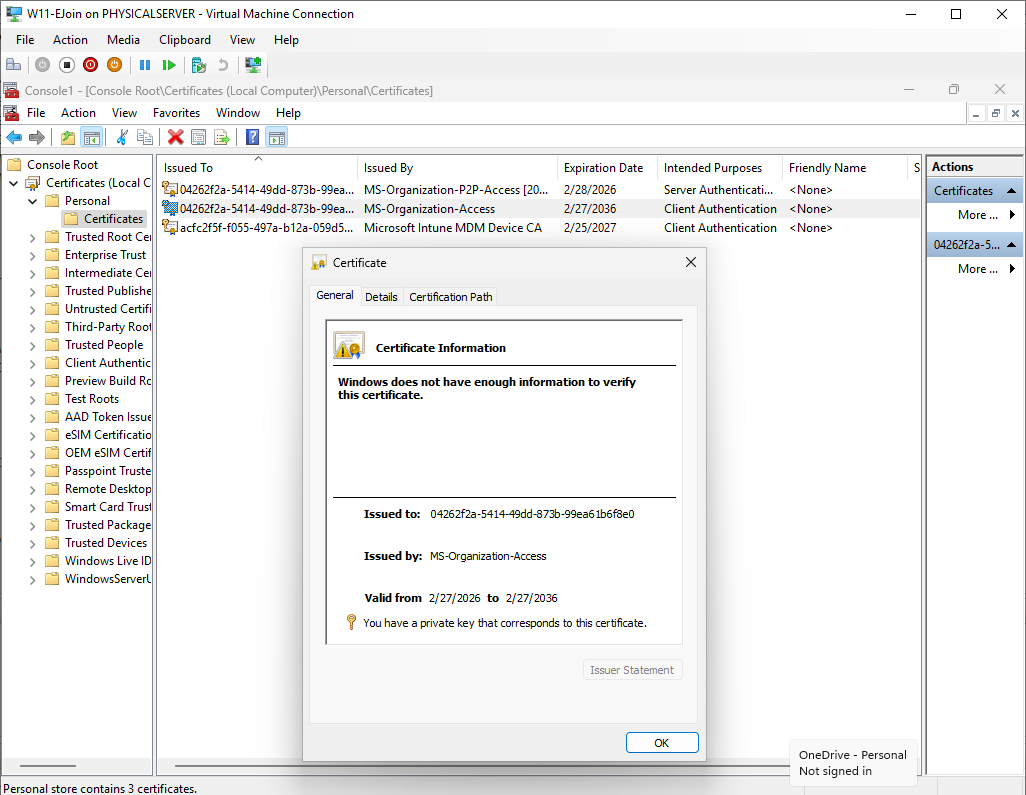
mmc > File > Add/Remove Snap-in > Certificates > Computer account (not user) > Local computer.Win + R > mmc > File > Add/Remove Snap-in > Certificates > Computer account (not user) > Local computer > Finish > OK.
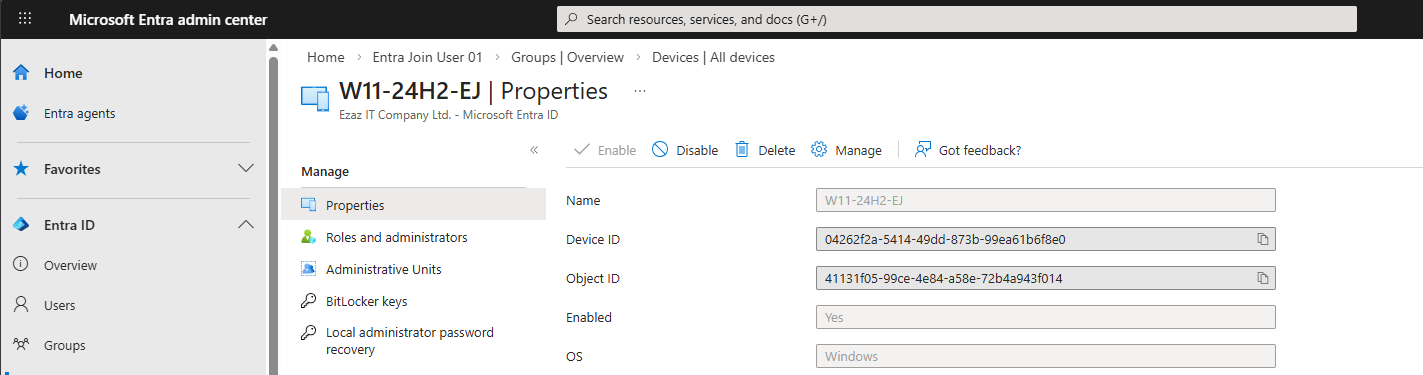
MS-Organization-Access — that’s the device cert from the Entra join. Don’t delete it.Personal > Certificates. Look for one whose Issued By = MS-Organization-Access. The Issued To matches your Device ID. Don’t delete it — removing it breaks the Entra connection and SSO stops working.
Section 7 — automatic Intune enrollment
Depending on tenant config, the device may auto-enroll in Microsoft Intune immediately after joining. You’ll see Compliant: Yes on the device entry in Entra Admin if this happened.
To enable auto-enrollment for an org: Entra Admin > Identity > Mobility (MDM and WIP) > set MDM User Scope to All (or a group).
Section 8 — troubleshooting
“Your organization has disabled this device”
Device was previously disabled in Entra Admin. Admin: Devices > All Devices > find > Enable.
Cannot find the “Join this device” option
Doesn’t appear if you’re already signed in with a Microsoft account, or the device is already domain-joined. Also check edition — Home doesn’t have it.
Join fails with credential errors
Verify the user account exists in the tenant, isn’t blocked or expired, and is allowed to join devices (Section 1, Step 4).
MFA keeps prompting every login after join
Normal for the first few sign-ins. Once the PRT is established, MFA prompts drop significantly.
Detailed join logs
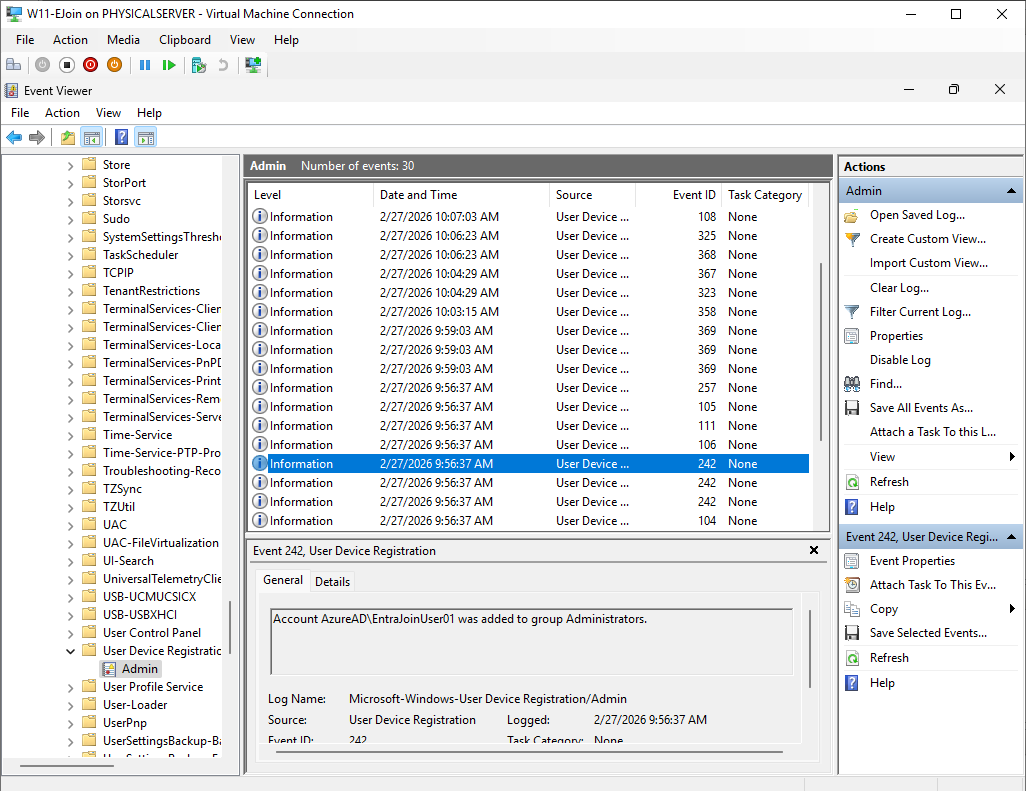
Event Viewer > Applications and Services Logs > Microsoft > Windows > User Device Registration > Admin. Every step of the join process logged with errors.
FAQ
What’s the difference between Entra Join and “adding a work account”?
Adding a work account (Connect > type email > Next) creates an Entra Registered device — lighter, BYOD-style. Entra Join is the full join — users log in with work credentials at Windows login, IT fully manages, the device is part of the org. Different levels.
Can I join a Windows 11 Home device?
No. Pro / Enterprise / Education only. Home users can only Register (Section 11 covers this).
What happens to my local user account?
Your existing local account is unaffected. After join, the login screen lets you choose either local or Entra ID account.
Internet required every login?
No. After first Entra login (which needs internet), Windows caches credentials locally. Offline logins work. PRT renewal + policy updates do need occasional connectivity.
Can multiple users join the same device?
Yes. Multiple Entra users can log in to one Entra Joined device, each with their own profile. Device is joined once; users sign in to it.
How many devices can one user join?
Default 50. Admin can change this (or set Unlimited) in Devices > Device Settings.
Difference between Entra Join and Hybrid Entra Join?
Entra Join = cloud-only (no on-prem AD). Hybrid Entra Join = both on-prem AD + Entra ID together. Hybrid covered in a later post.
Can I unjoin a device?
Yes. Settings > Accounts > Access work or school > click the connected account > Disconnect. Admin should also delete it from Entra Admin to keep cloud-side clean.
Can I delete the MS-Organization-Access certificate?
No. Removing it breaks the Entra connection and SSO stops. Don’t touch it.
“AzureAdJoined: YES” but “AzureAdPrt: NO” — what now?
Joined correctly but PRT not issued yet. Happens immediately after join, before the first proper Entra sign-in. Sign out, sign in with the Entra account, wait a few minutes, re-run dsregcmd /status. PRT should now be YES.
What’s next
The device is joined. Next post in the Entra ID Security pathway covers securing the local administrator account on an Entra Joined device — who can be local admin, how to control it, how to remove the default device-owner-as-admin behavior.