Privileged Identity Management (PIM) flips the assumption about admin access. Instead of “users with admin roles always have admin powers”, it’s “users are eligible for admin roles, and must activate them when they need them, with MFA + justification, for a bounded time window.” The credential to compromise is no longer “admin password” — it’s “admin password + MFA + reason + within an 8-hour window.” That’s the entire point of just-in-time admin access.
This guide walks Security Reader as a worked example, but the same configure-then-assign-then-activate flow applies to every Entra role you protect with PIM — Global Admin, User Admin, Helpdesk Admin, etc.
Phase 1 — verify the test user has no roles
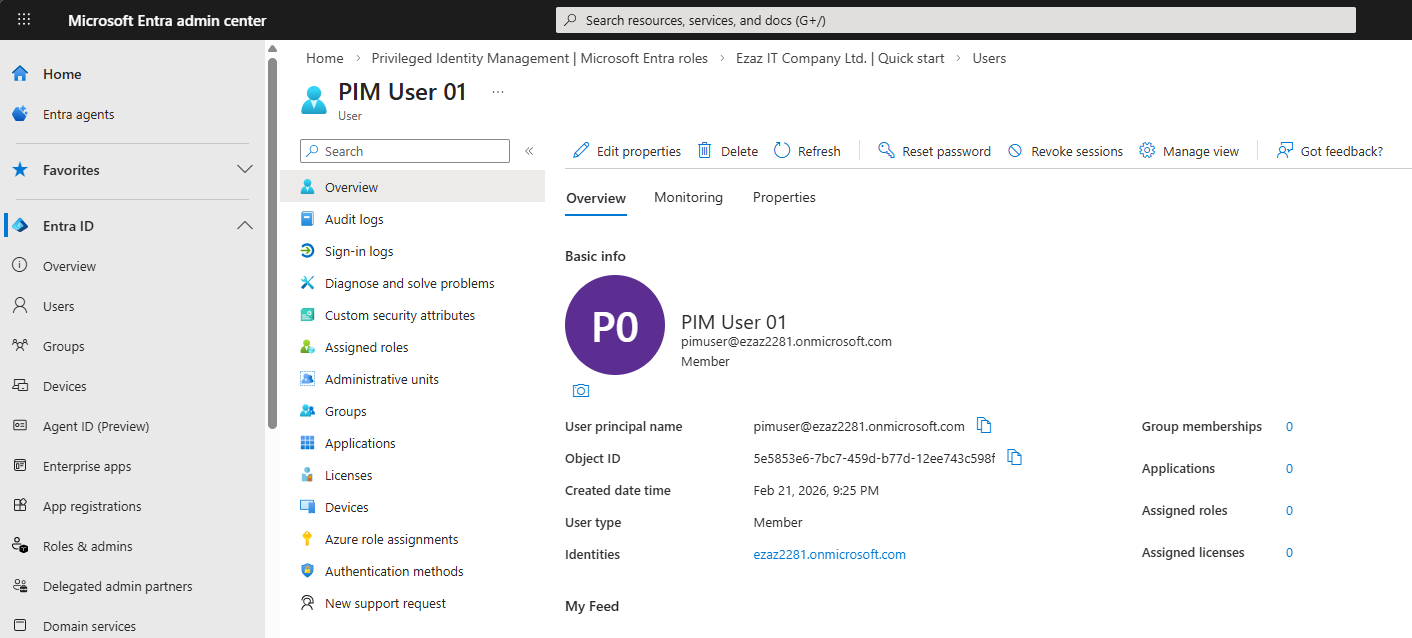
pimuser@…onmicrosoft.com at entra.microsoft.com.Sign in to entra.microsoft.com as the test user (pimuser@…onmicrosoft.com).
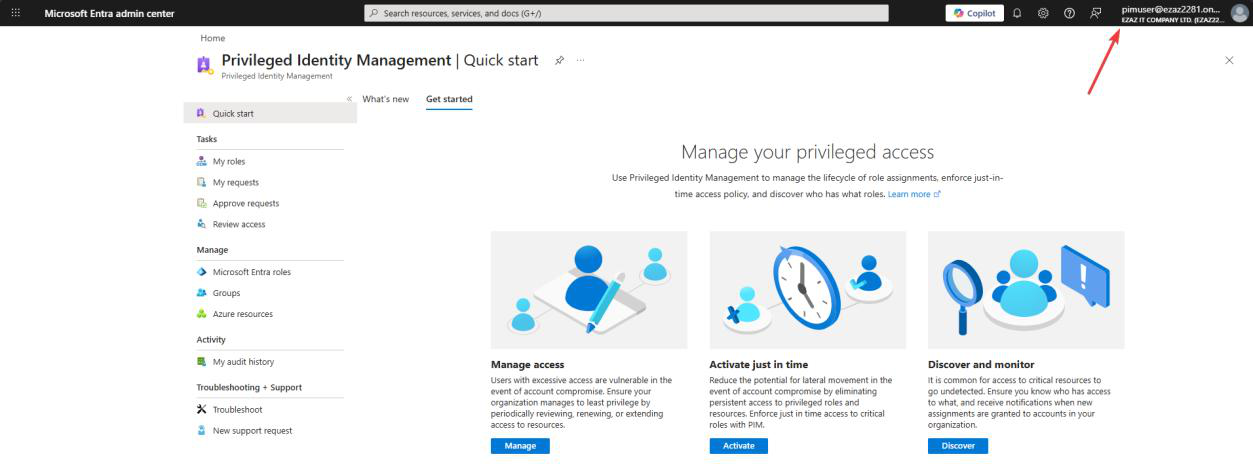
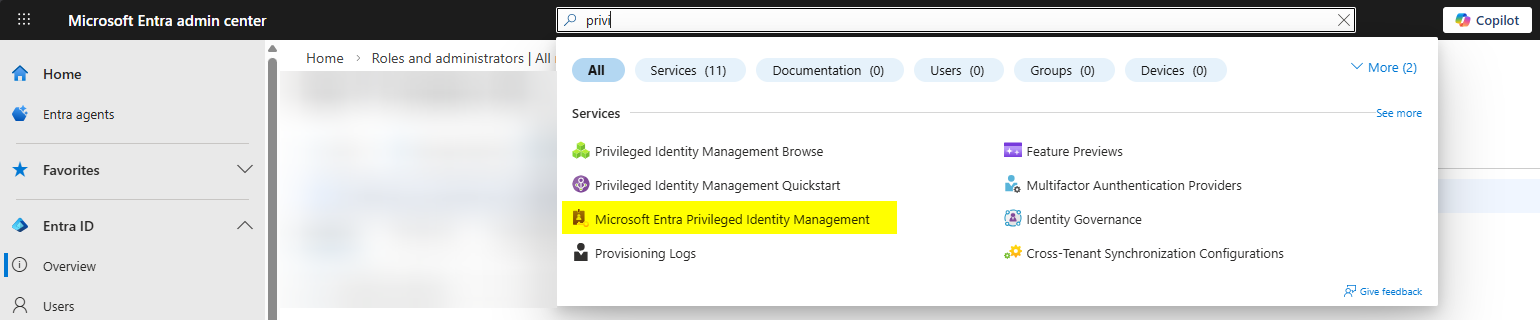
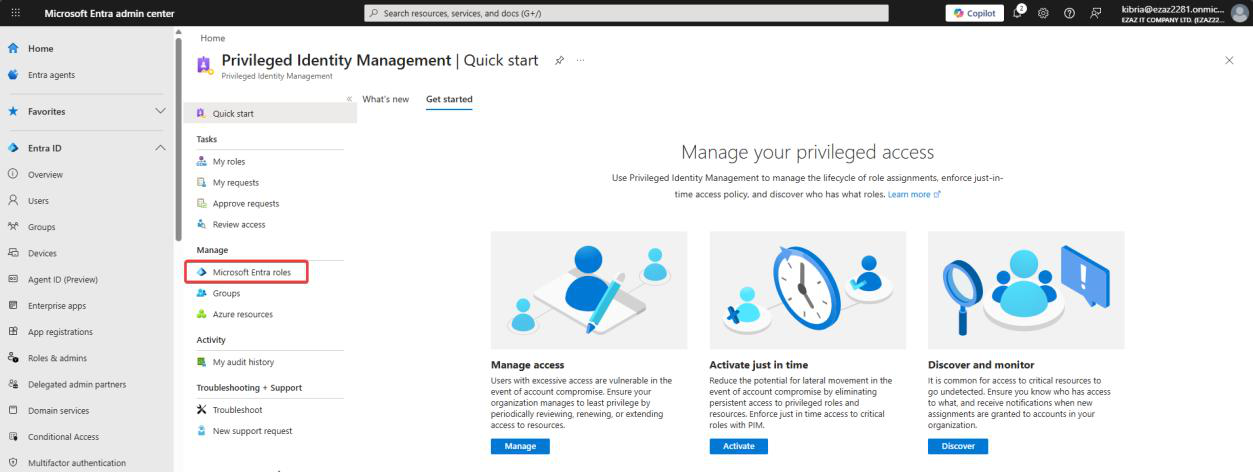
Top search bar > Privileged Identity Management > click the service.
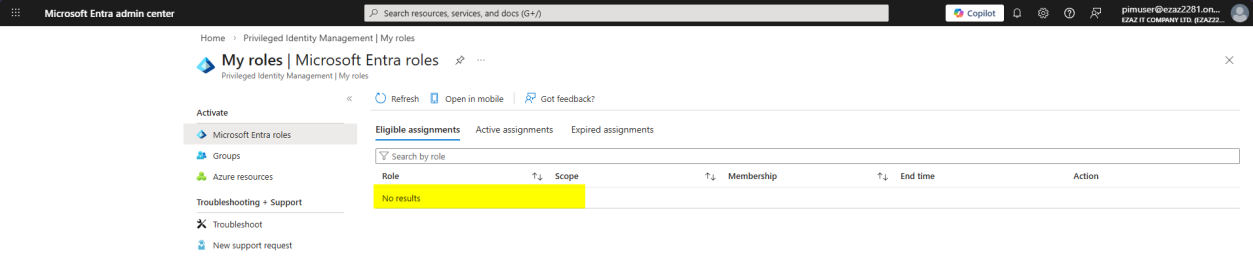
My roles > Microsoft Entra roles. Confirm the user has zero roles. This is our baseline.
Phase 2 — admin: configure role settings BEFORE anyone gets assigned
Critical sequencing: configure the role’s activation rules before assigning the role to anyone. If you assign first then change settings, existing assignments inherit the new rules — better to set the floor first.
Open a separate browser as Global Admin. Open PIM > Microsoft Entra roles.
Dashboard view from the admin perspective.
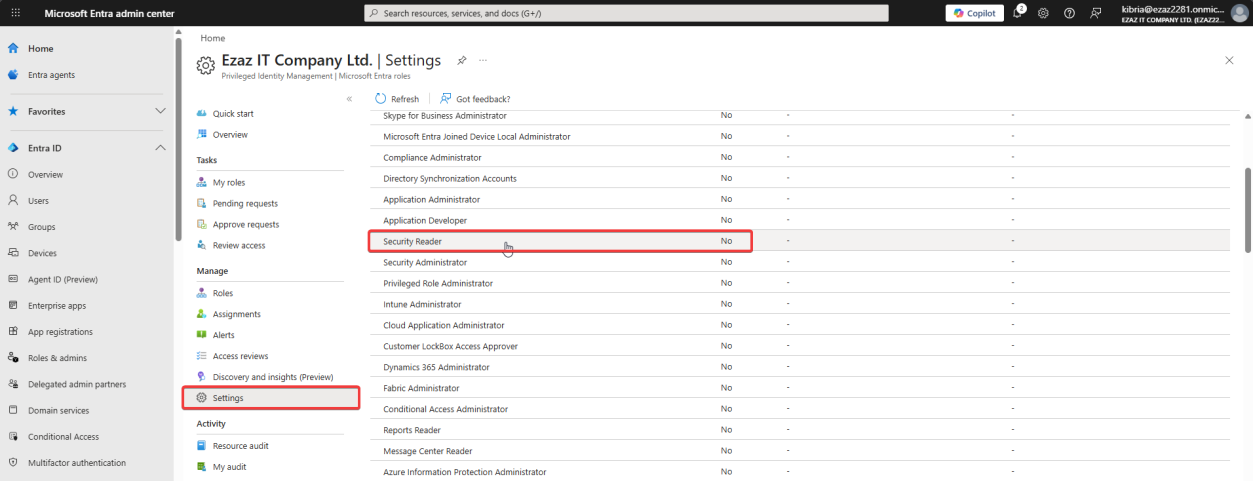
Manage > Settings > click Security Reader.
(Security Reader = read-only on security policies, alerts, reports, audit logs. Useful as a low-blast-radius role to learn PIM. Production: assign the actual role your user needs.)
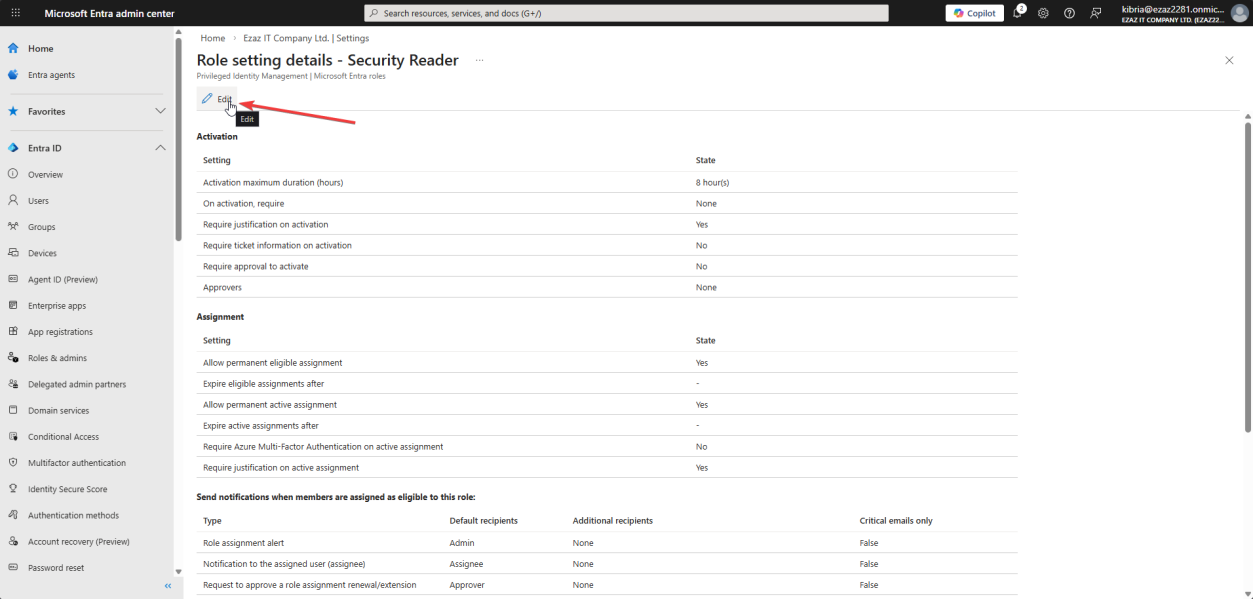
Click Edit > Activation tab.
- Maximum activation duration: 8 hours — the longest a single activation can run before auto-expiry. Set it to the shortest window your operations actually need; users can re-activate.
- Tick Require Azure MFA on activation — even if the user already MFA’d at login, they re-prove identity at the moment of elevation.
- Tick Require justification on activation — user must type a reason. Becomes searchable in the audit log.
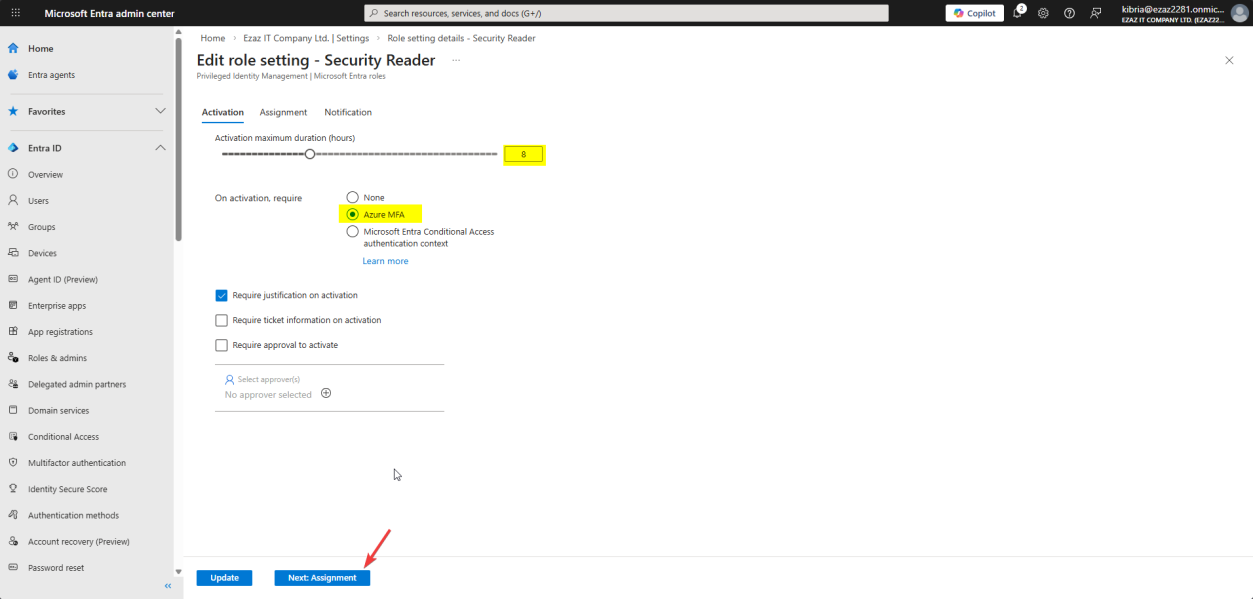
Both checkboxes ticked.
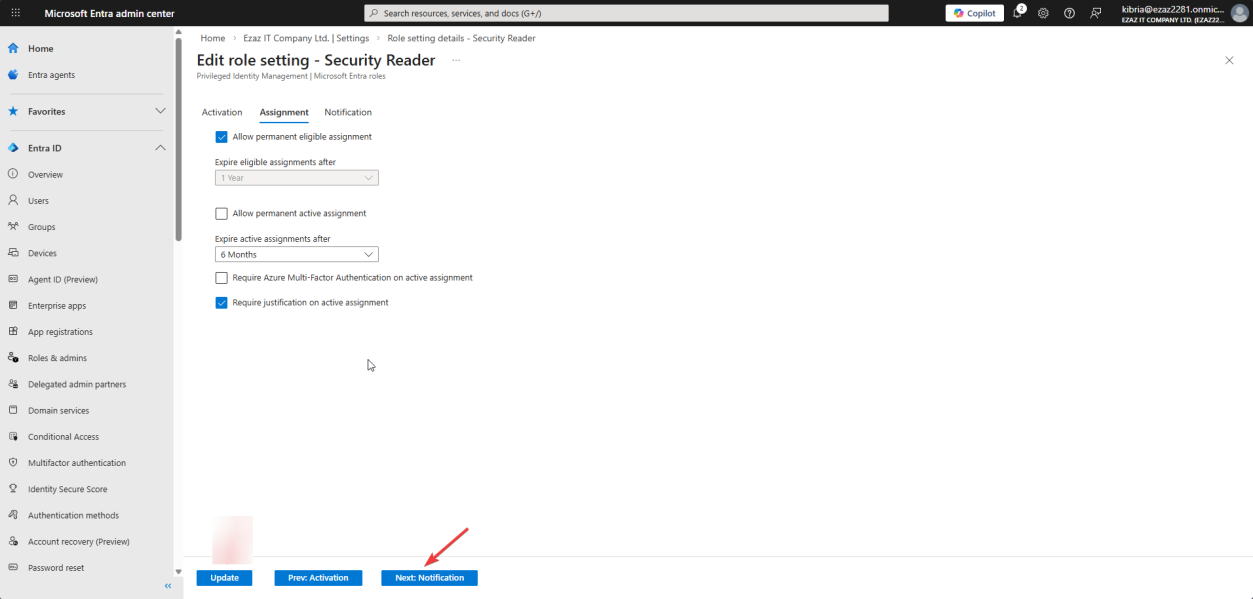
Assignment tab:
- Tick Allow permanent eligible assignment — users can be permanently eligible (the role is always available to them, but powers are off until they activate).
- Untick Allow permanent active assignment — this is the load-bearing change. With this off, you can never accidentally grant someone “always-on admin.” Every active assignment must have an end date.
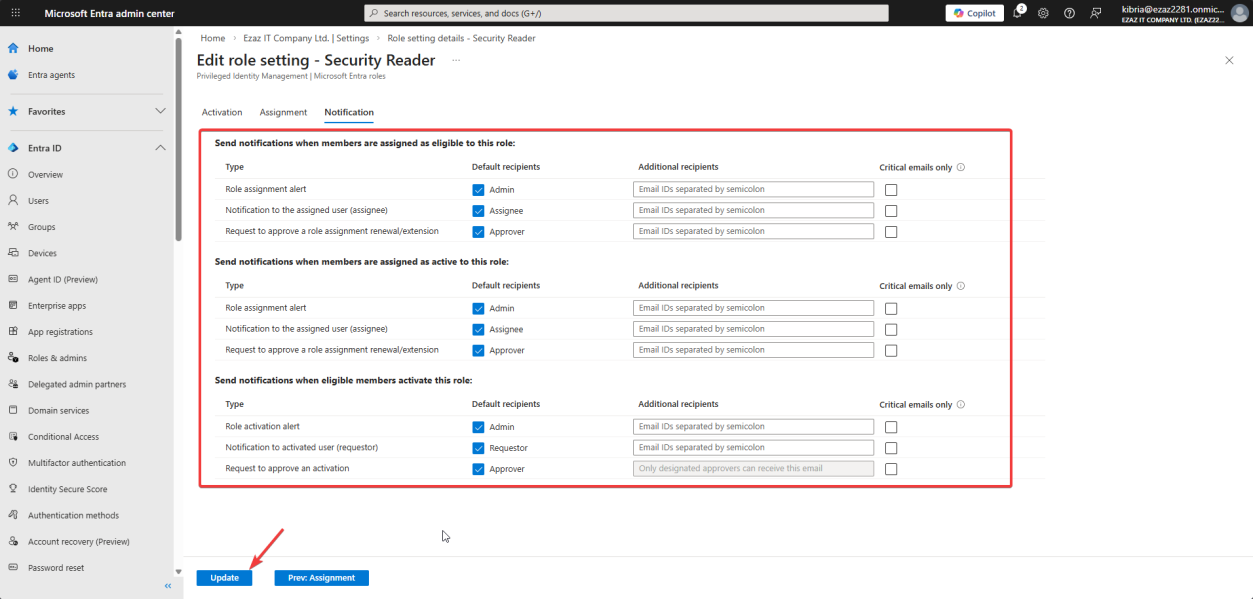
Notification tab > defaults > Update.
Defaults email Global Admins + Privileged Role Admins on assignment + activation. Don’t turn this off — it’s your real-time alert for “someone just elevated privileges.” Helpdesk operations sometimes filter these to a Teams channel for visibility.
Phase 3 — admin: assign the eligible role
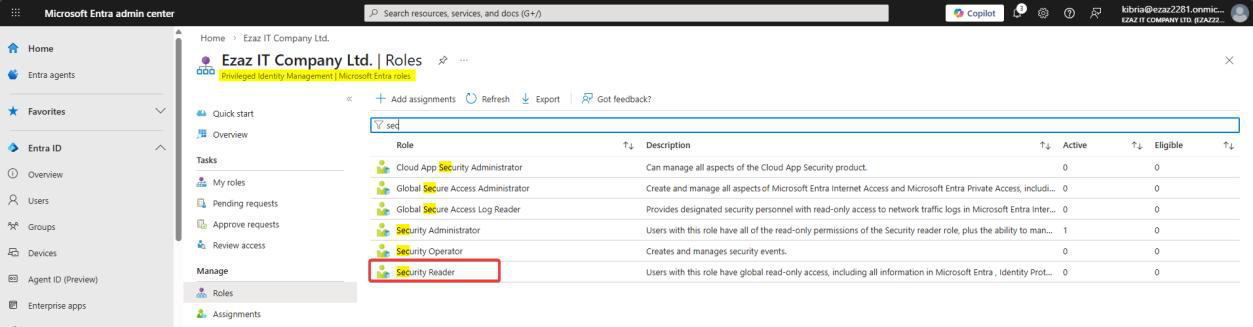
PIM > Manage > Roles > Security Reader.

+ Add assignments.
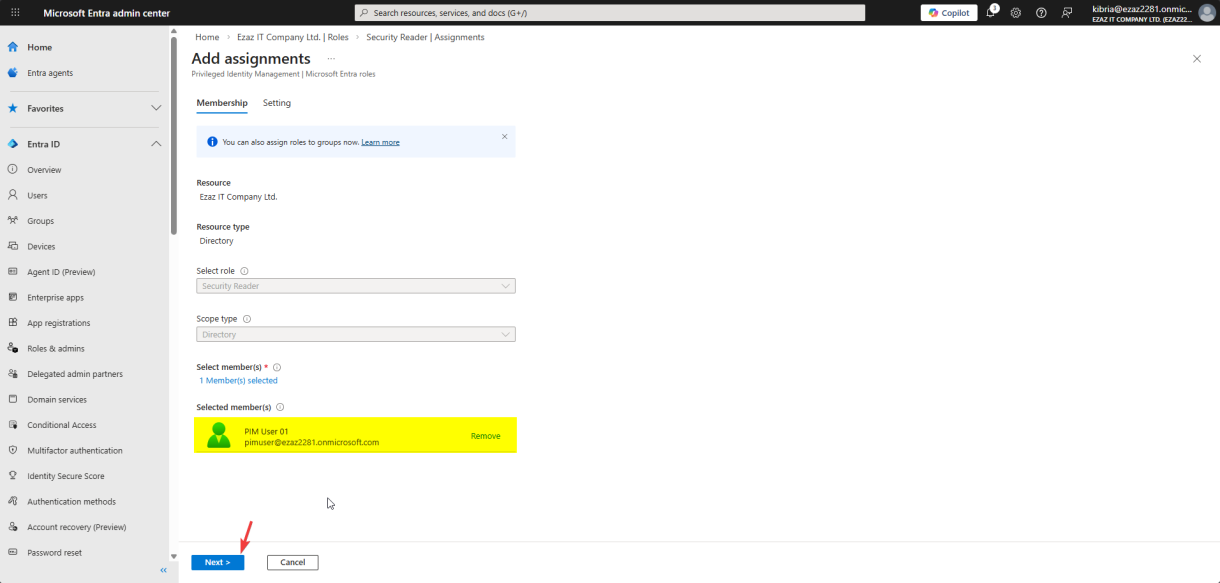
pimuser > pick > Next.Click the link to select members > search pimuser > pick > Next.
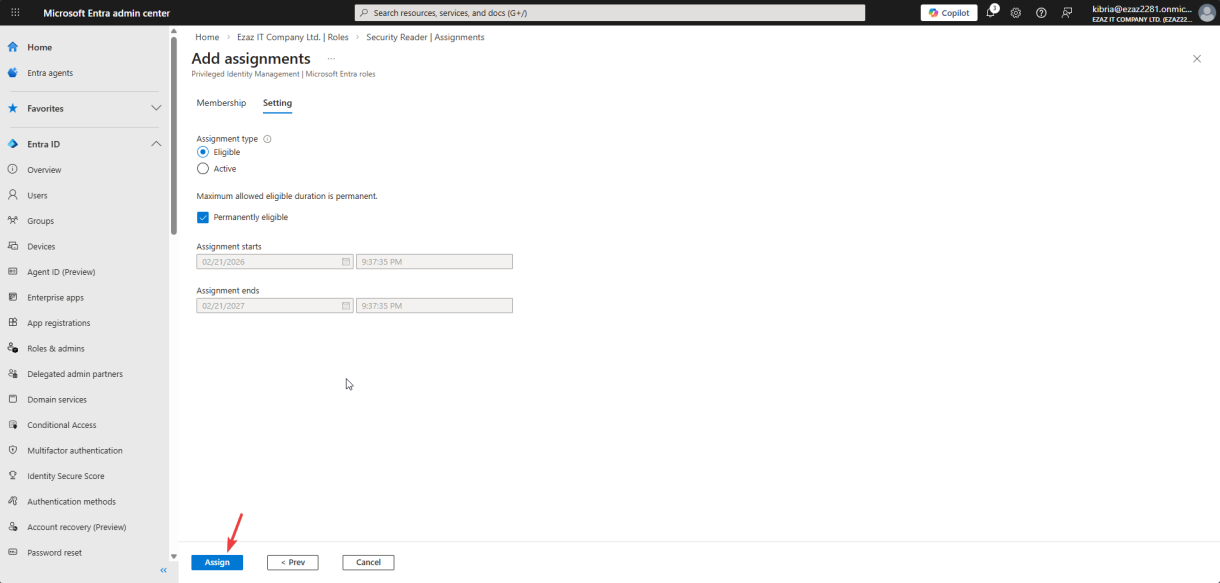
Assignment type: Eligible. Tick Permanently eligible. Assign.
“Eligible” = the user has the right to use the role but must activate it (just-in-time). “Active” would mean the role is always on — we explicitly avoid that pattern.
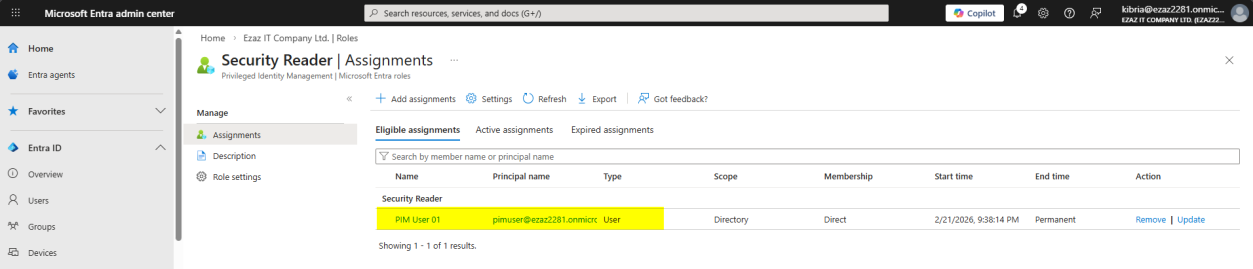
Assignments tab now shows pimuser as Eligible for Security Reader.

The first auto-email arrives in the Global Admin inbox. This is your audit trail starting — you didn’t have to enable anything for this email to send. PIM did it automatically.
Phase 4 — user: activate the role

Switch back to the test-user browser. Refresh My roles > Microsoft Entra roles. Security Reader is now listed with an Activate link.
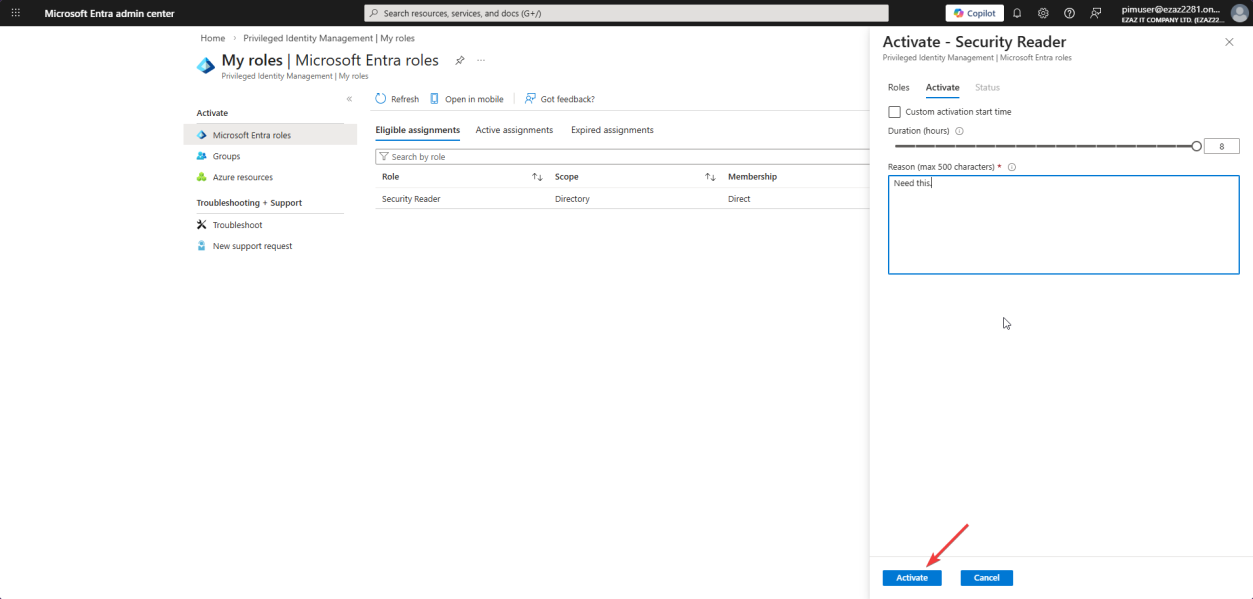
Click Activate. Pane slides in:
- Duration slider: capped at 8 hours (the admin set this in Phase 2)
- Reason: type something specific — “Reviewing sign-in logs for compliance audit, ticket #INC1234”. This goes in the audit log.
- If MFA is required (it is, per Phase 2): MFA prompt fires now
Click Activate.

Three-stage progress: Validating → Activating → Refreshing. The browser auto-refreshes once permissions land.
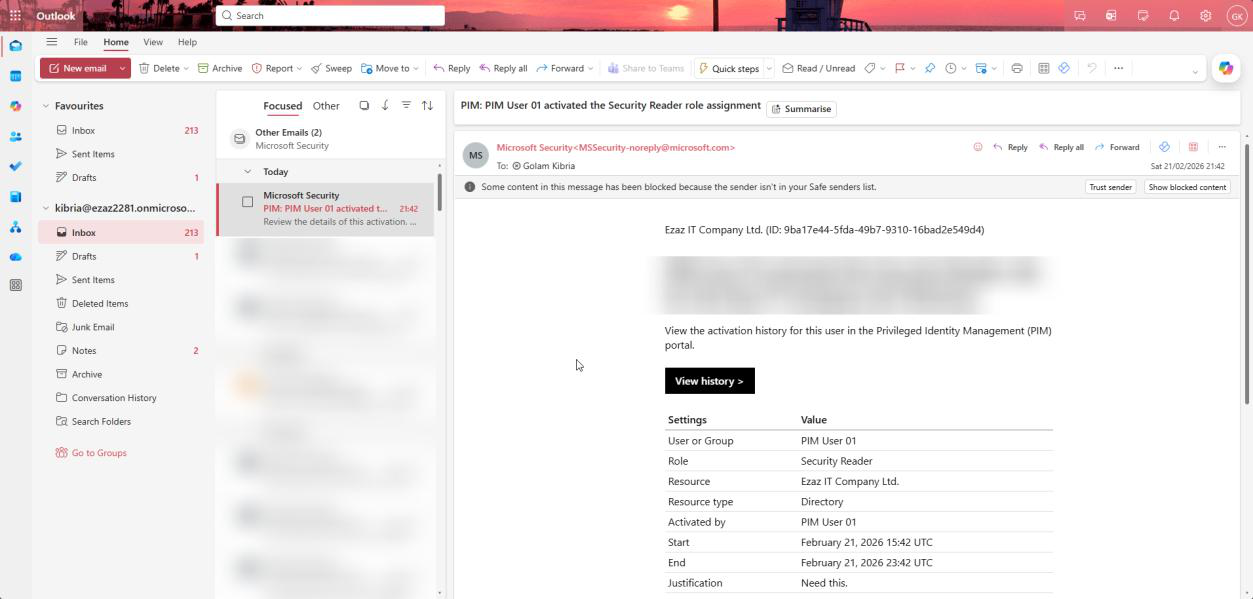
Second auto-email arrives in the Global Admin inbox: user has actively elevated. So far in this session: 2 emails. One on assignment, one on activation. If the user activates 4 times in a week, that’s 4 more emails.
Phase 5 — remove or update the role when done
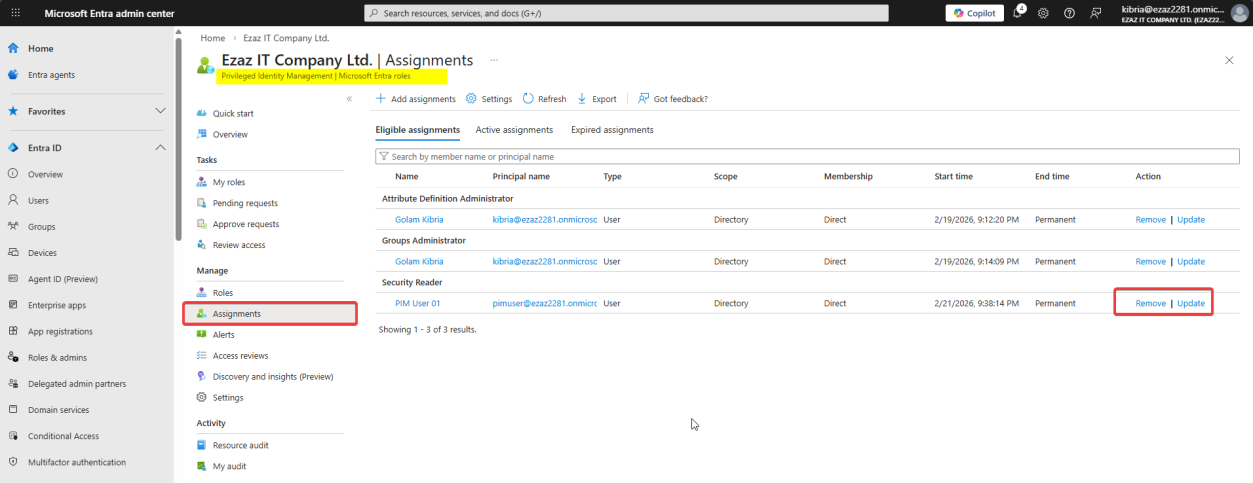
PIM > Manage > Assignments > find pimuser. Right-side options:
- Update — change assignment type (Eligible ↔ Active), change expiry date
- Remove — strip the role entirely
Project finishes → remove the assignment. Don’t leave dormant Eligible assignments around — they’re still attack surface.
Things that bite people
Why the test user got an MFA prompt at login (not just at activation)
You disabled Security Defaults. You have no Conditional Access policy enforcing MFA. You only configured PIM to require MFA at activation. So why did the user MFA at the front door of entra.microsoft.com?
Because Microsoft introduced mandatory MFA for sensitive admin portals — entra.microsoft.com, portal.azure.com, intune.microsoft.com. This is enforced by Microsoft tenant-wide and cannot be turned off. The MFA at activation is then a second challenge — defending against the “user walked away from an unlocked computer” scenario where an attacker would otherwise just click Activate.
The 3 automatic expiry emails
For Eligible assignments with an end date, PIM sends three emails automatically:
- 14 days before — gives the user time to ask for renewal
- 1 day before — final last-call
- On expiry — confirms removal to admins (audit completion)
You don’t configure any of this — PIM just does it. Don’t turn off the notification settings or you blind yourself to the lifecycle.
Forgot to untick “permanent active assignment”
If you leave that checkbox on (default behavior) and someone assigns Active + Permanent, the user has admin powers 24/7 with no expiry, no MFA-on-activation, no justification. Defeats the entire point of PIM. Always untick this in Phase 2 settings.
P2 license required
PIM requires Entra ID P2 (or EMS E5 / Microsoft 365 E5). It is not in P1 or Free. Without P2, you only have permanent role assignments. Worth budgeting for if you have any admin accounts.
Activation duration too short
If you set max duration too low (e.g. 1 hour), users will activate, lose access mid-task, re-activate, lose access again. Strikes a bad UX-vs-security balance — helpdesk gets pushback. 8 hours is the practical default for daily admin work; 4 hours for sensitive-role like Global Admin.
What’s next
Configure-then-activate is the foundation. The next post in the Entra ID Security pathway covers the lifecycle operations on top: assigning, activating, approving, rejecting, and renewing PIM requests from the admin side, including the approval-required flow for the highest-privilege roles.