This is the hands-on authoritative restore walkthrough — the procedure Part 5 set up conceptually. We simulate a real disaster: an OU with users is deleted from DC01, the deletion replicates to DC02, and now we have to roll it back forest-wide. The recipe: boot into DSRM, restore system state from backup, mark the OU authoritative with ntdsutil, reboot, force replication. Watch the OU come back on every DC.
This is the final post in the AD Backup & Disaster Recovery pathway. Previous posts covered the backup side (Parts 1–3), the bare-metal restore procedure (Part 4), and the non-authoritative vs authoritative concept (Part 5). Now we do the surgical authoritative restore.
Scenario
Two DCs: WS2K19-DC01 and WS2K19-DC02. We have a system state backup of DC01 from before the deletion. We need:
- The deletion to be a real forest-wide event (not just local to DC01)
- The backup to predate the deletion
- DSRM password ready
In real life: someone fat-fingered a cleanup script, or a runaway PowerShell removed the wrong OU. The AD Recycle Bin isn’t enabled, or the deletion is too old. Authoritative restore is the only path back.
Step 1 — Confirm pre-disaster state
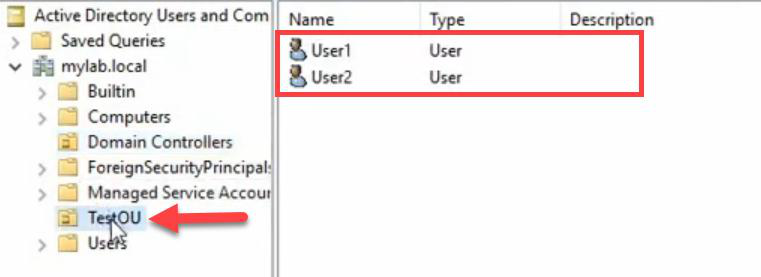
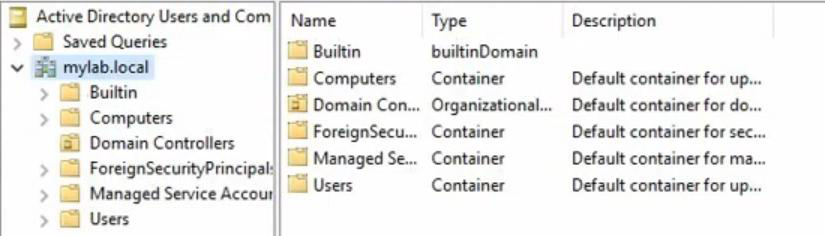
TestOU exists on DC01 with User1 and User2. This is what we’re going to destroy and then bring back.The system state backup is current (taken before the deletion). TestOU exists on DC01 with User1 and User2 inside. This is the baseline we’re going to recover to.
Step 2 — Simulate the disaster
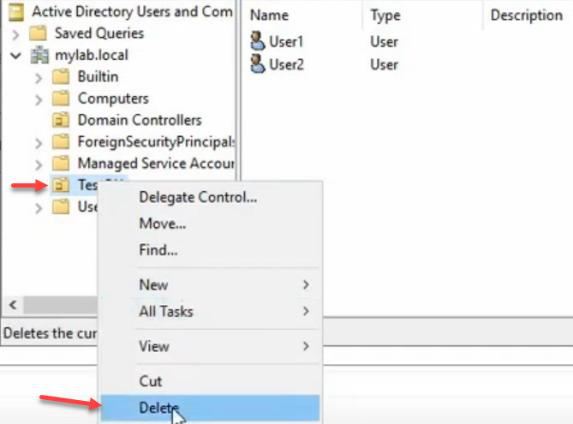
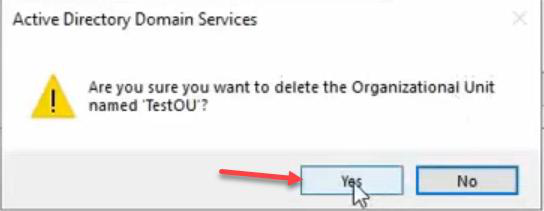
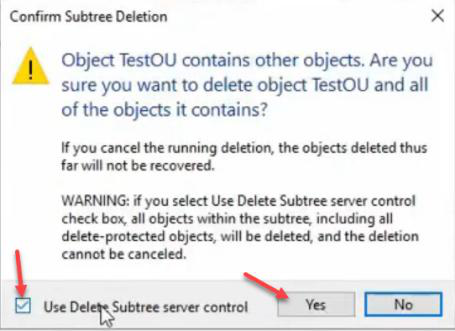
Delete the OU. Subtree delete (because OU has children). Confirm. TestOU is gone from DC01.
Why simulate? Because if you don’t practise the authoritative restore on a disposable lab, you’ll learn the procedure under pressure during a real outage — bad time to read docs.
Step 3 — Force the deletion to DC02 (make it forest-wide)
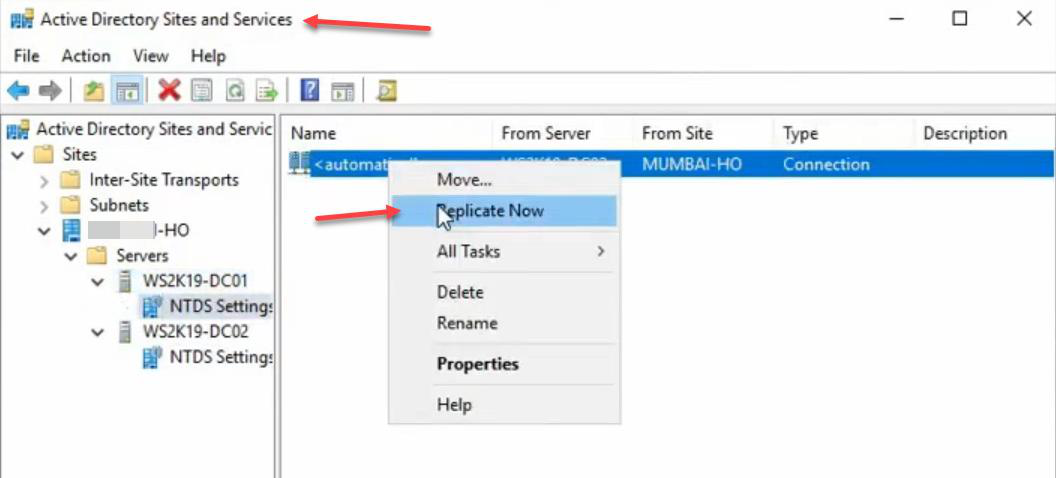
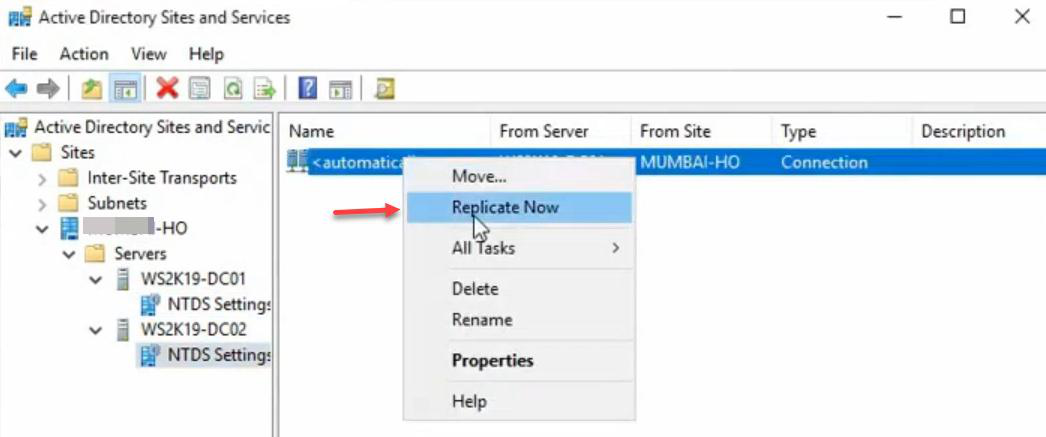
Sites and Services > DC01 > NTDS Settings > right-click outbound connection > Replicate Now. Same on DC02 to pull. The deletion is now mirrored on both DCs — we’ve modelled a real forest-wide accidental delete.
TestOU is gone here too. Both DCs agree the OU is deleted — the “disaster” is now forest-wide.Verify on DC02: TestOU is gone here too. Both DCs agree.
Step 4 — Boot DC01 into DSRM
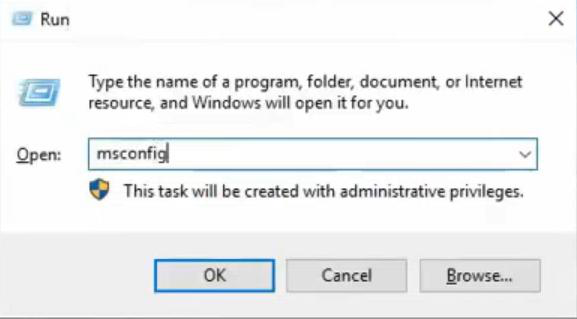
msconfig. The msconfig approach is more reliable than F8 (which has tight timing).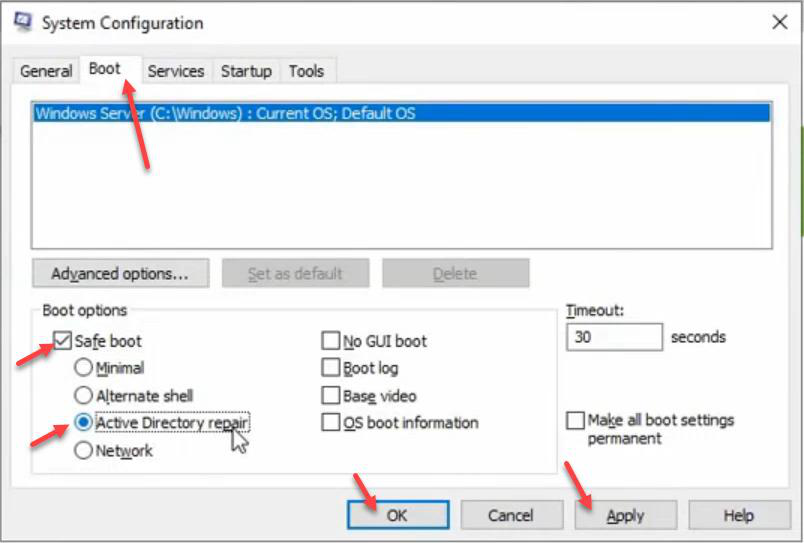
NTDS.DIT offline.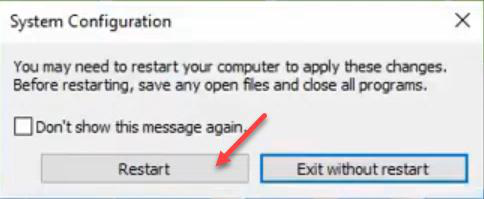

Windows + R > msconfig > Boot tab > tick Safe boot > choose Active Directory repair. Apply > OK > Restart.
Why msconfig vs F8? F8 has a tight pre-boot timing window that’s been removed in newer Windows. msconfig is reliable. Server boots into DSRM — AD services don’t start, NTDS.DIT is offline so we can modify it.
Step 5 — Log in to DSRM
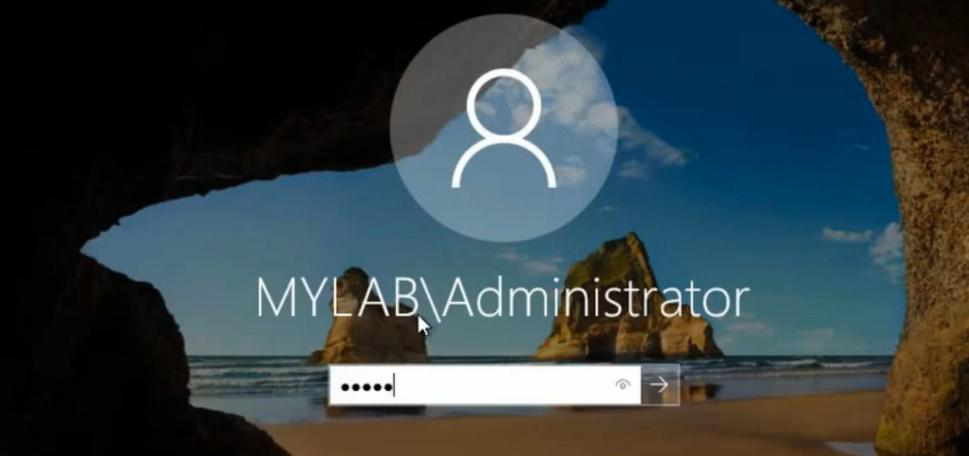
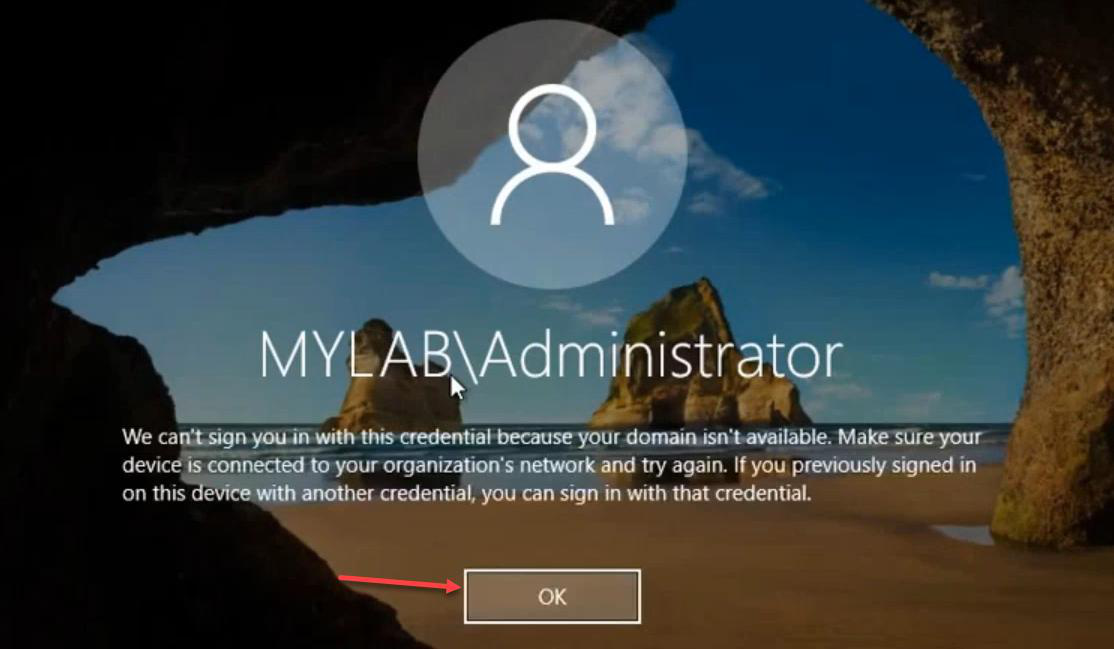
Try domain admin first — fails as expected. Error: your domain isn’t available. AD service isn’t running, so no domain auth.
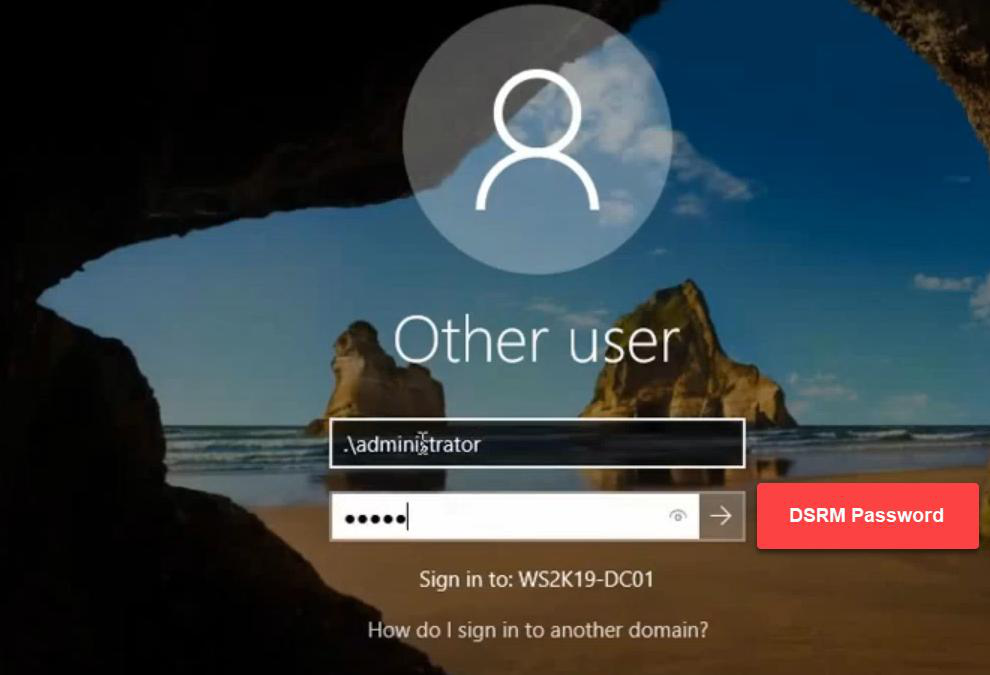
.\Administrator + the DSRM password you set during DC promotion. That’s a local account stored in the local SAM, not in AD — works offline.Click Other user. Log in with:
- Username:
.\Administrator(the dot prefix is important — it forces a local account lookup) - Password: the DSRM password you set when promoting this DC
If you don’t remember the DSRM password, you can reset it from a running DC with ntdsutil set dsrm password — but only when AD is up. See the DSRM password reset post for the full procedure. Set the DSRM password proactively, before you need it.
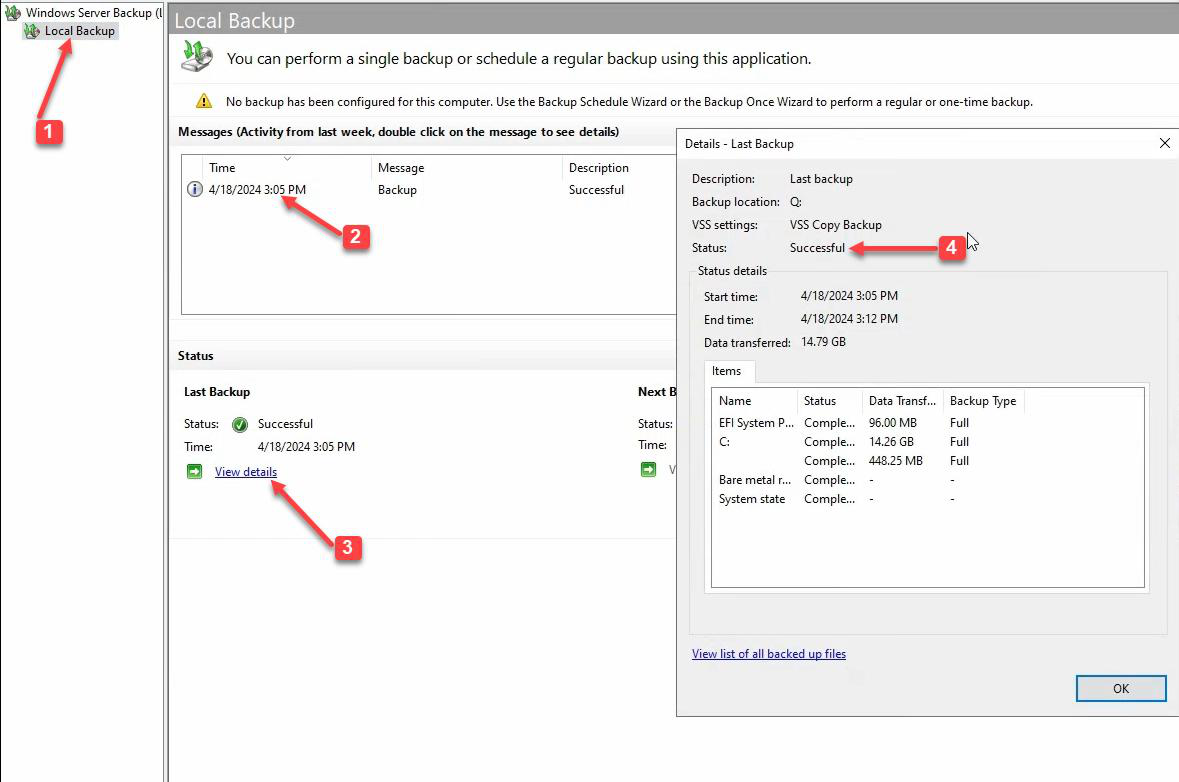
Step 6 — Restore system state via WSB

Server Manager > Tools > Windows Server Backup > Local Backup > Recover.
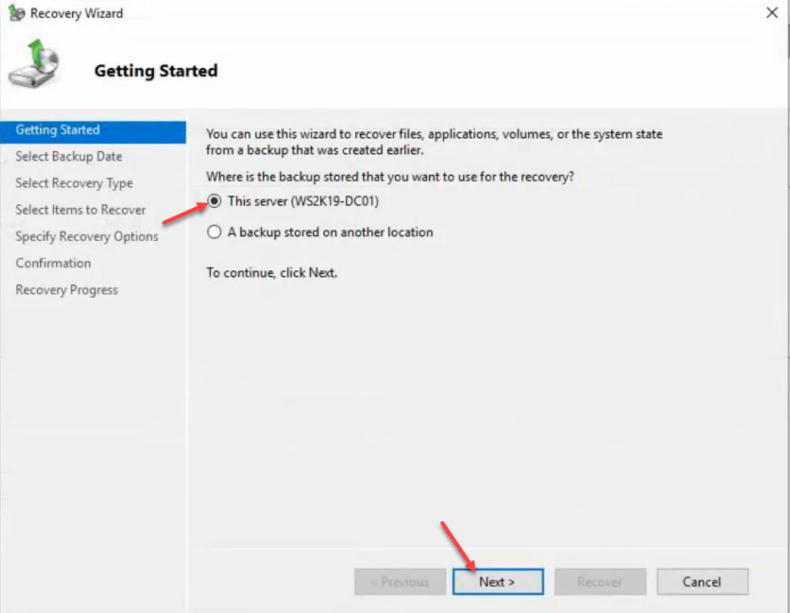
Recovery wizard > This server (backup is local).
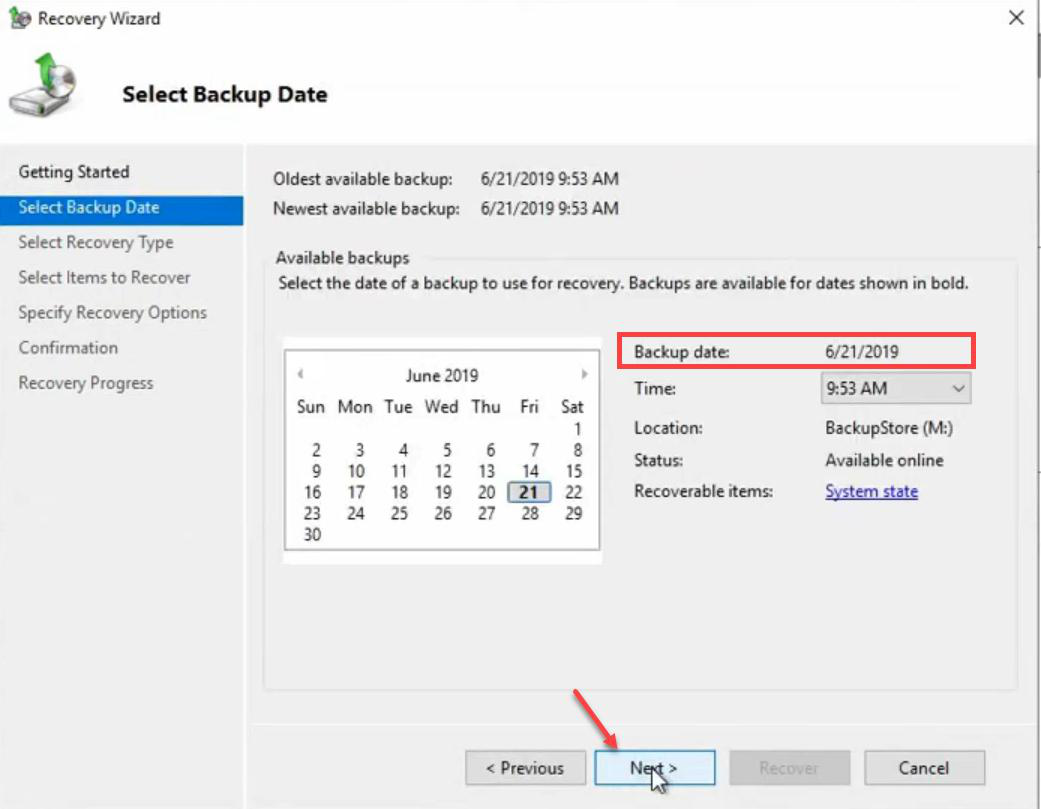
Pick the backup version. One available here; if you had multiple, pick the most recent one that’s still before the deletion.
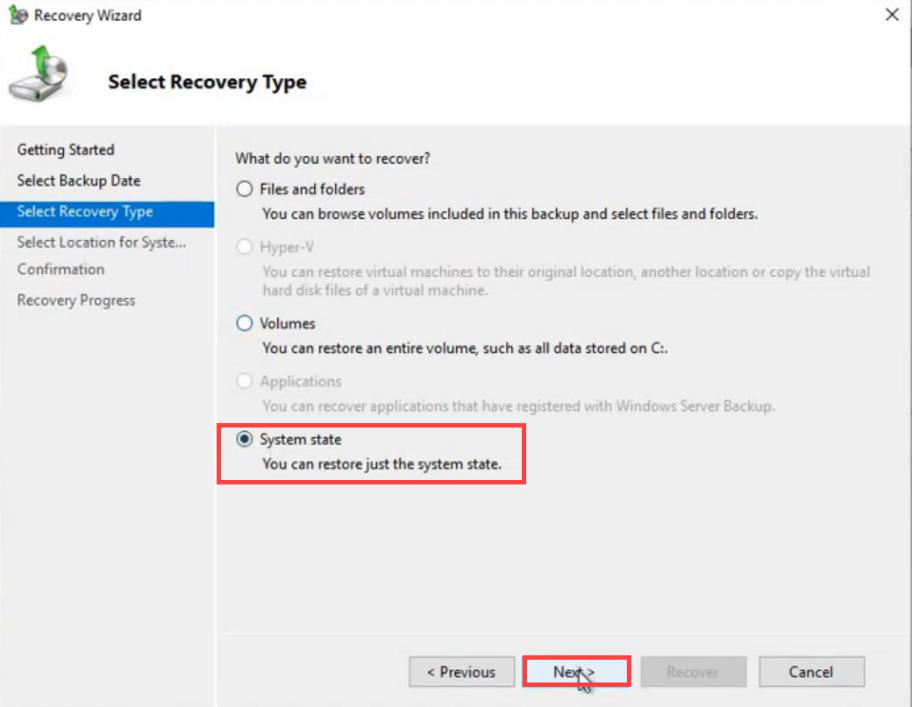
NTDS.DIT, SYSVOL, registry, etc. We are NOT doing a file-by-file restore.Recovery type: System state.
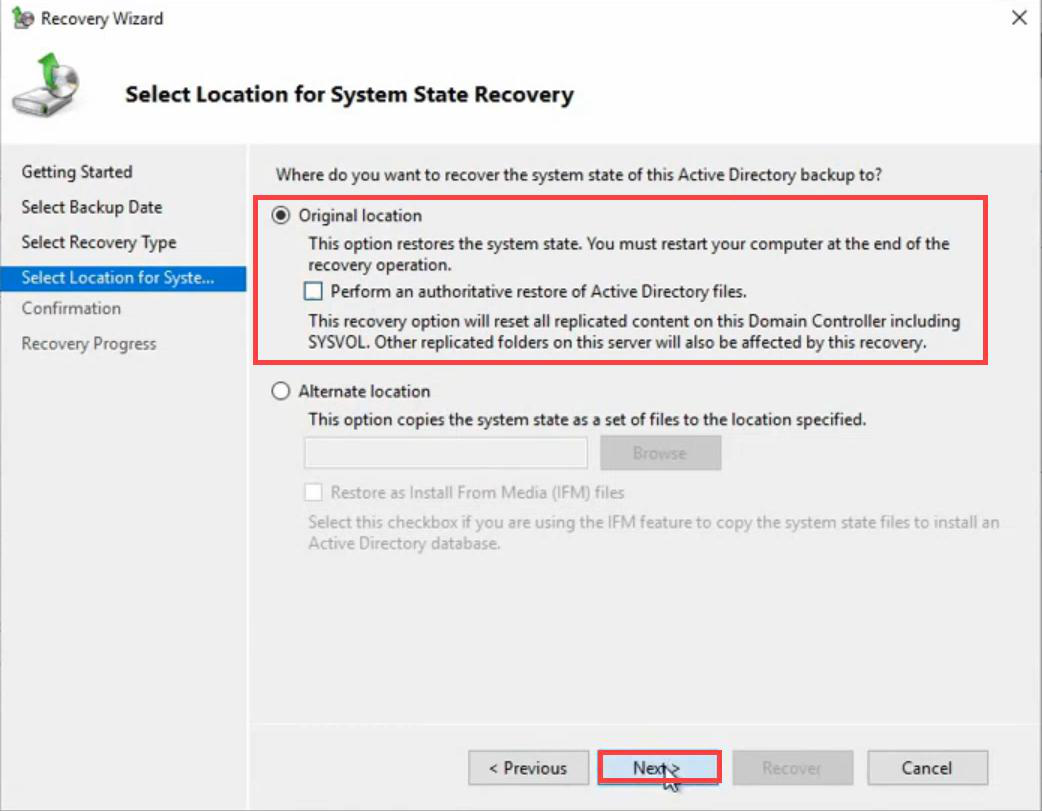
ntdsutil after this restore completes.Recovery location: Original location. Do NOT tick Perform an authoritative restore of Active Directory files — that GUI checkbox is a whole-database authoritative restore. We want granular control, which means leaving this unticked and using ntdsutil afterward.
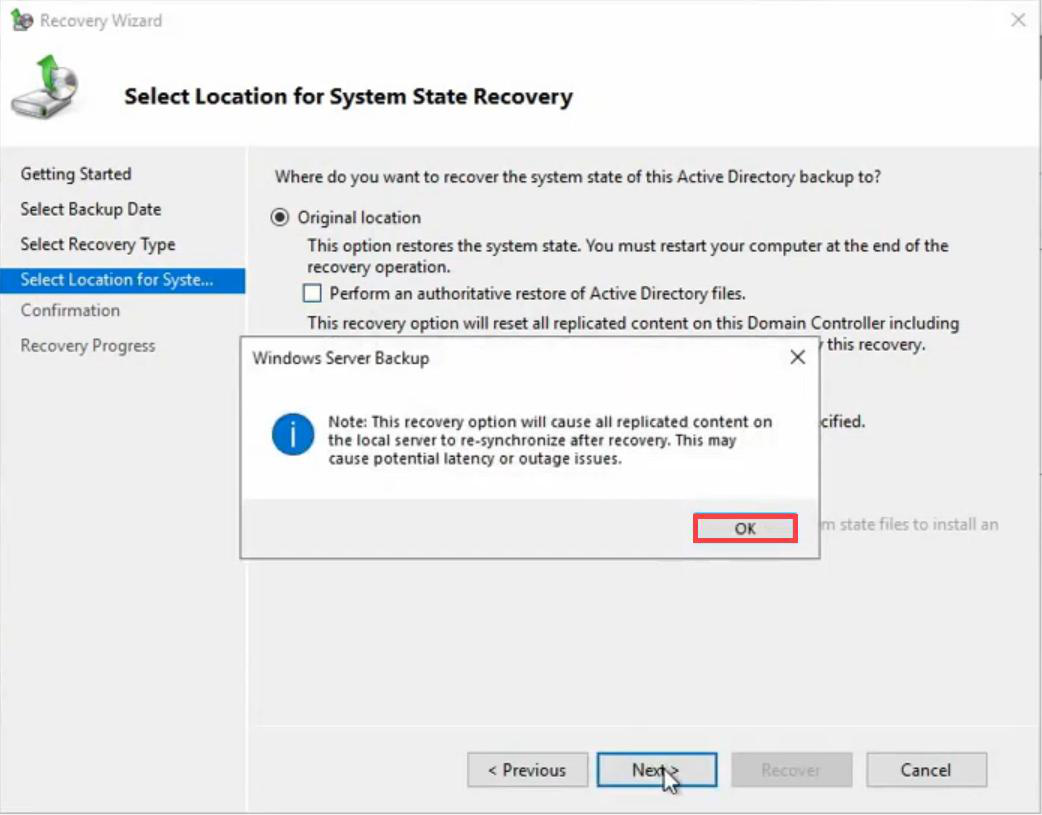
Warning about replication resync. OK.
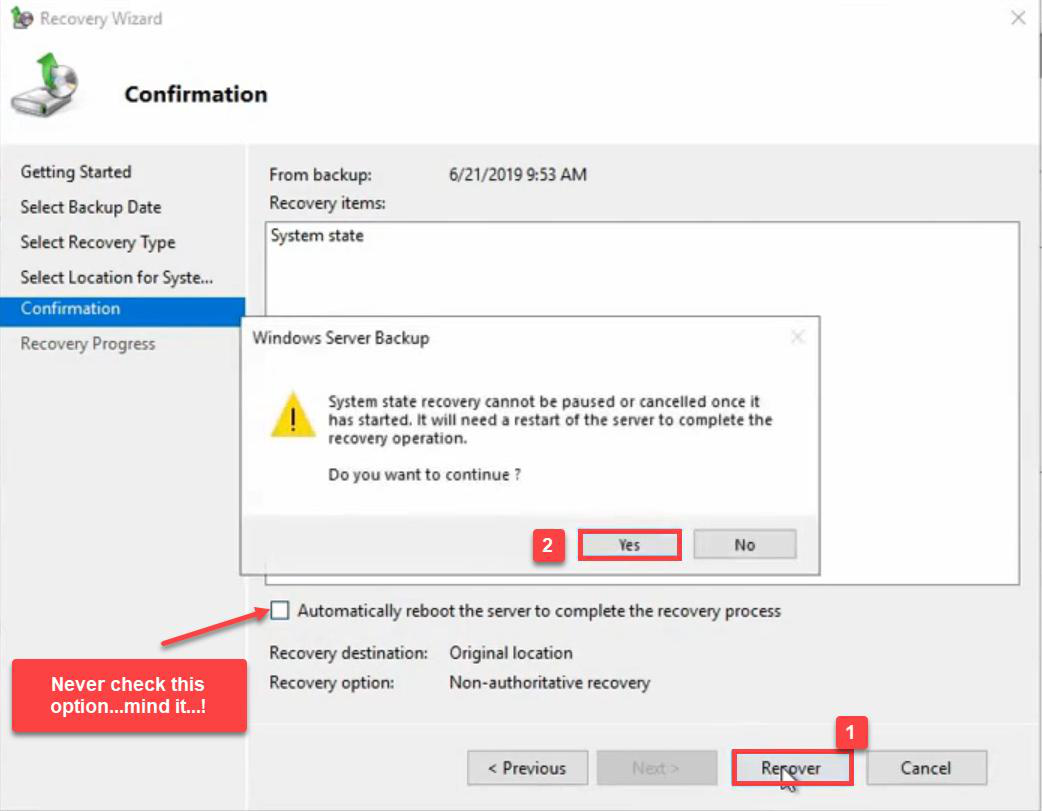
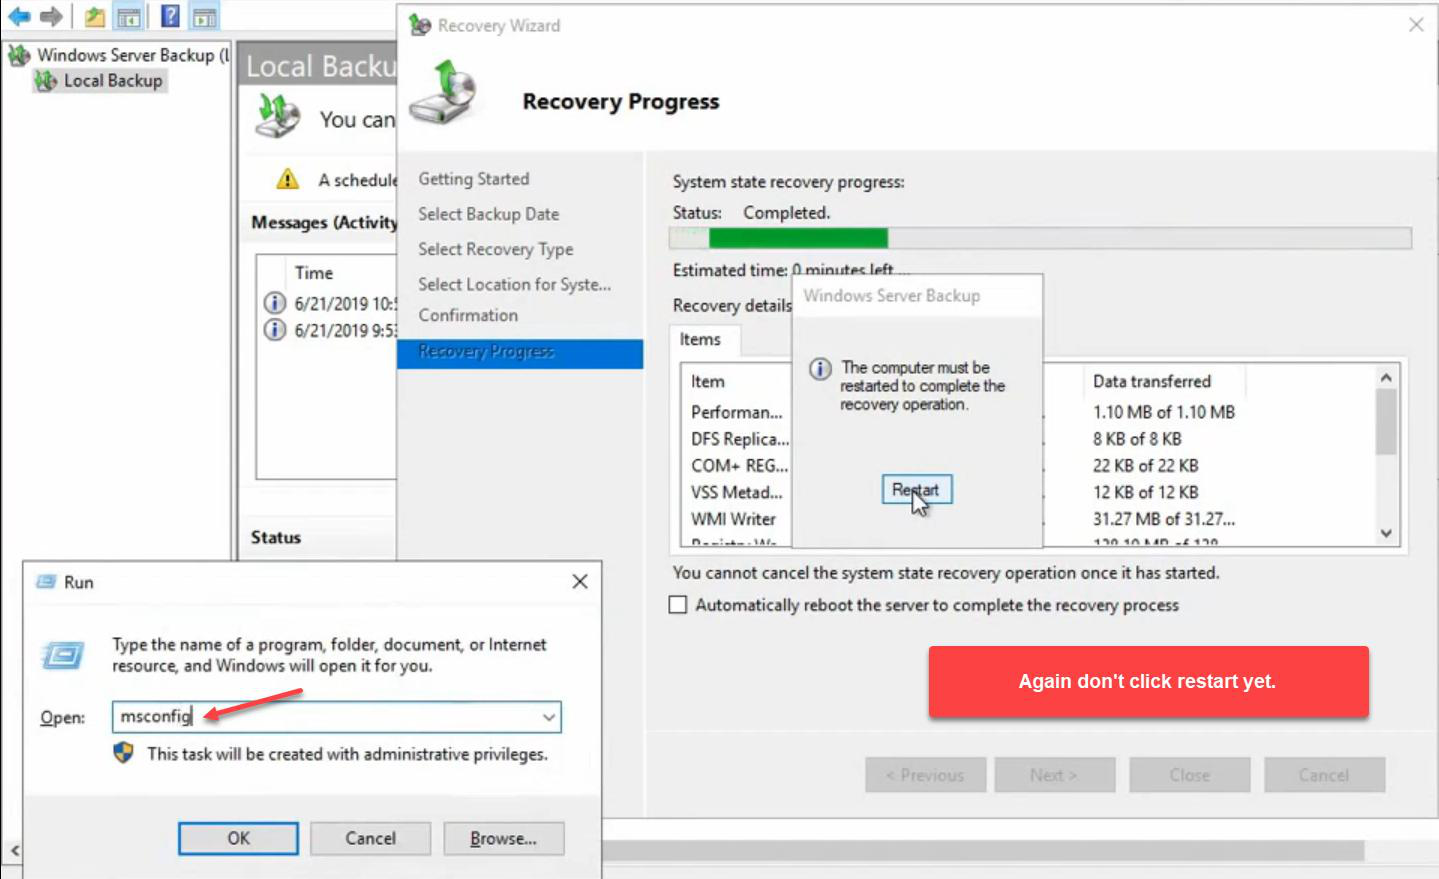
Confirmation summary. Critical: don’t tick “Automatically restart the server” — if you do, the DC reboots straight out of DSRM and the restore is purely non-authoritative. We need to mark objects authoritative before the next reboot, while still in DSRM.
Click Recover.
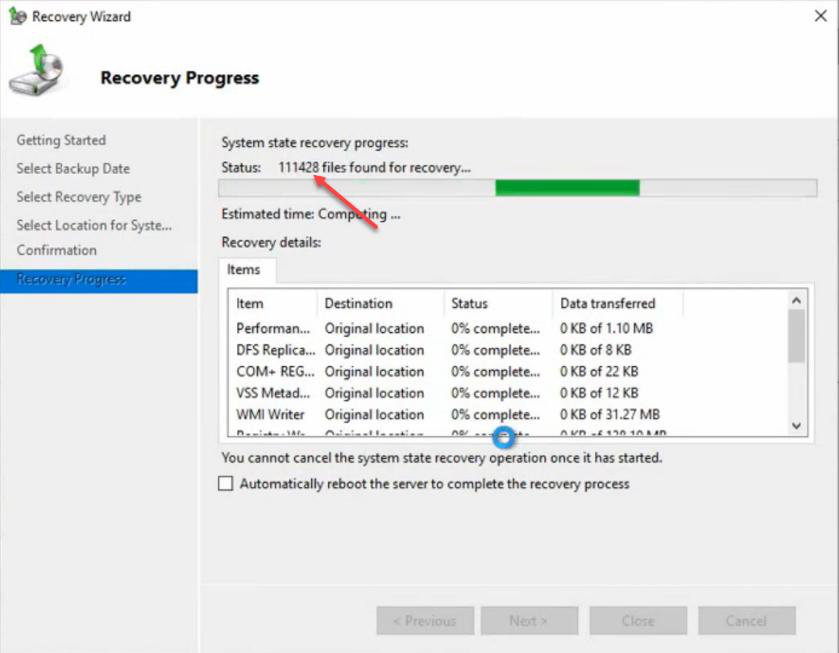
Restore completes. Close. Still in DSRM — don’t reboot yet.
Step 7 — ntdsutil authoritative restore
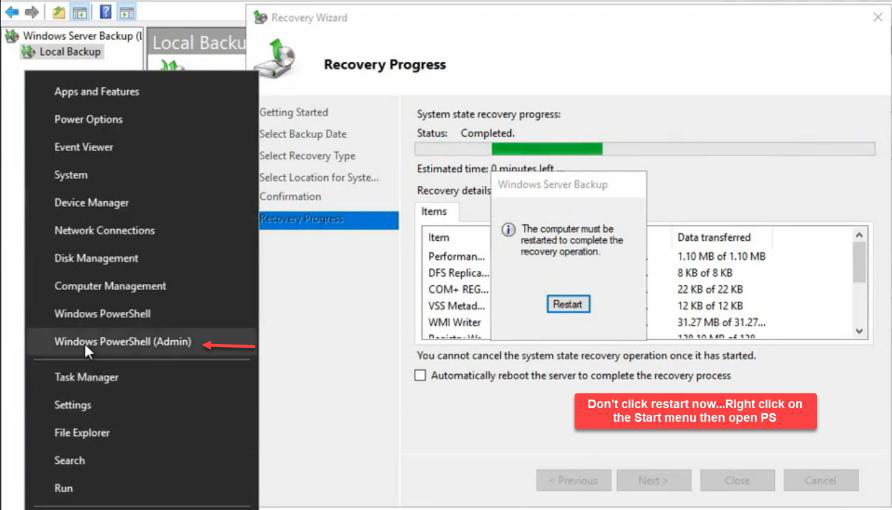
Open elevated PowerShell. Right-click Start > Windows PowerShell (Admin).
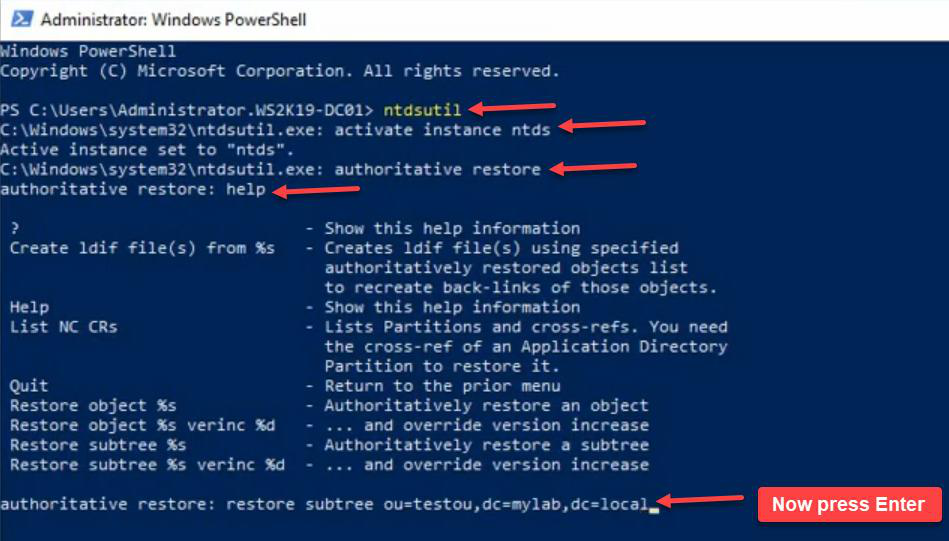
ntdsutil → activate instance ntds → authoritative restore → restore subtree "OU=TestOU,DC=MyLab,DC=Local". The DN must be exact, in quotes if it has spaces. Use help in any submenu to see available commands.The command sequence:
ntdsutil
activate instance ntds
authoritative restore
restore subtree "OU=TestOU,DC=MyLab,DC=Local"
Note the DN syntax. OU= for OUs, DC= for each domain component. Quote the whole DN if it has spaces. Use help in any submenu to see what’s available.
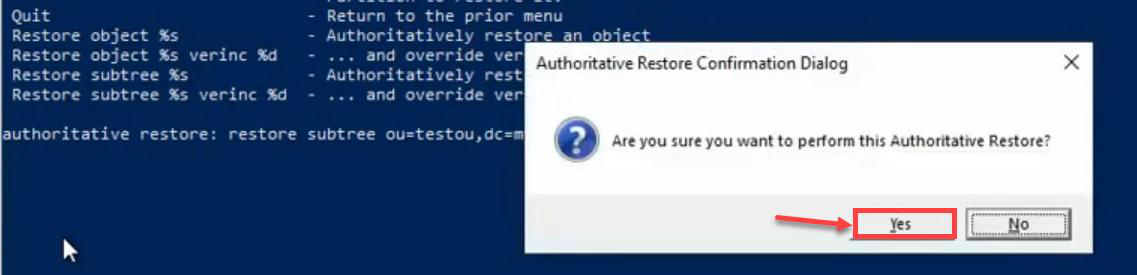
Confirmation prompt. y.
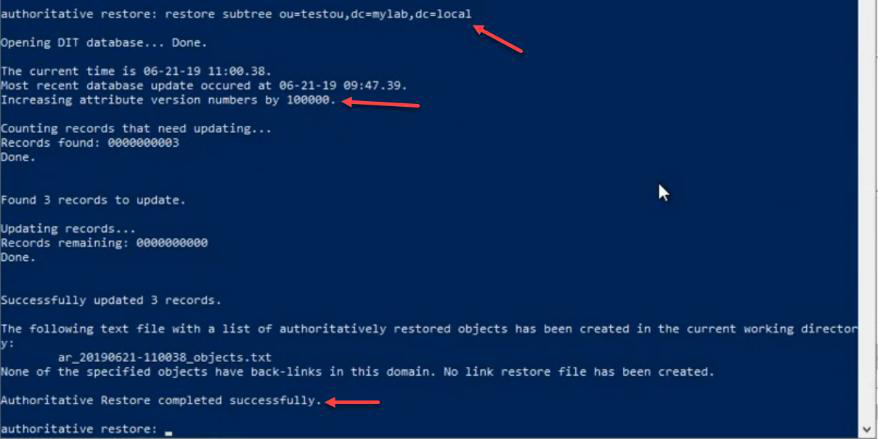
The output line that matters: Increasing attributes’ USN number by 100,000. This is the mechanism. Every attribute of every object in the marked subtree gets its USN bumped by 100,000. When DC01 replicates after reboot, those bumped USNs will be higher than anything on the surviving DCs — so the marked objects push out and overwrite.
Granular: single object instead of subtree

restore object "CN=User1,OU=TestOU,DC=MyLab,DC=Local" — marks a single user as authoritative. Useful when you only need one specific object back, not a whole subtree. Successfully updated one record.If you only need one specific user back (not a whole subtree), use restore object:
restore object "CN=User1,OU=TestOU,DC=MyLab,DC=Local"Successfully updated one record. Useful when surgical recovery is needed without disturbing other objects in the same OU.
Exit cleanly

quit twice (once to leave the authoritative restore submenu, once to leave ntdsutil itself), then exit from PowerShell.Quit out: quit to leave the authoritative restore submenu, quit again to leave ntdsutil, exit to close PowerShell.
Step 8 — Switch boot config back to normal
msconfig.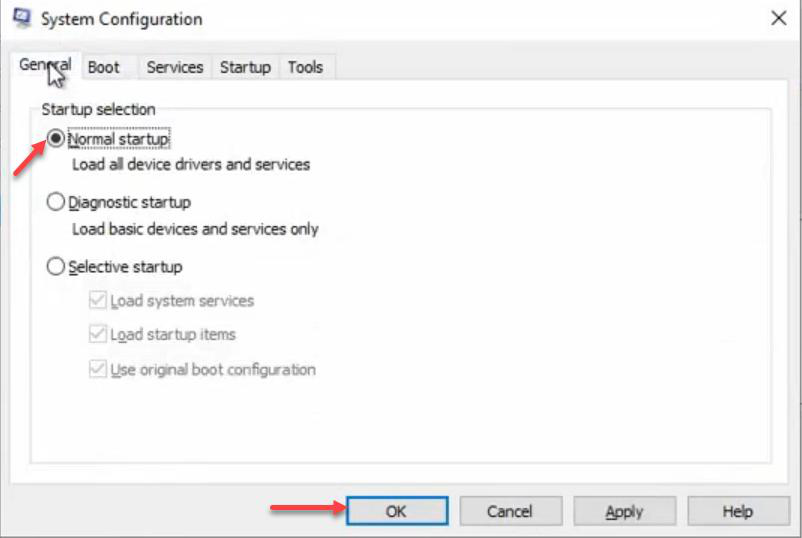
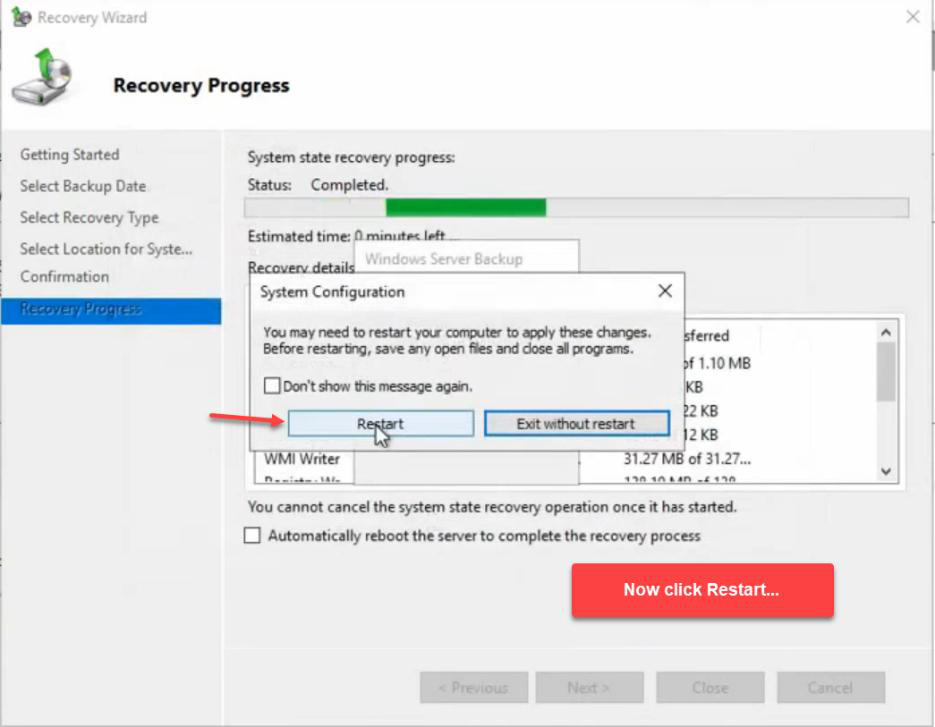

Windows + R > msconfig > General tab > Normal startup. This automatically unticks Safe boot. Apply > OK > Restart.
If you skip this step, the DC reboots back into DSRM and AD never starts up — you have to repeat the msconfig dance to fix.
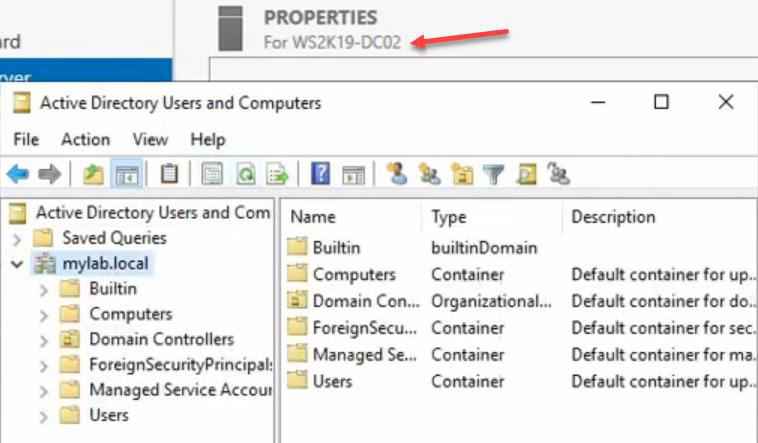
Step 9 — Verify on DC01

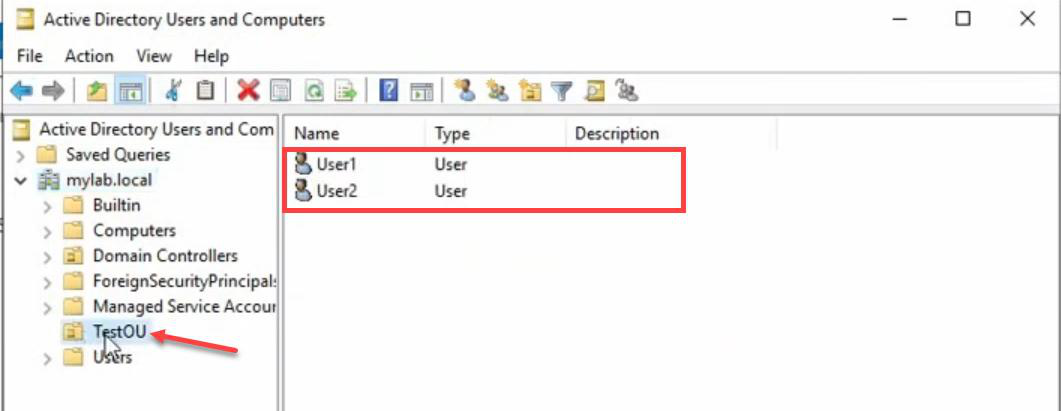
TestOU — back, with User1 and User2 intact. Authoritative restore succeeded locally.Normal boot. Login as domain admin (AD is back up). AD Users and Computers > MyLab.local > TestOU is back, with User1 and User2 inside. The local DC01 authoritative restore worked.
But we’re not done — the restored objects are only on DC01 so far. We need replication to push them to DC02.
Step 10 — Force replication to DC02
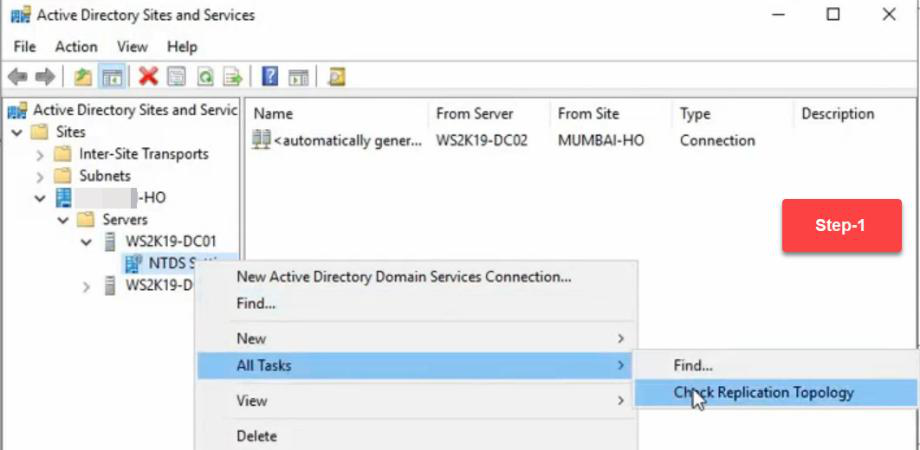
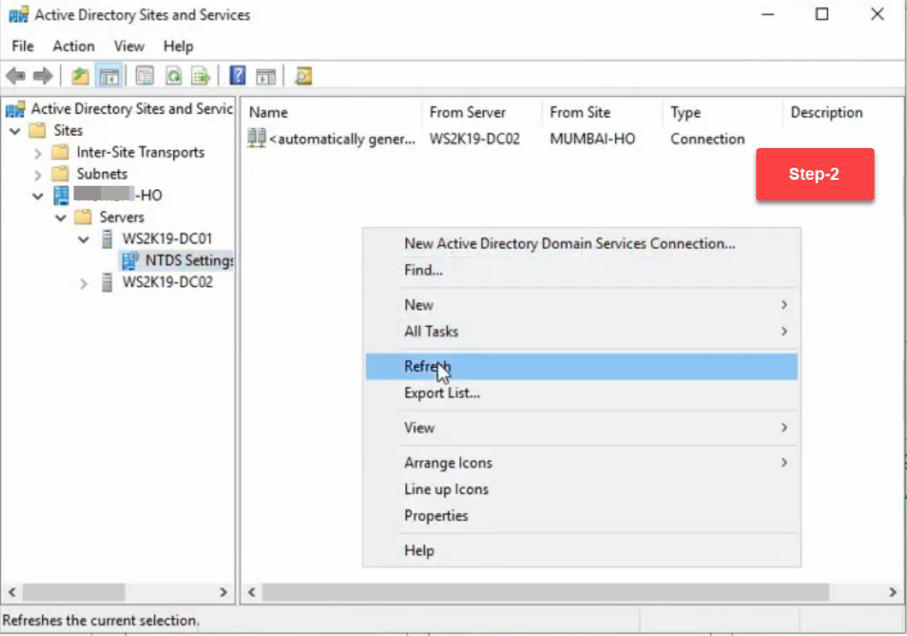
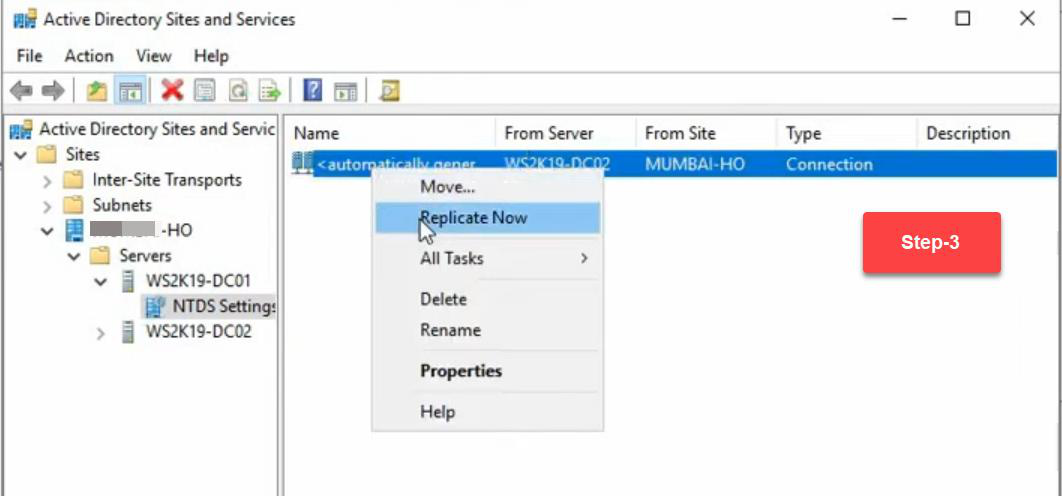
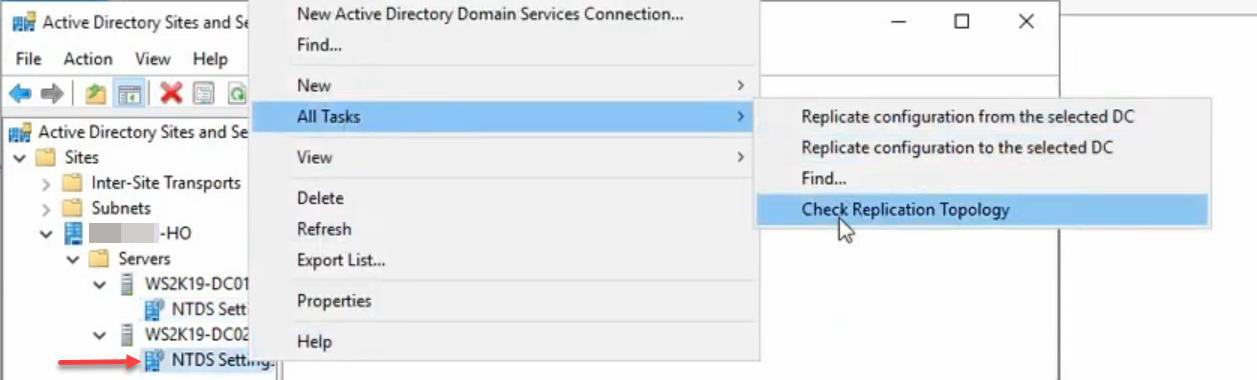
Sites and Services > DC01 > right-click NTDS Settings > Check Replication Topology > OK. Then right-click the outbound connection > Replicate Now.
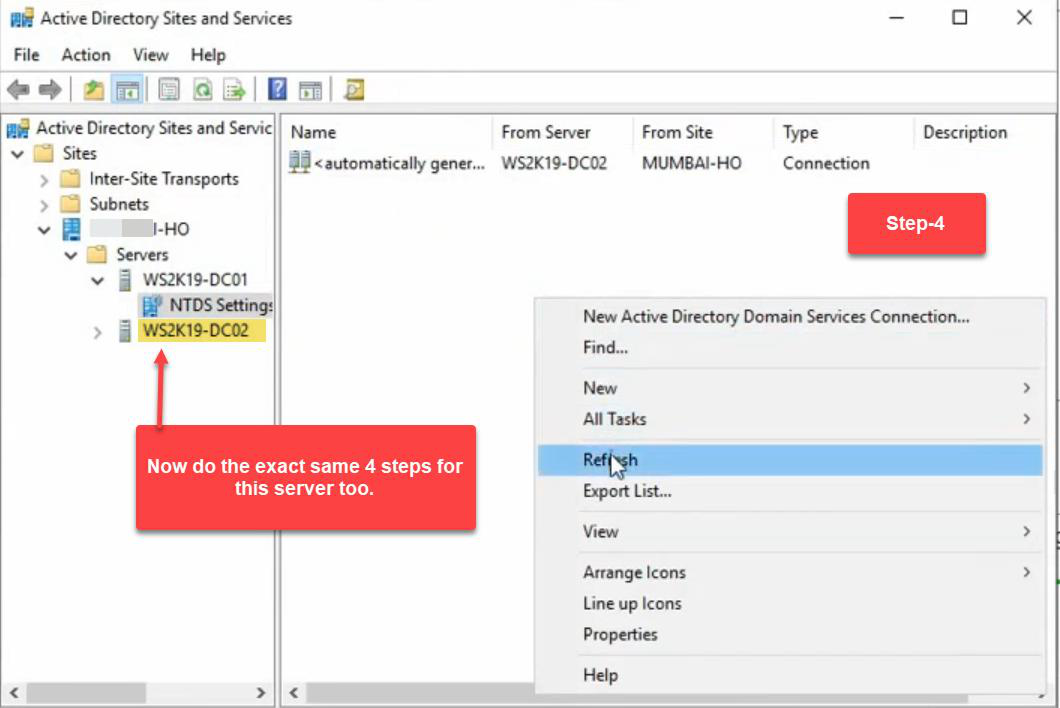
Same flow on DC02: check replication topology, replicate now (pull from DC01).

TestOU with User1 and User2. The OU is back on every DC in the forest. Authoritative restore is complete.Final verification on DC02: AD Users and Computers > TestOU back, with User1 and User2 inside. The OU is restored on every DC in the forest.
Verification commands
After the restore, run these to confirm replication is healthy:
repadmin /showrepl
repadmin /replsummary
dcdiag /v
Get-ADReplicationFailure -Target * -Scope Forest
Look for: zero replication failures, all DCs in sync, no critical dcdiag errors.
Things that bite people
Rebooting before running ntdsutil
If the DC reboots out of DSRM before you run the ntdsutil authoritative restore commands, the restore is purely non-authoritative. The restored data syncs from DC02’s newer USNs, and the OU you tried to bring back gets re-deleted by replication. You have to repeat the entire DSRM + restore procedure. Don’t tick “Automatically restart” on the WSB recovery wizard.
Wrong DN in ntdsutil
If the DN is off by one character — OU=TestOu instead of OU=TestOU — ntdsutil returns “Object not found.” The mark-authoritative operation fails silently in the sense that nothing got bumped. Always copy the exact DN from a working AD Users and Computers view before the deletion, or from the deletion event in the Security log.
Using the GUI checkbox for granular restore
The WSB GUI’s “Perform an authoritative restore of Active Directory files” checkbox marks the entire database authoritative. If you only need one OU back, ticking this overwrites every other recent change in AD too — passwords rotated, group memberships changed, etc., all reverted. Never use the GUI checkbox for granular restore. Always use ntdsutil.
SYSVOL not authoritatively restored
ntdsutil authoritative restore covers the AD database only. If the deleted object included a GPO (which lives in SYSVOL), you also need wbadmin start systemstaterecovery -authsysvol. Otherwise the GPO comes back in the AD pointer but the actual policy file is missing from SYSVOL. Watch for this in OUs that had linked GPOs.
DSRM password forgotten
If you don’t know the DSRM password, you can’t log in after boot to DSRM. Reset it proactively (from any working DC) with ntdsutil set dsrm password. Document the procedure in your DR runbook; store the DSRM password in a vault that’s reachable during an outage (not just on the broken DC).
FSMO role not seized
If DC01 is the FSMO role holder, the rest of the forest can’t do schema mods, password resets (PDC Emulator), etc., while DC01 is offline in DSRM. For long restores, seize the role to DC02 first, then seize back when DC01 is healthy again. Granular authoritative restore is usually quick enough this isn’t an issue.
Backup older than tombstone lifetime
If your backup is older than the tombstone lifetime (60 days default for older AD, 180 for AD Recycle Bin enabled), replication treats the restored objects as “already deleted, ignore.” The bumped USN means the local DC has them, but they don’t replicate out properly. Always verify backup age vs tombstone lifetime before relying on the backup.
Multiple authoritative restores in succession
The USN-bump-by-100,000 mechanism is fine for one or two cycles. If you authoritatively restore the same object a dozen times, you eventually exhaust the high-word USN space. In practice, you never hit this — but be aware that authoritative restore is not infinitely repeatable on the same objects.
What’s next
That’s the full AD Backup & Disaster Recovery pathway. You’ve built the backup, scheduled it, tested it bare-metal, restored it bare-metal, learned the non-authoritative vs authoritative model, and now driven a granular authoritative restore end-to-end. From here:
- Practise this on a lab at least once a quarter. The exact
ntdsutilcommands are different from anything else you do in AD — muscle memory matters when it’s for real. - Enable AD Recycle Bin (Server 2008 R2+). Most accidental deletions can be recovered from Recycle Bin without needing this full authoritative restore procedure. Authoritative restore is the fallback when Recycle Bin can’t help.
- Document your DR runbook with the exact DNs, DSRM passwords, FSMO roles, and IP plan for each DC. Don’t depend on memory under pressure.
- Forest Recovery is the next-tier disaster (corrupt schema, ransomware that replicated to all DCs). That’s a different procedure — Microsoft has a dedicated guide. Don’t conflate Forest Recovery with authoritative restore.
Happy learning — and may you never actually need this in production.