SQL Server Always On Availability Groups require a Windows Server Failover Cluster (WSFC) underneath. The AG itself doesn’t move shared storage around — it replicates databases. But the cluster service is what coordinates node membership, quorum voting, listener virtual IP, and automatic failover decisions.
So before SQL can do AG anything, both SQL-NODE-01 and SQL-NODE-02 need the Failover Clustering feature installed and the WSFC built. This is what we set up here.
This is different from the classic SQL Failover Cluster Instance (FCI) pattern — we’re NOT using shared storage. Each SQL node has its own local database files. The cluster only handles membership and quorum.
Install Failover Clustering on SQL-NODE-01

On SQL-NODE-01, open Server Manager > Manage > Add Roles and Features.
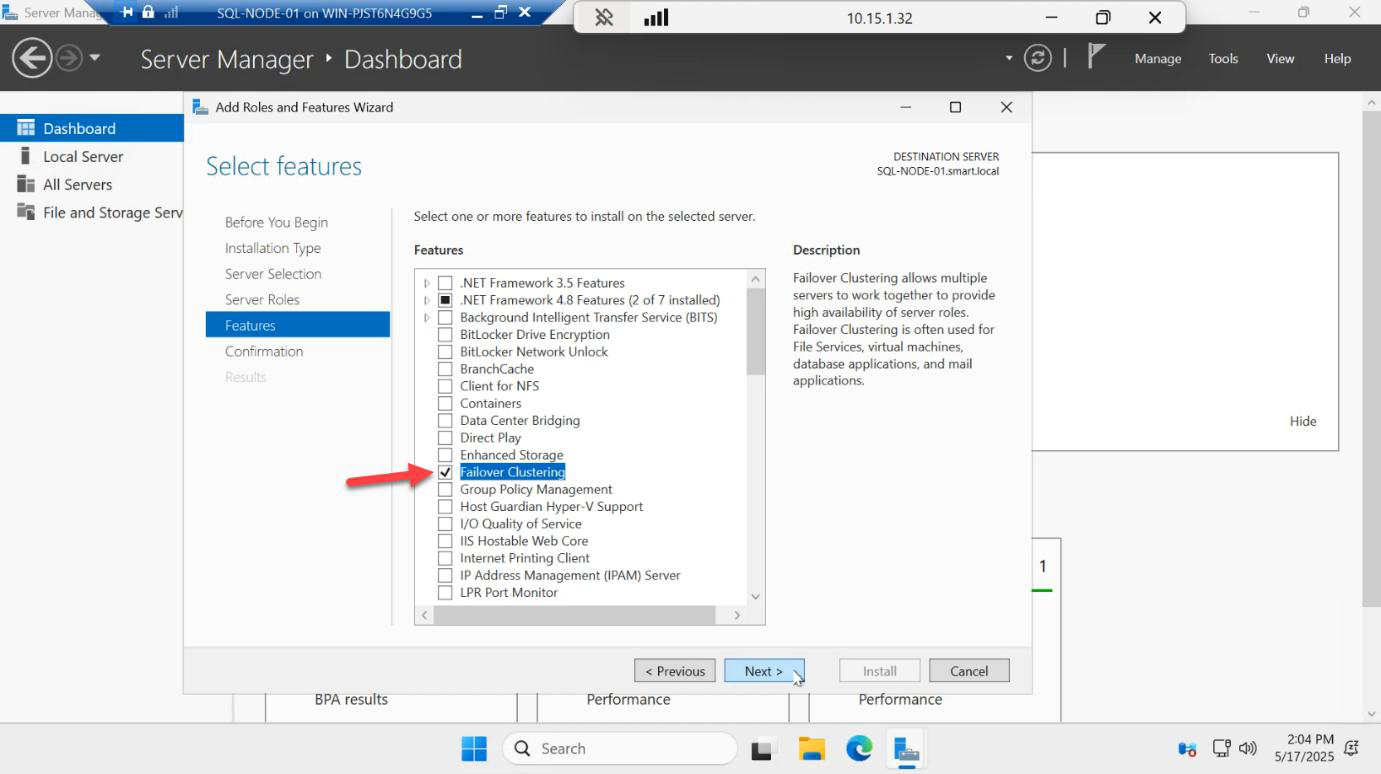
Skip the Roles page. On the Features page, tick Failover Clustering. A popup asks to add management tools — click Add Features. Next.
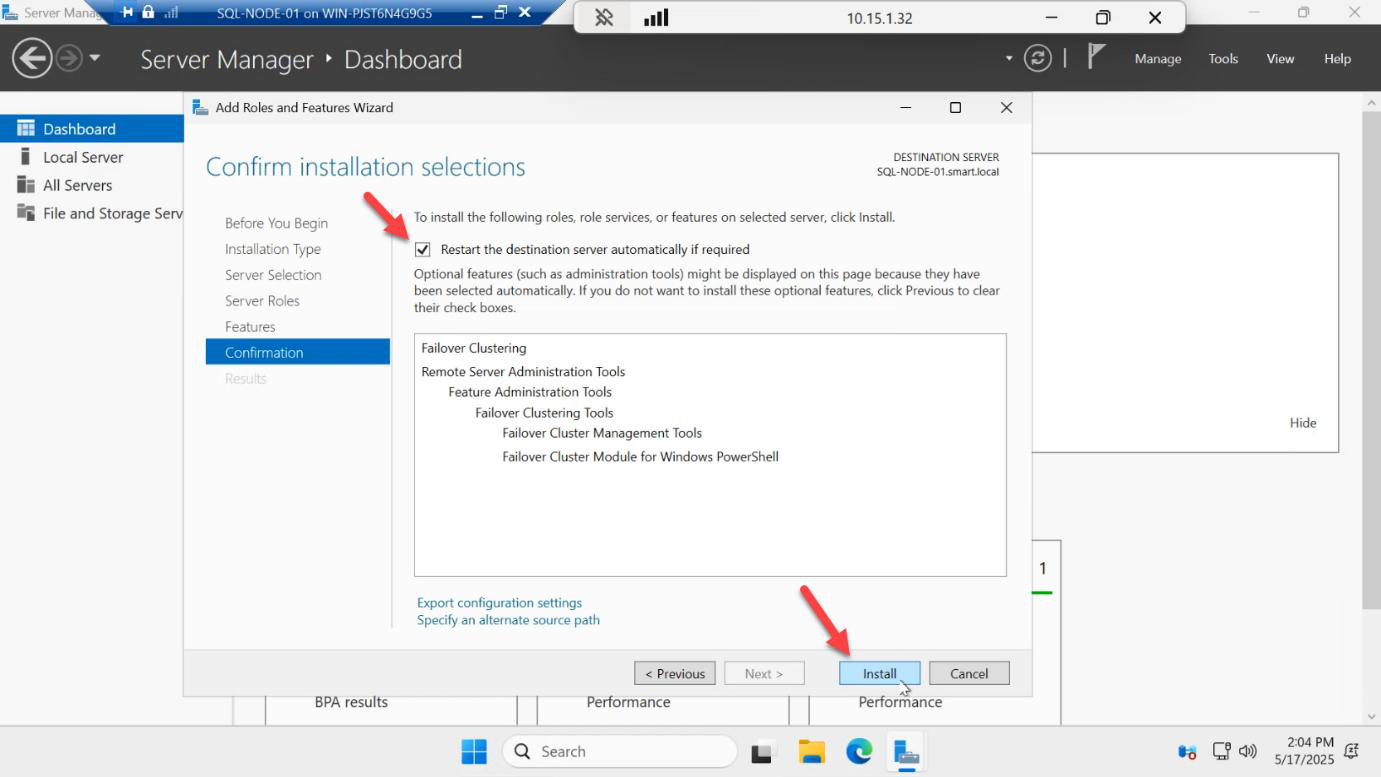
Confirm > Install.
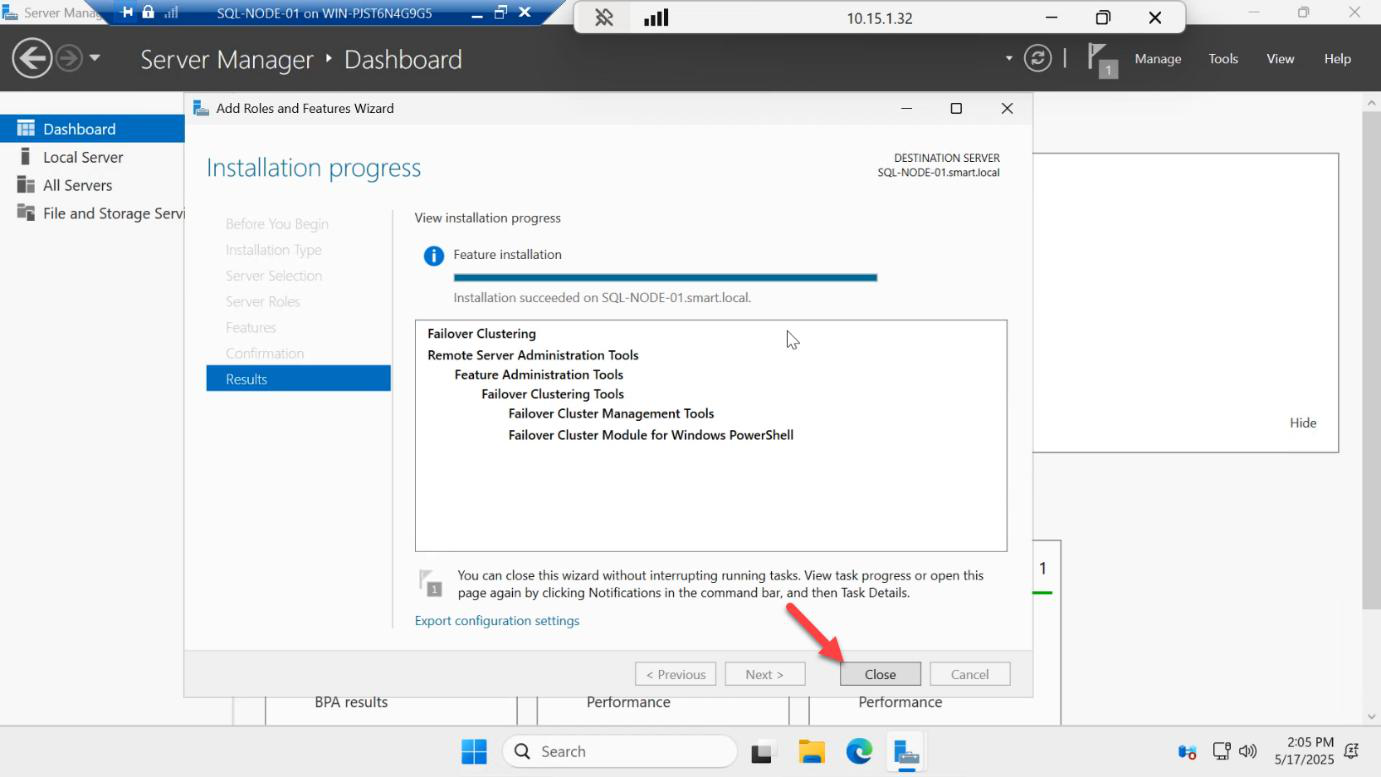
Install finishes in ~30 seconds — no reboot required. Click Close.
Now repeat all four steps on SQL-NODE-02. Both nodes need the feature before you can build the cluster.
Create the file share witness
WSFC needs a quorum witness — a tiebreaker that prevents split-brain when nodes lose visibility of each other. With 2 nodes you have 2 votes total; lose one node and the surviving node has no majority. The witness gives a third vote.
Witness options: disk, file share, or cloud. We’ll use a file share witness on the domain controller (or any SMB share that both nodes can reach). In production, place the share on a third server — not on either of the cluster nodes themselves.

C:\Quorum). Right-click > Properties > Sharing > Advanced Sharing > tick Share this folder. This is the file share witness for cluster quorum.On the DC (or whichever server hosts the share), create a folder — e.g. C:\Quorum. Right-click > Properties > Sharing tab > Advanced Sharing > tick Share this folder. Share name: quorum.
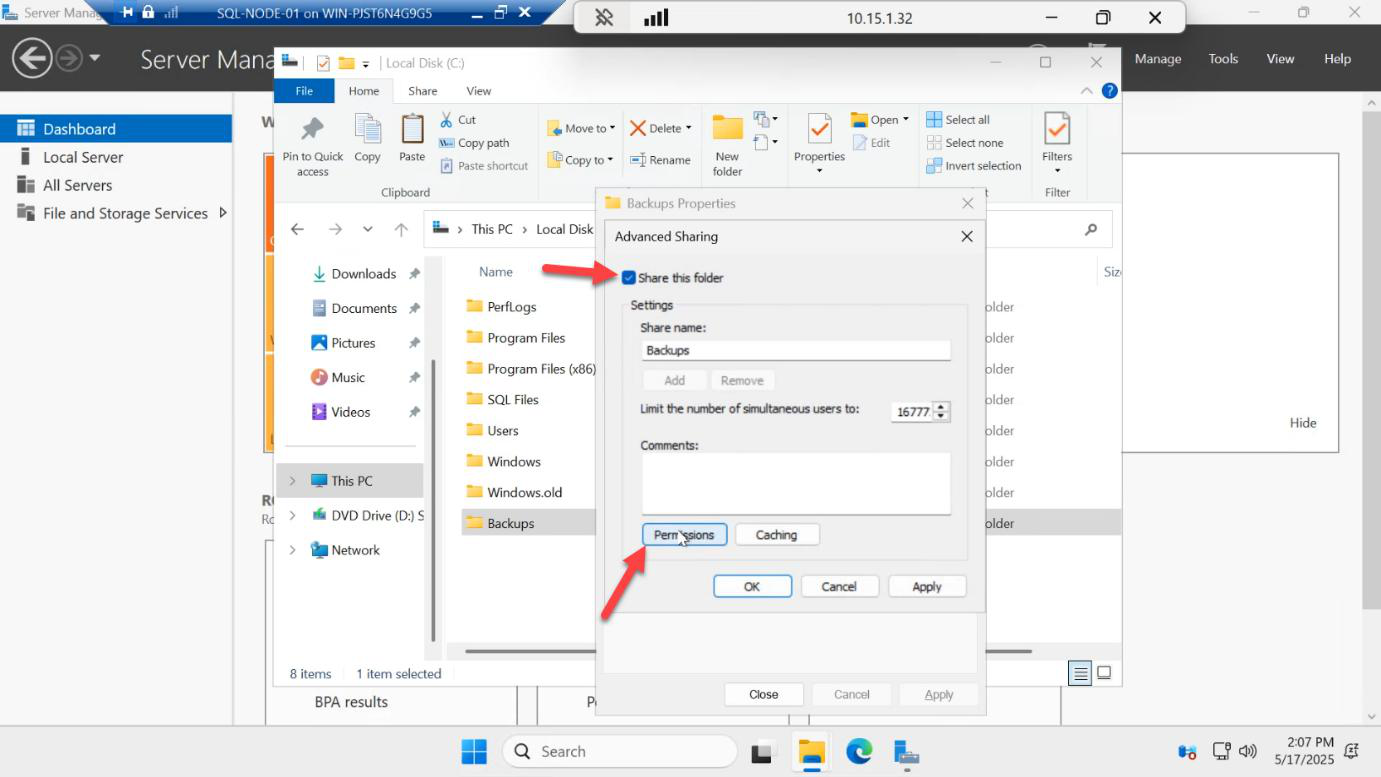
Click Permissions.
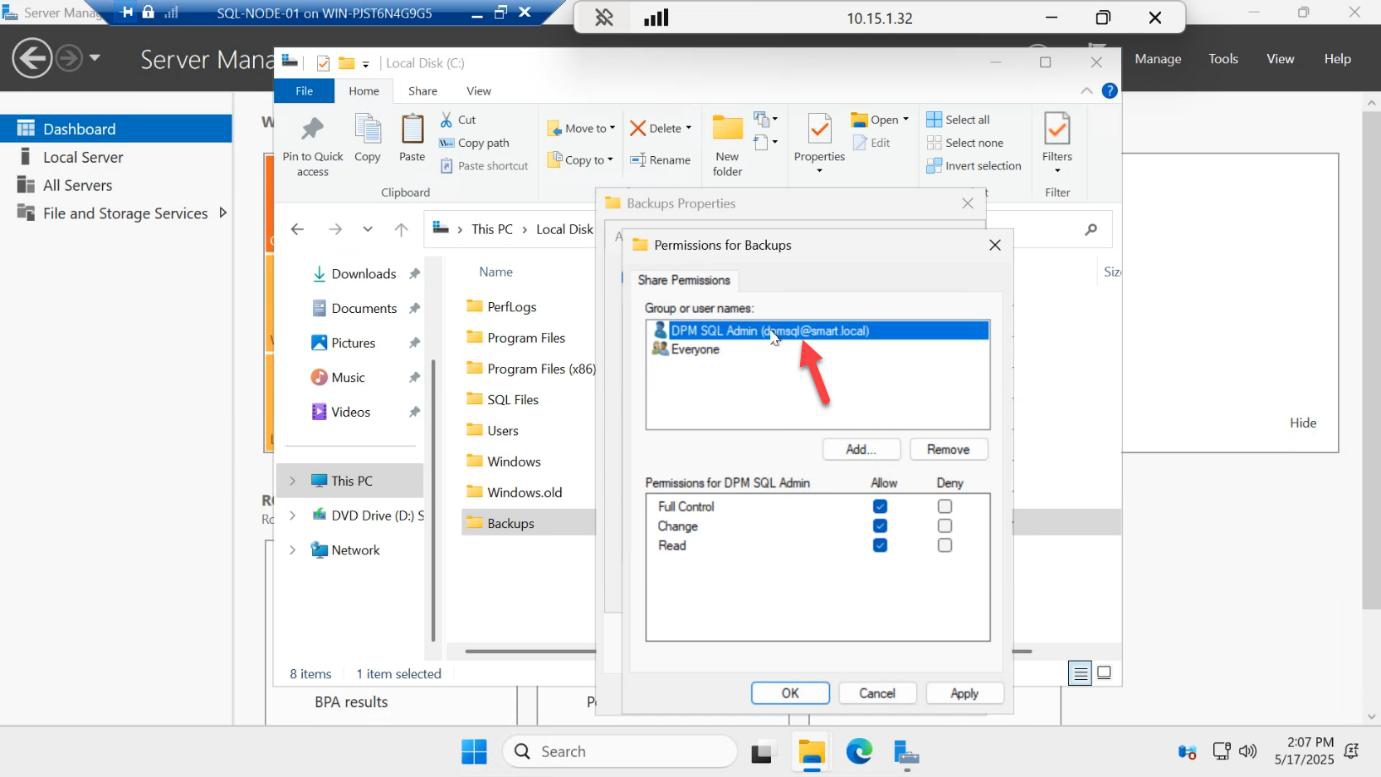
CONTOSO\sql-svc > tick Full Control. Apply. The cluster nodes need write access to maintain quorum heartbeat files in this share.Remove Everyone, then Add > CONTOSO\sql-svc > tick Full Control. The cluster nodes (running services as the SQL service account) need RW access to drop heartbeat / witness files in the share. Apply.
You can also grant the cluster CNO computer object Full Control after the cluster is created — either approach works.
Build the cluster
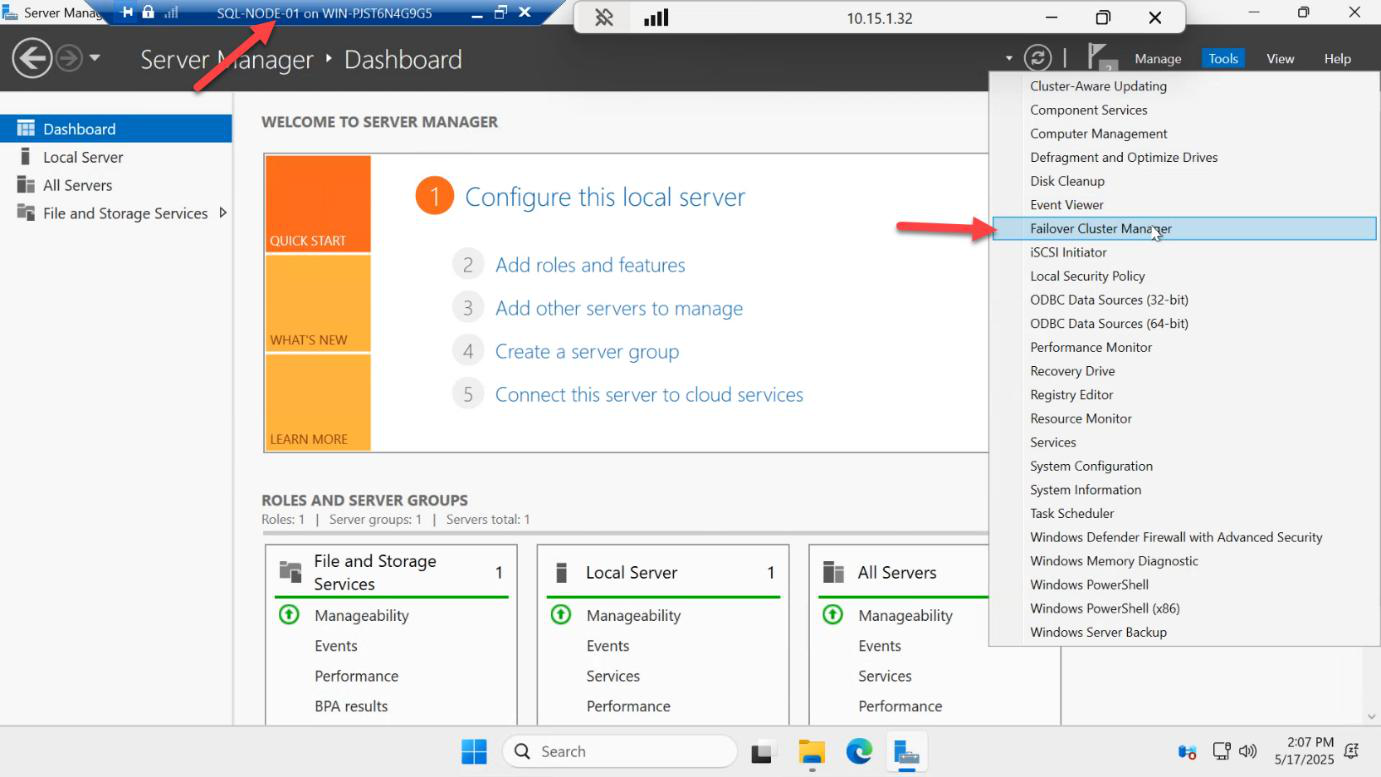
Back on SQL-NODE-01, open Server Manager > Tools > Failover Cluster Manager.
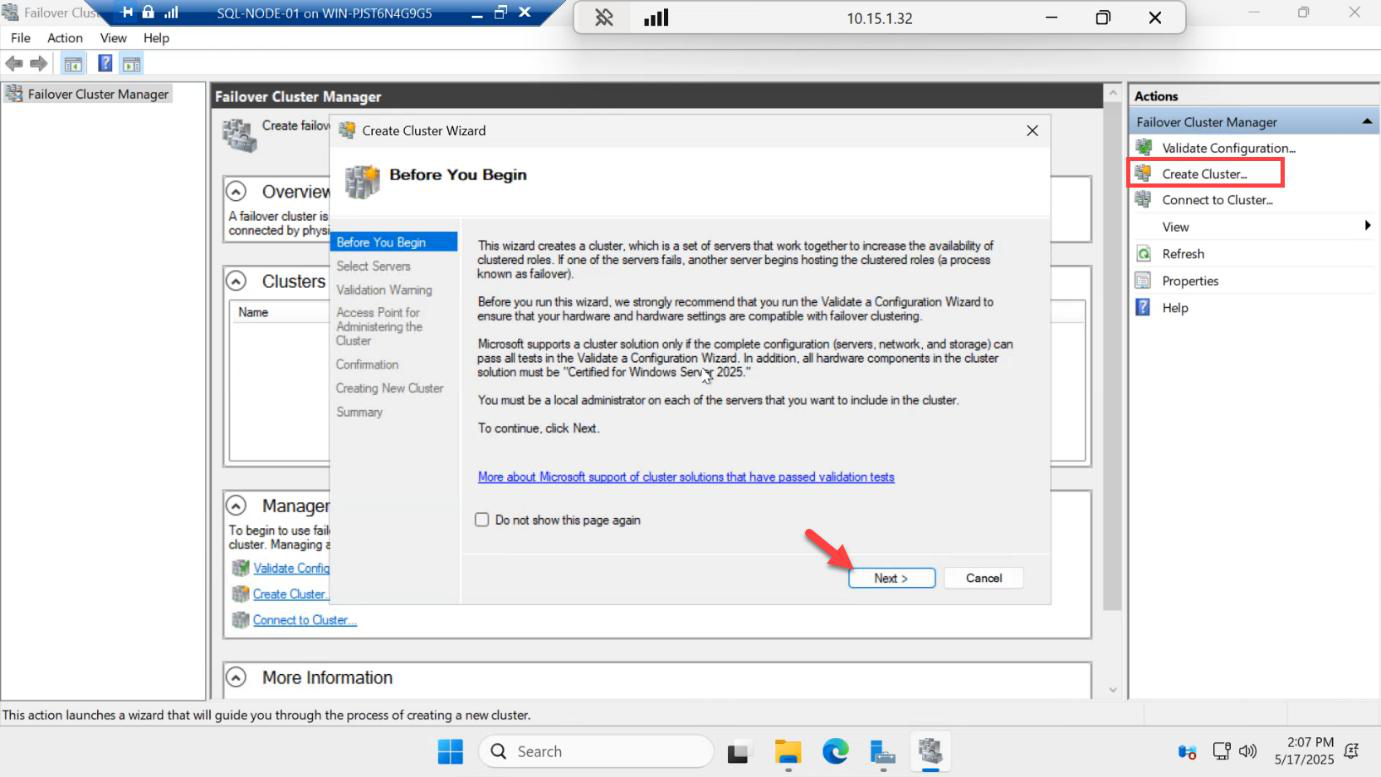
Right-side Actions pane > Create Cluster. Welcome > Next.
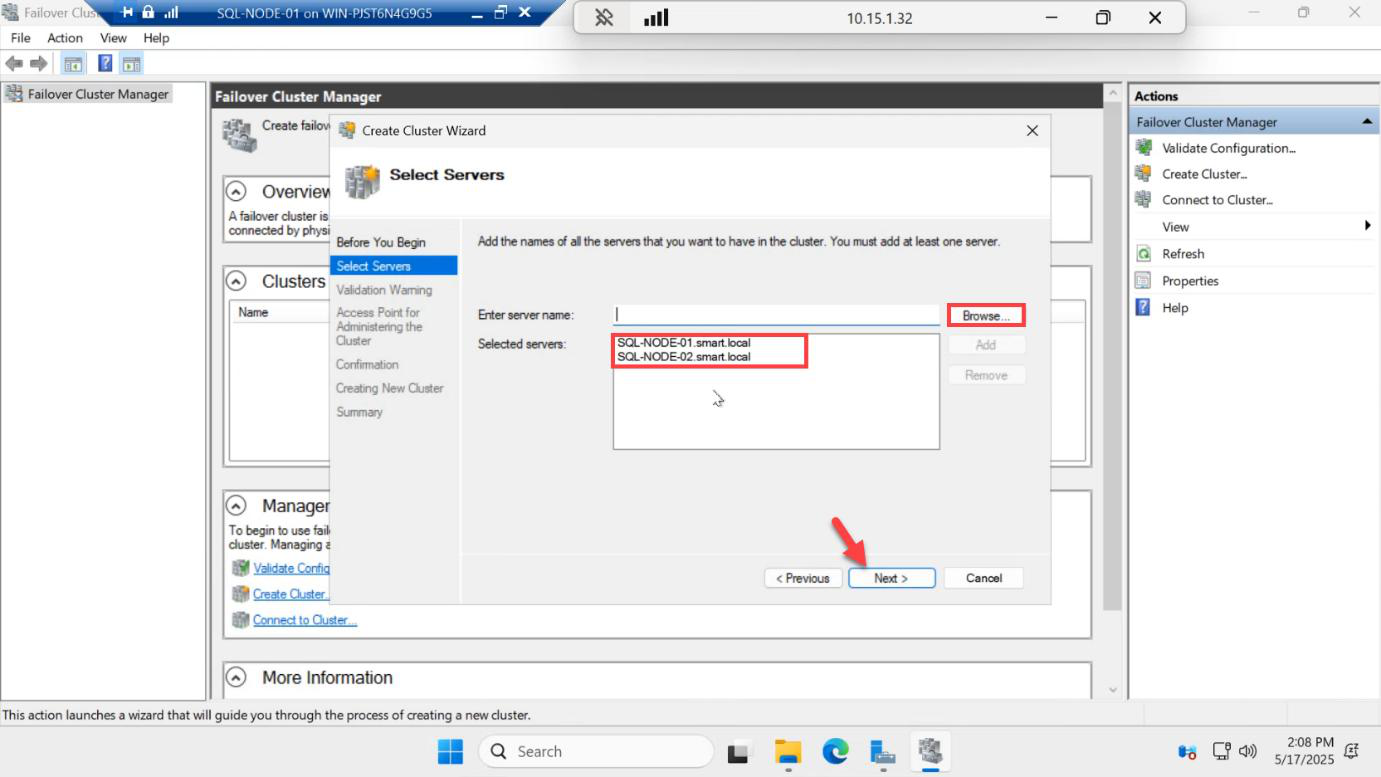
SQL-NODE-01 and SQL-NODE-02. Next.Select Servers: Browse and add both SQL-NODE-01 and SQL-NODE-02. Next.

Validation Warning: in production you’d run the full Validate a Configuration wizard now and resolve every error. For lab speed, pick No and skip — you can run validation later from the cluster pane. Next.
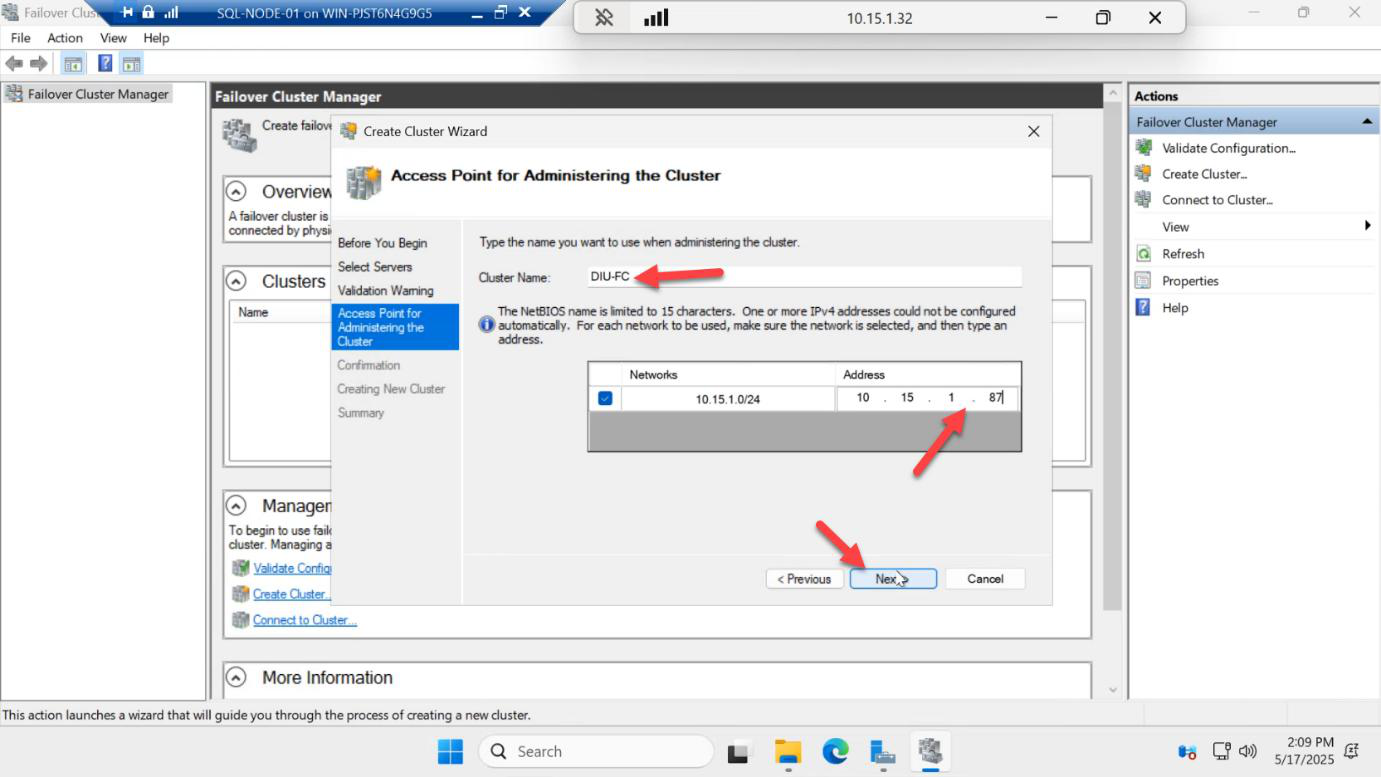
192.168.1.50). This becomes a Computer Object in AD.Access Point: this is the cluster name (which becomes a CNO computer object in AD) and the cluster management IP. Pick:
- Cluster name:
SQLCLUSTER01— meaningful, fits in 15 chars (NetBIOS limit) - Cluster IP:
192.168.1.50— same subnet as the nodes, not assigned to anything else
Note: this is NOT the AG listener IP. The listener gets its own IP later in Part 5.
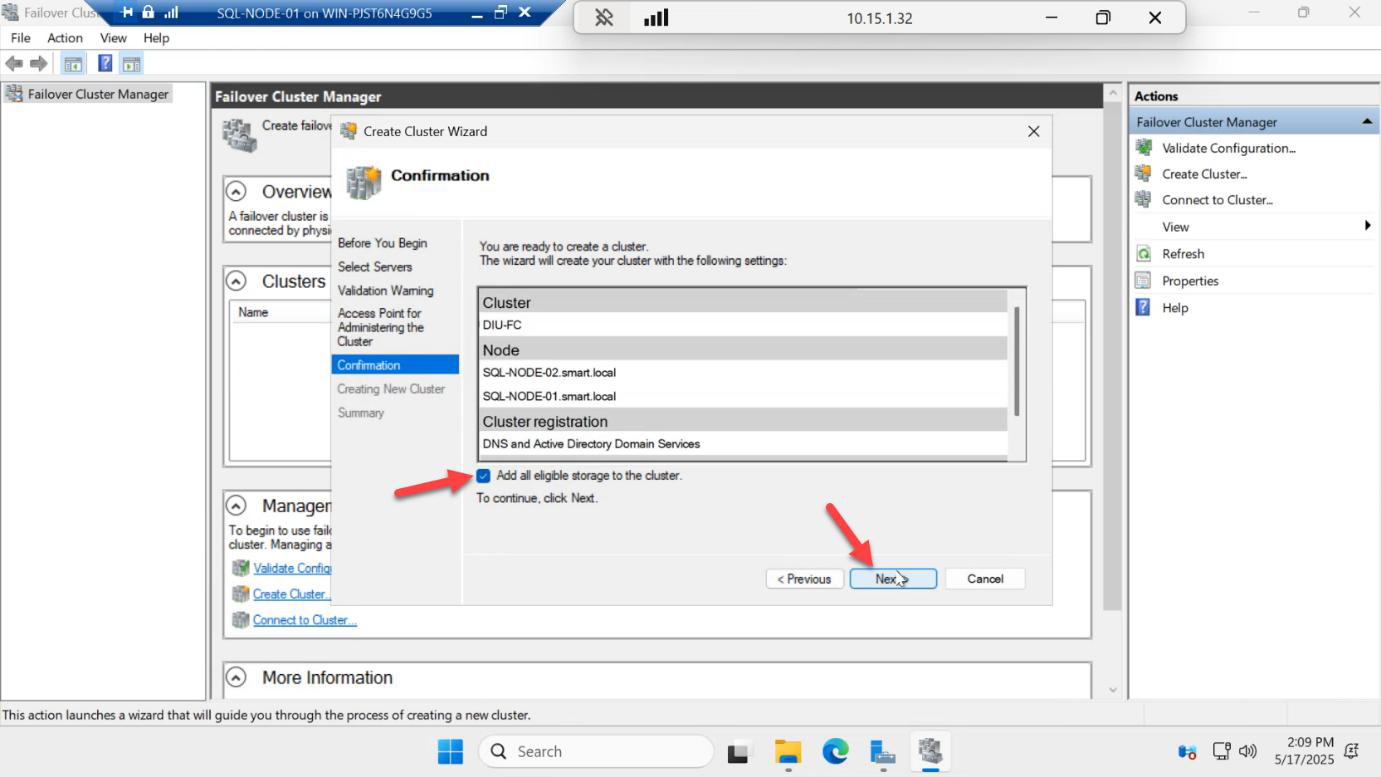
Confirmation page > Next. Watch for the cluster CNO showing up in Active Directory Users and Computers in your DC.
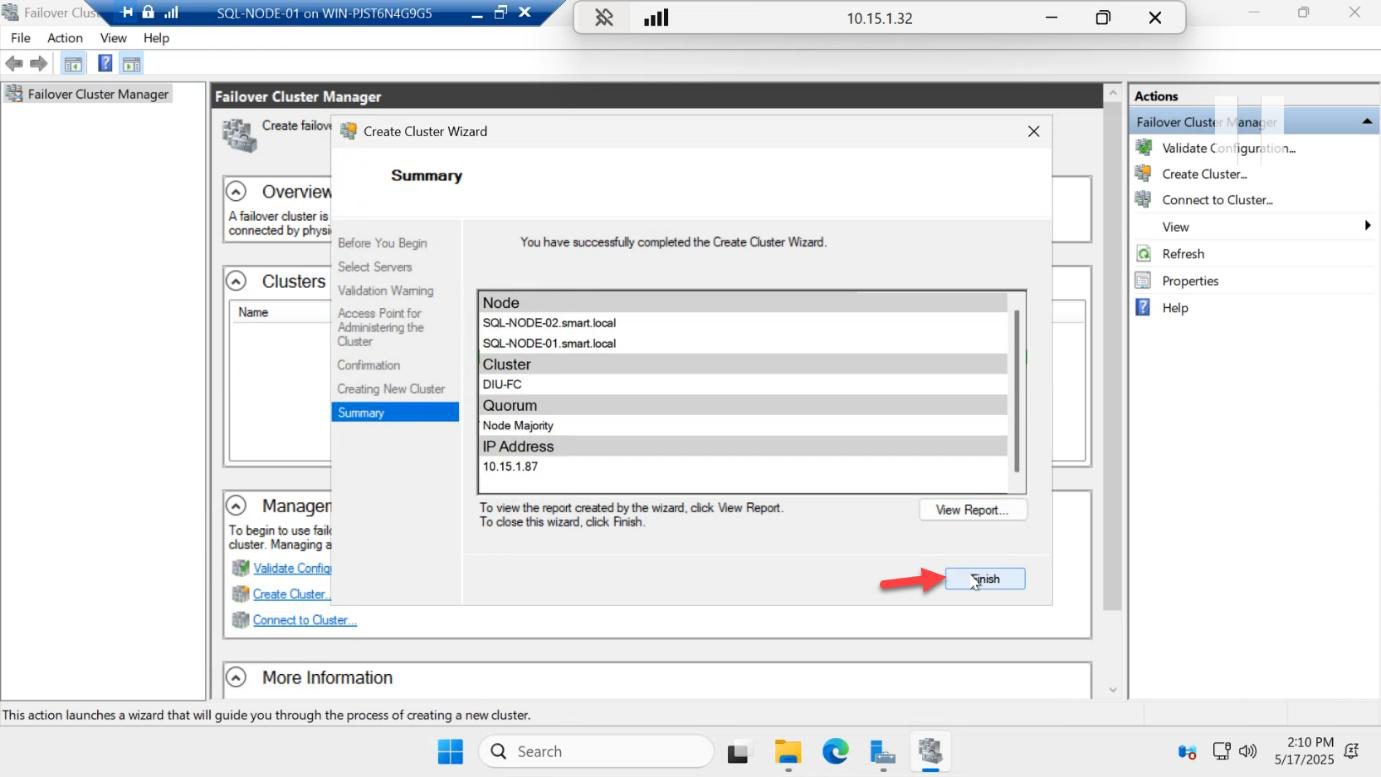
Cluster comes up > Finish.
Verify both nodes are UP
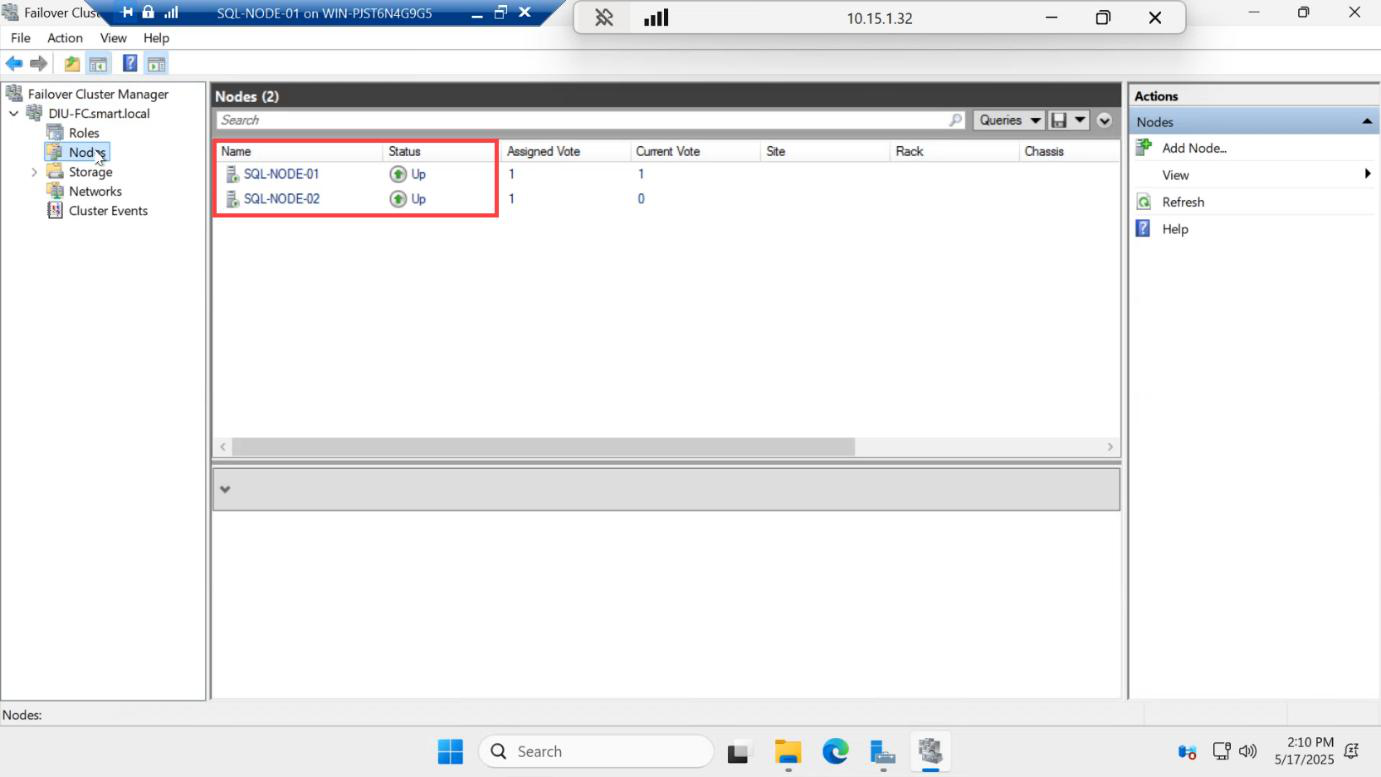
Expand the cluster in the left pane > click Nodes. Both SQL-NODE-01 and SQL-NODE-02 should show Status = Up.
If a node shows Down, the usual culprits are:
- Windows Firewall is on (open ports or disable for the lab)
- Time skew between nodes (must be within 5 min)
- Failover Clustering feature missing on that node
- DNS is broken (cluster nodes need to resolve each other by FQDN)
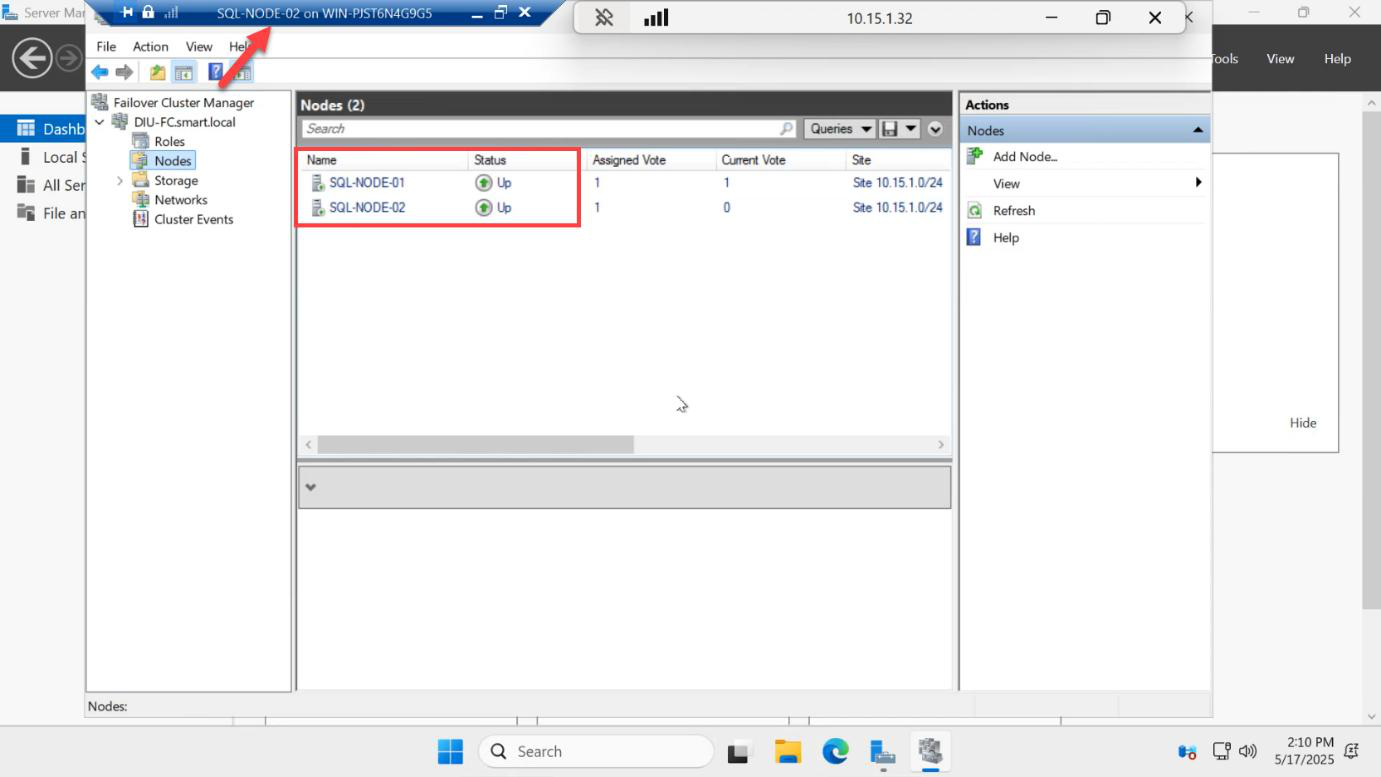
Now log into SQL-NODE-02 > open Failover Cluster Manager > connect to SQLCLUSTER01. Same cluster, same nodes Up. This proves the cluster is genuinely shared — both nodes see the same membership.
Things that bite people
Witness on one of the cluster nodes
Pointing the file share witness at a folder on SQL-NODE-01 means losing SQL-NODE-01 takes the witness with it. Witness must live outside the cluster — the DC is fine for lab; in production, a separate file server or cloud witness.
Using DHCP IPs on cluster nodes
If the cluster nodes get DHCP-assigned IPs, the cluster IP and CNO can drift. Always assign static IPs to cluster nodes (we did this in Part 1).
Cluster name longer than 15 chars
NetBIOS legacy limit. Pick something like SQLCLUSTER01 not SQL-AG-CLUSTER-PRODUCTION-01.
CNO creation fails
The cluster service tries to create the CNO in the default Computers OU. If the SQL service account doesn’t have Create Computer Object permission on that OU, CNO creation fails with cryptic errors. Either pre-stage the CNO computer object in AD before clustering, or grant the service account temporary OU rights.
Skipping validation
For a lab, skipping the validation wizard is fine. For production, ALWAYS run the full validation against both nodes before you build the cluster — it surfaces network MTU mismatches, missing patches, conflicting Hyper-V settings, etc.
Mismatched OS versions
If one node is Windows Server 2022 and the other is Windows Server 2025, validation fails (or warns loudly). Match exactly.
What’s next
Part 4 in the SQL Availability Groups pathway: enable the Always On feature in SQL Server Configuration Manager, restart SQL Server on both nodes, and create the test database (with a table and some rows) that we’ll add to the AG in Part 5.