An untested backup is not a backup. This post is the test. We’ll create a bare-metal backup of a disposable lab VM — not just system state, but the full machine including the system reserved partition and the OS volume — verify the artifact landed on disk in the right shape, and prepare for Part 4 where we wipe the VM and restore it.
This is Part 3 in the AD Backup & Disaster Recovery pathway. Parts 1 and 2 covered system-state backups (manual and scheduled). System state is enough for AD object recovery, but for a dead host or destroyed VM you need bare-metal recovery — the full image that WinRE can restore from inside the Windows Recovery Environment without any working Windows install on the box.
Why bare-metal as a test target
Three reasons we use bare-metal backup for the test rather than system state alone:
- It’s the worst-case backup — if bare-metal works, system state restore works trivially.
- It exercises WinRE — the Windows Recovery Environment boot path is where most real restores hit unexpected gotchas (driver mismatches, missing NIC drivers, wrong UEFI / BIOS firmware mode). Testing now flushes those out.
- It produces the artifact for Part 4 — the restore walkthrough uses the backup we make here.
Step 1 — Pick a disposable VM
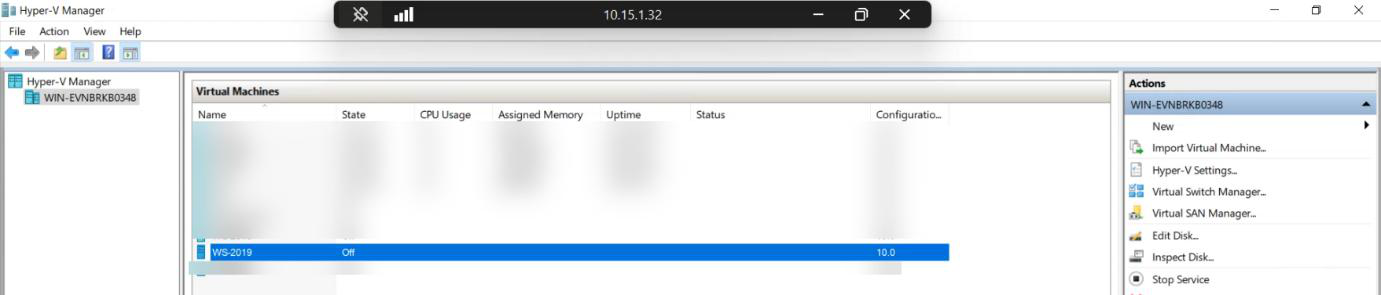
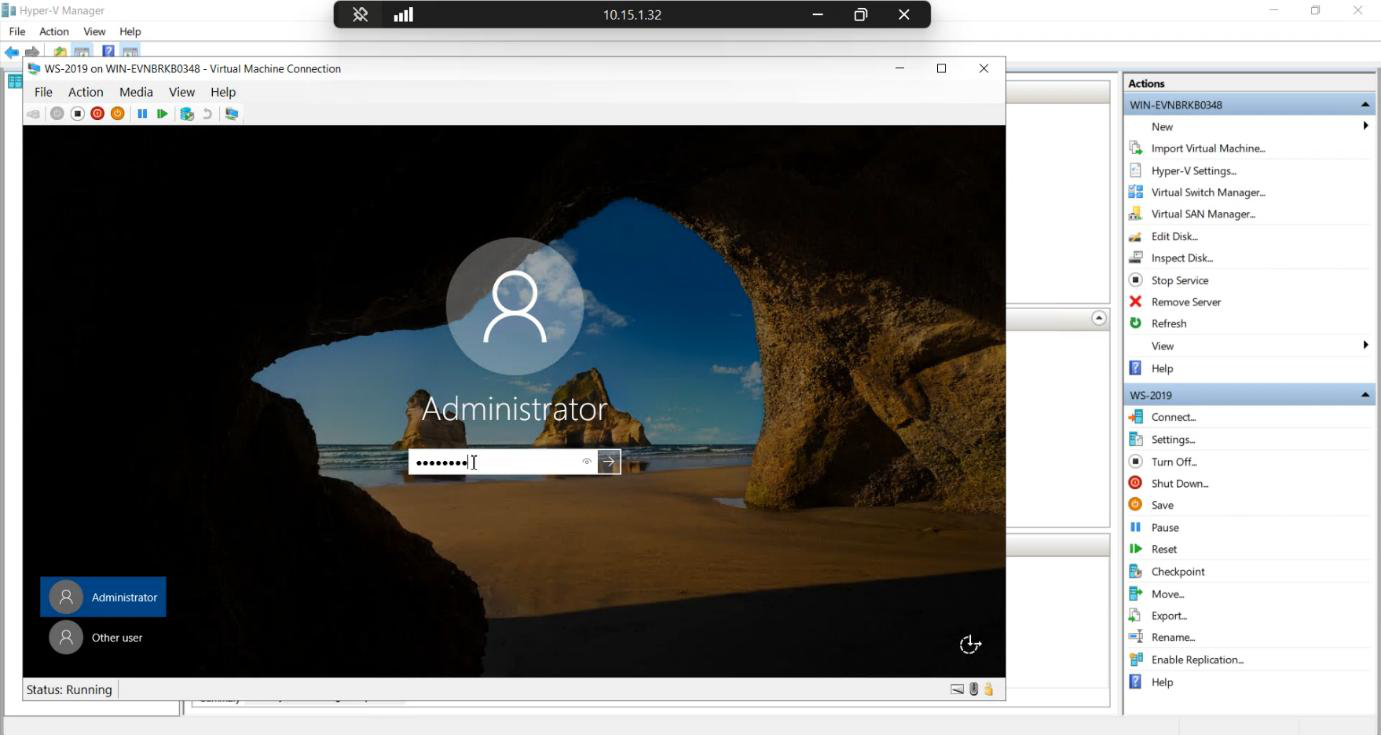
Use a lab VM you can delete — not a production DC. We’ll wipe this VM in Part 4 to prove the restore works. Test on production first and you’ll regret it.
Step 2 — Add a dedicated backup VHDX
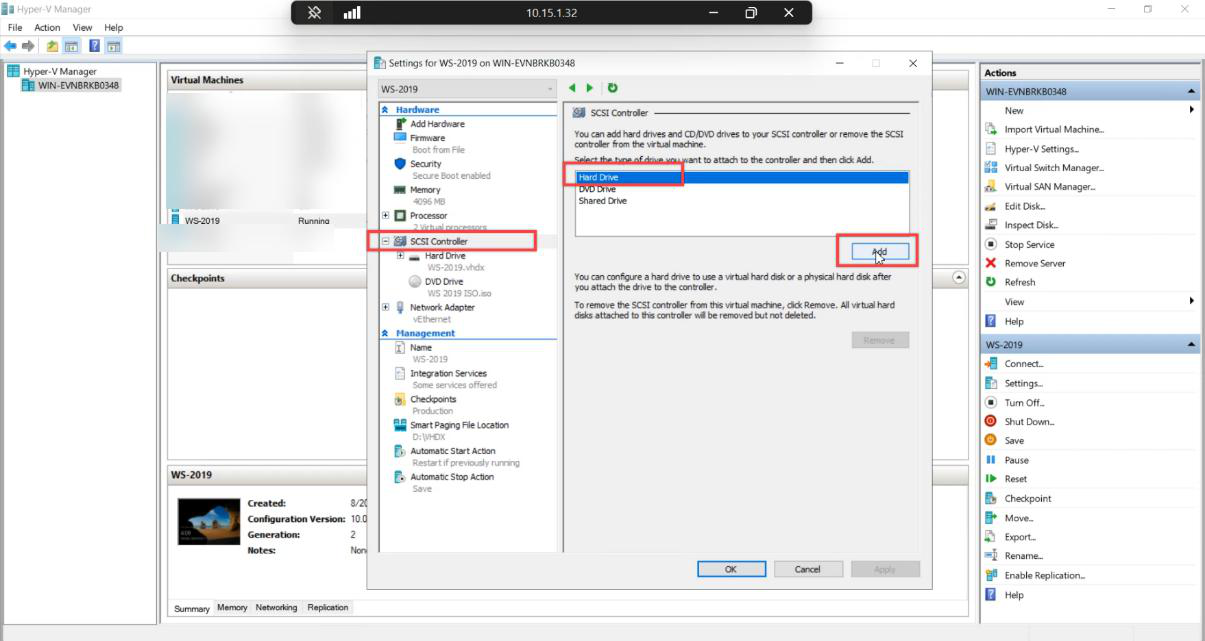
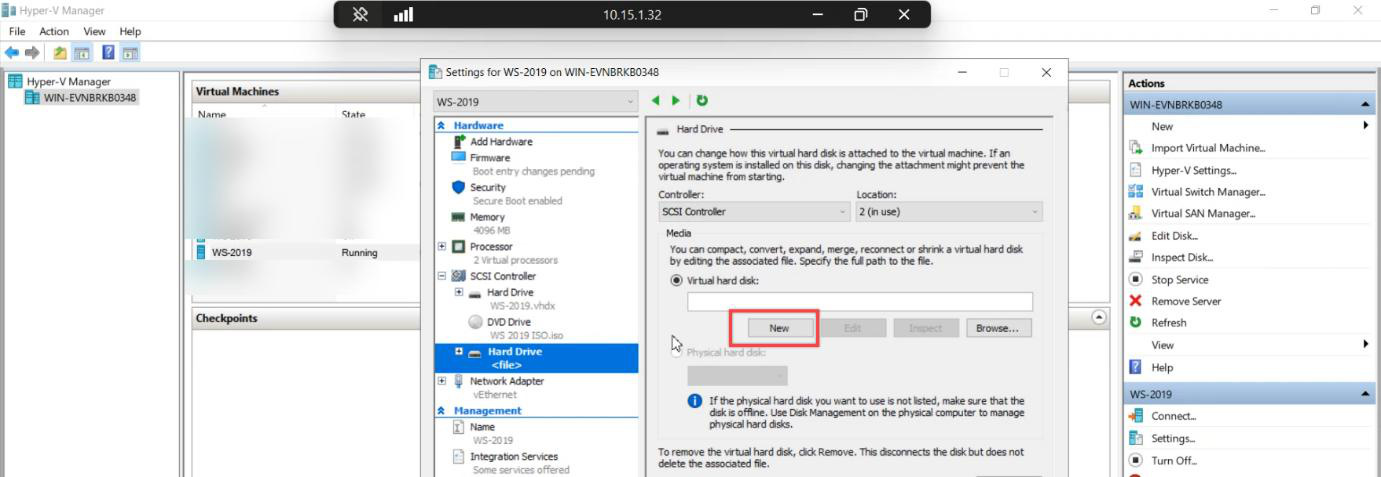
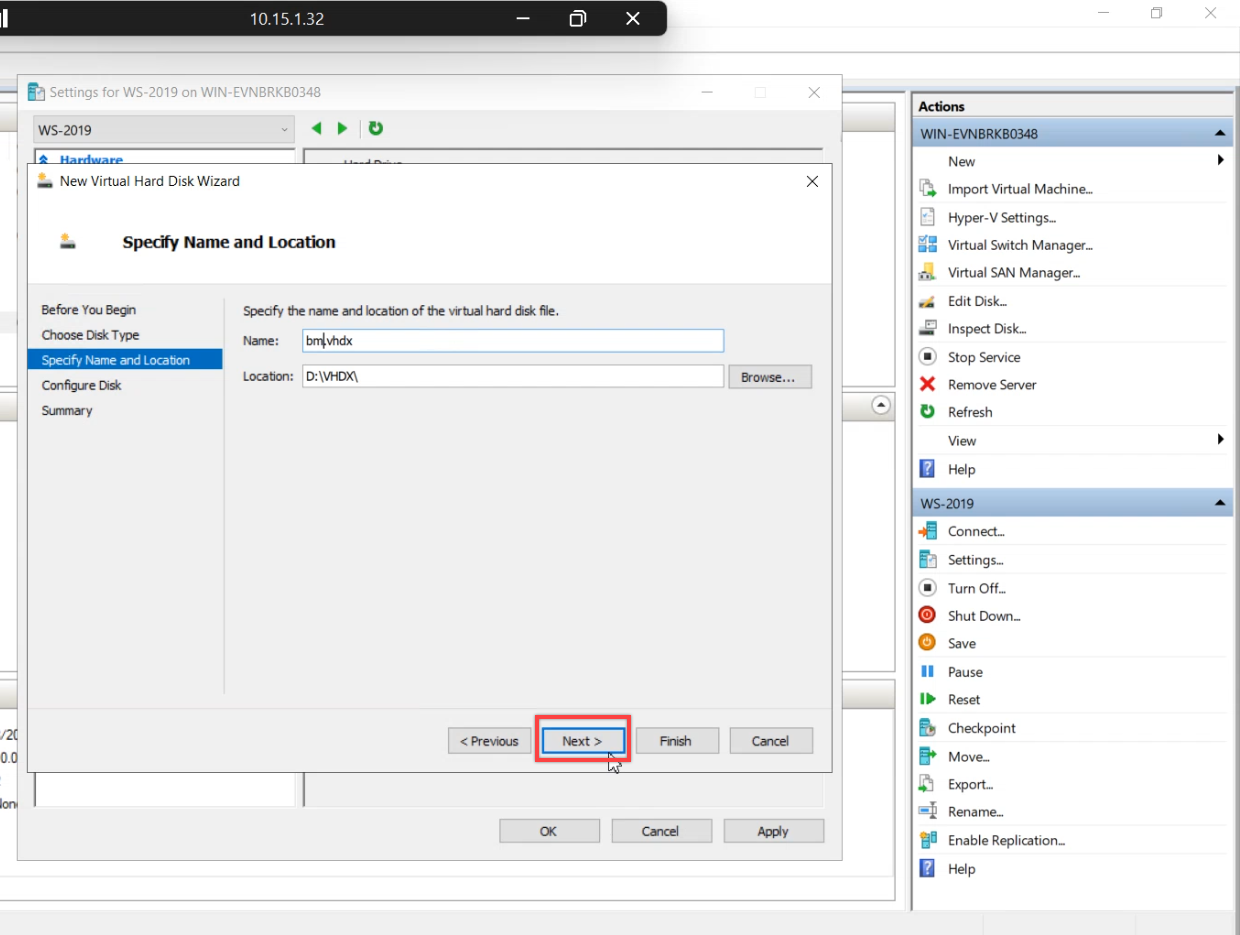
DC01-BACKUP.vhdx. Future-you grepping a Hyper-V config to find which disk holds what will thank you.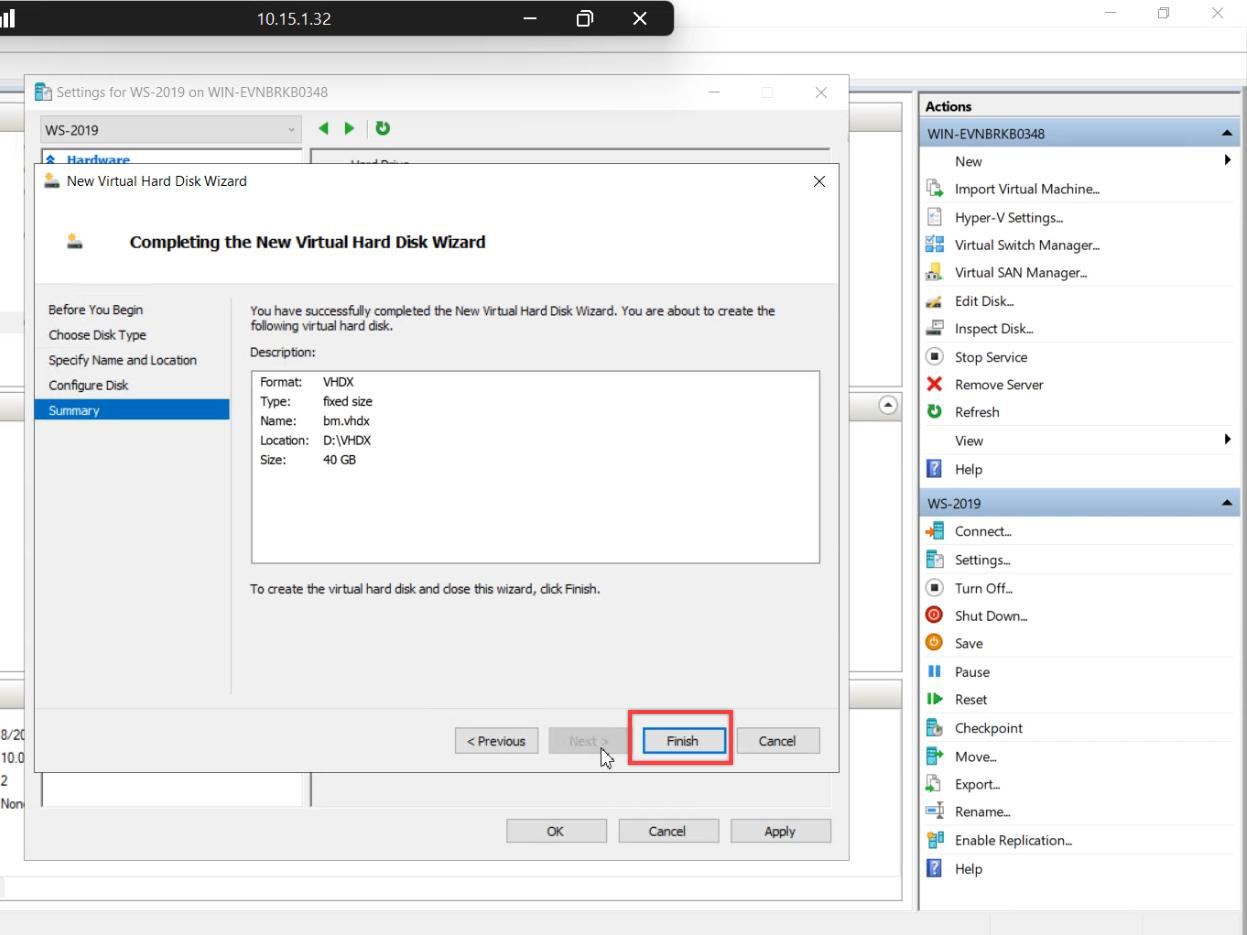
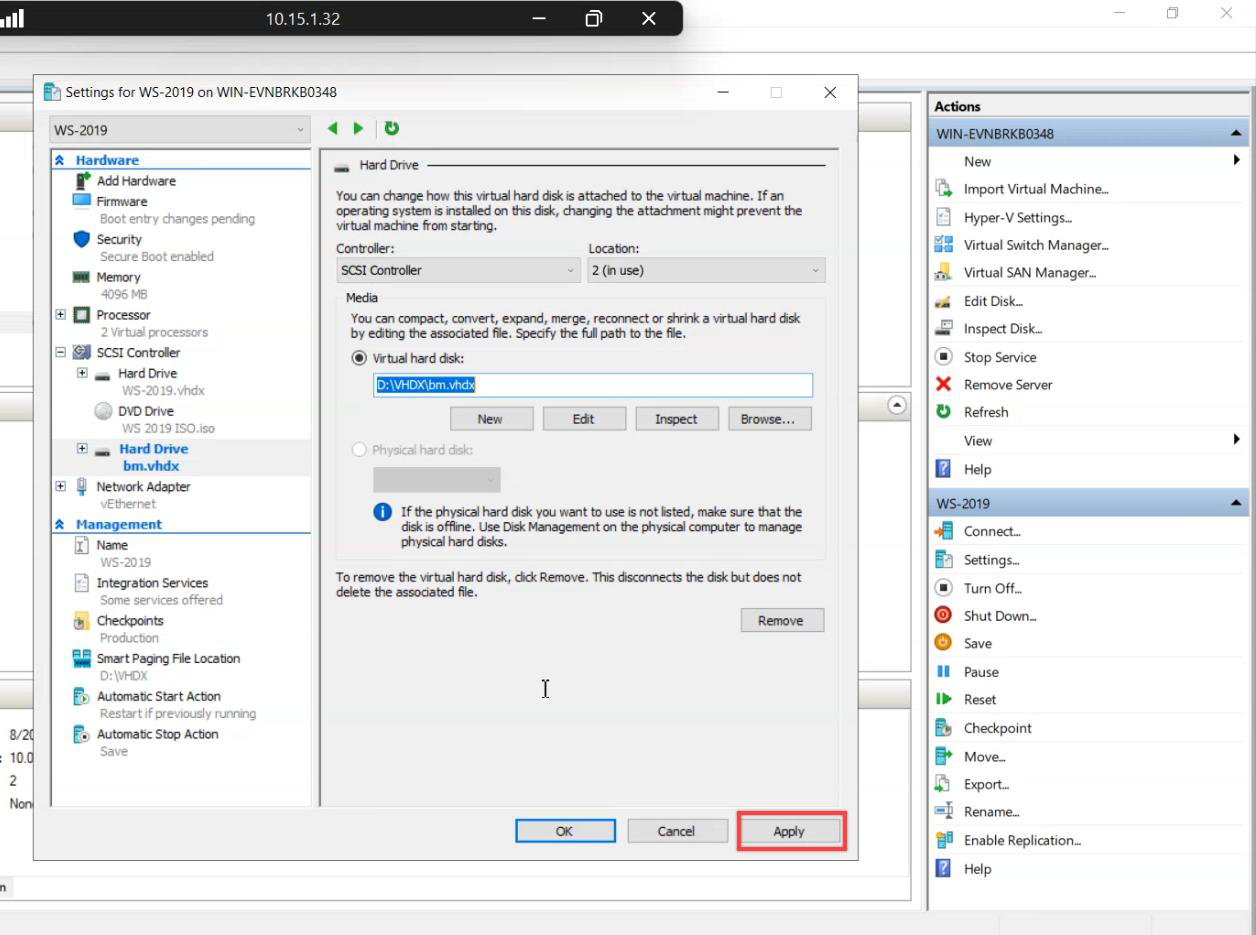
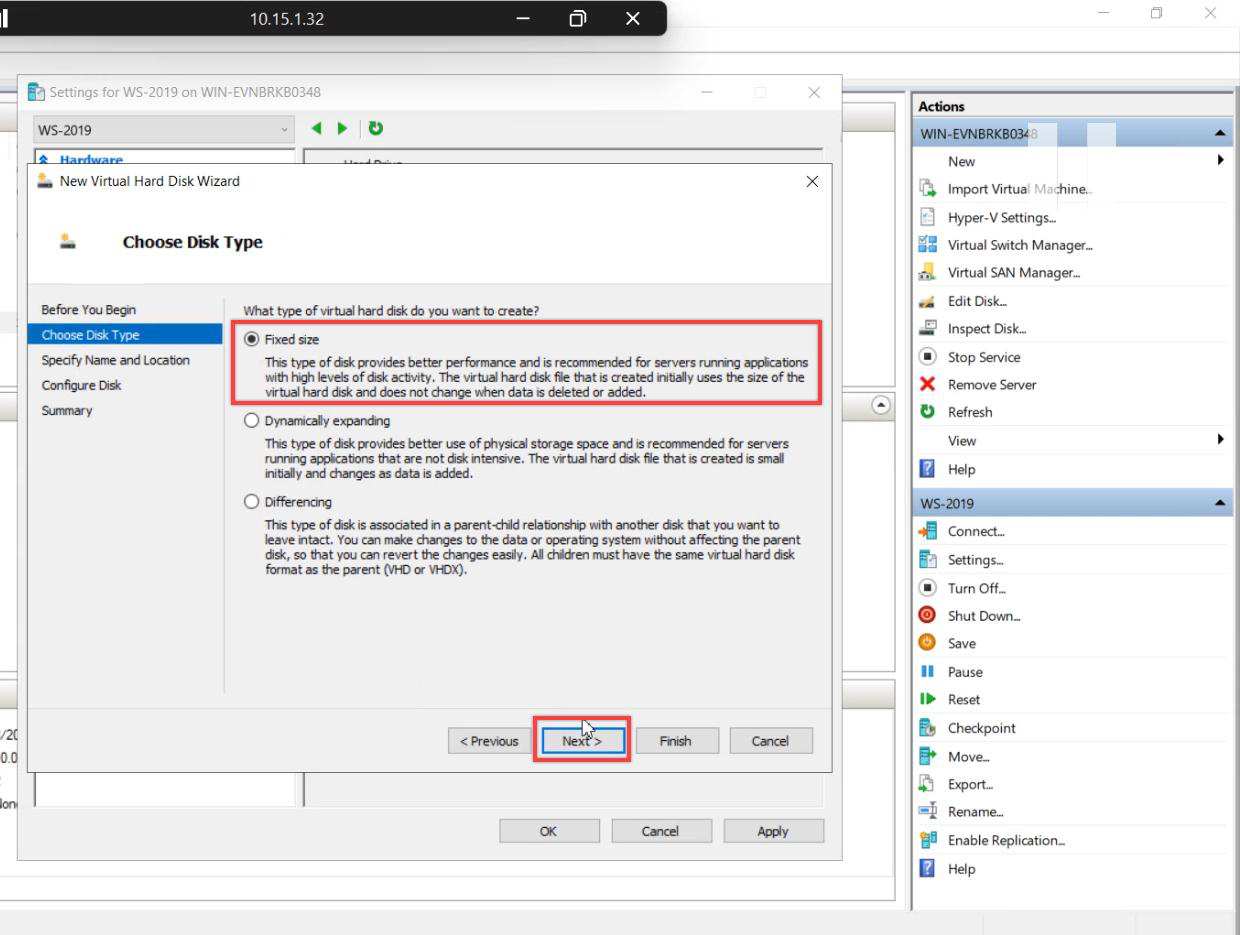
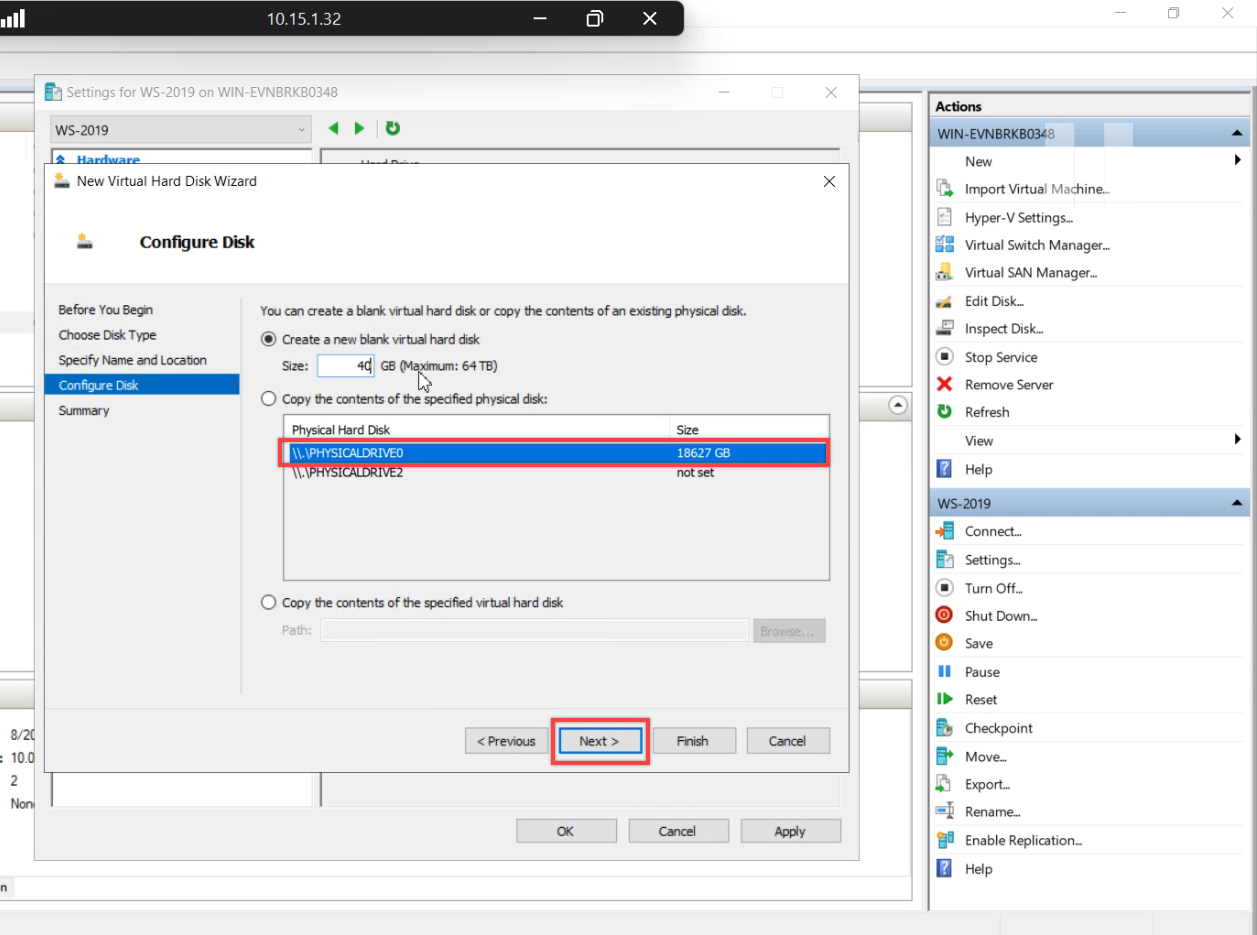
VM Settings > SCSI Controller > Hard Drive > Add > New > VHDX, Fixed size, sized for one full server backup. Lab can be small (20–40 GB). Production should be at least full backup size × 1.5 to cover the 1-full + 14-incremental rolling window.
Don’t reuse an existing data disk — WSB will format the destination during schedule creation.
Step 3 — Online and initialize the disk inside the VM
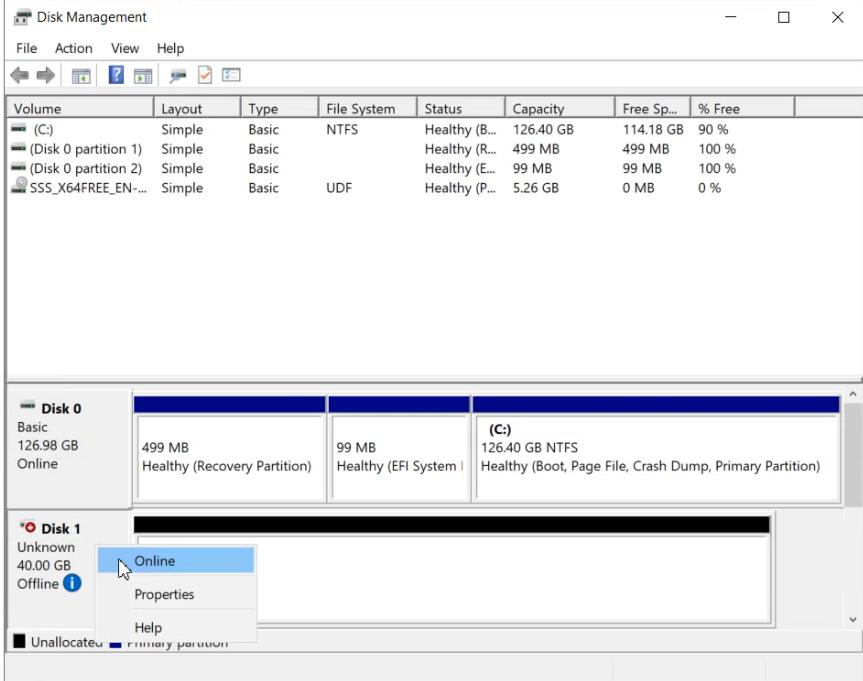
diskmgmt.msc. The new disk appears as offline. Right-click > Online.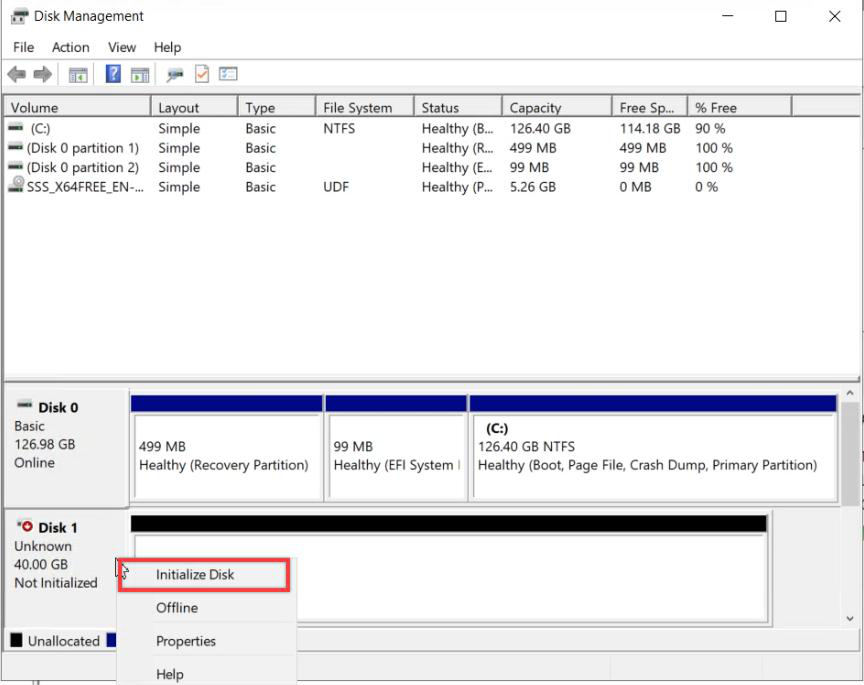
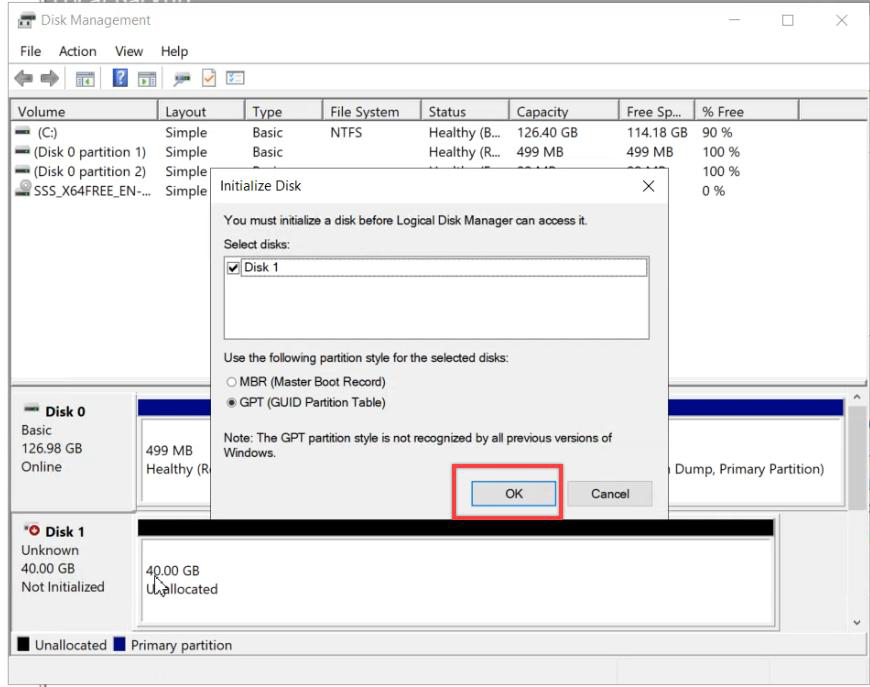
Log into the lab VM > diskmgmt.msc > right-click the new disk > Online > right-click again > Initialize Disk > GPT.
Don’t create a volume on it yet. WSB will format the entire disk when we point a Backup Schedule at it — any volume you create now gets blown away.
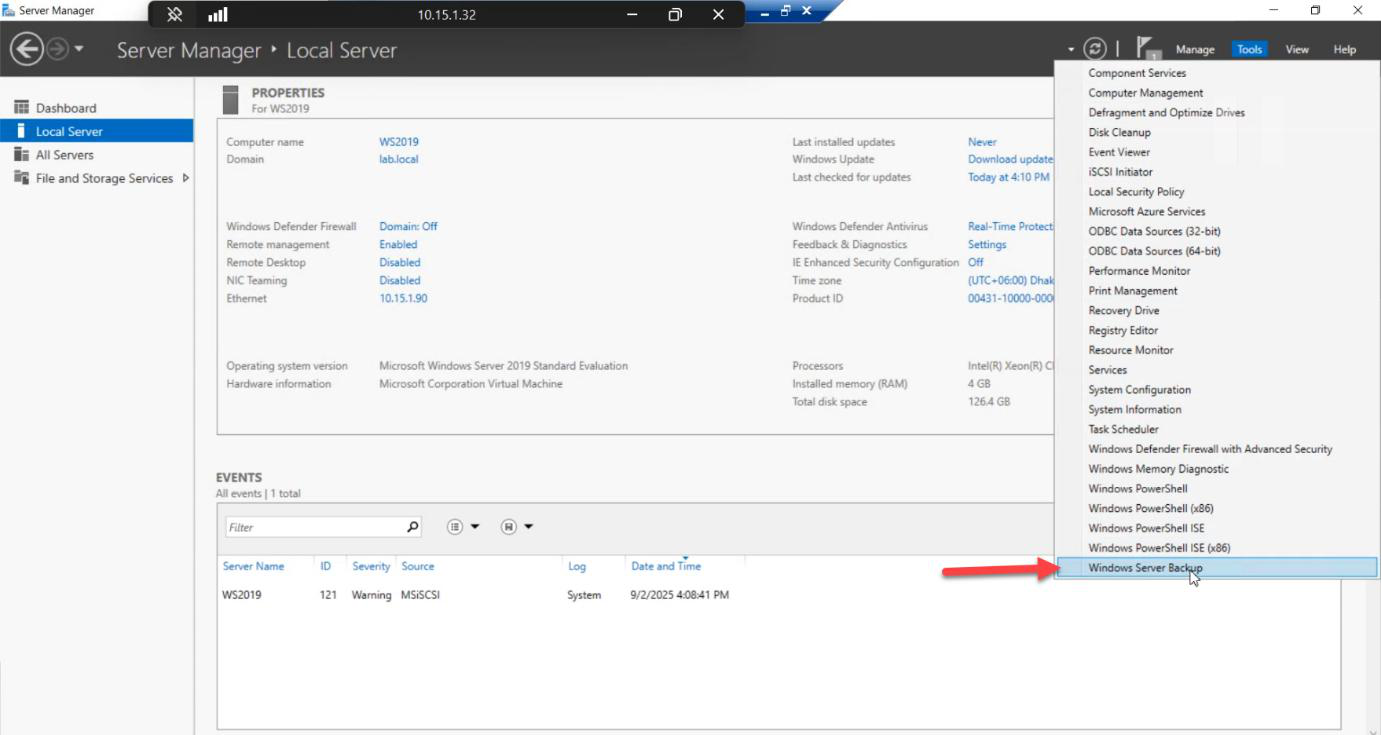
Step 4 — Install Windows Server Backup
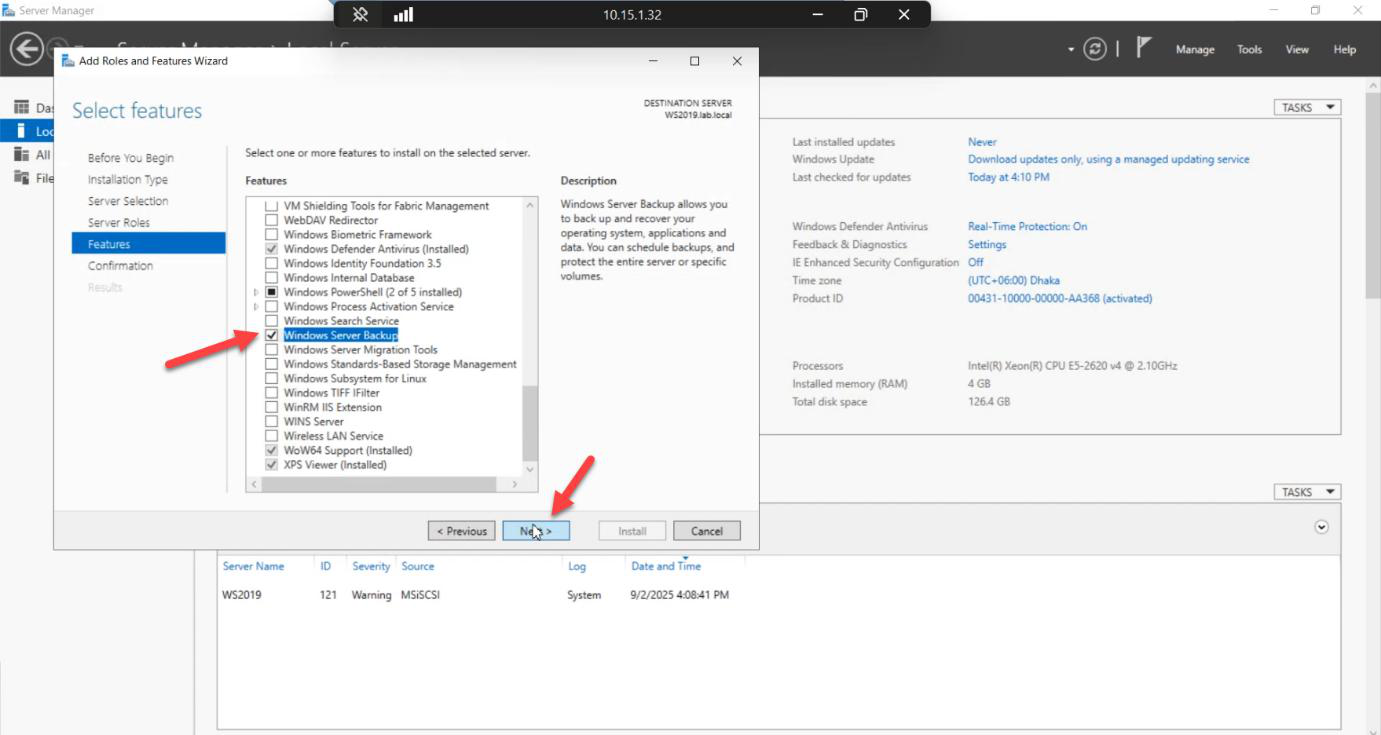
Install-WindowsFeature Windows-Server-Backup. No reboot.Same as Part 1: Server Manager > Add Roles and Features > Features > Windows Server Backup. Or PowerShell: Install-WindowsFeature Windows-Server-Backup.
Step 5 — Configure the Backup Schedule (yes, Schedule, not Backup Once)
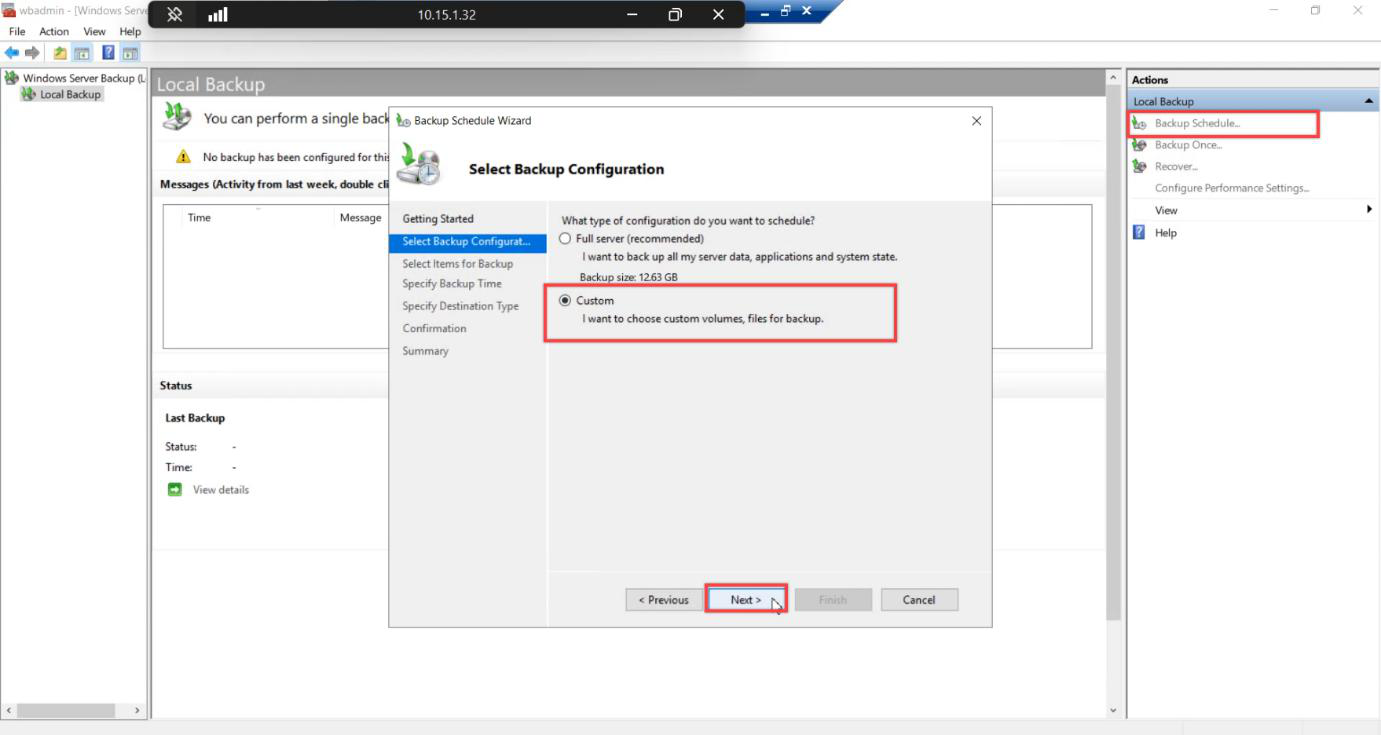
Open WSB > Backup Schedule > Custom > Next.
Why Backup Schedule for a one-shot test? Because Windows Server Backup’s Backup Once path does not let you pick a dedicated disk as the destination — only Backup Schedule does. We’ll configure the schedule, then trigger a one-shot run from Backup Once > Scheduled backup options. That hybrid is the workaround for the dedicated-disk + immediate-run combination.
Step 6 — Pick Bare Metal Recovery

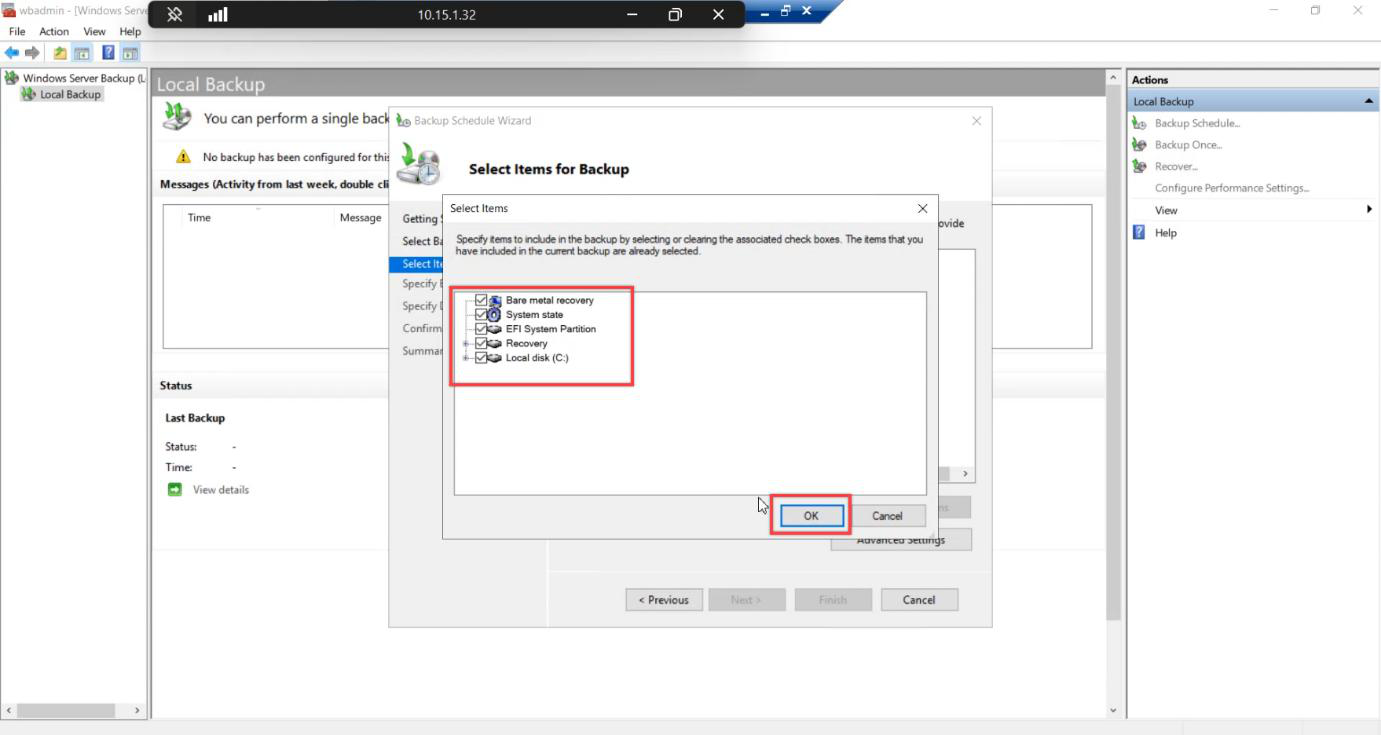
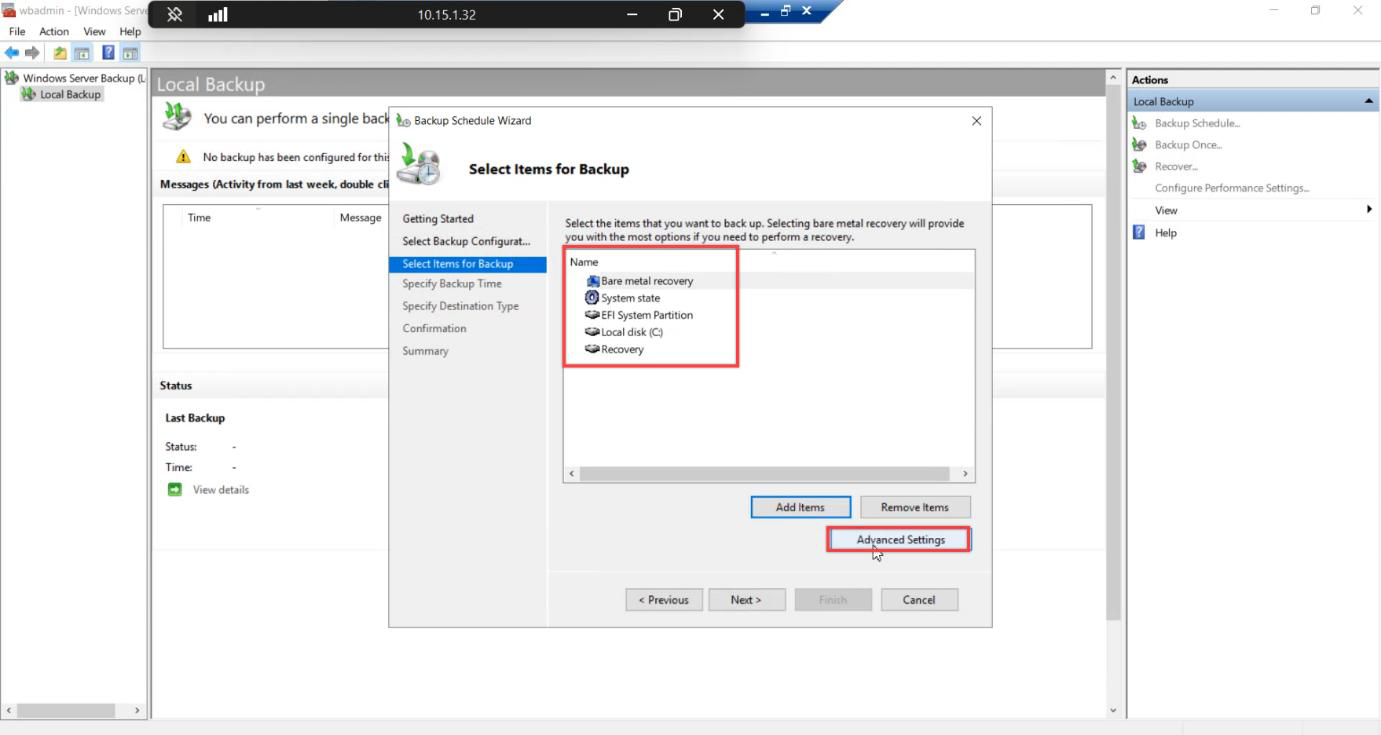
Add Items > tick Bare metal recovery > OK.
The Bare Metal Recovery checkbox auto-includes:
- System Reserved partition (~500 MB UEFI boot data)
- OS volume (C:)
- System State (NTDS.DIT, SYSVOL, registry, etc.)
- EFI partition (UEFI machines)
Tick only system state instead and you get an AD recovery, but you can’t do a true bare-metal restore from WinRE. Always pick Bare Metal Recovery for the full-machine recovery scenario.
Step 7 — VSS Full Backup
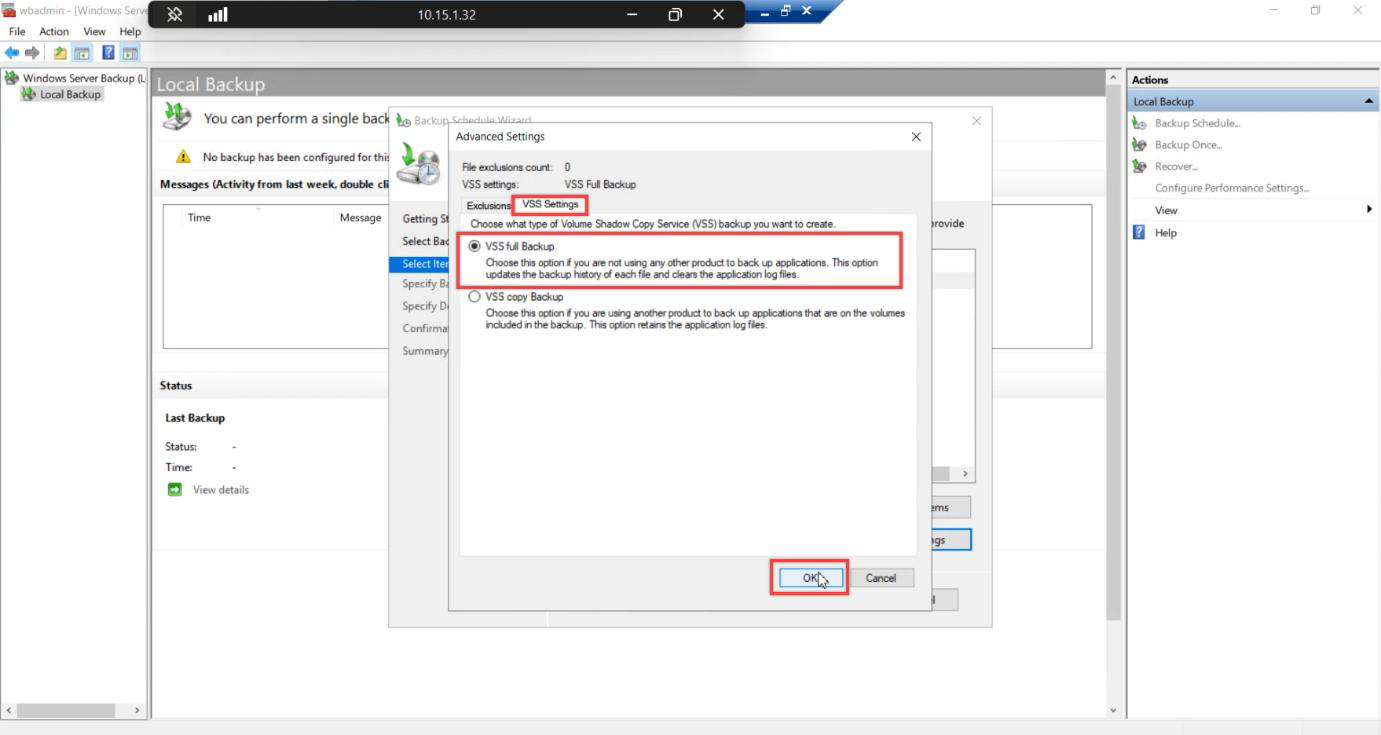
Advanced Settings > VSS Settings > VSS full backup. (Full = primary backup tool, Copy = secondary tool. See Part 1.)
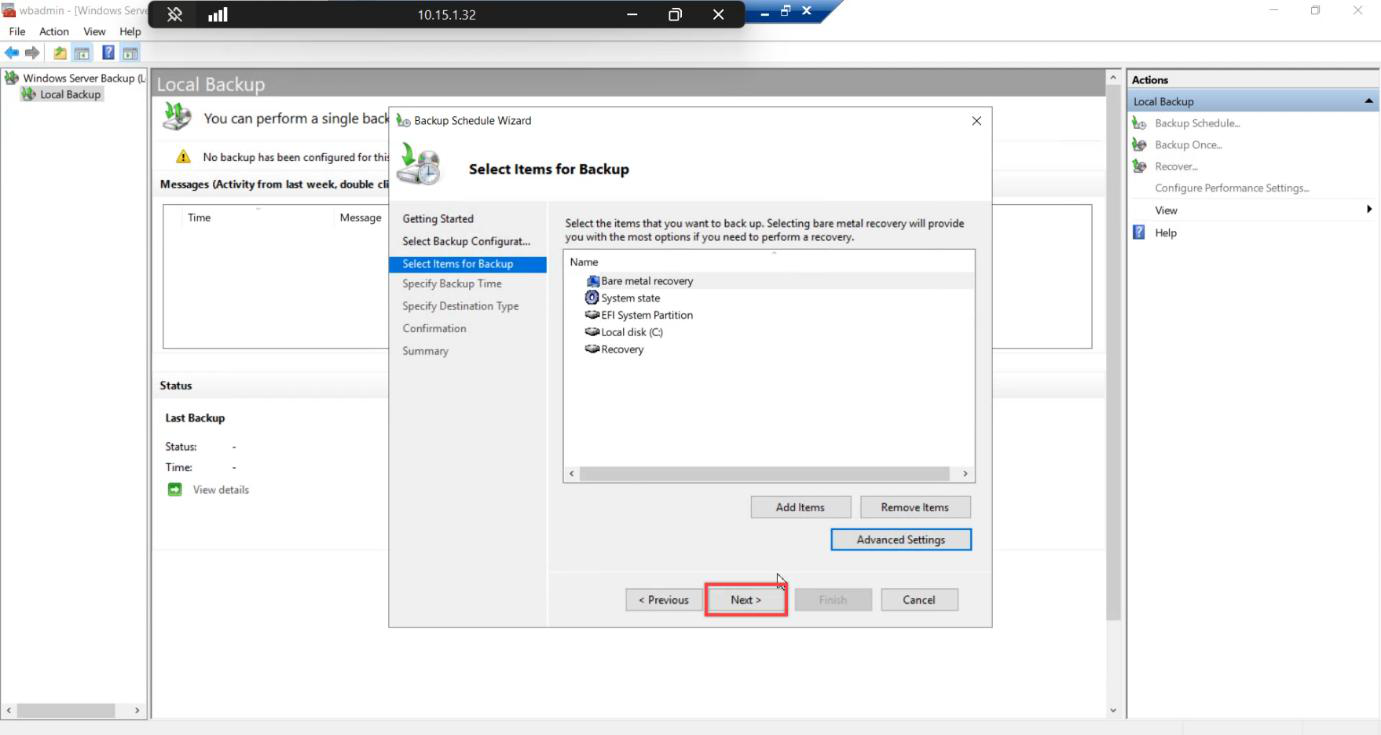
Step 8 — Schedule time and destination
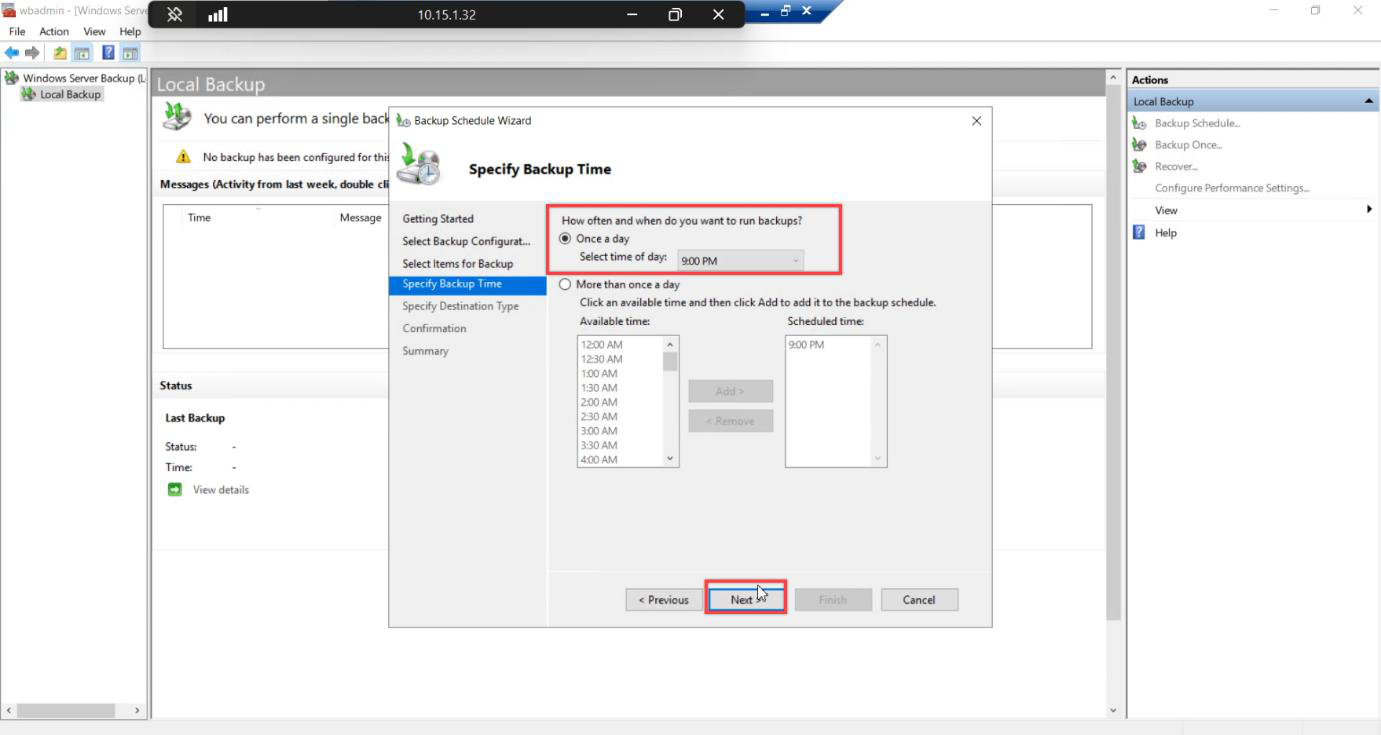

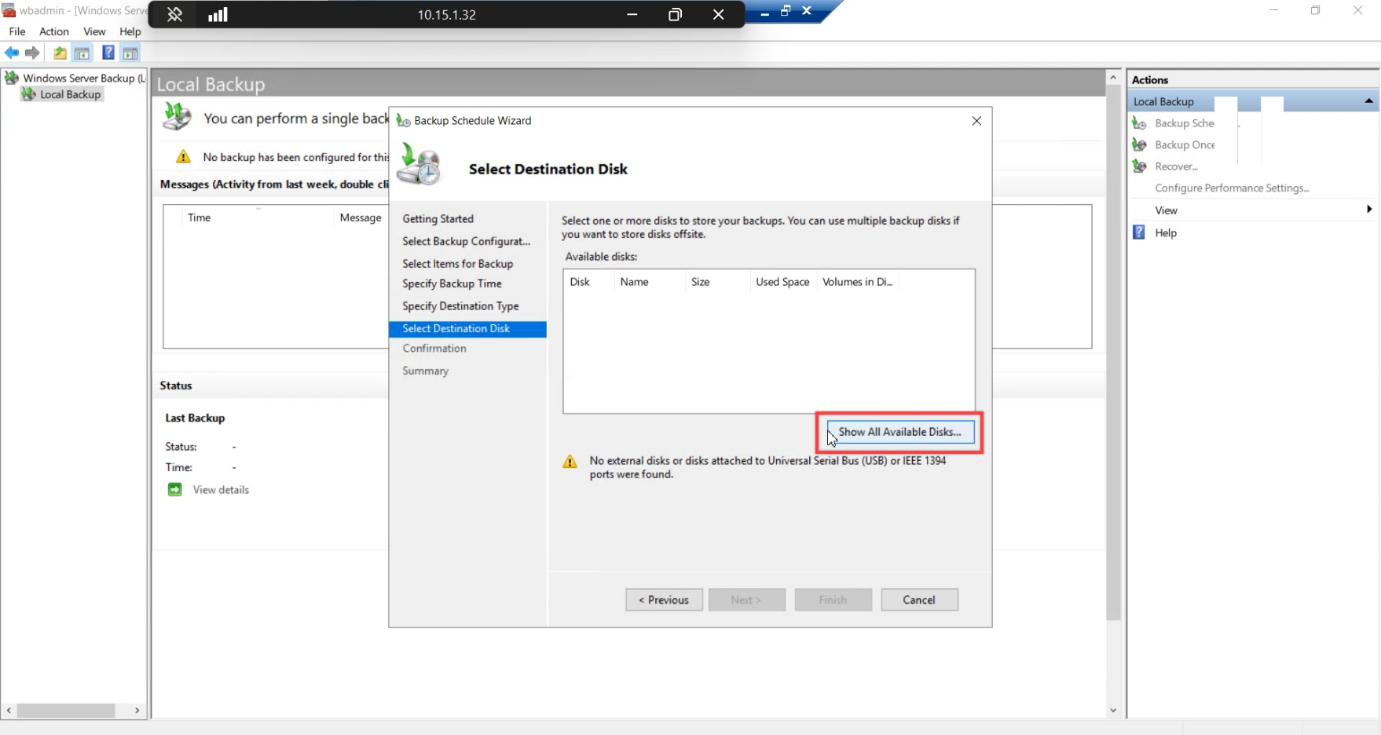
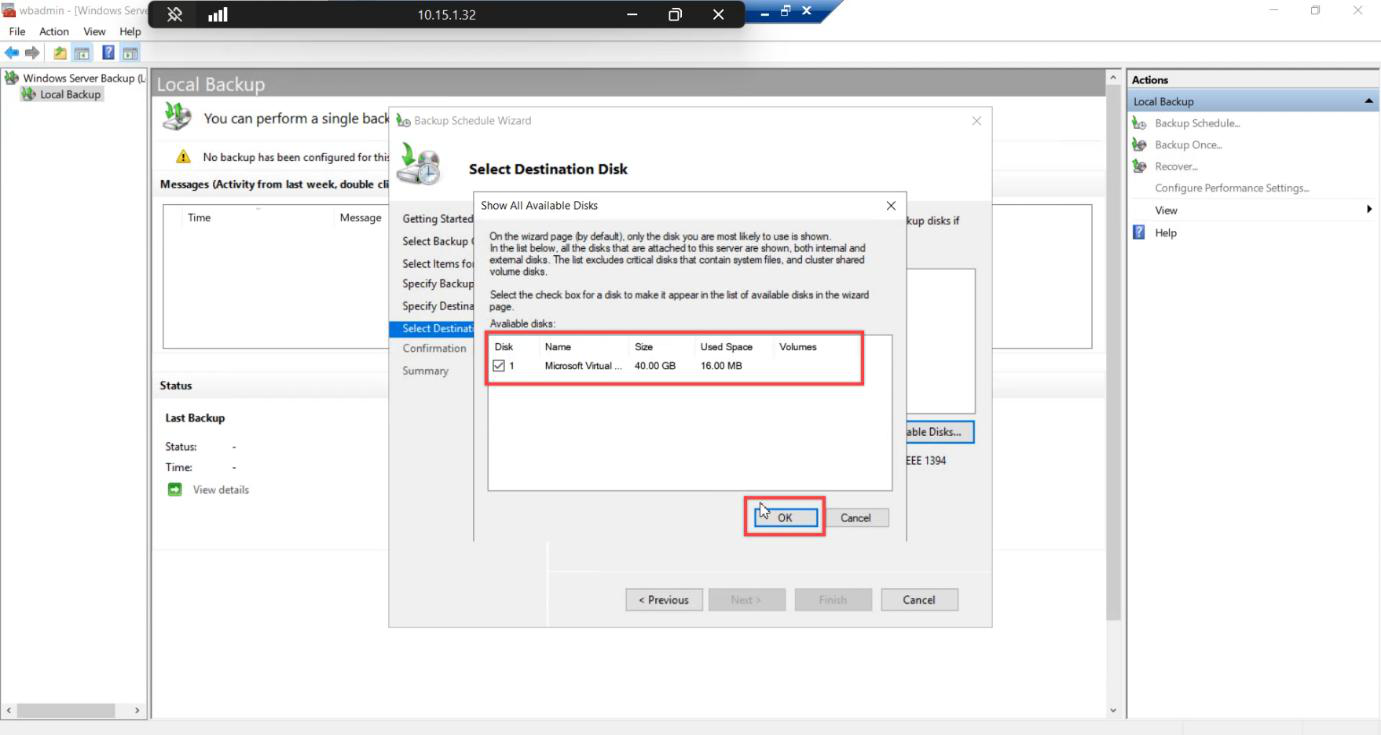
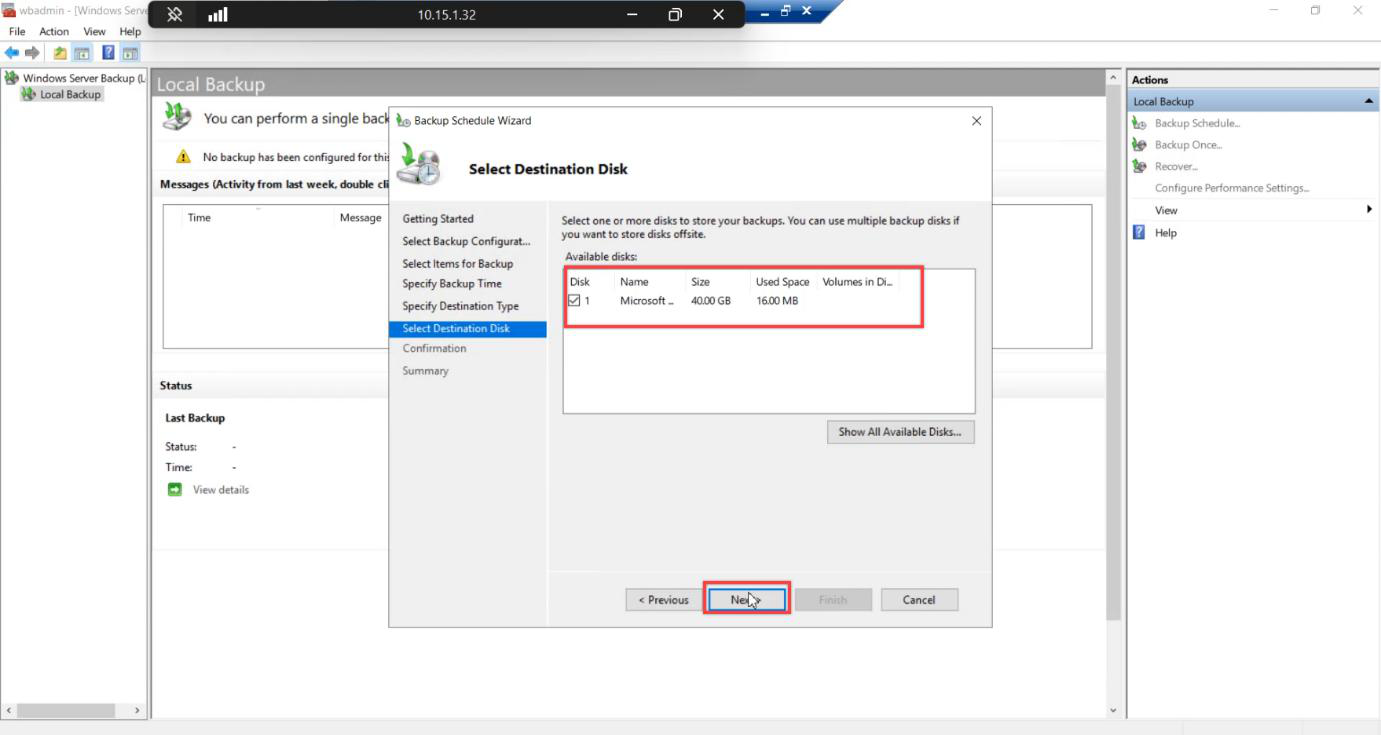
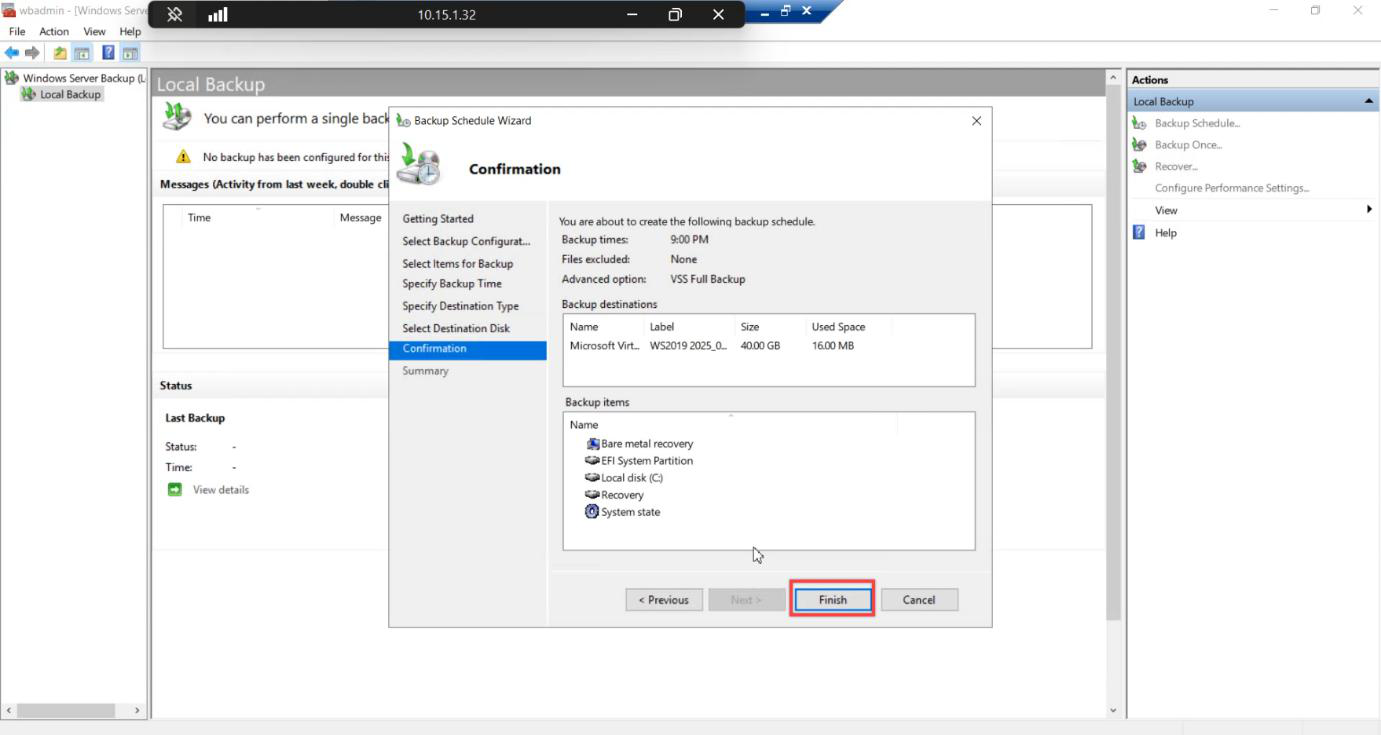
Schedule time: keep default for the test — we’re going to run it manually anyway. Destination: Back up to a hard disk that is dedicated for backups. Show All Available Disks > tick the new VHDX. Confirm > Finish.
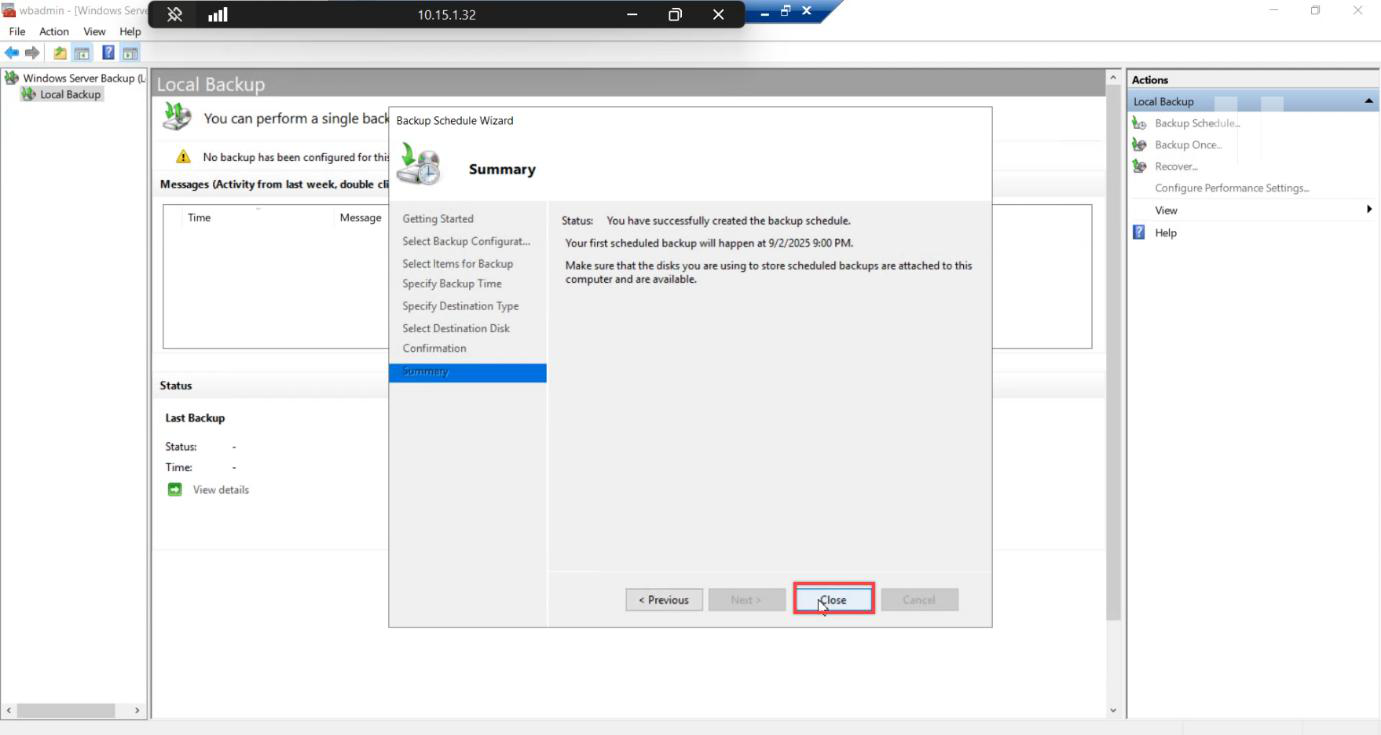
WSB formats the disk and creates the scheduled task. Close.
Step 9 — Trigger the test run immediately
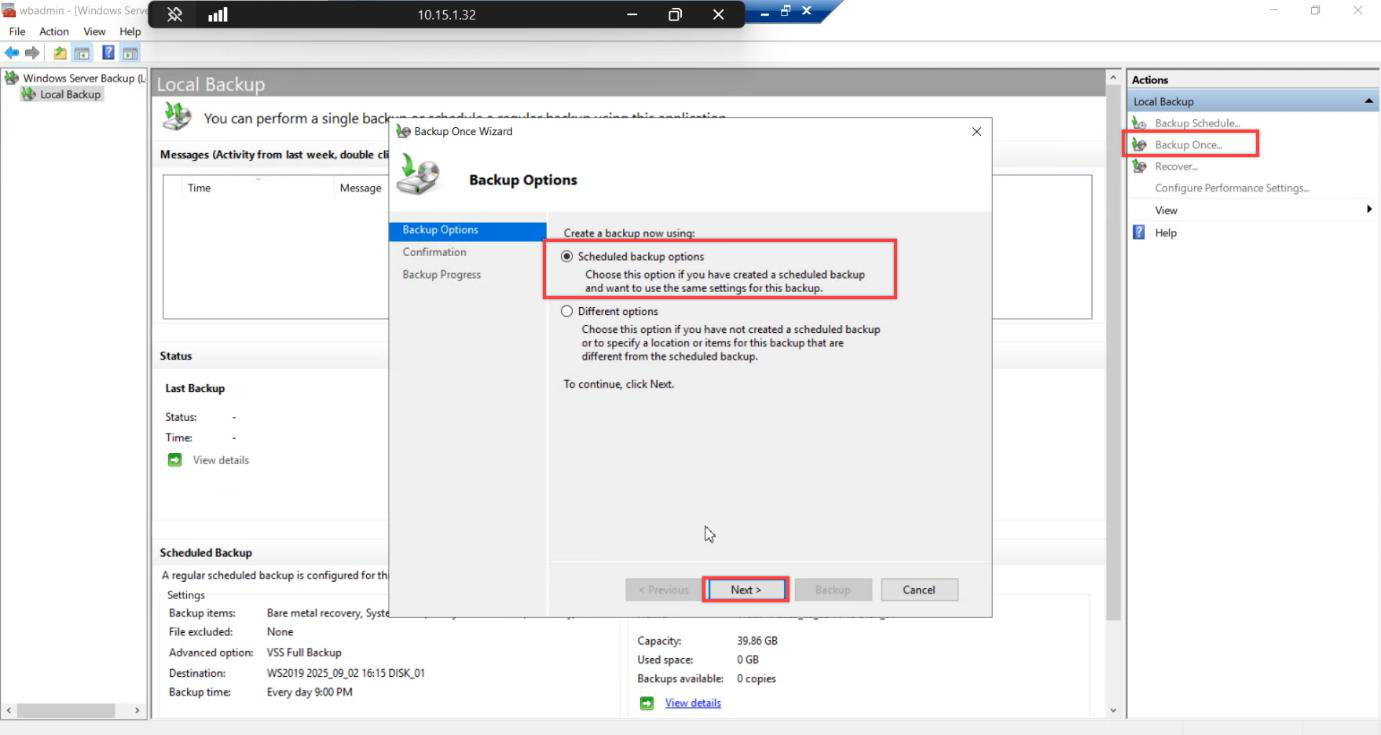
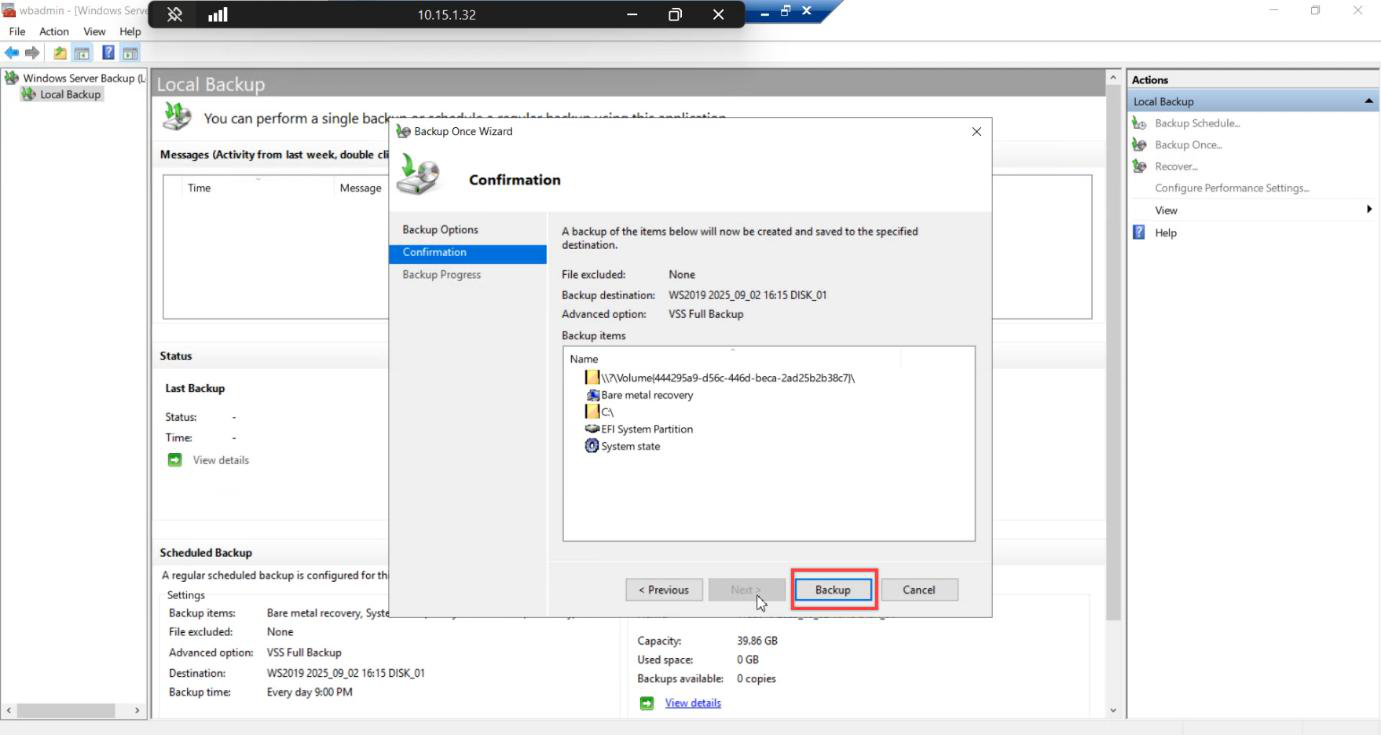
Actions pane > Backup Once > Scheduled backup options > Next. This is the “run my scheduled backup now” path — reuses the schedule we just configured but kicks off immediately. Click Backup.
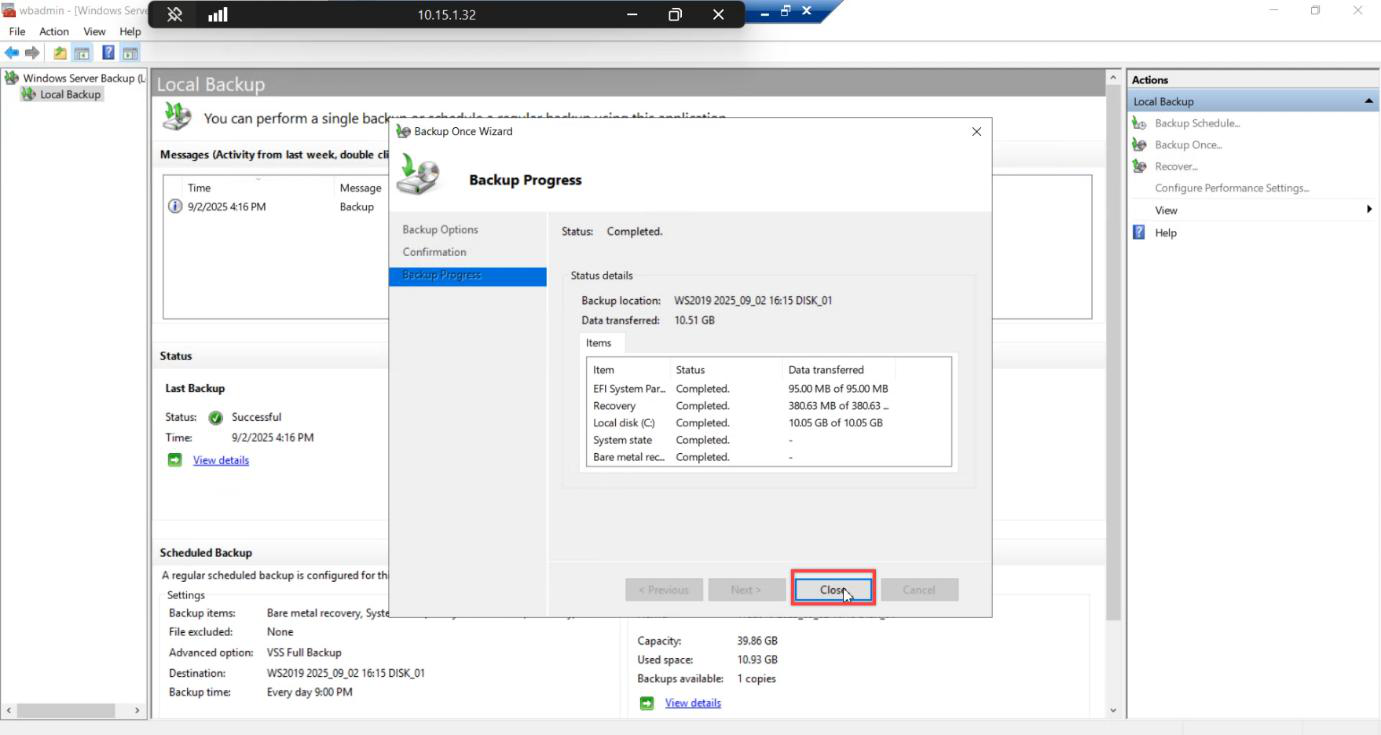
Backup runs. Time: 5–15 min for a small lab DC, longer for production. Status: Completed.
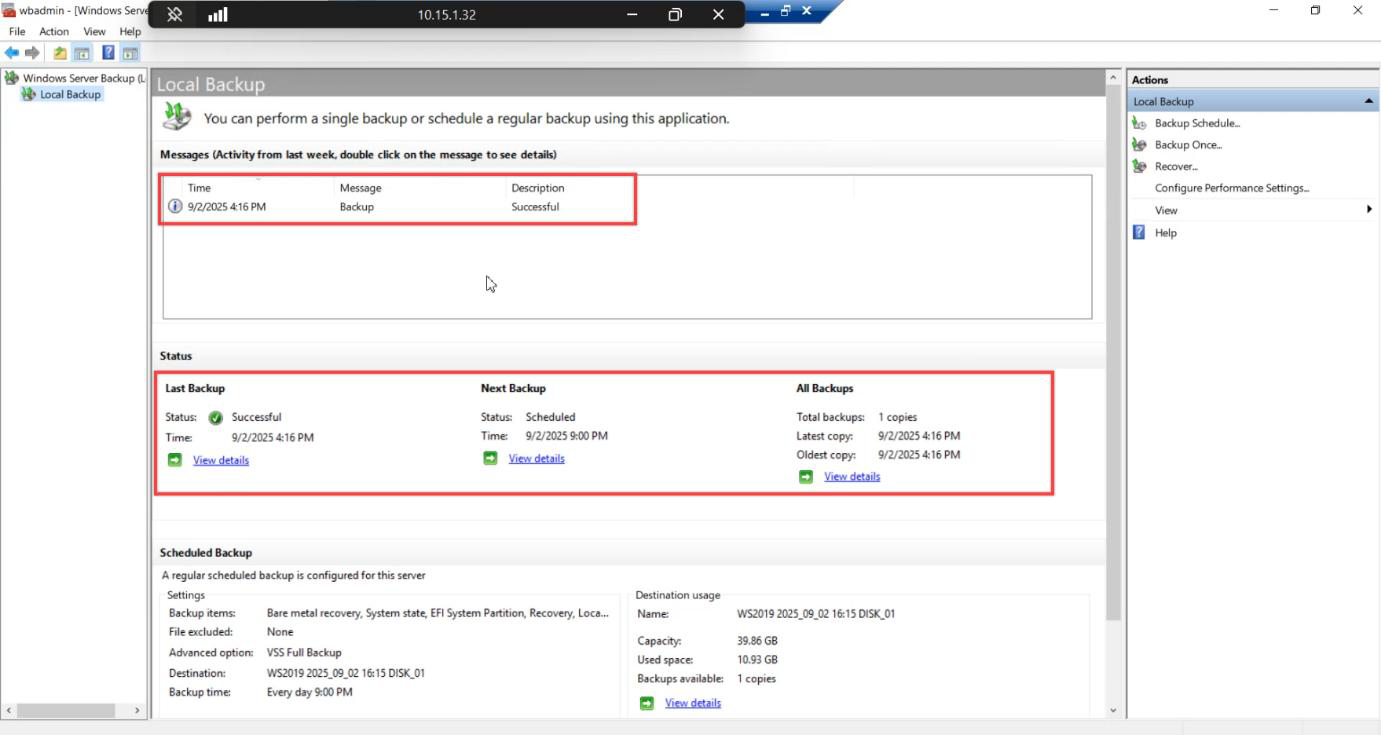
Check the recent activity pane. Confirm: Bare Metal Recovery, completed timestamp, no warnings.
Step 10 — Verify the backup artifact on disk
This is the verification step that everyone skips. Don’t skip it.
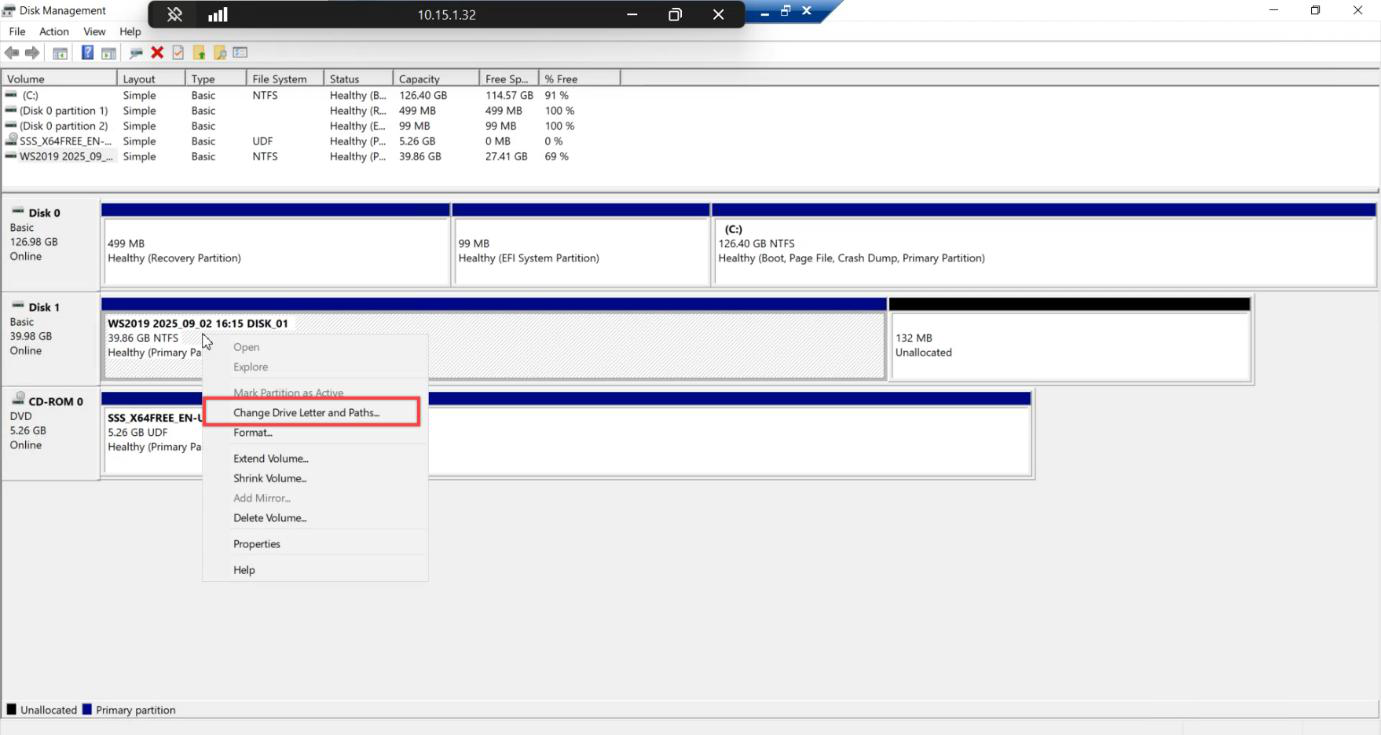
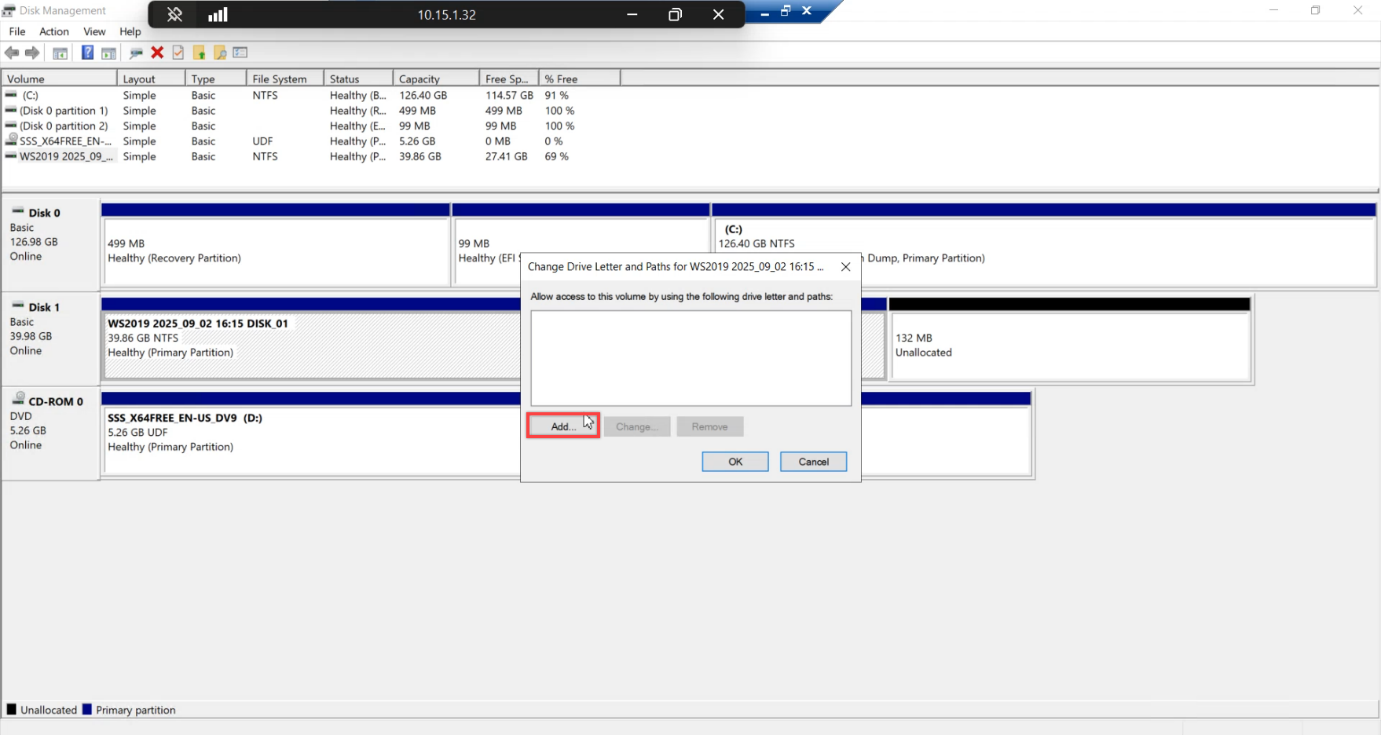
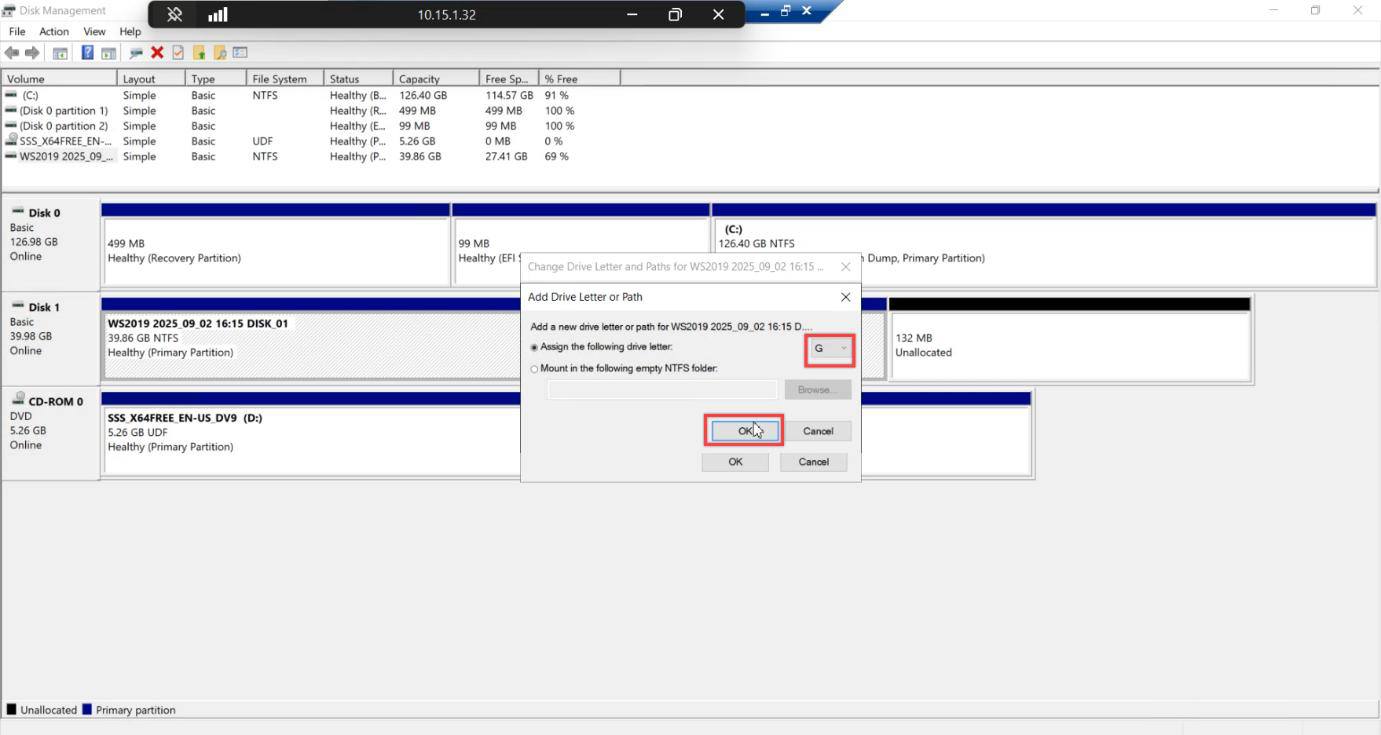
Disk Management > right-click the backup disk > Change Drive Letter and Paths > Add > pick a free letter (we used T:). This temporarily mounts the disk so we can browse it. WSB normally keeps its dedicated disk un-mounted to prevent accidental writes.
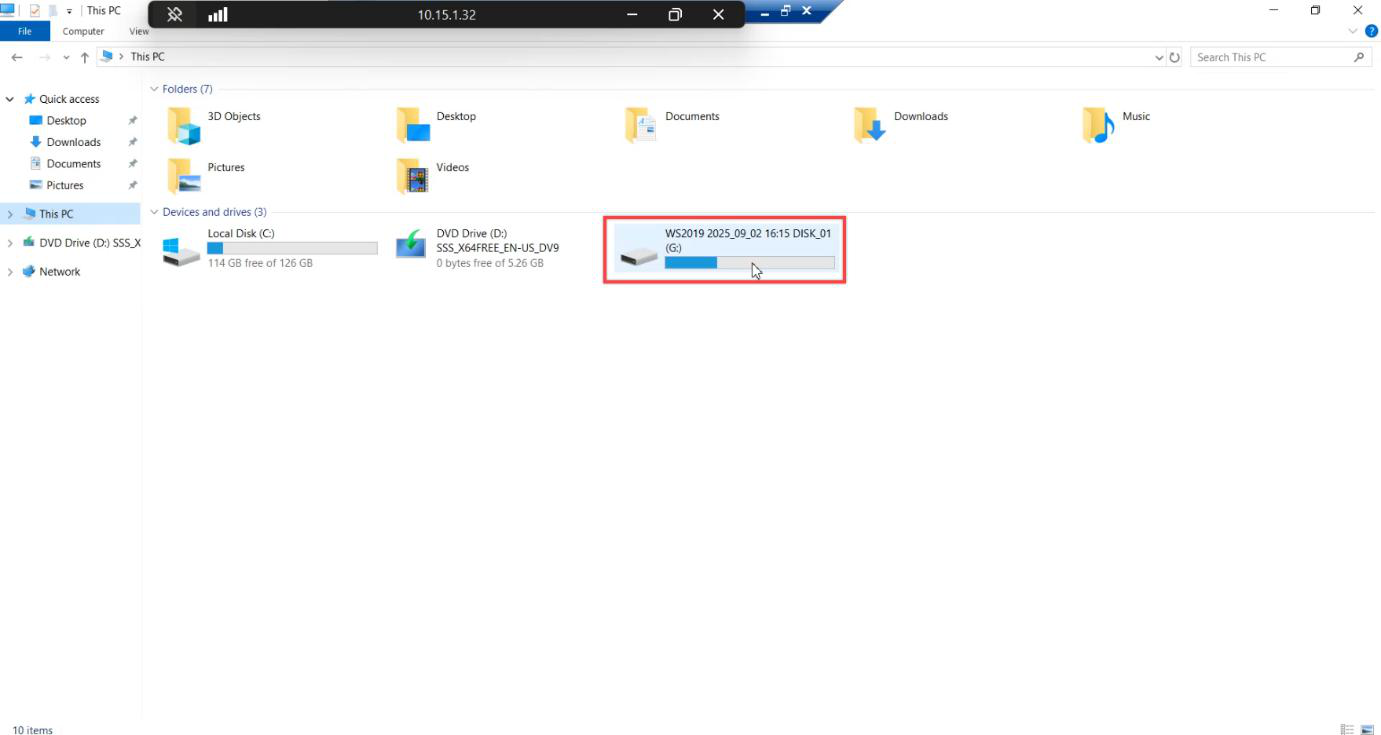
WindowsImageBackup at root — this is the standard WSB layout. Inside: per-server folders, then per-version timestamped folders, then the actual VHD-format backup files.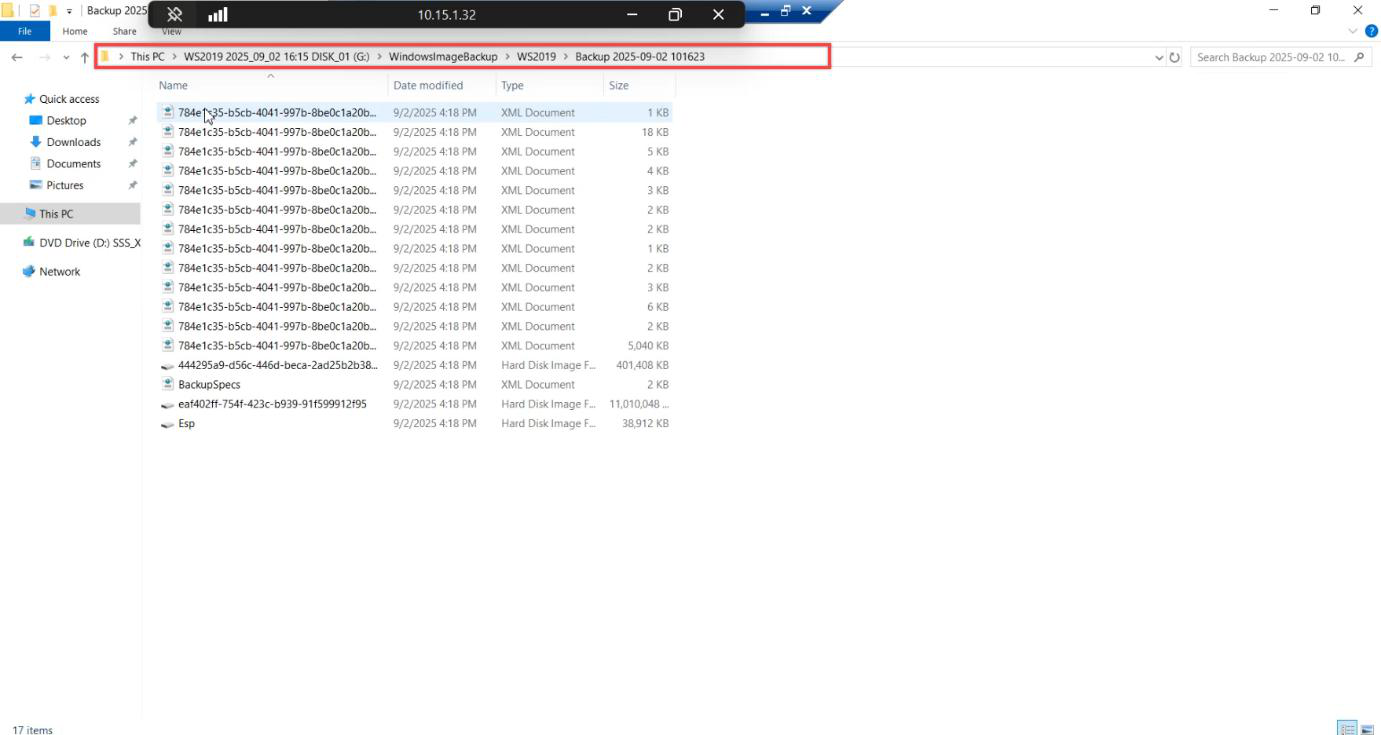
WindowsImageBackup\<SERVERNAME>\Backup <date>. The .vhd files are the per-volume snapshots; WSB structures these so WinRE can stream them back during a bare-metal restore.Open the new drive letter in File Explorer. You should see:
T:\
└─ WindowsImageBackup\
   └─ <SERVERNAME>\
      └─ Backup <YYYY-MM-DD HHMMSS>\
         ├─ <system-reserved-vhd>.vhd
         ├─ <OS-volume-vhd>.vhd
         └─ BackupSpecs.xml + catalog files
The .vhd files are virtual hard disks — one per source volume. You can actually mount these in another machine to confirm they’re readable, but for a routine verification, presence + size + timestamp is enough.
Step 11 — Remove the drive letter (important)
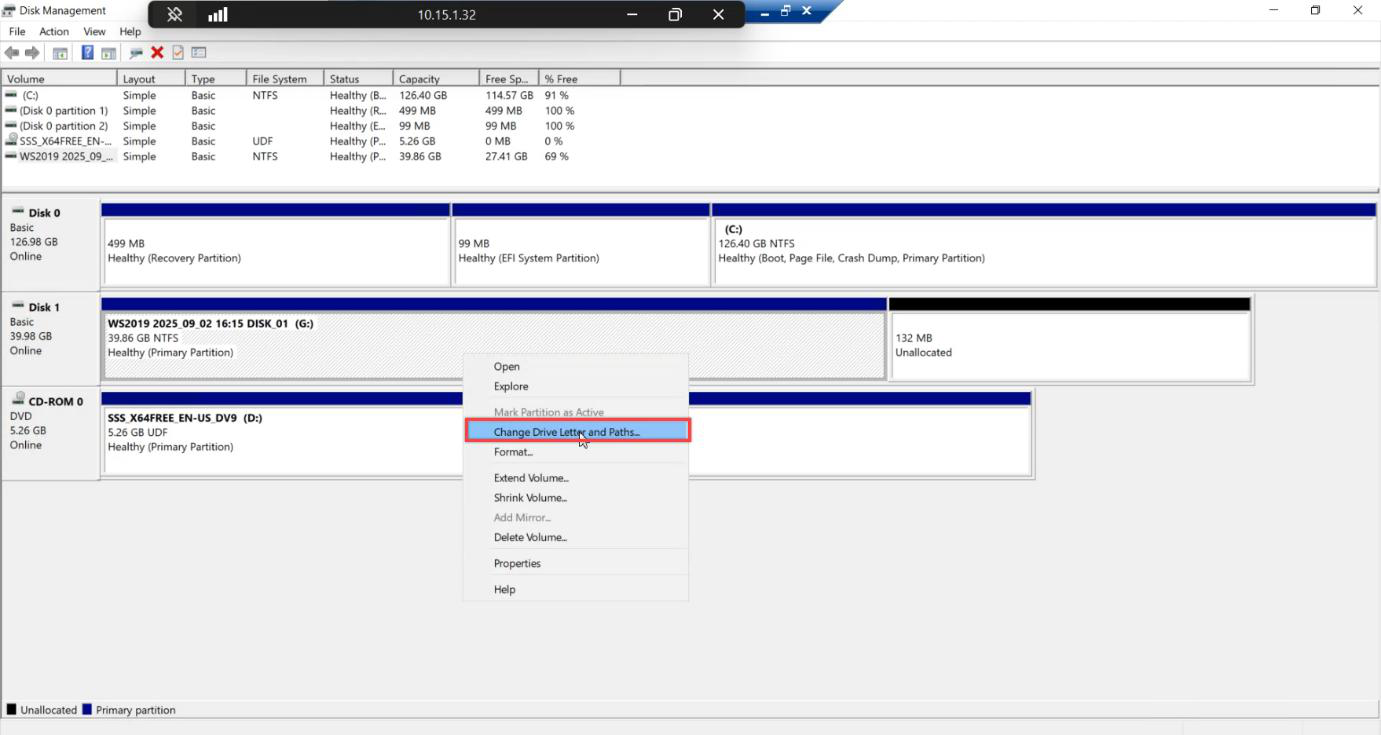
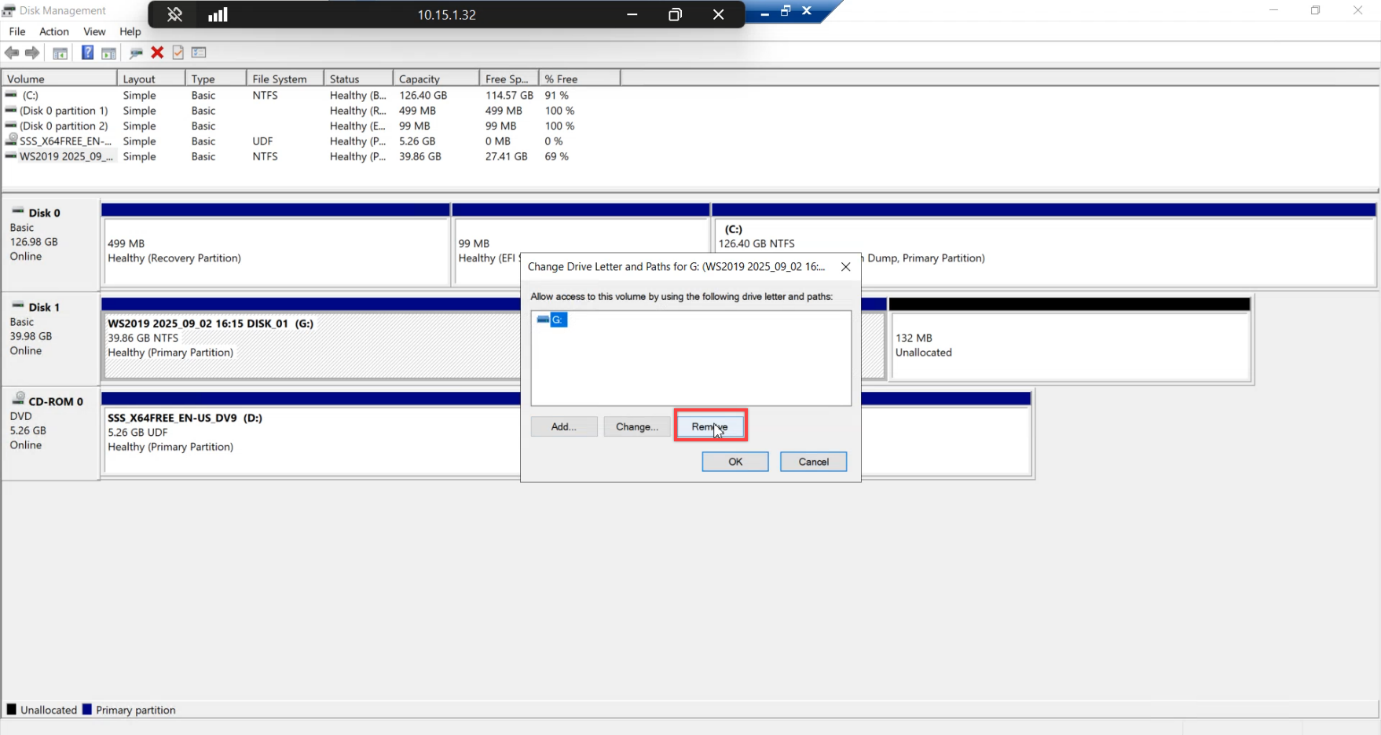
Disk Management > Change Drive Letter and Paths > Remove > Yes.
If you leave the drive letter assigned, the next scheduled backup may fail because the disk isn’t in WSB’s expected exclusive state. Always remove the letter after inspecting.
Things that bite people
Testing on a production DC
The test in Part 4 wipes the VM. If that’s a production DC, you’re recovering for real. Always use a disposable lab VM. If you don’t have one, build one — this is one of the most valuable lab exercises in AD admin.
Using Backup Once with Custom for a dedicated disk
Doesn’t work. Backup Once Custom can only target a local drive with a letter or a remote share — not a dedicated WSB-owned disk. The Schedule + run-now hybrid we used is the workaround. Be aware: this confuses anyone reading docs that say “just Backup Once.”
Picking System State instead of Bare Metal Recovery
Both checkboxes exist. System State gives you AD recovery only. Bare Metal Recovery gives you full-machine recovery and System State. For this test (and any disaster scenario), always pick Bare Metal Recovery.
Backup disk too small
WSB doesn’t fail upfront if the disk can’t fit the backup — it starts the backup, then runs out of space mid-run and errors. Rule of thumb: dedicated backup disk ≥ 1.5× the full backup size of the source.
Forgot to remove the drive letter after inspecting
WSB expects exclusive control of the dedicated disk. Leave a letter assigned and the next scheduled run may fail with event log errors about the disk not being in expected state. Always remove the letter.
Verifying by checking only the Recent Activity pane
The pane shows what WSB thinks happened. It doesn’t show whether the artifact is actually intact on disk. Always mount + browse + confirm the WindowsImageBackup folder structure exists with sensibly-sized .vhd files.
What’s next
You have a verified bare-metal backup of the lab VM. Part 4 deletes the VM and restores it from this exact backup using the Windows Recovery Environment + System Image Recovery. We’ll boot the replacement VM from the 2019 ISO, jump into WinRE, point at the backup disk, and watch the machine come back.