The Users may view their BitLocker keys toggle in Entra Device Settings is one of those security knobs where you don’t actually know it works until you test it end-to-end with a real user account in a real browser. Set it to Yes (admin-only) and assume self-service is off; set it to No (self-service) and assume users can recover their own keys. Both assumptions need verification — especially before you tell the helpdesk ‘just point users at myaccount’ or, conversely, before you depend on the toggle to keep stolen-laptop attackers from also harvesting the recovery key.
This guide walks the test procedure for both modes. You’ll need an Entra-Joined device with BitLocker enabled and the key escrowed, a standard (non-admin) user account, and a Privileged Role Administrator account to flip the setting. The whole exercise takes about 30 minutes if escrow is already in place.
What you’re actually testing
Whether a standard user, signed into myaccount.microsoft.com as themselves, can or cannot see the BitLocker recovery key for the device they own — and whether your Entra setting honours that intent. You’re also confirming that admin retrieval keeps working regardless of the toggle, because that’s the fallback that every helpdesk depends on.
Prerequisites
| Requirement | Detail |
|---|---|
| Entra-Joined device | Must be Entra Joined (not just Registered). Verify in Settings > Accounts > Access work or school > Info. |
| BitLocker enabled on C: | Active and the recovery key already escrowed to Entra (or about to be). |
| Standard user account | Non-admin Entra account — this is the ‘normal user’ the test simulates. Don’t use a Global Admin or Privileged Role Admin for the user-side test — their roles can mask the failure. |
| Privileged Role Administrator account | The toggle in question requires this role to change — Global Admin alone is not enough. |
| Access to entra.microsoft.com | To check / change the setting and view escrowed keys. |
| Access to myaccount.microsoft.com | The user-side portal where the self-service test happens. |
Step 1 — verify BitLocker is enabled and the key is escrowed
If there’s no key in Entra, the test is meaningless. Confirm both ends first.
1.1 BitLocker status on the device
Command Prompt as Administrator:
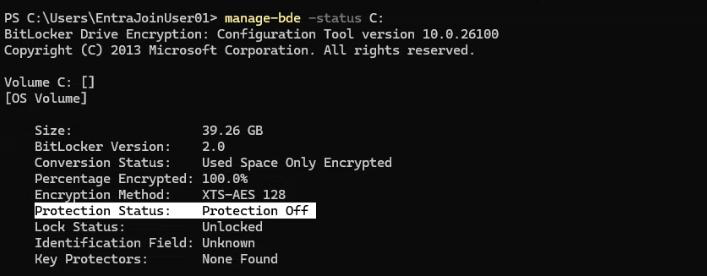
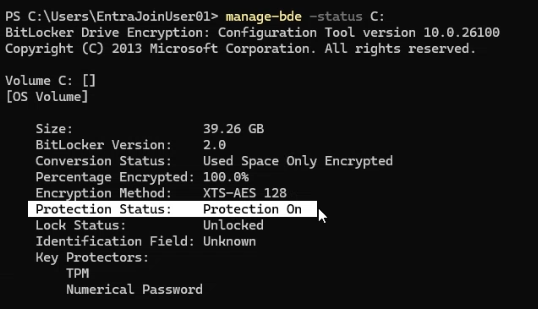
manage-bde -status C:Look for:
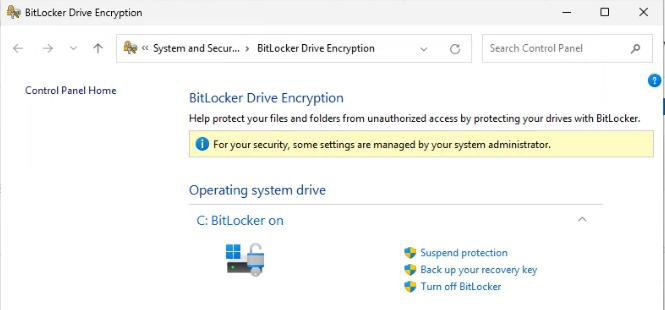
Protection Status: Protection On
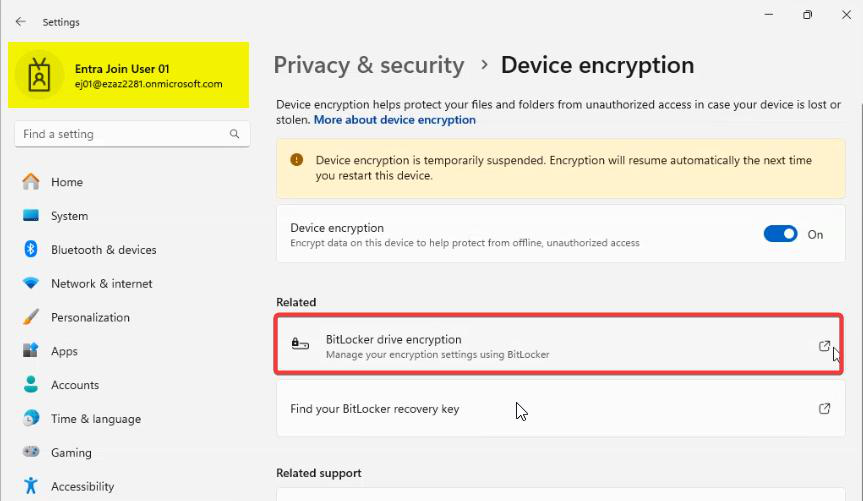
Key Protectors: Recovery PasswordIf Protection Status is Off, BitLocker isn’t active — enable it via Settings > Privacy & security > Device encryption, or via Group Policy / Intune for fleet-wide rollout, then come back.
manage-bde -status C: > Protection Status: Protection On + Key Protectors: Recovery Password.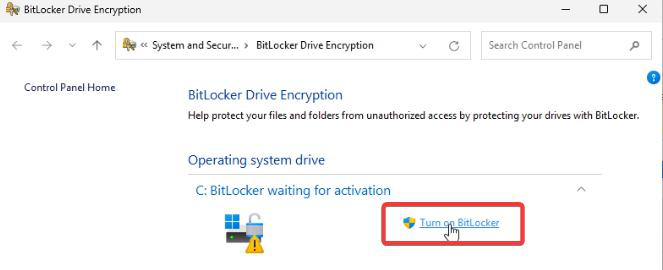
manage-bde -protectors -get C: — capture the Recovery Key ID for the next command if you need to force-escrow.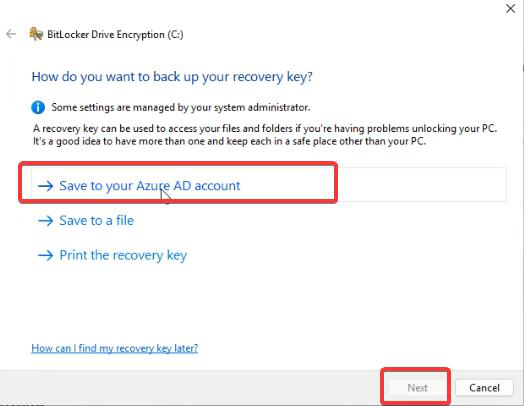
manage-bde -protectors -adbackup C: -id {KEY-ID} — force the upload to Entra. Wait 5–10 minutes before rechecking the portal.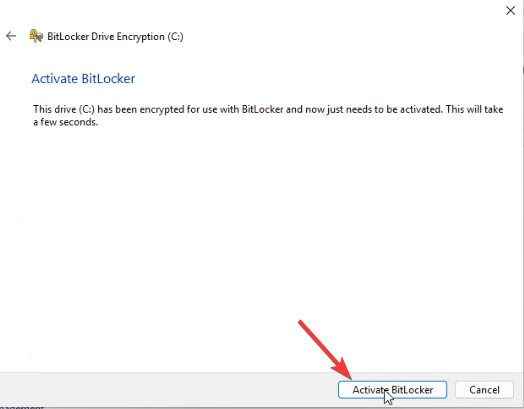
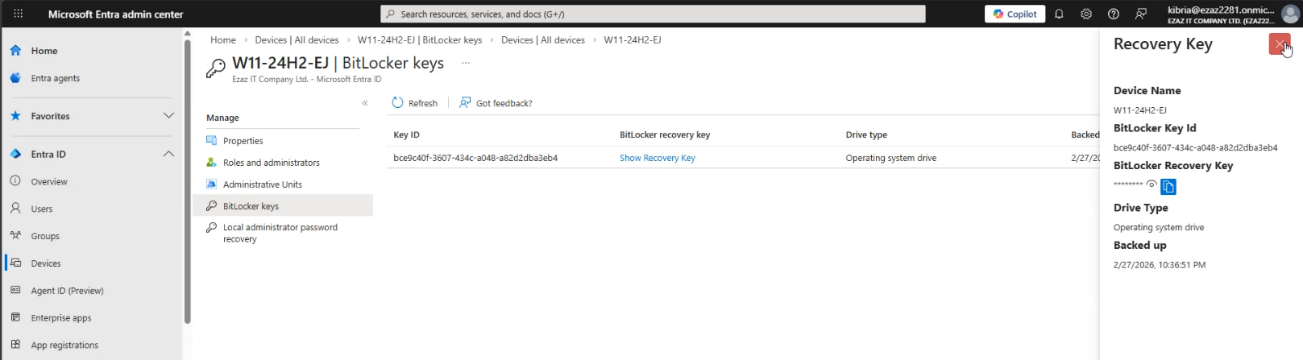
1.2 Key escrowed to Entra (admin check)
- Sign in to entra.microsoft.com as your admin.
- Devices > All Devices > click the test device.
- Scroll to BitLocker Keys.
- You should see one or more recovery key IDs. Empty = key never escrowed; do 1.3.
1.3 Force the escrow if it’s missing
On the device, elevated Command Prompt:
manage-bde -protectors -get C:Note the Recovery Key ID. Then:
manage-bde -protectors -adbackup C: -id {YOUR-KEY-ID}Wait 5–10 minutes, then re-check the Entra portal. Key should appear under BitLocker Keys.
Step 2 — record the current setting
Before you change anything, capture the baseline so you know exactly what to restore at the end.
- Sign in to entra.microsoft.com as a Privileged Role Administrator.
- Devices > Device Settings.
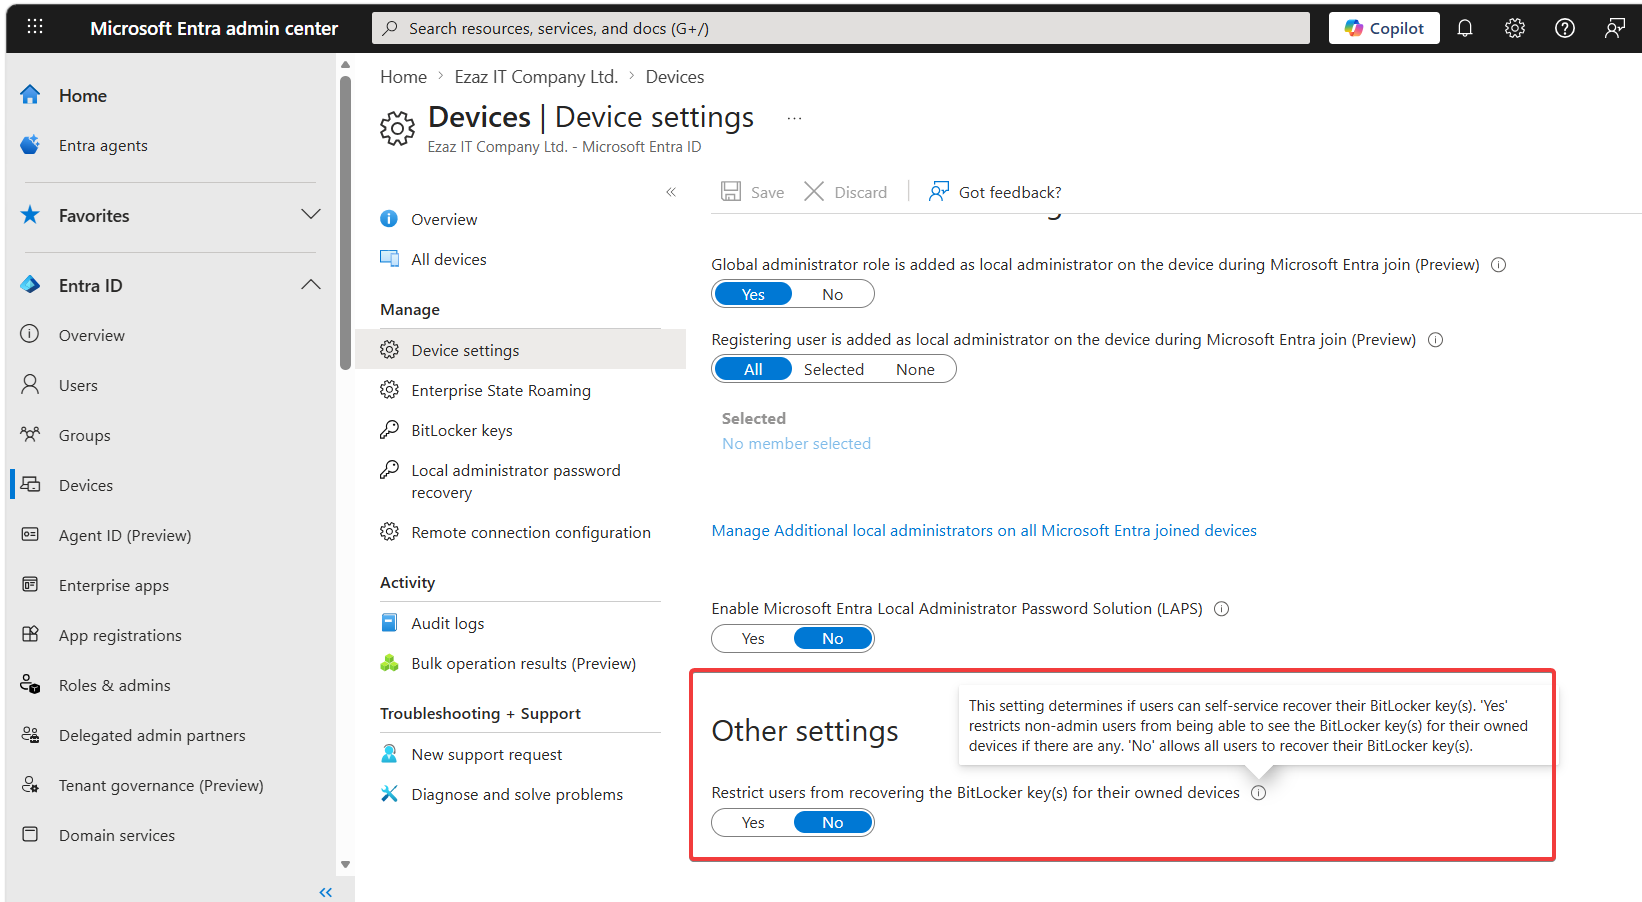
- Scroll to Users may view their BitLocker keys (Microsoft occasionally tweaks the wording).
- Note Yes or No.
| Setting | What it means | Expected user-side test outcome |
|---|---|---|
| Yes | Self-service disabled. Standard users cannot see their own keys. | User test FAILS — key not visible at myaccount. |
| No | Self-service enabled for all users. | User test PASSES — key visible at myaccount. |
Wording note: the setting is phrased in the negative (‘Restrict’ flavour). Yes = restrict, No = permit. Easy to misread — double-check before flipping.
Scenario A — restricted (user CANNOT see key)
A.1 set the toggle
- Devices > Device Settings.
- BitLocker self-service: Yes (restricted).
- Save.
- Wait 2–3 minutes for propagation.
A.2 user-side test
- Open a browser in InPrivate / Incognito mode — cookies from your admin session in another tab will silently grant elevated views and break the test.
- Go to
myaccount.microsoft.com. Sign in as the standard user. - Devices (left menu) > click the test device.
- Look for BitLocker Keys or View BitLocker recovery key.
- Pass criteria: the option is missing, or clicking it returns an error like You do not have permission to view this key, or the key value is hidden.
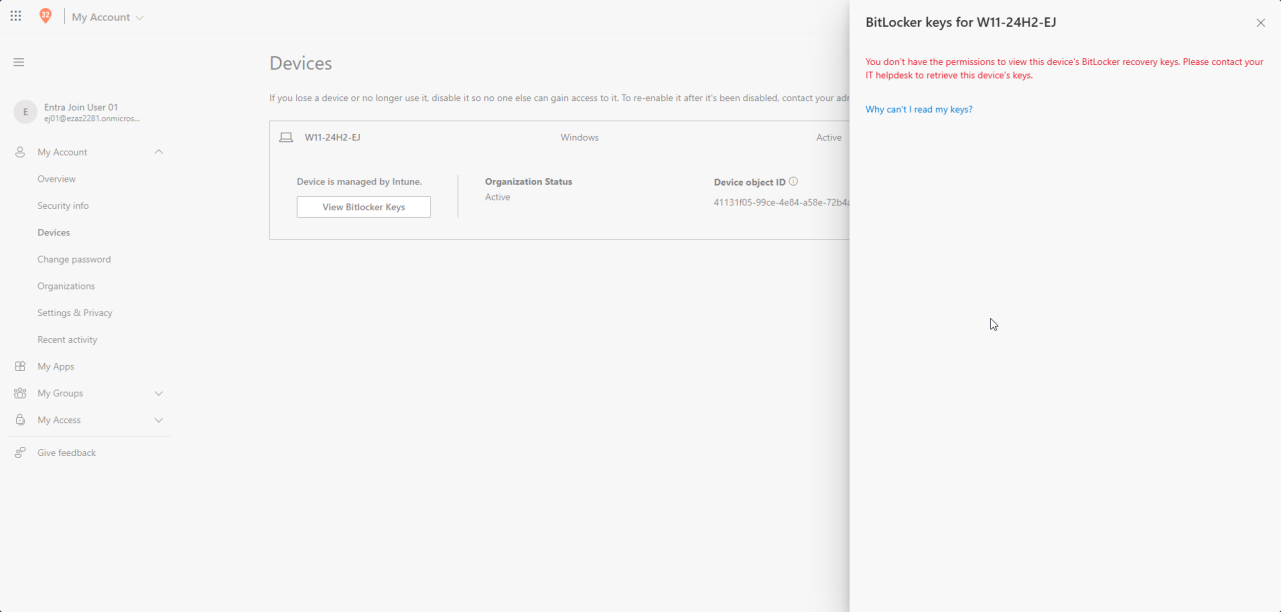
myaccount.microsoft.com > Devices, signed in as standard user. With setting = Yes the BitLocker key is hidden or shows a permission error.A.3 confirm admin retrieval still works
- Switch to your admin account at entra.microsoft.com.
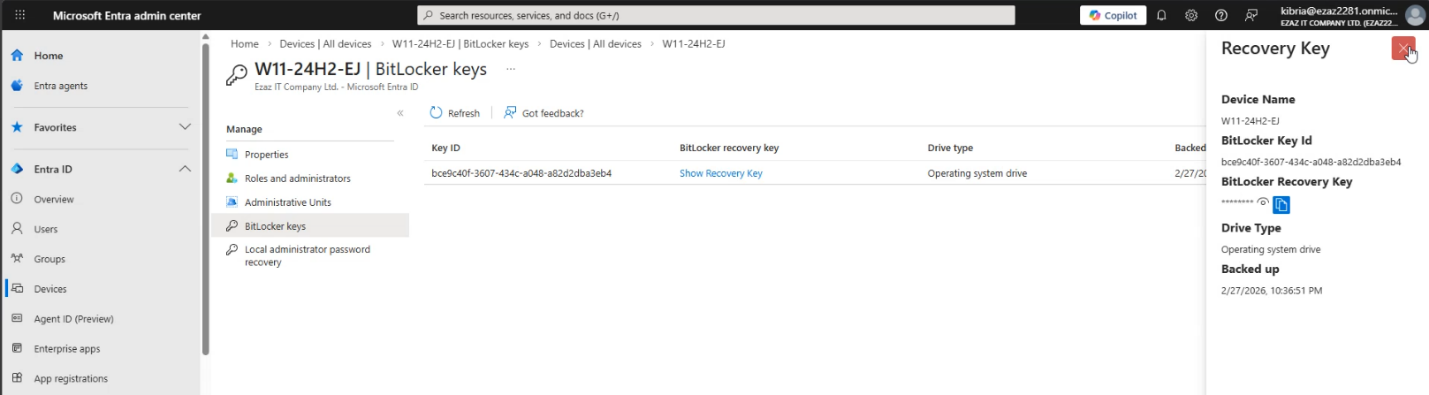
- Devices > All Devices > the device > BitLocker Keys.
- Click Show Recovery Key.
- Expected: full 48-digit recovery key displayed.
This confirms that restricting users does not lock IT out of recovery. If admin retrieval also failed, your account doesn’t have the right role — check you’re a Cloud Device Admin, Helpdesk Admin, or higher.
Scenario B — self-service enabled (user CAN see key)
B.1 set the toggle
- Devices > Device Settings.
- BitLocker self-service: No (permit).
- Save. Wait 2–3 minutes.
B.2 user-side test
- InPrivate / Incognito browser.
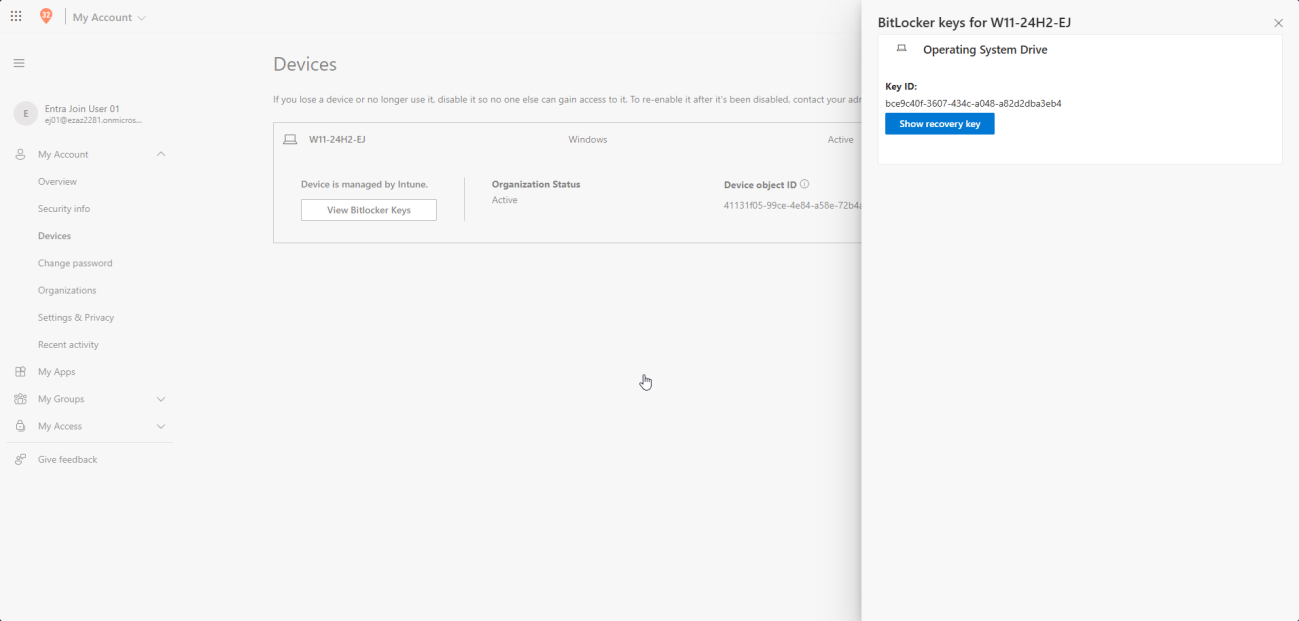
- myaccount.microsoft.com > sign in as the standard user.
- Devices > the test device > BitLocker Keys / View recovery key.
- You may be prompted for MFA (good — that’s the security gate around self-service).
- Pass criteria: 48-digit numerical key displayed; user can copy it.
B.3 cross-verify the key value
Switch to admin: Devices > All Devices > device > BitLocker Keys > Show Recovery Key. Compare digit-for-digit with what the user saw. They must match. If they don’t, you’re looking at two different protectors and need to investigate which one Windows actually uses on recovery.
Step 3 — restore the original setting
Don’t leave the tenant in a test state. Set the BitLocker self-service option back to whatever you recorded in Step 2 > Save.
Things that bite people
Browser session reused from admin tab
Always test the user side in InPrivate / Incognito with a fresh login. A signed-in admin session in another tab silently elevates everything.
Toggle says permission error when trying to change
You don’t have Privileged Role Administrator. Global Admin alone doesn’t cut it for this specific setting. Get the role assigned and retry.
Test user sees no devices in myaccount
Confirm the device’s Owner in Entra (Devices > the device > properties) is the same Entra account you’re signed in as on myaccount. The portal only shows devices the signed-in user owns.
Key didn’t escrow at all
Could be the device is Hybrid Joined and the key escrowed to AD instead of Entra (different attribute, different portal). Or BitLocker enabled before the device was Entra-Joined. Run the manage-bde -protectors -adbackup force-escrow from Step 1.3.
Setting flipped, change doesn’t propagate
Microsoft says ‘immediate’ but in practice 2–3 minutes is realistic. Wait, sign out, sign back in on the user side. If after 10 minutes nothing changed, recheck the Save took effect.
Helpdesk identity-verification gap
If you choose Yes (admin-only), make sure your helpdesk has a documented identity-verification procedure before reading recovery keys to callers. The whole point of the restriction is to add a human gate — if helpdesk reads keys to anyone who calls, you’ve regressed to self-service-via-phone.
Recommendation revisited
From the earlier Managing Device Settings post: most orgs should leave this set to Yes (restrict to admins) for the additional human-verification gate. Self-service is convenient and reduces helpdesk load, but it also means a thief who’s already taken the laptop can collect the recovery key from the user’s account if they also have the user’s credentials. The right answer depends on how confident you are in your account-level MFA + sign-in risk policies.
What’s next
That closes out this run of the Entra ID Security pathway — from device settings through join models, troubleshooting, decommission, B2B, and BitLocker key recovery. The next thread continues with self-service password reset (SSPR), conditional access deep-dives, and identity protection patterns. See the pathway index for the running sequence.