The built-in Administrator account on every Windows endpoint shares two properties that make it a perpetual target: it has well-known RID 500 (so the SID is predictable for any domain) and it is named Administrator by default (so the username half of any credential-stuffing attempt is also predictable). Disabling it is the right answer for some environments; renaming it is the lighter-touch hardening step that buys you the same “forces the attacker to guess two things, not one” benefit without breaking break-glass workflows that depend on the account existing.
The Accounts: Rename administrator account security policy is the supported, GPO-deployable way to rename the local Administrator account on every domain-joined computer. This article walks the workflow: create a Computer-scoped GPO at the right OU, set the policy, push it out with gpupdate /force, and verify on a target computer that the rename took.
Why Renaming Matters
Renaming the local Administrator account does not stop a determined attacker. The SID is still RID 500, so any tool that authenticates by SID rather than by name still finds the account. What renaming does is:
- Defeat name-only credential stuffing. A brute-force attempt against WORKSTATION-01\Administrator immediately fails account-lookup, before the password attempt is even processed. Tools that only know the well-known name are stopped at the door.
- Force the attacker to enumerate. To find the renamed account, the attacker has to enumerate accounts (net user, SAMR queries, etc.). That enumeration is logged on a properly monitored network and gives the SOC a chance to spot the activity before the password attempts start.
- Add a layer to lateral movement. Pass-the-hash and other credential-relay attacks against the renamed account need either the new name or the SID; tools that only know Administrator fail.
This is a defence-in-depth measure, not a panacea. Combine it with disabling the account where you can, with strong unique passwords (LAPS), and with monitoring for SAMR enumeration on member servers. By itself it raises the cost of an attack — with the rest of the layers in place, that cost becomes meaningful.
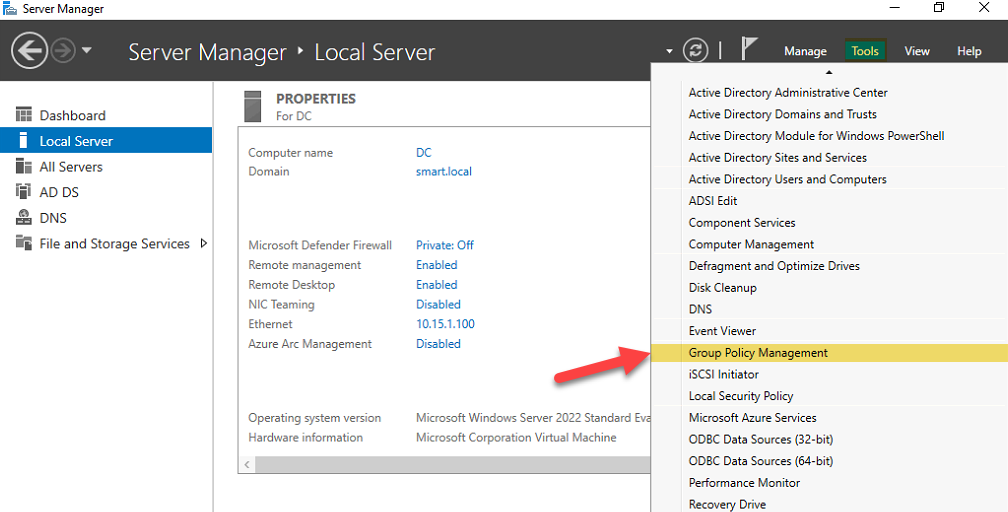
Step 1 — Open Group Policy Management
From a domain controller or any Windows Server with RSAT installed, open Server Manager → Tools → Group Policy Management:
If you are working from a Windows 10 or Windows 11 admin workstation, install RSAT first (Settings → Apps → Optional features) and launch GPMC the same way.
Step 2 — Create a New GPO at the Target OU
The rename should land on every domain-joined computer that needs hardening, but only those. The clean way is to create a GPO and link it to the OU containing your computer accounts — not the domain root.
Right-click the OU and choose Create a GPO in this domain, and Link it here…:
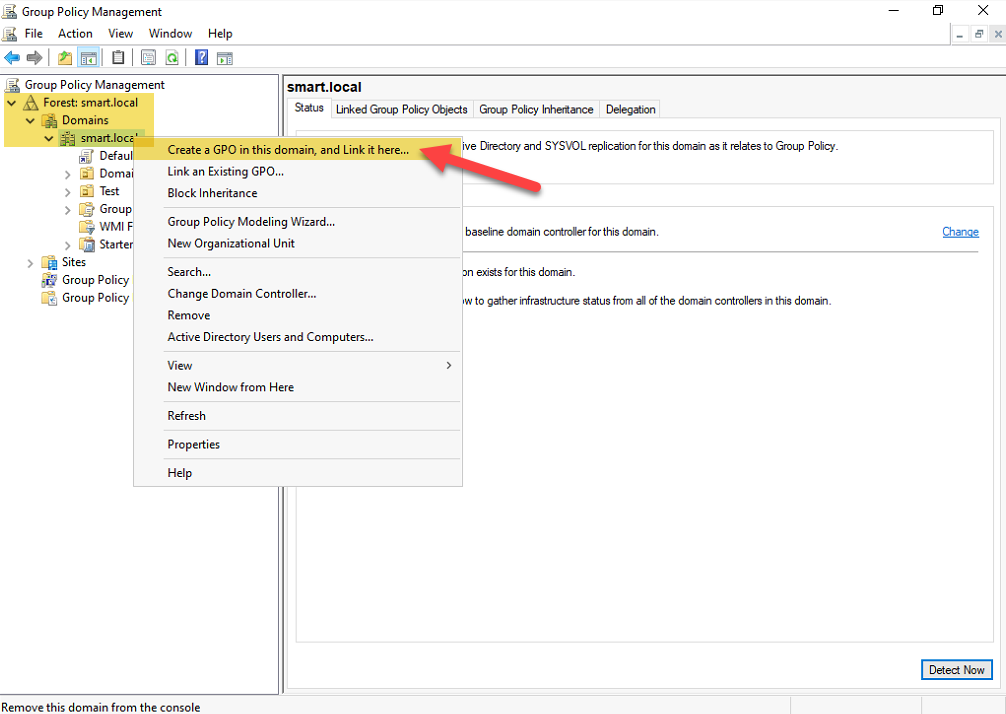
This is one of the rare GPMC operations that creates the GPO and the link in a single step. If you create the GPO in the Group Policy Objects container first and then drag it onto the OU later, you are doing the same thing in two clicks instead of one.
Naming Convention
A consistent GPO naming convention saves the next admin (or future you) thirty minutes of reading every GPO to figure out what it does. The convention we use:
C_— Computer-policy-only GPOs (User Configuration is disabled)U_— User-policy-only GPOs (Computer Configuration is disabled)CU_— GPOs with both Computer and User settings
For this rename policy — pure Computer Configuration — we use C_Rename-Admin-Account:
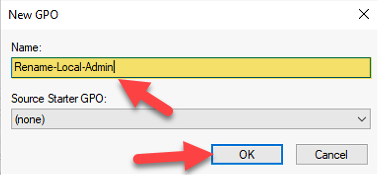
C_ prefix for Computer-only policies, U_ for User-only, CU_ for both — here it is a Computer policy, named Rename-Admin-Account.Whichever convention you adopt, the prefix matters less than the consistency. Pick one, document it, stick to it.
Step 3 — Edit the GPO and Set the Policy
Right-click the newly linked GPO and pick Edit:
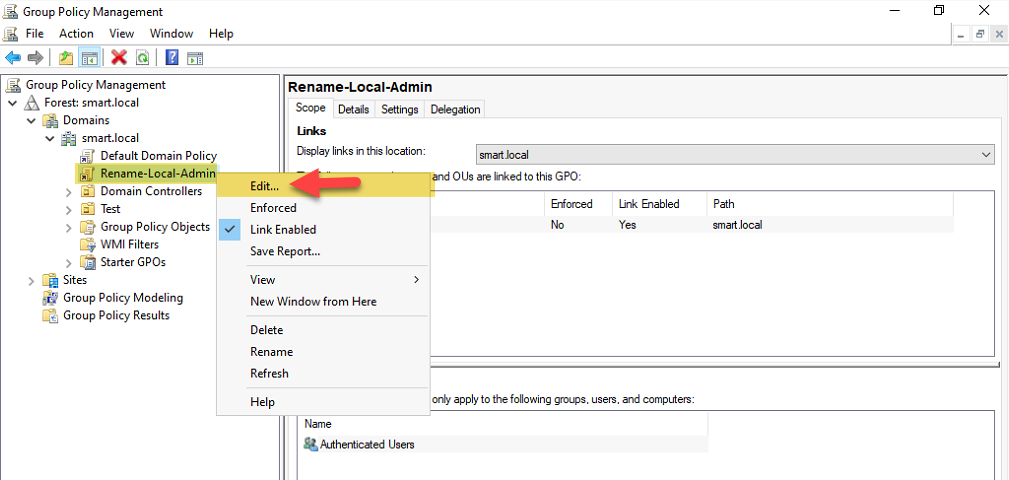
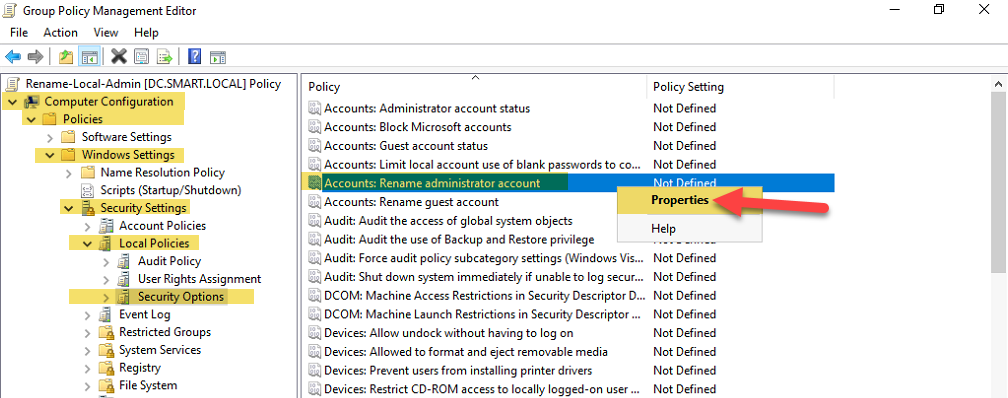
The Group Policy Management Editor opens. Navigate to:
Computer Configuration
→ Policies
  → Windows Settings
    → Security Settings
      → Local Policies
        → Security Options
In the right-hand pane, find Accounts: Rename administrator account and double-click it:
Tick Define this policy setting and enter the new account name:
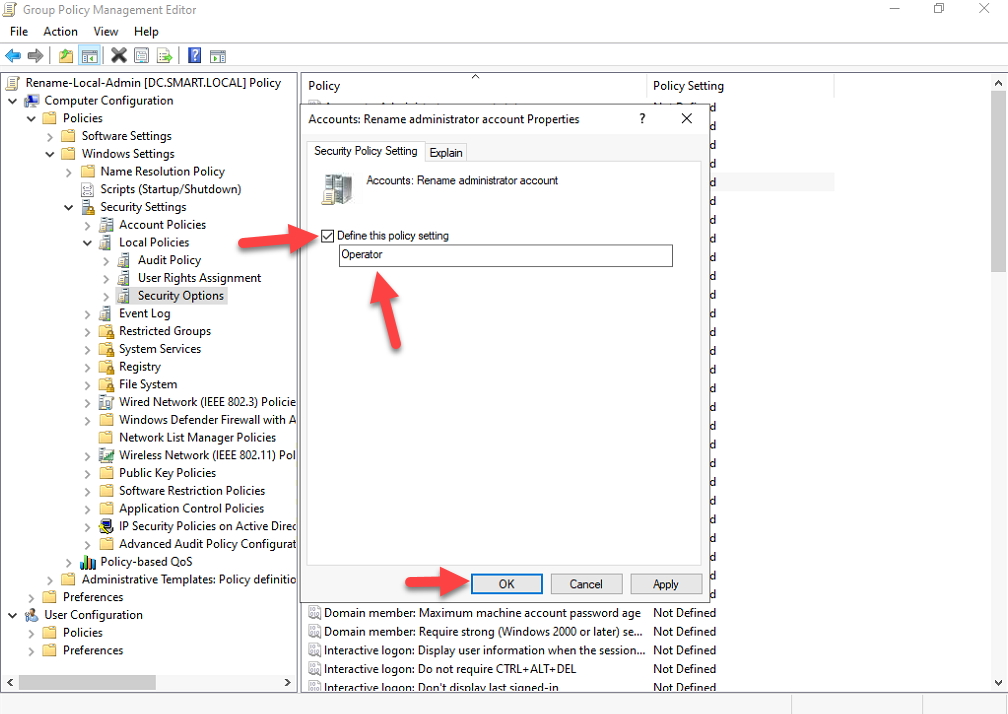
Pick a name that does not obviously identify the account as administrative. Names to avoid:
- Admin, SuperUser, Root — the next thing the attacker tries after Administrator
- Anything containing admin as a substring — SiteAdmin, NetAdmin, etc.
- The name of an actual user account — that defeats the obscurity benefit and confuses logs
Names that work better are deliberately neutral: Operator, BuildAcct, Service01, or a deliberately mundane personal-sounding name like tmaple or jthompson. The example in this walkthrough uses Operator.
Click OK, close the editor, close GPMC.
Step 4 — Apply and Verify
The GPO replicates within the standard refresh interval (default 90 minutes plus up to 30 minutes random offset). To apply the change immediately on a specific target, run on that computer:
gpupdate /forceFor a fleet, push the same command to every machine via Invoke-Command, RMM, or your endpoint management tool of choice. Or just wait for the natural refresh; the rename is not time-critical.
Verify on a target computer. Open Computer Management (compmgmt.msc) and navigate to Local Users and Groups → Users. The account previously called Administrator now appears as Operator (or whatever name you set):
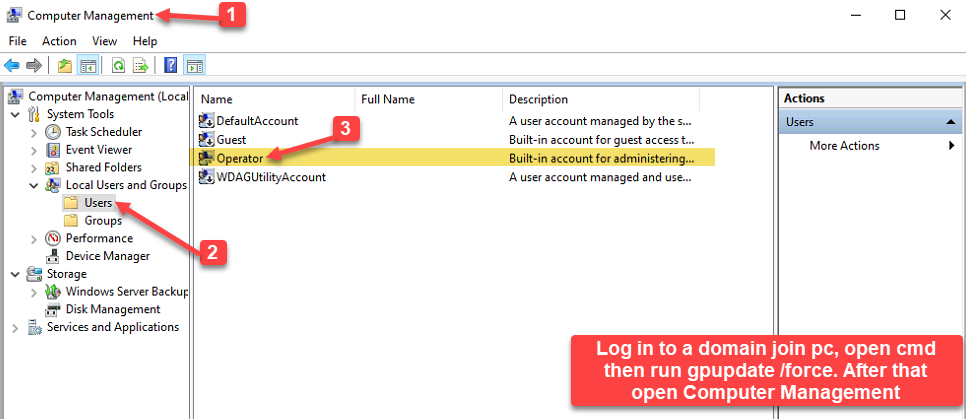
gpupdate /force, Computer Management → Local Users and Groups → Users shows the built-in account renamed to Operator.The account’s SID is unchanged — it is still S-1-5-21-<domain>-500 — and its group memberships, password, and rights are all intact. Only the name attribute has been updated.
From PowerShell, the equivalent verification:
# On the target computer
Get-LocalUser | Where-Object { $_.SID.Value -like '*-500' } |
    Select-Object Name, Enabled, SID
Common Pitfalls
- Linking the GPO at the domain root. The rename applies to every computer in the domain — including domain controllers. That is rarely what you want. Link at the OU containing member servers and workstations; leave DCs alone unless you have a very specific reason.
- Picking a guessable new name. Admin, Administrator2, or anything containing admin defeats the point of the rename. The attacker’s second guess is the obvious one. Use a neutral name.
- Forgetting that the SID does not change. Tools that authenticate by SID still find the account. The rename hardens against name-based attacks, not SID-based ones. If you need stronger protection, disable the account entirely and use a different break-glass mechanism (LAPS-managed local account, JIT/PIM via PAM solutions, etc.).
- Reverting accidentally. Removing the GPO link does not revert the rename — the rename is applied as a setting, not as a continuous tattooing. To revert, set the policy to Administrator explicitly (or some other name) and let GPO push that out, or run a manual rename per machine.
- Confusing this with the Domain Administrator account. The Accounts: Rename administrator account setting renames the local Administrator account on each computer the GPO applies to. The Domain Administrator account in AD is a different account and is renamed separately via Active Directory Users and Computers (right-click the Administrator user object → Rename).
Conclusion
Renaming the local Administrator account via GPO is a thirty-minute project that adds one extra layer to your endpoint hardening posture. It does not stop a determined attacker on its own; combined with strong unique passwords (LAPS), with monitoring for account enumeration, and with disabling the account where you can, it makes credential-stuffing attacks against your fleet meaningfully harder.
The workflow boils down to four steps: create a Computer-scoped GPO at the OU containing your endpoints, enable Accounts: Rename administrator account with a deliberately neutral name, run gpupdate /force on a target, verify in Local Users and Groups. Bake it into your standard endpoint baseline and the next time someone runs a credential-stuffing tool against your fleet, every name-based attempt fails at the lookup step.