The MBR partition table style was good enough when most servers had a single 250 GB drive and the OS booted via BIOS. It is not good enough now. MBR caps at four primary partitions and 2 TB per disk; modern Exchange databases, SQL data files, and cluster shared volumes routinely cross the 2 TB threshold and need GPT to grow. The standard Microsoft answer — create a fresh GPT disk, copy data over, retire the MBR disk — is doable but slow, requires double the storage during the migration, and means downtime for the workload that lives on the disk.
The better answer is to convert the partition style in-place, with the disk online, without moving a single byte of data. The on-disk MBR header gets rewritten as a GPT header; the file system underneath is untouched. This article shows how to do that with the free DiskGenius tool, plus the Get-Disk commands to identify which disks need converting and to verify the conversion afterwards.
Why GPT
The two limits of MBR are the ones you actually hit in production:
- 2 TB per disk. An MBR partition table addresses sectors with a 32-bit LBA. At a 512-byte sector size, that maxes out at 2 TB. Anything beyond that is invisible to the OS — you cannot grow an MBR partition past 2 TB even if there is more disk space behind it.
- Four primary partitions. MBR allows four primary partitions, or three primary plus one extended (which can hold logical partitions). It is rarely the limit you trip on, but it bites the moment you need a system / boot / data / log / recovery layout.
GPT removes both ceilings: 128 primary partitions, 9.4 ZB per disk (effectively unbounded for the next several decades), plus a redundant header at the end of the disk so a corrupt primary header is recoverable. UEFI firmware boots from GPT natively; Windows Server 2008 and newer mount and boot GPT disks without any compatibility shim.
Identify MBR Disks with PowerShell
Open Windows PowerShell as administrator and run Get-Disk to inventory every disk attached to the server and read its partition style:
Get-Disk | Format-Table -AutoSizeThe output identifies every disk by number and reports its Partition Style column — either MBR or GPT:
Number Friendly Name       Total Size Partition Style
------ -------------       ---------- ---------------
0      VMware Virtual disk    100 GB  GPT
1      VMware Virtual disk     10 GB  MBR
2      VMware Virtual disk     10 GB  MBR
The disks reported as MBR are the ones to convert. In an Exchange DAG, you may see disks with empty Number values — those are the passive copies of databases mounted from the other DAG member; you do not convert them from this server, you convert them from whichever server hosts the active copy.
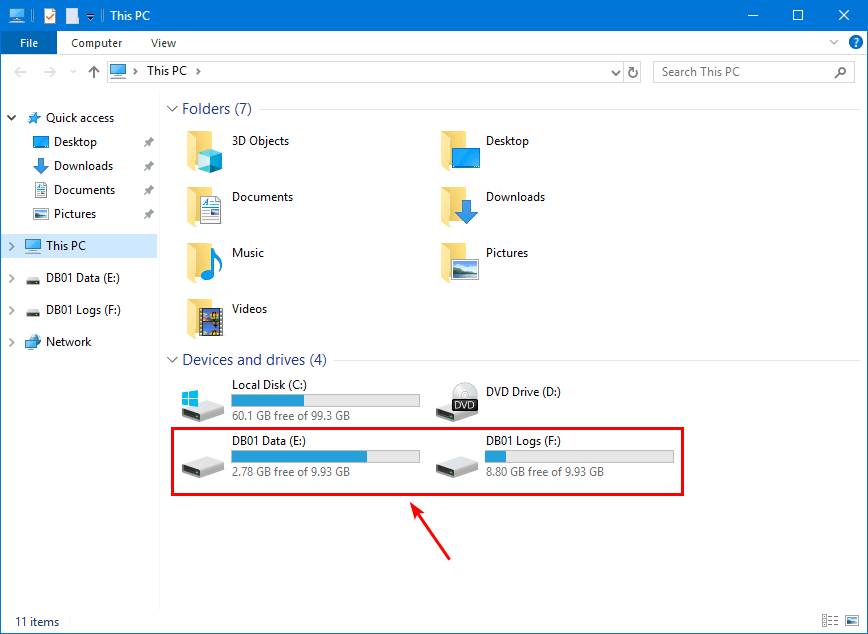
Get-Disk shows the partition style of every disk attached to the server. Disk 1 and Disk 2 are MBR; everything else is already GPT.If you want to filter to just the MBR disks (useful in a script):
Get-Disk | Where-Object { $_.PartitionStyle -eq 'MBR' } |
    Select-Object Number, FriendlyName, @{Name='SizeGB';Expression={[int]($_.Size/1GB)}}
Free Tools That Do (and Do Not) Work
Microsoft ships mbr2gpt.exe with Windows 10 and Windows Server, but it has hard limits: the disk must be the system disk, must boot via UEFI, and the conversion happens during a reboot to WinPE. It is not appropriate for data-disk conversions on a running server.
The open-source gptgen works in some scenarios but is not maintained, has no Windows Server support statement, and the GitHub project has been quiet for years.
The tool that actually does the data-disk conversion online without rebooting is DiskGenius (diskgenius.com). The free version supports the MBR-to-GPT conversion for non-system disks. NTFS and ReFS file systems both convert cleanly. The conversion is in-place: DiskGenius rewrites the disk header and partition table, the file system data is untouched.
Convert MBR to GPT with DiskGenius
Download the standalone installer from the official site:

Install or run the standalone executable on the server. The portable version does not require an install; it runs out of the extracted folder.
Convert the first disk
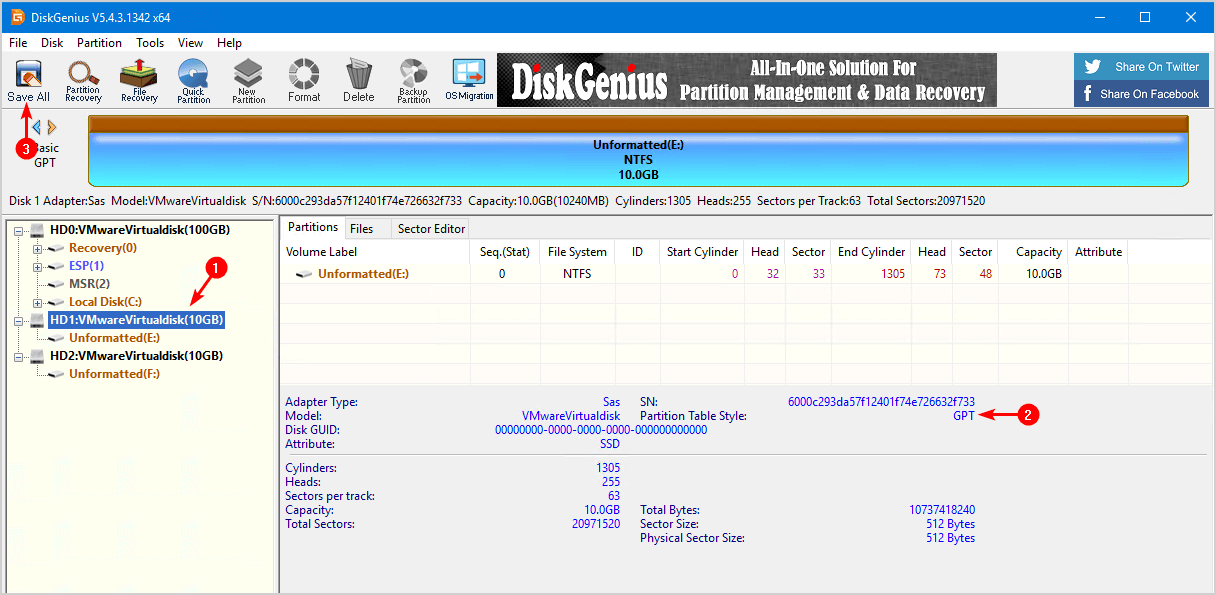
Launch DiskGenius. The left pane lists every disk by number, matching the numbers Get-Disk reported. Right-click the MBR disk you want to convert and pick Convert To GUID Partition Table:

The change is staged in memory — nothing has been written to disk yet. The disk now reads as Partition Table: GPT in DiskGenius. Click Save All to commit:
DiskGenius asks one final confirmation:
Click Yes. The header is rewritten in place. There is no progress bar — the operation is just a few hundred bytes of header data, so it completes in well under a second.
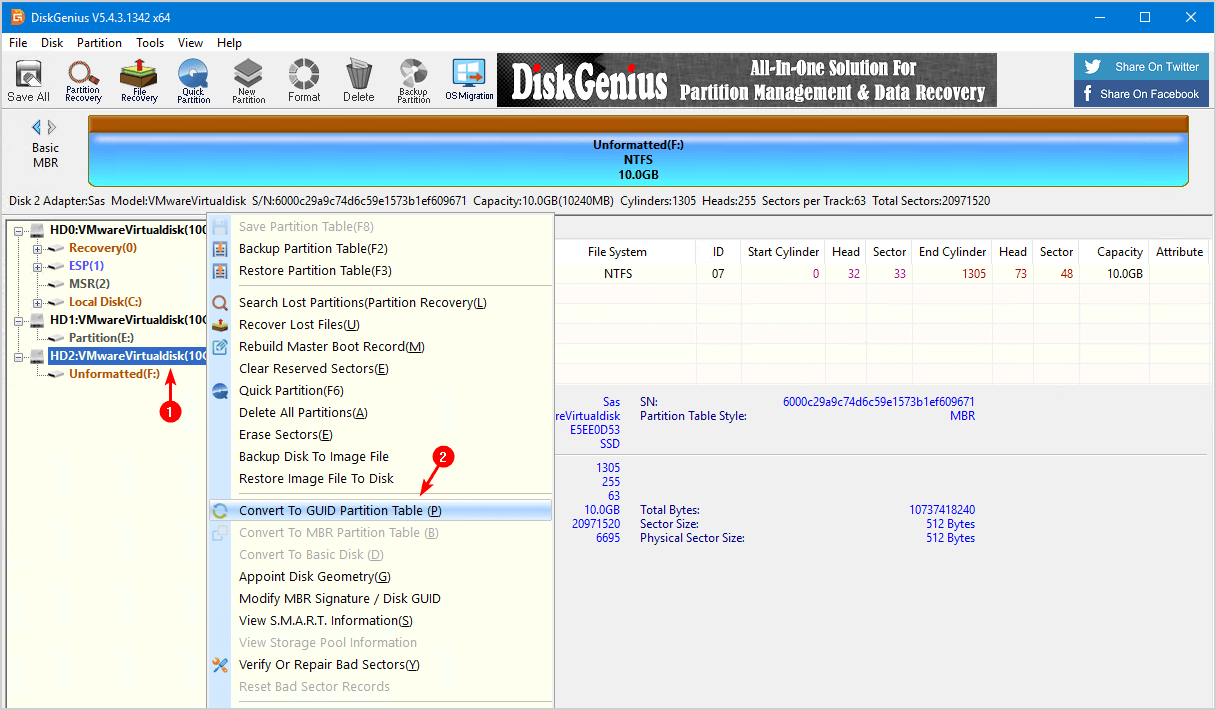
Convert the second disk
Repeat the same three clicks for any other MBR disks. Right-click, Convert To GUID Partition Table:
Confirm GPT in the disk panel, click Save All:
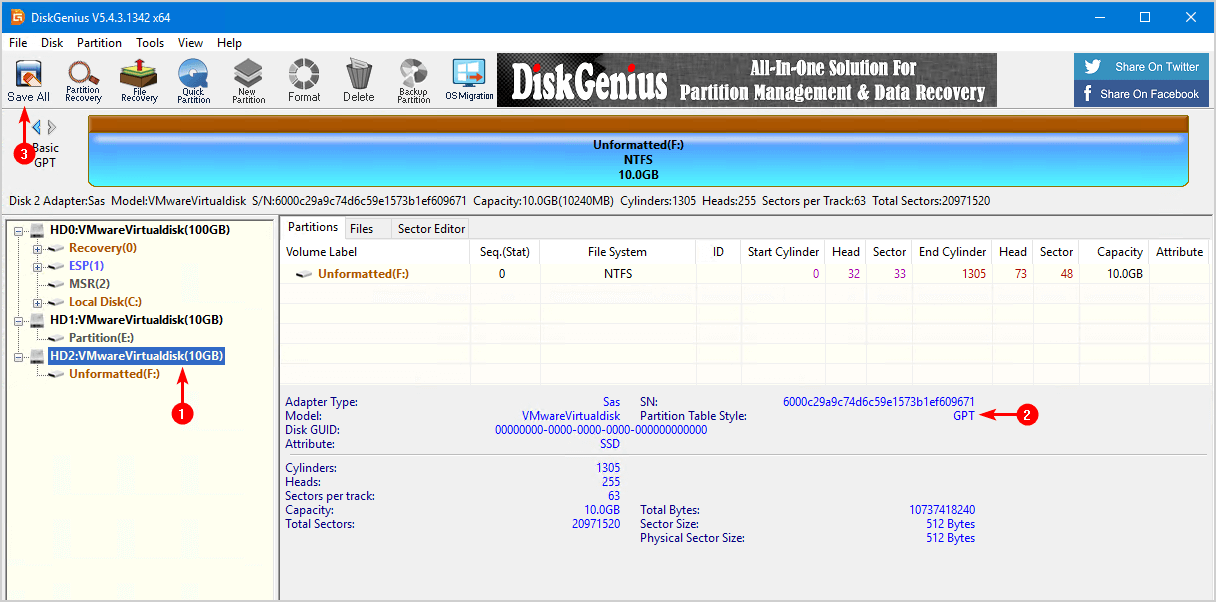
And confirm:
Both disks now report GPT and the data is fully intact.
Restart the server after the conversions. The OS picks up the new partition style on the next mount, but a reboot guarantees that every running process re-reads the disk geometry from scratch. For an Exchange or SQL workload, this is the kind of change you do during a maintenance window with the workload offline anyway.
Verify with PowerShell
Re-run Get-Disk and confirm every disk now reports GPT:
Get-Disk | Format-Table -AutoSizeNumber Friendly Name Total Size Partition Style
------ ------------- ---------- ---------------
0 VMware Virtual disk 100 GB GPT
1 VMware Virtual disk 10 GB GPT
2 VMware Virtual disk 10 GB GPTIf a disk still shows MBR after the DiskGenius conversion, the most likely cause is that the Save All step was skipped — the in-memory change was not committed. Open DiskGenius again, repeat the right-click conversion, and click Save All.
Common Pitfalls
- Trying mbr2gpt on a data disk.
mbr2gpt.exeis the system-disk conversion tool. It will not run on a non-system data disk; it requires UEFI boot and reboots into WinPE. For data disks, use DiskGenius. - Converting before a backup. Even though the conversion is in-place and metadata-only, take a system-state backup or a SAN snapshot first. Header corruption during the conversion is rare but possible; a snapshot lets you roll back in seconds if anything looks wrong afterwards.
- Skipping Save All. DiskGenius stages the conversion in memory; closing the app without Save All discards the change. If
Get-Diskstill shows MBR after you thought you converted, this is almost always why. - Converting an Exchange DAG passive copy from the wrong node. Database copies are mounted on whichever DAG member is currently active. Running the DiskGenius conversion on the passive node converts the disk geometry but leaves the database copy out of sync. Convert from the active node, or fail the database over to the node where you want to do the work first.
- BIOS-only servers. A GPT system disk requires UEFI to boot. Older servers in BIOS mode boot only from MBR. Data disks have no such constraint — this article’s steps work for data disks regardless of how the server itself boots — but if you are tempted to convert the system disk too, confirm UEFI is available and enabled first.
Conclusion
For data disks on a running Windows Server, the in-place MBR-to-GPT conversion with DiskGenius is the right tool: free, online, three clicks per disk, no data movement, no reboot to WinPE. The Microsoft mbr2gpt.exe tool is the right answer for system disks during a UEFI migration, but for everything else it is overkill.
The pre-flight is a single Get-Disk command, the conversion itself takes under a minute per disk, and the verification is the same Get-Disk command afterwards. Bake the conversion into your standard pre-Exchange-upgrade or pre-SQL-upgrade checklist and the 2 TB ceiling stops surprising you the next time someone asks for a 4 TB database volume.