The Trusted Platform Module is the small chip on every modern motherboard that handles cryptographic operations the OS doesn’t want to do in plain memory — key generation, key storage, secure boot measurement, attestation. BitLocker, Windows Hello, Credential Guard, and the Windows 11 install gate all assume one is present. Virtual machines, by definition, don’t have a physical motherboard, so Hyper-V emulates the chip in software via vTPM (virtual TPM). The emulated device exposes the same TPM 2.0 API to the guest, holds keys in encrypted memory protected by the host, and presents itself to the guest OS as if it were a physical chip. This post walks how to enable vTPM on a Hyper-V VM — both the GUI route and the PowerShell route — and the prerequisites that have to line up first.
What you need before starting
- A Hyper-V host with the role installed
- A Generation 2 VM — vTPM is not available on Generation 1 (which uses BIOS firmware and has no Secure Boot support). If your VM is Gen 1, the only fix is to recreate it as Gen 2; you can’t convert.
- The VM in Off state. The TPM device cannot be added to a running VM.
- Local administrator rights on the host.
- A standalone Hyper-V host (not Guarded Fabric / Shielded VMs). Shielded VMs use a more complex Host Guardian Service flow that’s out of scope here.
Why a guest needs a TPM
The short version: modern Windows builds increasingly assume one is present. Without it:
- Windows 11 setup refuses to install. The hardware-requirement check fires within the first few seconds of running Setup and exits with the “This PC can’t run Windows 11” banner. Skipping the check is possible via registry tweaks but is unsupported.
- BitLocker can’t auto-unlock. Without a TPM to bind the disk-encryption key to, BitLocker either falls back to a startup PIN every boot or doesn’t enable at all in standard configurations.
- Windows Hello biometric / PIN unlock falls back to a less-secure key store. Hello relies on the TPM for the gesture-to-credential binding; without one, the credentials are stored in the LSA which is more attack-surface.
- Credential Guard / Virtualization-Based Security can’t run. Both rely on the TPM for the key store that holds the LSA-isolated secrets.
- Measured Boot doesn’t produce verifiable measurements. The PCR (Platform Configuration Register) values that record the boot sequence don’t exist without a TPM, so attestation services have nothing to verify against.
For a lab VM that just runs a few applications and never touches BitLocker or Hello, technically you can skip vTPM. For anything that needs to install or run modern Windows builds with their security features intact, vTPM is the right configuration.
Method 1 — Hyper-V Manager GUI
The friendlier route, ideal for one-off configuration changes.
- Open Hyper-V Manager. Find the target VM (the lab uses one named
test win 11). - Right-click the VM and pick Settings. The Settings dialog opens.
- In the left panel, pick Security (under Hardware). The right panel shows the security configuration.
- Under Secure Boot:
- Tick Enable Secure Boot. Required for vTPM — the two are coupled in the Hyper-V security model.
- Set the Template dropdown to Microsoft Windows. The other options are Microsoft UEFI Certificate Authority (for non-Windows Gen 2 guests like some Linux distros) and Open Source Shielded VM (for Linux shielded VMs). For Windows guests, Microsoft Windows is correct.
- Under Encryption Support:
- Tick Enable Trusted Platform Module. This is the vTPM-enable checkbox.
- Optionally tick Encrypt state and virtual machine migration traffic. This is independent of vTPM — it covers the host-to-host VM-state encryption during live migration. Useful but not required for vTPM operation.
- Click Apply, then OK.

From this moment, the VM has a virtual TPM 2.0 device. Boot the VM and the guest OS sees a TPM via Windows’ tpm.msc console. Windows 11 setup will pass the TPM check; BitLocker will auto-detect a TPM during enablement; Credential Guard can be enabled.
Method 2 — PowerShell
The same operation, scriptable. Run from elevated PowerShell on the host:
Check current state
Get-VMSecurity -VMName TestWin11The output reports several properties; the relevant one is TpmEnabled. If it’s False, the vTPM is not active. Other useful fields:
EncryptStateAndVmMigrationTraffic— the live-migration encryption flag from the GUI.VirtualizationBasedSecurityOptOut— whether VBS is opted out of (default false).Shielded— only true on shielded VMs in Guarded Fabric environments.
Enable the vTPM
Enable-VMTPM -VMName TestWin11One cmdlet, no confirmation prompt. The host adds the vTPM device to the VM’s configuration. The cmdlet is silent on success; failures produce explicit errors (most common: “A required attestation feature is not present” if the host’s VBS configuration isn’t set up, or “The VM must be Generation 2” if you tried it on a Gen 1 VM).
Verify
Get-VMSecurity -VMName TestWin11The TpmEnabled line should now report True.
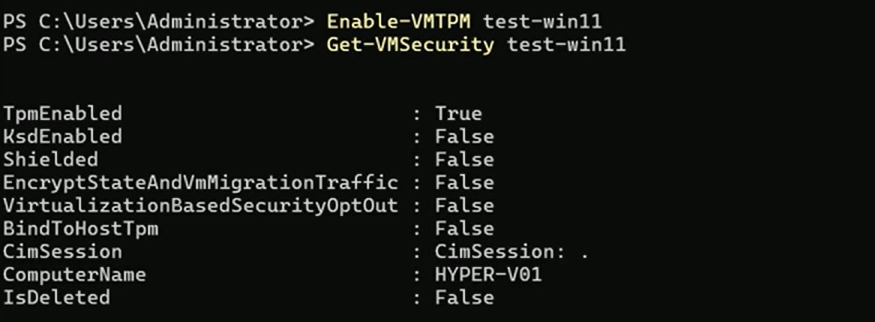
Get-VMSecurity TestWin11 after Enable-VMTPM TestWin11. The TpmEnabled : True line is the verification that the vTPM device is exposed to the guest. From here Windows 11 setup, BitLocker, Credential Guard etc. all work.The disable equivalent
If you ever need to remove the vTPM (rare; only really useful when you’re moving the VM to a host that doesn’t support it):
Disable-VMTPM -VMName TestWin11Note that disabling vTPM doesn’t automatically uninstall guest features that depend on it. If BitLocker is enabled inside the guest, disabling the host-side vTPM puts the guest into a state where BitLocker can’t auto-unlock and may need recovery-key entry on next boot. Disable BitLocker inside the guest first if the goal is removal rather than temporary toggle.
The bulk pattern
For environments deploying many VMs at once, the cmdlet form makes it easy:
Get-VM | Where-Object { $_.Generation -eq 2 -and -not (Get-VMSecurity $_).TpmEnabled } | ForEach-Object {
    Stop-VM $_ -Force -WarningAction SilentlyContinue
    Enable-VMTPM $_
    Start-VM $_
}
Stops every Gen 2 VM that doesn’t already have vTPM, enables it, and restarts. Useful for retrofitting an existing fleet that was built before vTPM was the default expectation.
Things that bite people in production
The host’s key-protector configuration must be in place
vTPM keys are stored in encrypted memory; the encryption key (the “key protector”) is held by the host. On a freshly-installed standalone Hyper-V host, the default local-key-protector mode handles this transparently — Enable-VMTPM just works. On a host that’s been hardened or is part of a Guarded Fabric, the cmdlet may fail with “A required attestation feature is not present.” The fix in that case is host-side configuration outside the scope of a single VM’s vTPM toggle.
Live migration carries the vTPM, but only with key-protector compatibility
A vTPM-equipped VM can live-migrate between hosts, but the destination host has to be able to decrypt the vTPM’s key store. Two hosts in the same Hyper-V cluster typically have compatible key protectors by default; two standalone hosts don’t and need explicit certificate sharing or a shared HGS. Plan vTPM rollout in the context of your cluster topology.
VM export captures the vTPM but not the keys
When you export a vTPM-enabled VM, the configuration file records that vTPM was enabled, but the key store is host-specific and doesn’t come along. Importing on a different host succeeds but the imported VM won’t have the key state — which means BitLocker inside the guest will need its recovery key on first boot post-import. For a planned host migration, capture the BitLocker recovery keys from inside the guest before the export.
vTPM is not the same as physical TPM for attestation
A real TPM’s attestation chain ties back to a manufacturer-issued endorsement key that proves the chip is genuine. The vTPM’s endorsement key is generated by the host at vTPM-enable time and signed by Microsoft’s TPM-emulator certificate authority. For most software that just needs “a TPM is here,” this is fine. For software that explicitly attests against the manufacturer chain (some HSM-based products), the vTPM may not satisfy the check.
Disabling vTPM with BitLocker active inside the guest is a recovery-key event
The BitLocker volume key was sealed against the vTPM’s state. Removing the vTPM destroys the seal; the next boot prompts for the recovery key. Always disable BitLocker inside the guest before removing the vTPM at the host level if you don’t want to deal with recovery prompts.
Generation cannot be changed; vTPM cannot be added to Gen 1
The single most-asked question. Enable-VMTPM on a Gen 1 VM fails with a clear error; the only fix is to recreate the VM as Gen 2 and reattach the VHDX (which itself may need conversion if it was created on Gen 1 firmware). Plan VM generation at create time, not after.
Where this fits
vTPM is part of the modern-Windows-on-Hyper-V baseline. For Win11 VM creation see create a VM on Hyper-V using PowerShell (which already wires Enable-VMTPM into the standard provisioning sequence). For golden-image / template patterns, build a Hyper-V golden image. For the broader virtualization surface area, the Hyper-V virtualization pathway covers live migration, replicas, vSwitch configuration, and the rest. For the broader Windows Server admin context, the Windows Server administration pathway.