You have a Hyper-V VM with a legacy VHD-format disk. Maybe it migrated from an old Server 2008 R2 host, maybe someone created it manually before VHDX became the default in 2012. Either way, you’ve hit one of VHD’s limits (2 TB cap, no power-loss resilience, suboptimal block alignment) and want to upgrade it to VHDX without losing data. Hyper-V’s Edit Disk wizard does this in one shot — the only catch is that the disk has to be detached from the VM first because vmwp.exe holds the file open. This post walks the GUI flow and the PowerShell equivalent end-to-end.
Why upgrade VHD to VHDX
| Feature | VHD (legacy) | VHDX (modern) |
|---|---|---|
| Max size | 2 TB hard cap | 64 TB |
| Power-loss resilience | None — corruption possible | Internal log + checksums |
| Logical sector size | 512 B | 4 KB (aligns with modern arrays) |
| Shared VHDX (guest cluster) | Not supported | Supported |
| Hot-resize | Limited | Yes for both Fixed and Dynamic |
| Generation 2 VM boot | Not supported | Required |
The 2 TB cap is the most common trigger — a VHD volume runs out of space, you try to grow it, and Disk Management refuses because you’re at the format limit. Upgrade to VHDX and you can grow further. The other features are nice-to-haves; the size cap is what actually forces the conversion most of the time.
The procedure in one paragraph
Shut down the VM (or just detach the disk from the VM’s settings while leaving the VM running). Run the Edit Disk wizard from Hyper-V Manager, point it at the .vhd file, pick Convert, choose VHDX as the output format, name the new file. Wizard reads the .vhd, writes a new .vhdx, leaves the original .vhd in place. Reattach the new .vhdx to the VM. Done. Original .vhd file can be deleted once you’ve verified the VHDX works.
The catch: the disk MUST be detached during the conversion because Hyper-V’s worker process holds the file open while the VM is using it. Trying to convert an attached disk fails with a “file in use” error.
The demo setup
For the walk-through, we create a fresh VHD just so we have something to convert. In real use you skip these prep steps because you already have an existing VHD that needs upgrading.
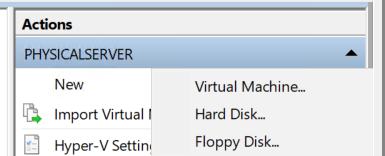
Hyper-V Manager > Action pane > New > Hard Disk. The standard New Virtual Hard Disk wizard opens.
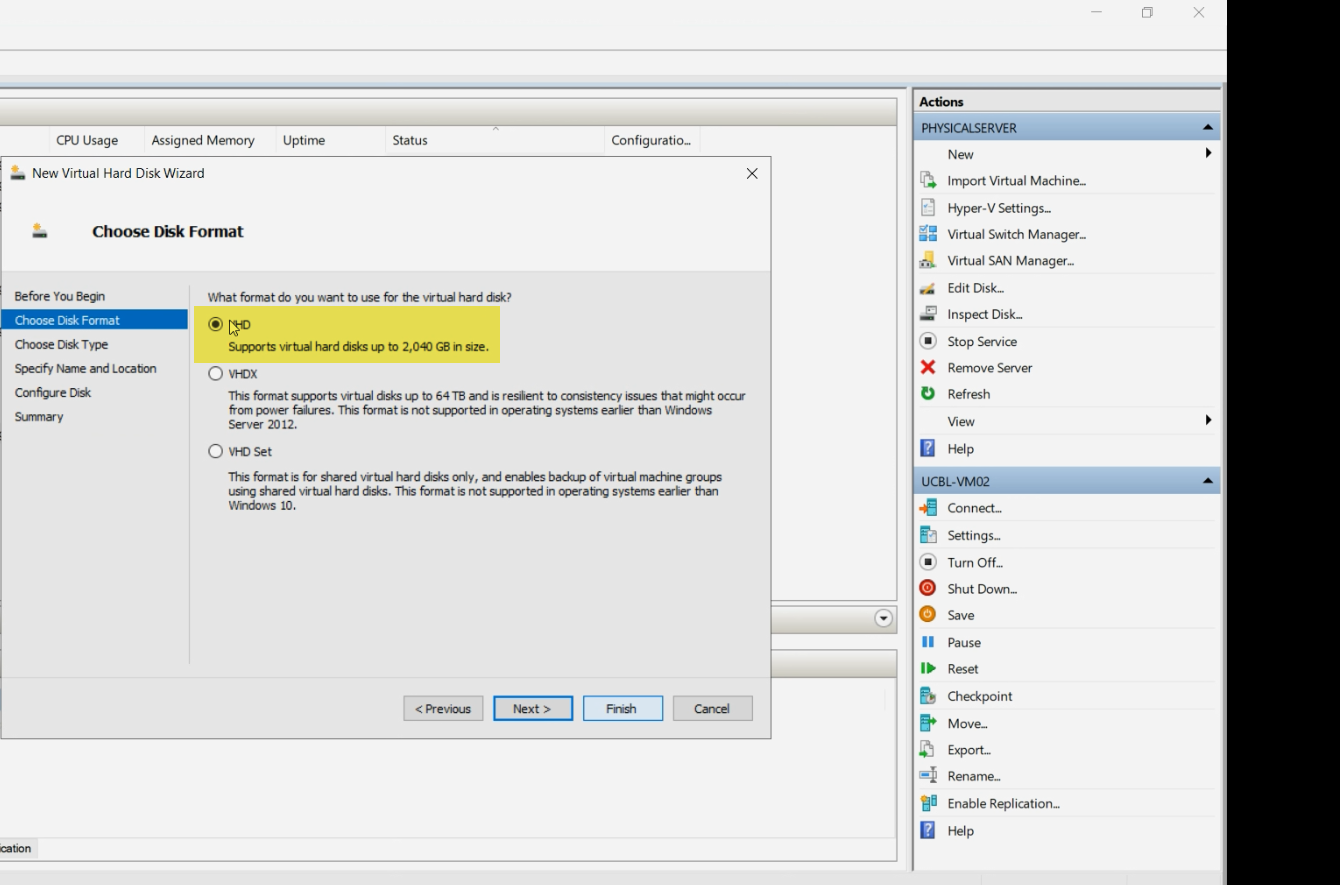
On the Disk Format page, pick VHD instead of the default VHDX. This is the only place where the format choice surfaces — the rest of the wizard is identical regardless.
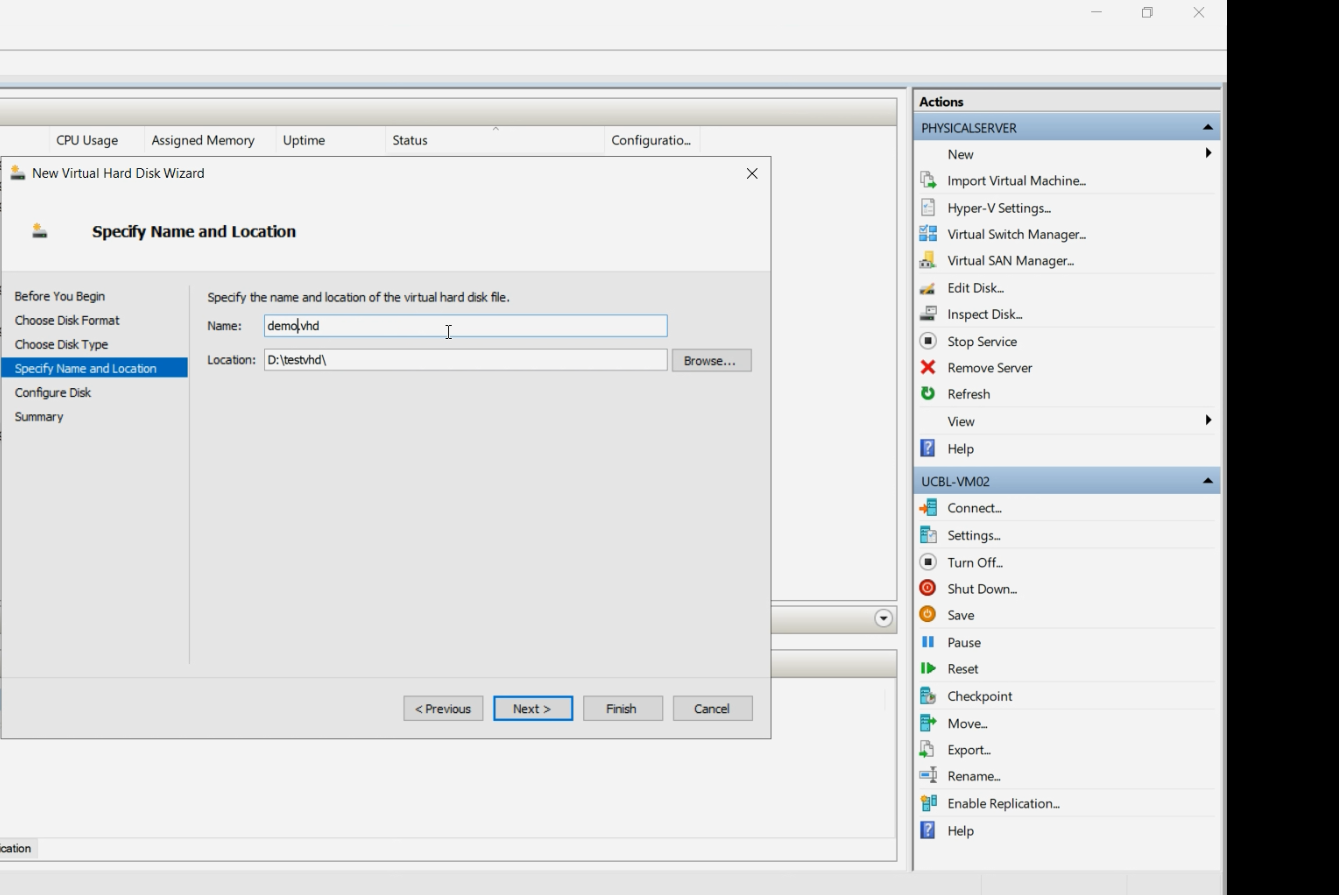
D:\VMDisks\<vm-name>\<disk-purpose>.vhd.Name and location — standard. Use a folder on a host drive with capacity. Convention: D:\VMDisks\<vm-name>\<disk-purpose>.vhd.
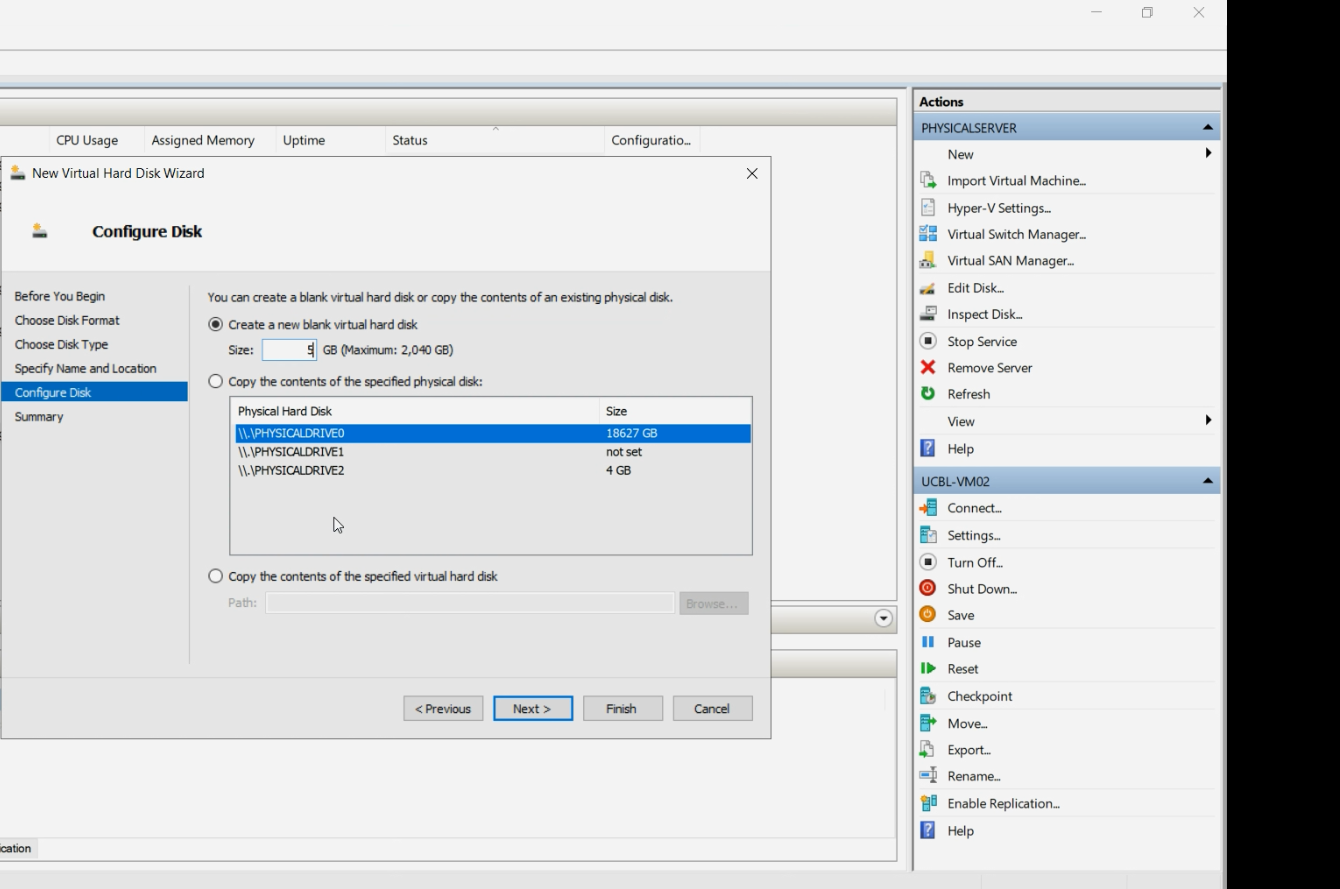
Pick size and Fixed-vs-Dynamic. For the demo, small + Dynamic is fine.
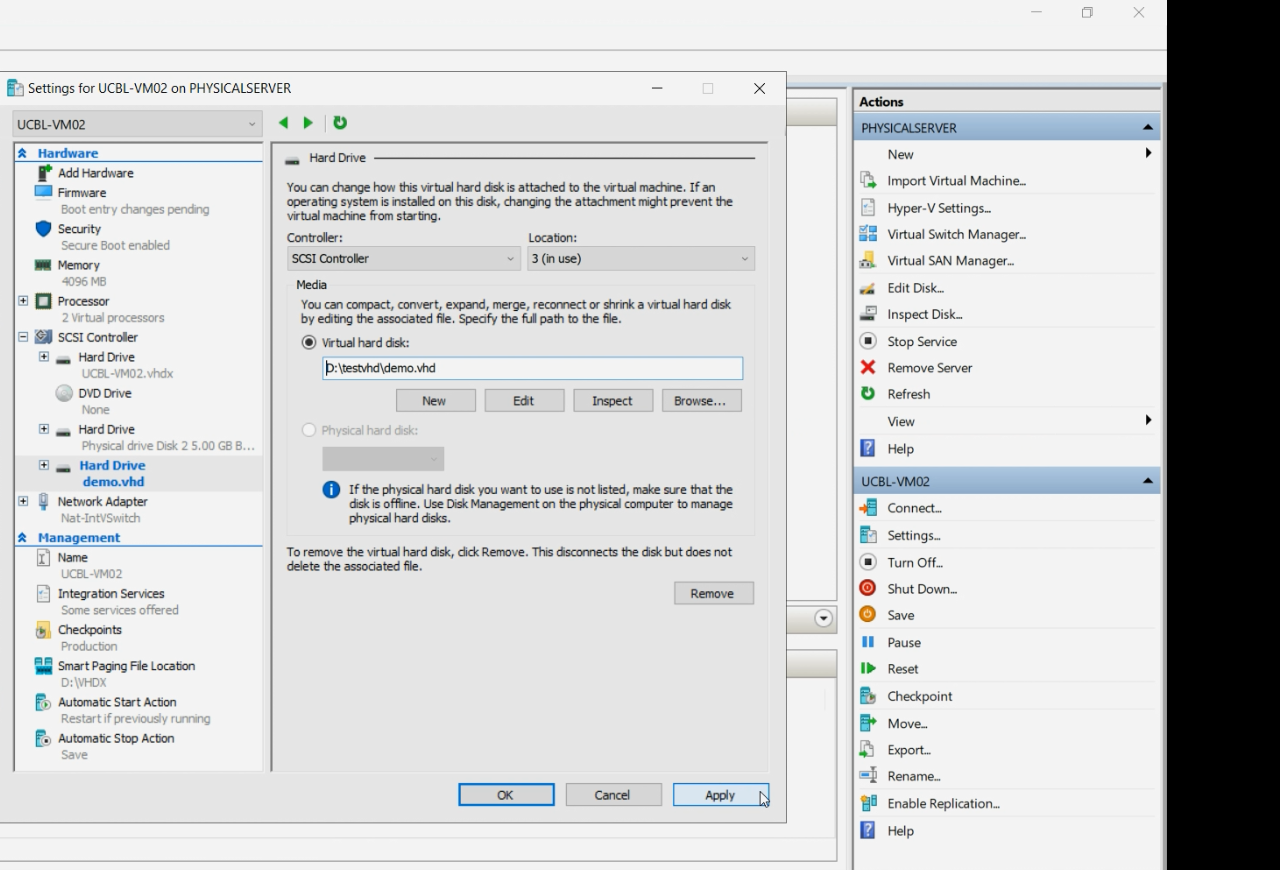
Attach the new VHD to a VM via VM Settings > SCSI Controller > Hard Drive > Add > Virtual hard disk > pick the .vhd. This is the “real-world” starting state — a VHD attached to a running VM.
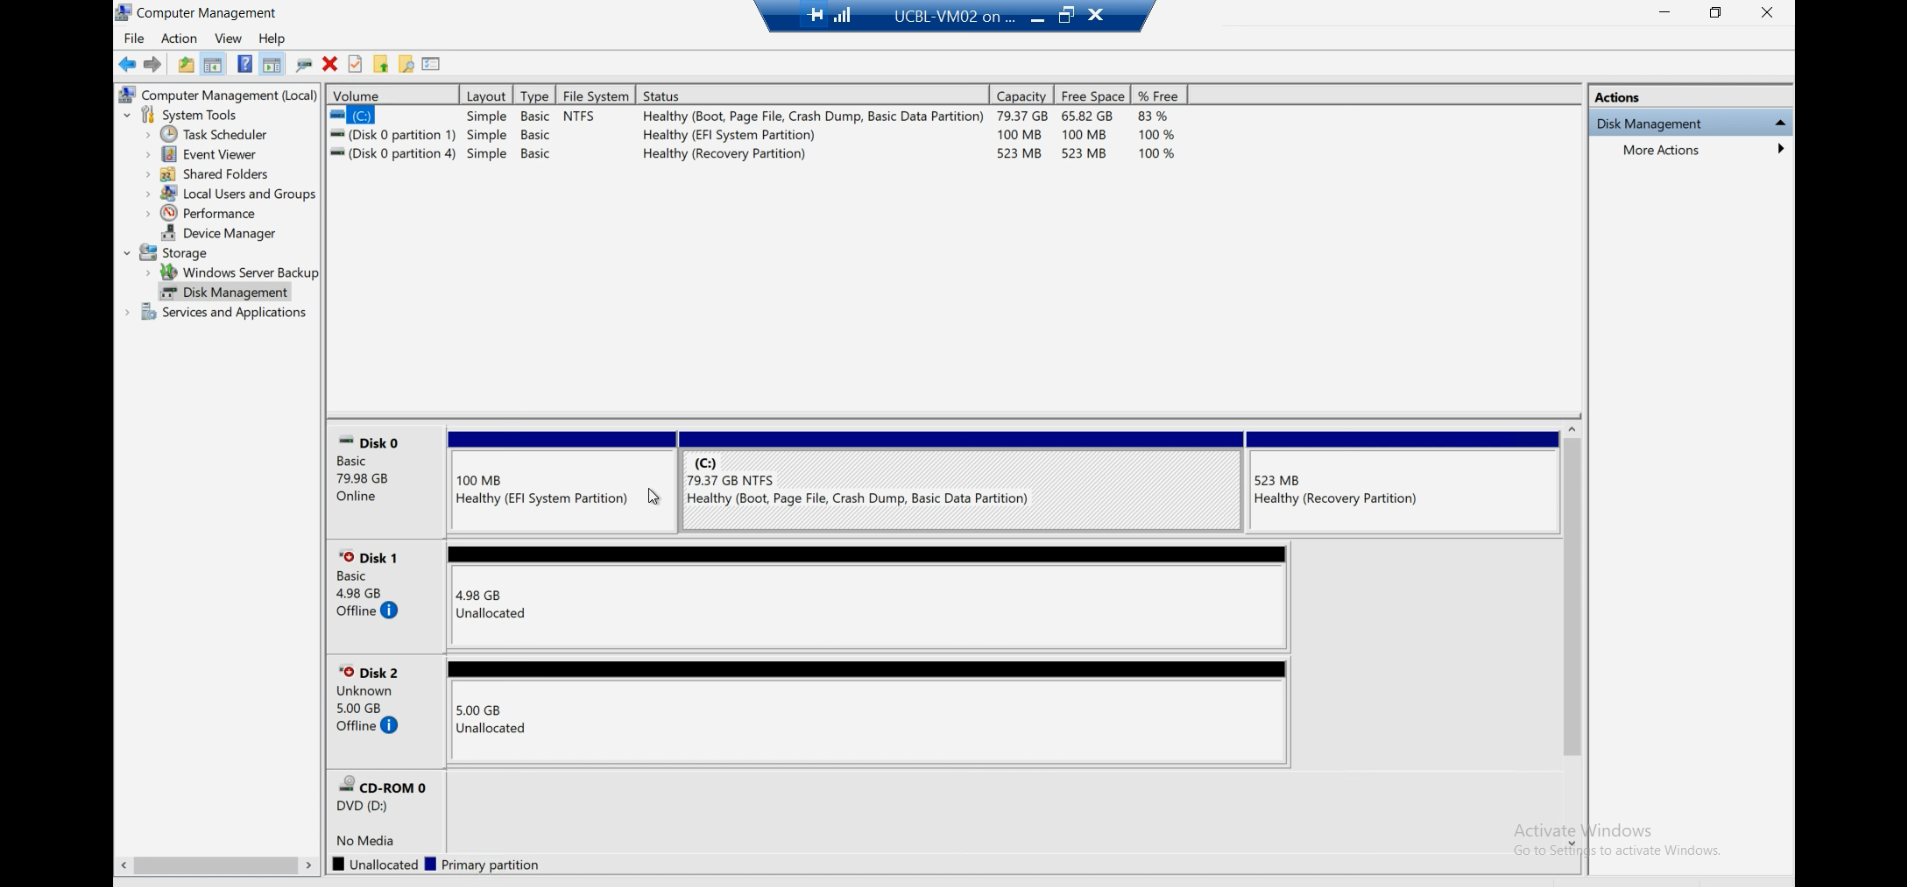
Inside the VM, the VHD shows up in Disk Management as a fresh disk. We’re not going to use it for anything — just confirming the VM sees it.
Step 1 — first attempt fails (the “file in use” lesson)
From the host, try the conversion while the VHD is still attached. Hyper-V Manager > Edit Disk (in the right Actions pane) > pick the .vhd file > Convert.
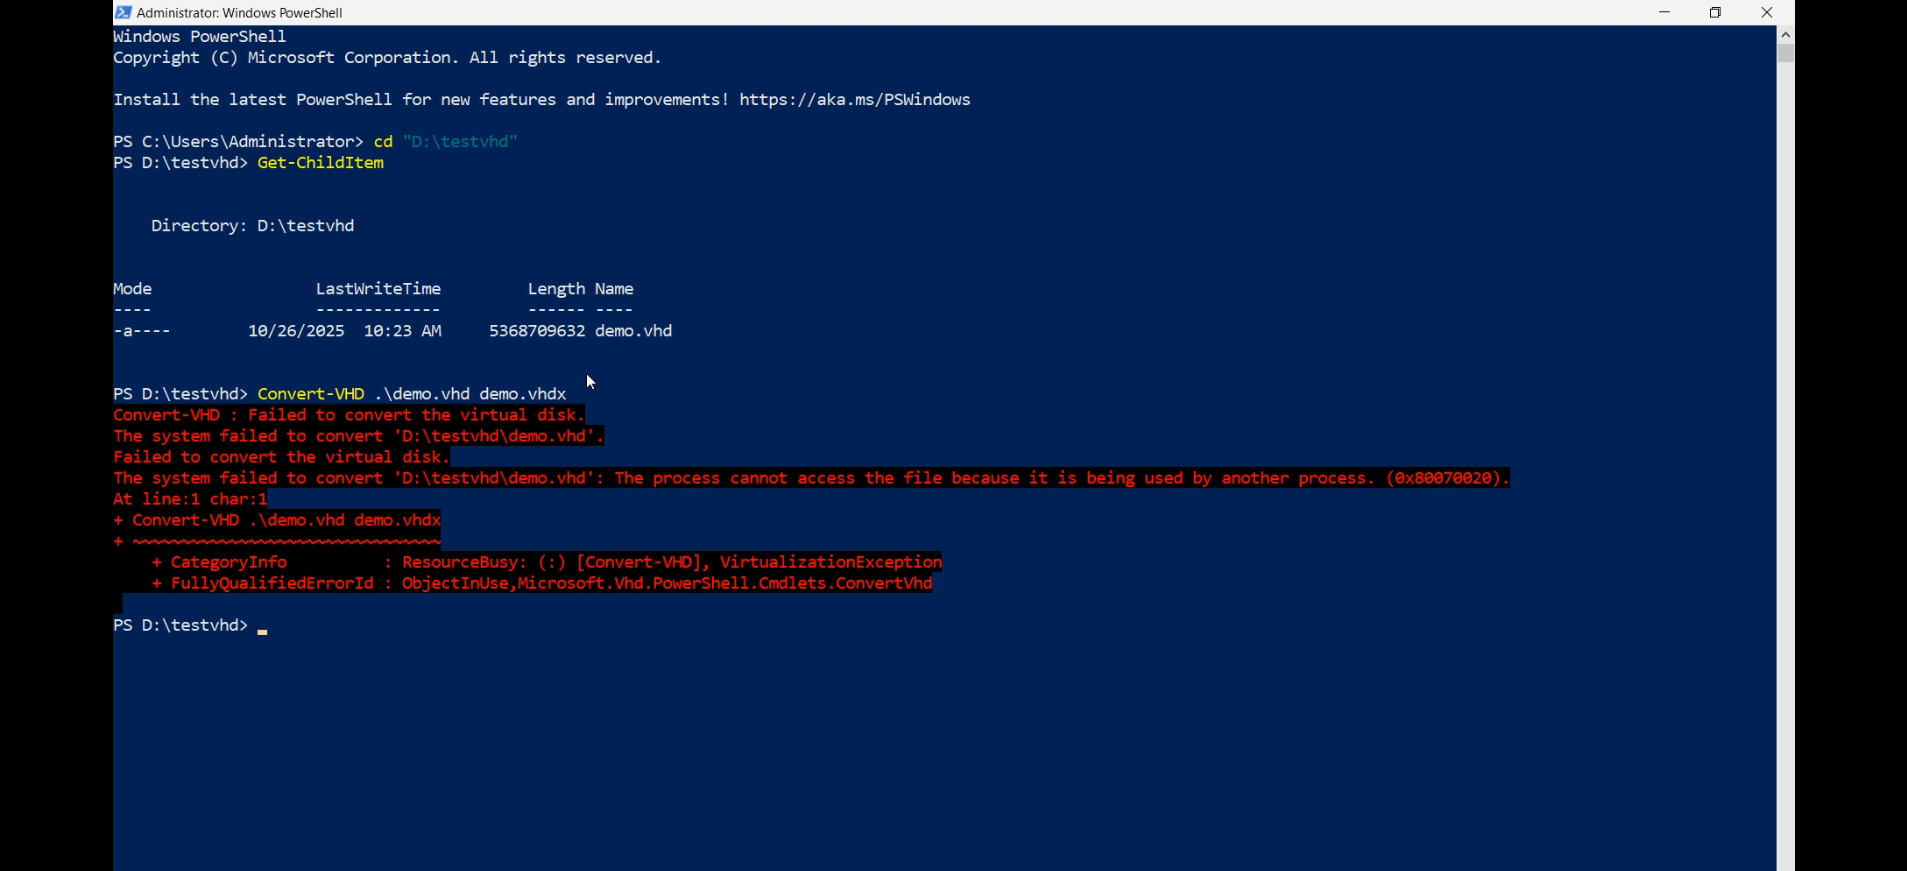
Wizard runs through… and fails.
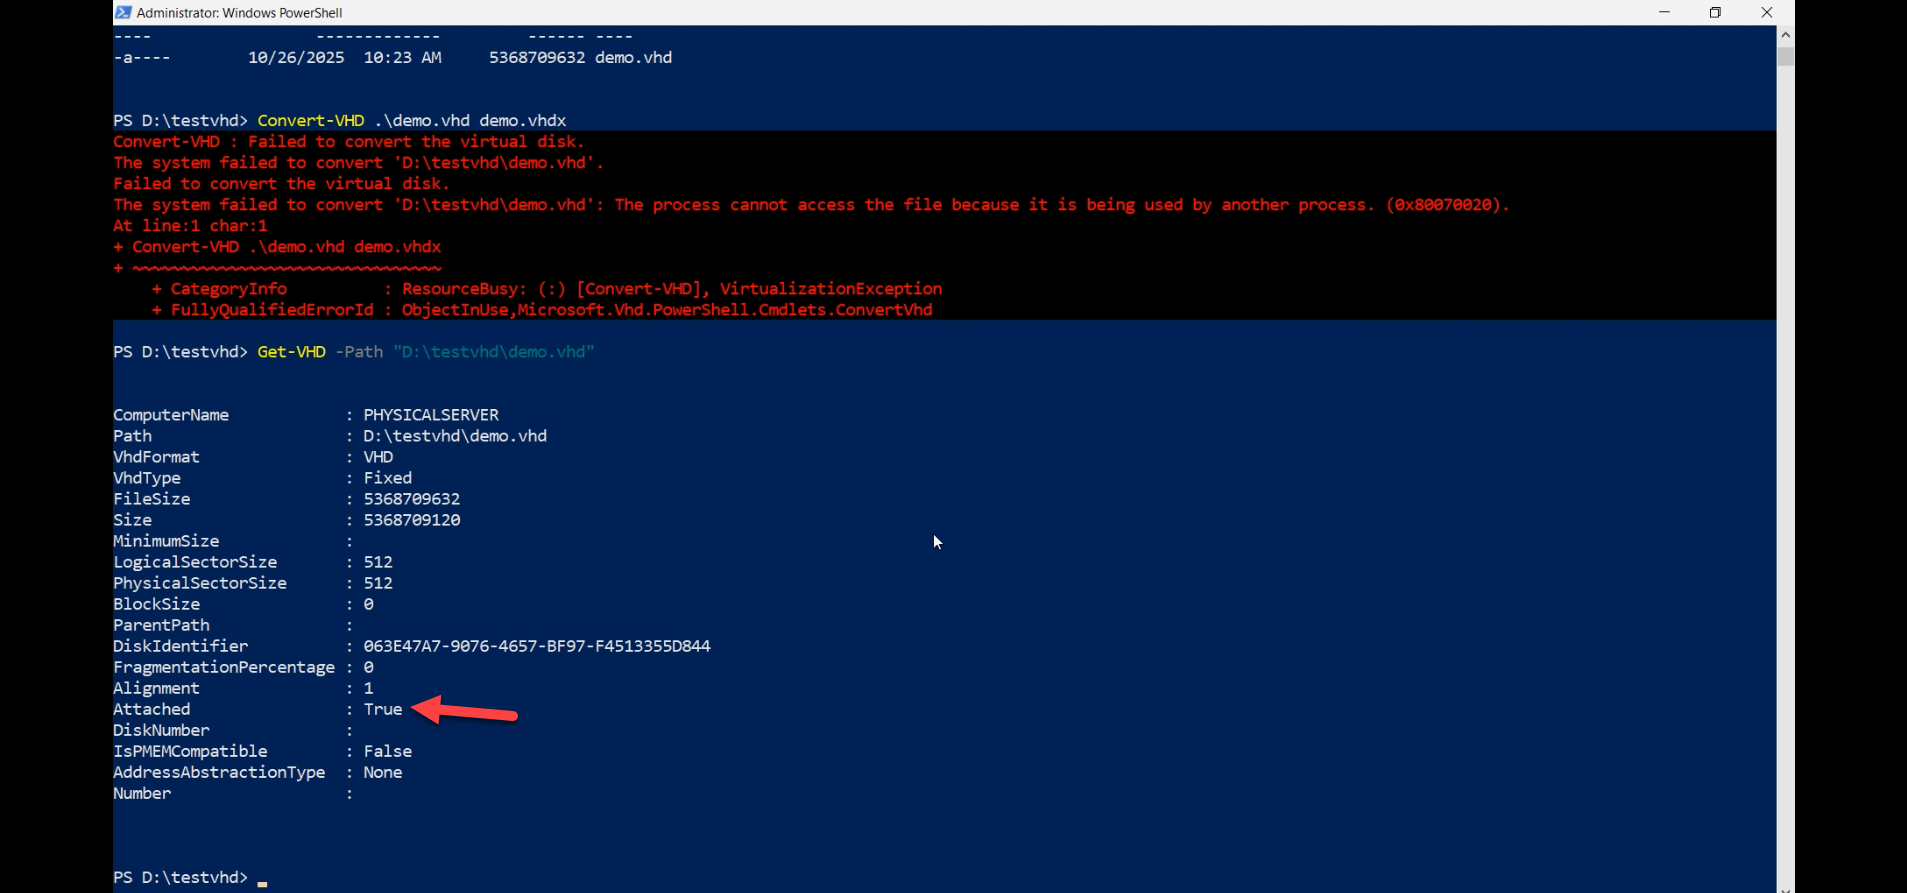
Error: the file is in use by another process. The “another process” is Hyper-V’s worker process (vmwp.exe) which holds the disk open exclusively while the VM is running. Conversion needs exclusive access to write the new file.
This is the lesson. Detach first, convert second. The error is harmless — nothing is corrupted; the conversion just didn’t happen.
Step 2 — detach the disk
VM Settings > SCSI Controller > select the Hard Drive entry > Remove > Apply.
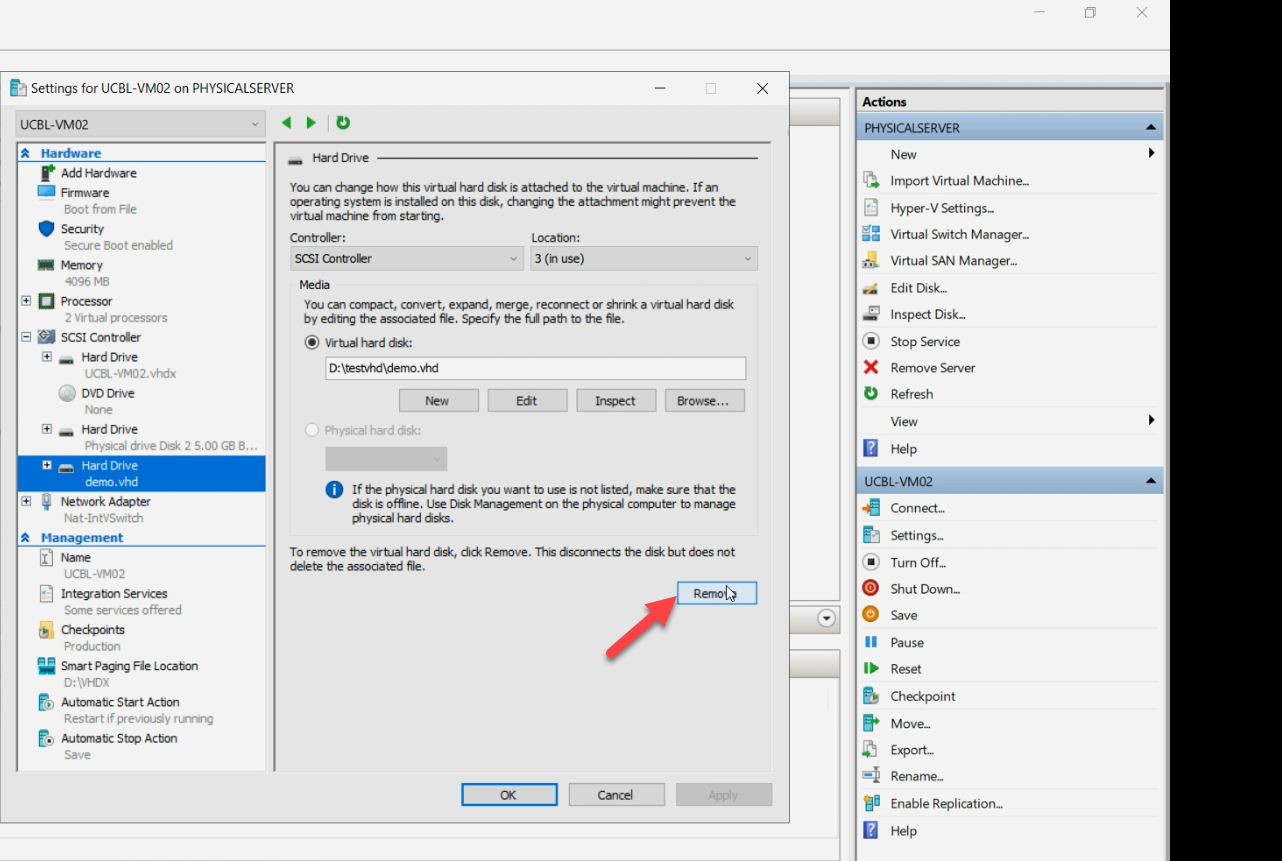
You’re only removing the attachment, NOT the file. The .vhd file remains on the host filesystem; the VM no longer has a reference to it. The VM continues running (now with one less disk).
Alternative: shut down the VM entirely. The conversion works either way. For VMs that can tolerate a brief outage, shutting down is simpler. For VMs that can’t, just detach the specific disk and leave the VM running.
Step 3 — run Edit Disk wizard, this time successfully
Hyper-V Manager > Edit Disk > pick the .vhd file again > Convert.
This time the wizard advances:
- Choose Action: pick Convert (other options are Compact, Expand, Merge — not what we want here).
- Choose Disk Format: pick VHDX.
- Choose Disk Type: pick Fixed or Dynamic. The choice is independent of what the source VHD was — you can convert a Dynamic VHD to a Fixed VHDX or vice versa. For production, Fixed; for general-purpose, Dynamic.
- Configure Disk: name and location for the new .vhdx file. By convention, same folder as the source with the .vhdx extension.
- Summary: review and Finish.
The wizard reads the .vhd, writes the .vhdx, and shows a progress bar. Time to convert scales with disk size:
- 10 GB on local SATA: ~30 seconds
- 100 GB on local SATA: 5–10 minutes
- 1 TB on local SATA: ~1 hour
- NVMe is much faster; network storage is much slower
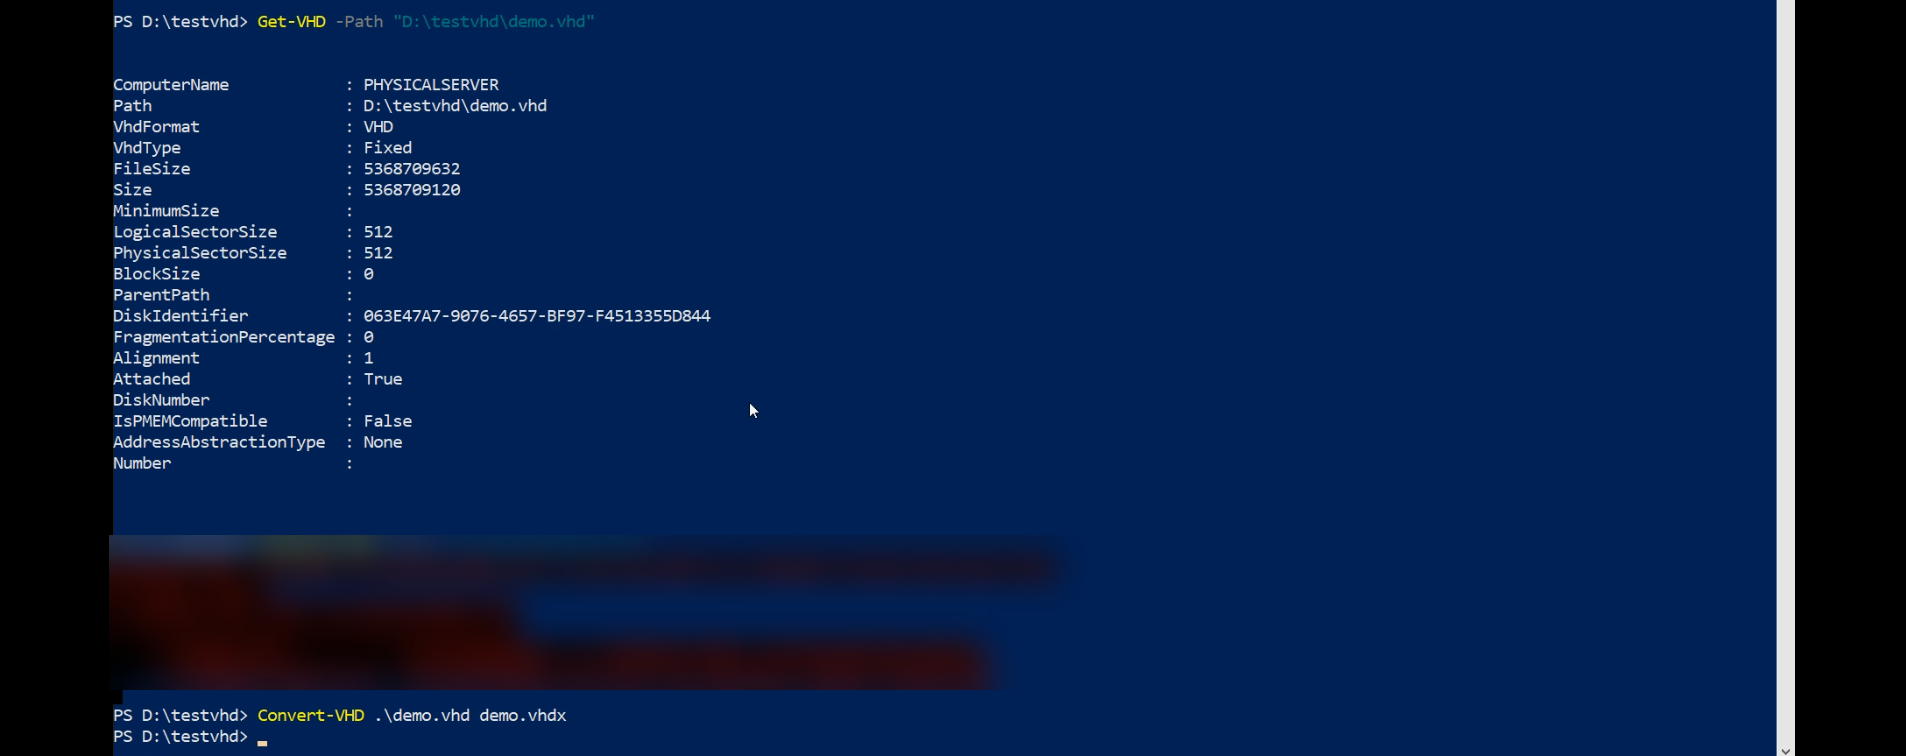
The original .vhd file is left in place — the conversion is non-destructive on the source side. You can verify the VHDX works before deleting the .vhd.
Step 4 — reattach the new VHDX
VM Settings > SCSI Controller > Hard Drive > Add > Virtual hard disk > browse to the new .vhdx file (NOT the original .vhd) > Apply.
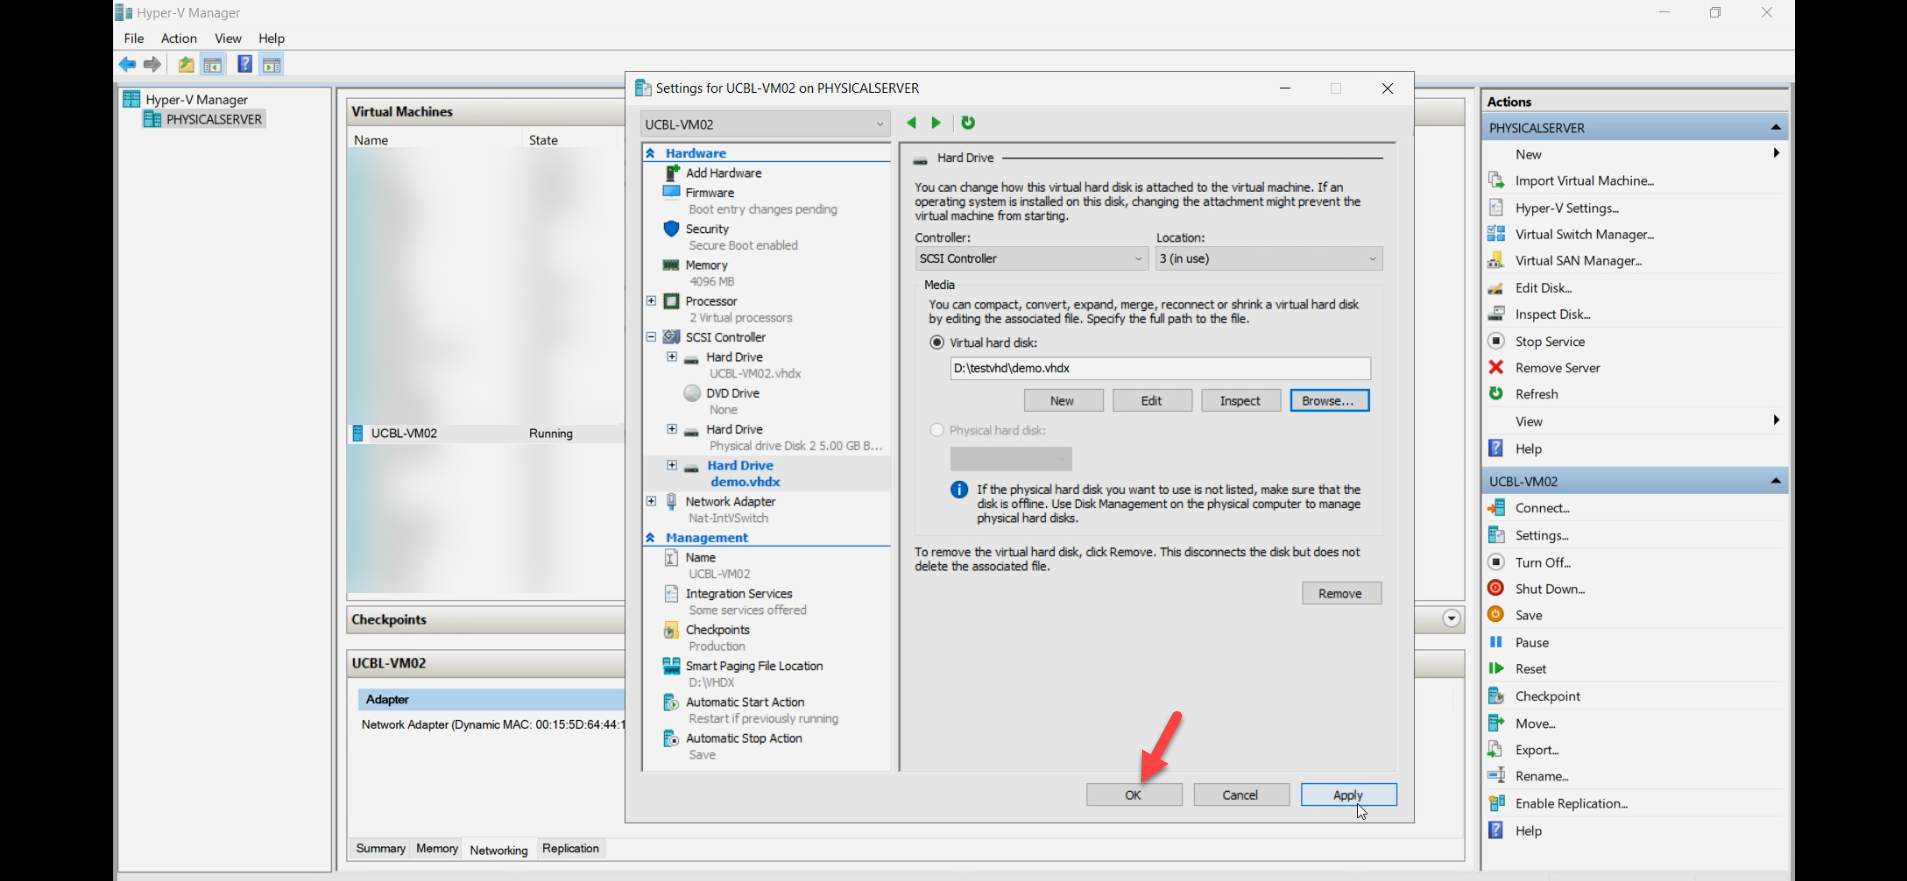
The VM gets the disk back, but now in VHDX format. If the VM was still running during the detach + convert + reattach sequence, the disk just hot-attaches; no boot needed.
Step 5 — verify in the guest
Inside the VM, open Disk Management again.
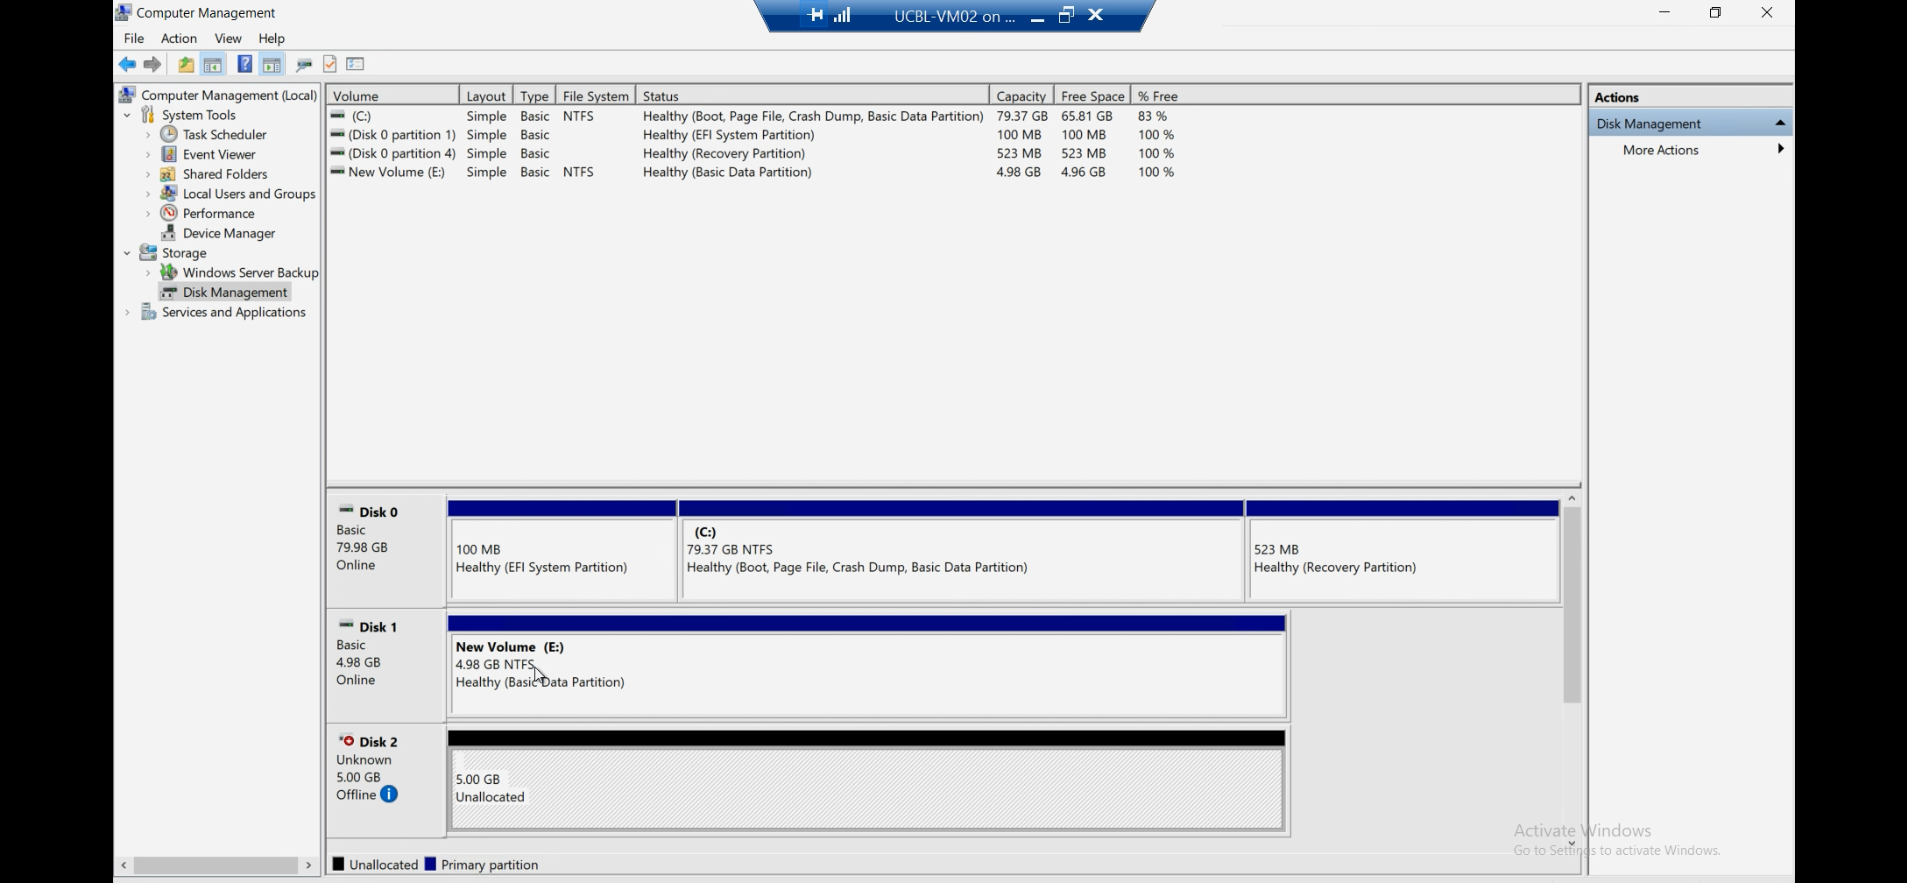
The disk should appear with the same data state as before the conversion. If the VHD had a partition table, volumes, and data, the VHDX has them too — the conversion preserved everything.
Once you’ve confirmed the VHDX works correctly:
- Delete the original .vhd file from the host filesystem to reclaim space.
- If this VHD was the only one referenced in your backup config, update the backup config to point at the new .vhdx file.
The PowerShell one-liner
For batch conversions of many disks, the GUI gets tedious. PowerShell:
Convert-VHD -Path "C:\OldDisks\disk01.vhd" -DestinationPath "C:\NewDisks\disk01.vhdx" -VHDType FixedSame constraints as the GUI: the source disk MUST NOT be attached to a running VM. Wrap in a loop for multiple disks:
Get-ChildItem "C:\OldDisks\*.vhd" | ForEach-Object {
    $dest = $_.FullName -replace '\.vhd$', '.vhdx'
    try {
        Convert-VHD -Path $_.FullName -DestinationPath $dest -VHDType Fixed
        Write-Host "Converted: $($_.Name)"
    } catch {
        Write-Warning "Failed: $($_.Name) - $($_.Exception.Message)"
    }
}
For very large batches, run sequentially — parallel conversions saturate disk I/O and don’t complete faster than serial.
Things that bite people
Trying to convert while the VM is running and the disk is attached
The classic. Wizard fails with “file in use.” Either detach the disk from the VM (no need to shut down) or shut down the VM. Same fix either way.
Confusing Convert with Compact, Expand, or Merge
Edit Disk wizard offers four operations:
- Compact — reclaim space in a Dynamic disk (zero out unused blocks). Doesn’t change format.
- Expand — increase the maximum size. Doesn’t change format.
- Merge — combine a differencing disk into its parent. Doesn’t change format.
- Convert — change format (VHD ↔ VHDX) or type (Fixed ↔ Dynamic). This is what you want.
Pick Convert. The other three are different operations.
Forgetting that Generation 2 VMs require VHDX
If your VM is Generation 2 (Hyper-V’s modern UEFI-based VM type) you can’t boot from a VHD — only VHDX is supported. If a Gen 2 VM has a VHD attached as a data disk, it works fine; but the boot disk MUST be VHDX. If you’re moving a Gen 1 VM’s boot disk to a Gen 2 VM, convert to VHDX first.
Disk space for the conversion
The conversion creates a NEW file alongside the existing one — for the duration of the conversion, you need free space equal to (or greater than) the size of the source disk. For a 1 TB Fixed VHD being converted to a Fixed VHDX, you need at least 1 TB free on the destination drive. Check before starting.
Backup config still points at the old .vhd
You convert, reattach, delete the old .vhd, and your nightly backup fails because it’s still configured to back up the old .vhd path. Update the backup config when you change the disk file. Same applies to any monitoring or scripts that reference the disk by path.
Differencing disks need their parent converted too
If you have a differencing VHD with a VHD parent, converting just the differencing disk doesn’t convert the parent. The chain still references VHD format throughout. To fully migrate to VHDX, either:
- Merge the differencing disk into the parent first (Merge operation), then convert the consolidated disk.
- OR convert the parent disk separately, then update the differencing disk to point at the new parent.
Plan the chain before starting.
Checkpoints prevent conversion
If the VM has checkpoints (snapshots), the disk file is part of a chain (each checkpoint creates a differencing disk). The conversion only works on the BASE file, not the checkpoint chain. Delete checkpoints first via Hyper-V Manager > right-click VM > Delete Checkpoint > Apply now (this merges the chain back to the base), THEN convert.
Conversion is one-way (in practice)
Convert-VHD can convert VHDX back to VHD too, but this is almost never useful — the VHD format limits will reassert themselves. Default direction is VHD → VHDX; the reverse direction is for very specific compatibility scenarios with legacy hosts.
Where this fits
VHD-to-VHDX conversion is a once-per-disk operation that you do when you bump into one of VHD’s limits. Combined with the previous post on attaching disks to VMs and the storage migration posts in the Hyper-V Virtualization pathway, this rounds out the “managing virtual disks” story for Hyper-V deployments. For broader Hyper-V context including VM creation, replica, and live migration, see the rest of the pathway.