If you only ever do one Active Directory backup, it’s the system state backup. System state pulls everything AD needs to come back from scratch — the NTDS.DIT database, SYSVOL, the registry, boot files, COM+ class registration, and the Certificate Services database if the box is a CA. Take this on every Domain Controller, on a schedule, and you’ve covered the worst-case Forest Recovery scenario.
This is the first post in the 6-part AD Backup & Disaster Recovery pathway. We’ll cover scheduled backups, bare-metal test/restore, the conceptual difference between non-authoritative and authoritative restore, and the full ntdsutil authoritative restore procedure across the next five posts. Here we’re going to do the one-time, manual, GUI-driven system state backup using Windows Server Backup — the cleanest place to start.
What “system state” actually contains on a DC
Pick the System state checkbox and Windows Server Backup pulls in every component required to bring AD back. On a Domain Controller, that includes:
- Active Directory database —
NTDS.DITand its transaction logs - SYSVOL — Group Policy templates, scripts, replicated objects
- System registry — all hives
- Boot files — BCD, boot manager
- COM+ class registration database
- Certificate Services database — if the DC also runs AD CS (avoid that in production, but it happens)
- Cluster service info — if applicable
You don’t pick those individually. The system state checkbox handles it. That’s why we’re using Windows Server Backup over a plain file copy — everything required is captured atomically inside one VSS snapshot.
Step 1 — Install the Windows Server Backup feature
Windows Server Backup is an optional feature, not installed by default. Add it via Server Manager > Add Roles and Features.
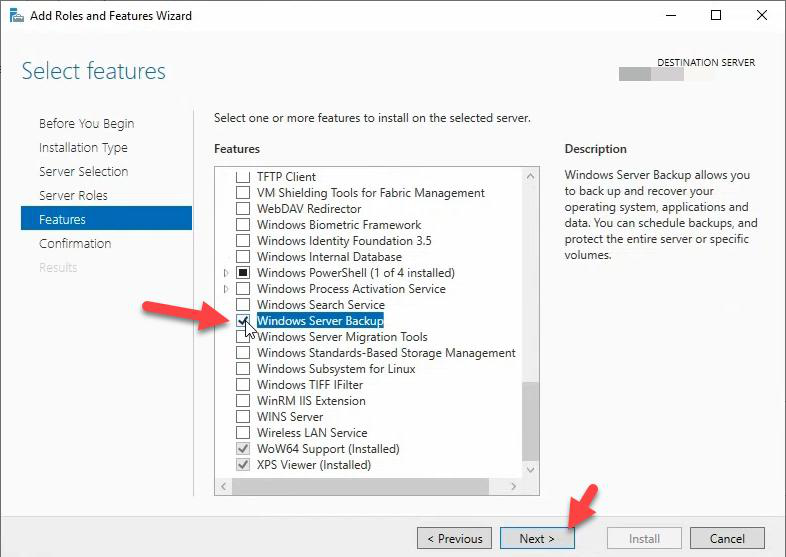

Want the one-line PowerShell version? Install-WindowsFeature Windows-Server-Backup. Same result, no reboot needed.
Step 2 — Enlarge the shadow storage cap on the source volume
This step is the difference between “backup works” and “backup silently truncates”. VSS uses a per-volume shadow storage area. The default cap is roughly 10% of the volume size, which on a small system drive can be smaller than a single AD snapshot.
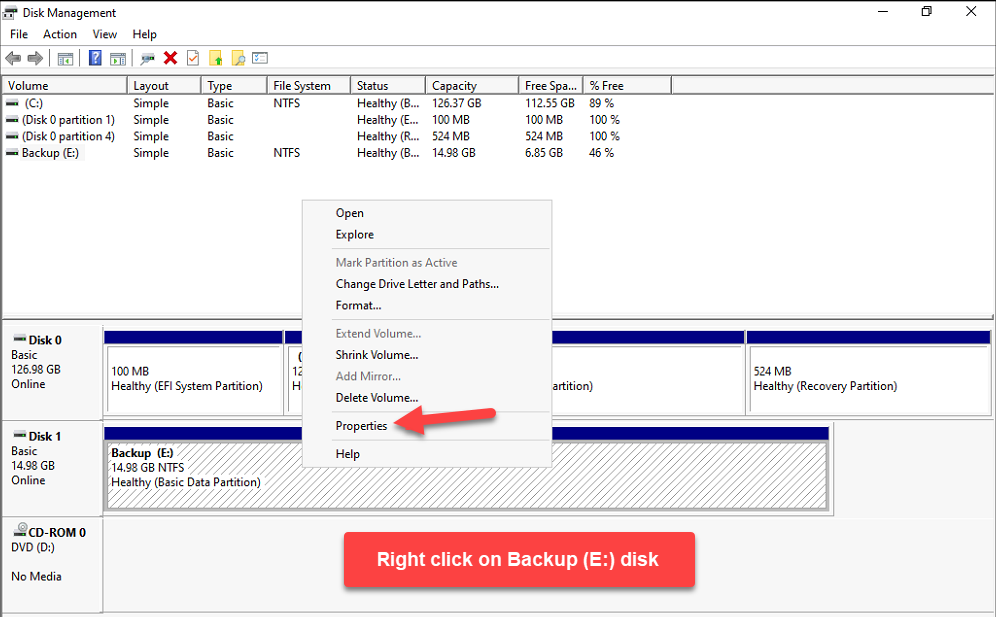
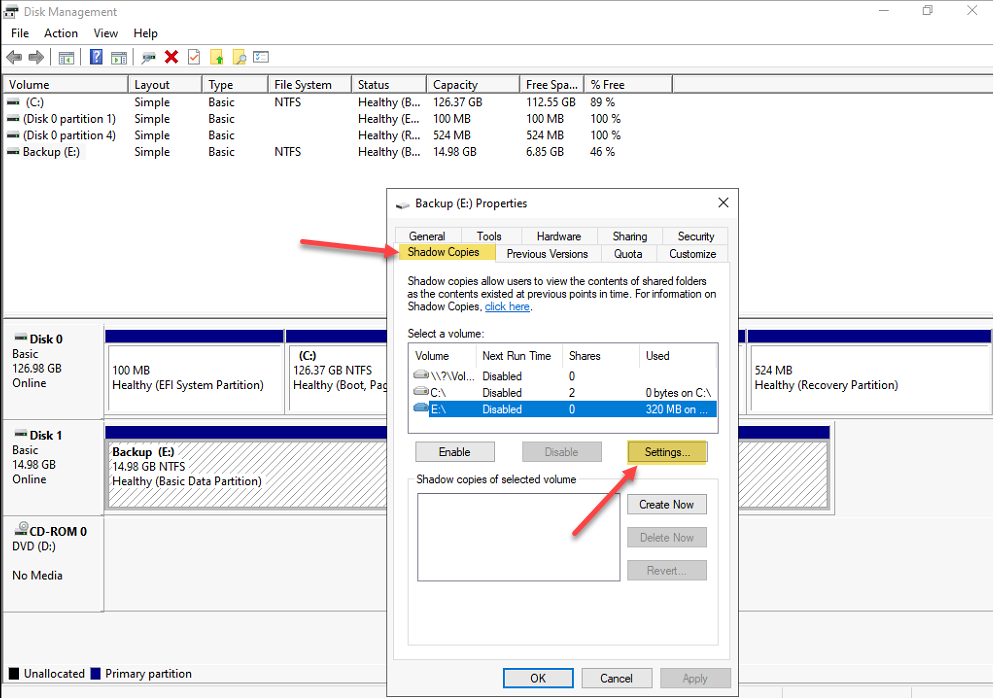
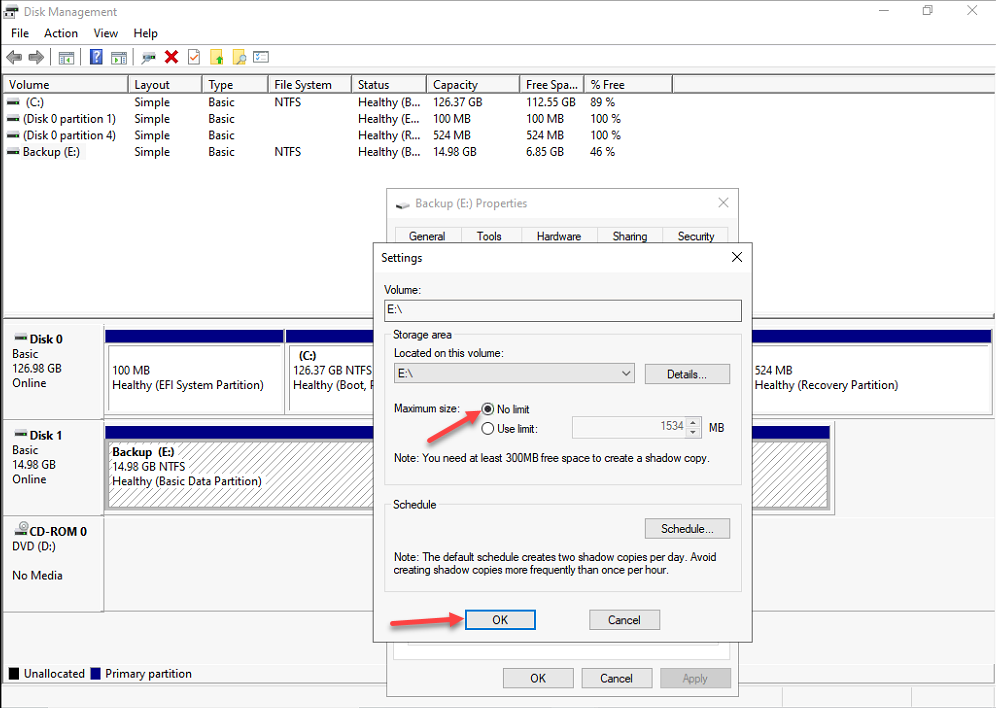
Right-click the source volume in File Explorer > Properties > Shadow Copies tab > Settings > No limit. Repeat on every volume that participates in the backup (most often this is the system drive holding NTDS.DIT).
Step 3 — Launch Windows Server Backup, pick Backup Once

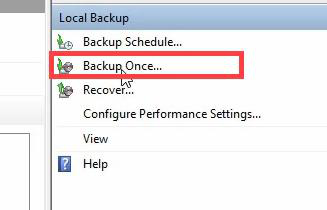
Server Manager > Tools > Windows Server Backup. Click Local Backup in the left pane > Backup Once in the Actions pane. (Scheduled backups are covered in Part 2 of this pathway.)
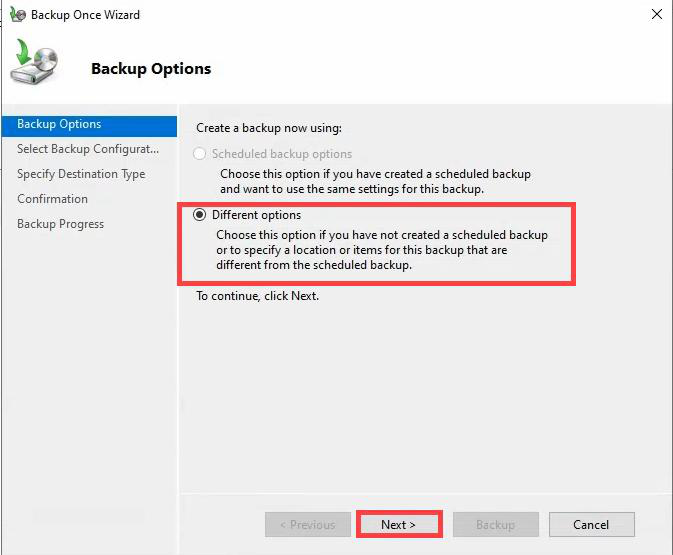
Backup Options page: Different options > Next.
Step 4 — Custom backup, System state only
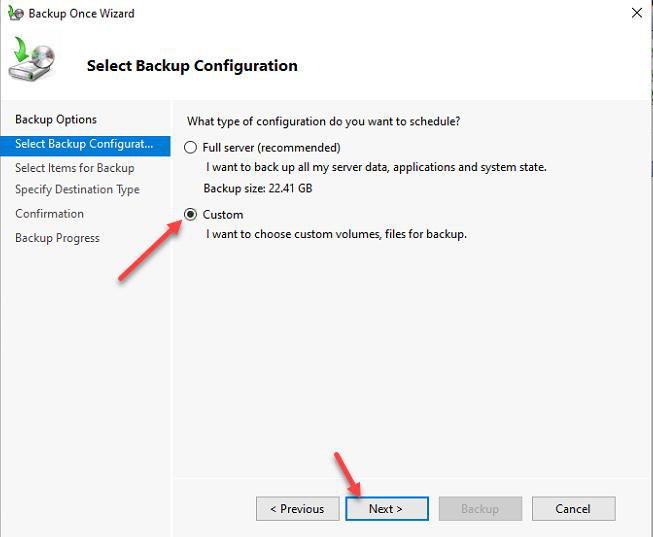
Choose Custom, not Full server. Full server backs up everything (OS + data + apps) and is what Part 3 uses for bare-metal test. Here we only need AD.
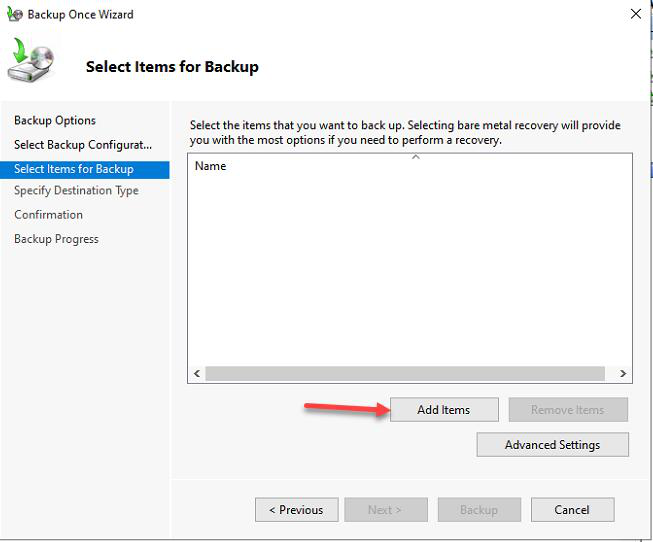

NTDS.DIT, SYSVOL, registry, boot files, COM+ class registration, and (if present) Certificate Services database. That is everything you need to authoritatively recover AD.Add Items > tick System state > OK. The System state node is the umbrella that covers NTDS.DIT, SYSVOL, registry, boot files, and the rest of the components listed above — you cannot pick those individually, only as a group.
Step 5 — VSS Full Backup (this matters)
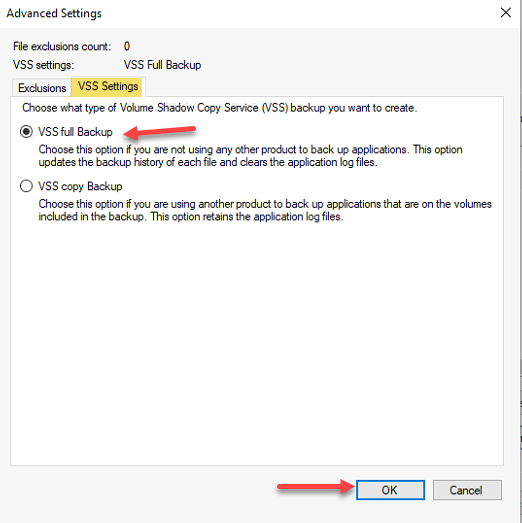
In the Items dialog, click Advanced Settings > VSS Settings > VSS full backup. There are two VSS modes:
- VSS full backup — marks files as backed up, updates the backup history, clears application logs (Exchange / SQL truncate their VLFs). Pick this when Windows Server Backup is your primary backup method.
- VSS copy backup — takes a snapshot but doesn’t update history or clear logs. Use this when a third-party tool (Veeam, Commvault, etc.) is the primary backup and Windows Server Backup is a side artifact — otherwise the two tools fight over backup history.
For an AD DC, VSS full backup is almost always correct.
Step 6 — Destination
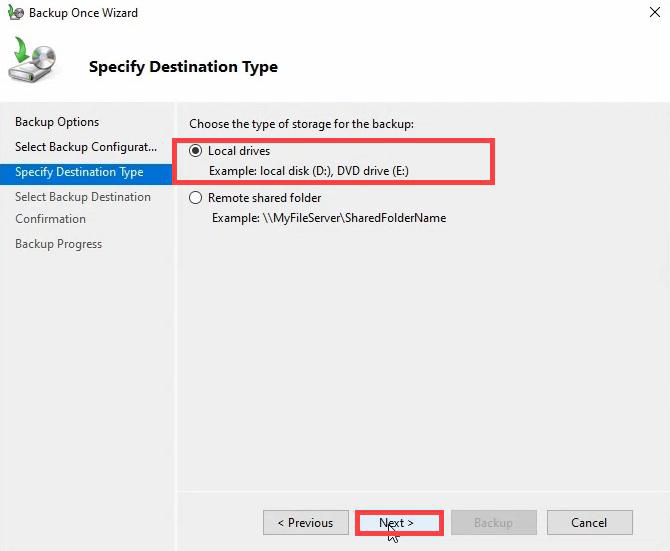
Local drives. Remote shared folder works too, but adds credentials, TCP, and SMB layer to a recovery path you want to be as simple as possible. Use a dedicated disk for backups — not the OS drive, not a SYSVOL volume.
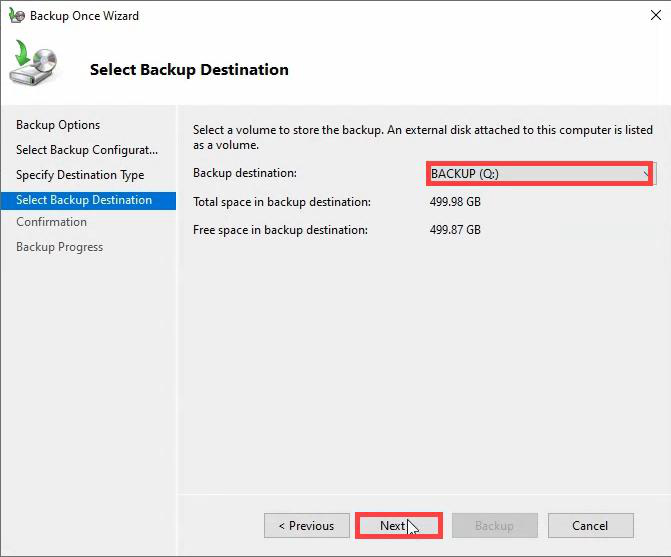
Confirm the destination volume.
Step 7 — Run the backup
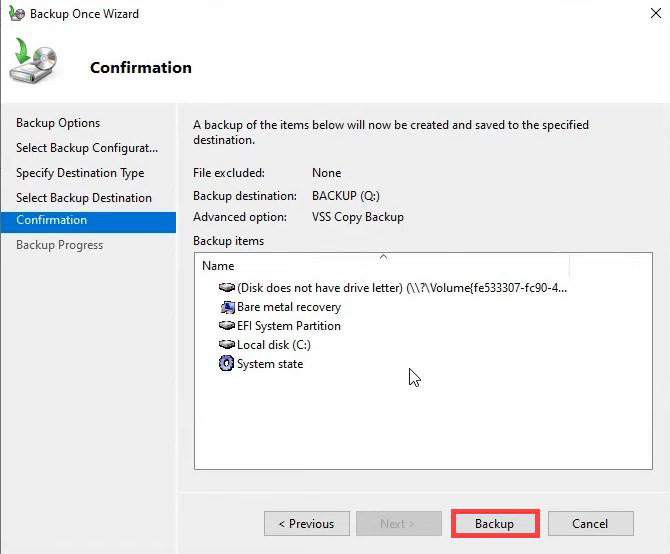
Summary page > Backup. Backup runs in the foreground; don’t close the console.
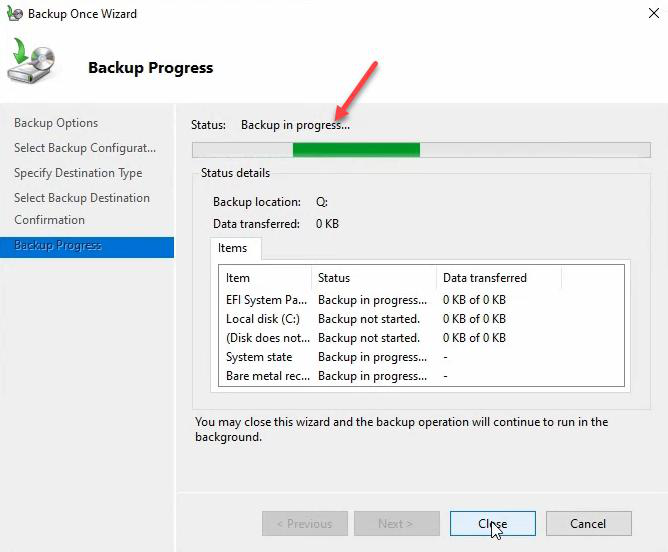
Watch the live progress. VSS creates a shadow copy first, then enumerates system state files and copies them to the destination. A clean AD on a small domain is 14–20 GB. SYSVOL with a heavy GPO load or replicated files can push that much higher.
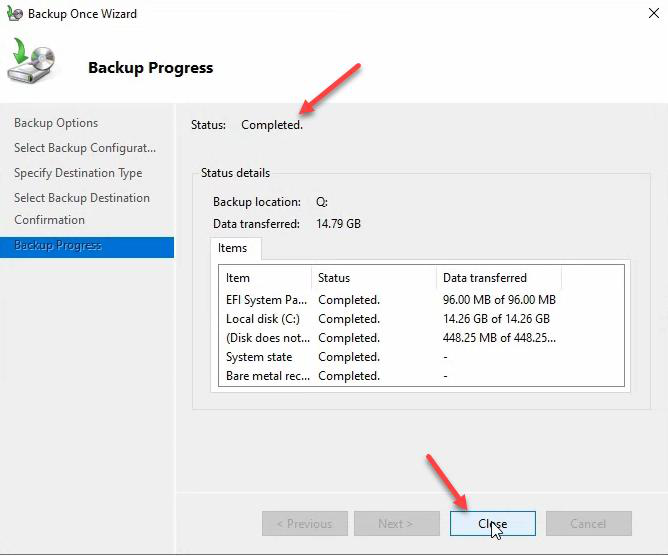
Status: Completed. Item: System state. Done.
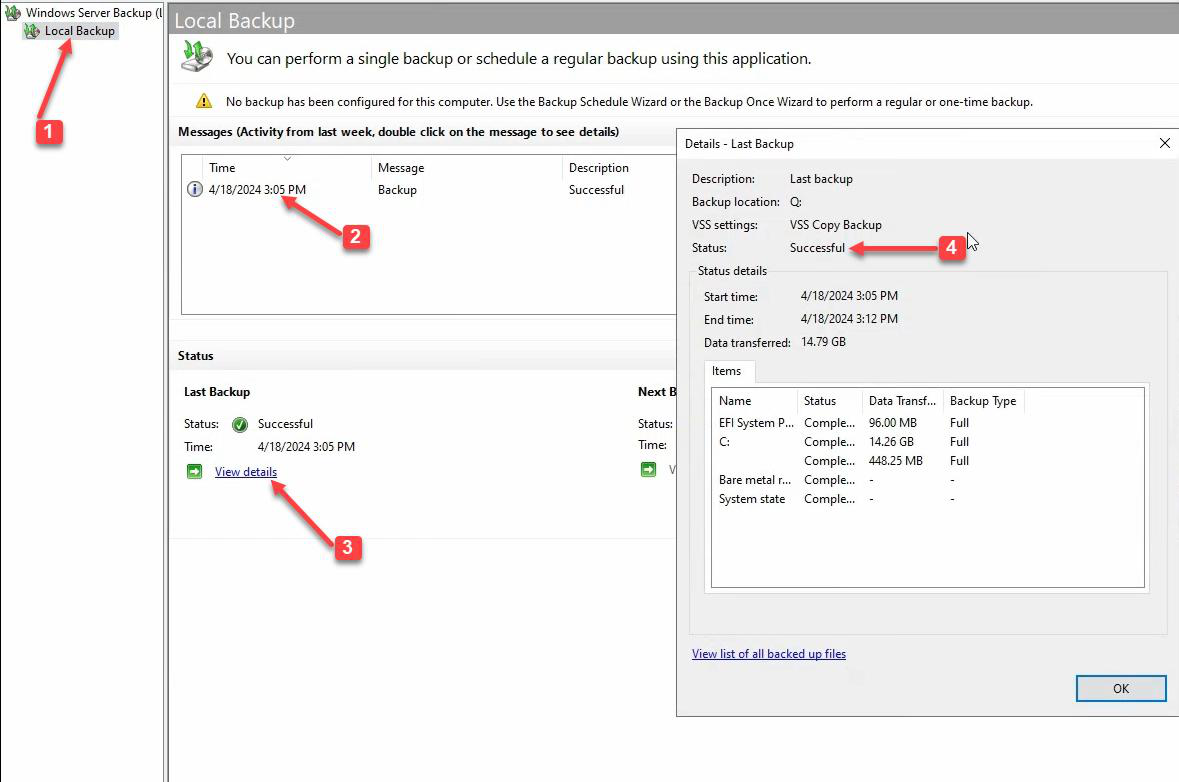
Verify the backup before you trust it
A completed wizard is not a verified backup. Two quick checks:
1. Inspect the backup with wbadmin
wbadmin get versions -backupTarget:E:That lists every backup version on the disk, with timestamp and identifier. Capture the identifier — you’ll need it if you ever drive restore from the command line.
2. List the components in the backup
wbadmin get items -version:<identifier>Confirms System State is in there. If for any reason it’s not, the backup is useless for AD recovery — rerun the wizard.
Things that bite people
Backing up to the same disk that holds NTDS.DIT
If the disk dies, your backup dies with it. Always use a separate physical disk or, better, a separate physical machine reached over the network. Even a USB external drive that gets rotated weekly is better than nothing.
Shadow storage cap left at default
VSS will silently truncate the snapshot when it hits the cap. Backup completes “successfully” with an incomplete shadow copy, and you only discover the gap when you try to restore. Always set No limit on the source volume.
Picking individual SYSVOL files instead of System state
The Custom wizard lets you tick C:\Windows\SYSVOL or individual files. Don’t. SYSVOL by itself isn’t a recoverable AD backup — you also need the NTDS.DIT at the matching USN and the registry hives the DC was running with. Always use the System state node, never piece together AD components by hand.
VSS copy when Windows Server Backup is the primary tool
Backup history never advances, application logs never truncate. After a few weeks SQL or Exchange logs fill the disk. Match the VSS mode to whether this is your primary backup.
Backing up only one DC
If you have two DCs, take System State on both. They have the same database but different USN starting points, and one of them is likely to be your FSMO holder. Backing up both gives you flexibility in a forest-recovery scenario.
No off-box copy
A backup on the same physical host as the DC dies with the host. Once the wizard completes, immediately copy the WindowsImageBackup folder to another machine, NAS, or cloud blob. Test the copy by listing it with wbadmin get versions -backupTarget:<remote>.
What’s next
Part 2 walks through automating this exact wizard with a daily 11:00 PM schedule using Windows Server Backup’s Backup Schedule wizard — plus the Task Scheduler tweaks that make the scheduled task survive long runs and on-demand kicks.