A roaming profile follows a user across machines: log into PC-A, place a folder on the desktop, log out, then log into PC-B and the same desktop is waiting. The mechanism is straightforward — the user’s profile (Desktop, Documents, AppData, registry hive) is stored on a central file share instead of locally, downloaded on logon, modified during the session, and uploaded back at logoff. Done well it eliminates the “works on my PC” problem for users who hot-desk between machines, kiosks, or shift-share workstations. Done badly it produces slow logons, duplicate “username.V6” folders nobody can clean up, and AppData syncing horror stories.
This walkthrough configures roaming profiles end to end on Windows Server 2022 + Windows 10 / 11 clients: AD security group, hidden SMB share with the right ACL, user profile-path attribute, GPO that grants Administrators read access to the roaming profile folders, and a verified test on a domain client.
What a Roaming Profile Actually Stores
The profile contains everything that lives under C:\Users\<name>: Desktop, Documents, Pictures, Downloads, AppData (which holds Outlook OST cache, browser cache, app settings, and the user’s registry hive NTUSER.DAT). Roaming syncs all of that to the share by default. The size matters — a 200 MB profile syncs fast; a 10 GB Outlook cache adds 2 minutes to every logon and logoff.
The standard production pattern is roaming profile + folder redirection together: roam the registry hive and a small set of settings; redirect Documents / Desktop / Downloads / Pictures to a separate share so they are not copied at every logon. Folder redirection is a separate topic; this article covers the roaming-profile foundation it sits on.
Without a Roaming Profile
For comparison, the default behaviour without any roaming profile configured: each domain-joined PC creates its own local profile under C:\Users\<name> the first time the user signs in. The profiles are independent — what the user does on PC-A stays on PC-A. PC-B has its own fresh local profile with nothing carried over. If PC-A’s drive fails, every desktop file and app setting on it is gone.
Step 1: Create the AD Security Group
The group is the membership filter for the share permissions later. Open ADUC, navigate to the OU you want, right-click → New → Group:
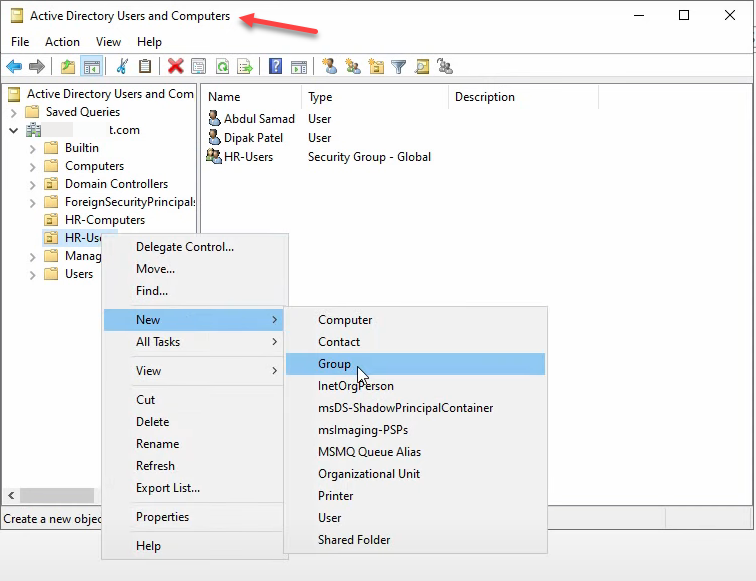
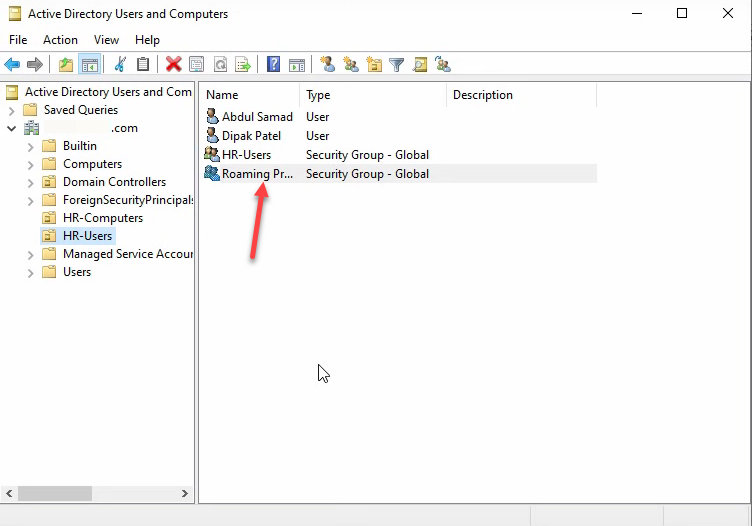
Name it Roaming Profiles Users, scope Global, type Security:
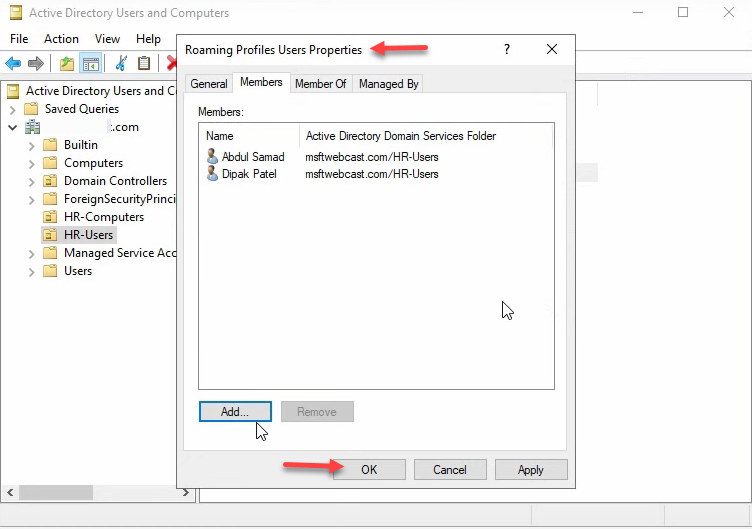
Add the test users to the group via Properties → Members:
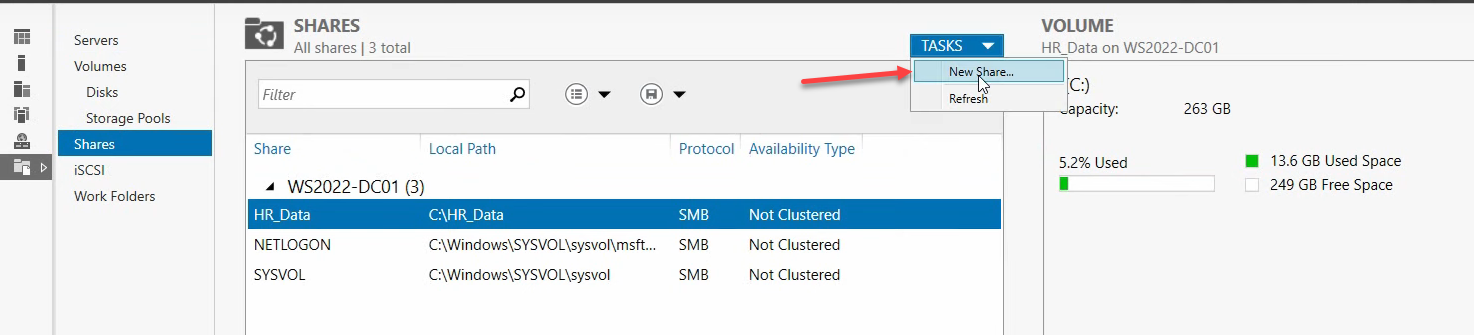
Step 2: Create the Hidden SMB Share
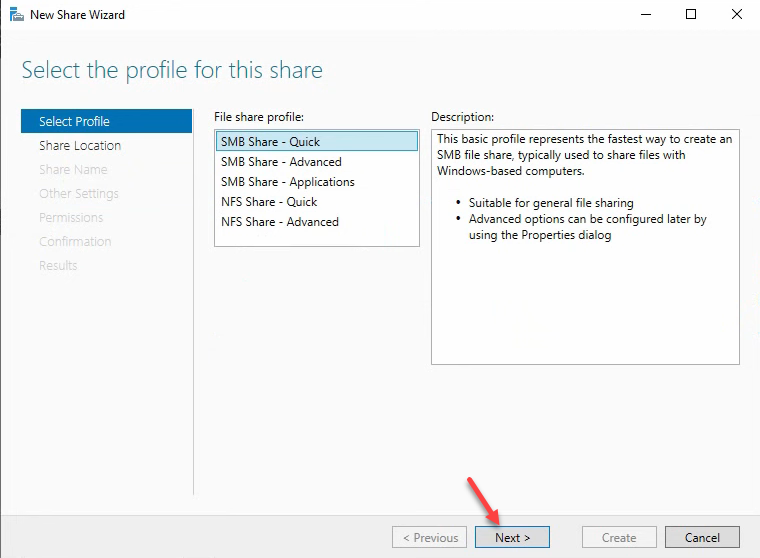
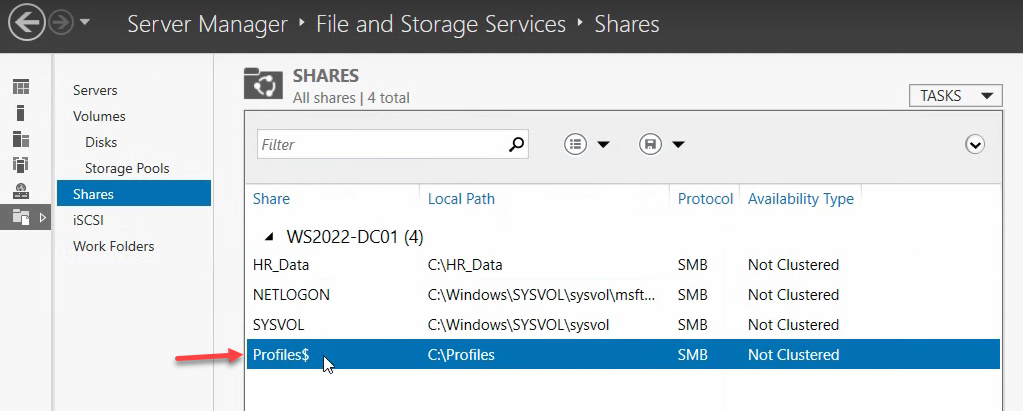
In production, this share lives on a dedicated file server, not the DC. For the lab walkthrough we are using WS2022-DC01 for simplicity. From Server Manager › File and Storage Services › Shares, click Tasks → New Share:
Pick the SMB Share – Quick profile:
For the location, pick the server, choose Type a custom path, and create a folder named profiles on the C: drive (production: a non-OS drive):
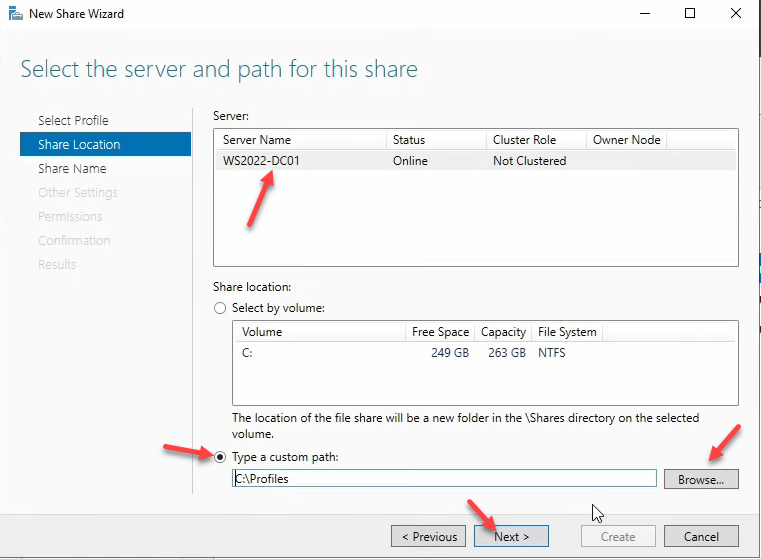
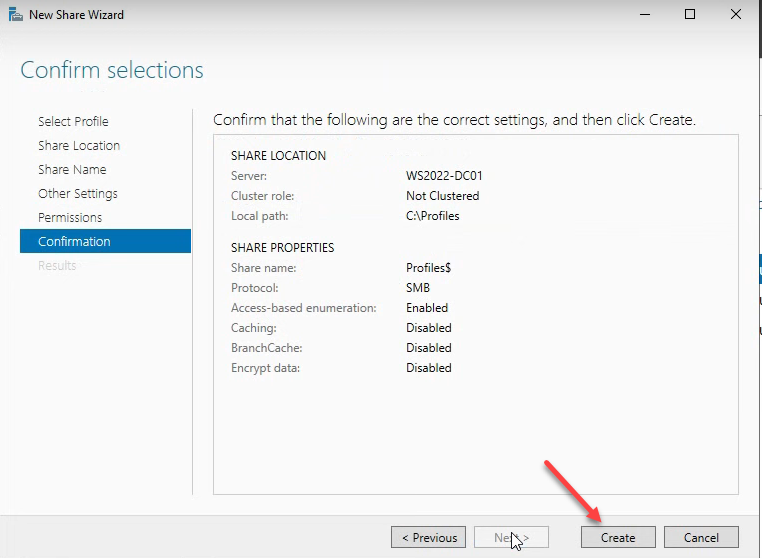
profiles at C:\profiles. In production, point this at a dedicated file server, not the DC.Share name profiles$. The $ hides the share from the network-browse list:
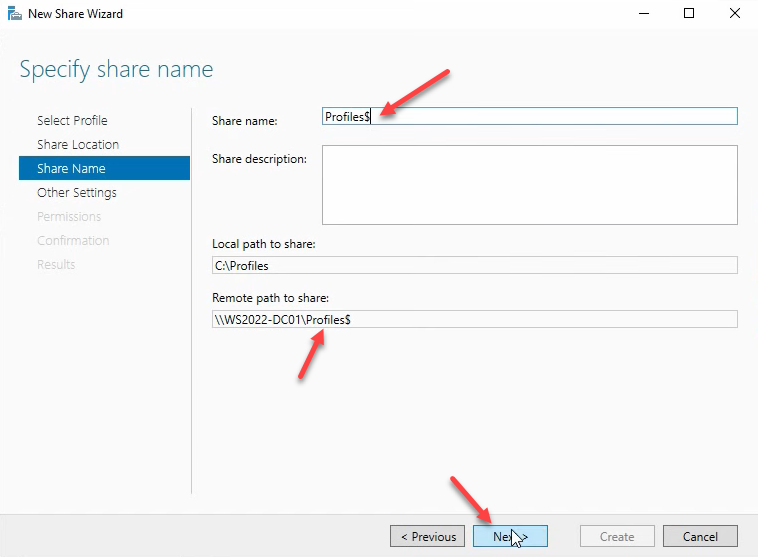
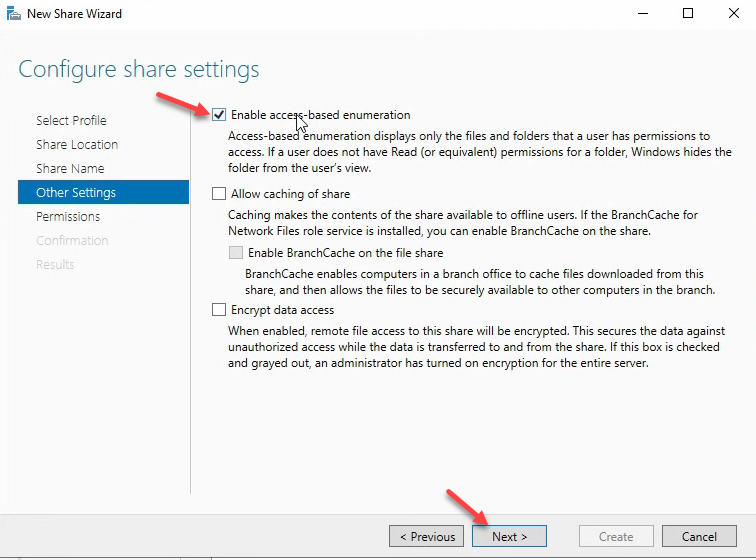
profiles$. The trailing $ hides the share from the network browse list. Users who know the path can still connect; users browsing \\server in File Explorer cannot see it.Other settings: uncheck Allow caching of share (offline-files do not belong on roaming profiles), check Enable access-based enumeration (users only see their own folder when listing the share):
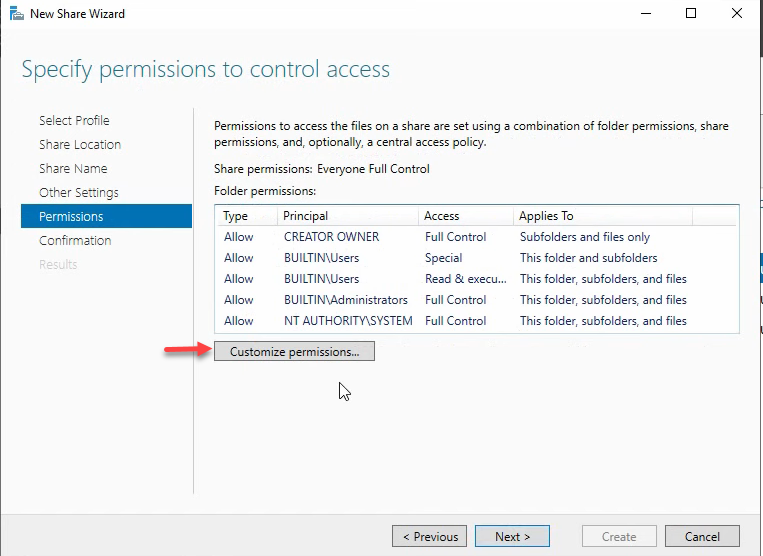
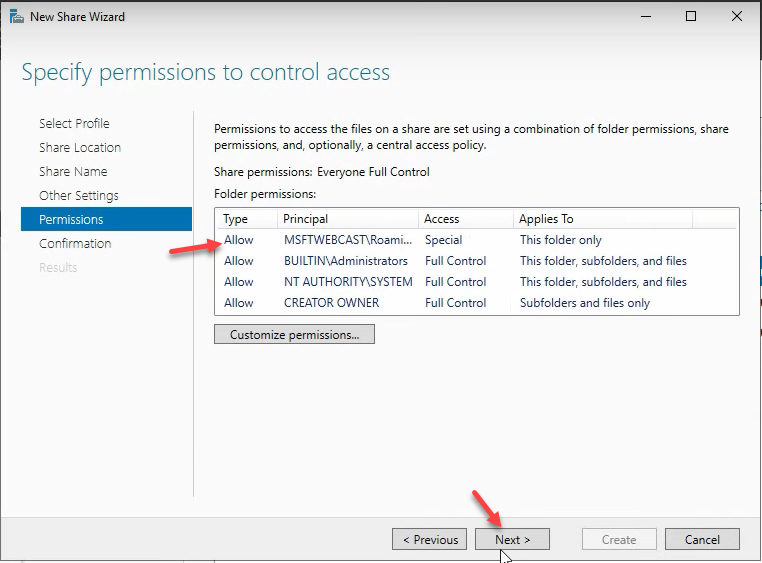
Custom Permissions
The default share + NTFS ACL is too permissive. Customize permissions to give the Roaming Profiles Users group exactly enough to create their own folder and nothing more.
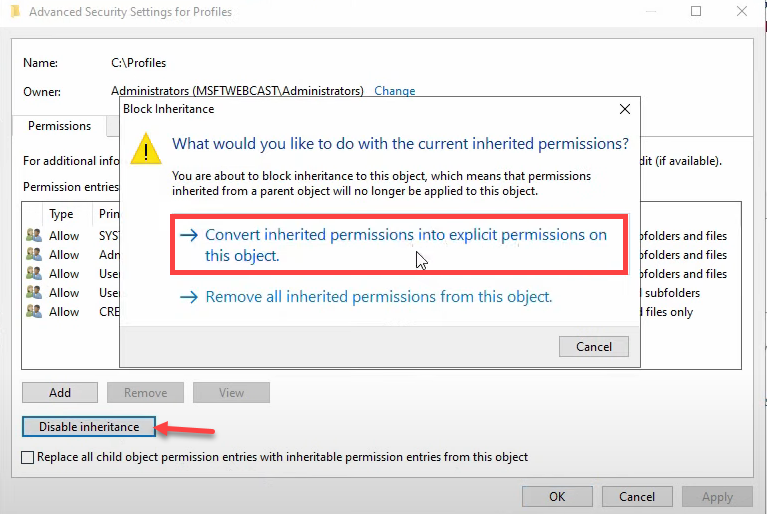
profiles$.Disable inheritance and convert to explicit:
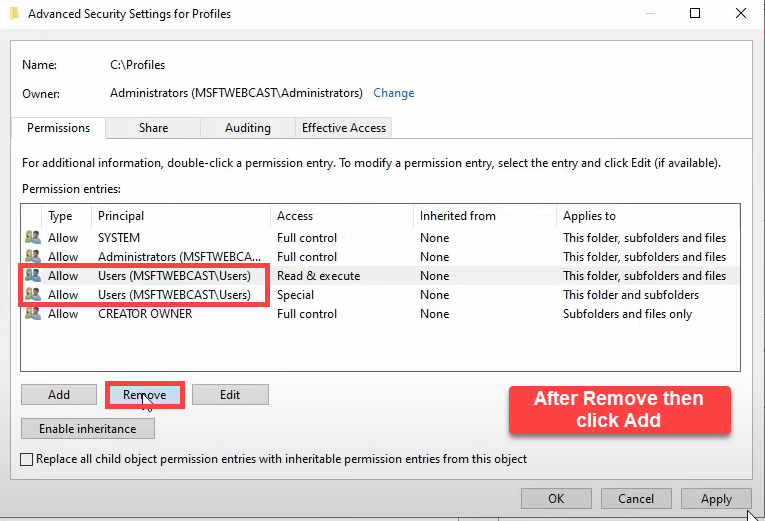
Add a new principal:
Type Roaming Profiles Users, click Check Names, OK:
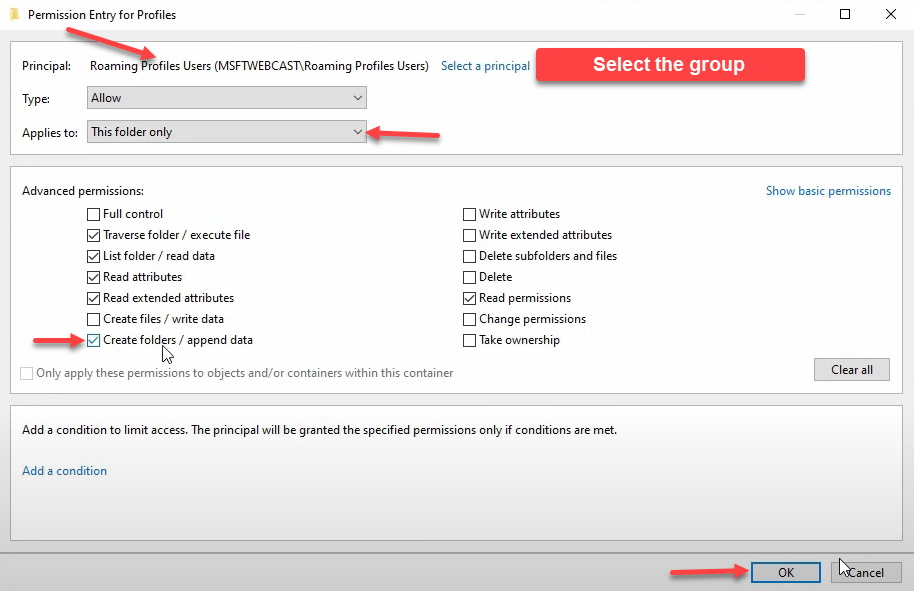
The permission entry needs Type: Allow, Applies to: This folder only:
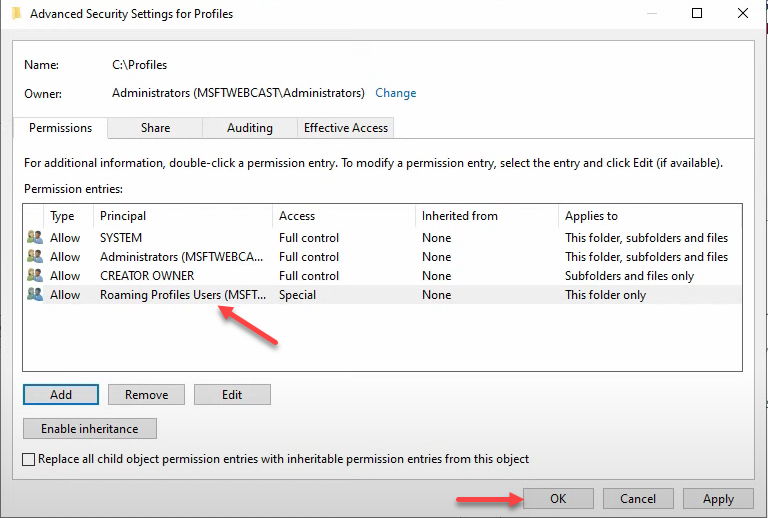
In Show advanced permissions, check only Create folders / append data. That is the minimum permission — group members can create their own profile folder; they get no rights on subfolders, so each user only owns their own profile:
Click OK through the dialogs. Confirmation page summarises everything:
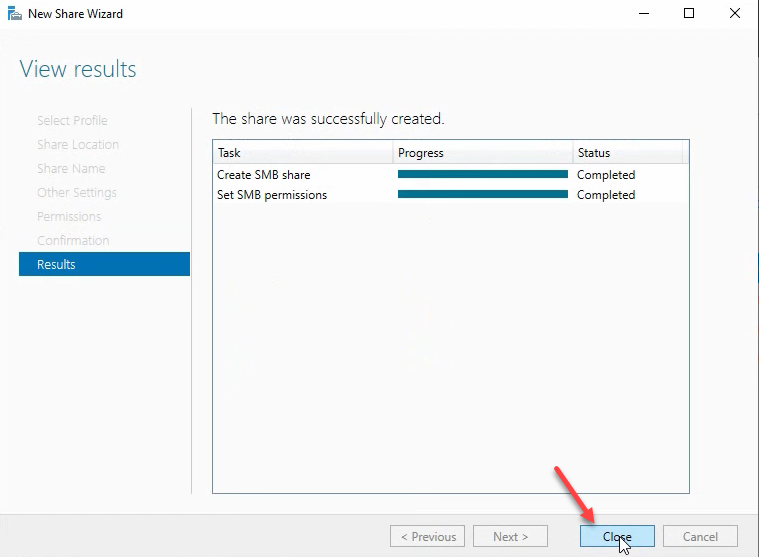
The share is now live at \\WS2022-DC01\profiles$:
Step 3: Set the Profile Path on User Accounts
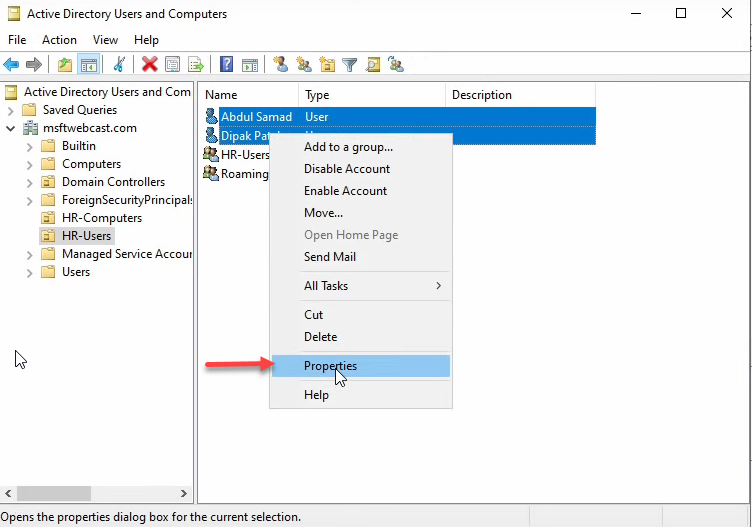
Back in ADUC, multi-select the users (or open one at a time) and pick Properties. Multi-select applies the same change to every selected user:
Switch to the Profile tab. Check Profile path and enter \\WS2022-DC01\profiles$\%username%:

\\WS2022-DC01\profiles$\%username%. The %username% token expands per user when the change is applied.%username% is the expansion token. AD substitutes the user’s logon name when applying the change. Re-open one user’s Properties to verify — the path now contains the resolved name with a .V6 suffix:
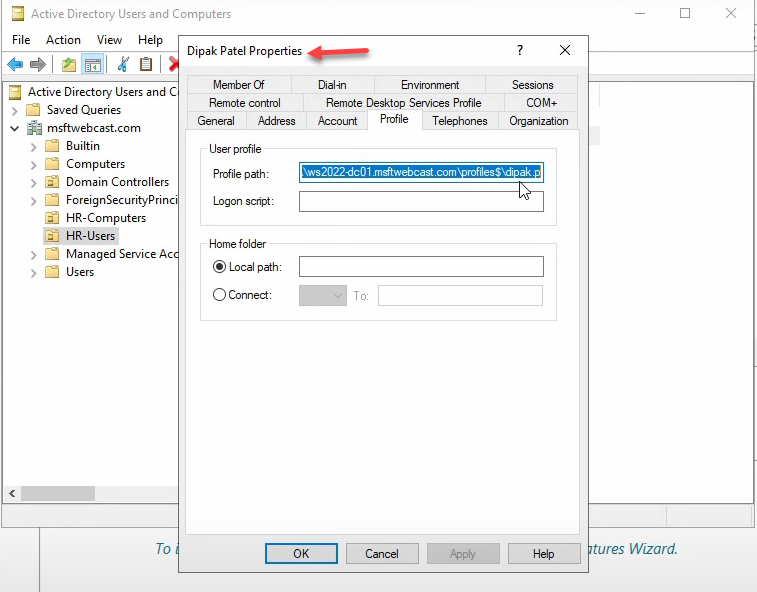
%username% token has resolved to the actual logon name (Deepak.P.V6 for Windows 10 / 11).The .V6 suffix. Windows appends a version to the profile folder name so different OS major versions do not collide:
- .V2 — Windows Vista / 7 / Server 2008 (R2)
- (none) — very old OS
- .V5 — Windows 8.1
- .V6 — Windows 10 / 11 / Server 2016 / 2019 / 2022
The same user logging into a Server 2008 R2 machine and a Windows 11 machine ends up with two separate folders — Deepak.P and Deepak.P.V6 — and they do not sync to each other. This is intentional; the AppData layout differs between OS versions and merging would corrupt application state.
Step 4: GPO — Add Administrators to Roaming Profile Folders
By default, only the user owns their profile folder. Administrators cannot read it for backup, troubleshooting, or migration. There is a Group Policy that fixes this once and forever, but it must be in place before the first roaming profile is created — once a folder is created with the user as sole owner, the policy does not retroactively add Administrators.
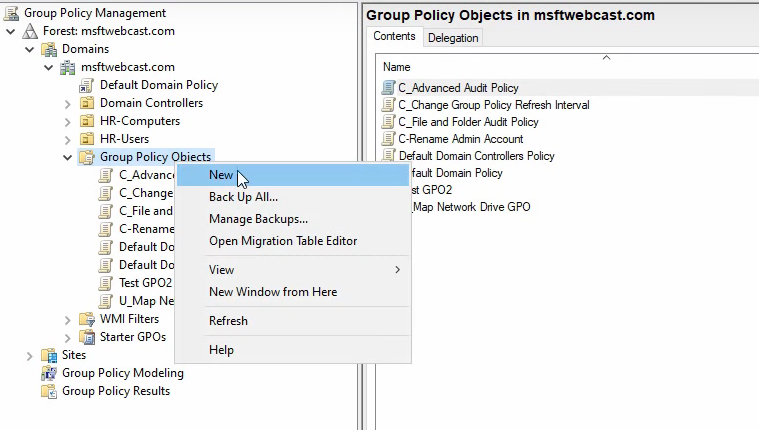
In Group Policy Management, right-click Group Policy Objects → New:
Name it descriptively:

Right-click the new GPO → Edit:
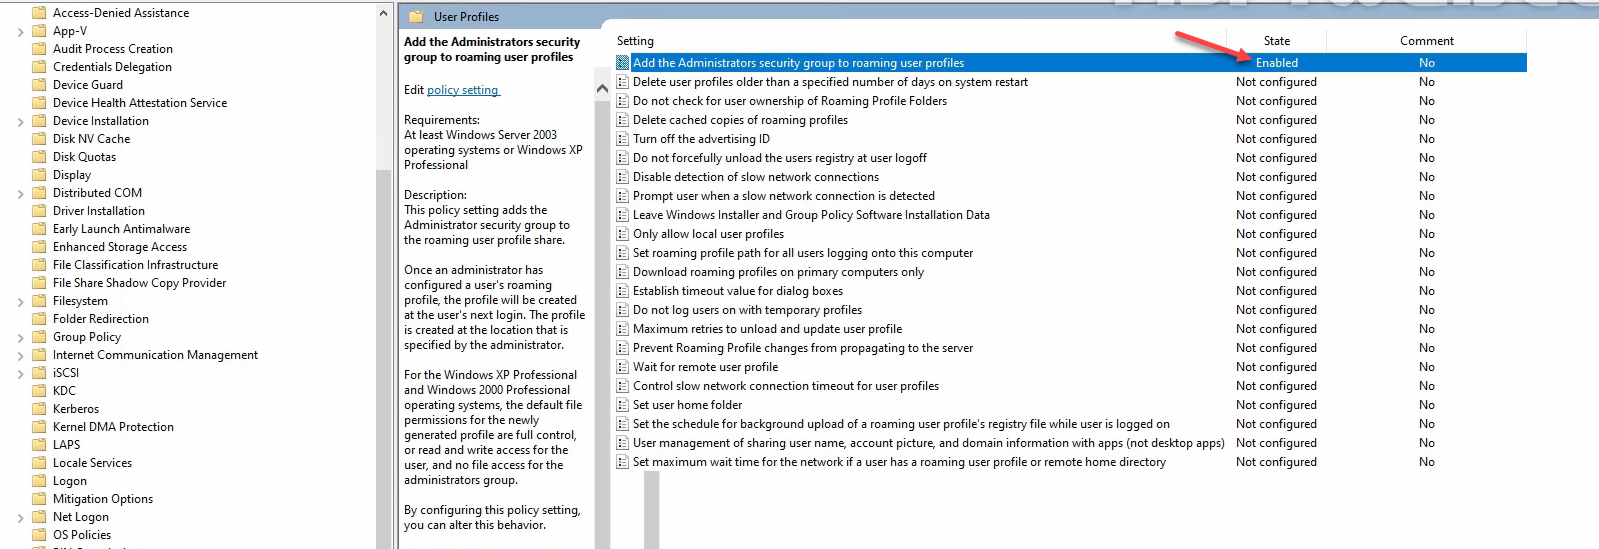
Navigate to Computer Configuration › Policies › Administrative Templates › System › User Profiles:
Find Add the Administrators security group to roaming user profiles and set it to Enabled:
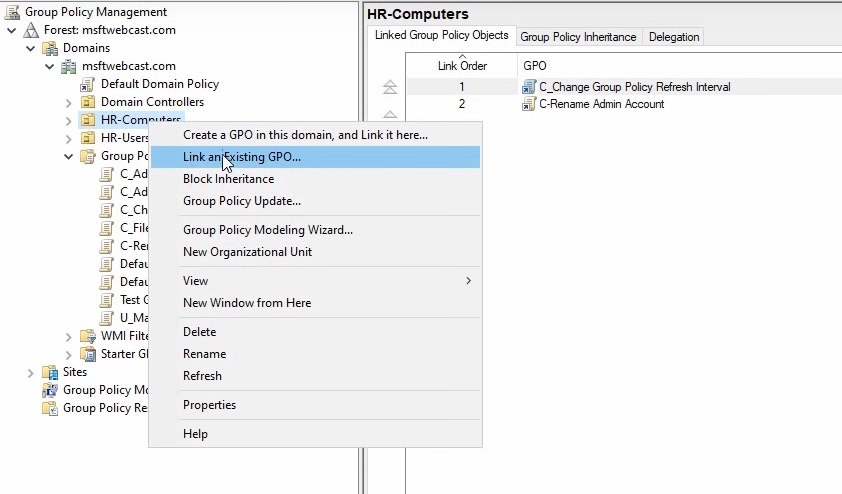
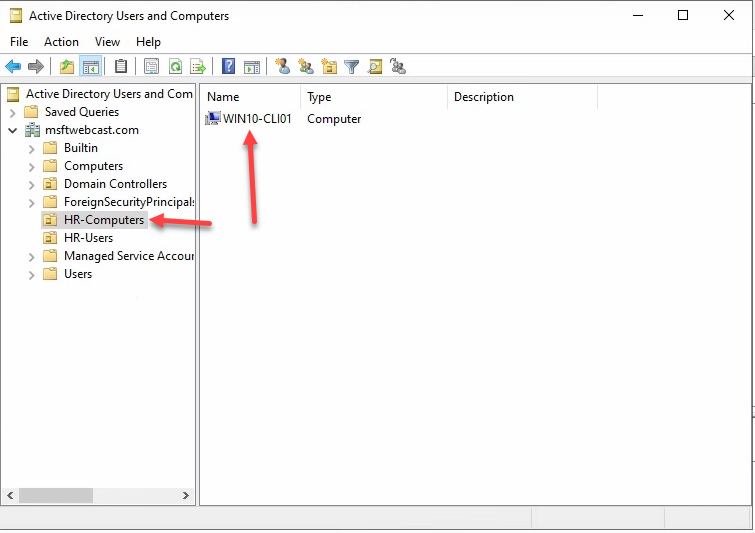
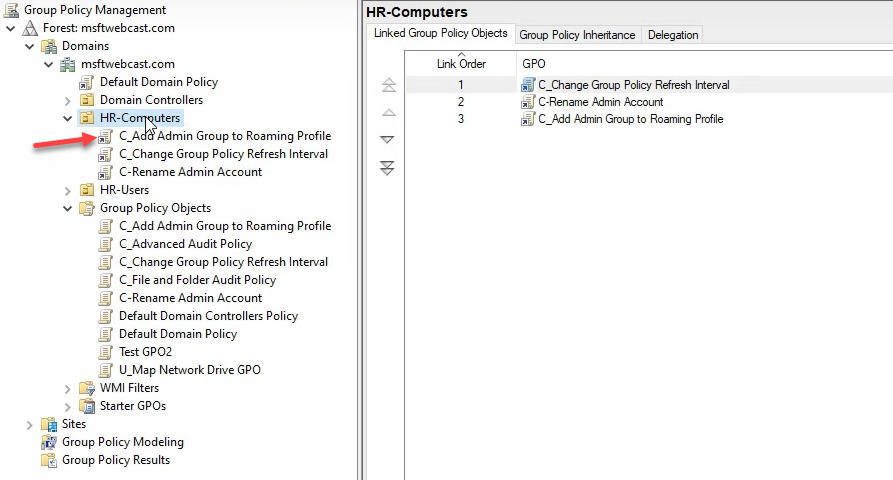
Link the GPO to the OU that contains the client computers (here HR Computers) — not the OU that contains the user accounts. The setting takes effect at the client side, so it has to scope to computer objects:
Step 5: Test on a Windows 10 / 11 Client
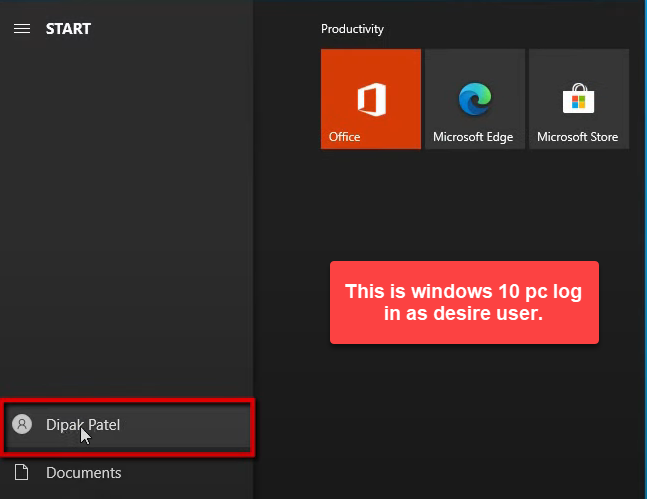
Sign in to the client as the test user (smart\Deepak):
From an elevated Command Prompt, force a Group Policy refresh so the client picks up the Administrators-to-roaming-profile policy:
gpupdate /force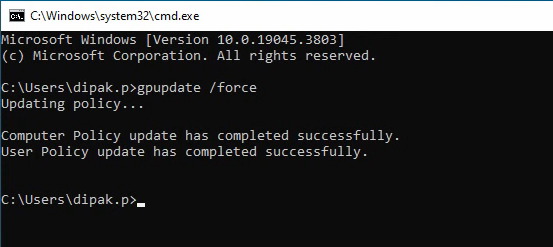
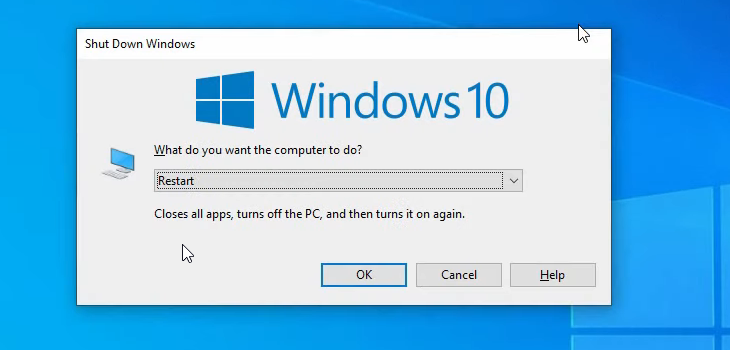
gpupdate /force from an elevated Command Prompt to pull the new computer GPO. The Administrators-to-roaming-profiles policy applies on the next user logon after a reboot.Reboot the client — the policy is computer-side and applies fully on next boot:
After the reboot, sign in again as Deepak. The first sign-in establishes the roaming profile folder on the share:

\\WS2022-DC01\profiles$\Deepak.P.V6\.Drop a folder named Test on the desktop:
Sign out. Windows copies the modified profile up to the share:

\\WS2022-DC01\profiles$\Deepak.P.V6. Log files for the sync live in Event Viewer › Applications and Services Logs › Microsoft › Windows › User Profile Service.From any machine on the network, browse to \\WS2022-DC01\profiles$. The folder Deepak.P.V6 appears:
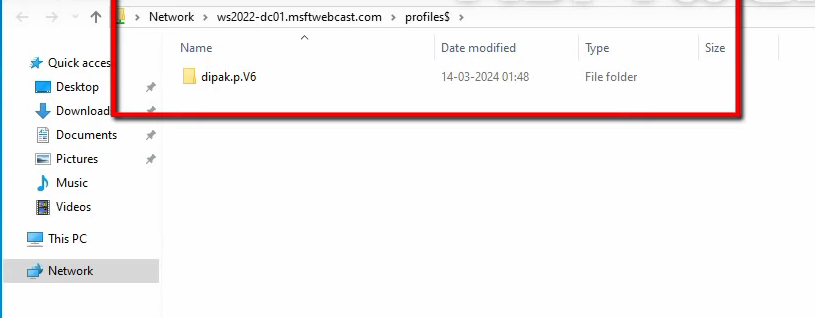
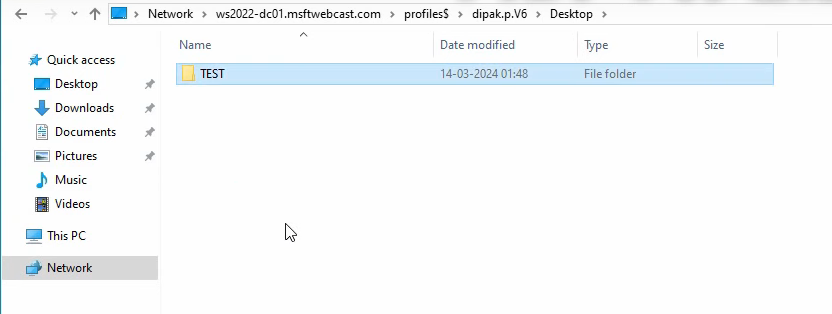
\\WS2022-DC01\profiles$. The folder Deepak.P.V6 appears (.V6 is the Windows 10/11 profile version — older OSes get .V2 / .V5).Drill into Deepak.P.V6 › Desktop — the Test folder is there, synced from the client:
Test the inverse path: delete the Test folder from the share:
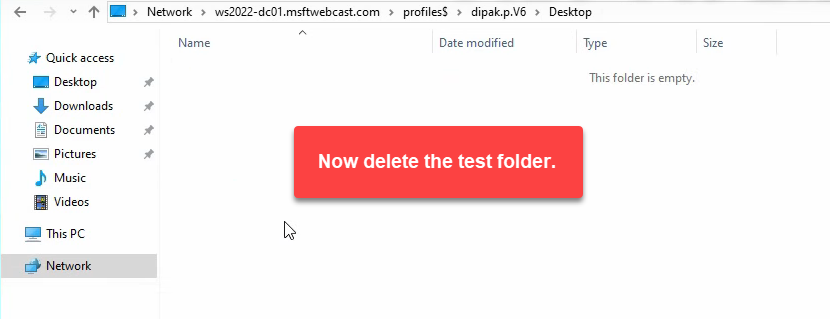
On the client desktop, the Test folder still shows — the local profile copy has not synced yet:
Sign out and back in. The next logon reconciles local with share, and Test is gone:
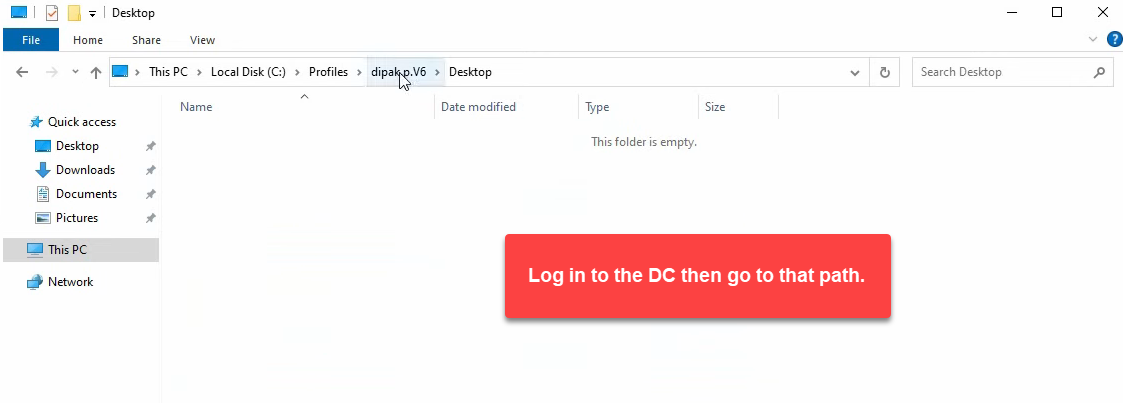
On the DC, browse the share folder directly — thanks to the GPO from step 4, Administrators can read the user’s profile contents:

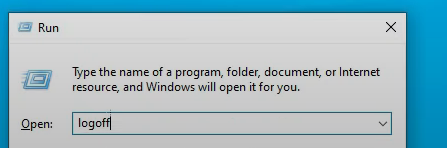
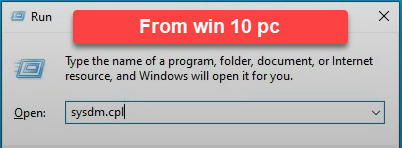
C:\profiles\Deepak.P.V6 directly. Admins can now read the folder thanks to the GPO from step 4.Confirm the profile type from the client side. Run → sysdm.cpl → Advanced → User Profiles → Settings:
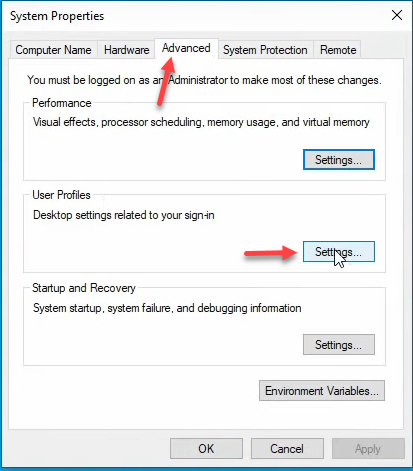
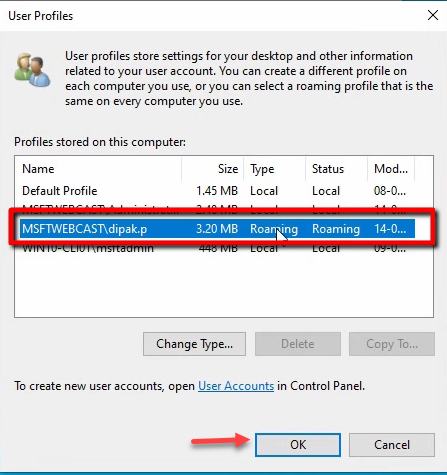
sysdm.cpl › Advanced tab › User Profiles → Settings. The dialog enumerates every profile cached on this machine and the type.Deepak’s profile reports Type: Roaming. End-to-end working:
What Happens at Logon and Logoff (the Lifecycle)
Worth understanding the underlying flow once you have it working:
- First logon, ever. No profile exists on the share. Windows builds a fresh profile from the Default User template on the client, then uploads it to
\\server\profiles$\<name>.V6\at logoff. Subsequent logons download from there. - Subsequent logon. Windows compares the local cached copy on the client (if any) with the share. The newer copy wins; missing files are pulled. If the local copy is missing entirely (first time on this PC), the entire profile is downloaded.
- During the session. Changes are made to the local cached copy. The share is not touched.
- Logoff. Windows uploads changed files back to the share. The local cached copy is retained for the next logon (so the next logon is a delta sync, not a full pull) unless the GPO Delete cached copies of roaming profiles is set.
Logon time is dominated by the size of the profile and the network speed to the share. A 100 MB profile over gigabit is sub-30-second. A 5 GB profile over a slow VPN can take 10+ minutes — this is why folder redirection (Desktop, Documents, AppData\Roaming subset) is the right pairing for any environment with non-trivial profiles.
Common Pitfalls
- Configuring the path before creating the share. Windows tries to create the user’s folder on first logon. If the share is missing or the user does not have Create folders on it, the logon fails with “your roaming profile is not synchronized” and a temporary profile is created instead. Always create the share + ACL first, then set the user attribute.
- Forgetting the Administrators-to-roaming-profile GPO. Once a profile folder is created with only the user as owner, even the Domain Admin cannot read it without taking ownership. Do the GPO first; never let any user create their first roaming profile without it.
- Using folder redirection without roaming profiles. Possible, just less common. Pure folder redirection redirects specific folders (Documents, Desktop) to a network location without roaming the rest of the profile. Useful for performance-sensitive environments where AppData syncing is the problem.
- Caching enabled on the share. Windows offline-files would try to cache the profile share for offline use; that interacts badly with roaming profile sync. Always uncheck caching on profile shares.
- Roaming Outlook OST files. Outlook OST cache lives in
AppData\Local\Microsoft\Outlook, which Windows correctly excludes from roaming by default (only AppData\Roaming syncs, not AppData\Local). If you somehow forced AppData\Local to sync, you would discover this in week one of the rollout. - .V6 vs no suffix. Older Windows clients without the .V6 suffix produce a separate profile folder on the share. Mixed-OS environments end up with two folders per user, neither of which sync to the other. Plan for this if you have Windows 7 / 8 / 10 / 11 fleet diversity.
- Profile bloat. Without limits, profiles grow indefinitely. Pair with Limit profile size Group Policy or with folder redirection so the actual roaming payload stays small.
Conclusion
Roaming profiles are a five-step setup — AD security group, hidden share with custom ACL, user profile path, GPO for Administrators access, and verification on a client. The 40-screenshot walkthrough above looks elaborate but the actual click count is around 30; the screenshots are mostly the wizard reading the same data back at you. Get this in place once for your standard user OU, pair with folder redirection if your profiles will be larger than a few hundred MB, and the “why is my desktop blank on this other PC?” ticket disappears. The same skeleton works for kiosk users, hot-desking, shift-share workstations, and any environment where users move between machines.