Introduction
The Windows registry is a hierarchical database that stores machine-specific settings and configuration data for almost everything on your computer — user preferences, installed applications, attached devices, driver settings, file associations, and the boot configuration of the OS itself. The registry is built from two basic elements: keys (containers, like folders) and values (the data inside them, like files). Windows constantly refers back to the registry: opening a program, installing software, plugging in new hardware, or changing a system setting all involve reading and writing registry keys.
Because the registry is central to almost every Windows operation, a corrupted or misconfigured registry can result in poor performance, application crashes, failed boots, or a fully unusable system. Corruption can be caused by malware, a botched application installer, a power loss during a write, a bad driver, or a manual edit gone wrong. The single most effective insurance against any of these is a recent backup — preferably one taken immediately before you make any registry change.
In this article you will learn how to back up the entire Windows registry to a .reg file using Registry Editor, how to back up only a specific branch, and how to restore the registry from that backup — both from inside Windows and from Safe Mode if the system will not boot normally.
Before You Edit: Always Back Up
Before you change any registry key — whether you are following a Microsoft KB article, a forum tip, or a security-hardening checklist — create a backup. The cost is one minute; the value is the ability to undo a bad change in seconds. The procedure below produces a .reg file that you can double-click to restore the affected keys, or import via Registry Editor if Windows itself is unstable.
If you are editing a single key for a known purpose (for example, changing one DWORD value), it is usually enough to back up just that branch. If you are running a third-party tweaking tool, an installer, or anything that touches an unknown number of keys, back up the entire registry.
Step 1 — Open Registry Editor
Registry Editor (regedit.exe) is built into every supported version of Windows. Launch it as administrator:
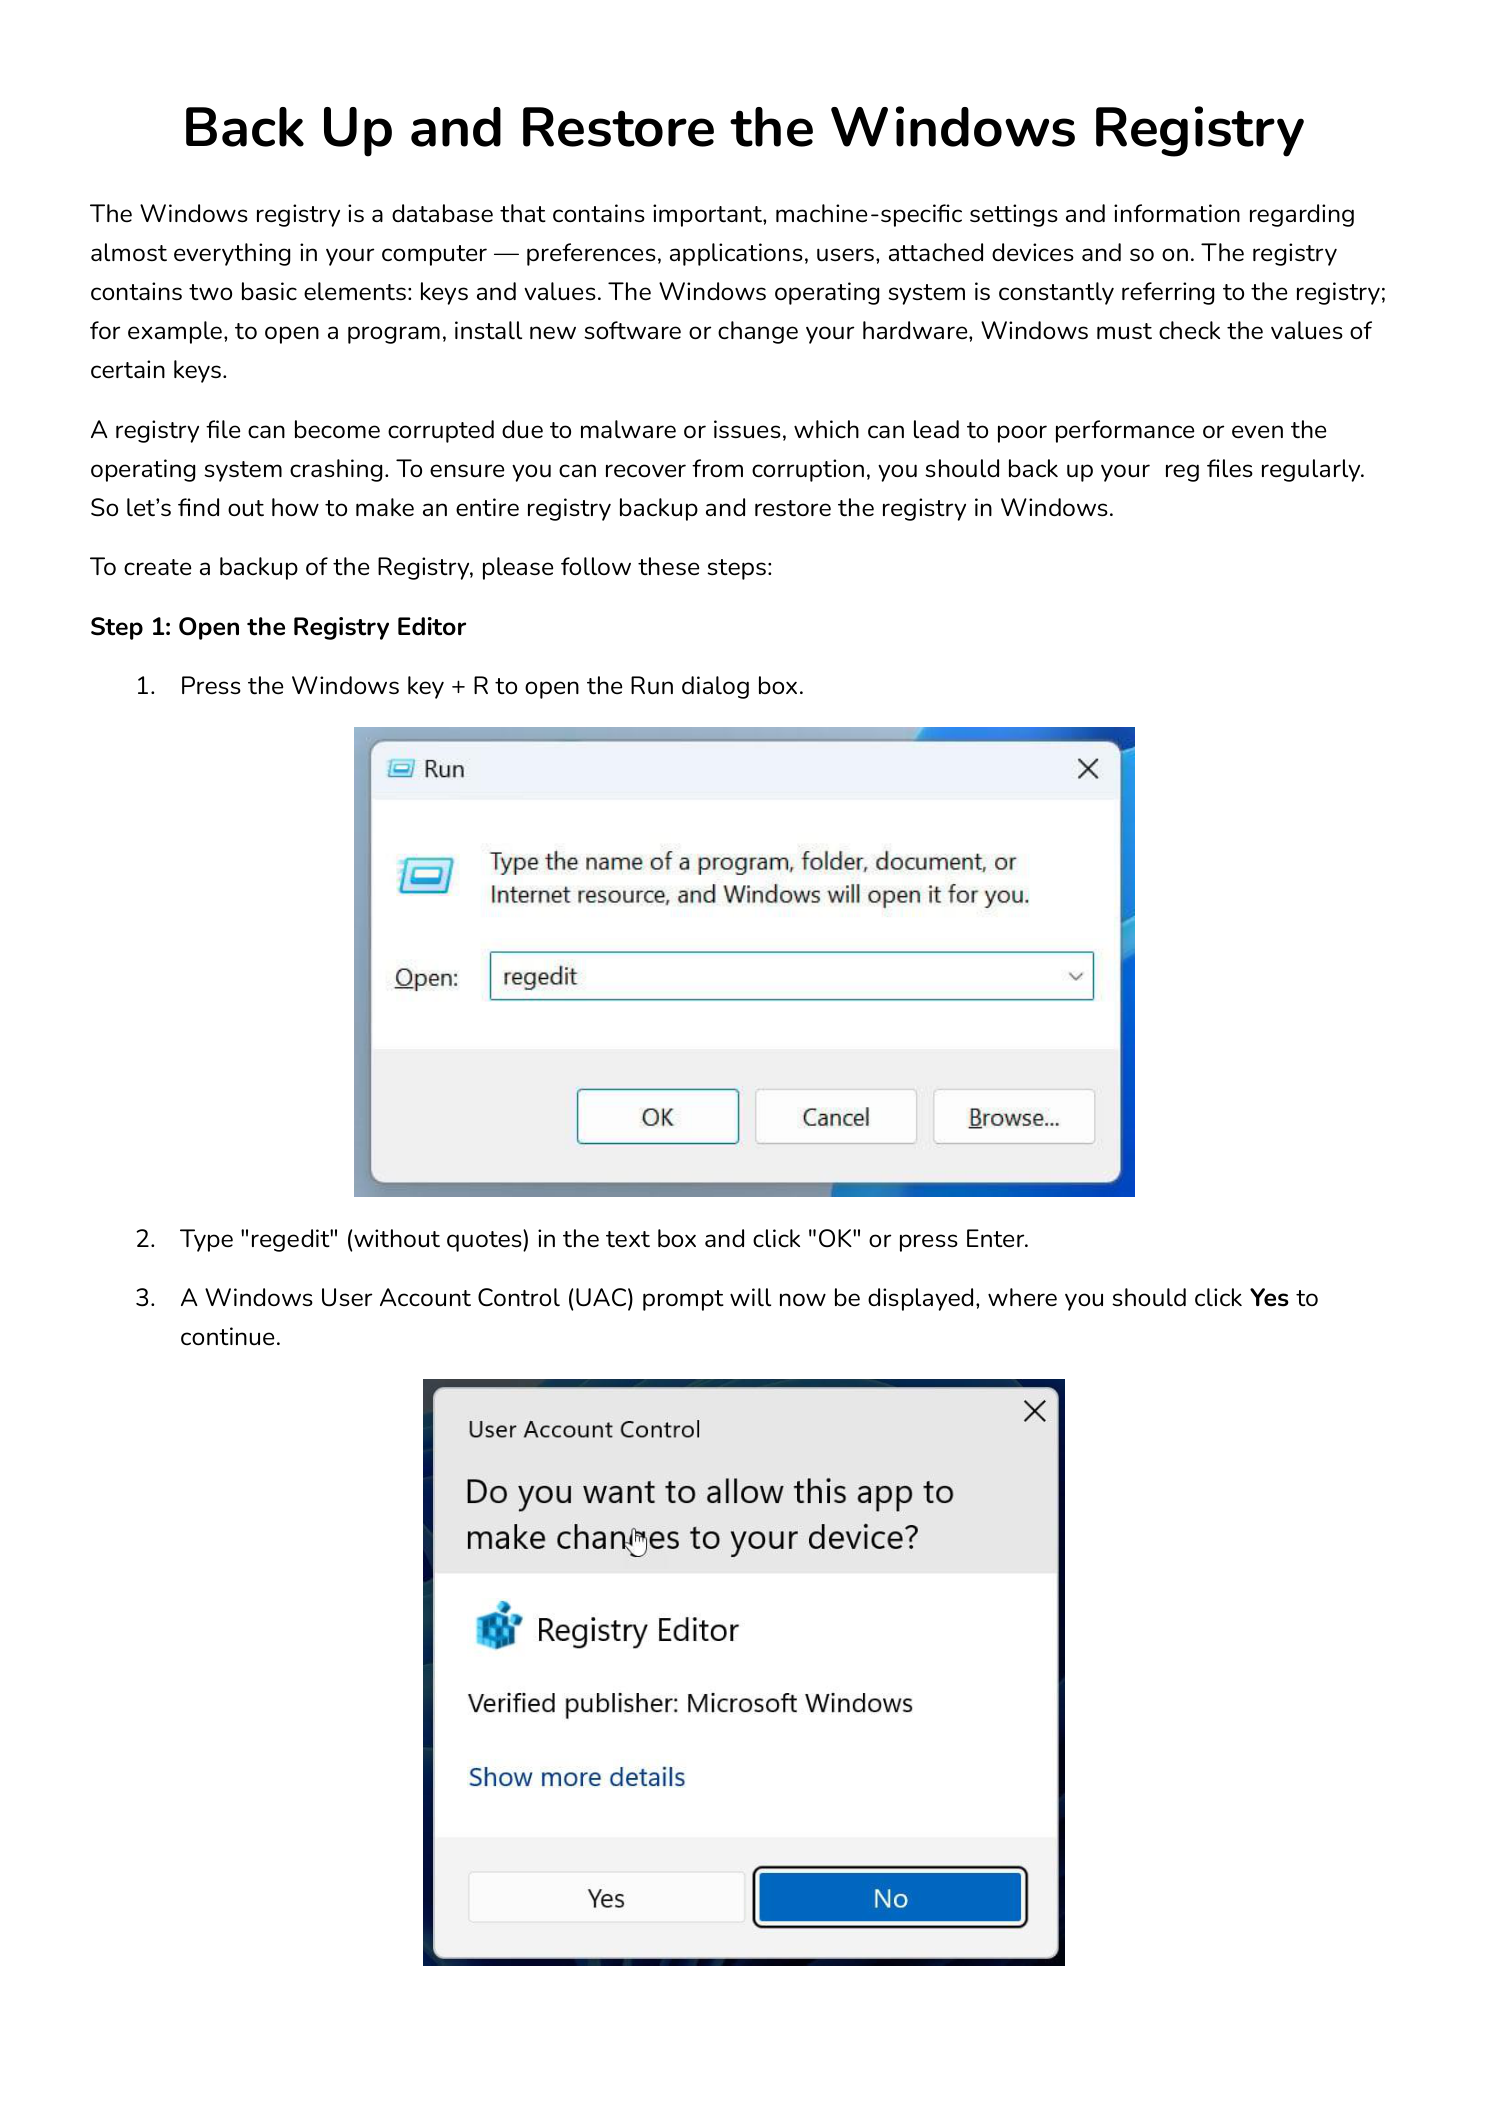
- Press Win + R to open the Run dialog.
- Type
regedit(without quotes) and click OK or press Enter. - A User Account Control (UAC) prompt appears asking “Do you want to allow this app to make changes to your device?” with the publisher listed as Microsoft Windows. Click Yes to continue.
Registry Editor opens with five top-level hives in the tree on the left: HKEY_CLASSES_ROOT, HKEY_CURRENT_USER, HKEY_LOCAL_MACHINE, HKEY_USERS, and HKEY_CURRENT_CONFIG (commonly abbreviated HKCR, HKCU, HKLM, HKU, and HKCC).
Step 2 — Open the Export Dialog
To back up the registry, you will use Registry Editor’s built-in Export feature, which writes either the entire registry or a selected branch to a .reg text file.
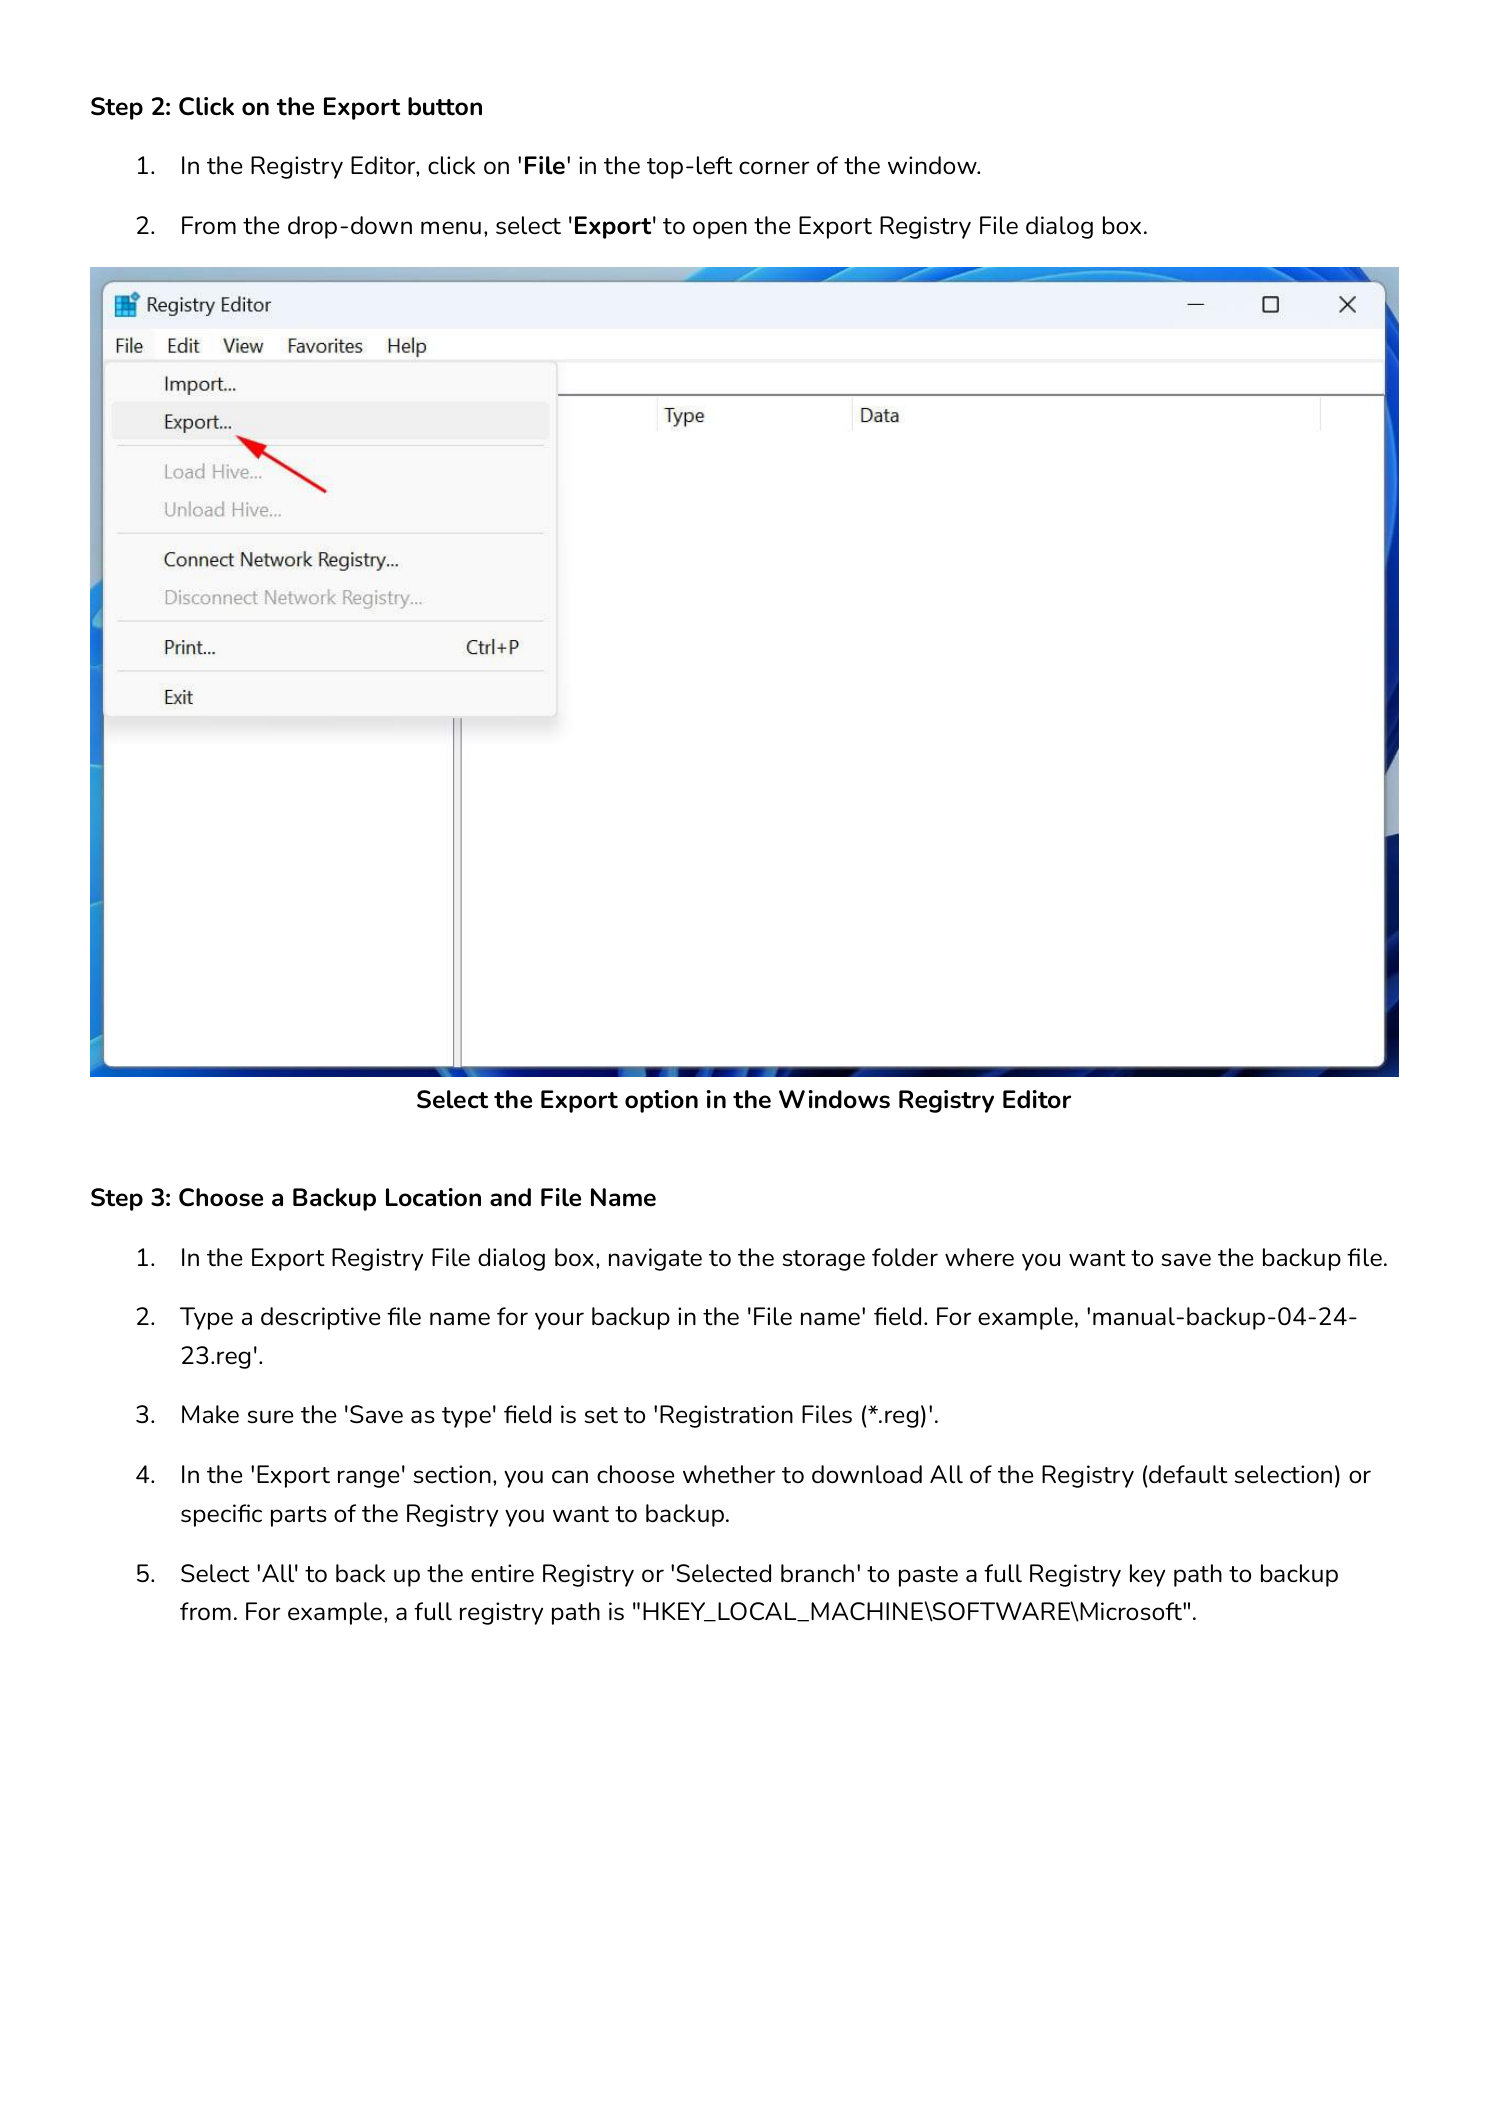
- Click File in the top-left corner of the Registry Editor window.
- From the drop-down menu, select Export… to open the Export Registry File dialog.
If you want to export only a specific branch, click that branch in the tree on the left before opening the Export dialog — the dialog will pre-select that branch in its Export range section. To export the entire registry, the selection in the tree does not matter.
Step 3 — Choose a Backup Location and File Name
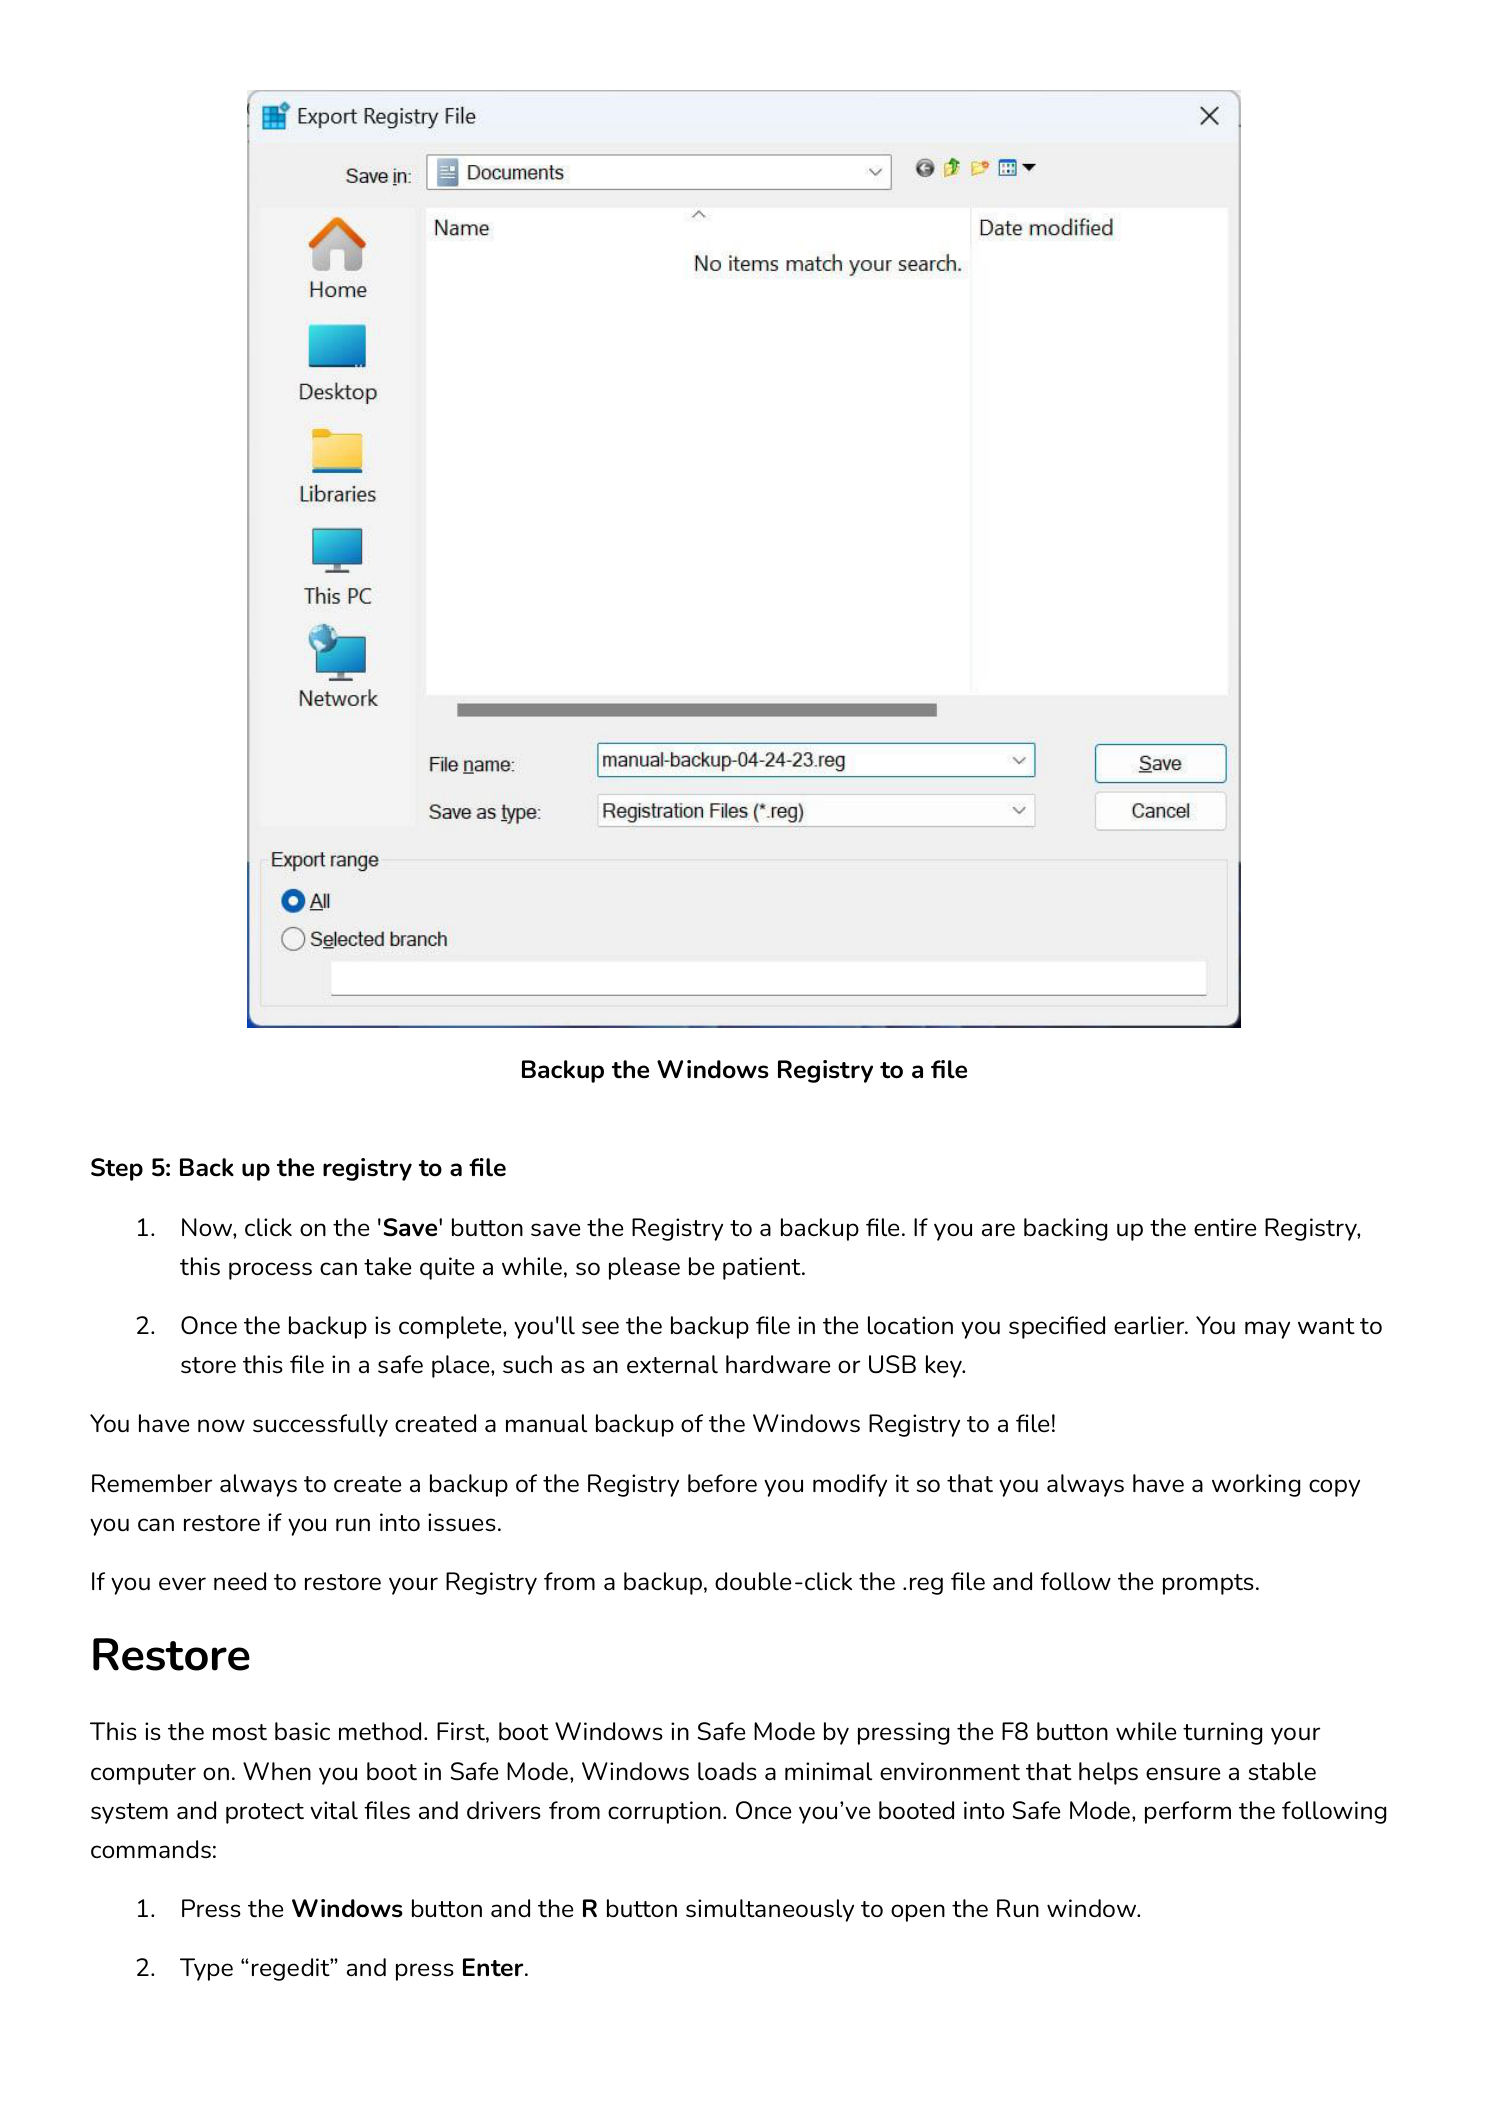
The Export Registry File dialog looks like a standard Save dialog with one extra section at the bottom. Configure it as follows:
- Browse to the folder where you want to save the backup file. A common choice is
C:\Users\<you>\Documentsfor personal backups orC:\Backupsfor system-level backups. - In the File name field, type a descriptive name. Including the date in the name pays for itself the first time you have multiple backups in the same folder. Examples:
manual-backup-04-24-23.reg— full registry, datedbefore-installing-app-04-24-23.reg— before a specific changeHKLM-Run-pre-cleanup.reg— one branch only
- Confirm that Save as type is set to Registration Files (*.reg). This is the default and is the format Registry Editor can re-import.
- In the Export range section at the bottom of the dialog, choose:
- All — backs up the entire registry. Use this whenever you are not 100% sure which keys a change will touch.
- Selected branch — backs up only the branch typed in the field below it. You can either accept the branch you had selected in the tree or paste a full registry path, for example
HKEY_LOCAL_MACHINE\SOFTWARE\Microsoft.
Step 4 — Save the Backup
Click Save. Registry Editor writes the registry contents to the .reg file at the location you chose. If you selected All, the file can take a minute or two to write and will typically be tens to hundreds of megabytes — this is normal. If you selected a single branch, the export is nearly instantaneous and the file is usually a few kilobytes.
Once the export completes, browse to the folder in File Explorer and confirm the .reg file is there. You can open it in Notepad to verify the contents — a valid registry export starts with the line:
Windows Registry Editor Version 5.00For a critical backup (for example, before a major OS upgrade or a sensitive registry edit on a production server), copy the .reg file off the machine to an external USB drive, a network share, or cloud storage. A backup that lives on the same disk as the registry will not help you if that disk fails.
That is all that is needed to create a manual backup of the Windows registry to a file.
Restore the Registry from a .reg File
How you restore the backup depends on whether Windows still boots normally.
Method 1 — Restore from a Working Windows Session
If you can sign into Windows and reach Registry Editor, the simplest restore is to import the .reg file directly:
- Open Run with Win + R, type
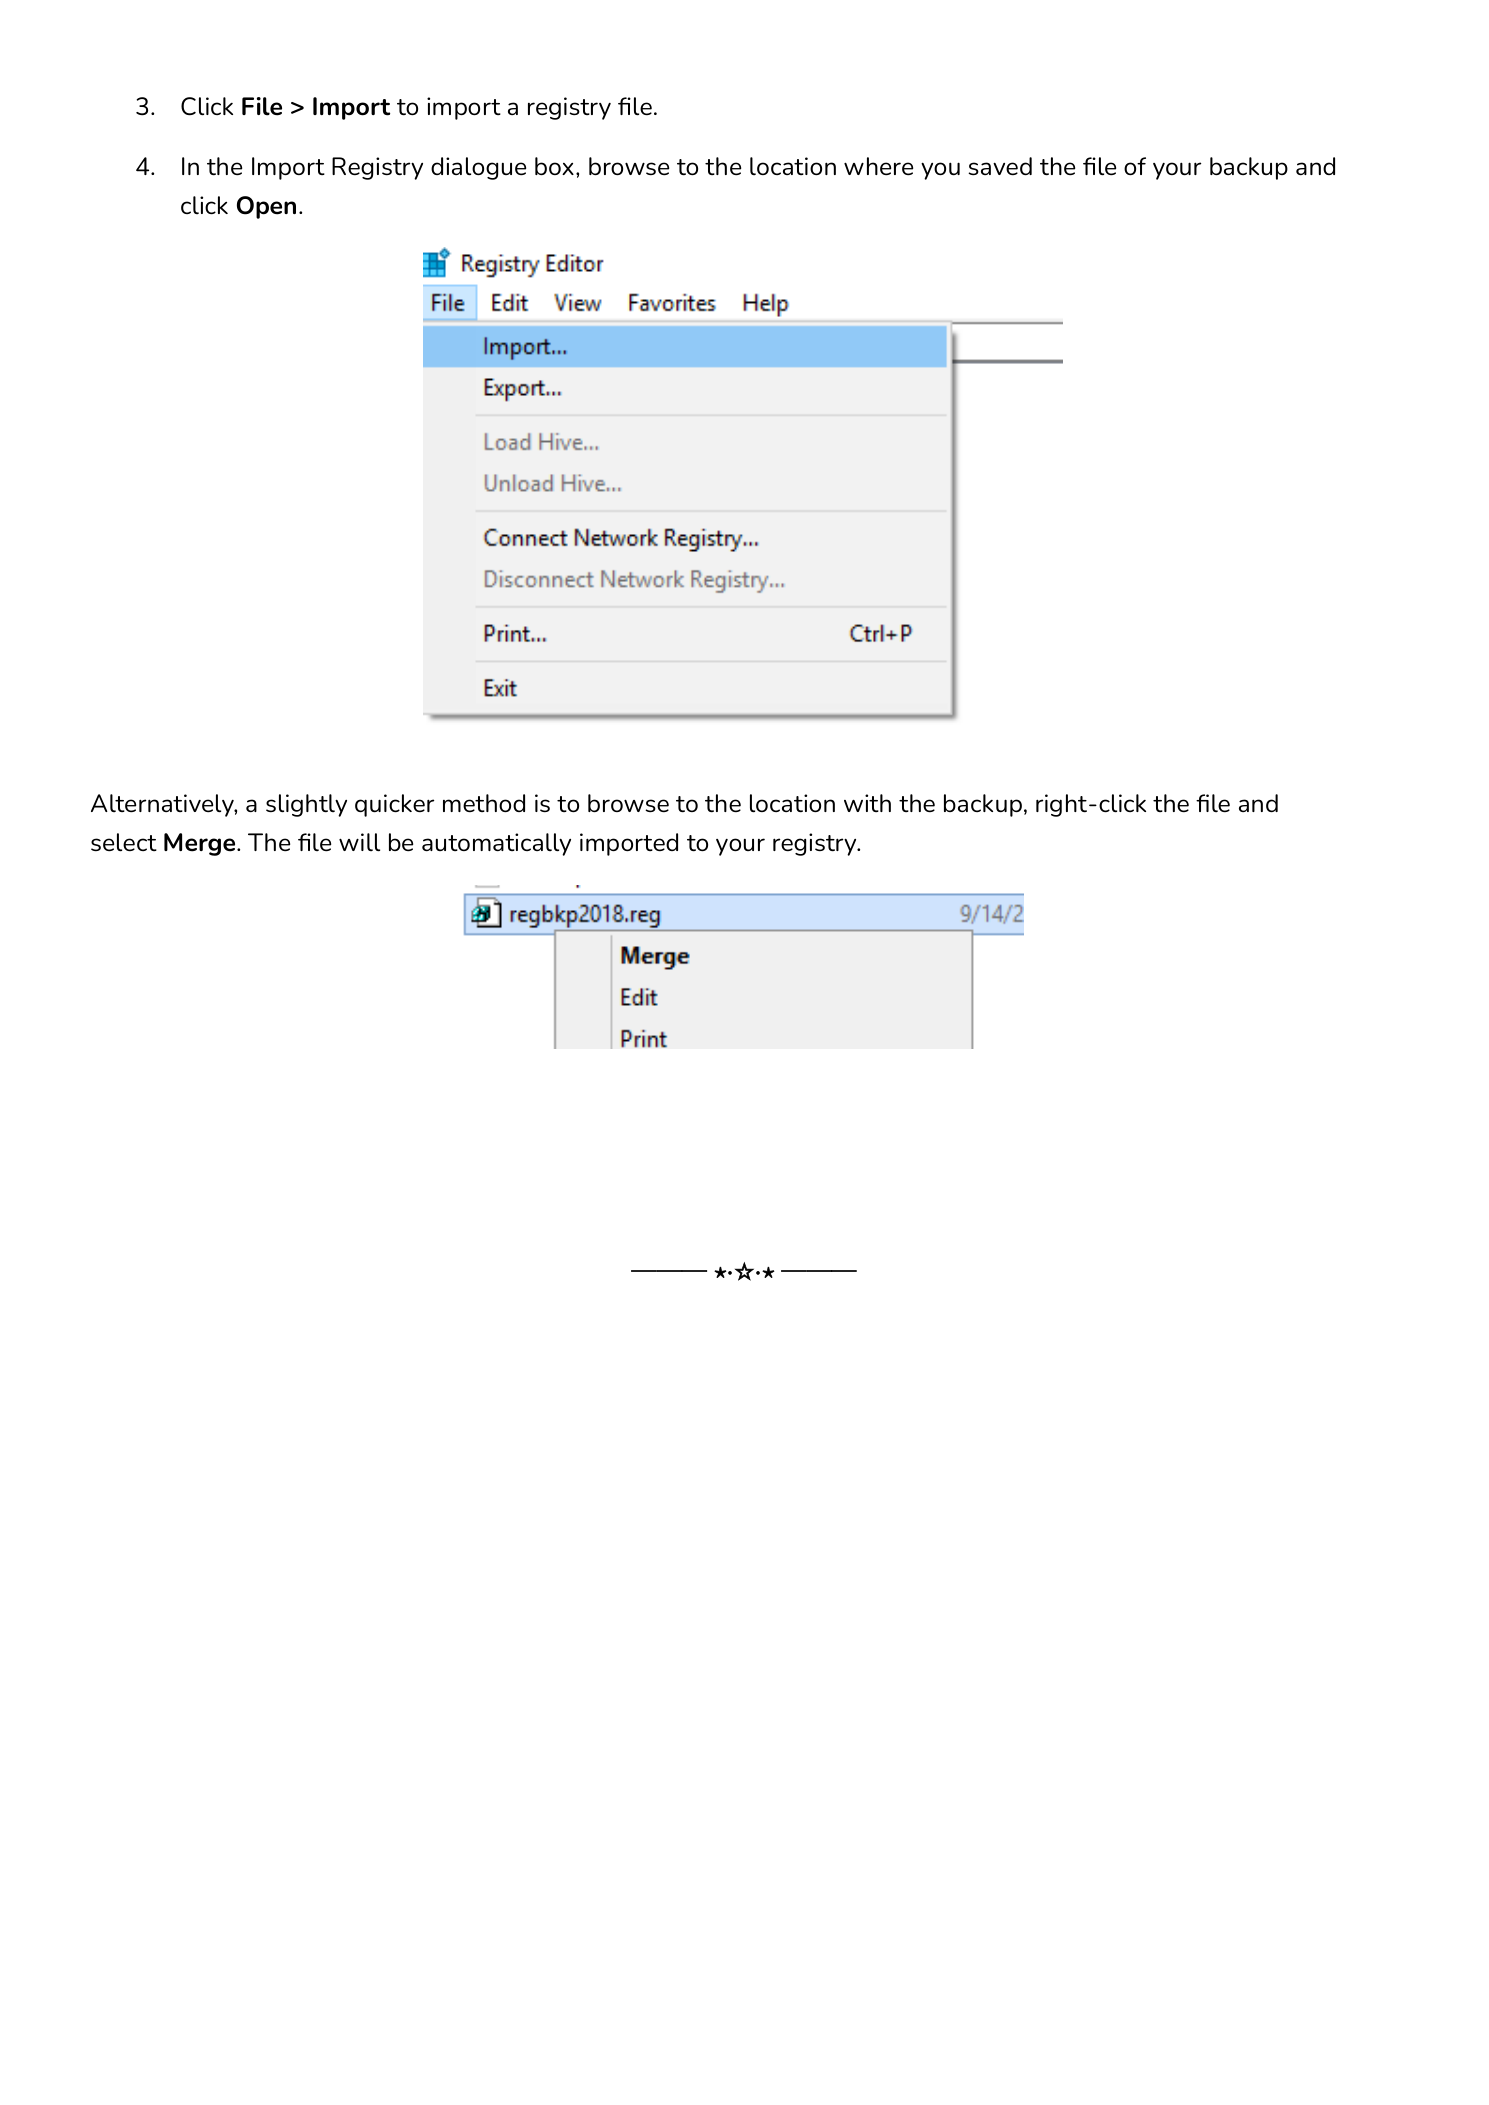
regedit, press Enter, and click Yes on the UAC prompt. - In Registry Editor, click File and choose Import….
- In the Import Registry File dialog, browse to the location where you saved your
.regbackup, select it, and click Open. - Registry Editor reads the file and merges it into the live registry. When the import finishes, a confirmation message appears.
An even quicker shortcut: open File Explorer, browse to the .reg file, right-click it, and choose Merge. Windows will prompt for confirmation and then import the file in one click. This is the same result as File > Import inside Registry Editor.
Important: Importing a .reg file merges it into the existing registry — it adds keys and overwrites values that exist in the file but does not delete keys that exist in the live registry but not in the file. If your goal is to fully revert to an earlier registry state, importing alone may not be enough; you may also need to manually delete keys that were added after the backup, or use System Restore (covered below).
Method 2 — Restore from Safe Mode If Windows Will Not Boot
If a registry change has left Windows unbootable, you cannot just sign in and double-click the .reg file. Boot into Safe Mode first — Safe Mode loads a minimal driver and service set, which is often enough to bring up the system long enough to fix the registry.
To enter Safe Mode on Windows 10 or 11:
- Force three failed boots in a row (power off the machine during the Windows logo screen) until Windows offers the Recovery menu, or
- From any working sign-in screen, hold Shift and click Restart, then choose Troubleshoot > Advanced options > Startup Settings > Restart, and
- When the Startup Settings menu appears, press 4 for Safe Mode (or 5 for Safe Mode with Networking if you need to copy the
.regfile from a share).
Note: The classic F8 boot menu is disabled by default on modern Windows for boot-time performance reasons; the Recovery menu route is the supported way in.
Once Windows is up in Safe Mode, the import is the same as Method 1: Win + R > regedit > File > Import > pick your .reg file. Reboot normally when the import completes.
What .reg Backups Do Not Cover
A .reg file is a great fix for ordinary registry mistakes — a deleted value, an incorrect type, an aggressive third-party cleaner. It is not a complete system backup. In particular:
- It will not save you from a corrupted registry hive file (for example,
SOFTWARE,SYSTEM,SAMinC:\Windows\System32\config). For that, use System Restore points or a full image backup. - It does not undo deletions of keys outside the export. If you exported only one branch, restoring it only fixes that branch.
- It does not roll back files on disk. Application installs that wrote both registry keys and binaries on disk are only half-undone by a registry import.
For a complete safety net, combine three layers: a registry export before any manual edit, a System Restore point before installing or removing major software, and a regular full-disk image (Macrium Reflect, Veeam Agent, Windows Backup, etc.) for full disaster recovery.
Conclusion
Backing up the Windows registry takes about a minute and gives you a clean undo button for almost any single-machine registry mistake. The recipe is the same on every modern version of Windows:
- Open Registry Editor —
Win + R,regedit, accept UAC. - File > Export, choose All for the entire registry or Selected branch for one subtree.
- Name the file with the date and save it somewhere outside the working set you are about to change.
- Restore by double-clicking the
.regfile, right-click Merge, or File > Import from Registry Editor — in Safe Mode if Windows will not boot normally.
Make this the first habit before any registry edit and the worst-case outcome of a bad tweak goes from reinstall Windows to double-click a file.