Introduction
Installing Windows Server is just the beginning. A fresh installation leaves several default settings in place that are either unnecessary for a server environment, potentially insecure, or simply inconvenient. Before you add any roles or connect this server to your network infrastructure, you need to run through a post-installation checklist to get the system into a production-ready state.
This guide covers nine essential configuration tasks you should complete on every Windows Server deployment — whether it is a lab VM, a domain controller, a file server, or a production workload. Following this checklist ensures your server is properly named, networked, accessible, secured, updated, and licensed before any workloads go live.
Step 1 – Disable Server Manager Automatic Startup
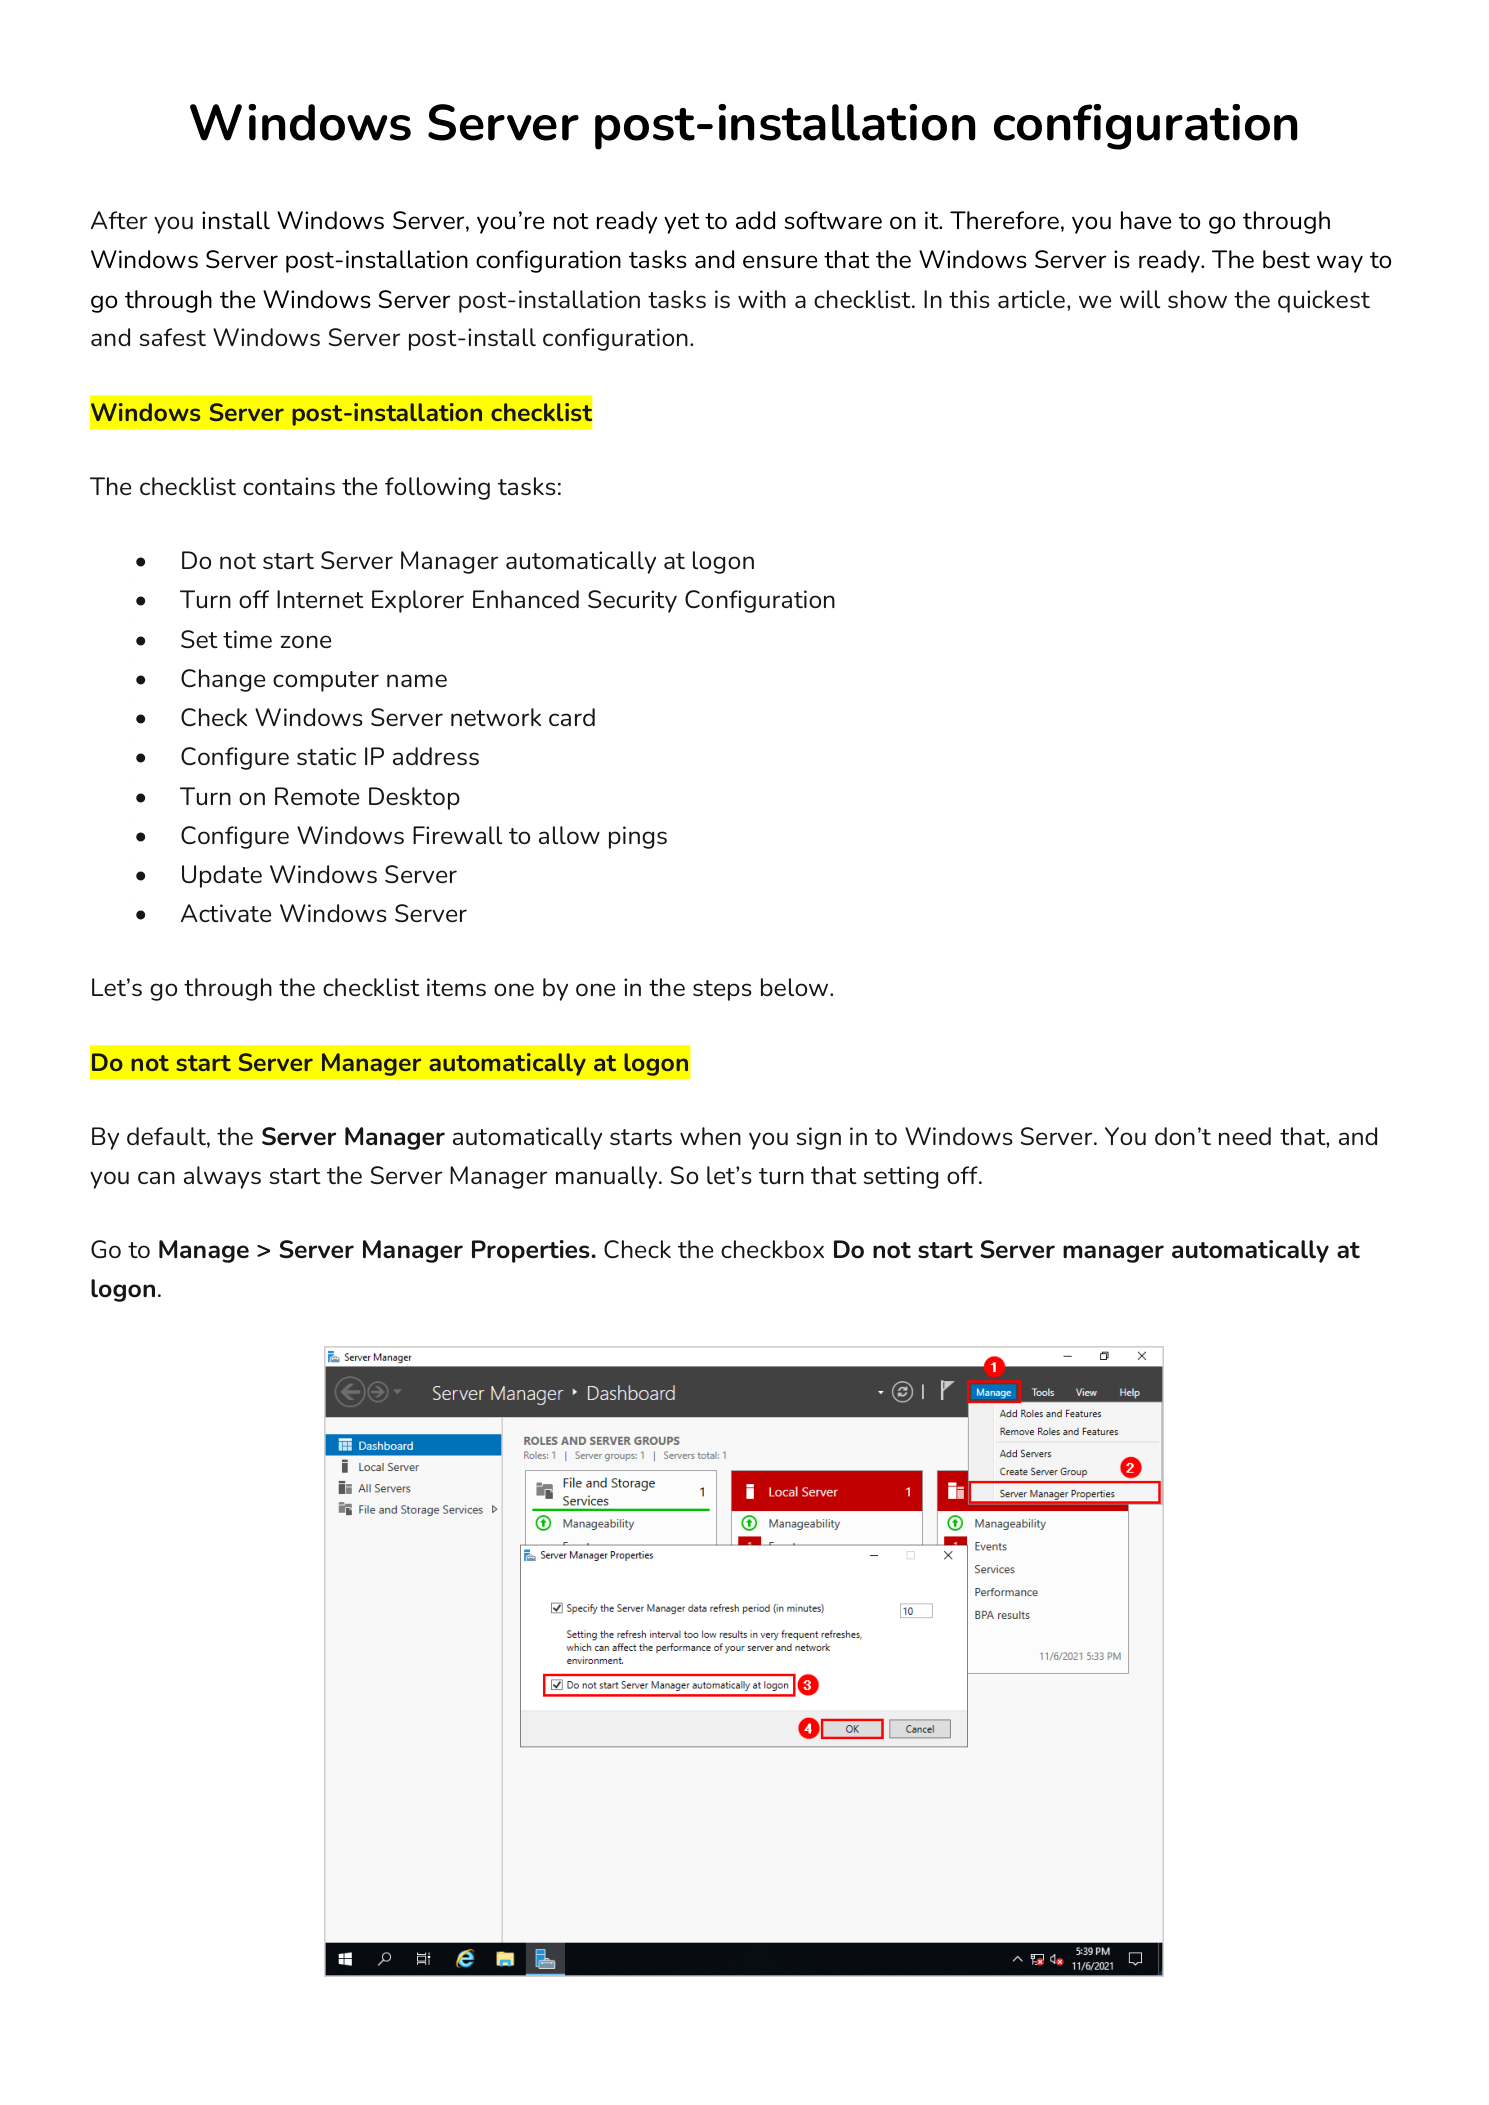
Server Manager opens automatically every time you sign in to Windows Server. While useful during initial setup, it gets in the way once the server is in regular use — especially when you are connecting via Remote Desktop and just need to quickly make a change.
To disable it: in Server Manager, go to Manage > Server Manager Properties. Check the box labeled Do not start Server Manager automatically at logon and click OK. The change takes effect on the next login.
If this server is a domain controller, you can enforce this setting across multiple servers at once using a Group Policy Object (GPO) linked to the appropriate Organizational Unit (OU).
Step 2 – Turn Off Internet Explorer Enhanced Security Configuration
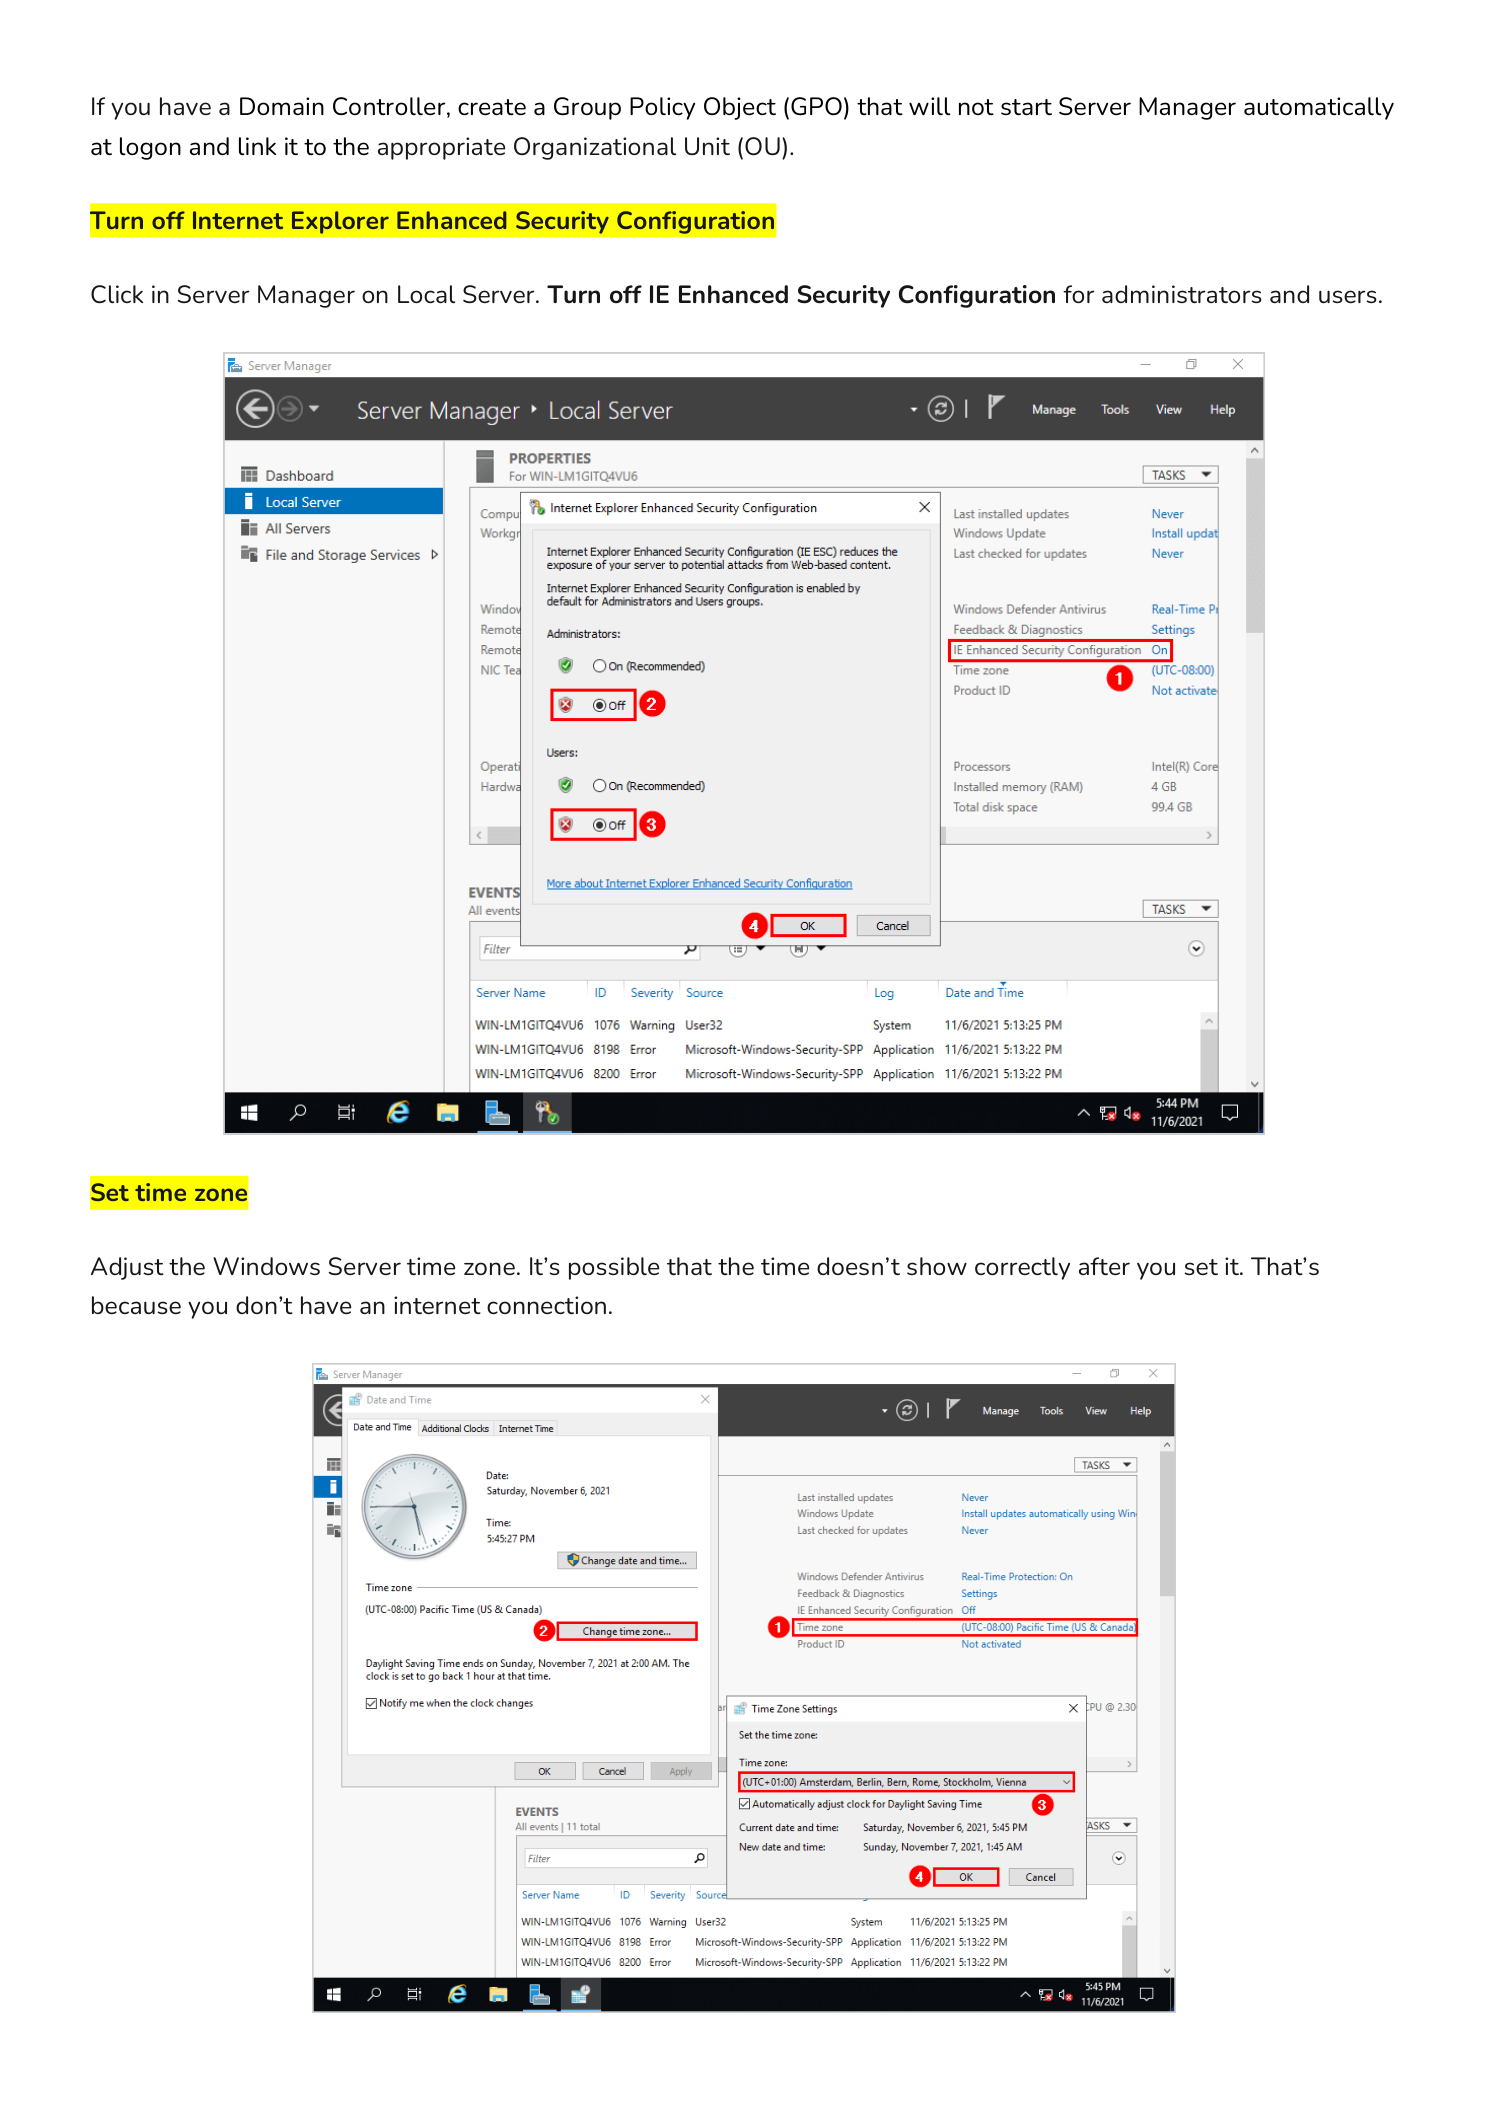
Internet Explorer Enhanced Security Configuration (IE ESC) is enabled by default on Windows Server. It applies aggressive security restrictions that block most websites and require constant approval prompts when browsing. This makes it nearly impossible to download software, access documentation, or use web-based management consoles directly from the server.
To turn it off: in Server Manager, click Local Server in the left panel. Locate IE Enhanced Security Configuration in the Properties section and click the link next to it. Set it to Off for both Administrators and Users, then click OK.
Step 3 – Set the Time Zone
Windows Server time zone accuracy matters more than it does on a workstation. Kerberos authentication — which Active Directory depends on — will fail if the clock on a domain-joined machine is more than five minutes off from the domain controller. Incorrect time zones also produce misleading timestamps in event logs, which makes troubleshooting significantly harder.
To set it: in Server Manager, click Local Server and click the time zone link in the Properties panel. Alternatively, right-click the clock in the taskbar and select Adjust date/time. Choose the correct time zone for your environment and verify that internet time sync is enabled.
Step 4 – Rename the Computer
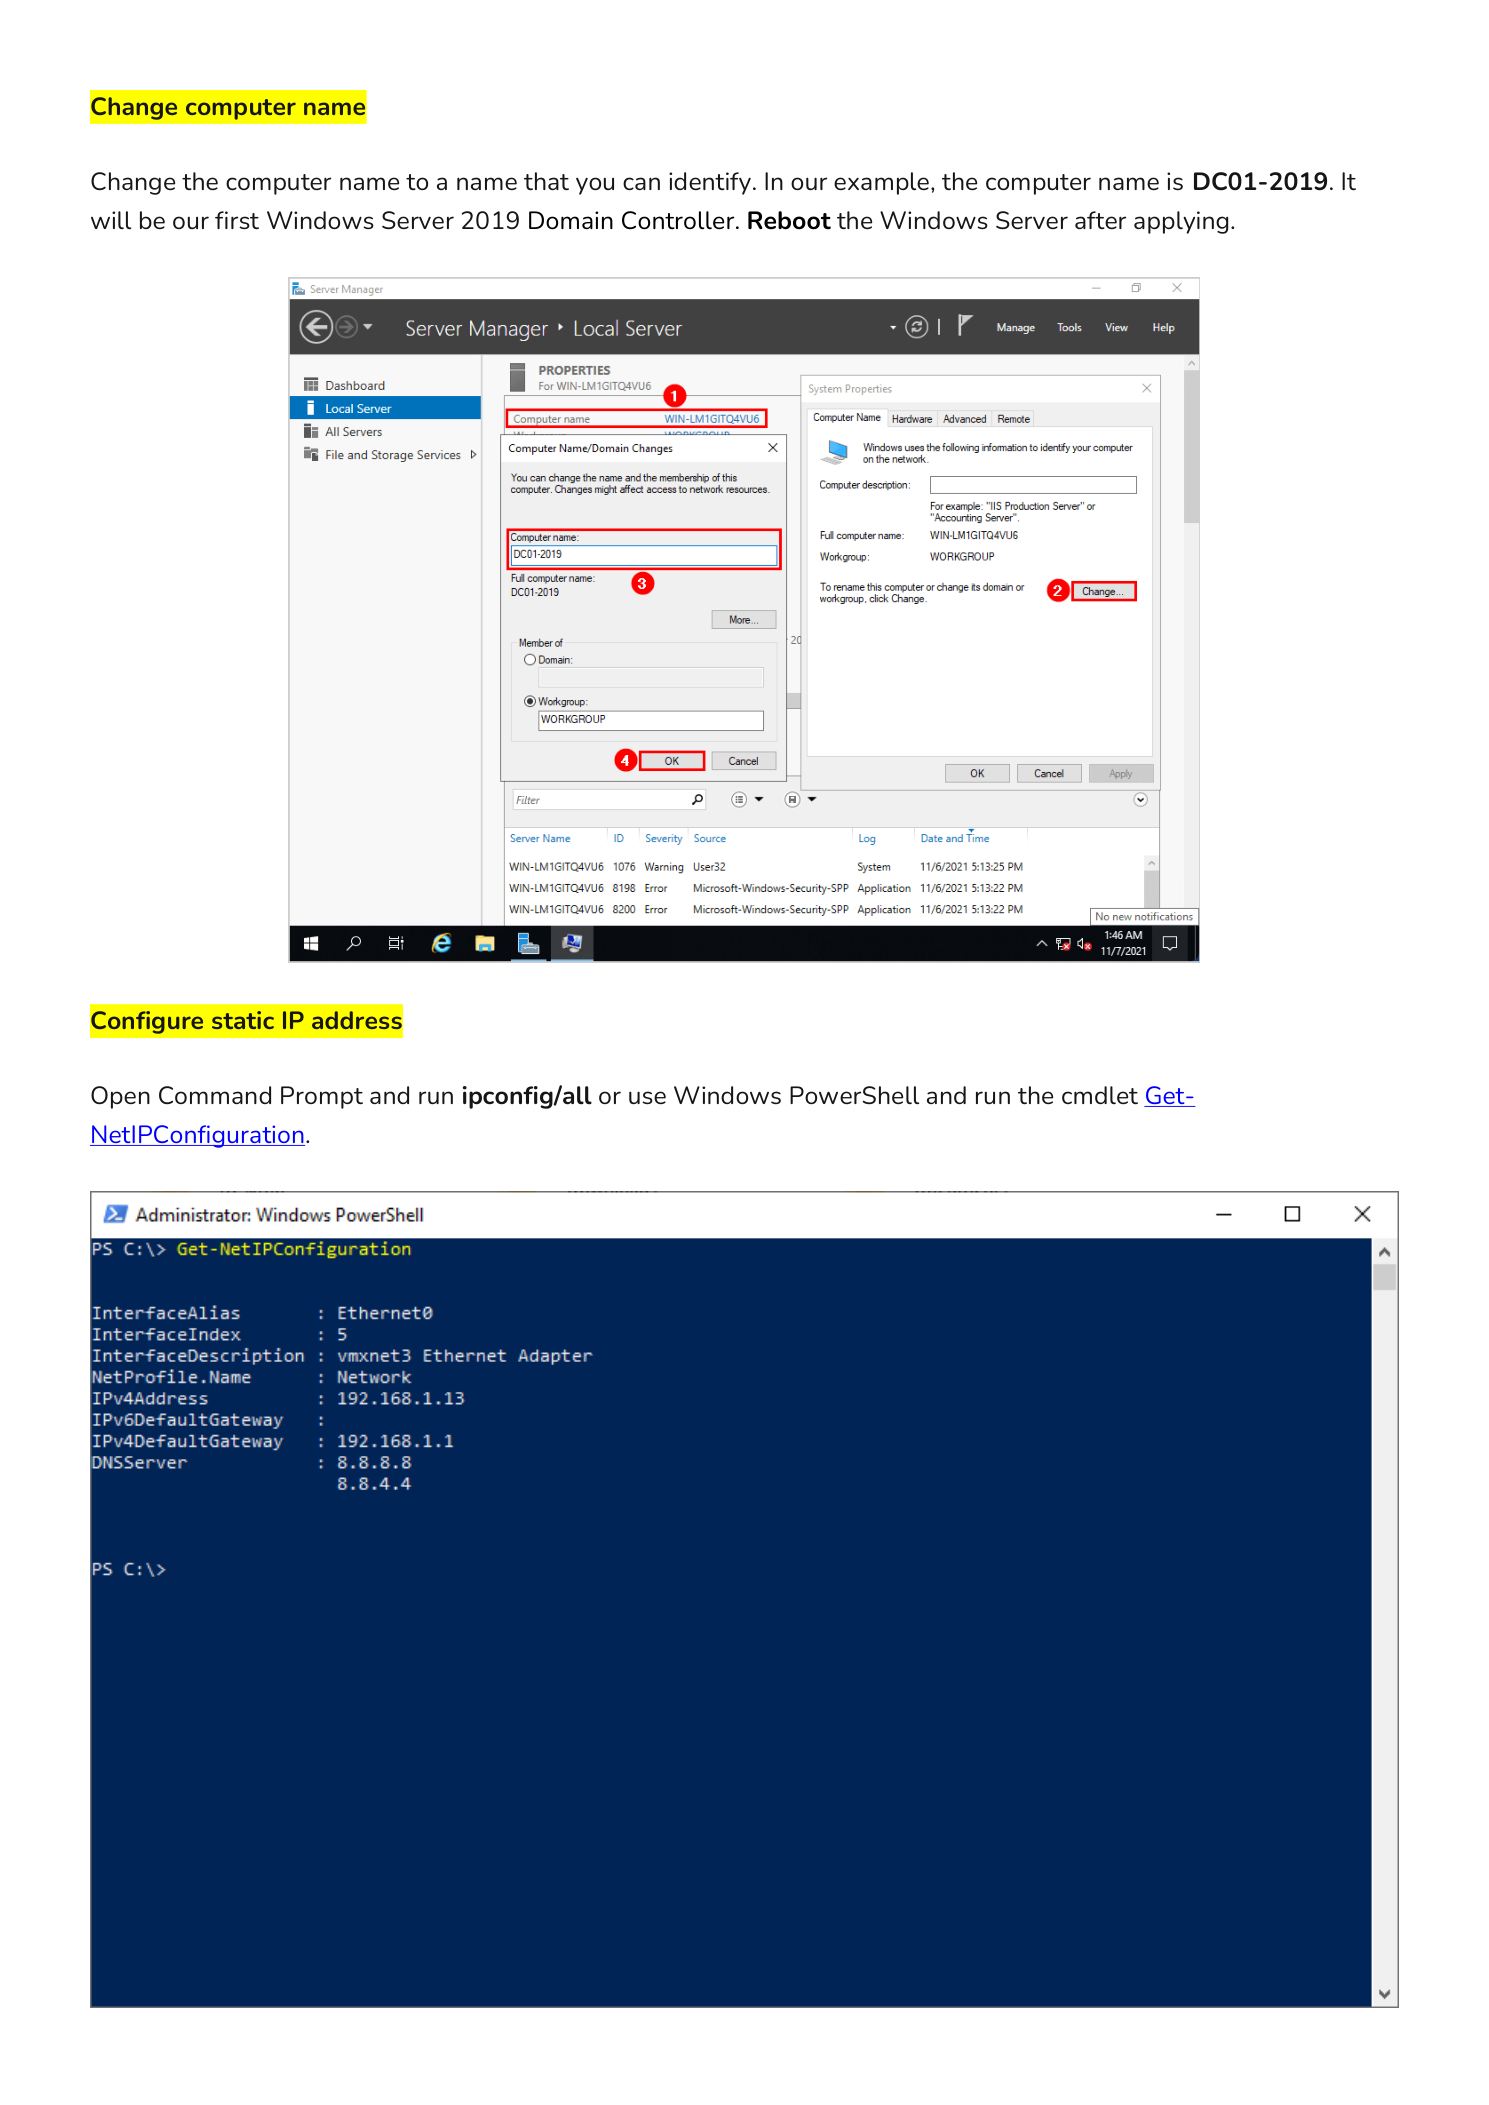
Windows Server assigns a random computer name during installation — something like WIN-A3B7K2L9P4. That name is meaningless in a real environment. You should rename the server to something that identifies its role, location, or both before you do anything else — especially before joining it to a domain, since renaming a domain-joined server requires additional steps and another restart.
Common naming conventions include role-based names such as DC01, FS02, and SQL01, or site-based names like LON-DC01 and NYC-FS01. Pick a convention and stick with it across your environment.
To rename: in Server Manager, click Local Server and click the current computer name. In System Properties, click Change, enter the new name, and click OK. Restart the server to apply the change.
Step 5 – Configure a Static IP Address
Servers should never rely on DHCP for their IP address. A DHCP lease can expire, the address can change during a network outage, or the DHCP server itself might become temporarily unavailable. Any of these scenarios would break name resolution, domain connectivity, or remote access to the server.
Before configuring the static IP, check the current network settings. Open PowerShell and run:
Get-NetIPConfigurationThis shows your current IP address, subnet mask, default gateway, and DNS server. Note these values before making changes.
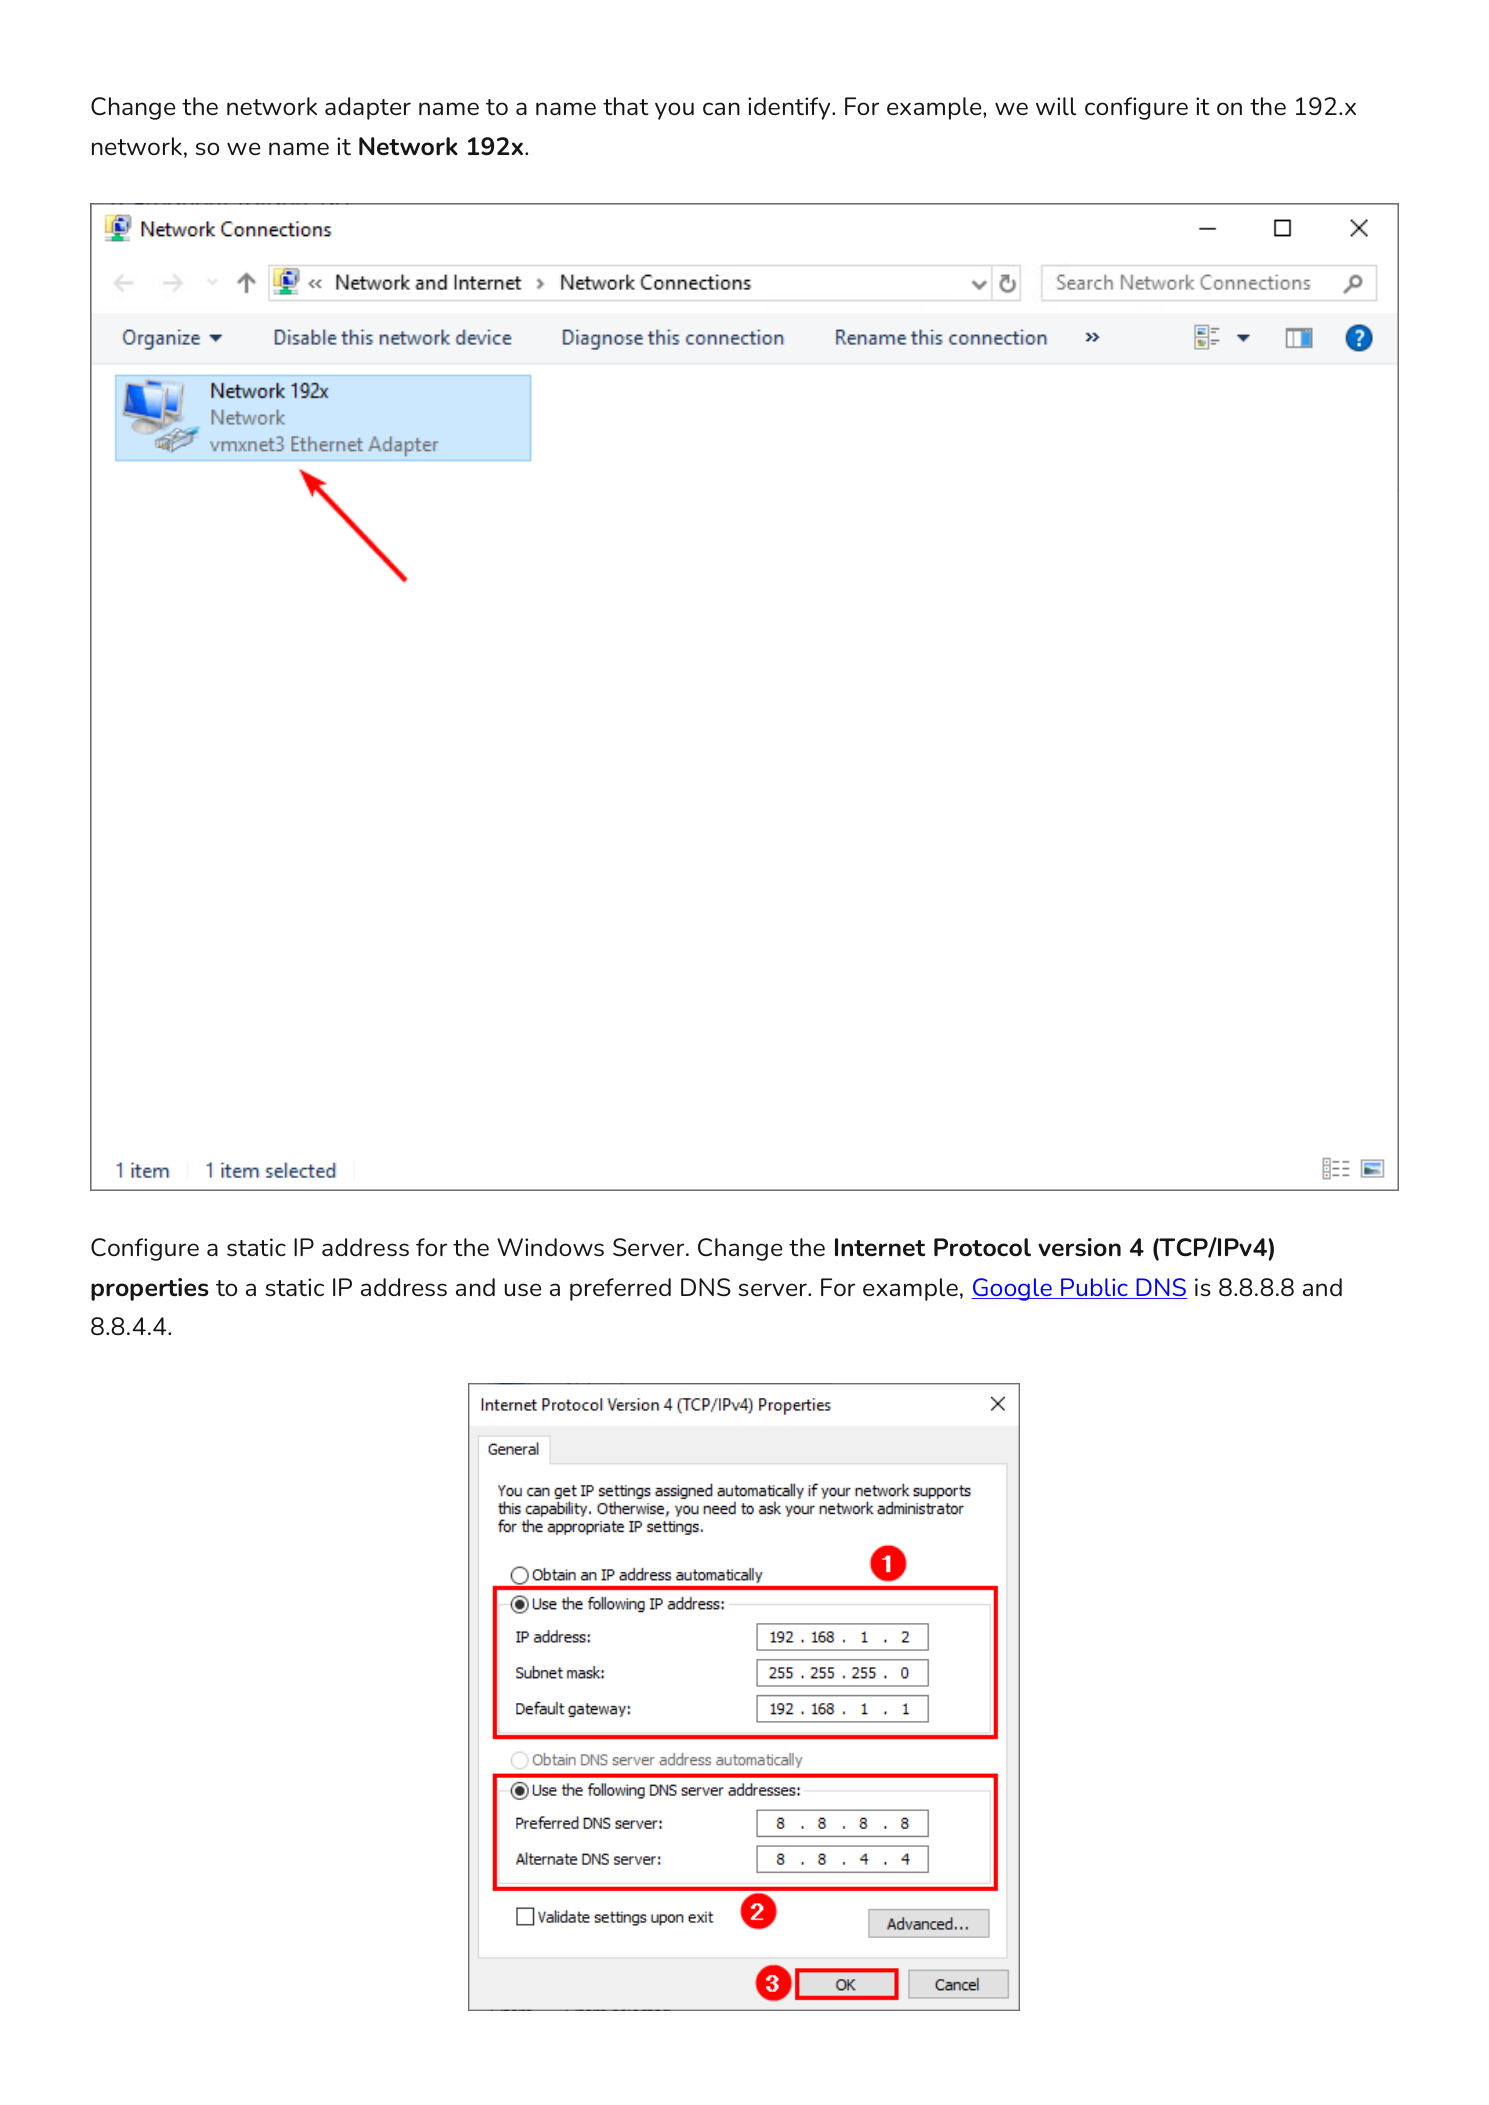
To set a static IP: open Network Connections (run ncpa.cpl), right-click your network adapter and select Properties. Double-click Internet Protocol Version 4 (TCP/IPv4) and select Use the following IP address. Enter the IP address, subnet mask, and default gateway. For DNS, enter the IP address of your DNS server — typically the domain controller in an Active Directory environment, or a reliable public DNS server for standalone deployments. Click OK twice to apply.
Step 6 – Enable Remote Desktop
Remote Desktop is disabled by default on Windows Server. You need to enable it before you can manage the server remotely via RDP — which is the primary way most administrators interact with servers day-to-day once initial setup is complete.
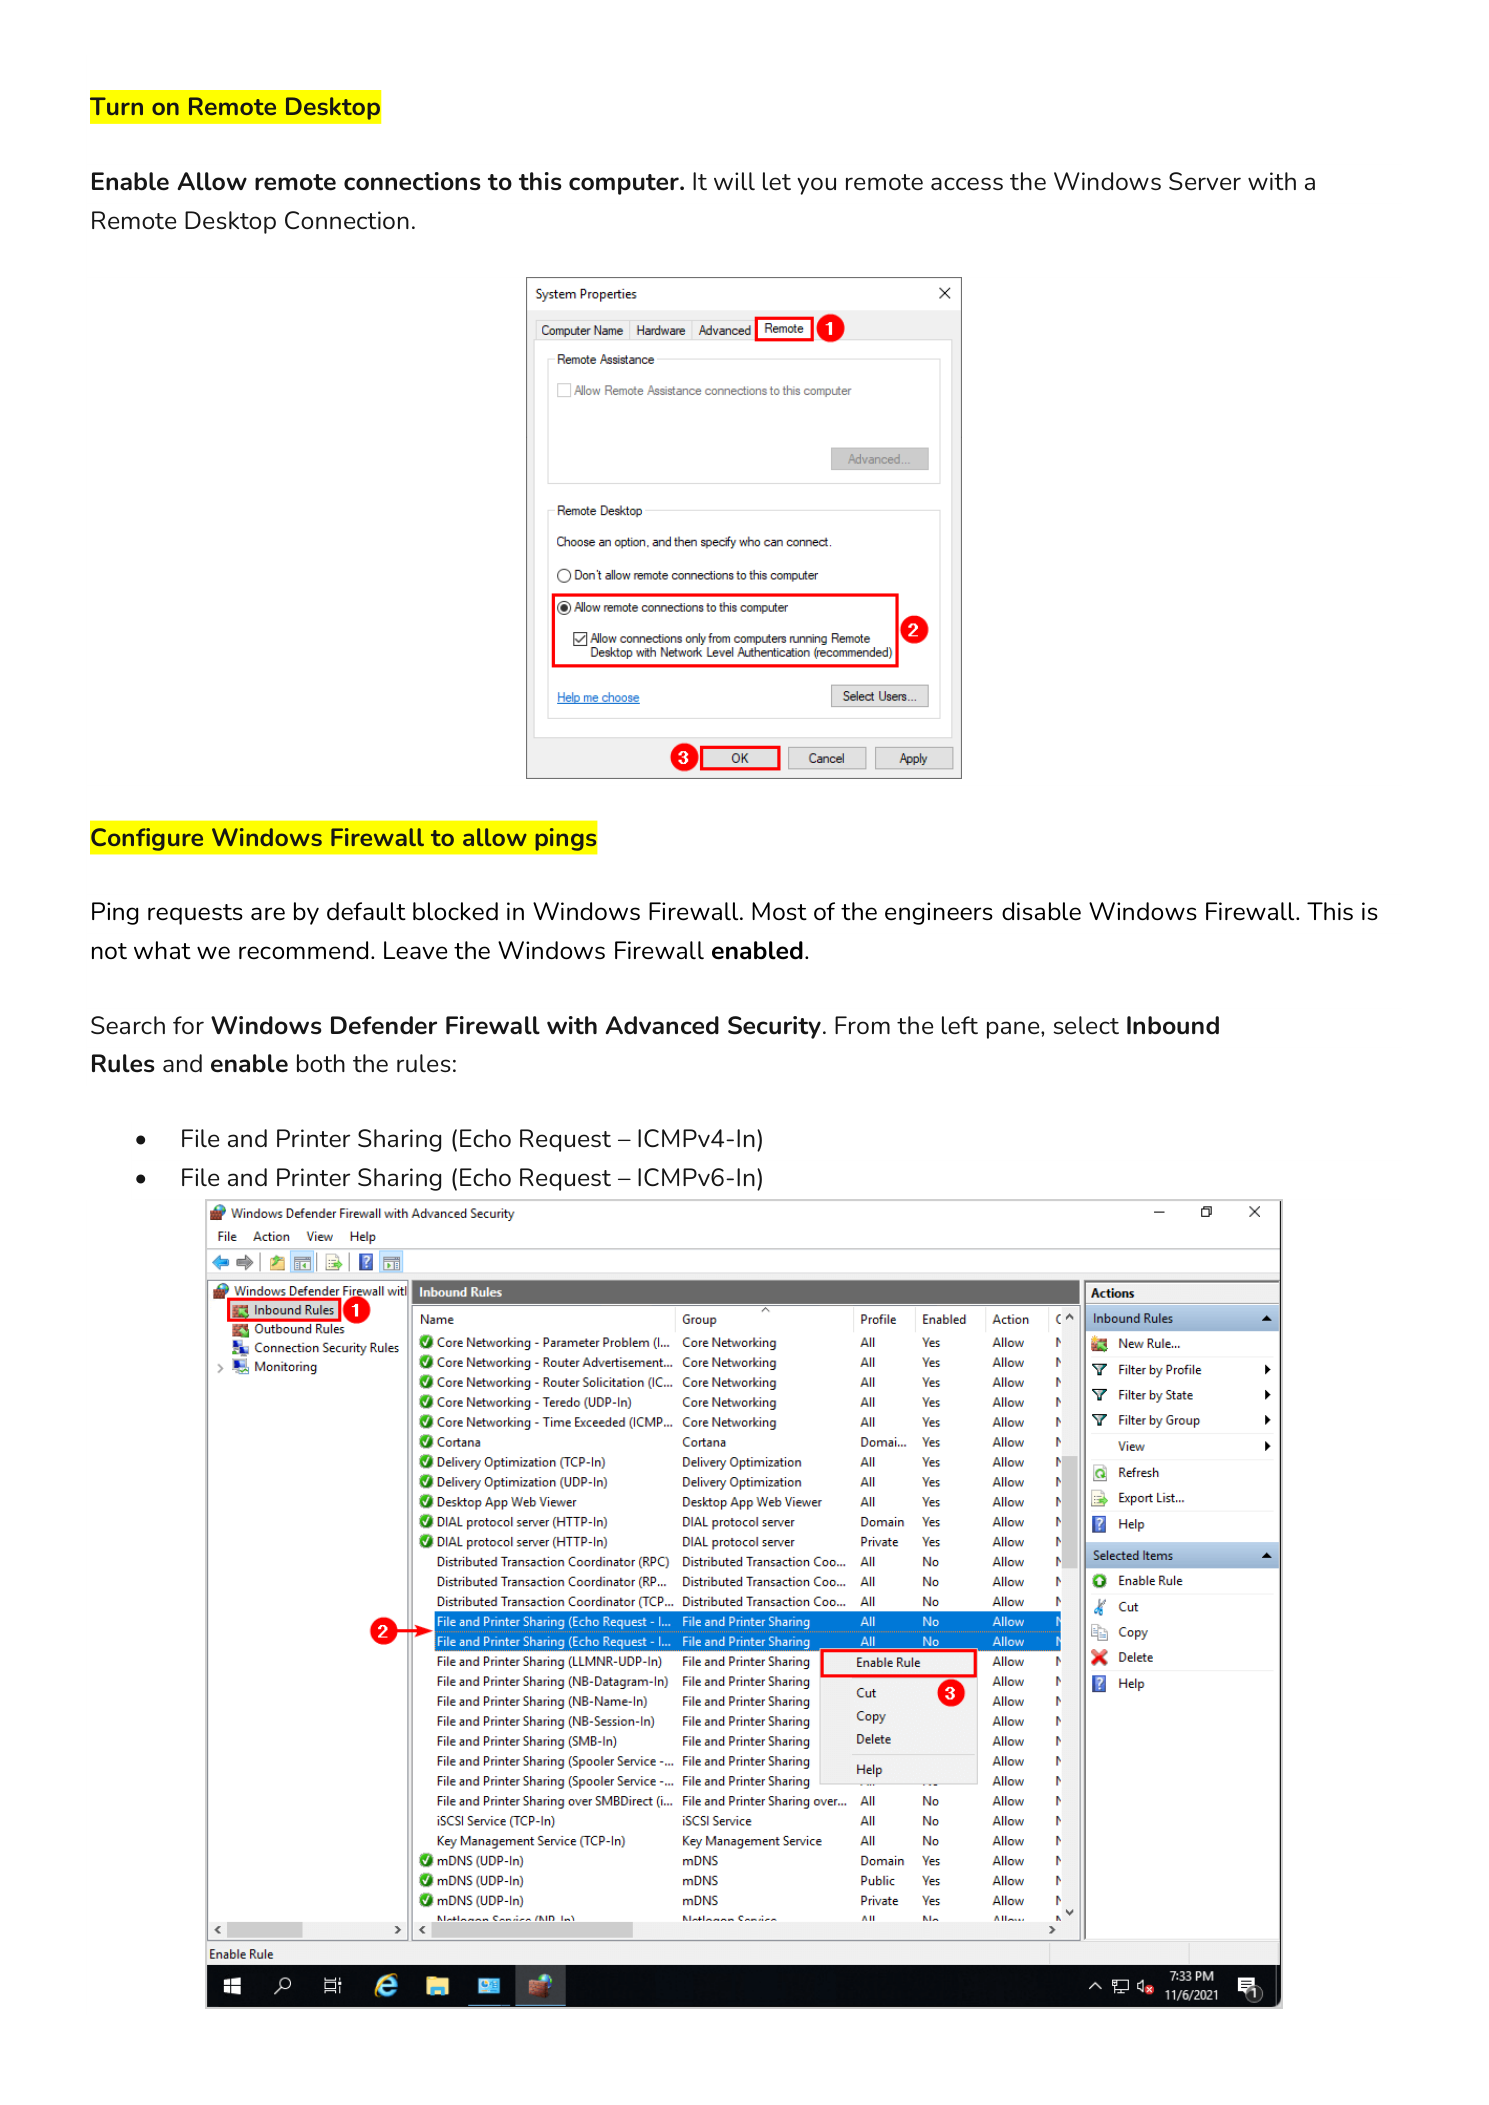
To enable it: open System Properties (run sysdm.cpl) and click the Remote tab. Select Allow remote connections to this computer. For most environments, leave Network Level Authentication (NLA) checked — it authenticates users before establishing the full RDP session, which reduces exposure to brute-force attacks.
Make sure user accounts that need RDP access are either Administrators or members of the Remote Desktop Users local group.
Step 7 – Configure Windows Firewall to Allow Pings
Windows Firewall blocks ICMP echo requests (pings) by default. While this is a valid hardening measure in some environments, it makes basic network troubleshooting significantly harder. If you cannot ping the server, diagnosing connectivity issues requires additional tools and steps that slow everything down.
For most internal server environments, enabling ping responses is a reasonable trade-off. Rather than disabling the firewall entirely, enable only the specific rules needed. Open Windows Defender Firewall with Advanced Security, navigate to Inbound Rules, and enable these two rules:
- File and Printer Sharing (Echo Request – ICMPv4-In)
- File and Printer Sharing (Echo Request – ICMPv6-In)
Right-click each rule and select Enable Rule. The server will now respond to ping from other machines on the network.
Step 8 – Run Windows Update
A freshly installed Windows Server image can be months out of date. Microsoft releases cumulative updates, security patches, and driver updates on a regular cycle. Running Windows Update immediately after installation closes known vulnerabilities before the server goes online and reduces the attack surface from day one.
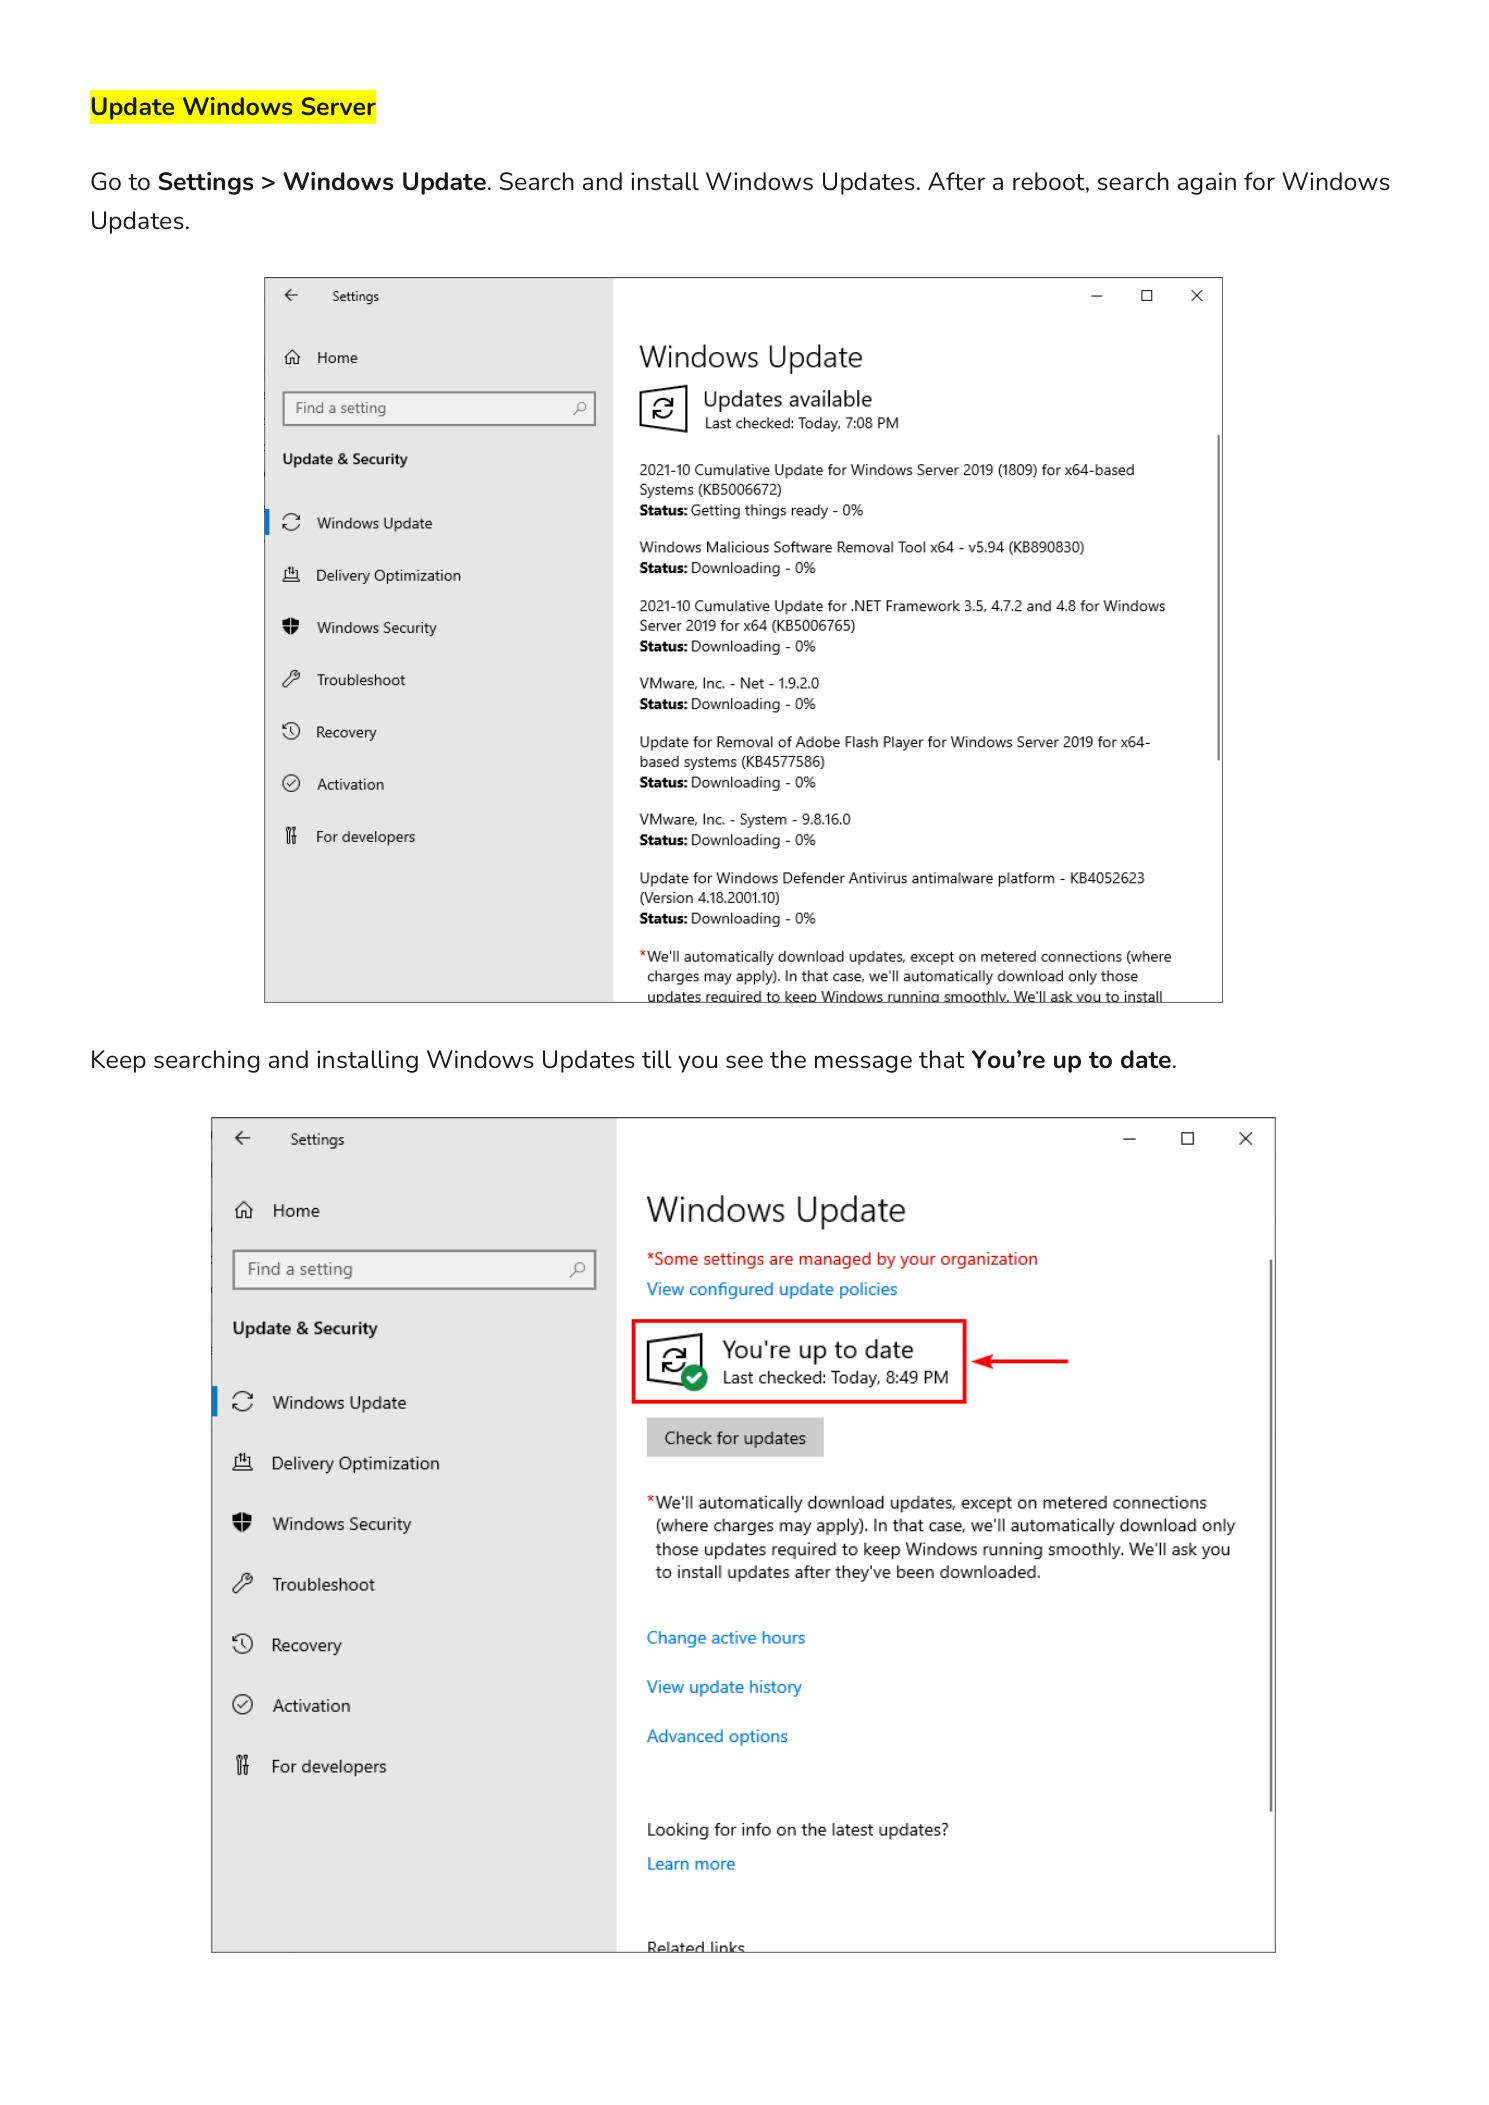
Go to Settings > Update & Security > Windows Update and click Check for updates. Install all available updates and restart when prompted. Repeat the process until you see the You are up to date message — a fresh installation often requires multiple update passes before reaching a current state.
Step 9 – Activate Windows Server
Windows Server must be activated to avoid losing functionality after the grace period expires. Unactivated servers display persistent activation reminders and may eventually have features restricted. The activation method depends on your license type:
- Retail or OEM key: Go to Settings > Update & Security > Activation and enter your product key directly.
- Volume license with KMS: Your organization’s Key Management Service (KMS) server handles activation automatically once the server is network-connected and domain-joined.
- Evaluation build: Evaluation builds run for 180 days before requiring activation. Use the command
slmgr /dlvin an elevated PowerShell session to check the remaining activation period at any time.
Conclusion
These nine steps take less than 30 minutes to complete on a fresh installation and set a clean baseline for any Windows Server deployment. Every server in your environment should go through this checklist before roles are installed, before the machine joins a domain, and before users or services start depending on it.
With the server named, networked, updated, and secured, the next step is installing roles. For a domain controller, that means promoting this server with Active Directory Domain Services. For a file server, it means configuring NTFS permissions and DFS namespaces. Explore the InfoTech Ninja Systems Admin series for step-by-step walkthroughs on each of those next steps.