Sometimes you need a Hyper-V host inside a Hyper-V VM — running a lab Active Directory forest, building a clustered Hyper-V scenario without two physical servers, testing System Center Virtual Machine Manager against multiple “hosts,” or just learning Hyper-V administration without dedicating real hardware. The catch is that a default Hyper-V VM doesn’t see virtualization extensions on its CPU — the host hypervisor strips them. Try to install the Hyper-V role inside the VM and the install fails with a hardware-capability error.
Nested virtualization is the one-line fix: a single PowerShell command on the physical host that exposes the CPU’s virtualization extensions to a specific VM. Once enabled, the VM behaves like a real Hyper-V host and can create its own VMs. This walkthrough hits the install error first to show what it looks like, then enables nested virtualization, then completes the Hyper-V install successfully — the most common path the first time someone does this.
What you need before starting
- A physical Hyper-V host (Windows Server with the role installed)
- A guest VM that will become the nested Hyper-V host (this walkthrough uses NYC-SVR1)
- The physical host’s processor must support Intel VT-x or AMD-V — almost all modern server CPUs do; cloud-hosted environments often don’t (Azure Dv3/Ev3 or later families do; older sizes don’t)
- Local administrator rights on the physical host (for the PowerShell command) and inside the VM (for the role install)
- Enough RAM allocated to the VM for both its own OS and its future nested guests — 8–16 GB is a practical minimum
Step 1 — Open the VM in Hyper-V Manager
This walkthrough assumes you already have a VM created and ready to become the nested host. Open Hyper-V Manager on the physical server, locate the target VM (NYC-SVR1 in this example), right-click and pick Connect to open its console.
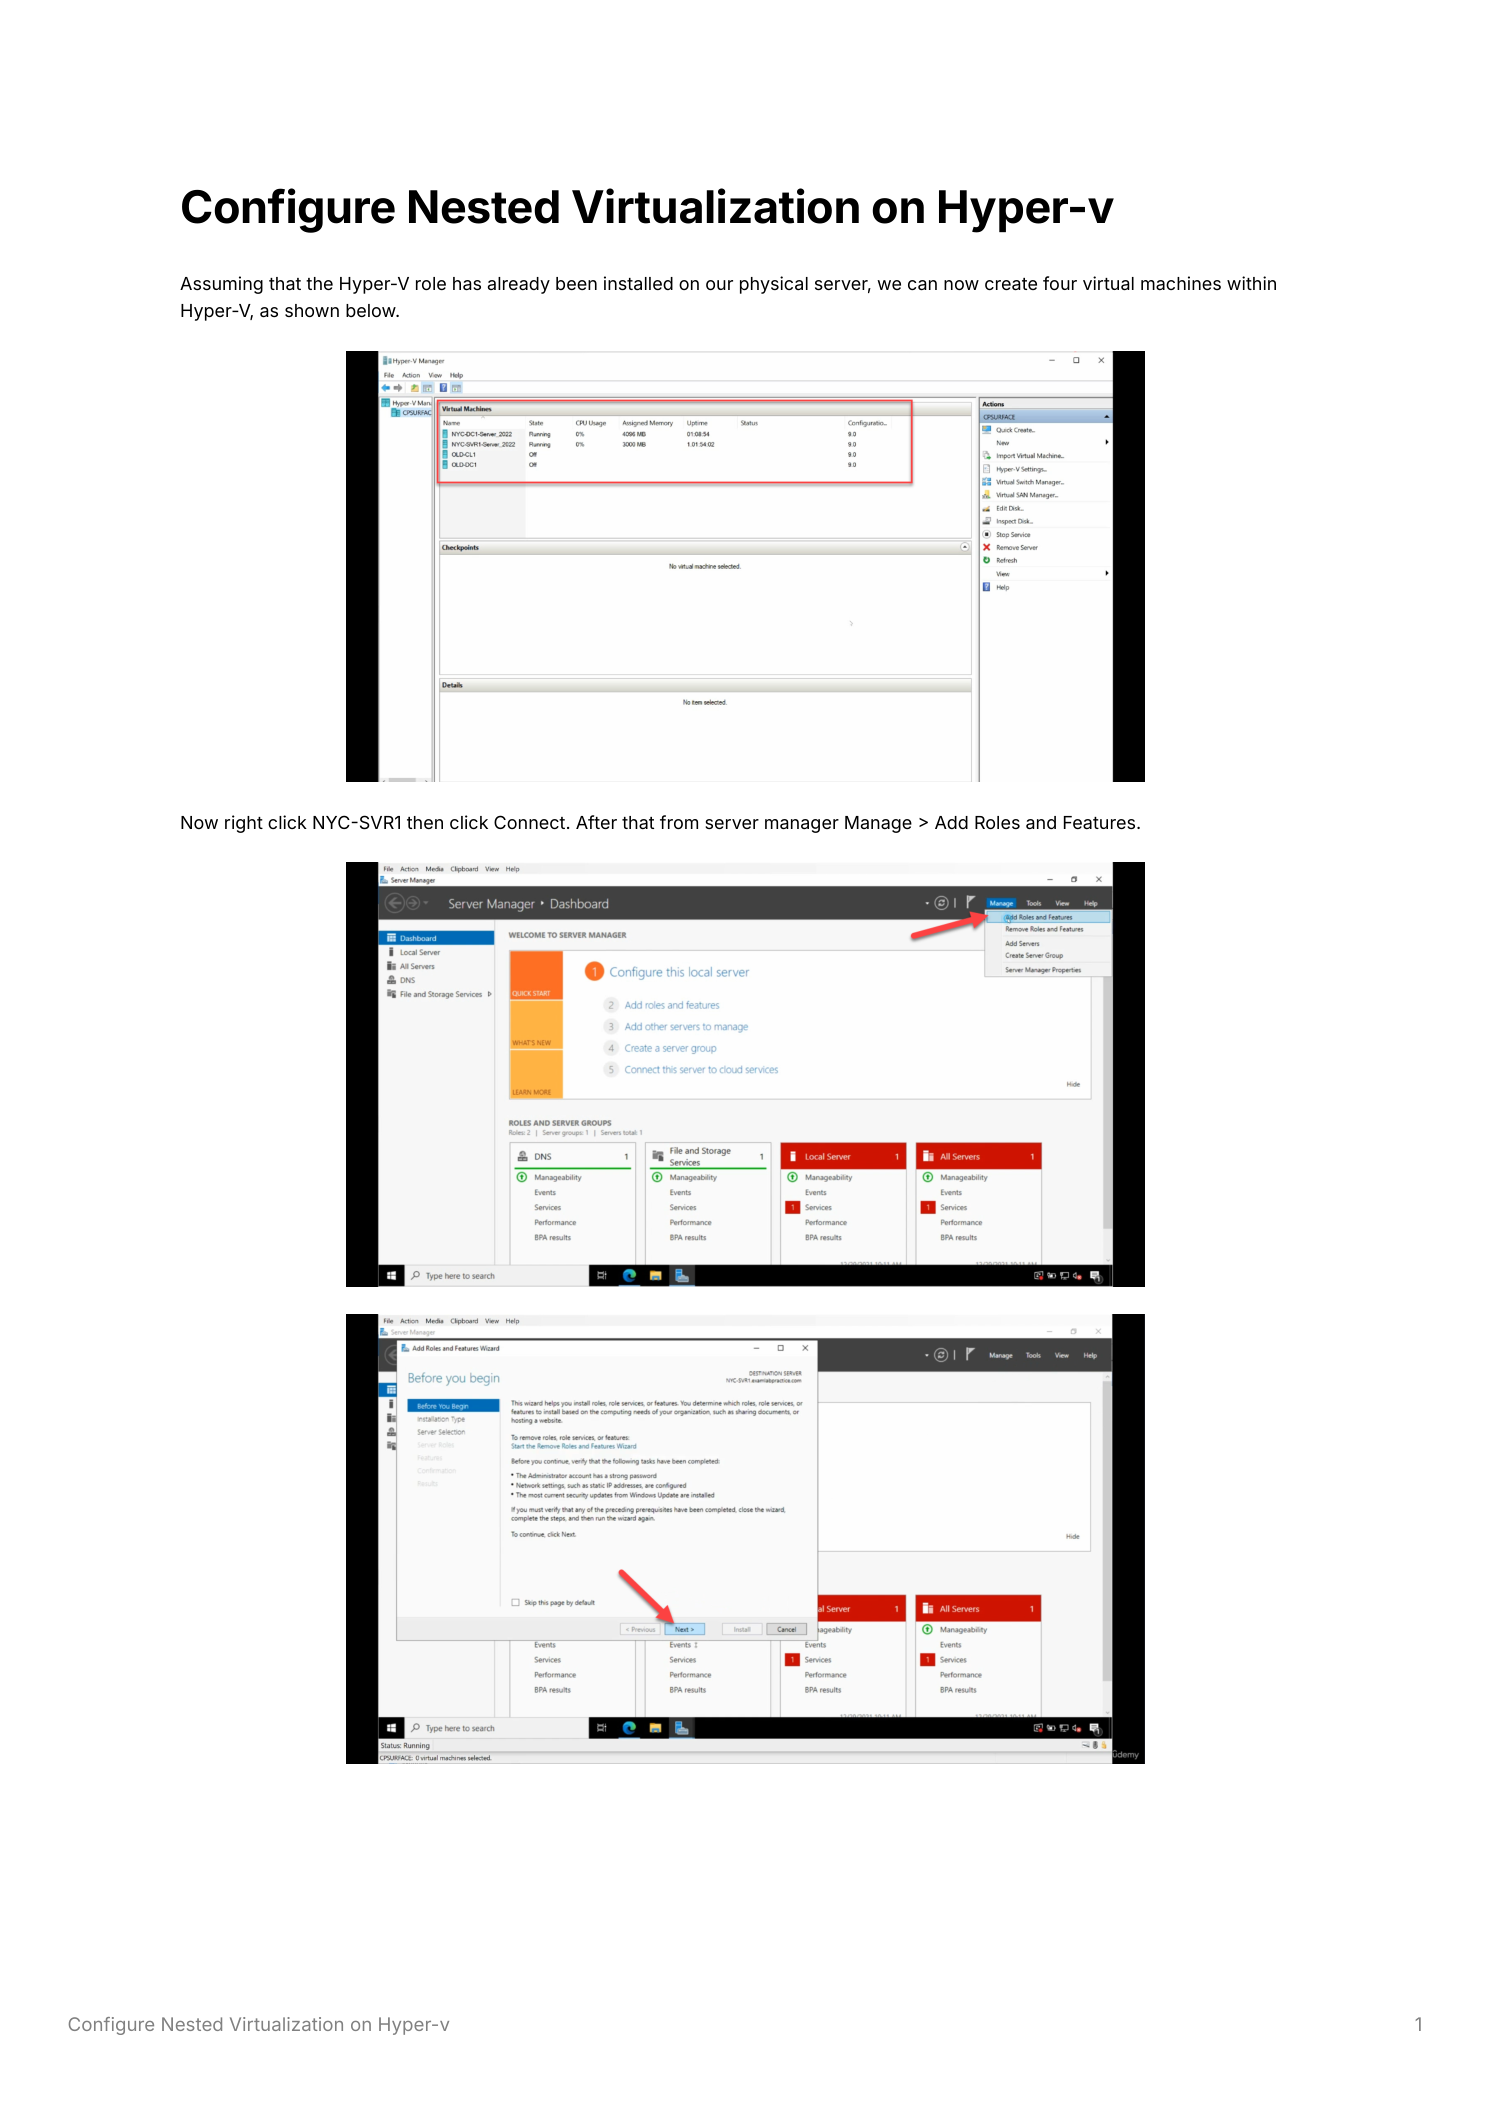
Step 2 — Try to install Hyper-V (this fails on purpose)
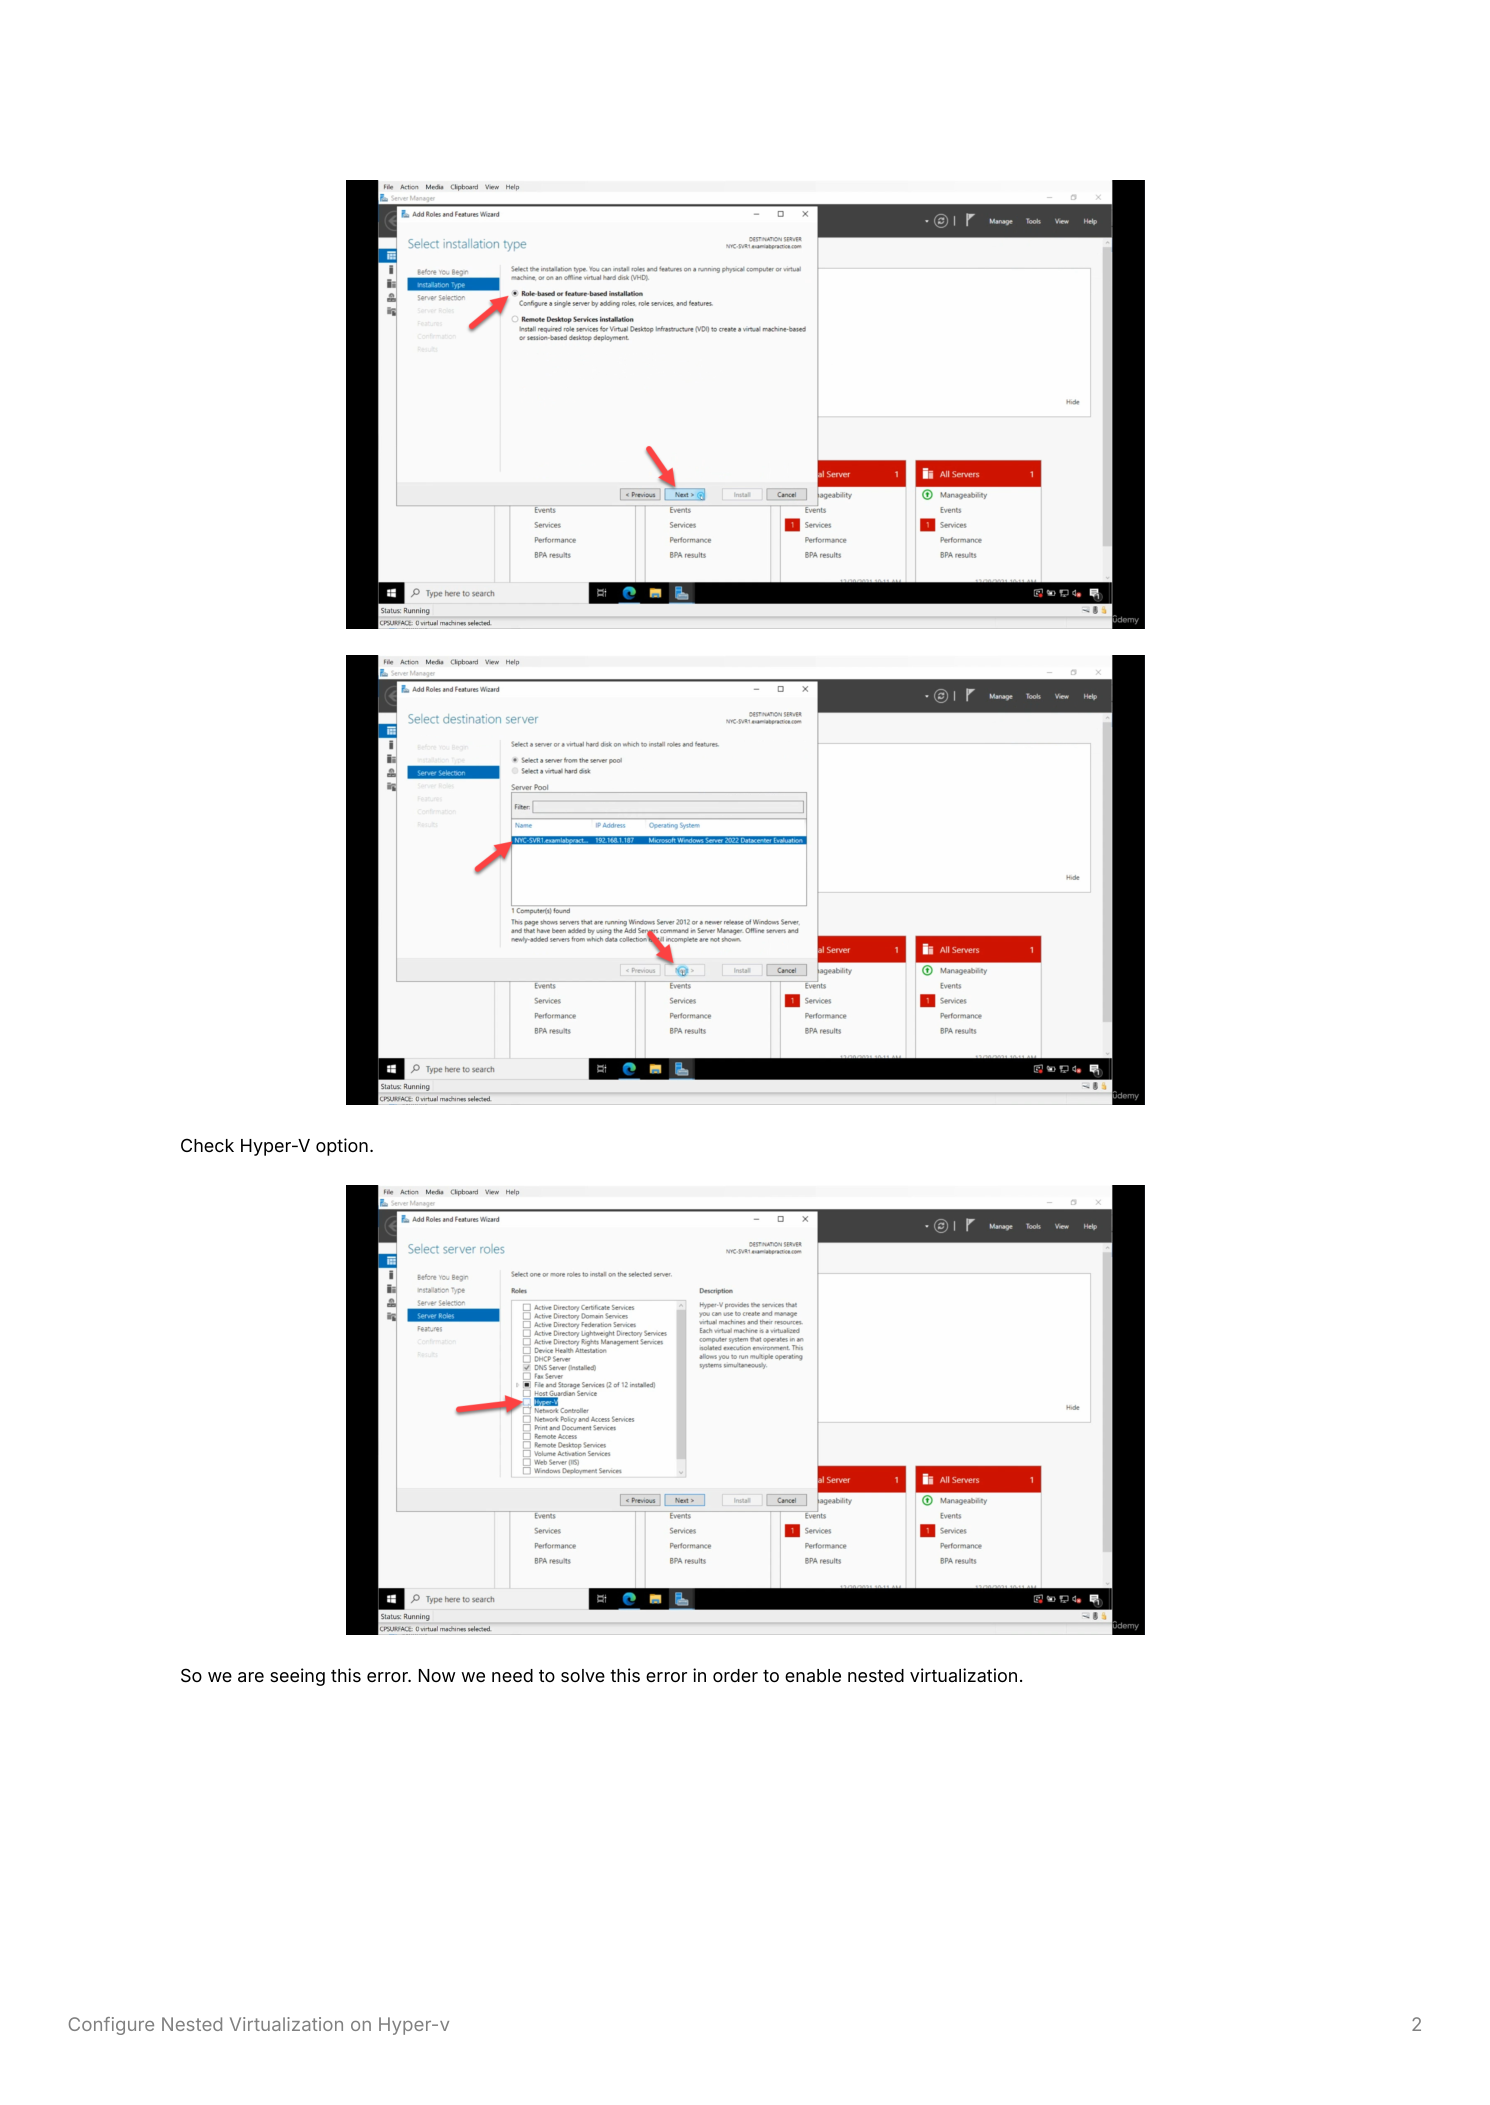
Inside the VM, run through the Hyper-V install attempt to see the exact failure mode — this is what you’ll hit if you forget to enable nested virtualization first, so it’s worth recognizing. Server Manager > Manage > Add Roles and Features. Role-based installation, local server. On Server Roles, tick Hyper-V, accept the management features prompt, click through to Install.
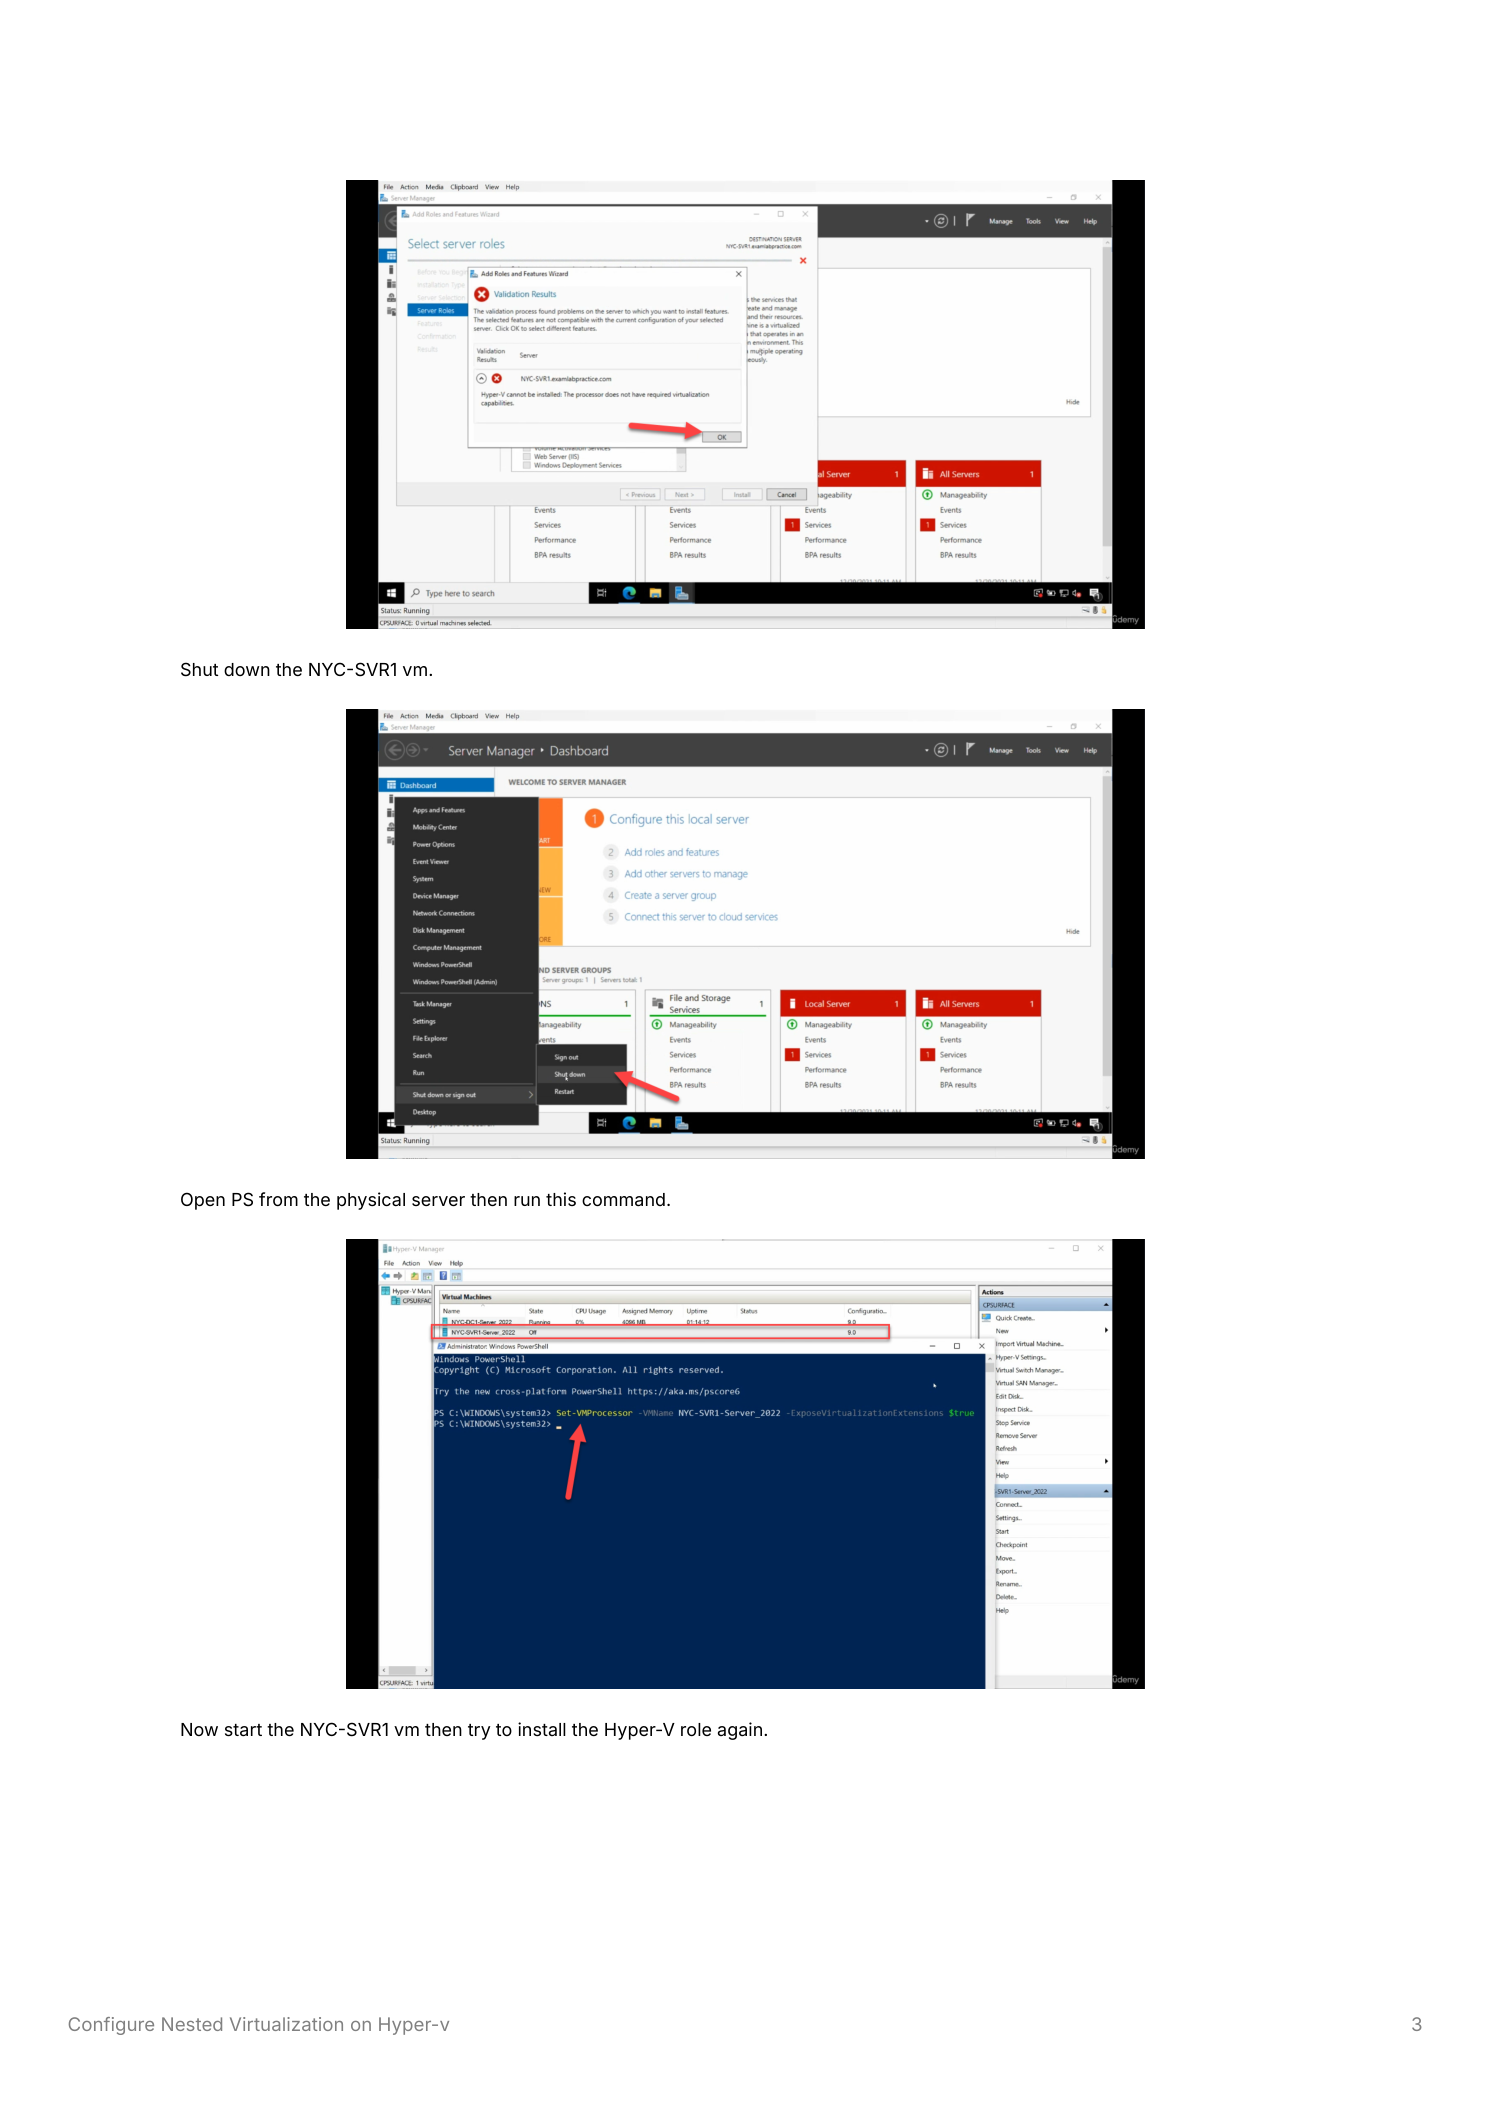
The install fails — the error says the processor doesn’t have the required virtualization capabilities. Which is correct: the host has been hiding those capabilities from the VM. Time to fix that.
Step 3 — Shut the VM down, run the magic PowerShell on the physical host
Two important details:
- The VM must be in the Off state — not paused, not saved. Saved-state VMs throw an error when you try to modify processor settings.
- The PowerShell command runs on the physical host, not inside the VM.
Shut down the VM cleanly from inside (Start menu > shut down). Wait for Hyper-V Manager to show Off. On the physical host, open elevated PowerShell:
Set-VMProcessor -VMName "NYC-SVR1" -ExposeVirtualizationExtensions TrueThe command produces no output on success. The setting persists across VM restarts — you only do this once per VM that needs nested virtualization. Replace the VM name with whatever yours is called in Hyper-V Manager.
Step 4 — Power the VM back on and retry the Hyper-V install
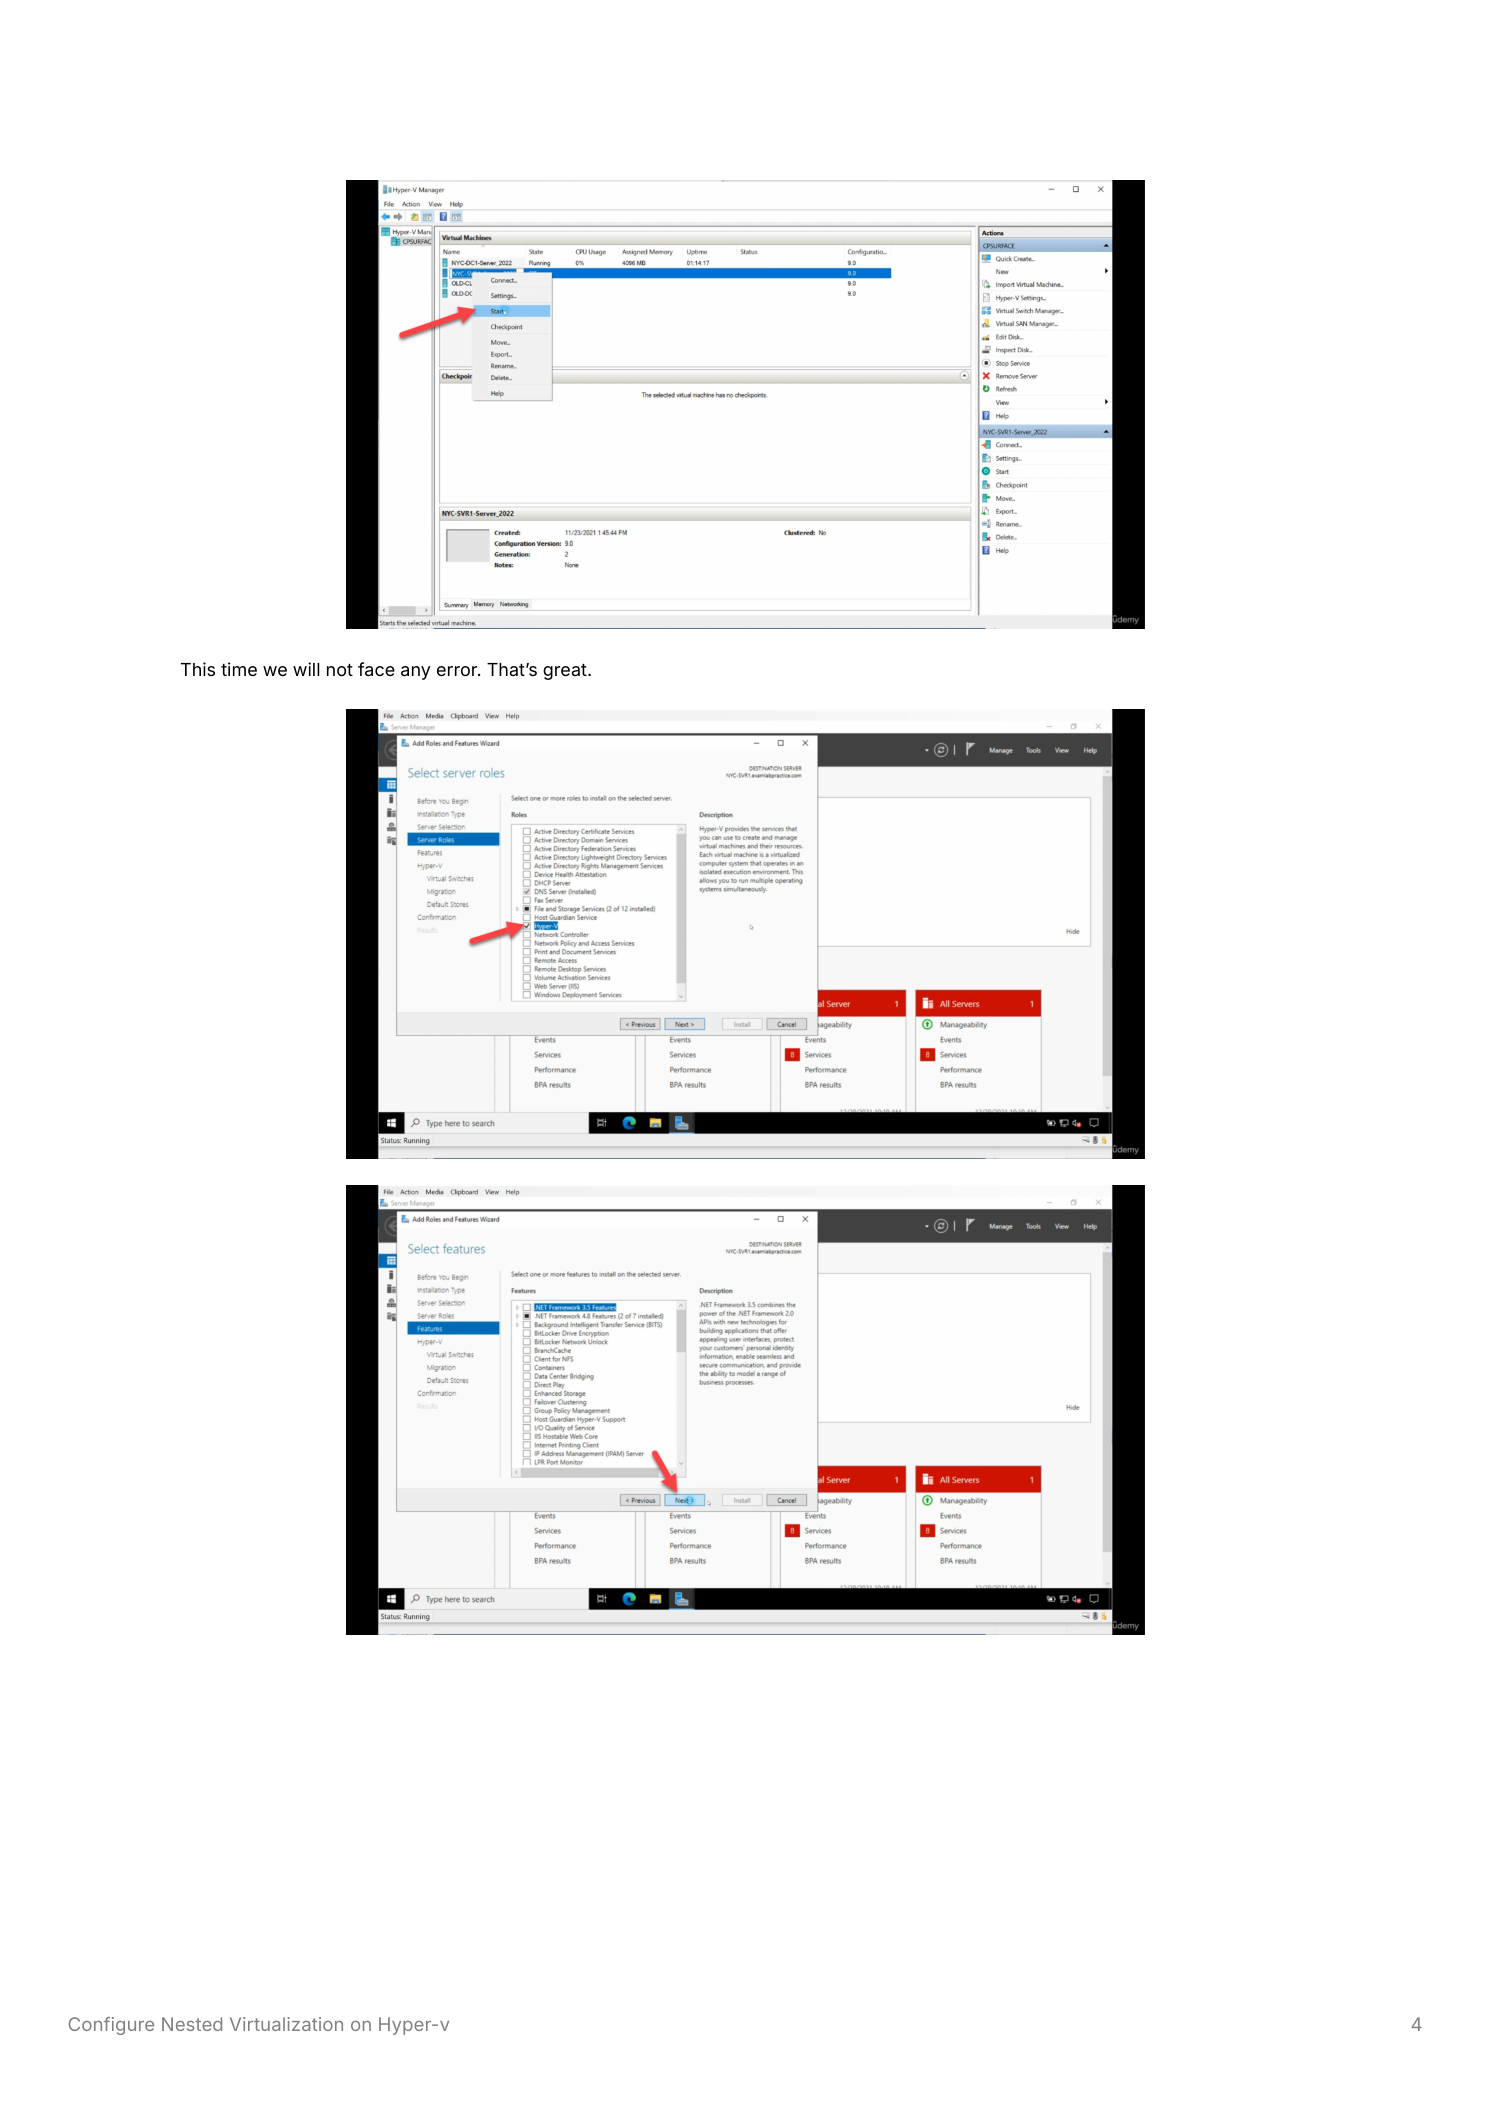
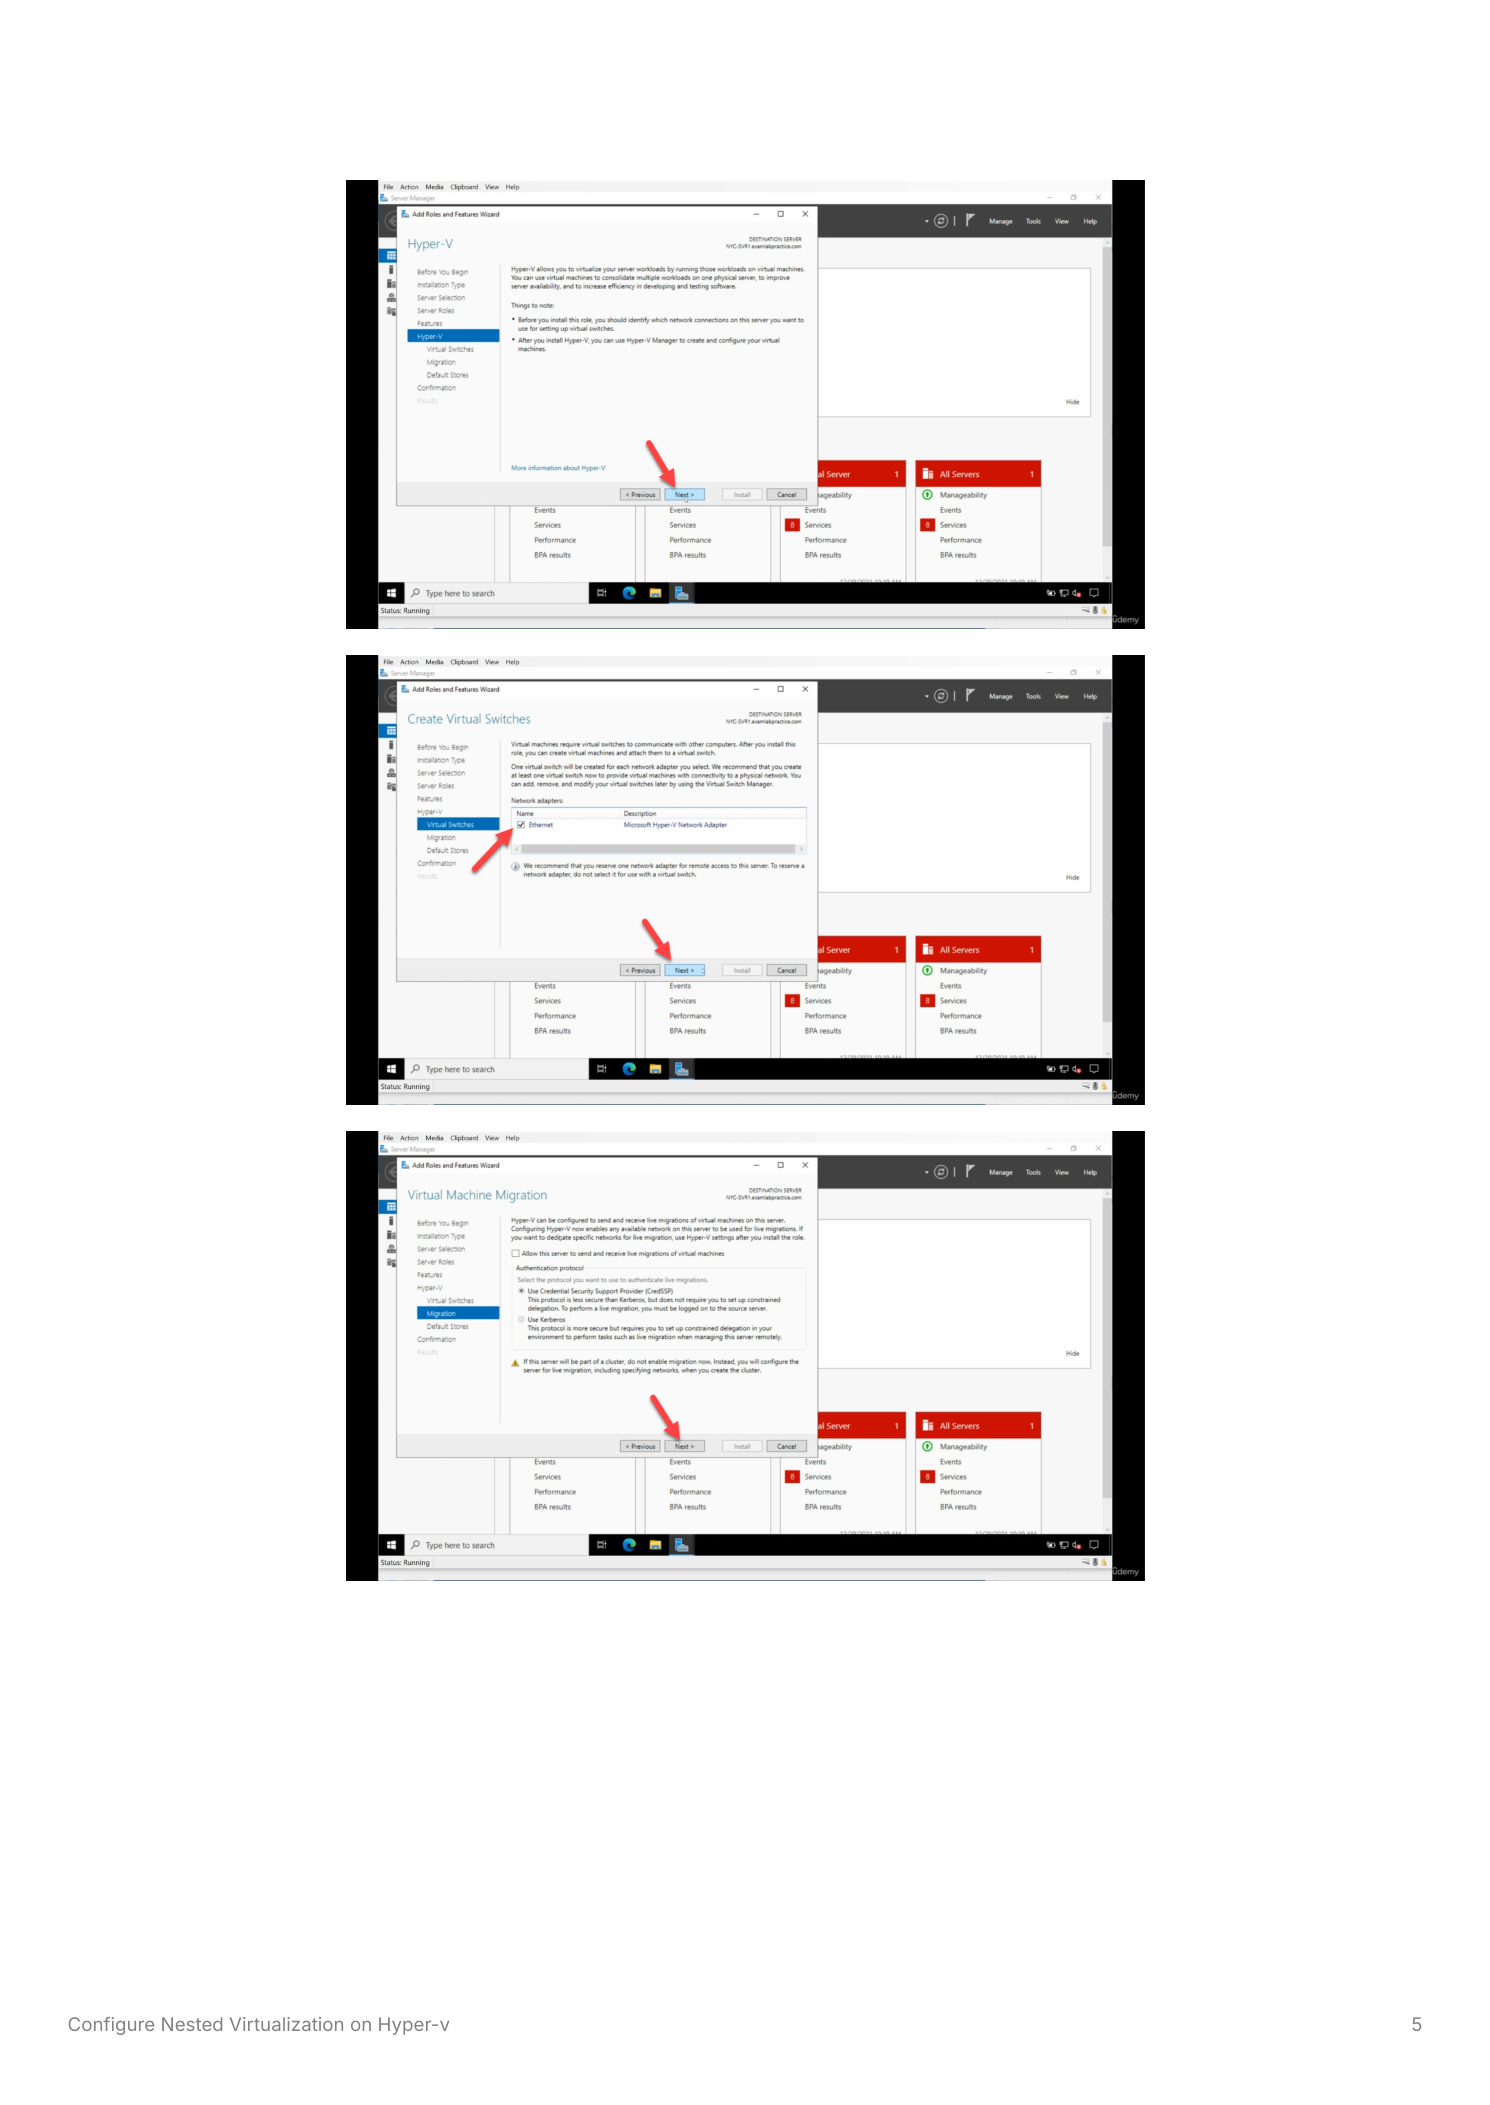
Start the VM from Hyper-V Manager, connect, log in. Open Server Manager > Add Roles and Features again, walk through the wizard exactly as before: Role-based, local server, tick Hyper-V on Server Roles. The role is accepted — no error this time. Click through to the next pages.
The wizard now shows the Hyper-V-specific configuration pages it skipped before. The Create Virtual Switches page asks which network adapters to attach to internal virtual switches for the nested VMs — configure now or skip and add them later from Hyper-V Manager once the role is installed.
Step 5 — Migration and default stores
Two more Hyper-V-specific pages before the confirmation:
- Virtual Machine Migration — only relevant if this nested host will be in a Hyper-V failover cluster (which is unusual for nested setups). For lab use, leave defaults and click Next.
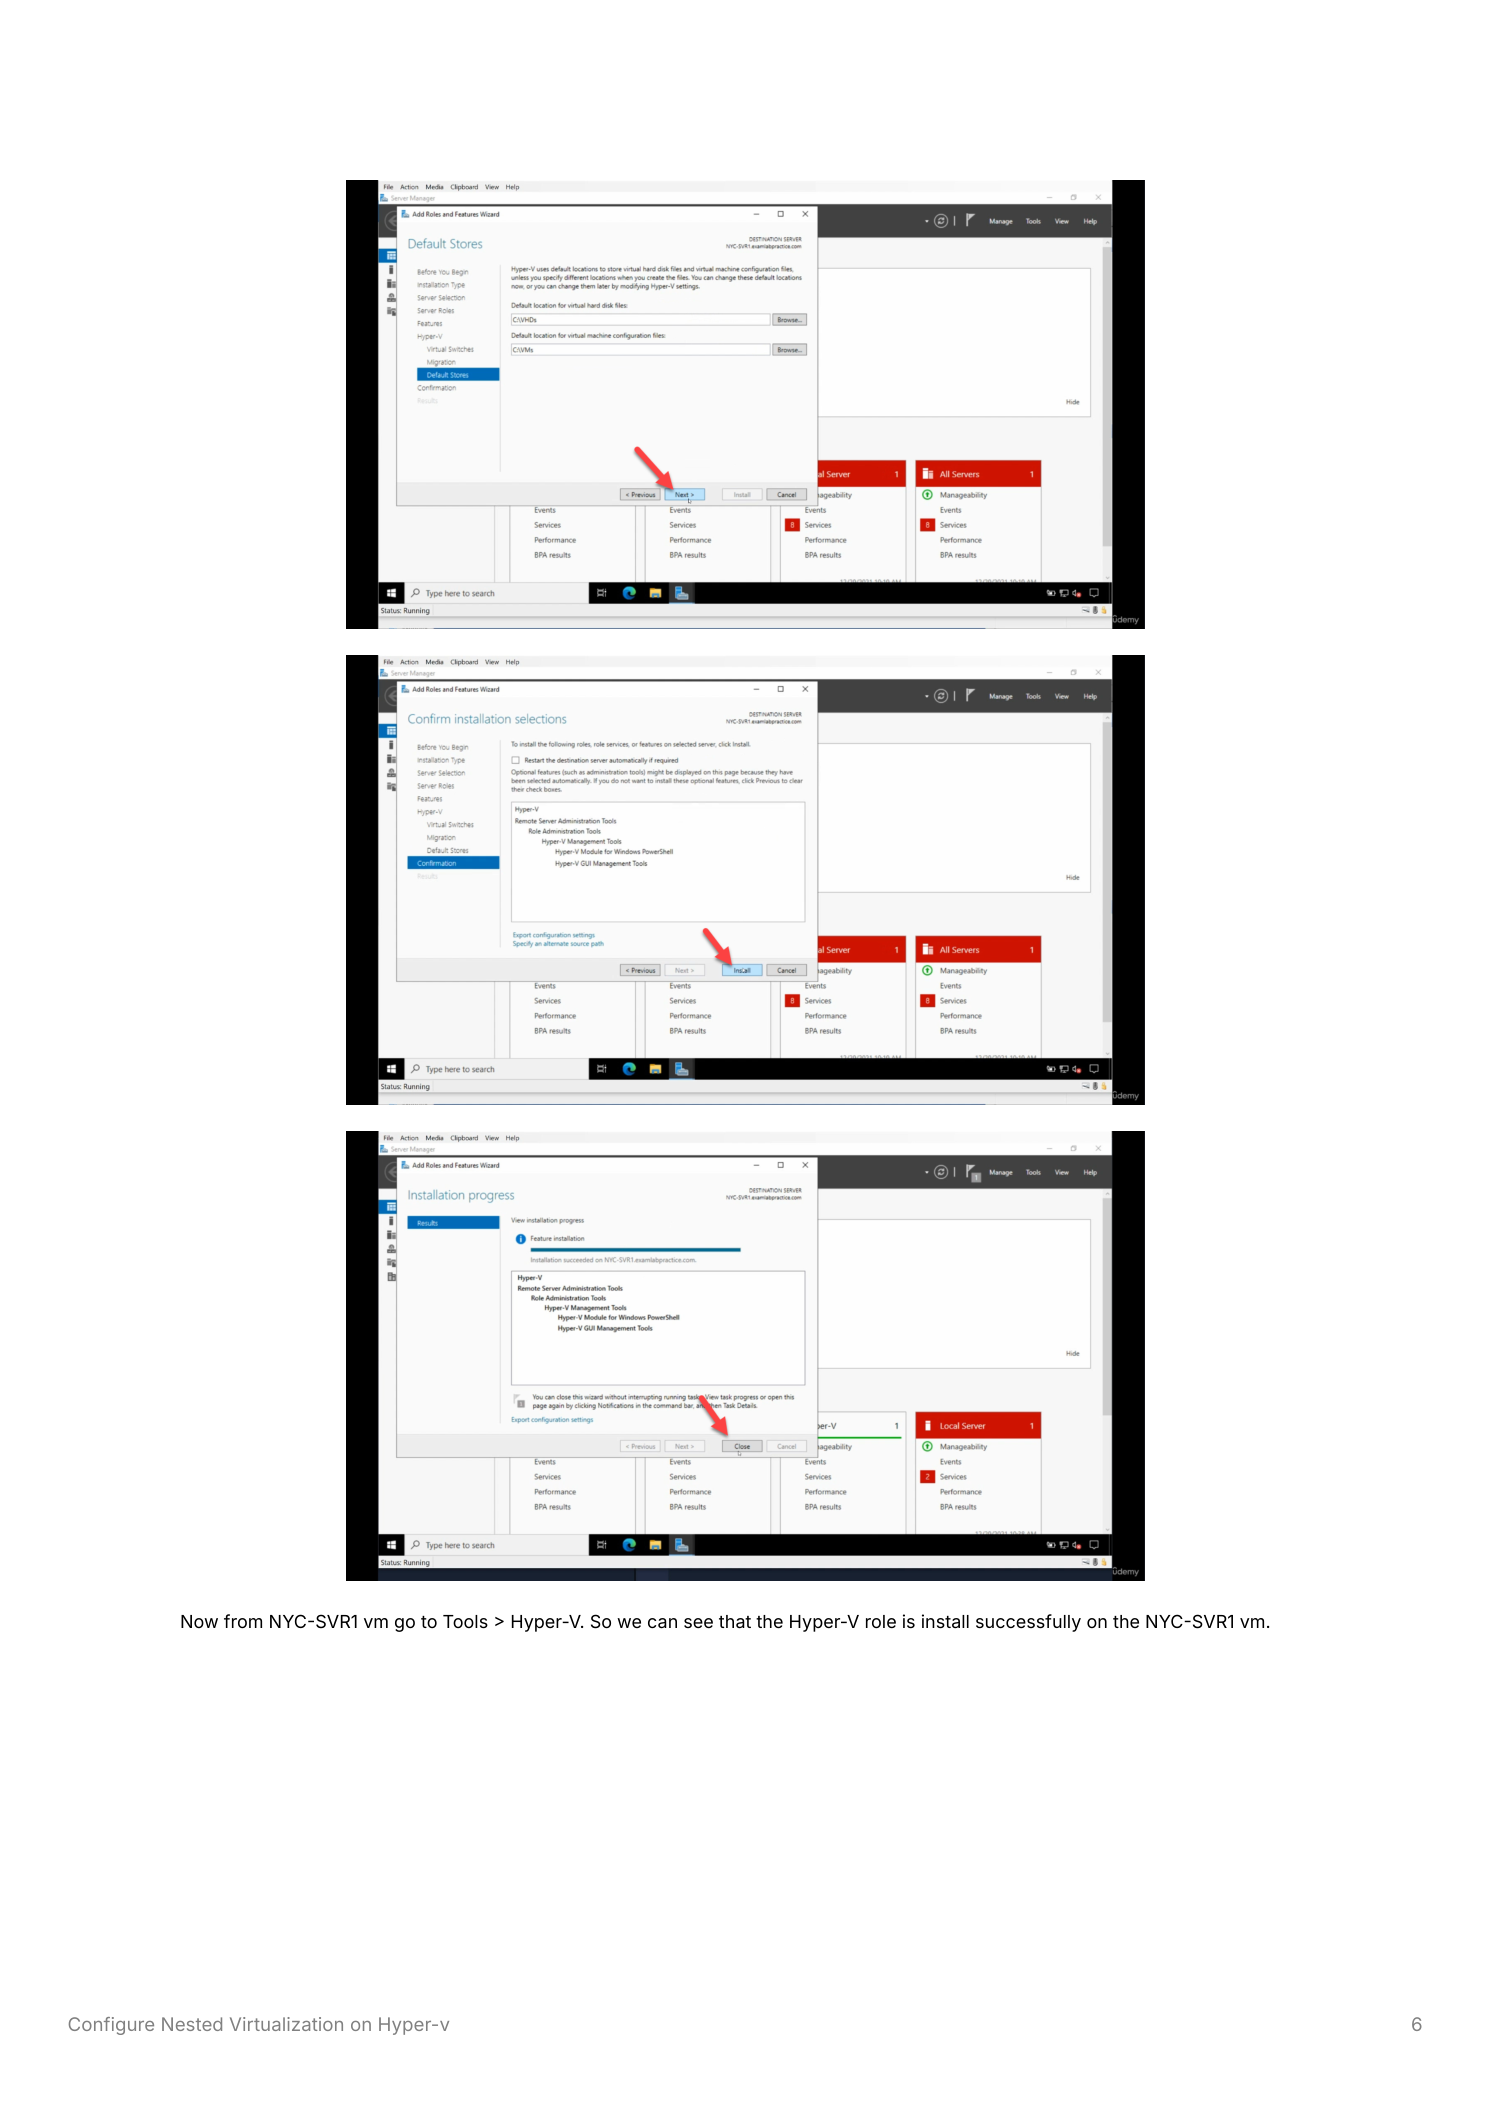
- Default Stores — where new VHDX files and VM configuration files land by default on this nested host. Defaults are fine for lab use; for any persistent or larger workload, point them at a drive with adequate free space.
Step 6 — Install and reboot
The Confirmation page lists Hyper-V and Hyper-V Management Tools. Click Install. The progress bar runs through; success this time. The wizard prompts for a restart — let the VM restart so the Hyper-V hypervisor takes over the VM’s OS at boot.
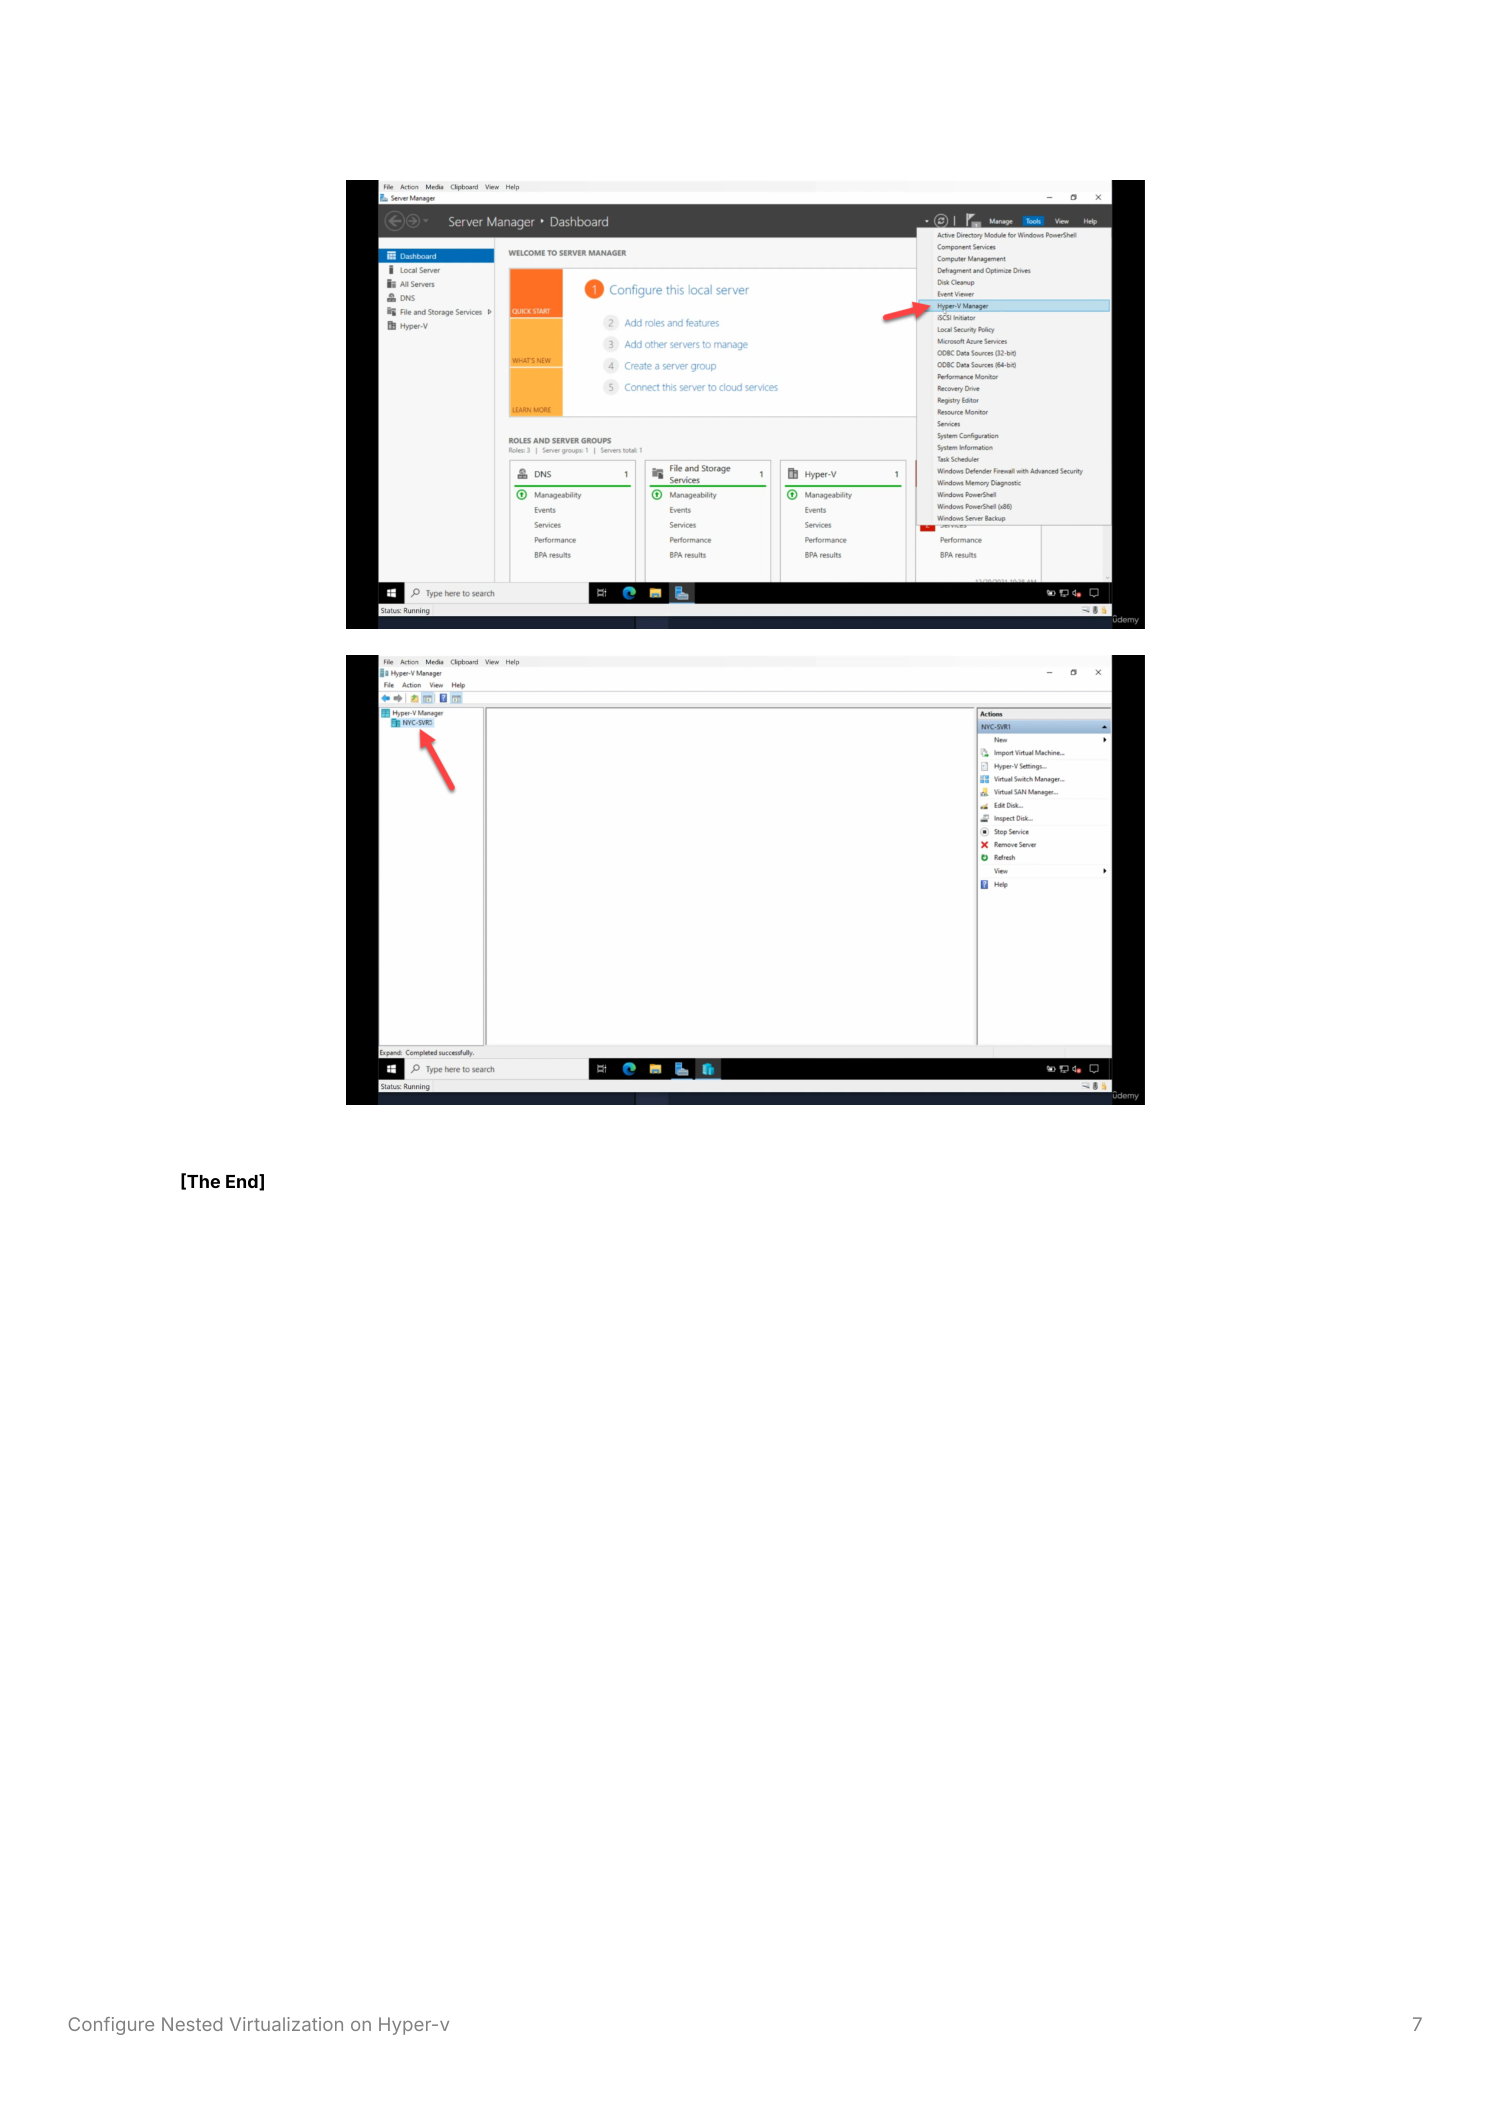
Step 7 — Verify the nested host works
After the restart, open Server Manager inside the VM. Tools > Hyper-V Manager — the Hyper-V Manager console is now available inside the VM. Open it; the NYC-SVR1 node appears as a Hyper-V host. From here you can create VMs nested inside the VM, connect them to virtual switches, and manage them with the same tools you’d use on a physical host.
Things that bite people in production (and labs)
Cloud hosts may not support nested virtualization
Bare-metal Hyper-V hosts almost always support nested virtualization. Cloud-hosted Hyper-V (Azure VMs, AWS EC2 with Hyper-V) is a mixed bag — some VM sizes expose virtualization extensions, others don’t. Azure’s Dv3, Ev3, and newer general-purpose sizes support nested; older A-series and B-series typically don’t. Check the provider documentation before assuming this works in the cloud.
Performance overhead is real
Nested virtualization adds an extra layer of CPU translation. Performance degrades by roughly 10–30% compared to running the same workload on the physical host directly. Fine for labs, learning, CI/CD pipelines. Not fine for production workloads — if you find yourself reaching for nested in production, the right answer is almost always “run the workload directly on a physical host instead.”
Memory pressure compounds
The outer VM needs enough RAM for its own OS plus the RAM of every nested VM it will host. A nested host with 4 GB of RAM and three 2-GB nested VMs is going to thrash. Allocate generously to the outer VM — 16 GB is a reasonable minimum for a useful lab, more if you plan to run multiple Windows Server nested VMs.
The VM has to be Off, not Saved
Set-VMProcessor with -ExposeVirtualizationExtensions only succeeds against a VM in the Off state. Saved or Paused VMs throw an error. If you started the VM hoping “maybe it’s fine,” shut it down completely first. The setting persists across subsequent restarts — you only need to do this once per VM.
Generation 2 VMs are usually better
Generation 2 VMs use UEFI firmware and have better performance characteristics than Generation 1. When creating the outer VM that will host nested Hyper-V, prefer Generation 2 unless the guest OS specifically requires Generation 1 (some older Linux distributions, some legacy applications).
Dynamic Memory and nested don’t mix well
If the outer VM uses Dynamic Memory, the inner VMs see CPU memory configuration as static at the value Dynamic Memory happens to be at when they boot. Disable Dynamic Memory on outer VMs that host nested guests — assign a fixed amount of RAM and let it be predictable.
Where this fits
Nested virtualization is the foundation for any Hyper-V learning lab and many CI/CD pipelines. For broader Hyper-V coverage see the Hyper-V & Virtualization pathway. For Windows Server administration of the underlying hosts, the Windows Server Administration pathway covers post-install configuration, storage, and the rest of the supporting infrastructure.