Introduction
Windows Server is the backbone of enterprise IT infrastructure. Whether you are setting up a home lab to practice for a certification, testing a new configuration before rolling it out to production, or building out a dev environment from scratch, knowing how to install Windows Server manually is a core skill every sysadmin needs in their toolkit.
In this guide you will walk through the complete process of installing Windows Server 2019 on a VMware ESXi virtual machine. The same procedure applies to other hypervisors including Microsoft Hyper-V and VirtualBox, as well as bare-metal physical servers. By the end you will have a fully operational Windows Server instance ready for role configuration.
What You Need Before You Start
Before diving in, make sure you have the following ready:
- A VMware ESXi host or another hypervisor of your choice
- A VM with at least 2 vCPUs, 4 GB RAM, and 60 GB of disk space
- A Windows Server ISO file (covered in the next section)
- Access to the ESXi web client or vSphere Client
Step 1 – Download the Windows Server ISO
If you already have a Windows Server ISO file or a bootable USB drive, skip ahead to Step 2. If not, Microsoft offers free evaluation builds through the Microsoft Evaluation Center. These are fully functional and include a 180-day evaluation window — more than enough for lab use and certification prep.
Download the version that matches your environment:
- Windows Server 2025
- Windows Server 2022
- Windows Server 2019
- Windows Server 2016
- Windows Server 2012 R2
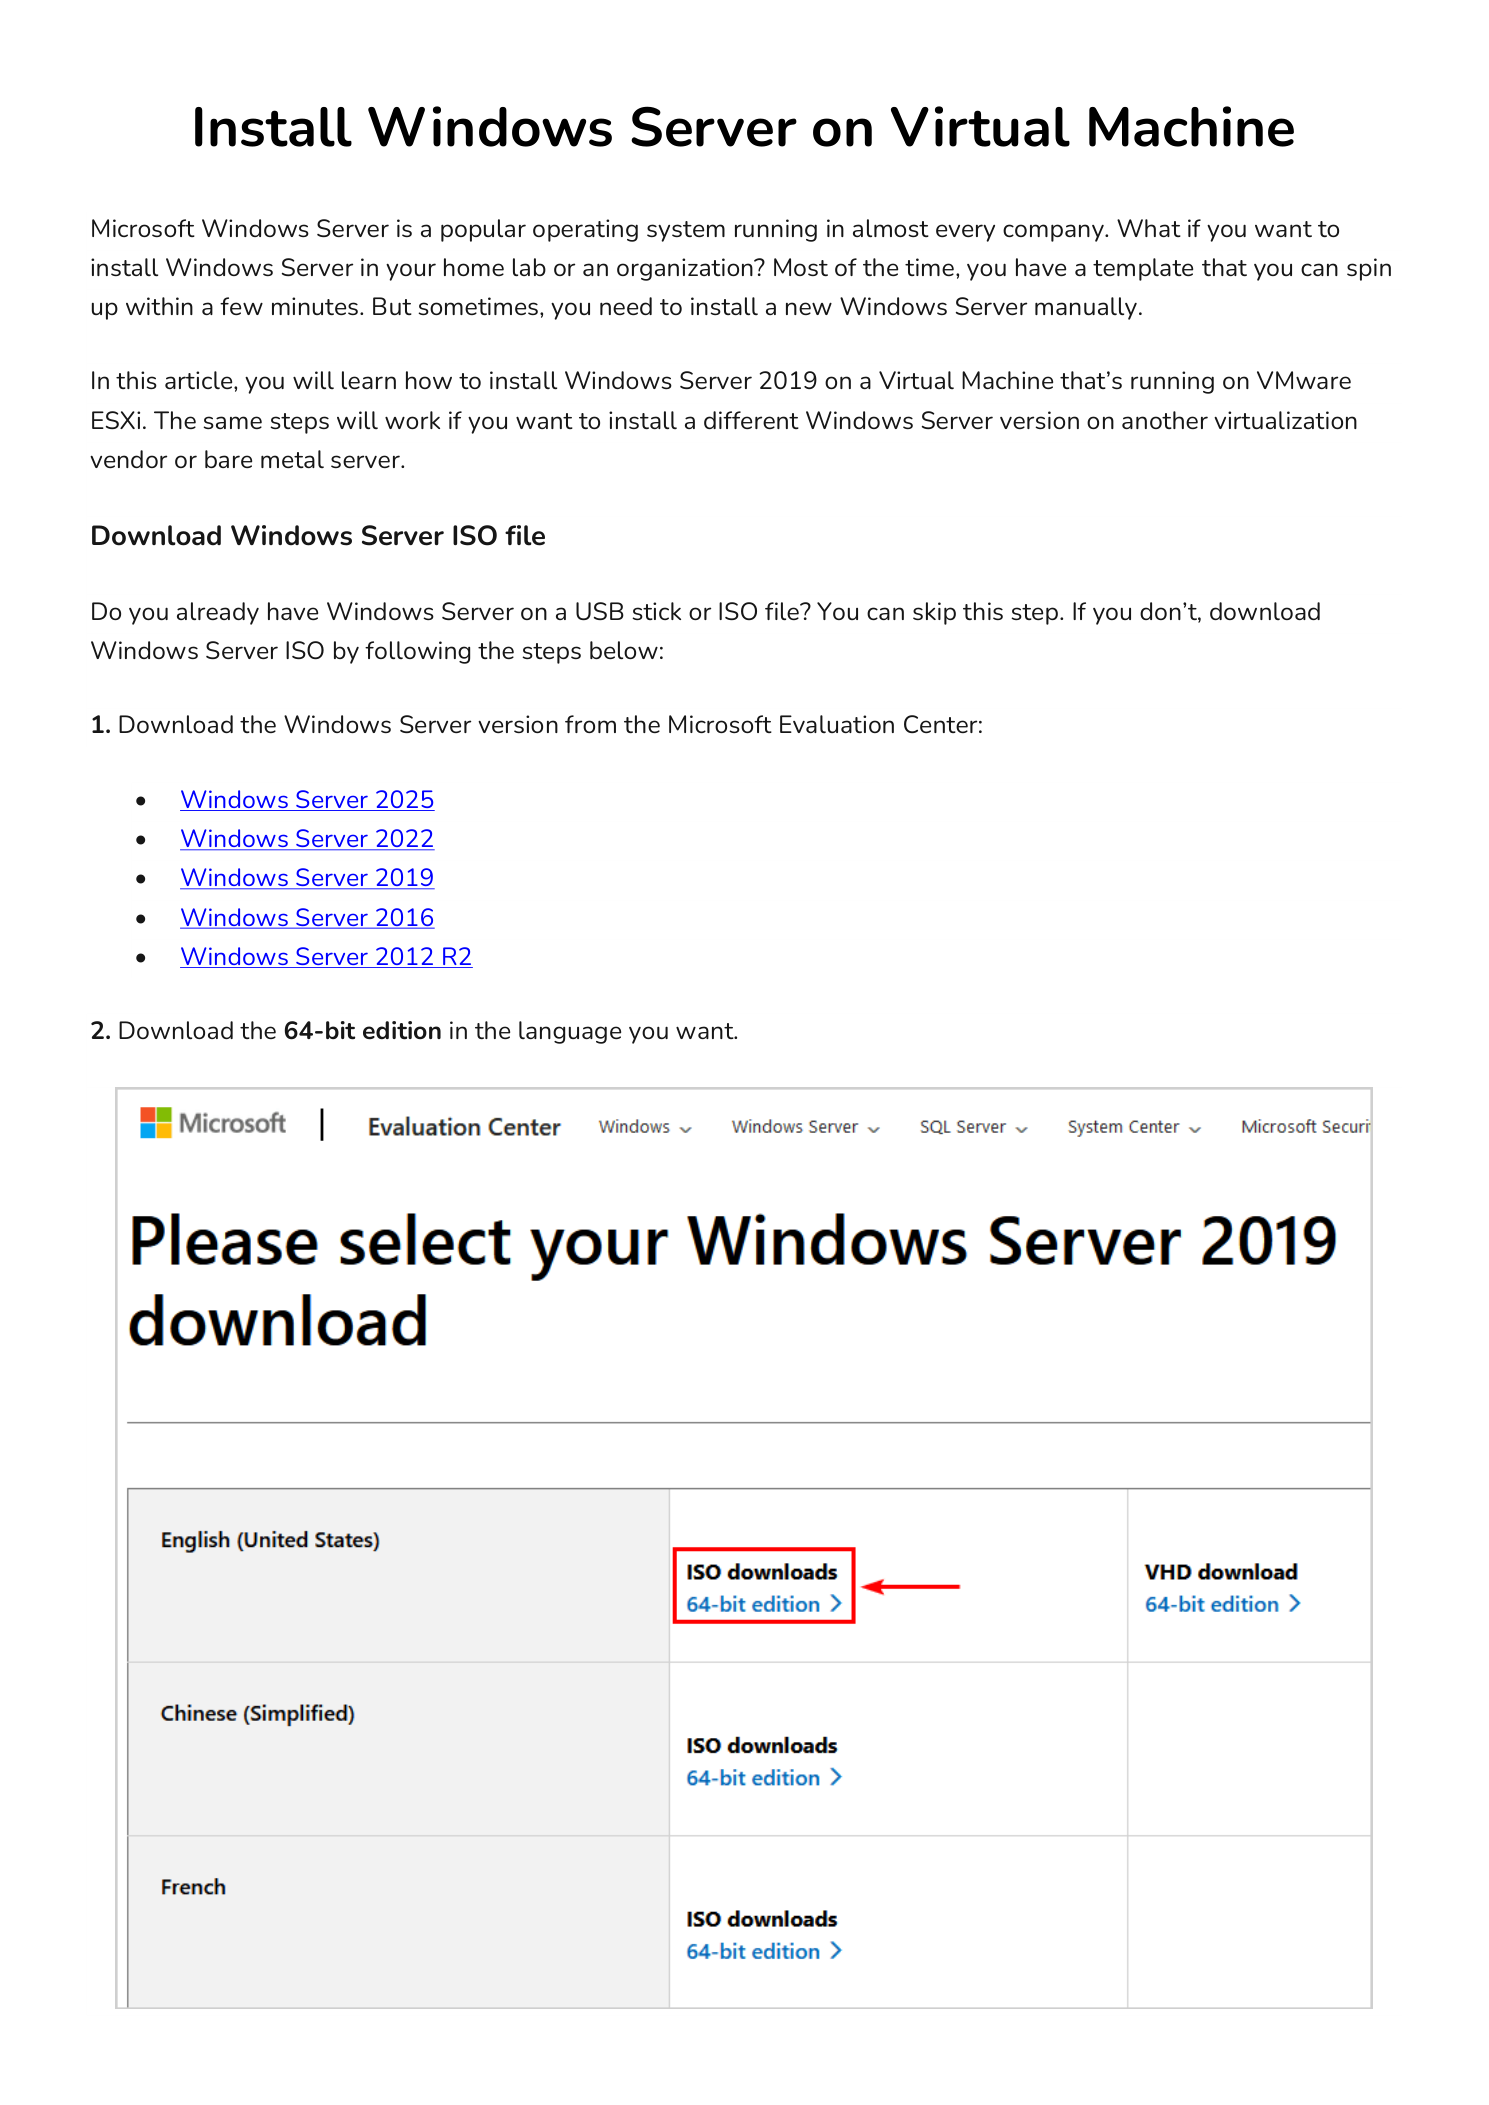
Navigate to the Microsoft Evaluation Center, select your version, and choose the 64-bit ISO download in your preferred language. Save the file somewhere accessible from your ESXi host or local machine.
Step 2 – Upload the ISO and Create the Virtual Machine
With the ISO downloaded, you need to get it onto your ESXi host and attach it to a new virtual machine.
- Upload the ISO to the ESXi datastore. Log into your ESXi host, go to Storage, select your datastore, and upload the Windows Server ISO file to the ISO folder.
- Create a new virtual machine. In the ESXi web client, start a new VM wizard. Set the guest OS family to Windows and the guest OS version to match the Windows Server version you are installing.
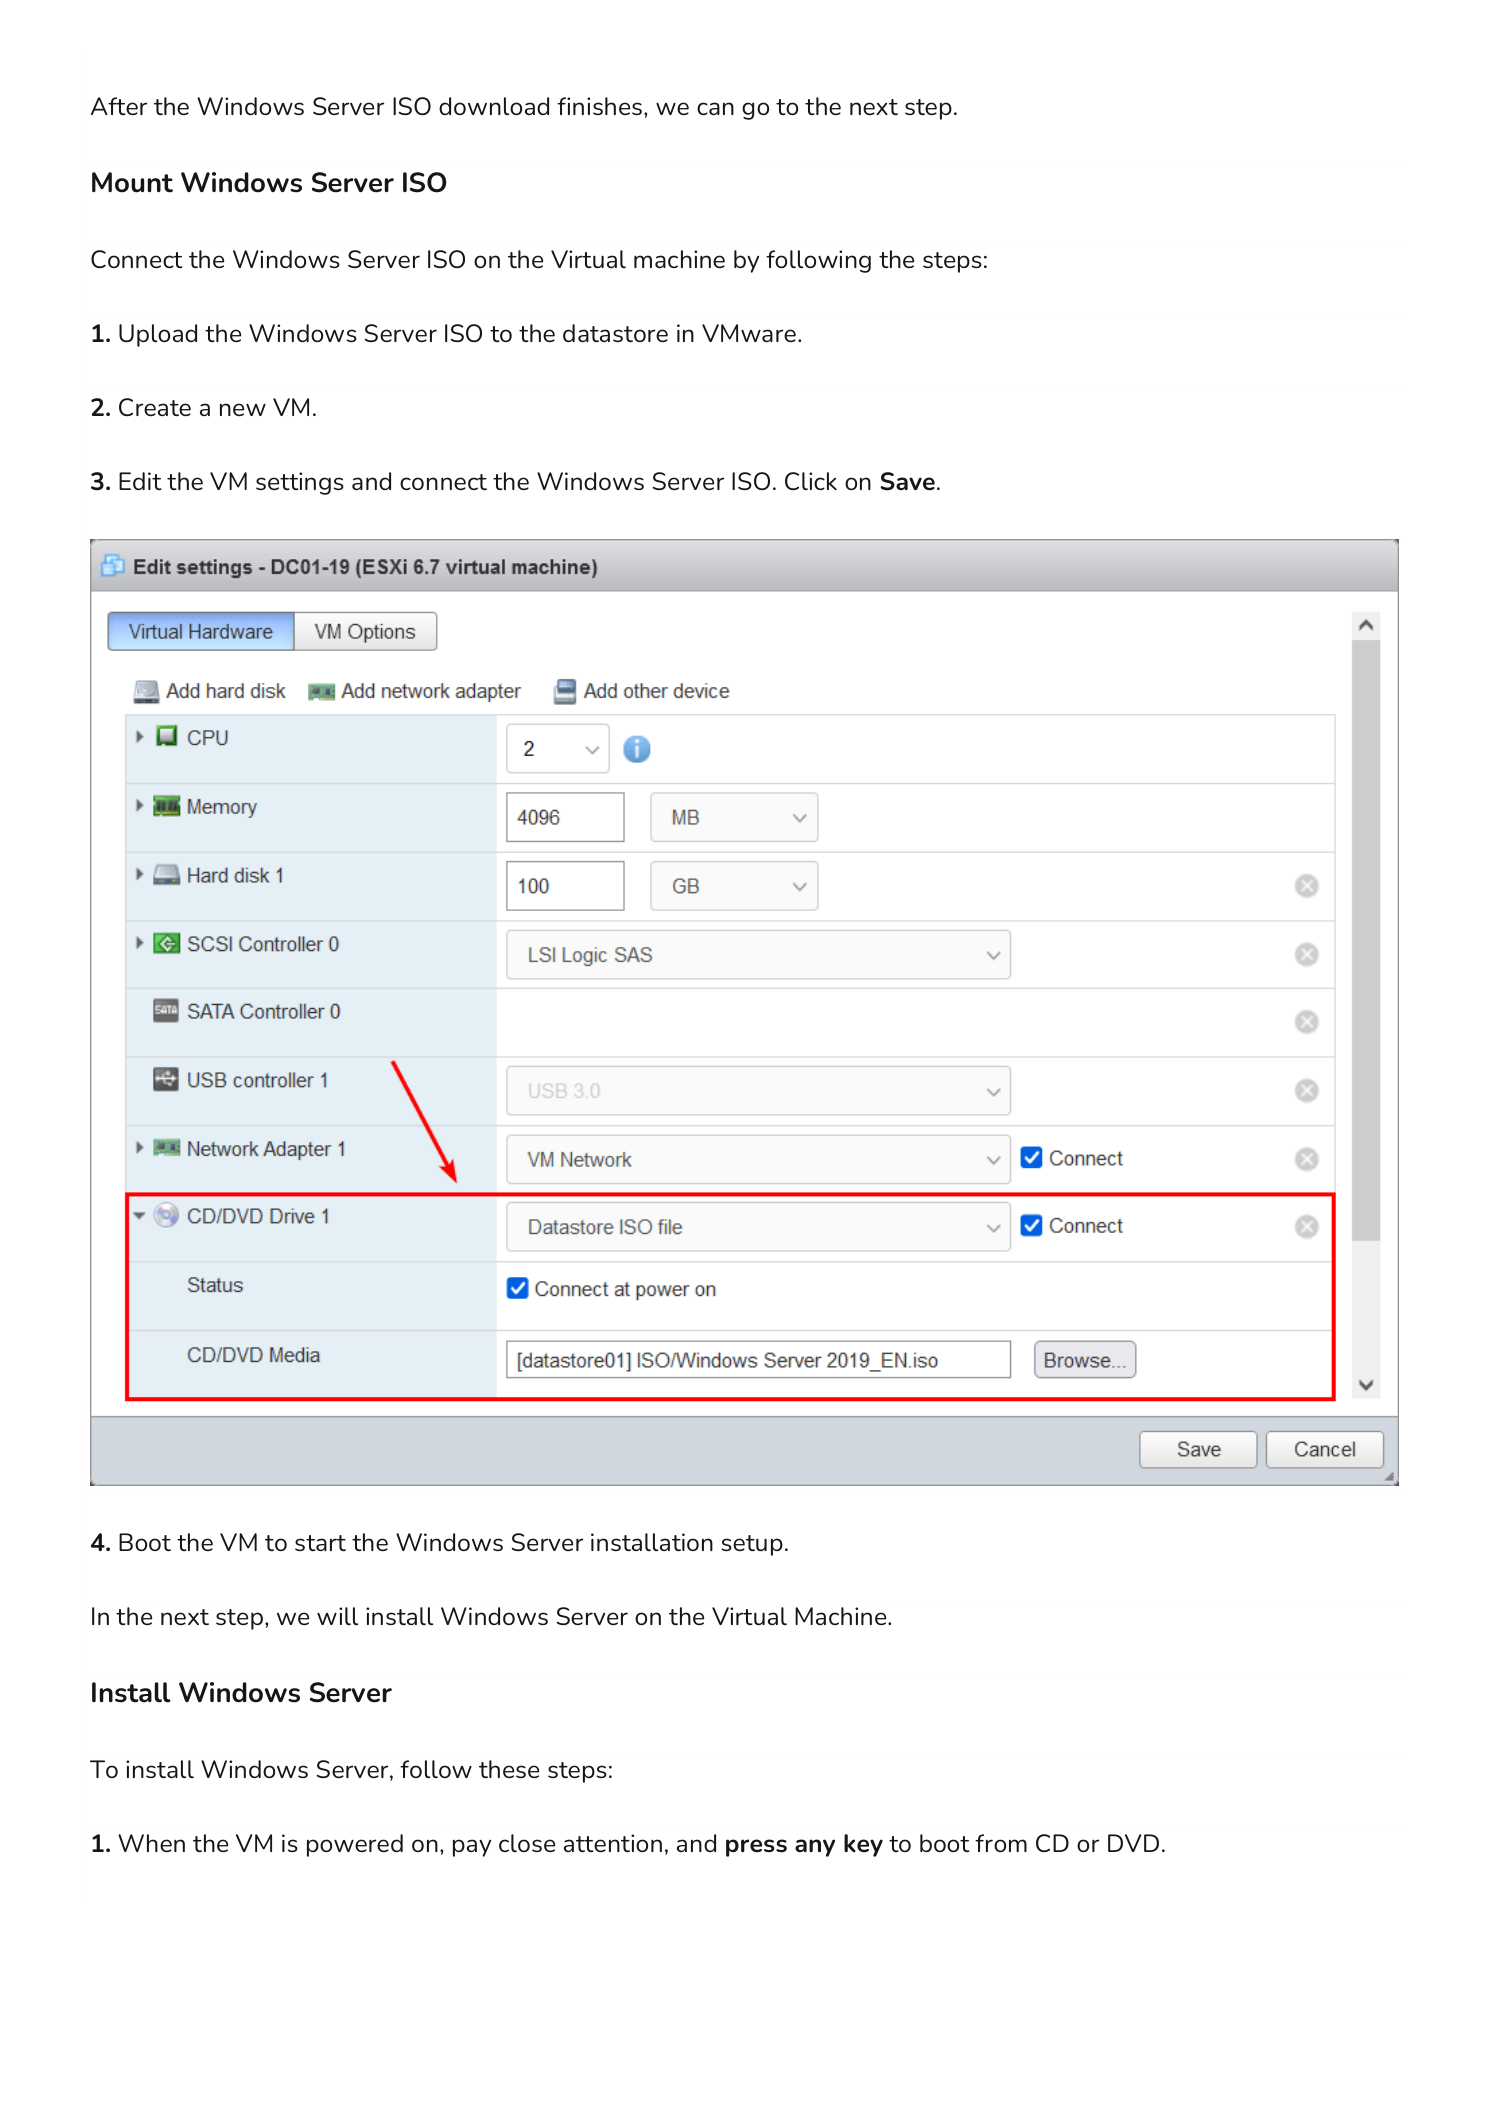
- Attach the ISO. Before powering the VM on, open the VM settings and locate the CD/DVD Drive. Set the type to “Datastore ISO File,” browse to the ISO you uploaded, and check “Connect at power on.” Click Save.
- Power on the VM to launch the Windows Setup wizard.
Step 3 – Run the Windows Setup Wizard
With the VM powered on and the ISO mounted, the installation begins. Follow each screen carefully.
Boot from the ISO
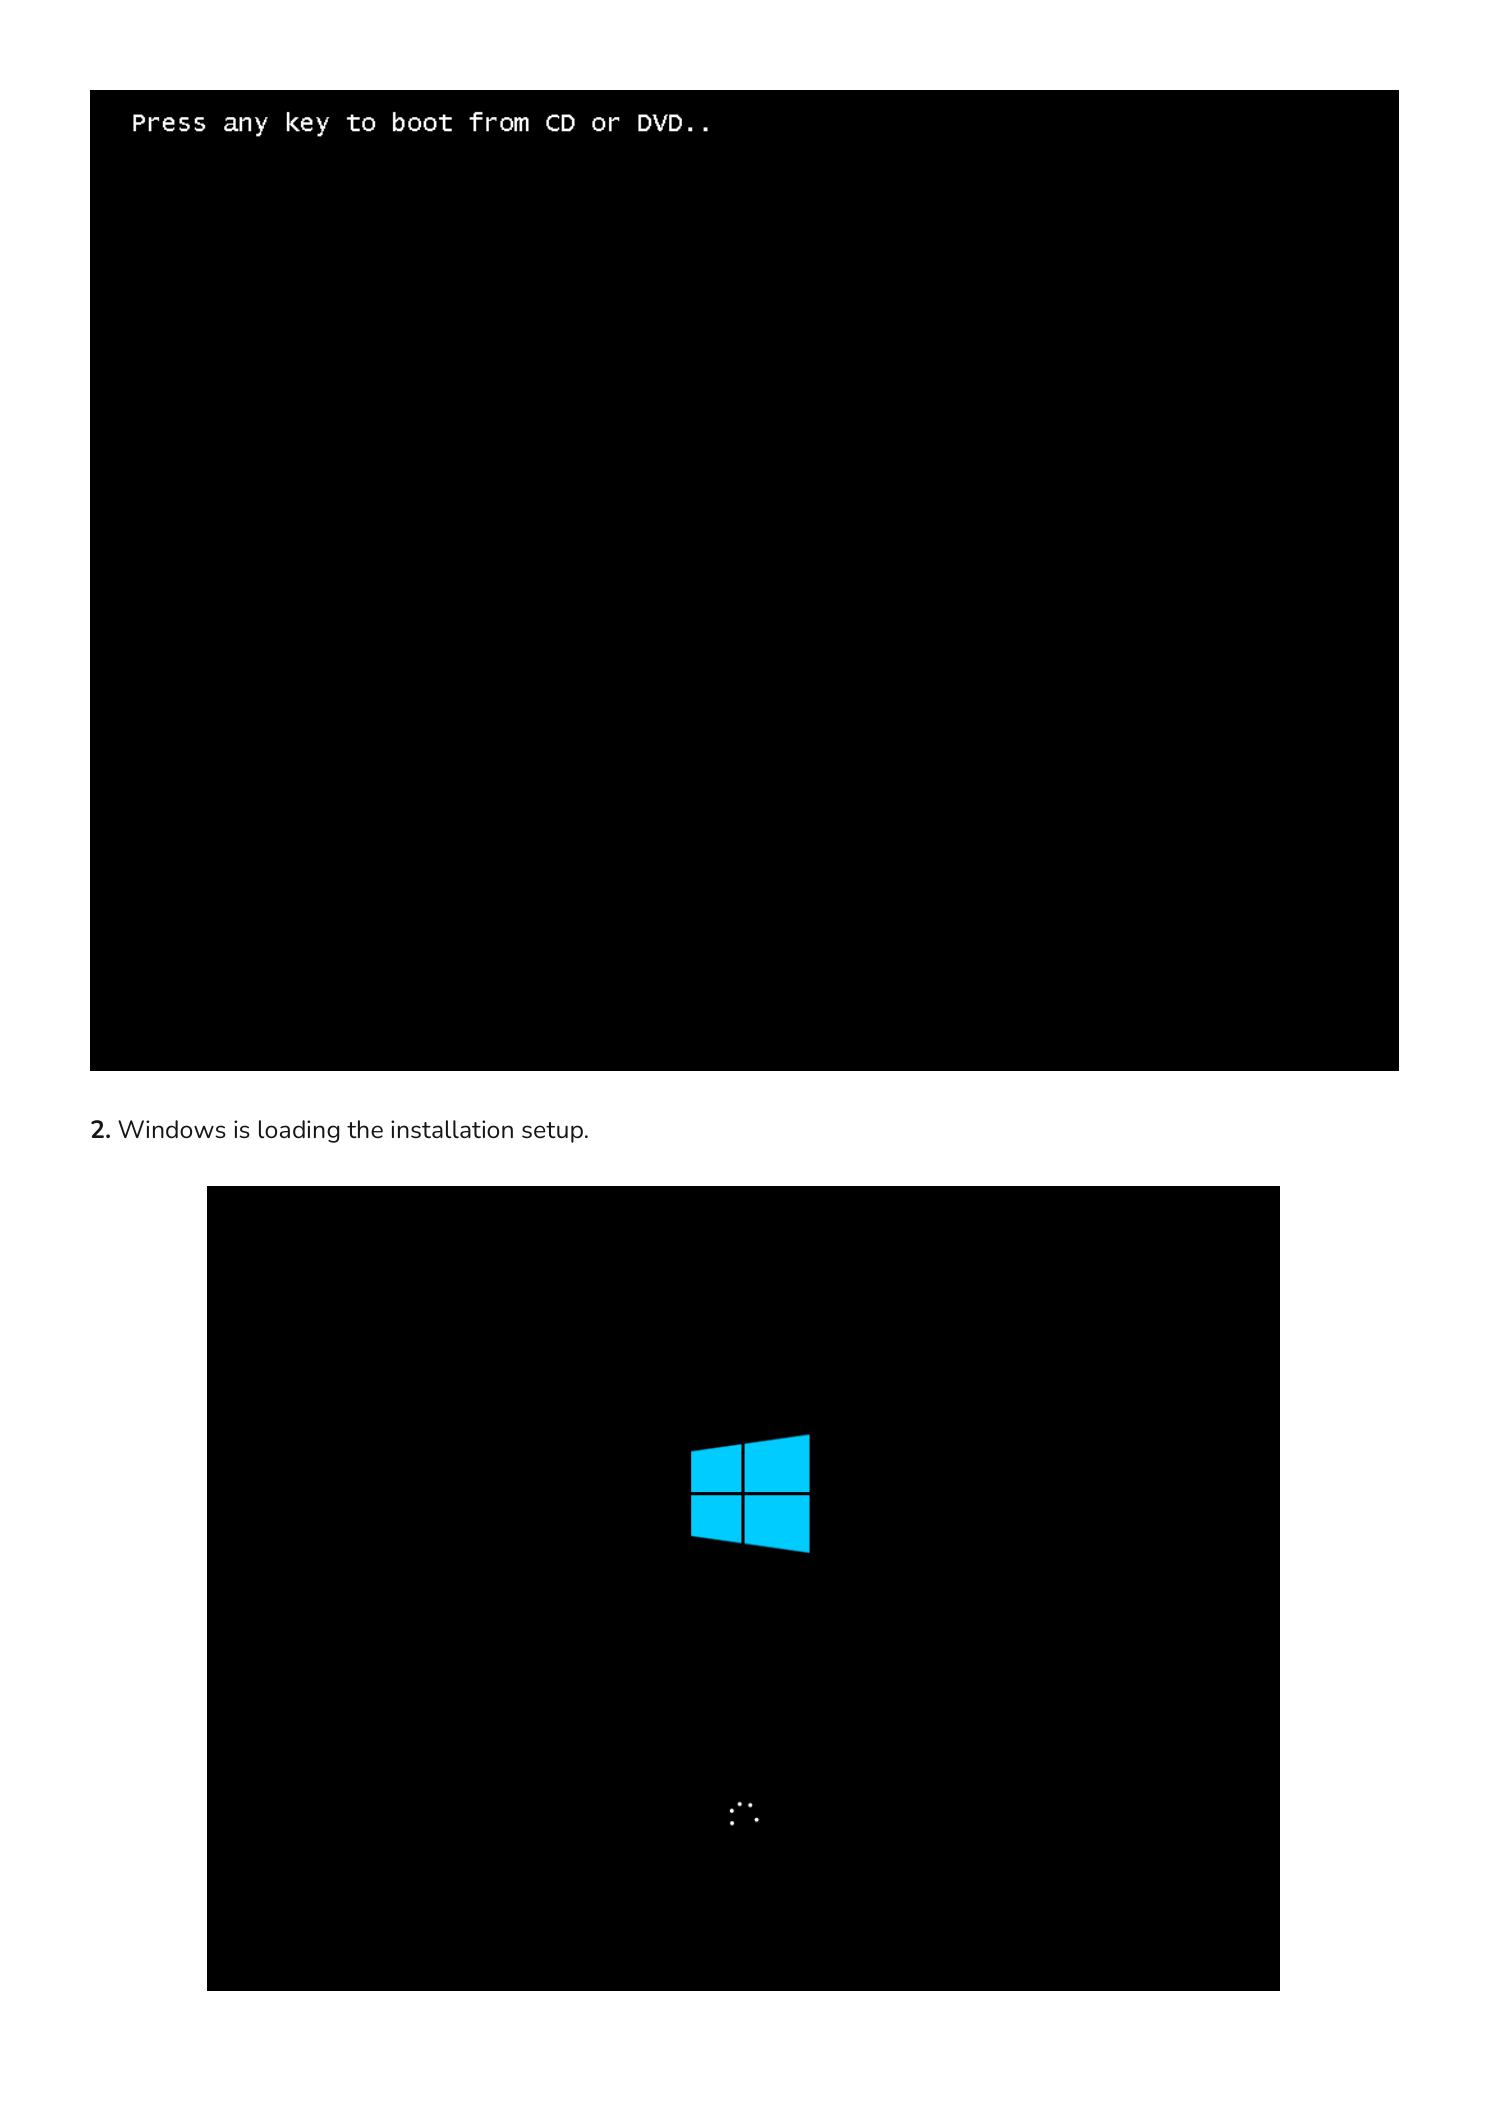
The moment the VM powers on, watch the console. When you see “Press any key to boot from CD or DVD”, press a key immediately. If you miss this window, the VM will try to boot from the empty hard disk. Simply restart and try again.
Language and Preferences
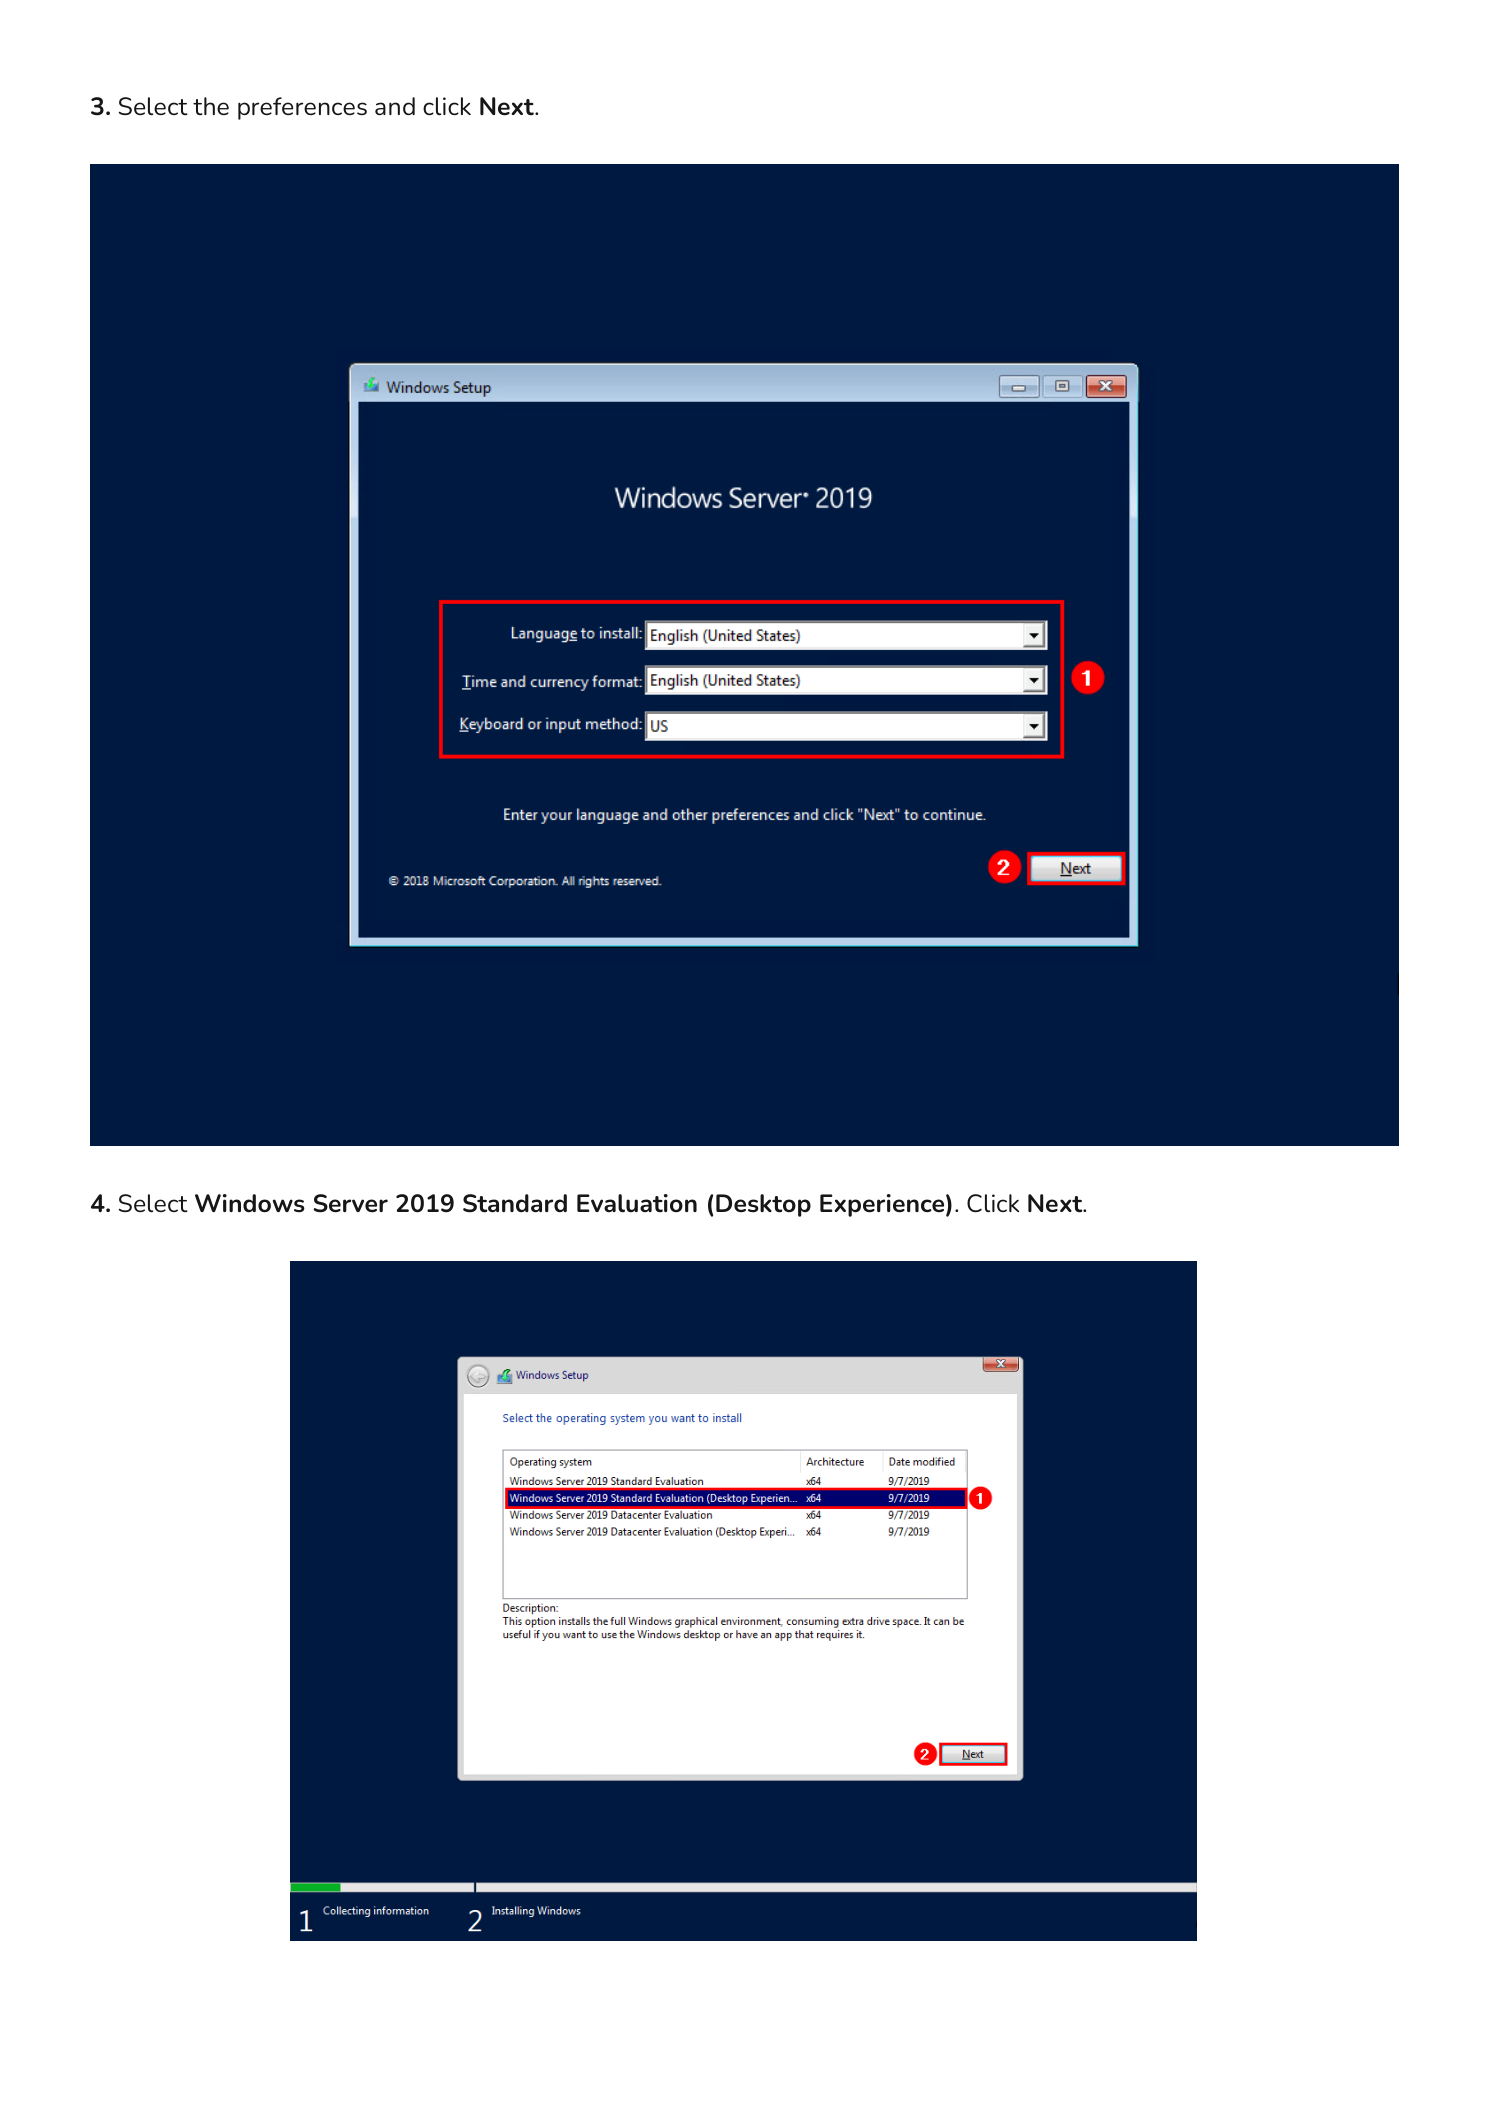
The Windows Setup screen loads. Select your language to install, time and currency format, and keyboard input method. Click Next to continue.
Select the Operating System Edition
Choose Windows Server 2019 Standard Evaluation (Desktop Experience). The Desktop Experience edition installs the full graphical interface. Without it, you get Server Core — a command-line only environment that is more secure and lightweight but requires you to manage everything from PowerShell or remote tools. For most lab and learning scenarios, Desktop Experience is the right choice. Click Next.
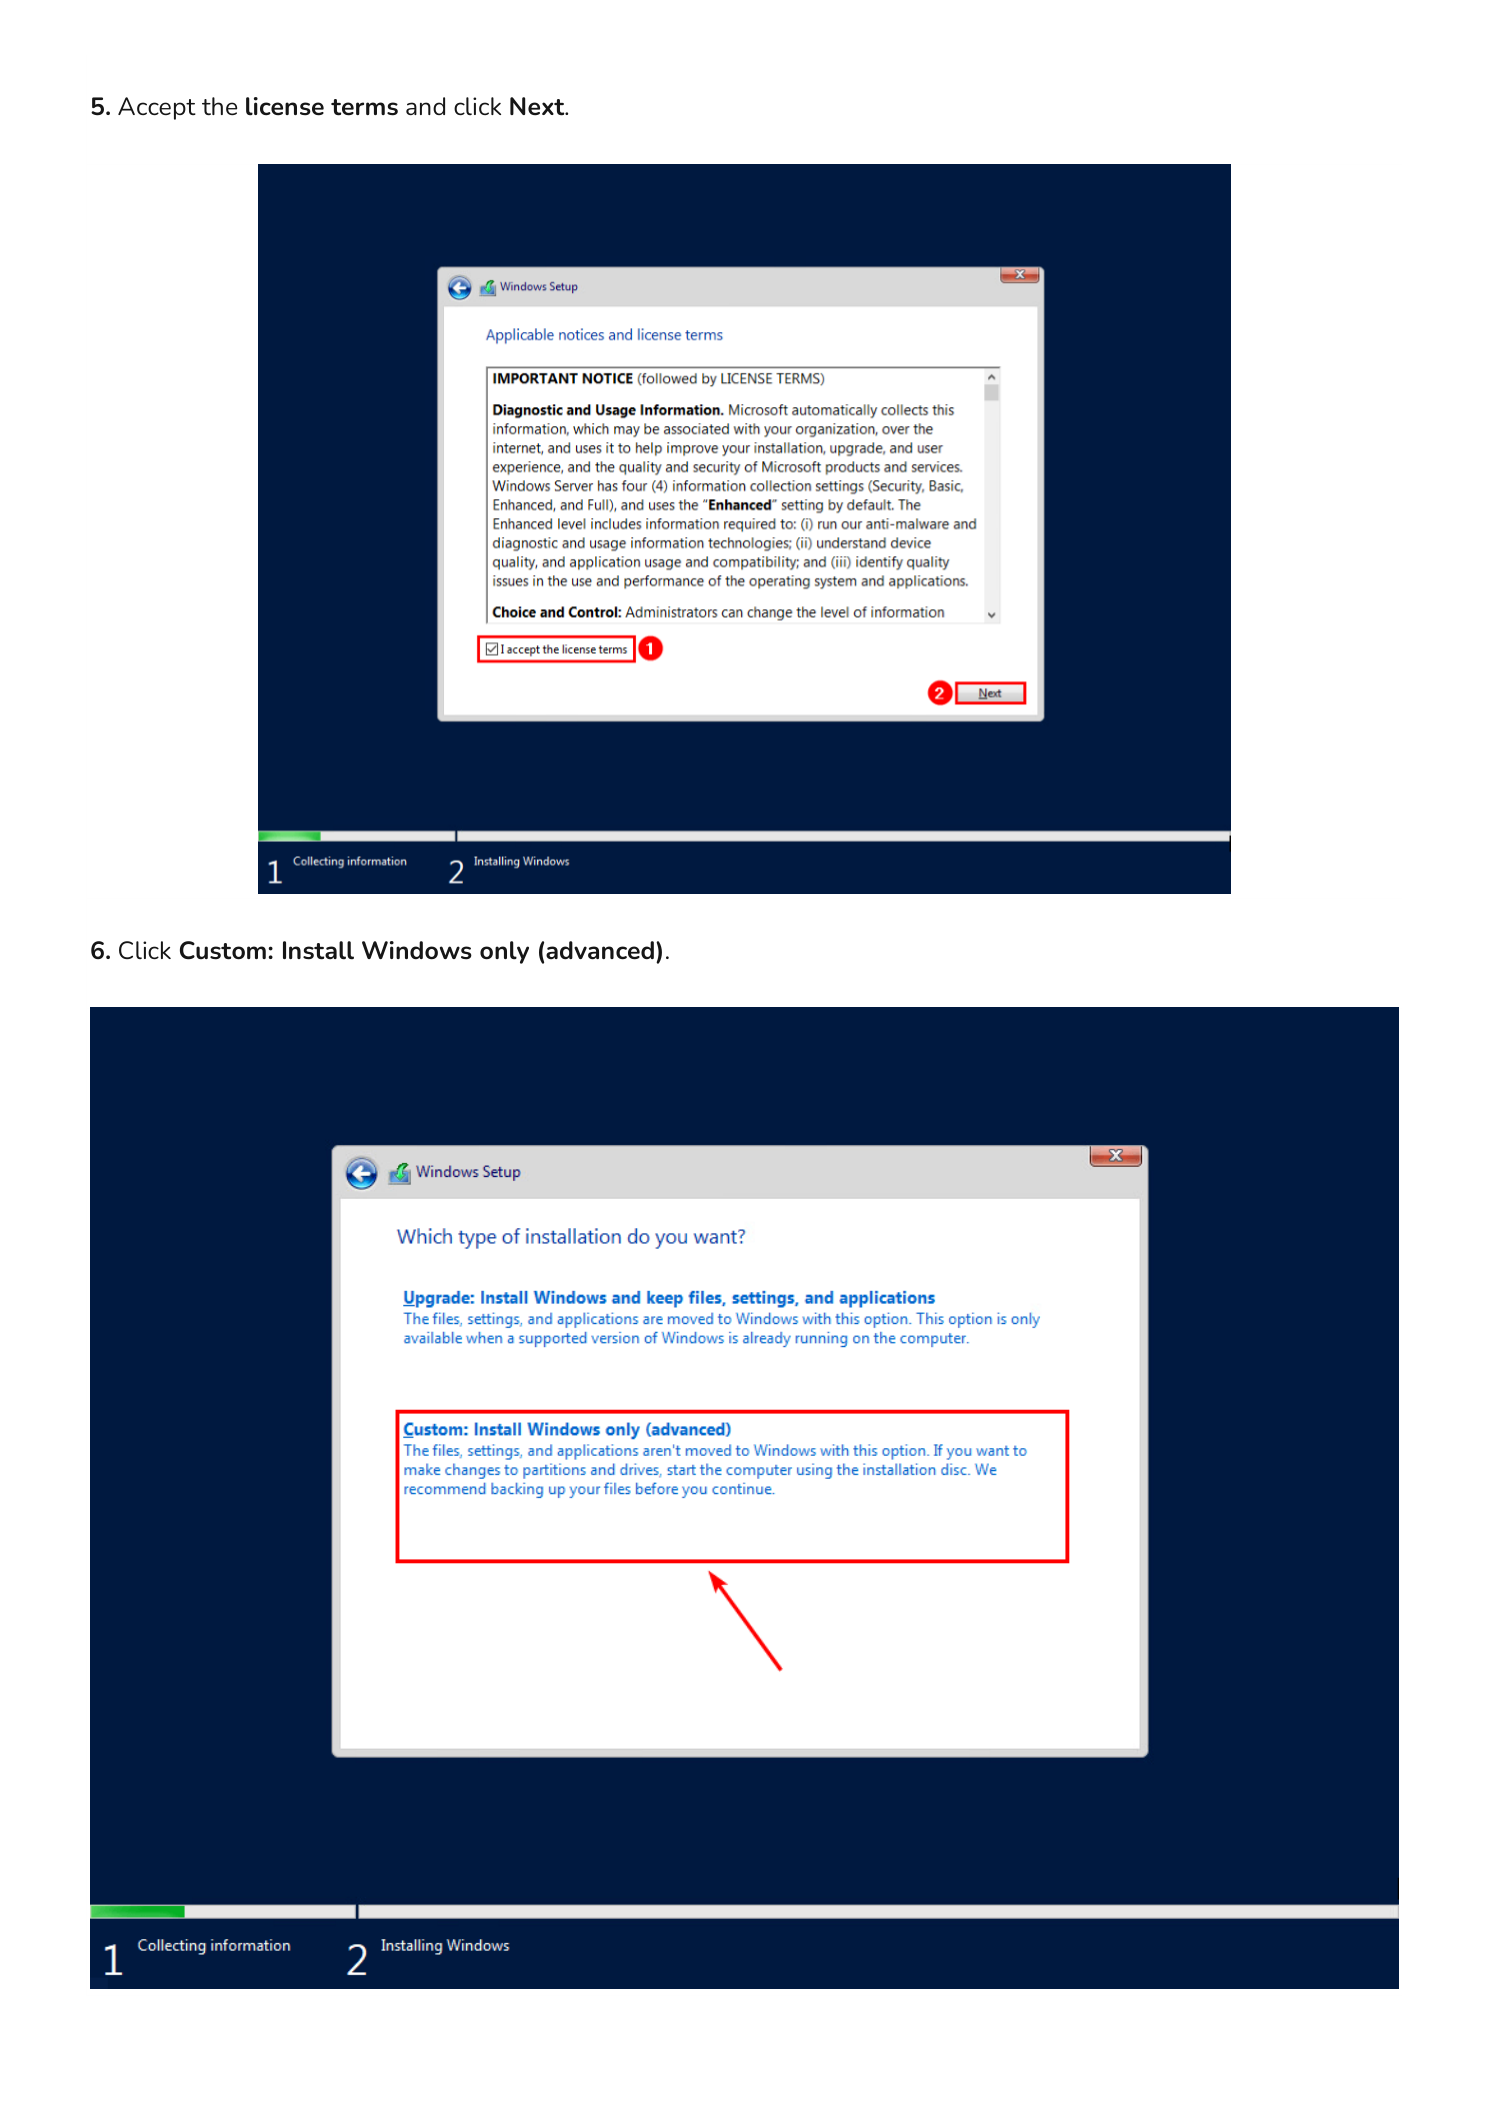
Accept the License Terms
Check the box to accept the Microsoft Software License Terms and click Next.
Choose the Installation Type
Select Custom: Install Windows only (advanced). The Upgrade option only appears when an existing Windows installation is detected on the disk. Since this is a fresh VM, Custom is the only valid path.
Select the Destination Drive
You will see a drive listed as Drive 0 with Unallocated Space. Click on it to select it and click Next. Windows Setup automatically creates the required system partitions — you do not need to partition the disk manually unless you have specific requirements.
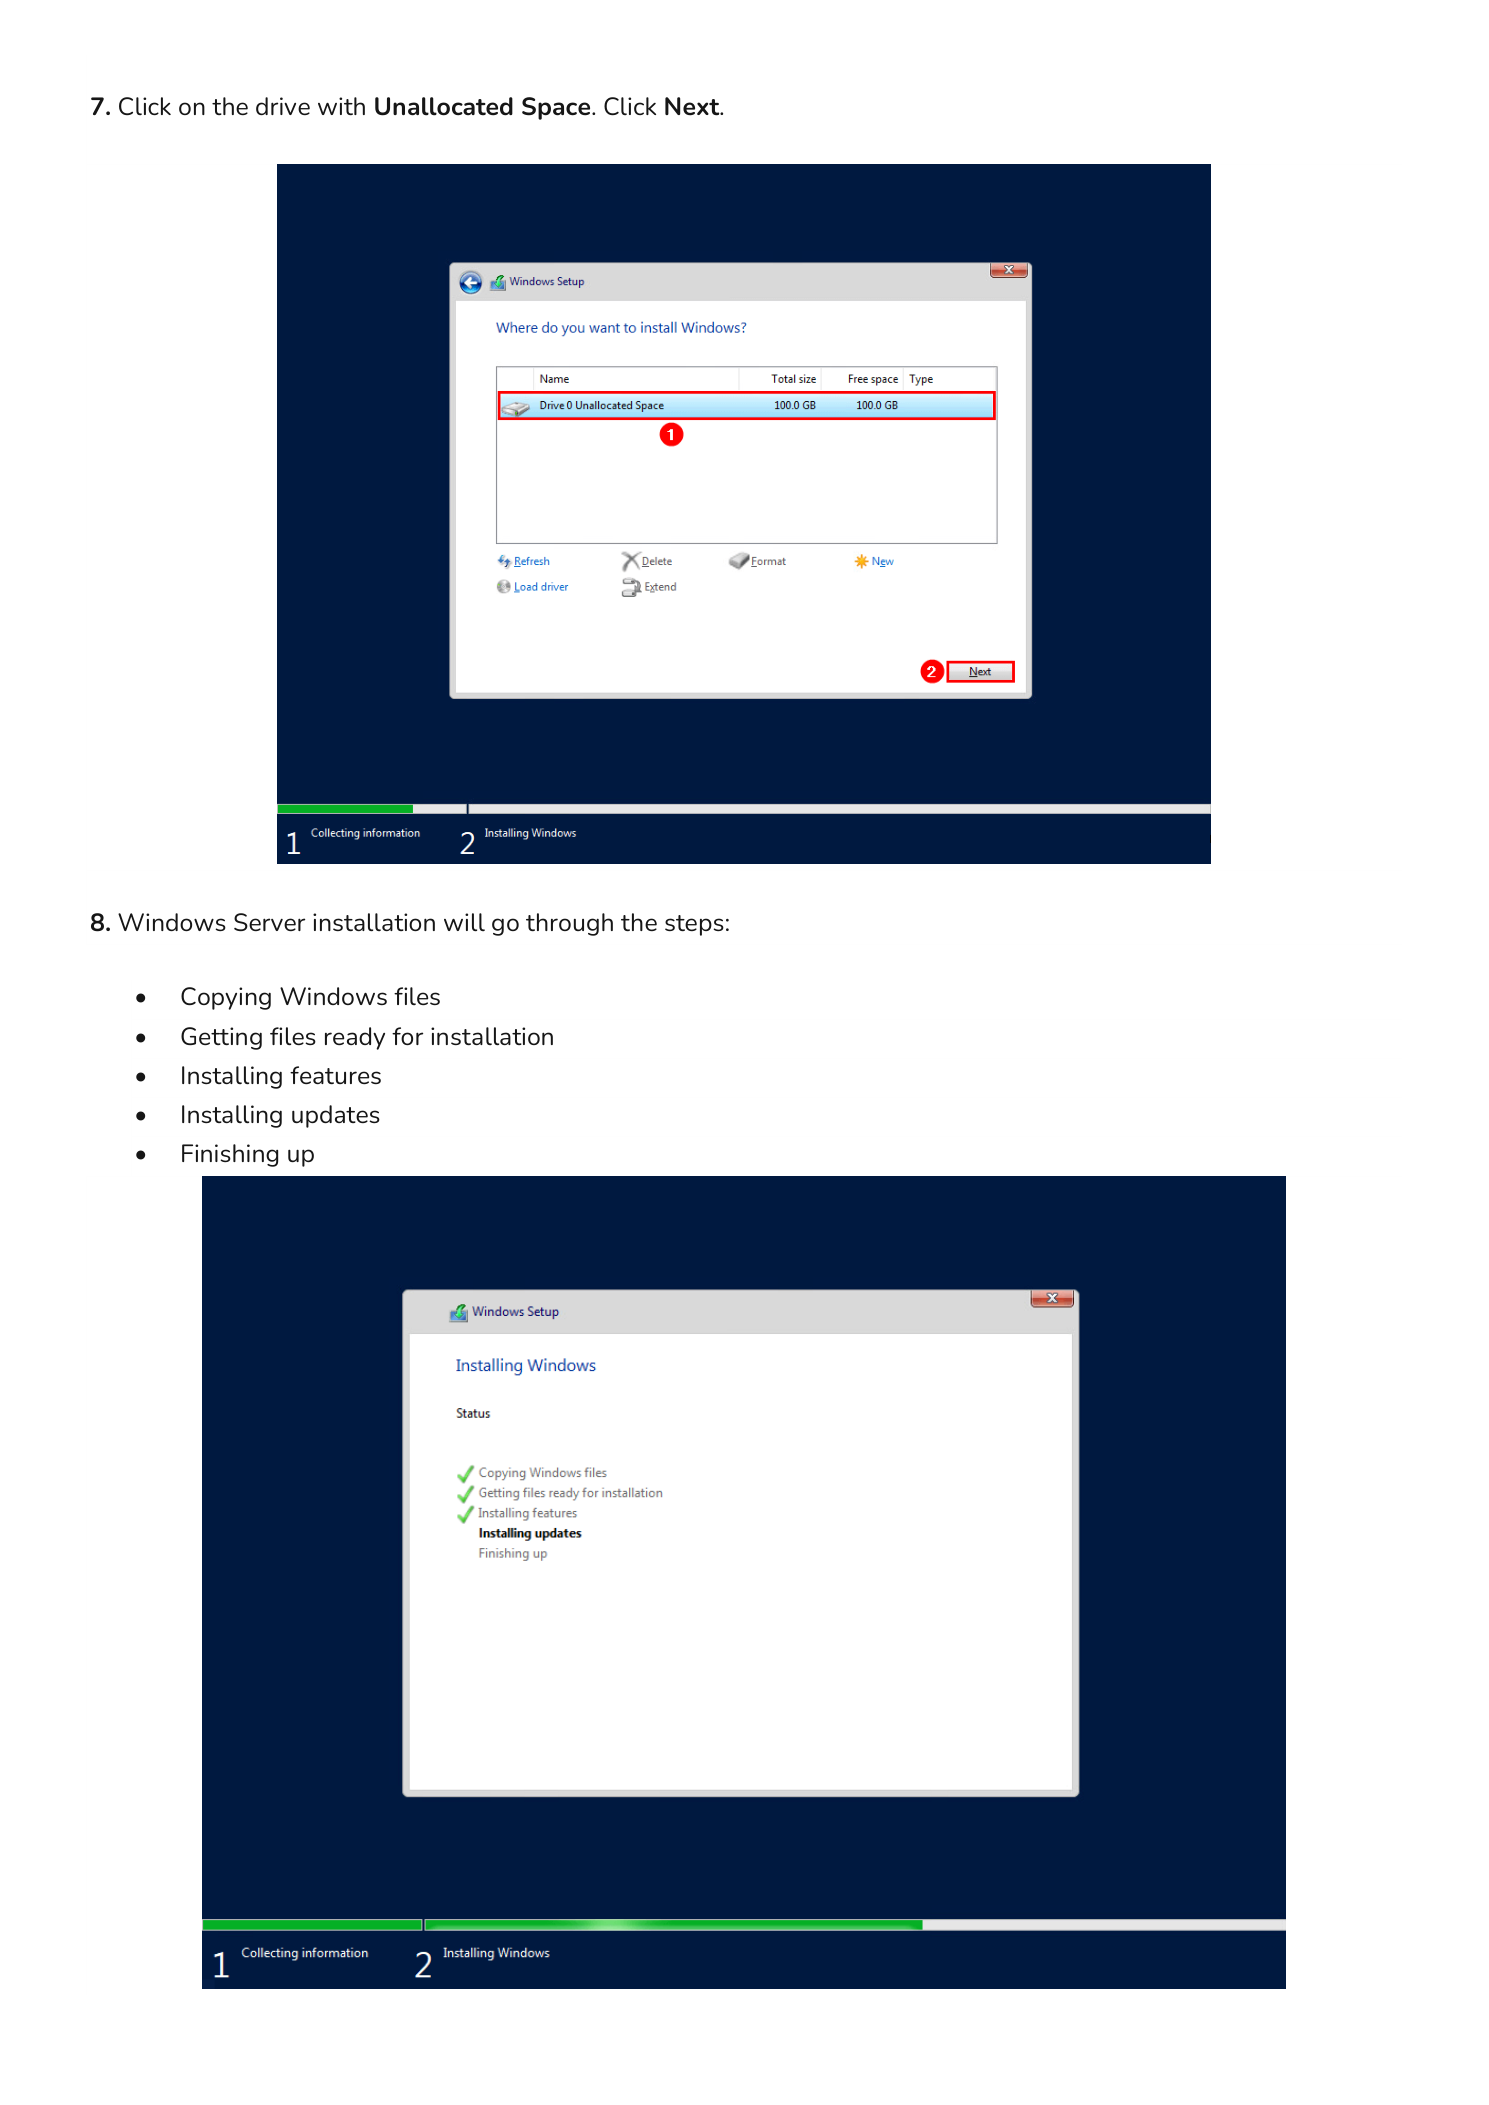
Step 4 – Wait for the Installation to Complete
Windows Setup now handles the installation automatically. It works through five stages:
- Copying Windows files
- Getting files ready for installation
- Installing features
- Installing updates
- Finishing up
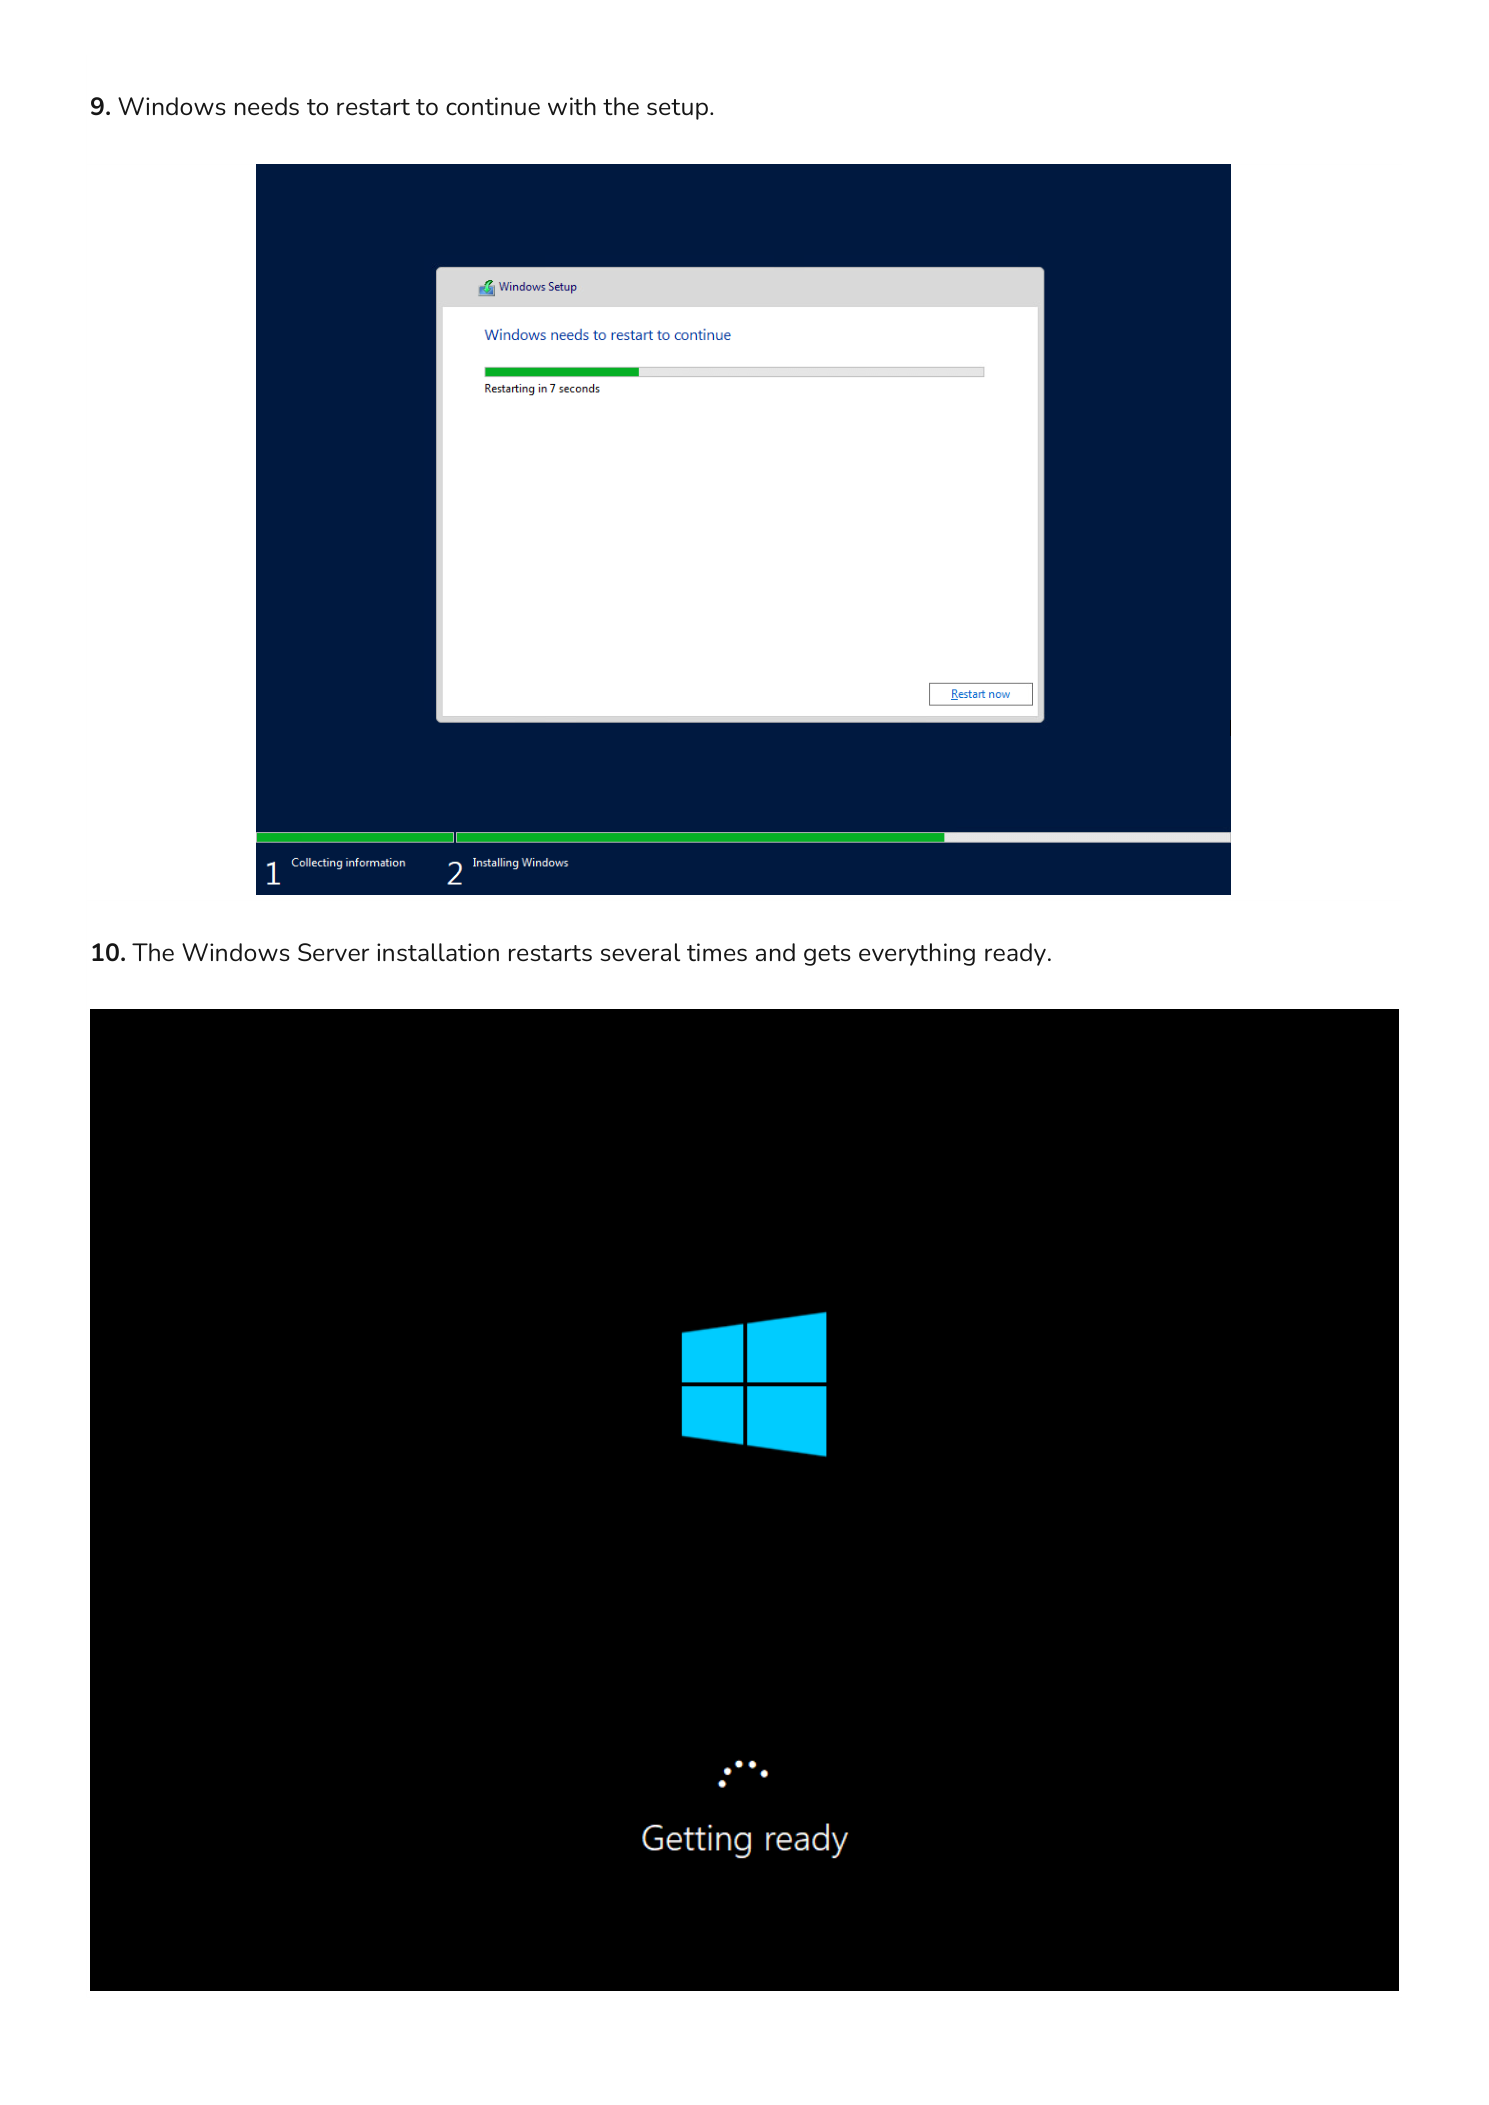
The VM will restart automatically during this process. When it restarts, do not press any key to boot from the CD/DVD. Let it boot from the hard disk so the installation can continue. The setup may restart two or three times before completing.
Step 5 – Set the Administrator Password
After the final restart, Windows Server prompts you to set a password for the built-in Administrator account. This is the first account you will use to manage the server, so choose a strong password that meets complexity requirements — at least 8 characters including uppercase letters, lowercase letters, numbers, and a special character.
Enter the password twice to confirm and click Finish. If the password does not meet complexity requirements, Windows will prompt you to try again.
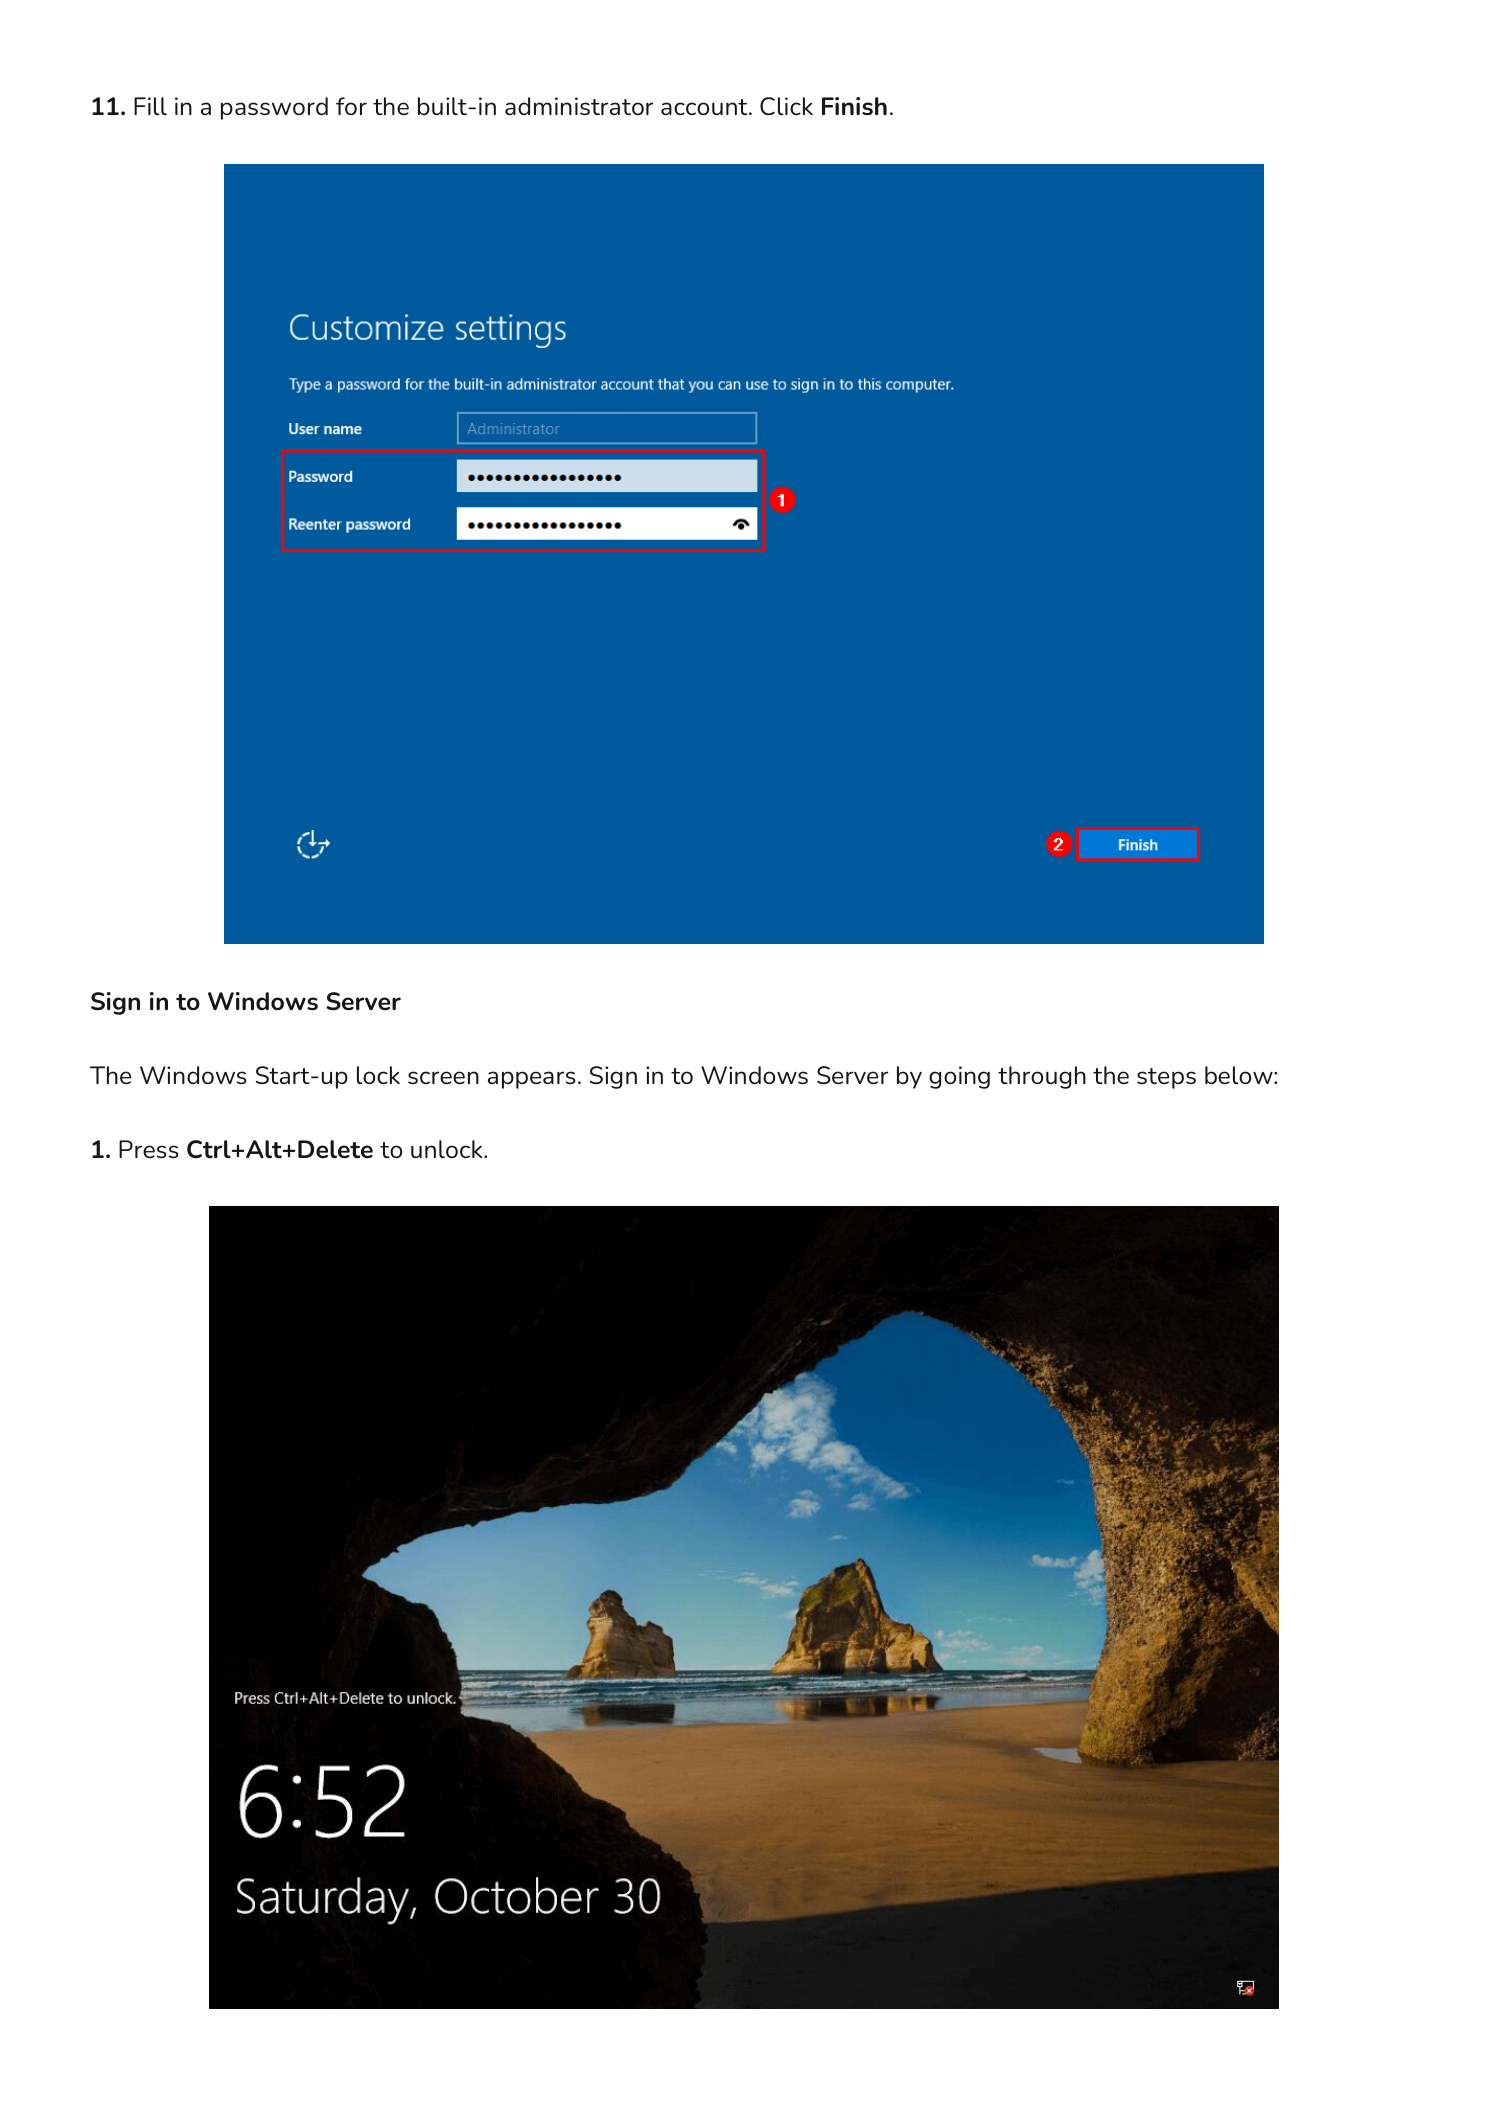
Step 6 – Sign In to Windows Server
The Windows Server lock screen appears. Follow these steps to sign in:
- Press Ctrl+Alt+Delete to unlock. In a VM console, use the “Send Ctrl+Alt+Delete” option in the VMware toolbar rather than pressing the keys directly on your keyboard.
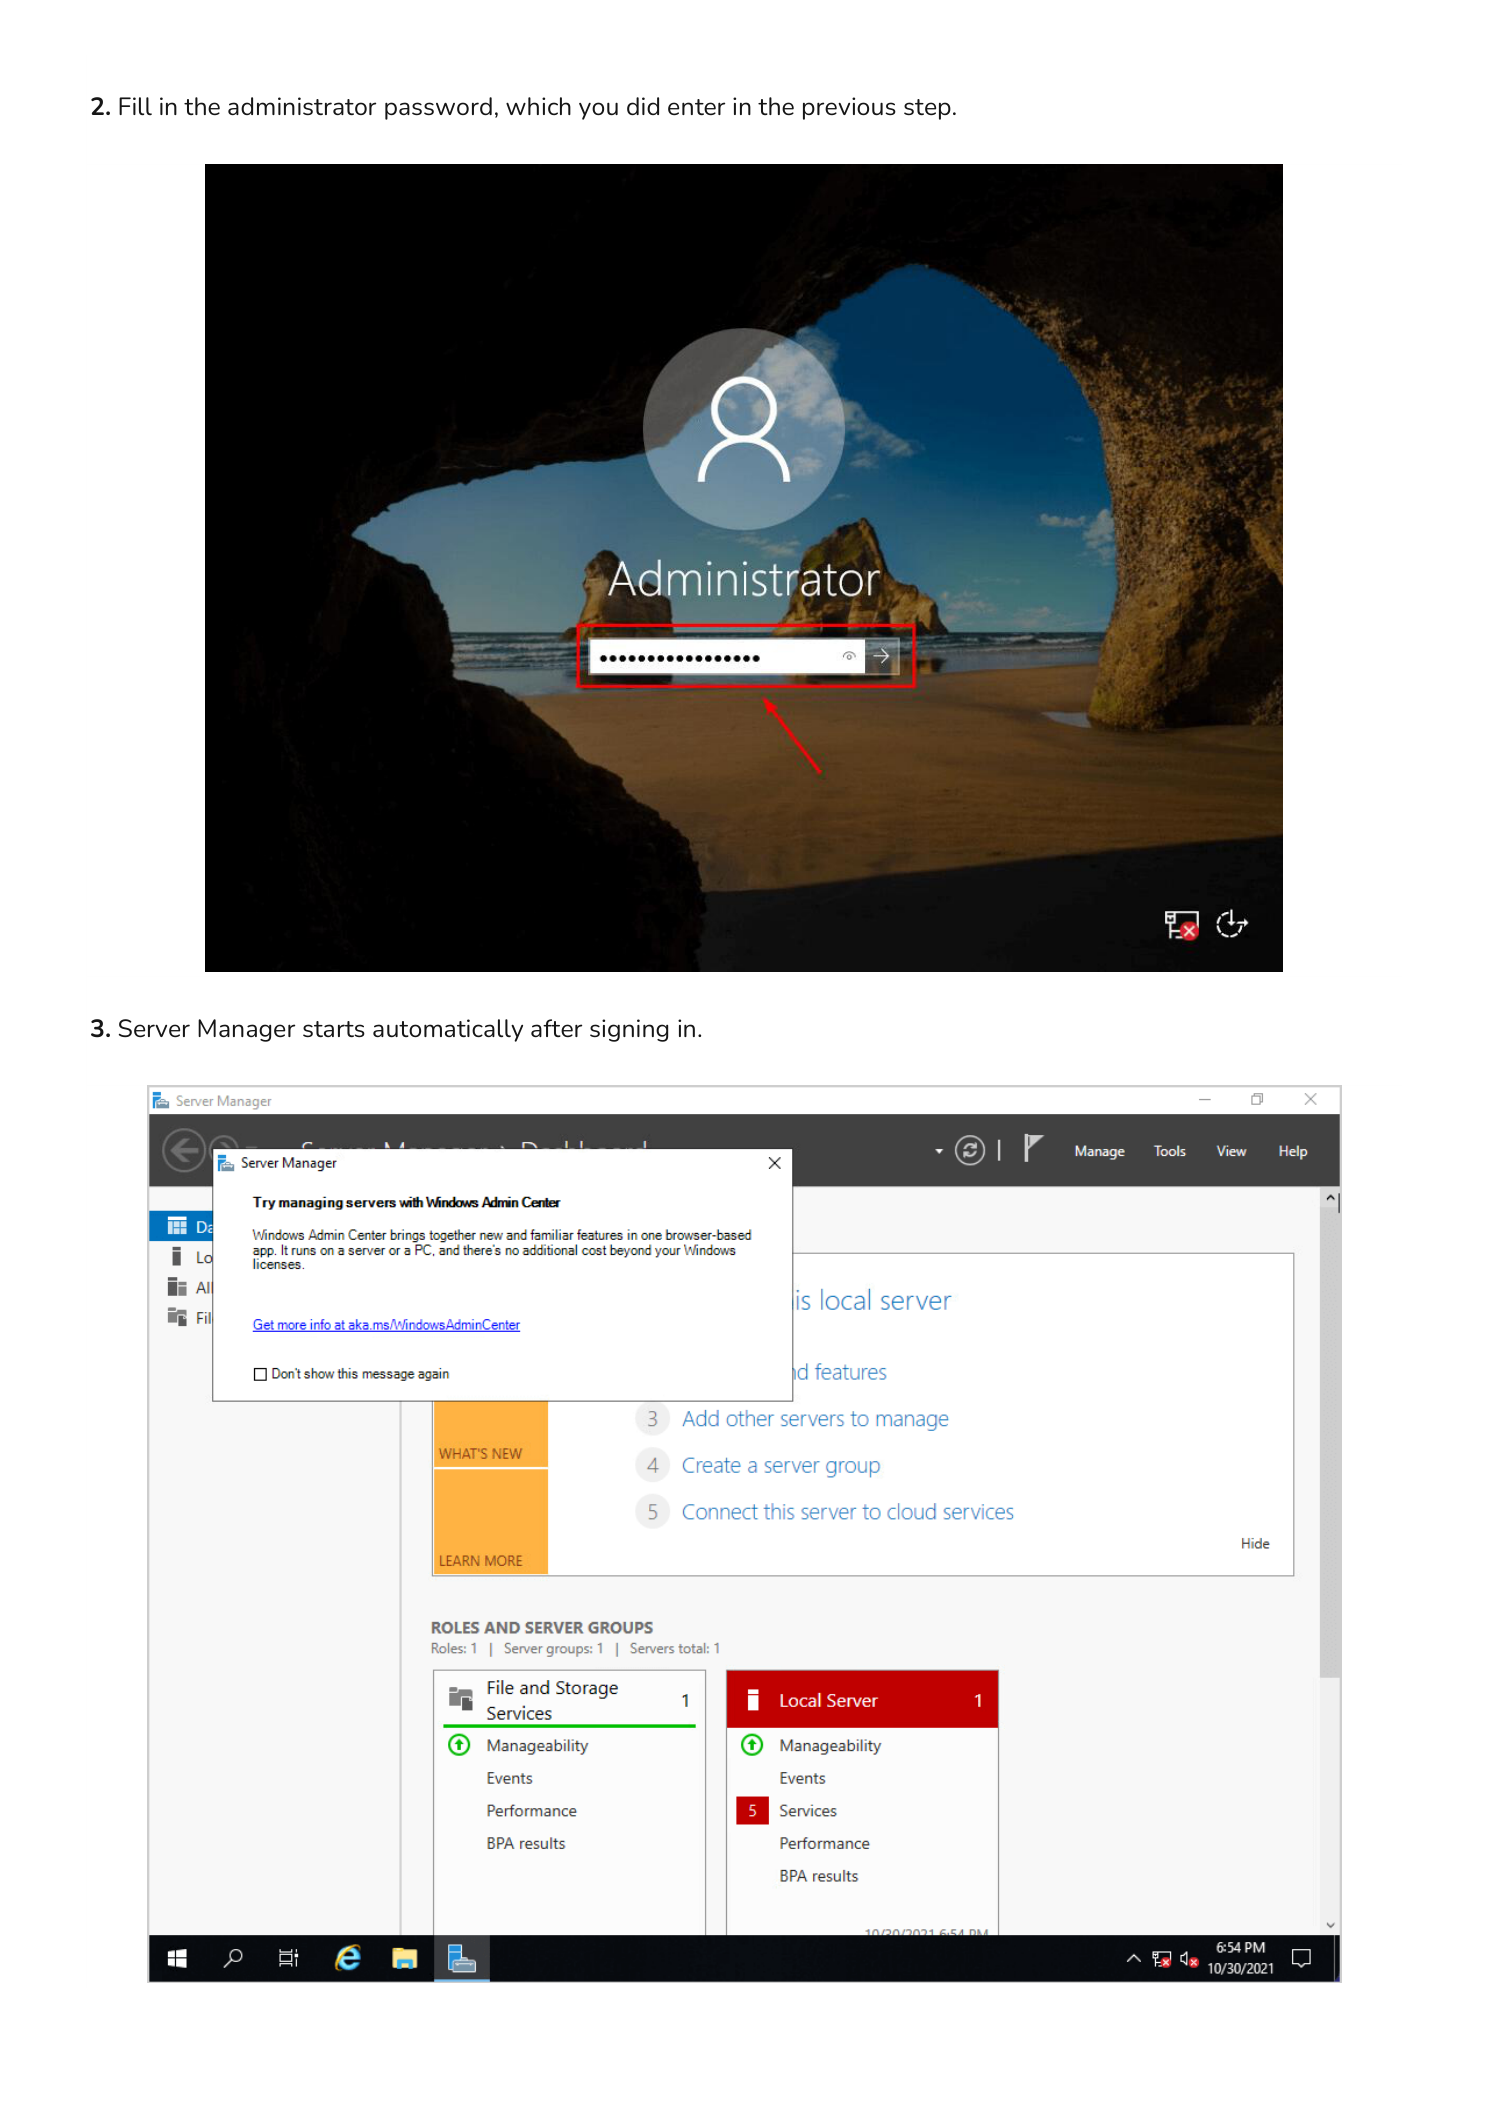
- Enter the Administrator password you just created and press Enter or click the arrow.
After signing in, Server Manager launches automatically. This is your central dashboard for managing server roles, features, events, and performance. From here you can add roles like Active Directory Domain Services, DNS, DHCP, IIS, and more.
Conclusion
You now have a fully installed Windows Server 2019 instance running on a virtual machine. The process is the same regardless of whether you are using VMware ESXi, Microsoft Hyper-V, VirtualBox, or installing directly on physical hardware — Windows Setup behaves identically across all platforms.
From here, your next steps depend on the role this server will play in your environment. If you are building out an Active Directory lab, your next step is promoting this server to a domain controller. If you are setting up network services, you will want to install DNS and DHCP roles. Explore the rest of the InfoTech Ninja Systems Admin series for step-by-step walkthroughs on each of those configurations.