A single DHCP server is fine until the moment it isn’t. When it goes down, two failure modes hit simultaneously: new clients can’t obtain leases, and existing clients fail to renew when their leases reach the renewal point. Both look identical to the end user — the network is “down” — even though every other piece of infrastructure is healthy. DHCP failover in Windows Server eliminates this single point of failure by pairing two DHCP servers that share a scope, replicate lease state, and either share the load (active-active) or stand ready as a passive backup (active-passive). No license, no extra components — it’s built into the role.
This walkthrough covers the two failover modes and when each applies, prepping the secondary server, running the Configure Failover Wizard end to end, verifying lease replication, testing the actual failover, and the operational stuff (forced sync, port 647 firewall, shared-secret authentication).
What you need before starting
- Two Windows Servers with the DHCP Server role installed and AD-authorized (the install path is in implementing the DHCP server role)
- An existing scope on the primary server you want to make highly available
- Bidirectional network connectivity between the two servers, with TCP port 647 permitted in both directions
- DHCP Administrators rights on both servers
- Decision in advance: load balance or hot standby? (See the next section.)
Pick the right failover mode
Two distinct configurations, two different use cases:
- Load Balance — both servers actively serve clients, splitting the load by a configurable percentage (default 50/50). When one fails, the other takes 100% of the traffic. Right answer when both servers are on the same physical network — you get redundancy AND extra throughput in steady state.
- Hot Standby — one server (primary) handles all DHCP requests; the other (standby) sits passive, monitoring, and takes over only on primary failure. The standby holds a small reserve of addresses (typically 5%) to service new clients during the cutover window. Right answer for remote-site secondaries reached over a WAN — load balance over latency-prone WAN links can produce inconsistent client experience.
Both modes continuously replicate lease state between the two servers. The secondary always has an up-to-date copy of every active lease, which is what lets it service renewals seamlessly when the primary goes down.
Step 1 — Get the secondary ready
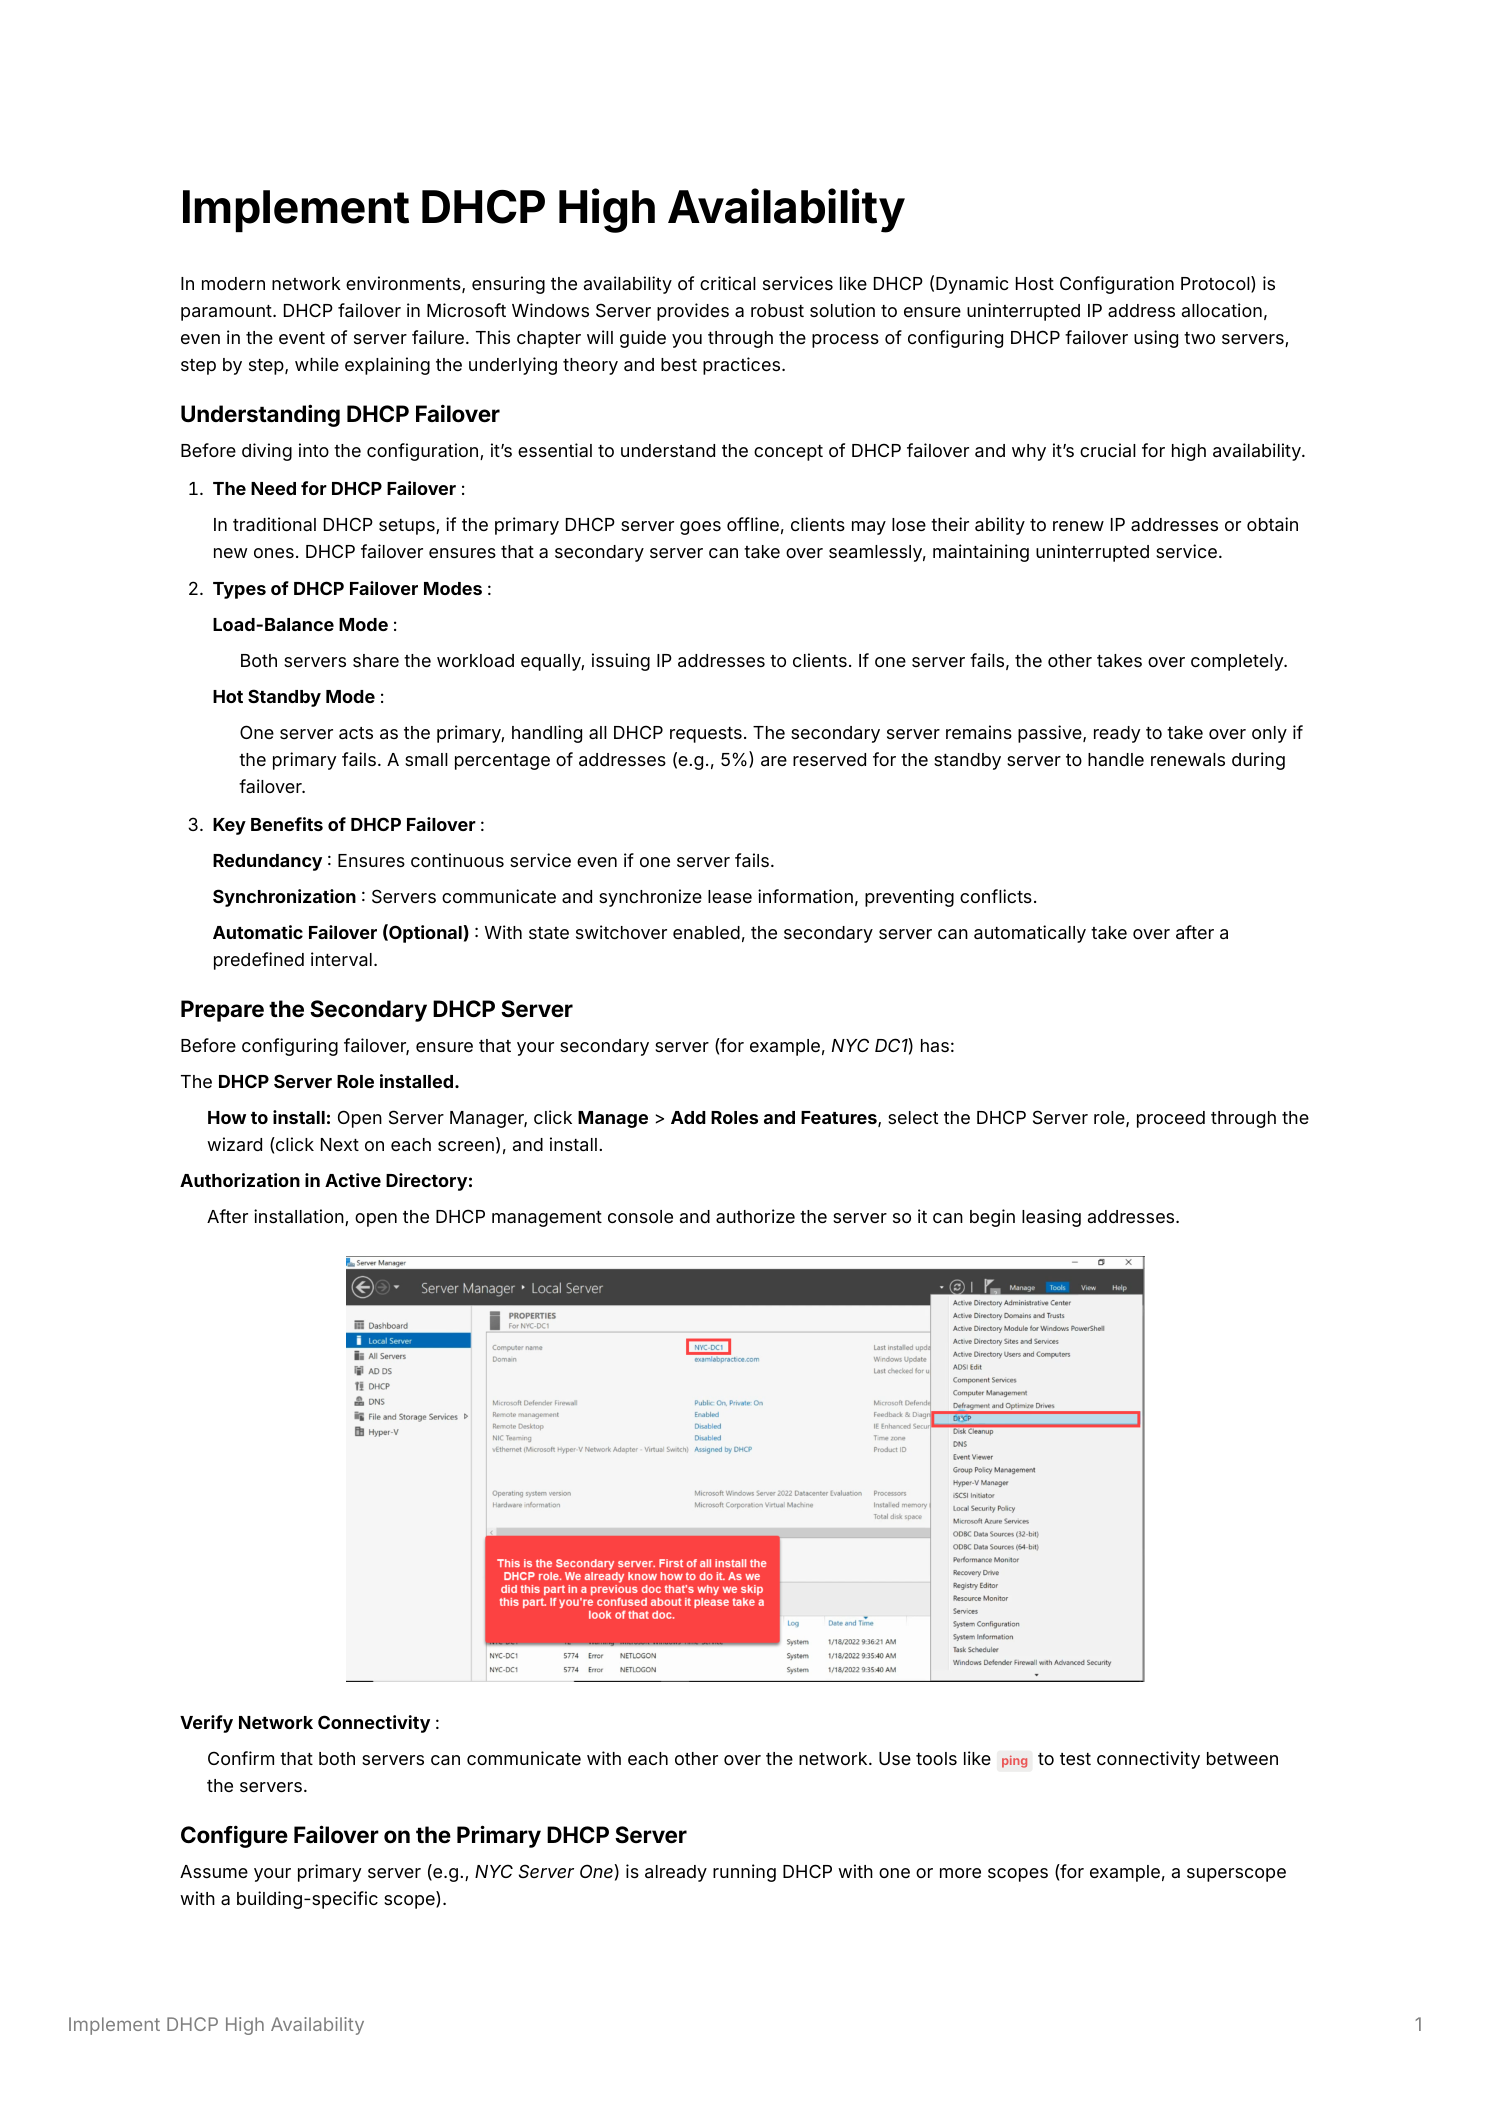
Install the DHCP Server role on the secondary (in this walkthrough, NYC-DC-One) using the same procedure as the primary. After install, run the DHCP Post-Installation Configuration Wizard to authorize it in AD and create the local DHCP Administrators / DHCP Users groups. Both servers must be authorized before failover can be configured.
Verify connectivity between the two servers in both directions — Test-NetConnection <other-server> -Port 647 from each side. If the connectivity test fails, fix the network or firewall before continuing; the failover wizard is going to fail anyway without working communication.
Step 2 — Launch the failover wizard on the primary
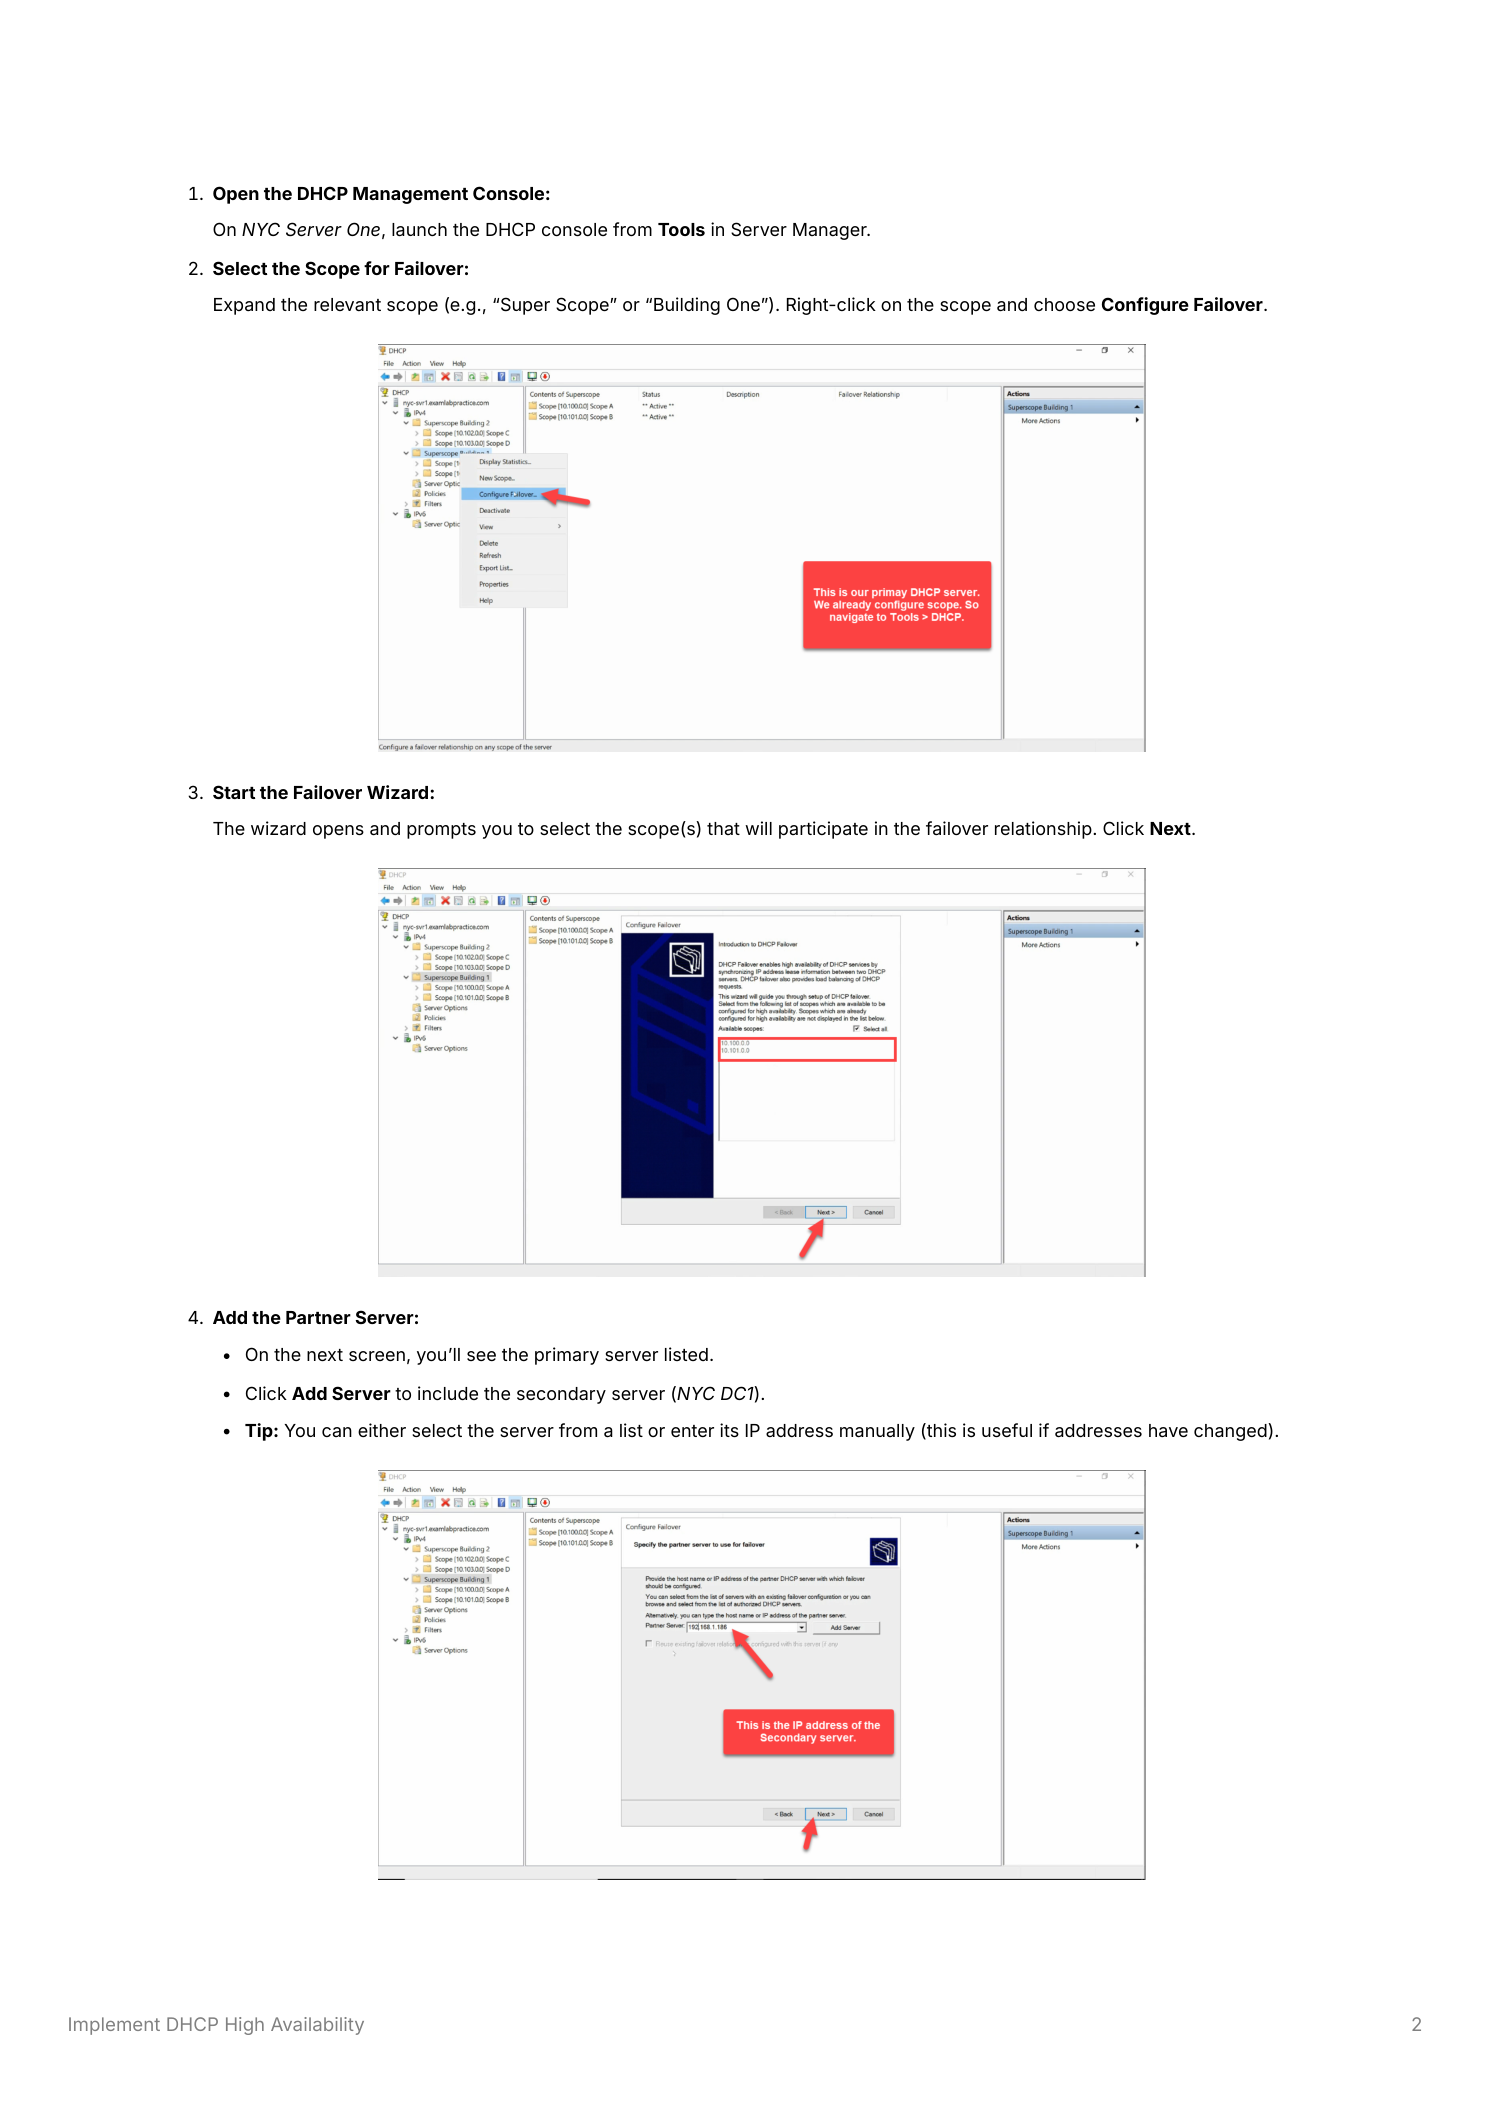
On the primary DHCP server (NYC-Server-One), open the DHCP console (Server Manager > Tools > DHCP). Expand the server > IPv4. Right-click the scope you’re making HA > Configure Failover. The wizard opens with the selected scope listed; click Next.
Step 3 — Pick the partner server
Click Add Server, browse for the secondary server (or type its hostname/IP if it’s newly added and not in the cached list), confirm. Click Next. The wizard verifies it can talk to the partner before letting you proceed; if it can’t, you’ll get an error here that points back at the connectivity problem from Step 1.
Step 4 — The settings that matter
Five fields on the failover-settings page actually affect behavior:
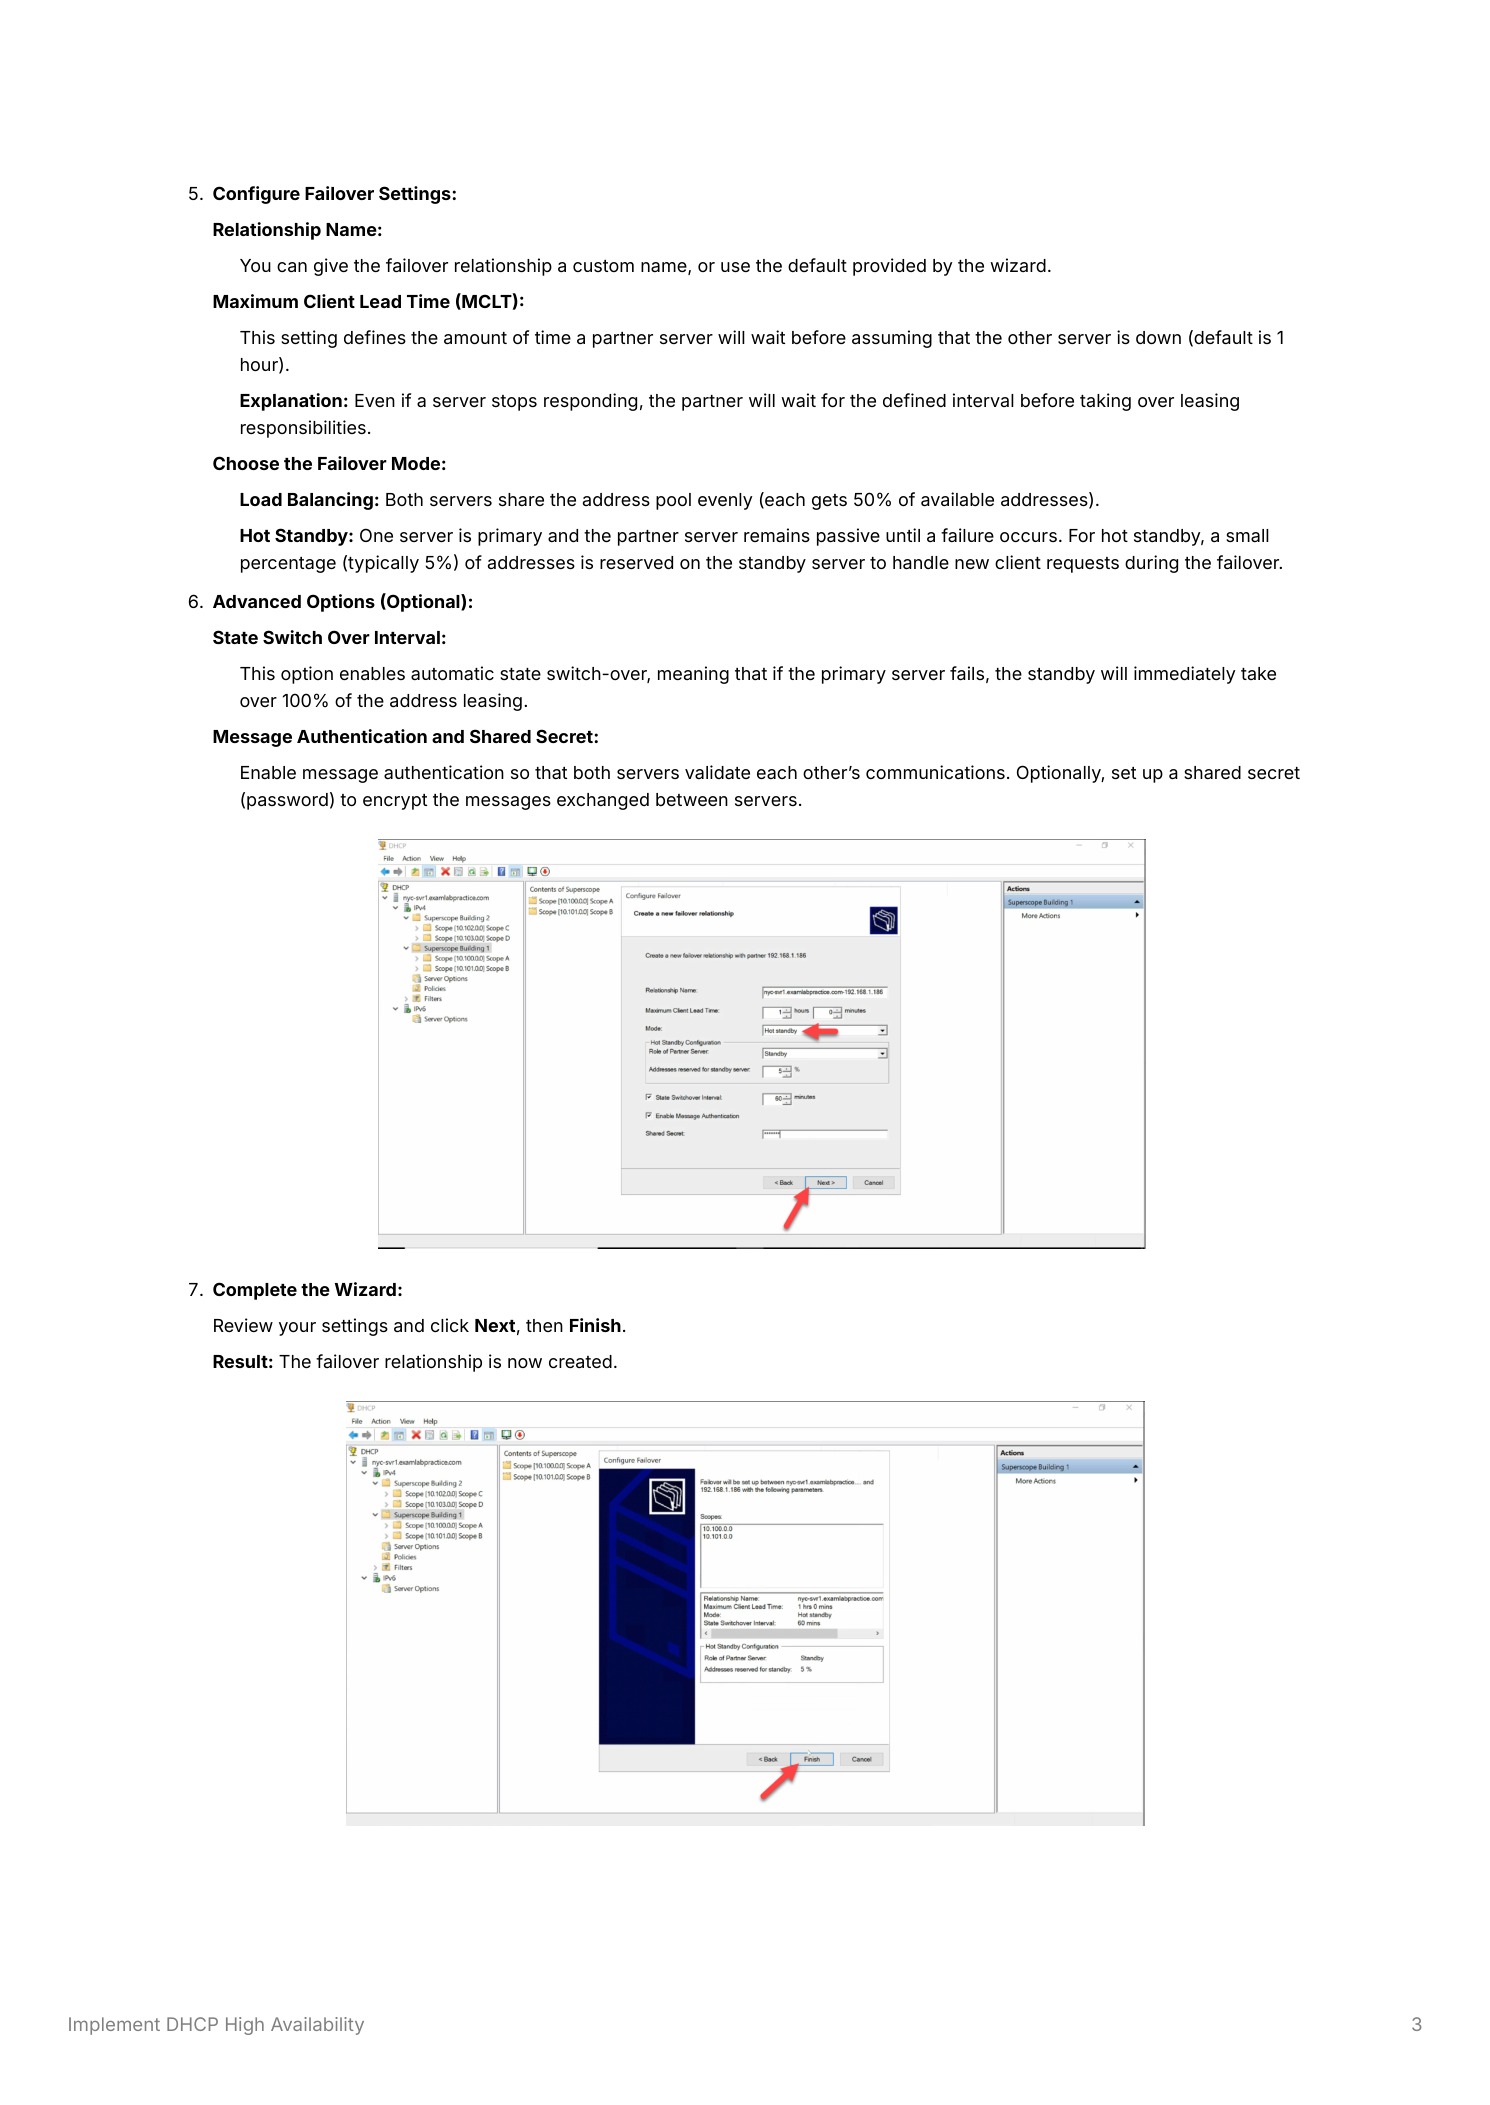
- Relationship Name — descriptive identifier (e.g. “NYC-Building-One-Failover”). The wizard generates a default; override it for clarity.
- Maximum Client Lead Time (MCLT) — how long the partner waits before fully assuming the failed primary’s leases. Default 1 hour. During MCLT the partner serves its own portion but doesn’t reissue leases that belonged to the dead primary — this prevents lease conflicts during brief network blips.
- Failover Mode — Load Balance (with percentage split, default 50/50) or Hot Standby (with reserve percentage, default 5% of pool reserved on standby).
- State Switchover Interval — under Advanced Options. Enable this. Without it, the partner stays in “Communication Interrupted” state forever waiting for an admin to manually flip it to Partner Down. With it, the partner auto-promotes after the configured timeout. 60 minutes is reasonable for most environments.
- Message Authentication and Shared Secret — also enable this. A short shared secret. Without it, any rogue server that knows the relationship name can inject into the failover dialog. Cheap insurance.
Step 5 — Finish and verify replication
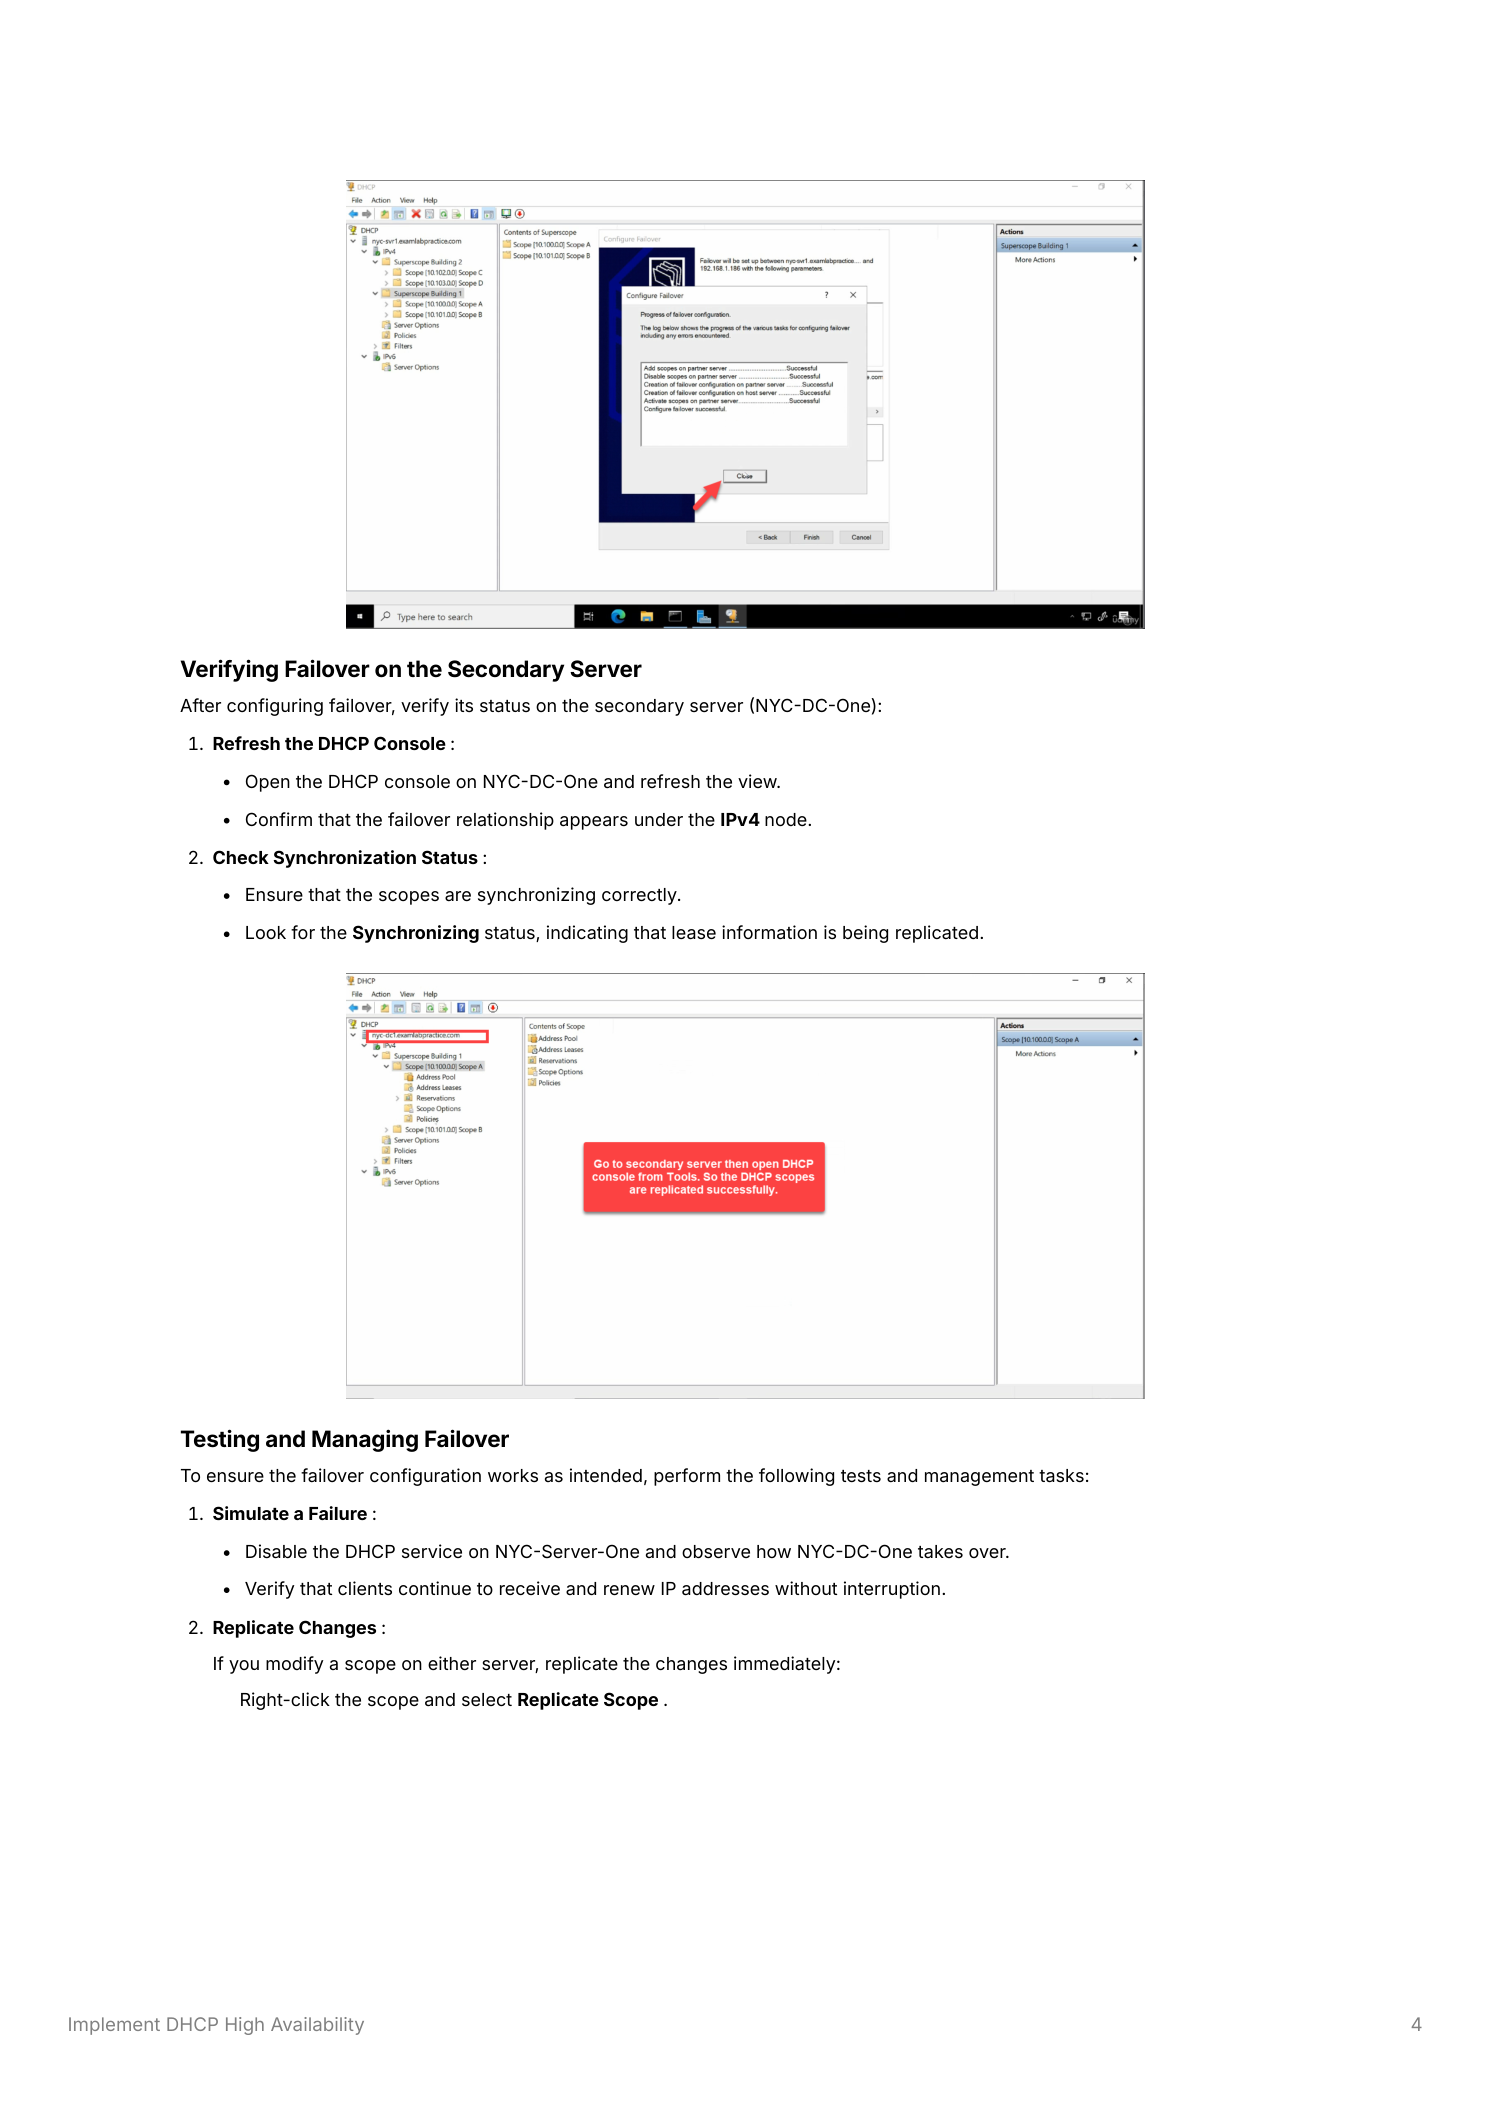
Review the summary, click Finish. The wizard creates the relationship, replicates the scope config and existing lease database to the secondary in one operation. Move to the secondary server (NYC-DC-One), open its DHCP console — the scope should appear under IPv4 with status Synchronizing (briefly, during initial sync) then Normal. Anything other than Normal means replication isn’t healthy; check port 647 connectivity and the relationship status pages on both servers.
Step 6 — Test the failover (and use it operationally)
The only way to know failover works is to test it. Pick a maintenance window, stop the DHCP service on the primary (Stop-Service DHCPServer), and watch a few clients release/renew. They should obtain leases from the secondary without complaint. The secondary’s DHCP console should show the relationship transitioning Normal → Communication Interrupted → (after the State Switchover Interval) → Partner Down. When you bring the primary back, status returns to Normal and lease state re-syncs.
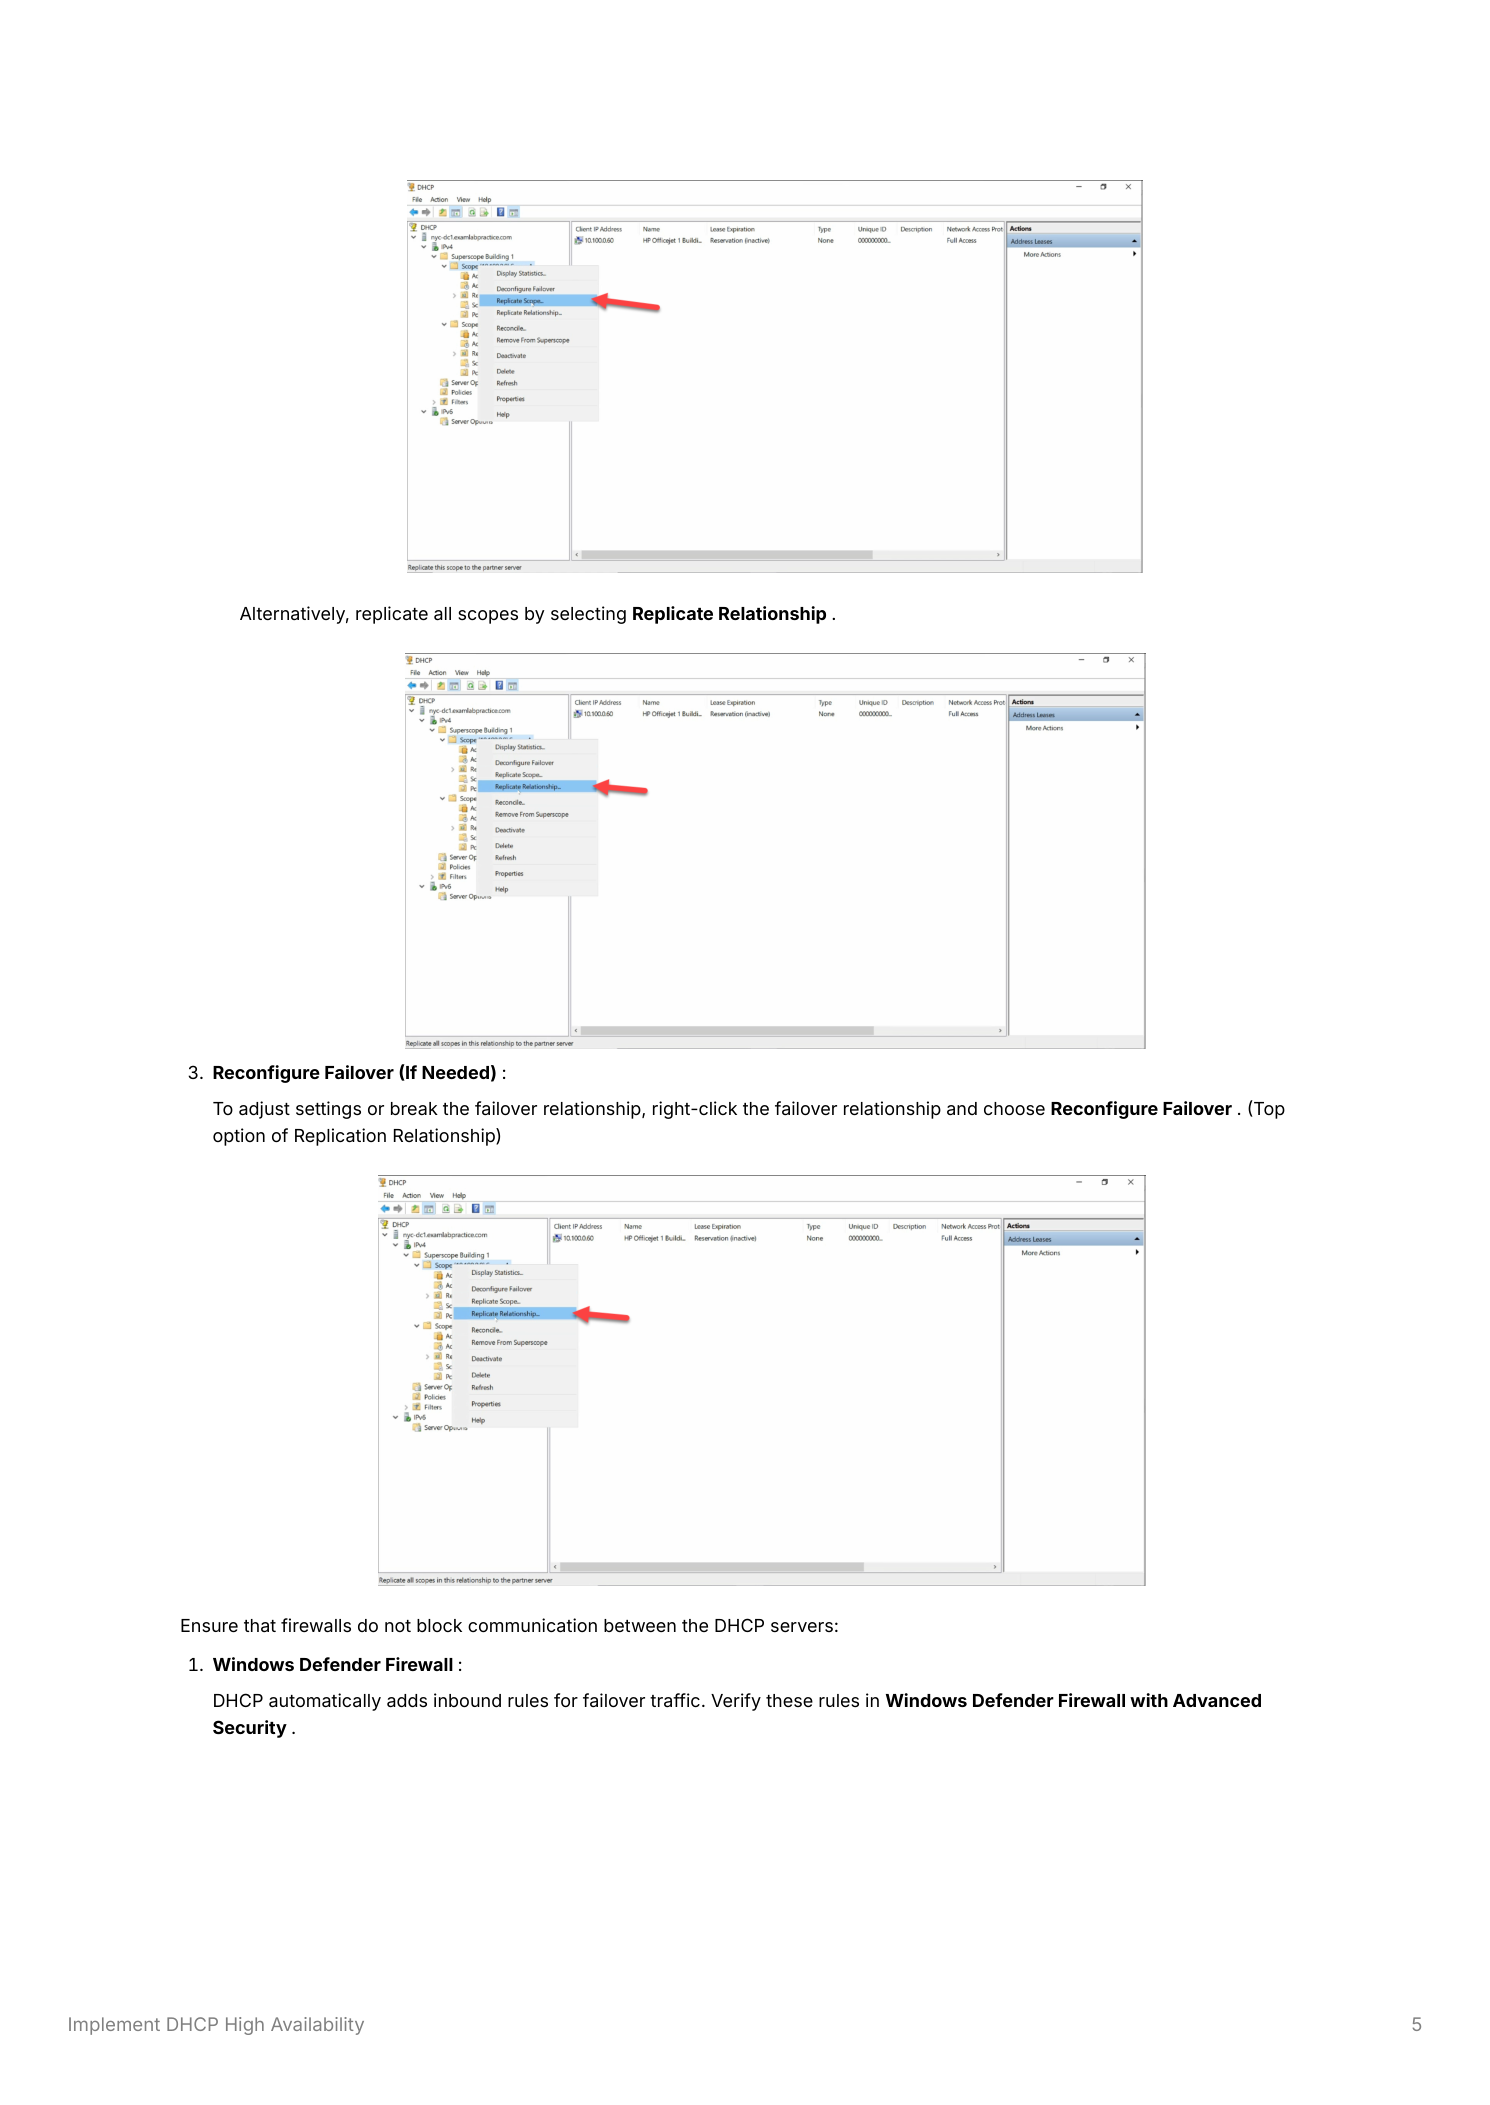
For day-to-day operations, two manual replication actions are available by right-clicking the scope on either server:
- Replicate Scope — pushes the current scope config and lease state for one scope to the partner immediately. Useful right after you change something (added an exclusion, changed scope options) and don’t want to wait for the next automatic sync.
- Replicate Relationship — pushes every scope in the failover relationship at once. Useful after multiple changes or after recovering from extended communication loss.
You can also Reconfigure Failover from the same right-click menu to adjust mode, MCLT, or shared secret without tearing down the relationship.
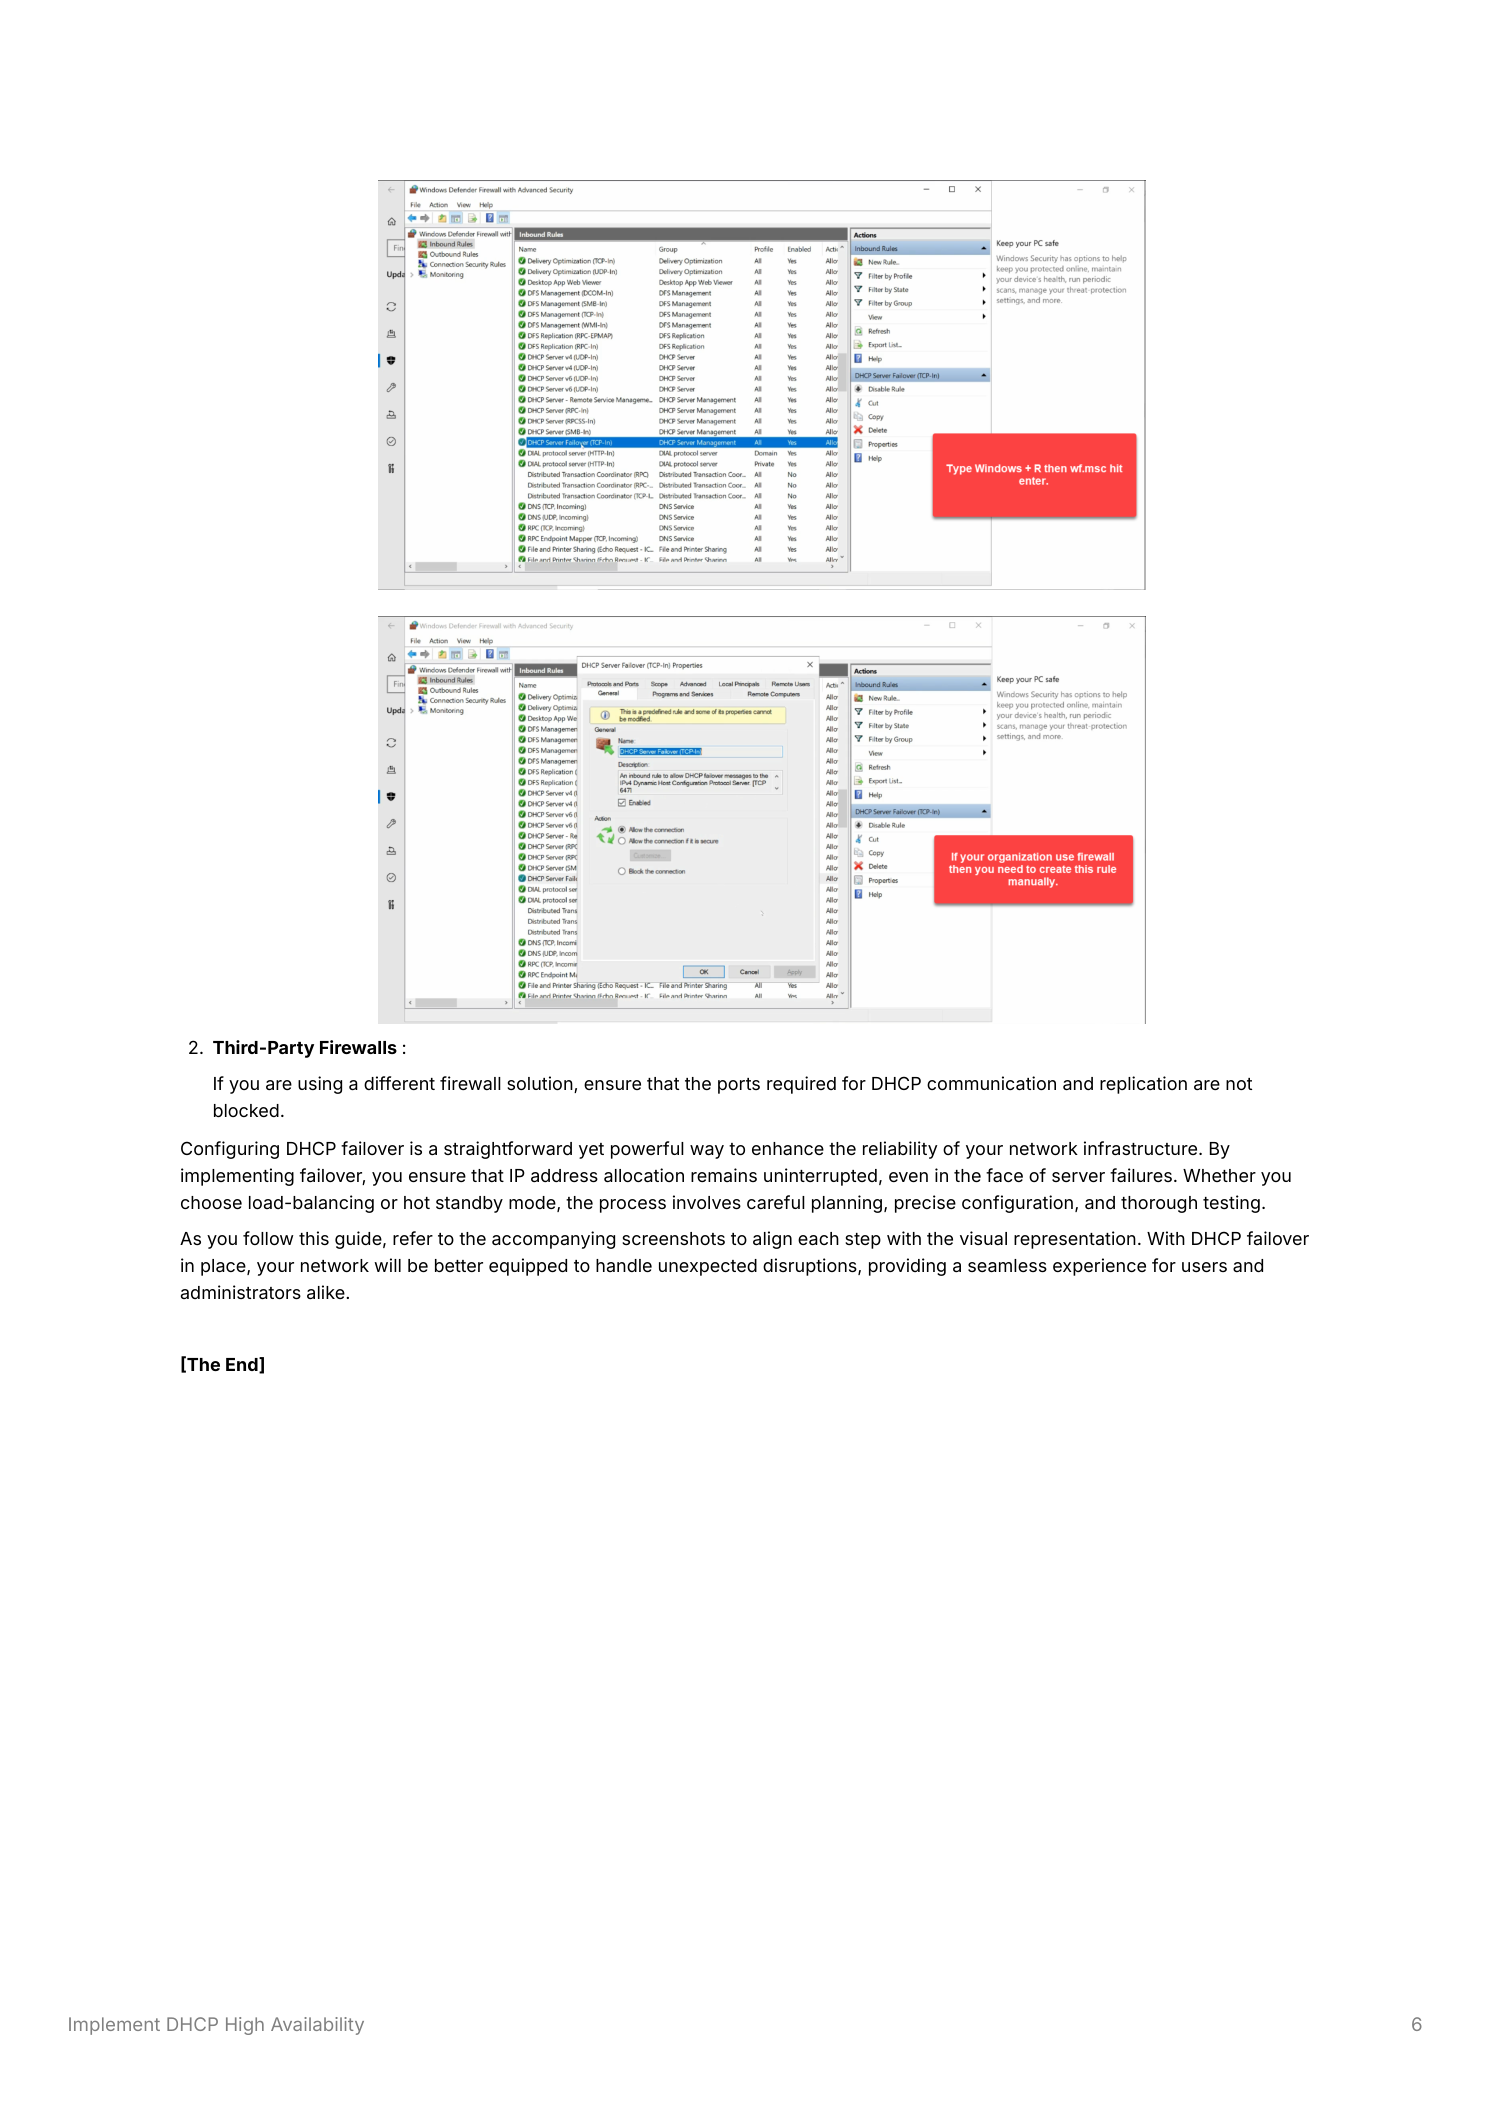
Don’t forget port 647
DHCP failover uses TCP 647 for server-to-server lease replication. The DHCP role install adds the inbound firewall rule automatically on Windows Defender Firewall, but verify both servers have it enabled (search Inbound Rules for “DHCP Failover”). For environments with third-party firewalls or network ACLs between the two DHCP servers, you have to permit TCP 647 bidirectionally yourself. Blocking it doesn’t break DHCP serving — both servers will continue to operate — but they can’t share lease state, and the relationship reports communication failure. The two servers end up working independently with diverging lease databases, which is the worst of both worlds when one of them fails.
Things that bite people in production
Pick the right mode for the topology
Same-site servers: Load Balance. Different sites with WAN between them: Hot Standby. Picking load balance across a WAN can produce inconsistent client experience because brief WAN blips push the relationship into communication interrupted, and clients on each side get different leases. Hot standby tolerates that better.
Always enable State Switchover
Without it, when the primary goes down, the partner stays in Communication Interrupted forever — serving its own portion but never assuming the primary’s addresses. New clients fail to lease until you manually flip the partner to Partner Down. That manual step might happen in 5 minutes; it might happen in 5 hours. Auto-switchover removes the human from the path.
Always set a shared secret
Without authentication, anyone on the network who can reach port 647 and knows the relationship name can inject. A short shared secret eliminates that attack vector. Set it once at relationship creation; you don’t have to think about it again.
Test failover before you need it
An untested failover relationship is a relationship that probably doesn’t work. Schedule a quarterly test in a maintenance window: stop the primary, verify clients keep leasing from the partner, restart the primary, verify resync. Five minutes of testing finds the broken bits before a real outage does.
Watch synchronization status
Status should be Normal on both sides, all the time. Persistent Synchronizing or Communication Interrupted means something’s wrong with replication — usually port 647 blocked, or a name resolution issue, or a clock skew between the two servers (failover is sensitive to time mismatch). Investigate before the next real failure exposes the problem at the worst time.
Where this fits
DHCP failover is the redundancy layer for the DHCP service. The companion pieces are implementing the DHCP Server role, creating and managing DHCP scopes (the scope you’re making HA), DHCP IP reservations (which replicate as part of scope state), and the broader DNS, DHCP & Networking pathway. For environments managing multiple failover relationships across many servers, IPAM aggregates the relationship status into a single console.