Most Windows DHCP deployments live inside an Active Directory domain — the AD authorization gate is a useful safety net against rogue DHCP servers, and the management groups created during install plug into your existing delegation model. But there are real environments where domain-joining the DHCP server isn’t practical: a small business that doesn’t run AD at all, an isolated lab network, a branch site too small to justify a local DC, a development sandbox that intentionally lives outside the production directory. For those, you want a standalone DHCP server — same role, same wizard, with the AD authorization step explicitly skipped.
This walkthrough covers the standalone install end to end: confirming the static IP prerequisite, installing the role, completing the post-install wizard with AD authorization skipped, then creating an active scope with the New Scope Wizard from start to finish. It ends with verifying a Windows client successfully obtains a lease and converting that dynamic lease into a permanent reservation.
What you need before starting
- A Windows Server (any reasonably recent edition) with a static IP address already assigned
- Local administrator rights (no AD account needed — that’s the point of standalone)
- The address plan for the network: scope range, subnet mask, gateway IP, DNS server IPs, and any static-IP devices that need exclusion
- Network connectivity to the subnet you’re going to serve — standalone DHCP only serves the broadcast domain it sits on (or any subnet a DHCP relay forwards from)
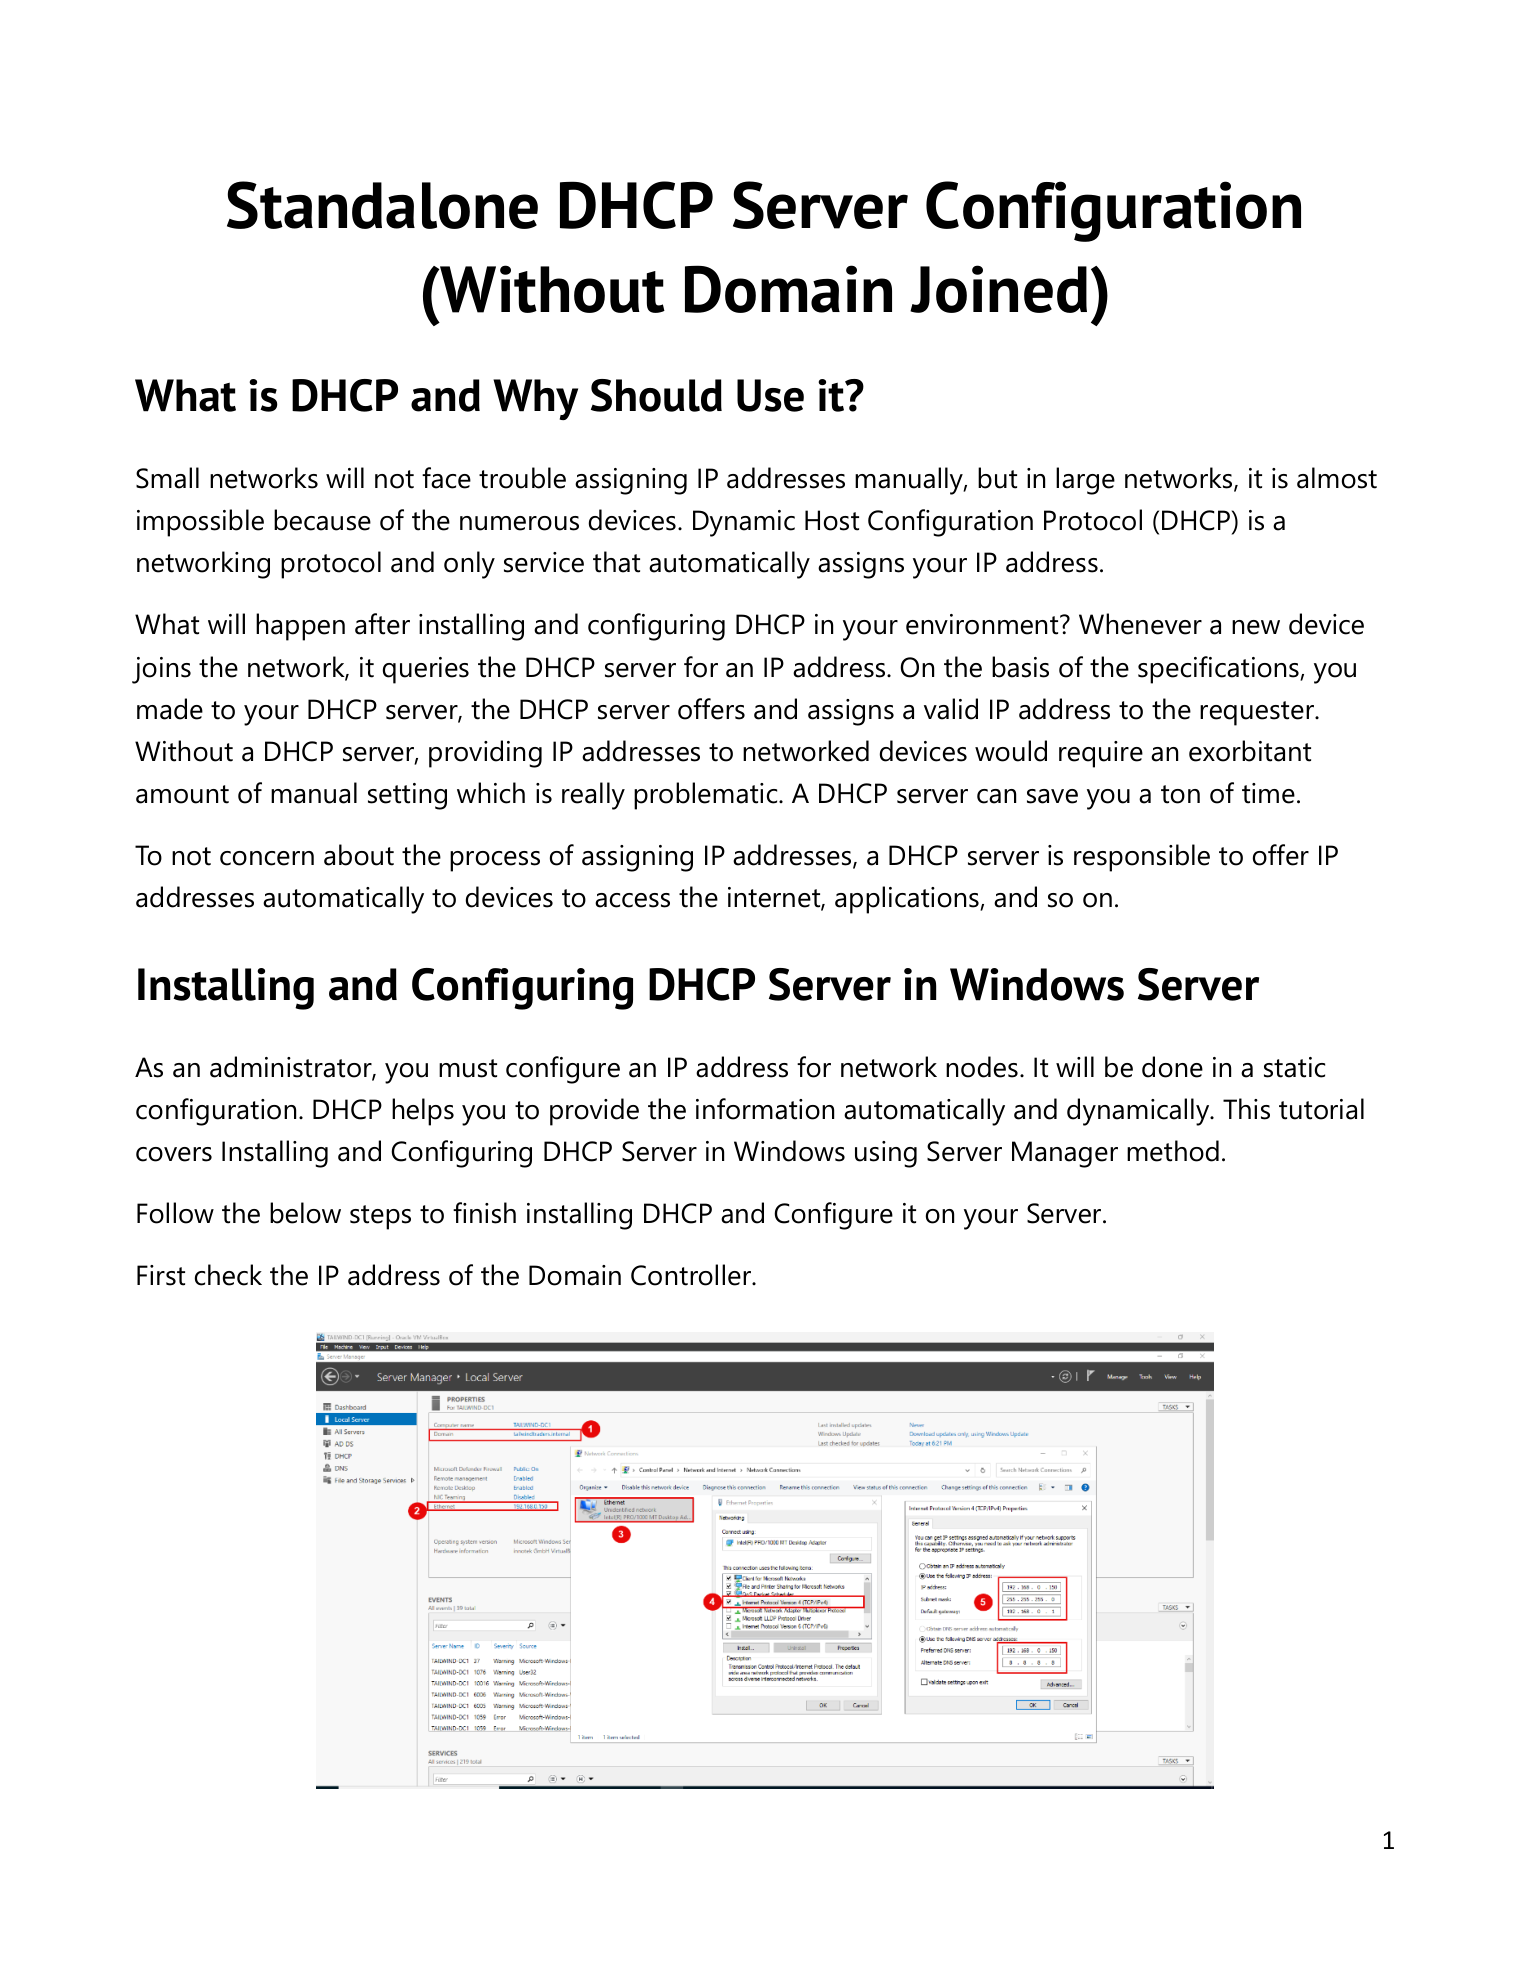
Step 1 — Confirm the static IP
This is non-negotiable. A DHCP server cannot reliably hand out leases when its own address keeps changing — clients that received leases referencing the server’s old IP can’t renew. Open a command prompt and run ipconfig to display the current configuration. Note the IP, subnet mask, and default gateway; you’ll reference all three during scope setup. If the address shows up as DHCP-assigned, fix that before installing the role.
Step 2 — Launch Add Roles and Features
Open Server Manager. Click Manage in the top bar and select Add Roles and Features. Click Next through the Before You Begin page. On Installation Type, pick Role-based or Feature-based installation, click Next.

Step 3 — Pick the destination server
On Server Selection, leave Select a server from the server pool chosen and confirm the local server is highlighted. Click Next.
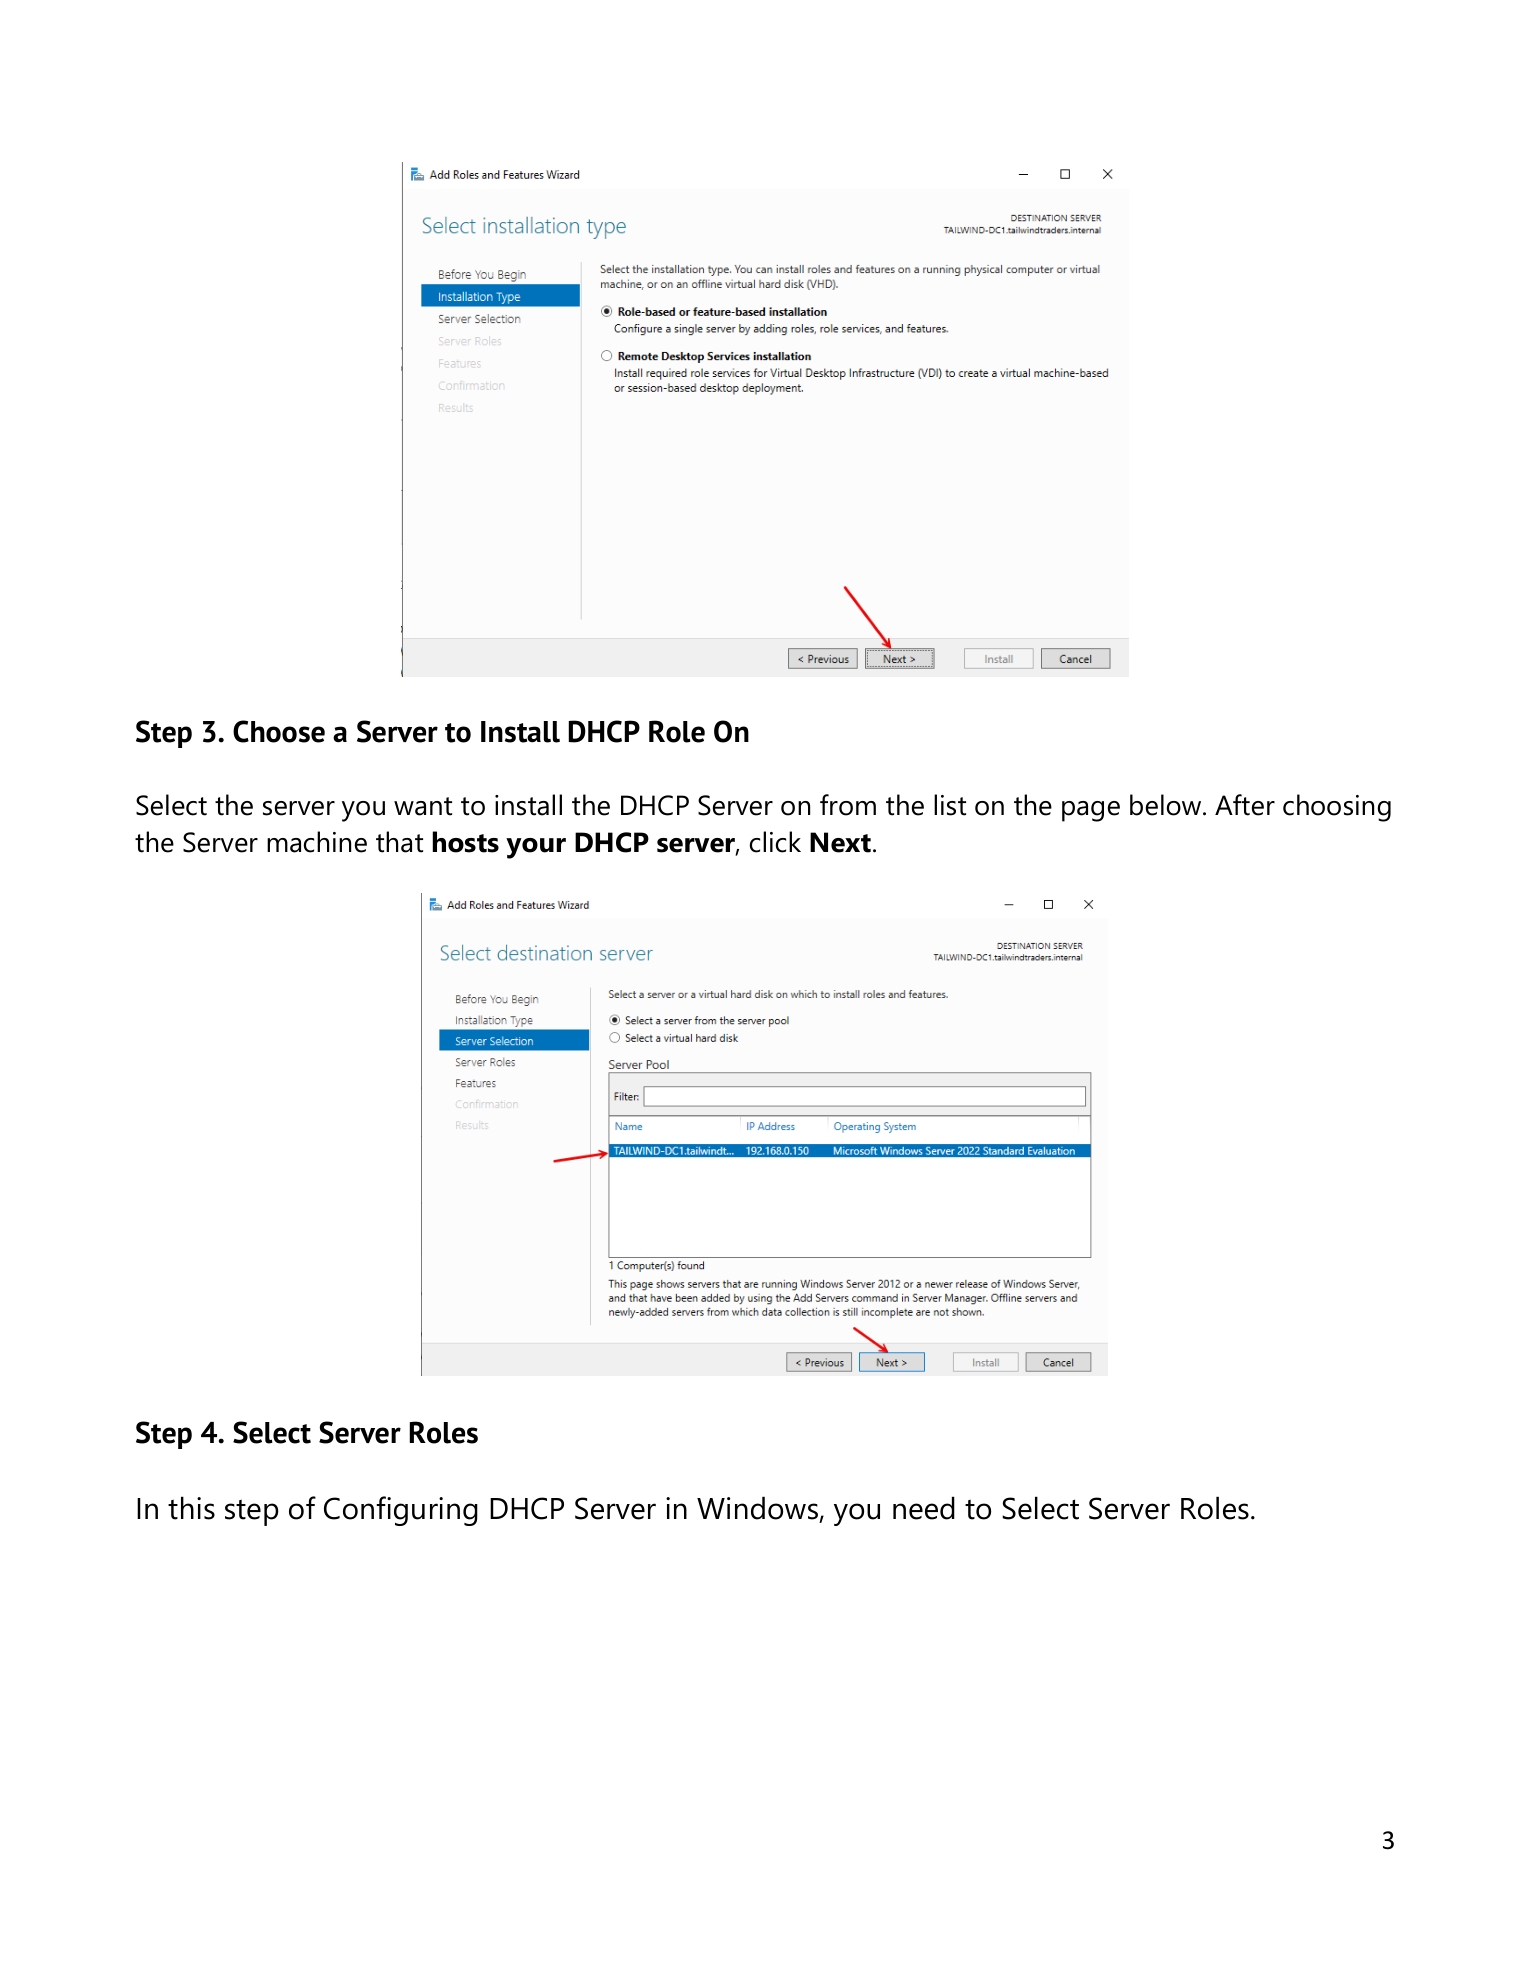
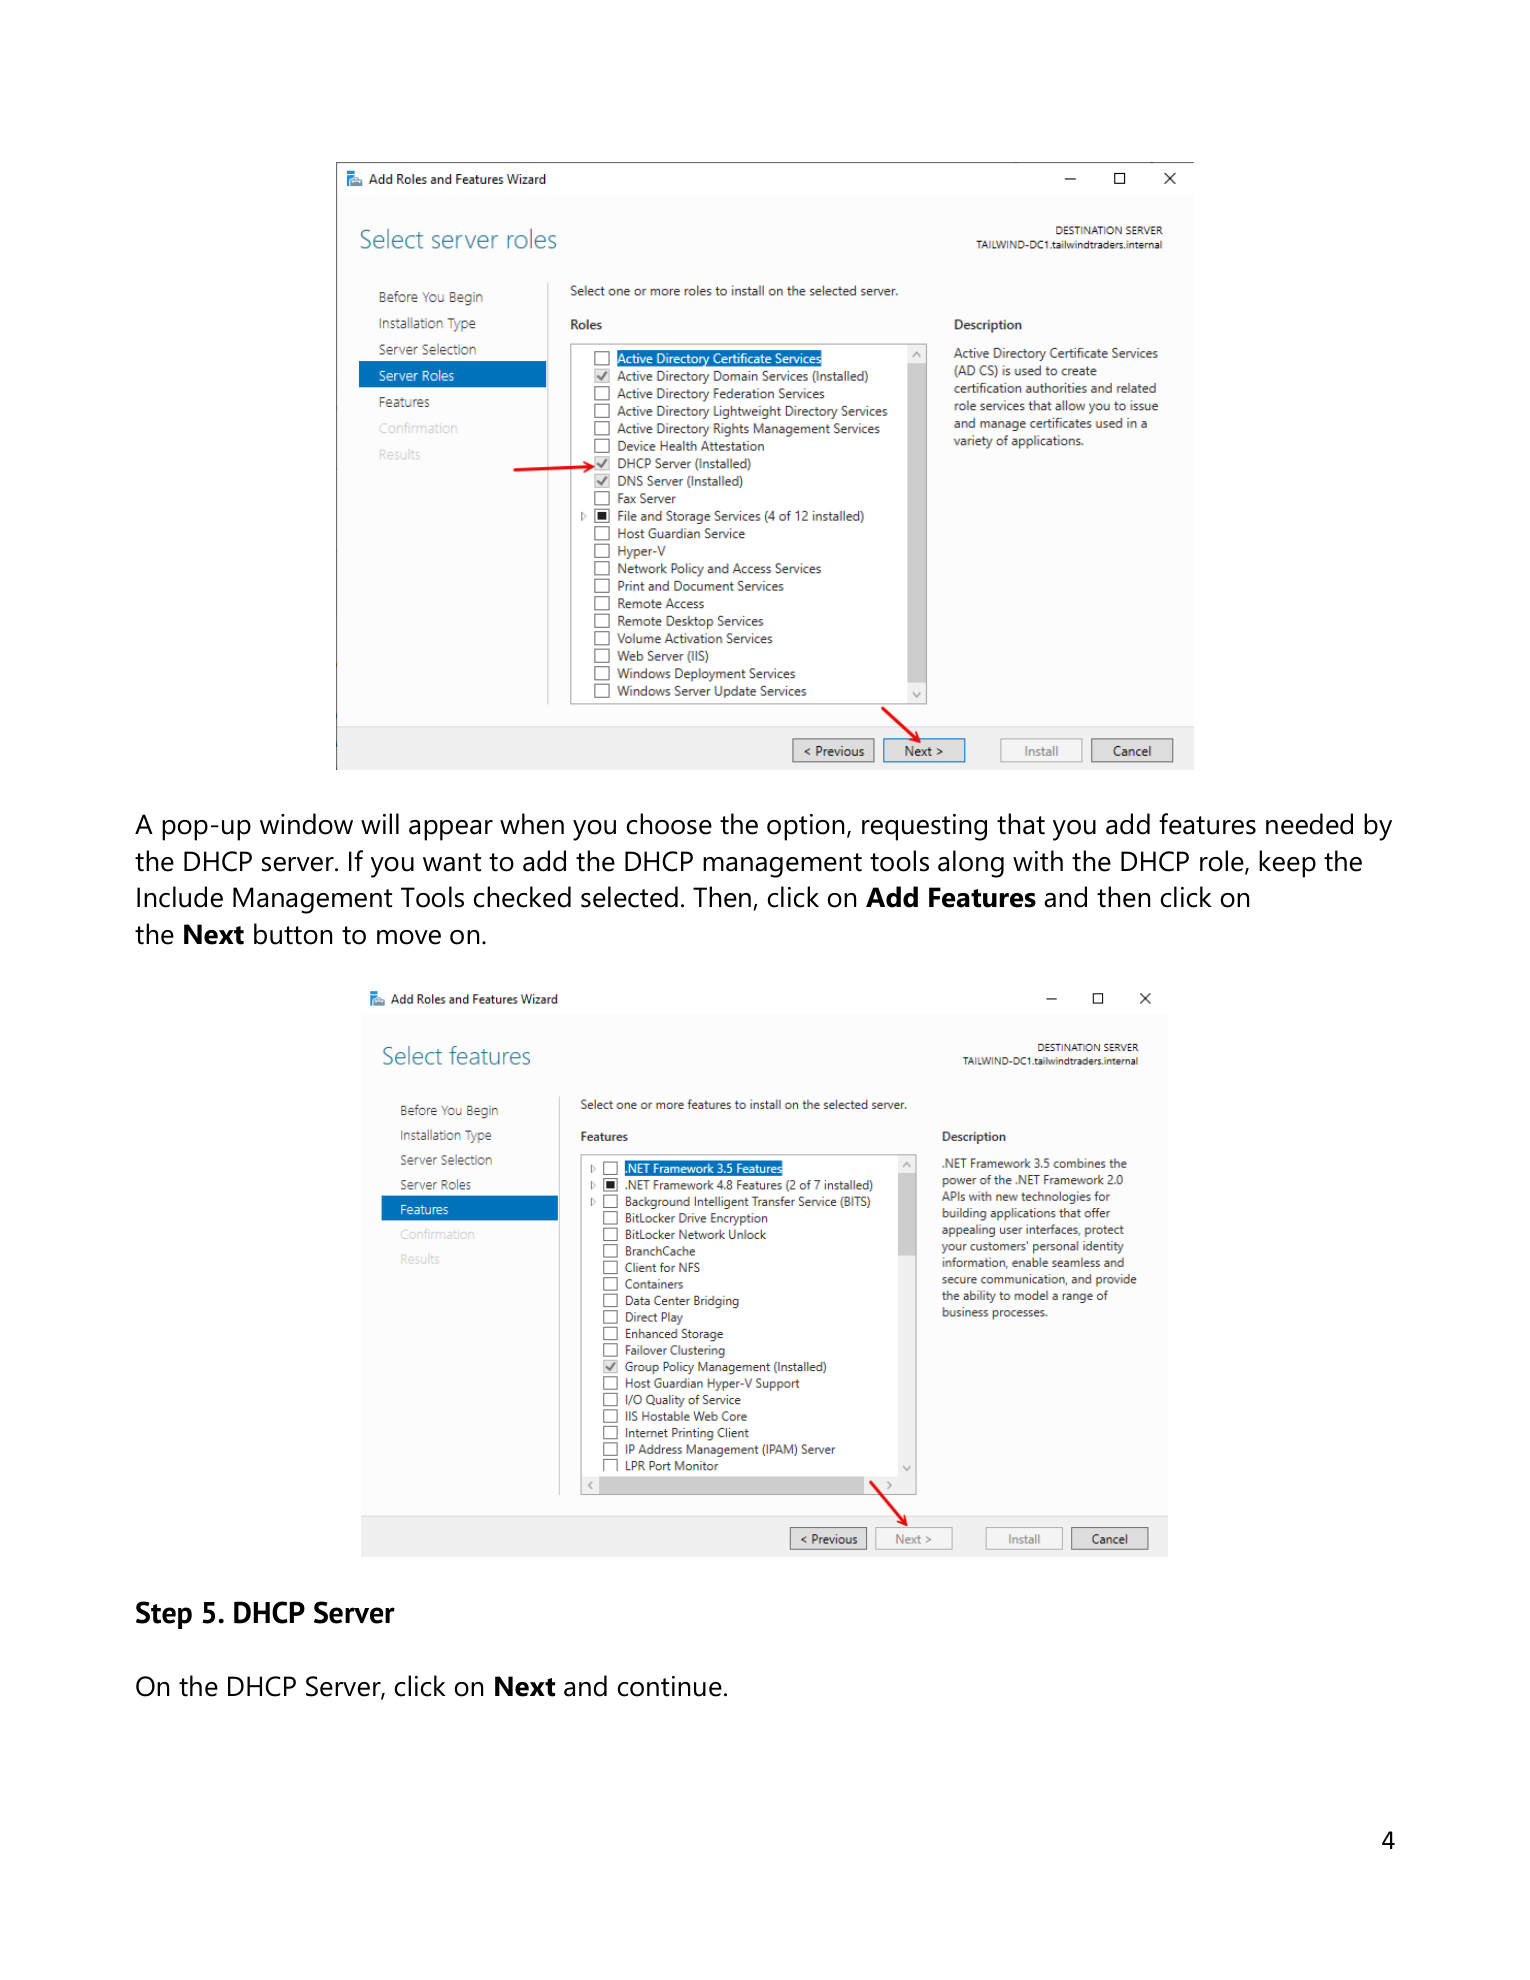
Step 4 — Tick DHCP Server
On Server Roles, tick DHCP Server. The Add Features dialog pops up offering the management console — click Add Features; you need the console to do anything meaningful with the role. Click Next through the Features page (no extras needed) and the DHCP Server info page.
Step 5 — Confirm and install
Confirmation page lists DHCP Server and DHCP Server Tools. Click Install. Install runs in a few minutes; you can close the wizard while it works — Server Manager notifies on completion.
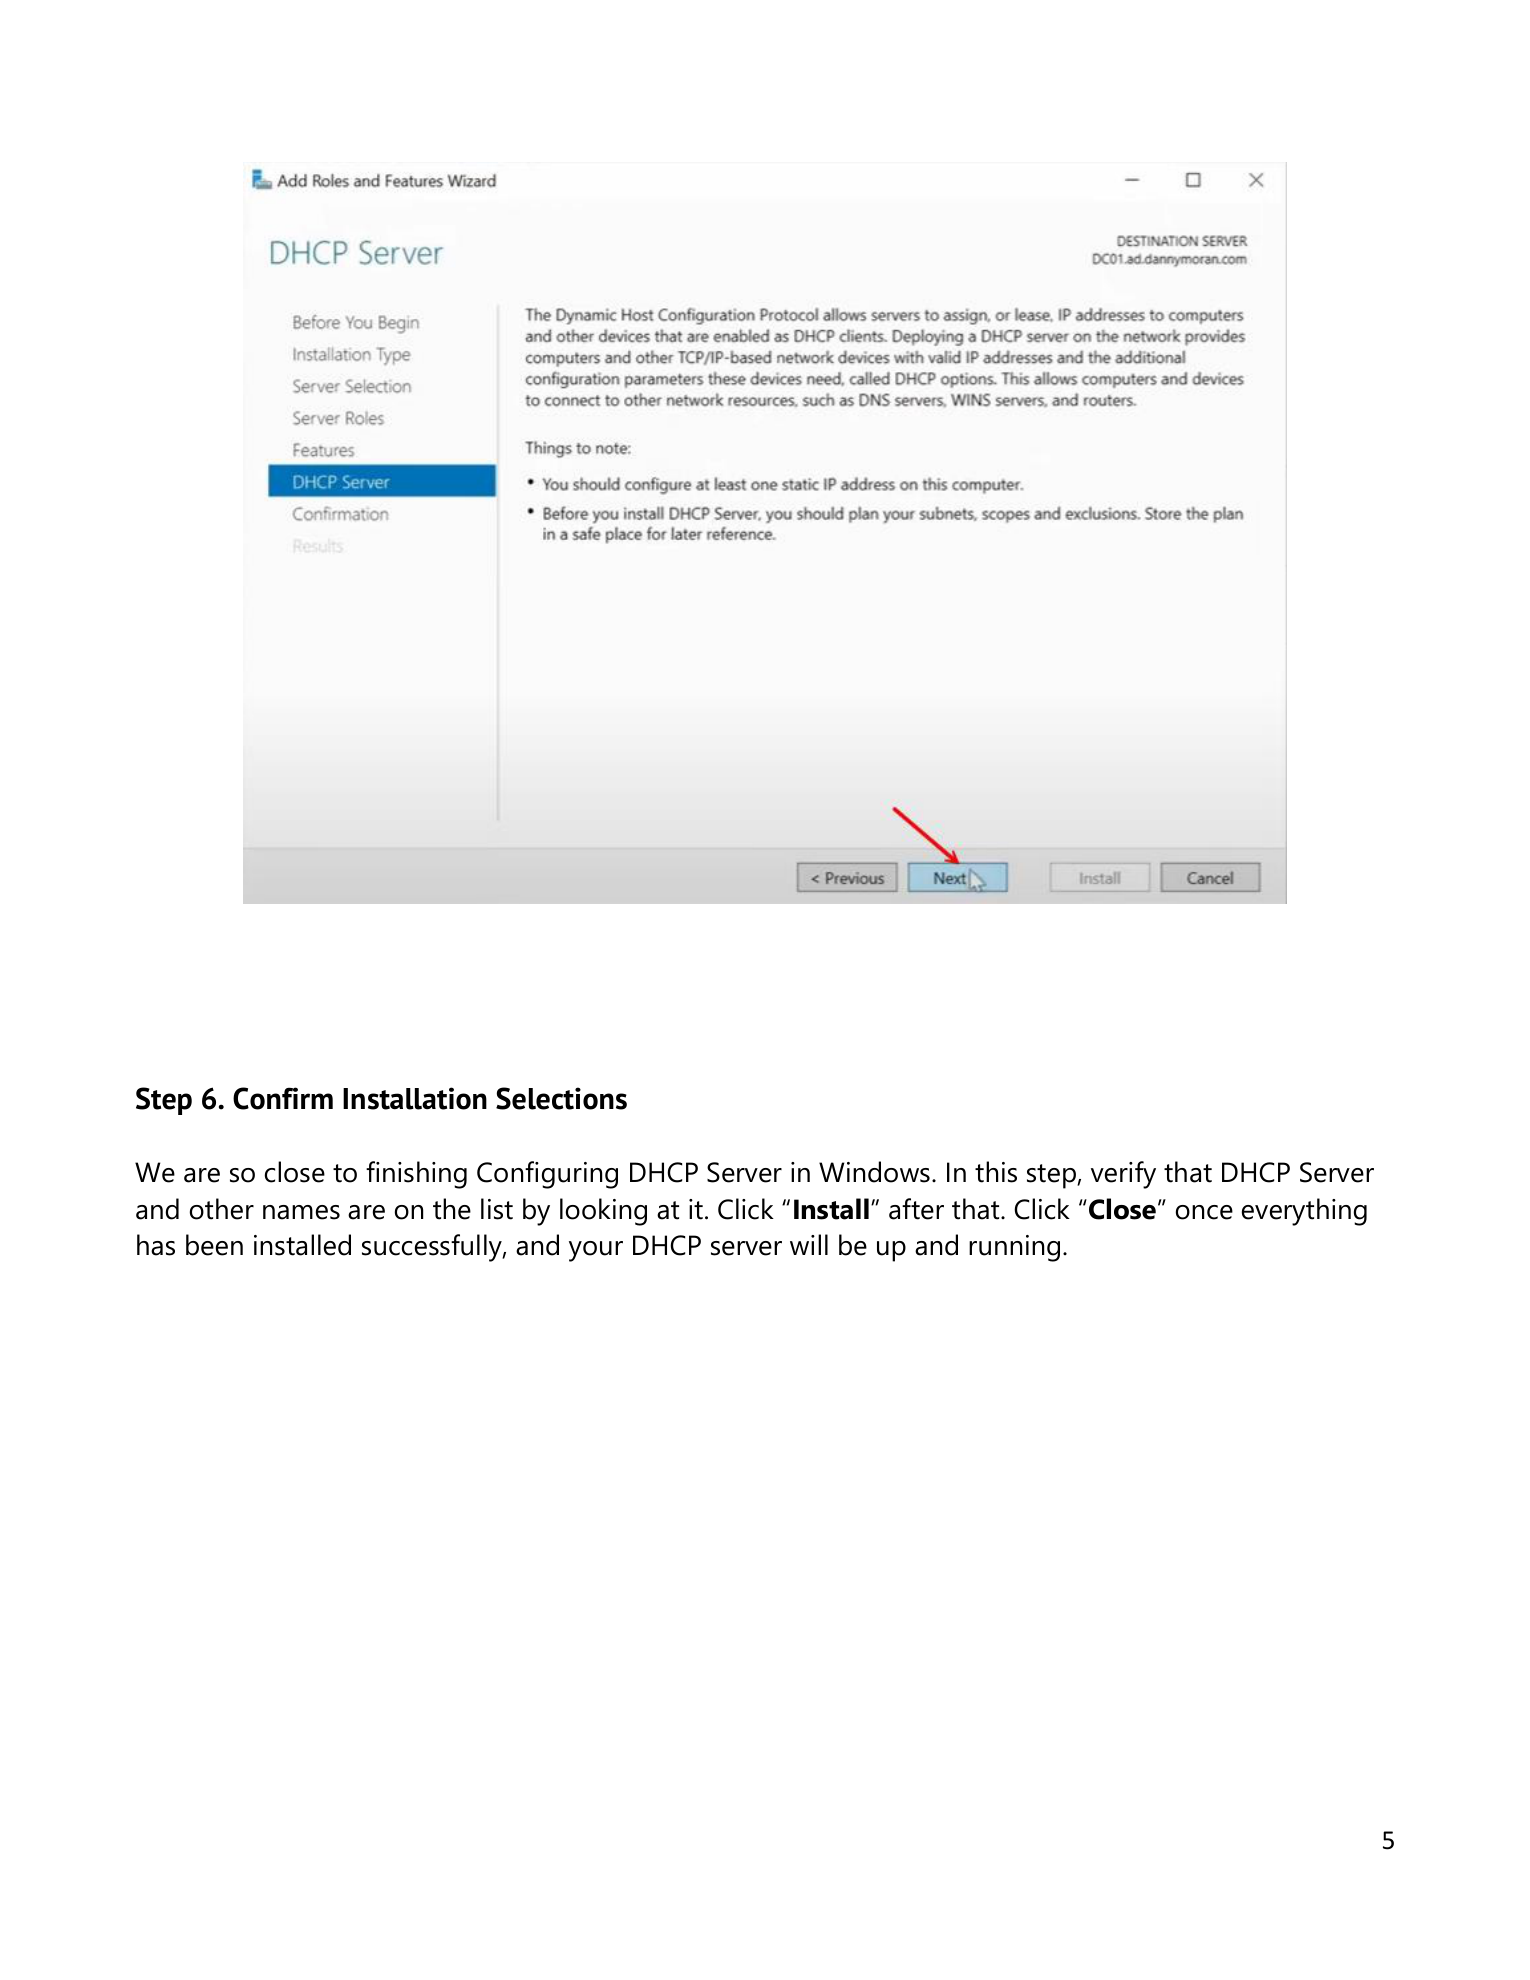
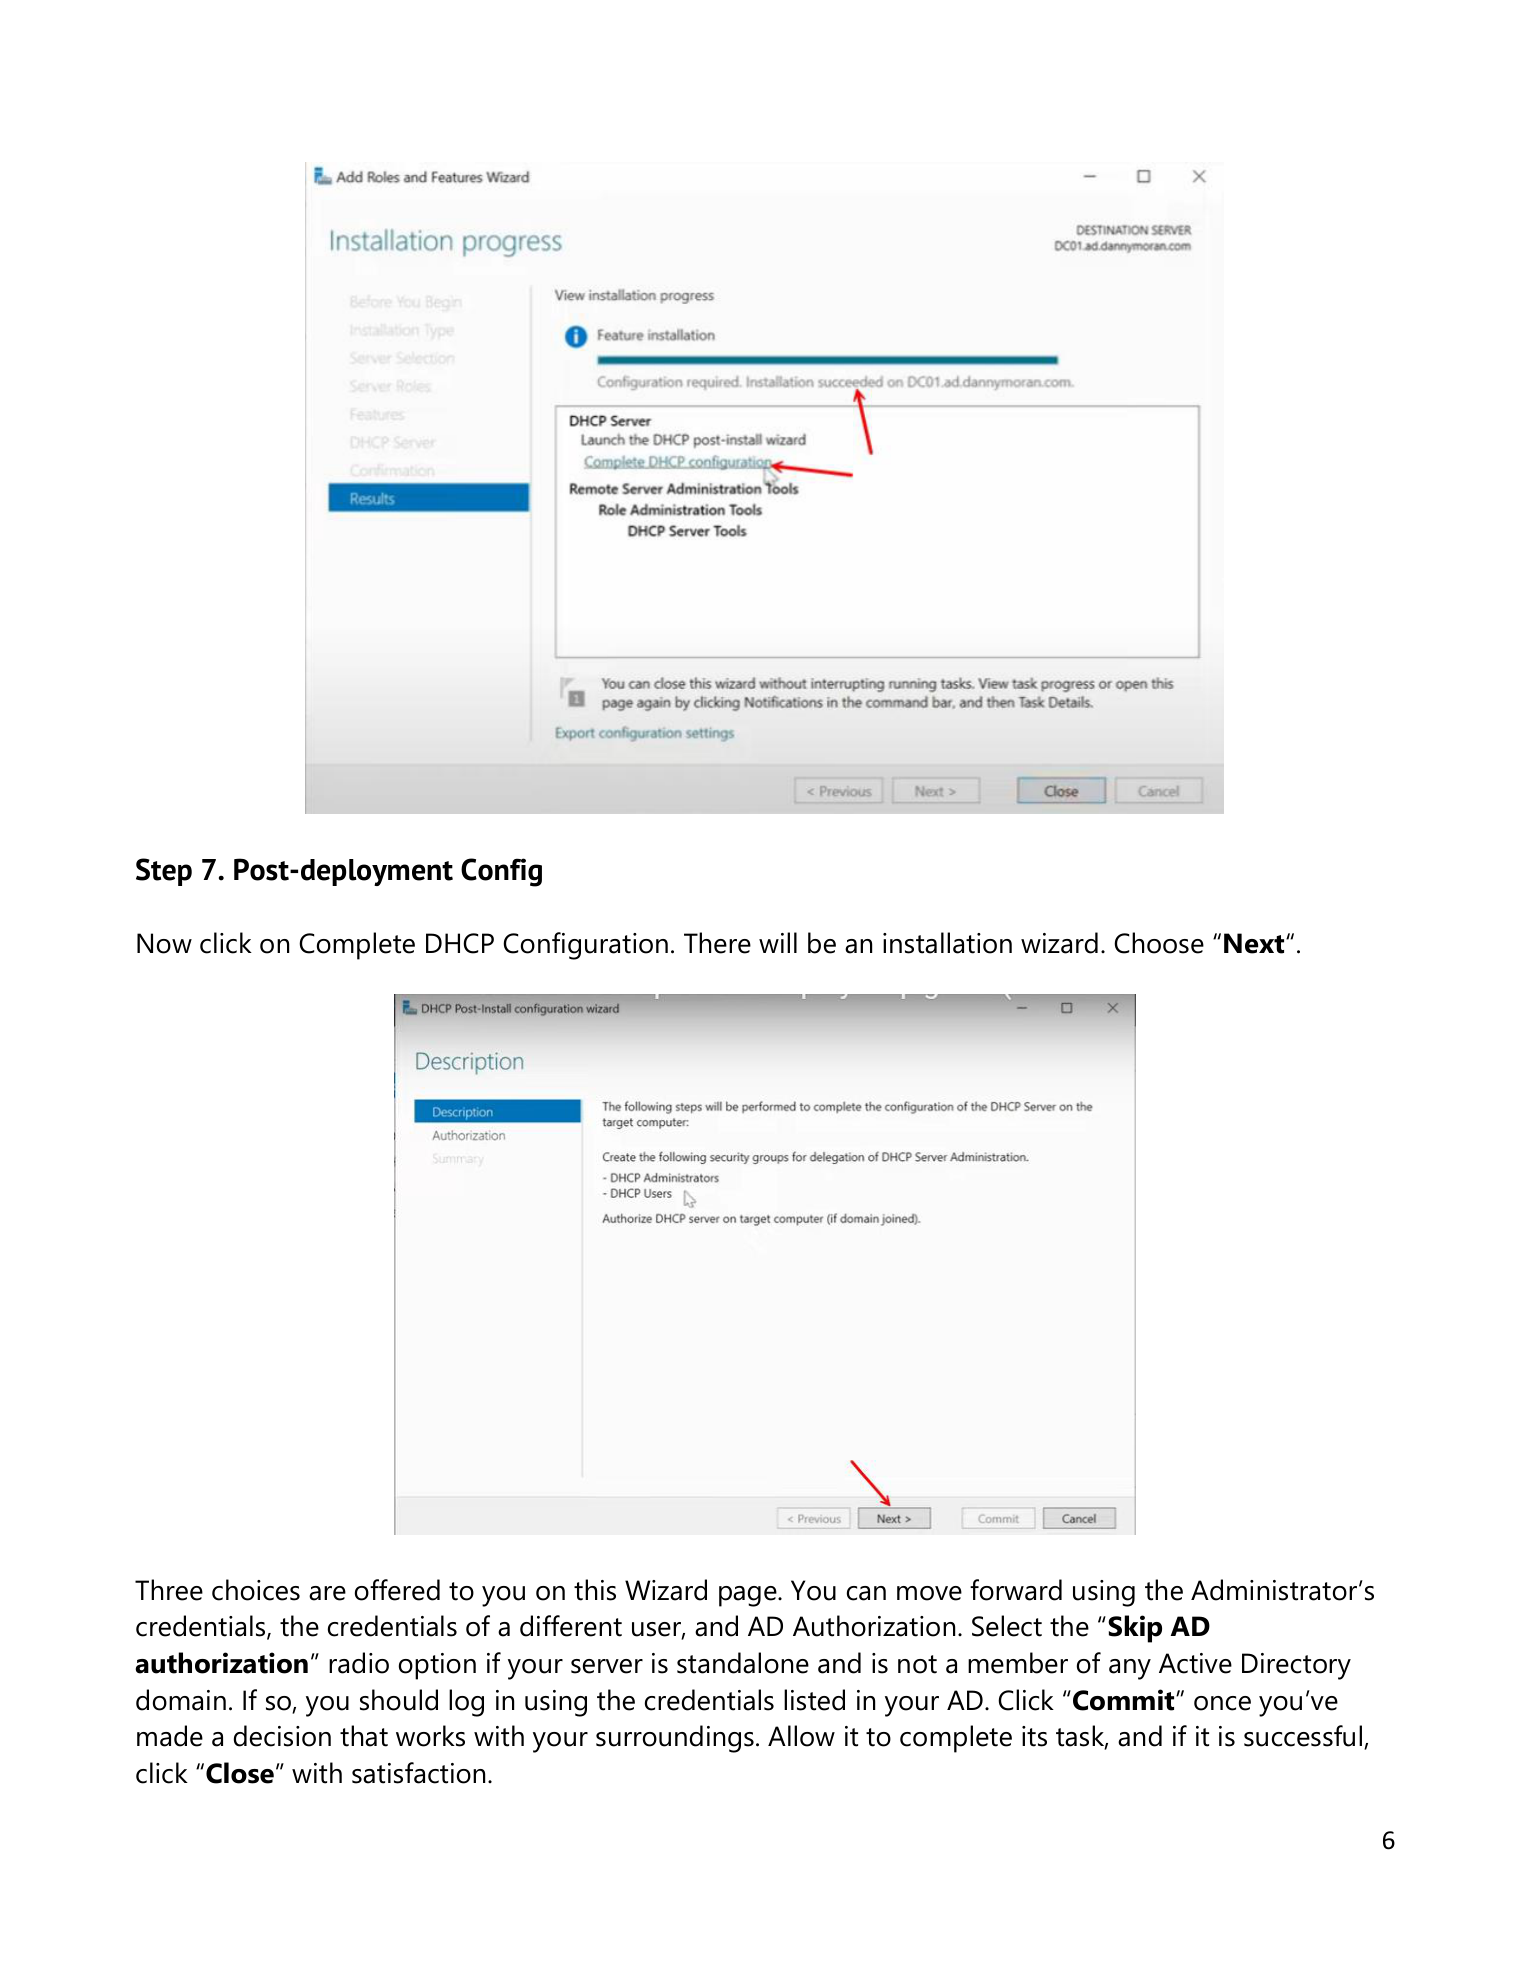
Step 6 — Open the post-install wizard
After install, a yellow notification flag appears in Server Manager’s header. Click it and pick Complete DHCP Configuration. The Post-Install Configuration Wizard opens.
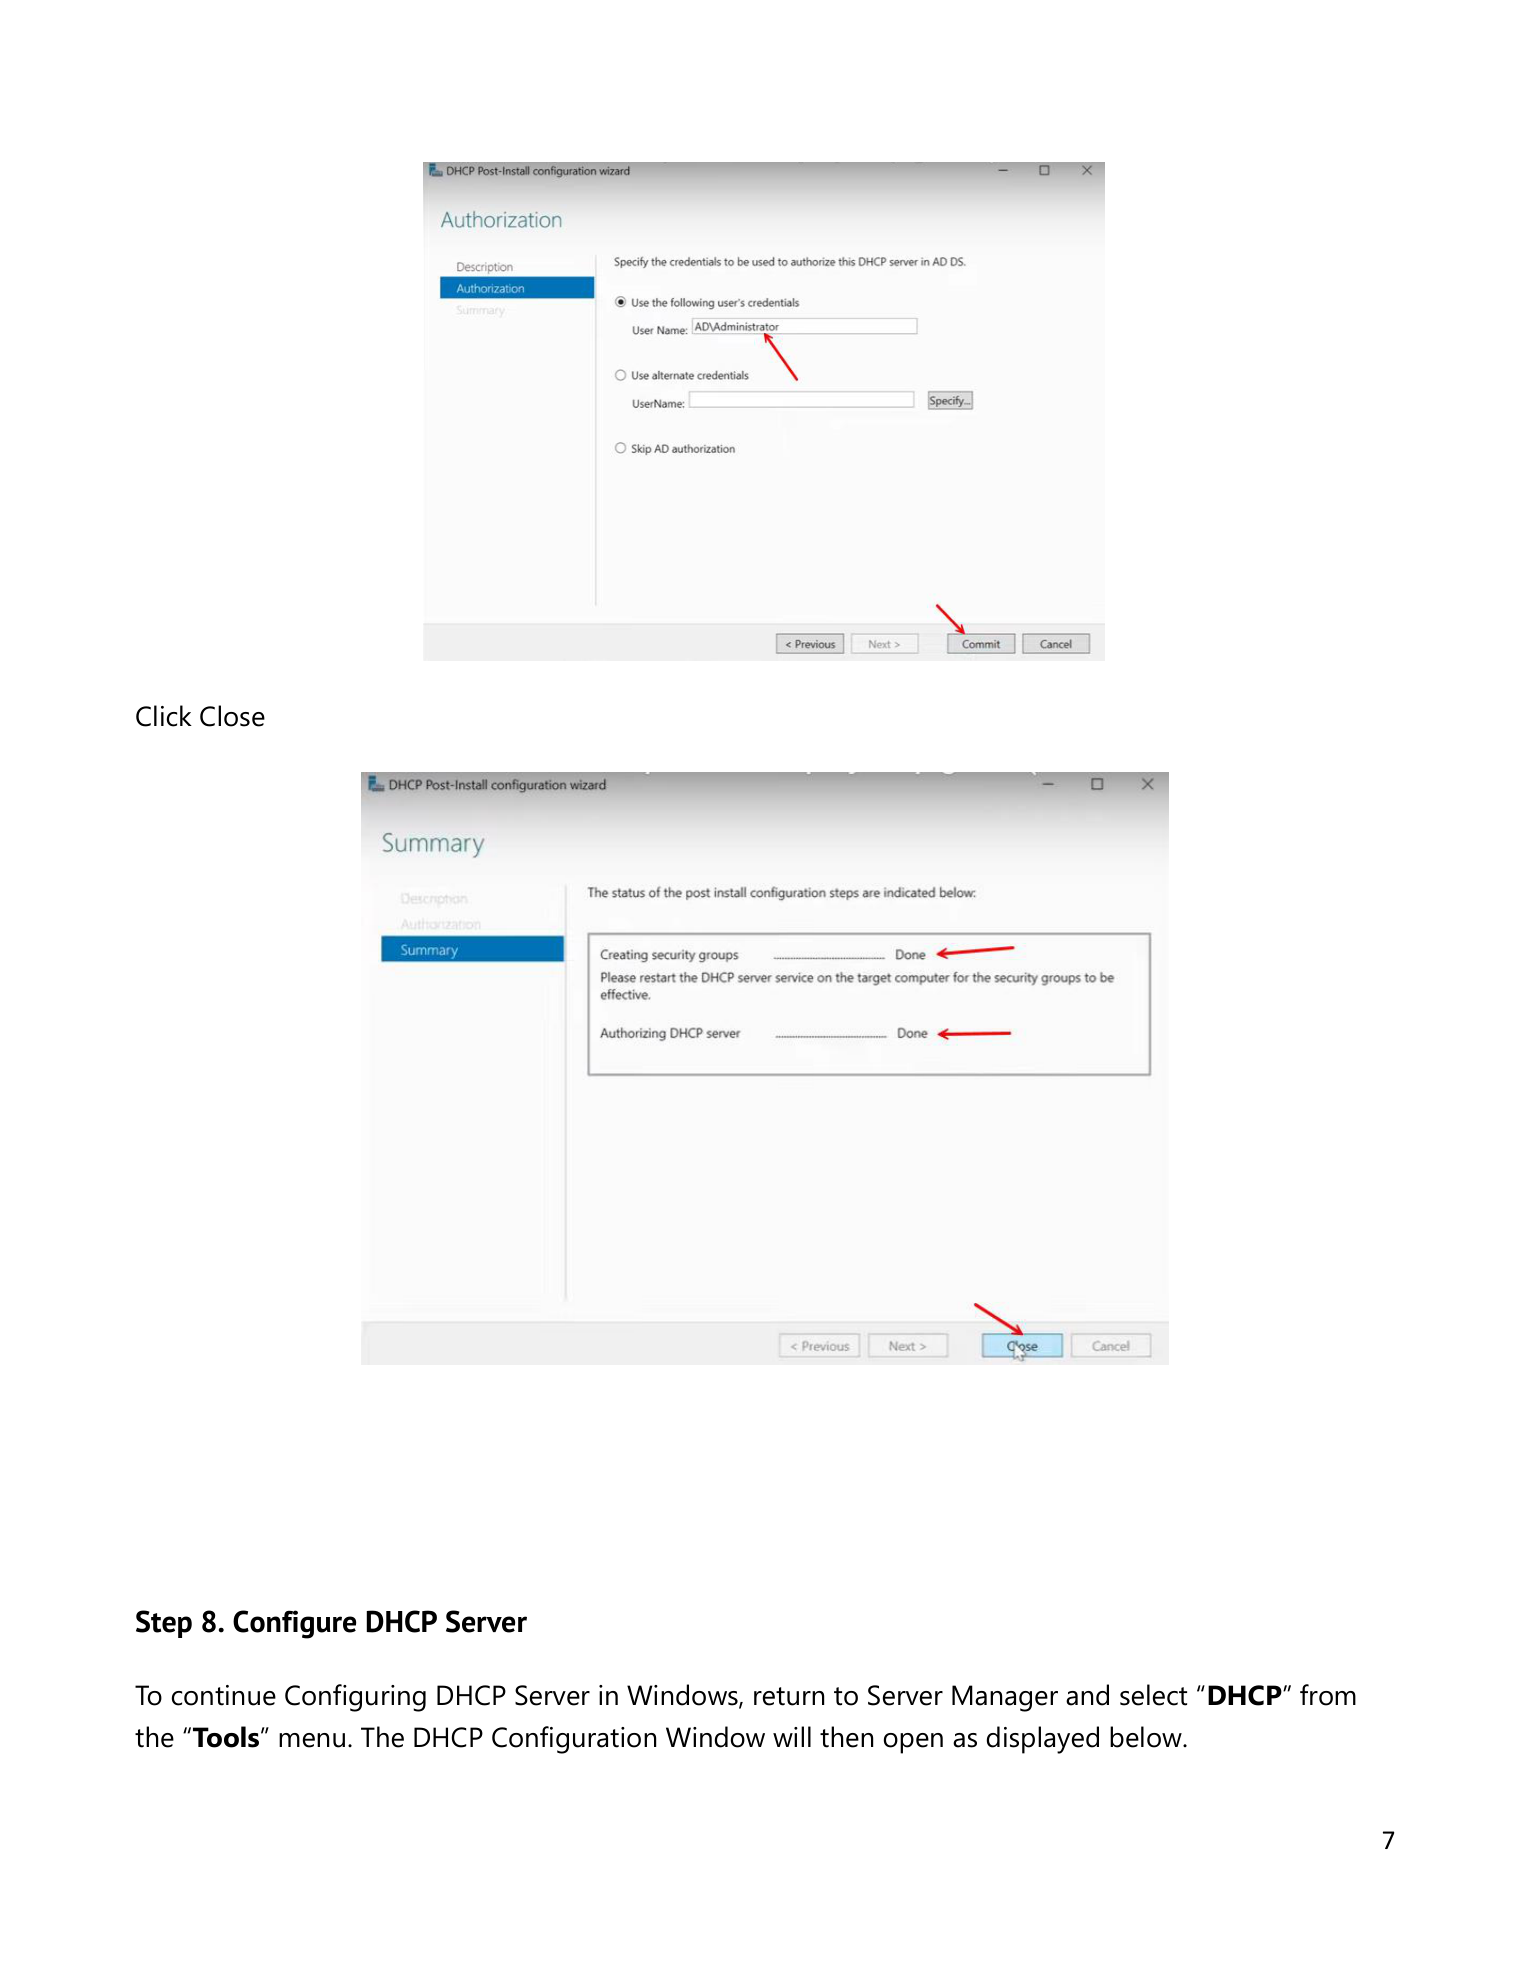
Step 7 — Skip AD authorization (this is the key step for standalone)
The Authorization page is where standalone diverges from the domain-joined install. Domain-joined servers need to be authorized in AD before they can issue leases (covered in implementing the DHCP server role). A standalone server isn’t in any domain — there’s nothing to authorize against. Pick Skip AD authorization. Click Commit. The Summary page confirms the local DHCP Administrators / DHCP Users groups were created and the AD step was skipped. Click Close.
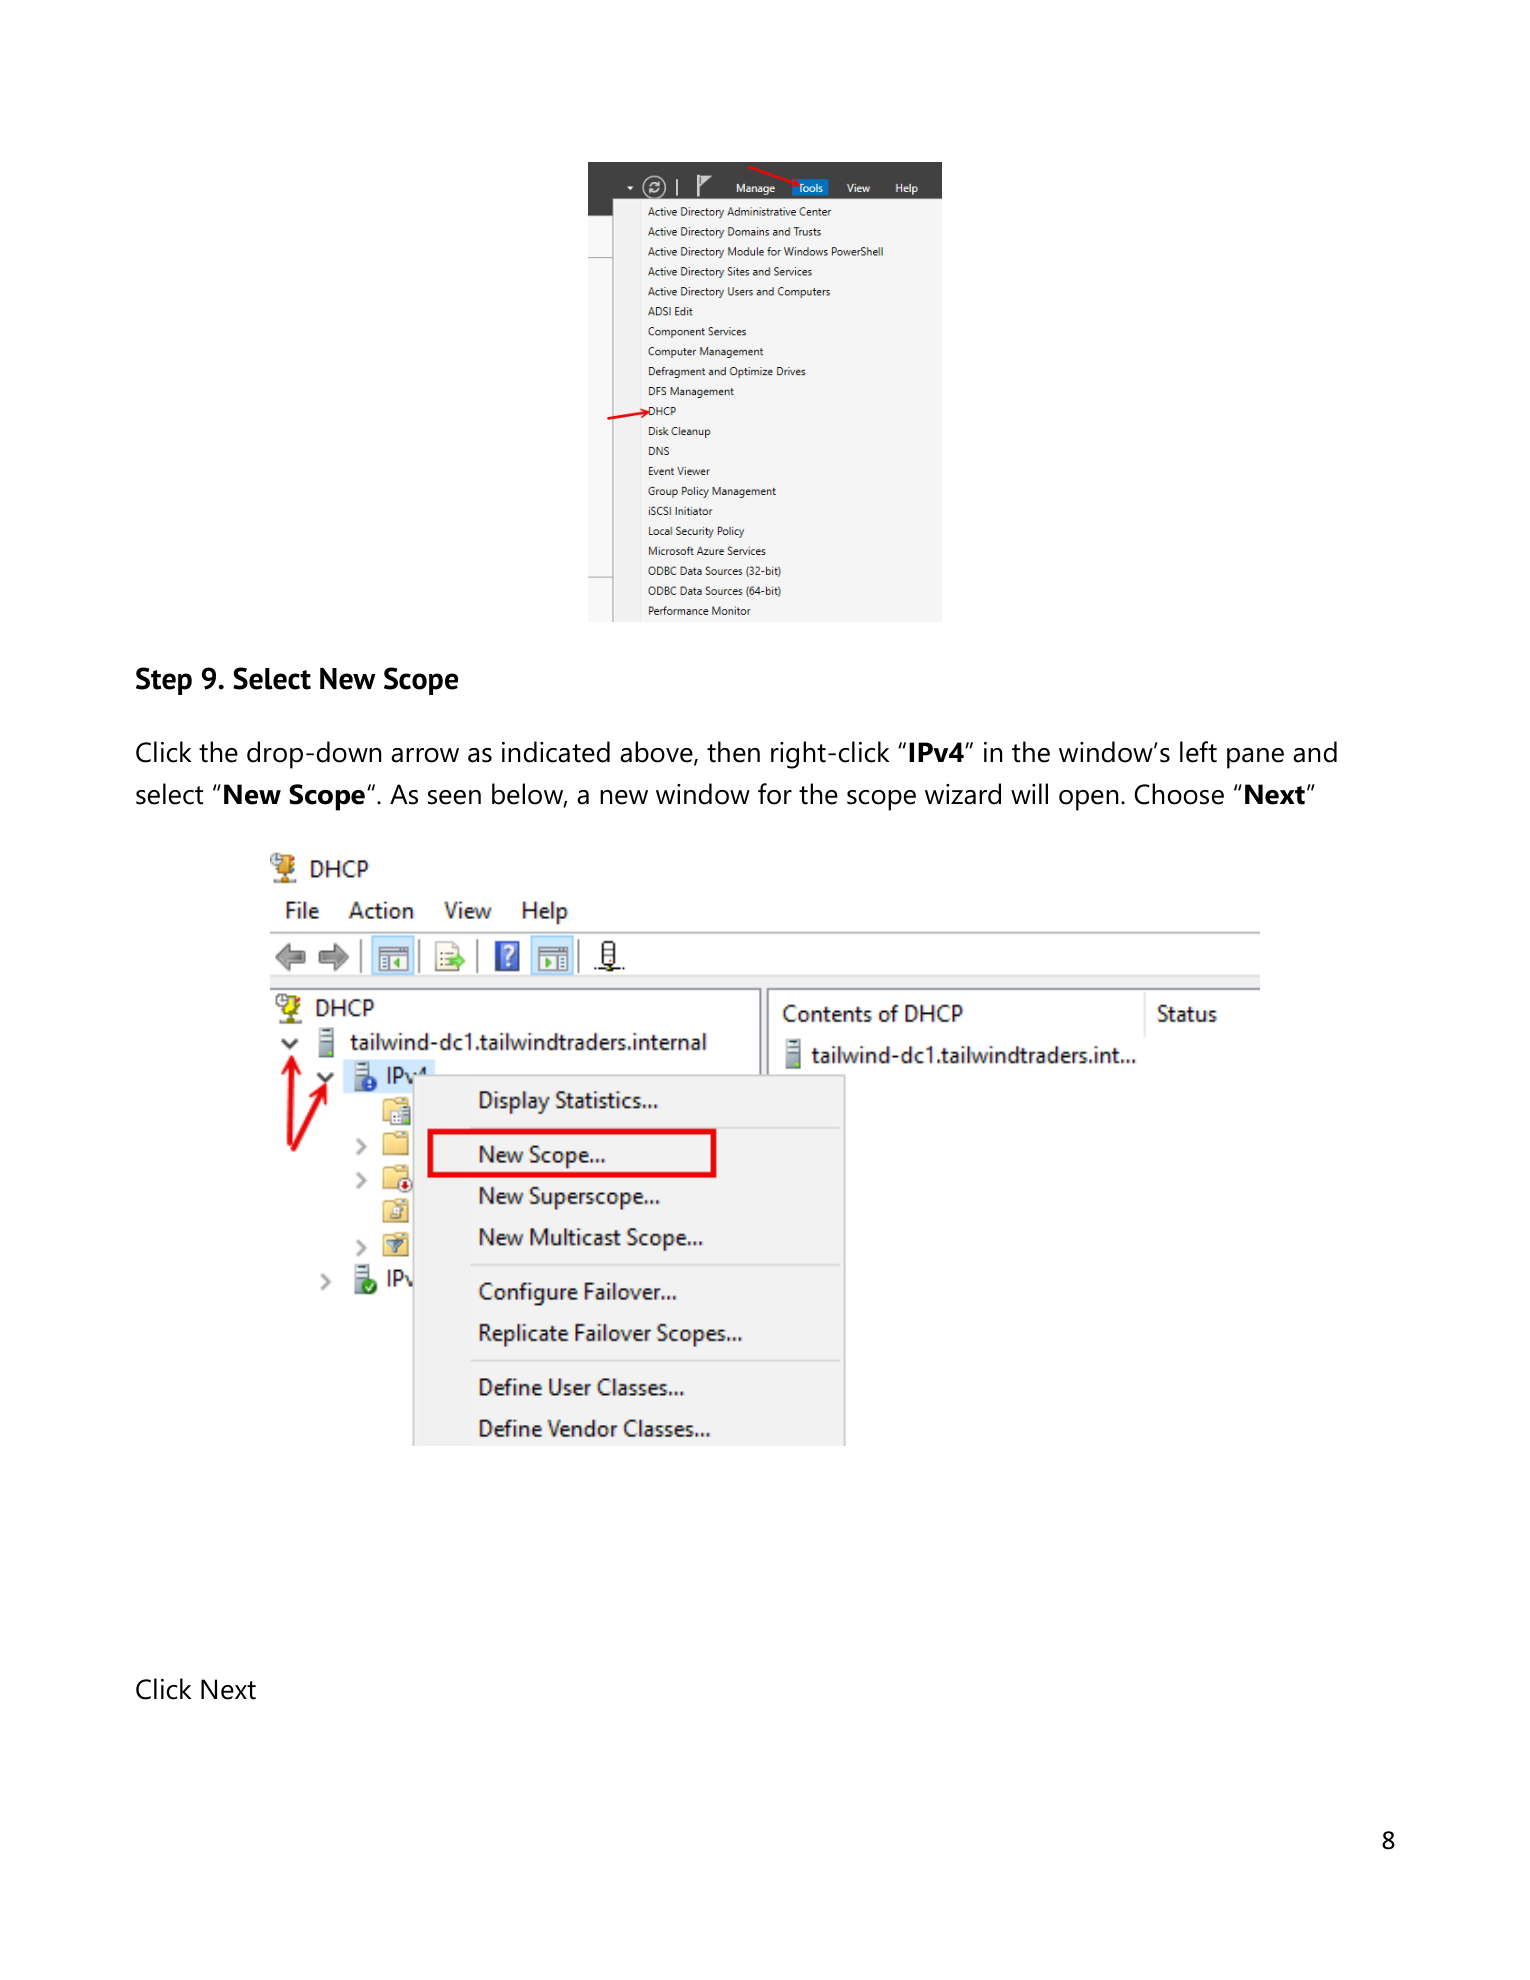
Step 8 — Open the DHCP console
From Server Manager > Tools > DHCP. The console opens with the local server node. Expand it; you’ll see IPv4 and IPv6 nodes with no scopes yet. Right-click IPv4 > New Scope to launch the New Scope Wizard.
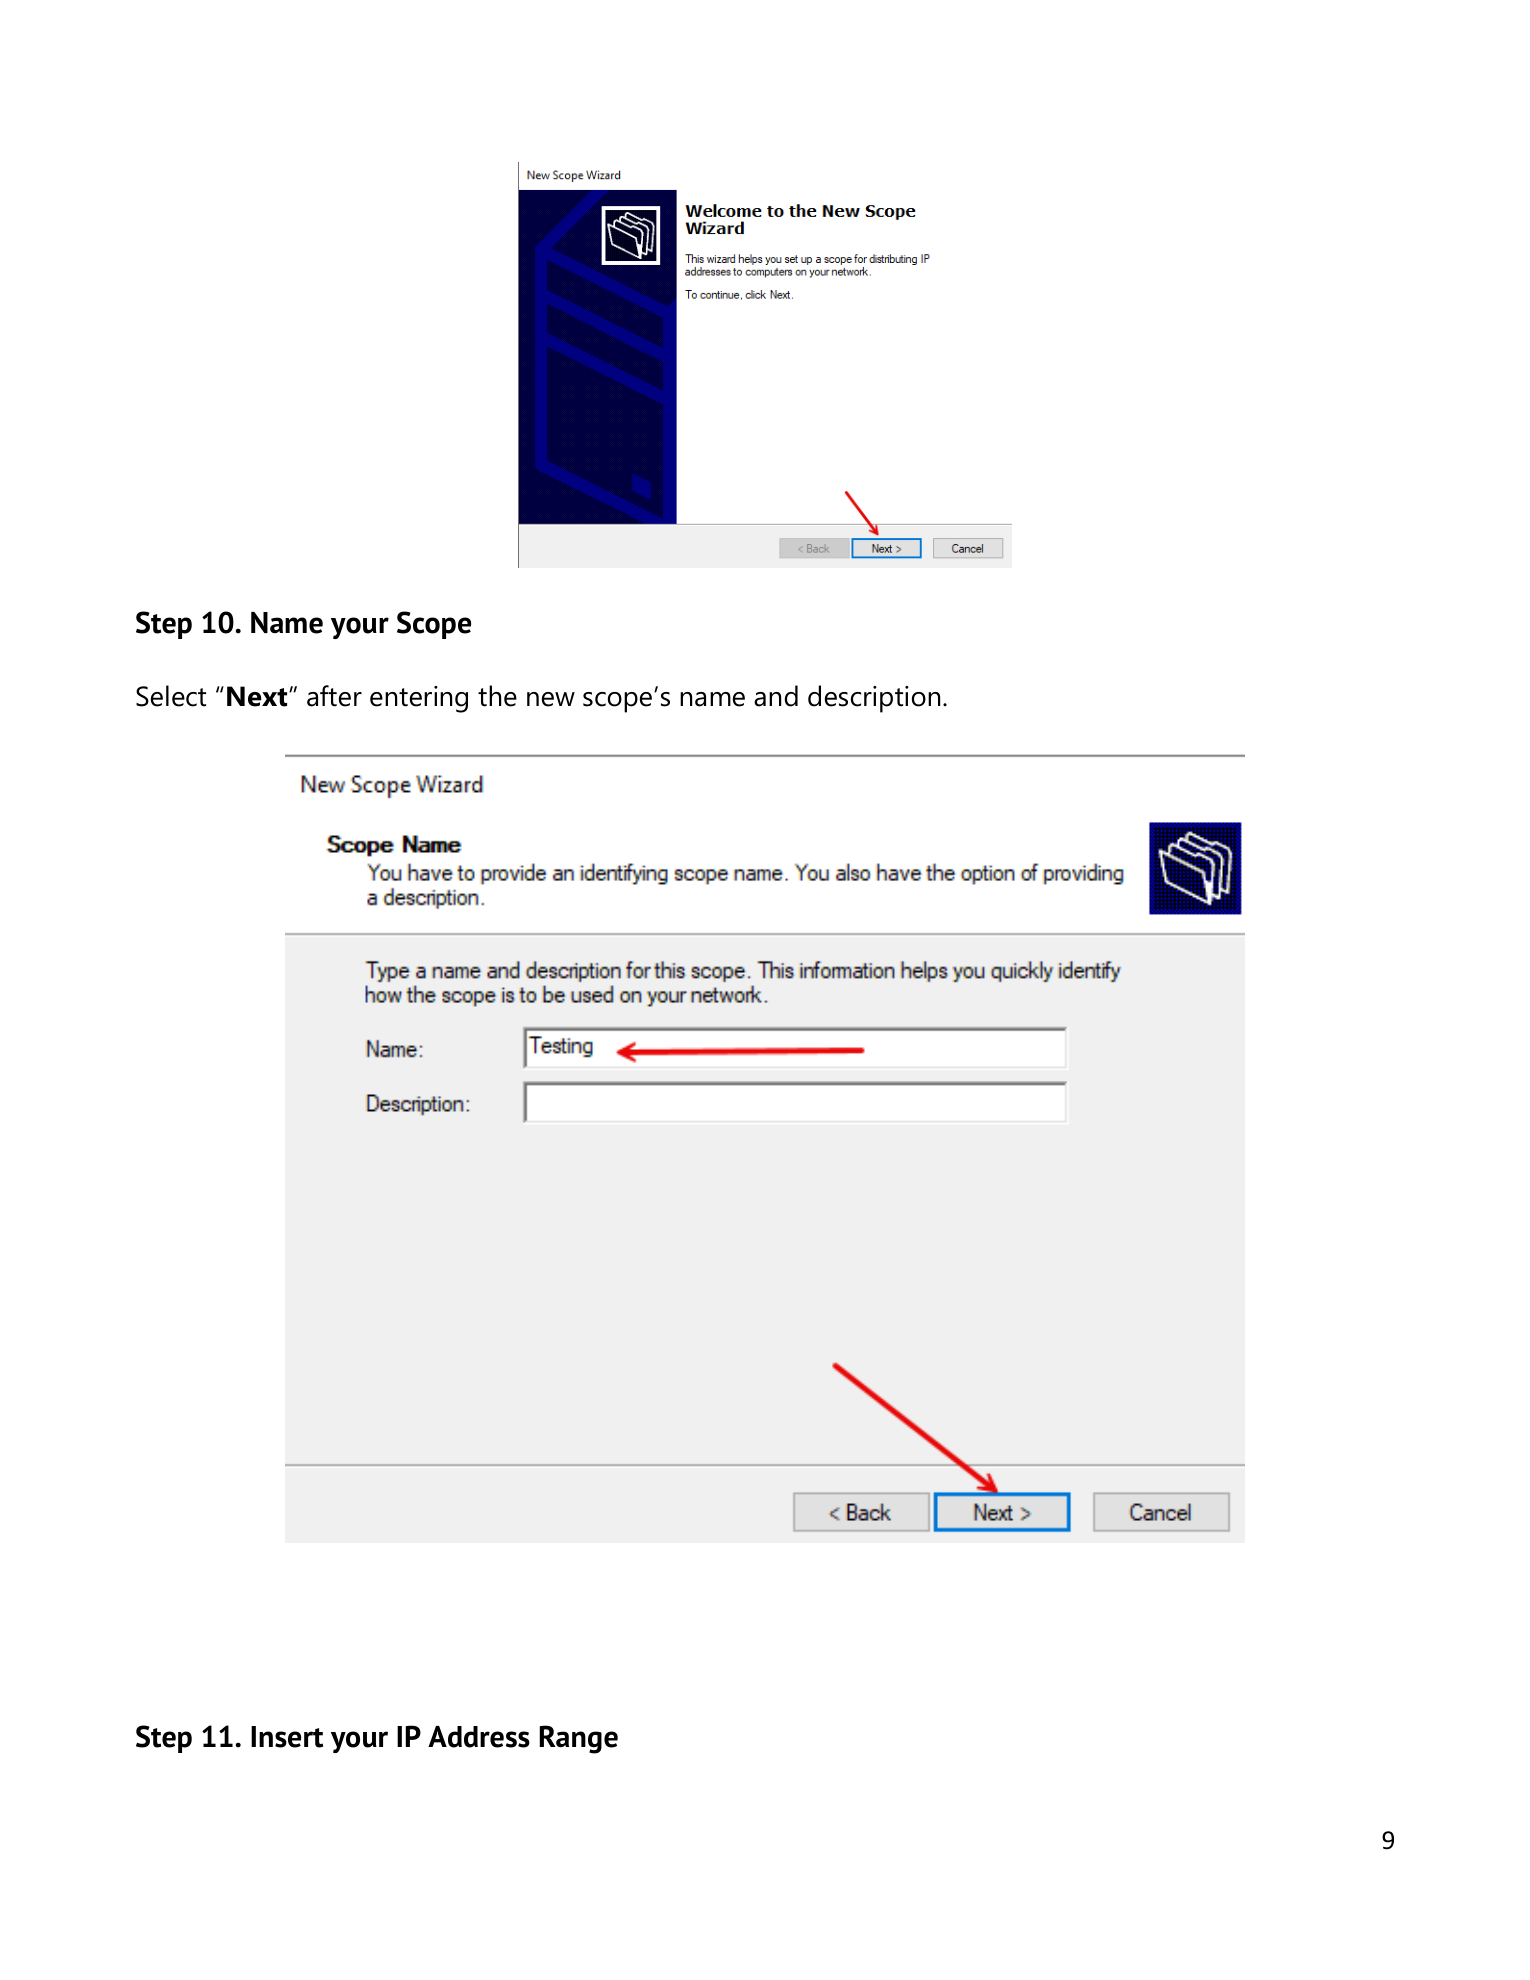
Step 9 — Name the scope
Click Next on the welcome page. On Scope Name, enter a descriptive name — this appears in the console tree and identifies the scope at a glance. Optional description is useful for noting which subnet/site/purpose. Click Next.
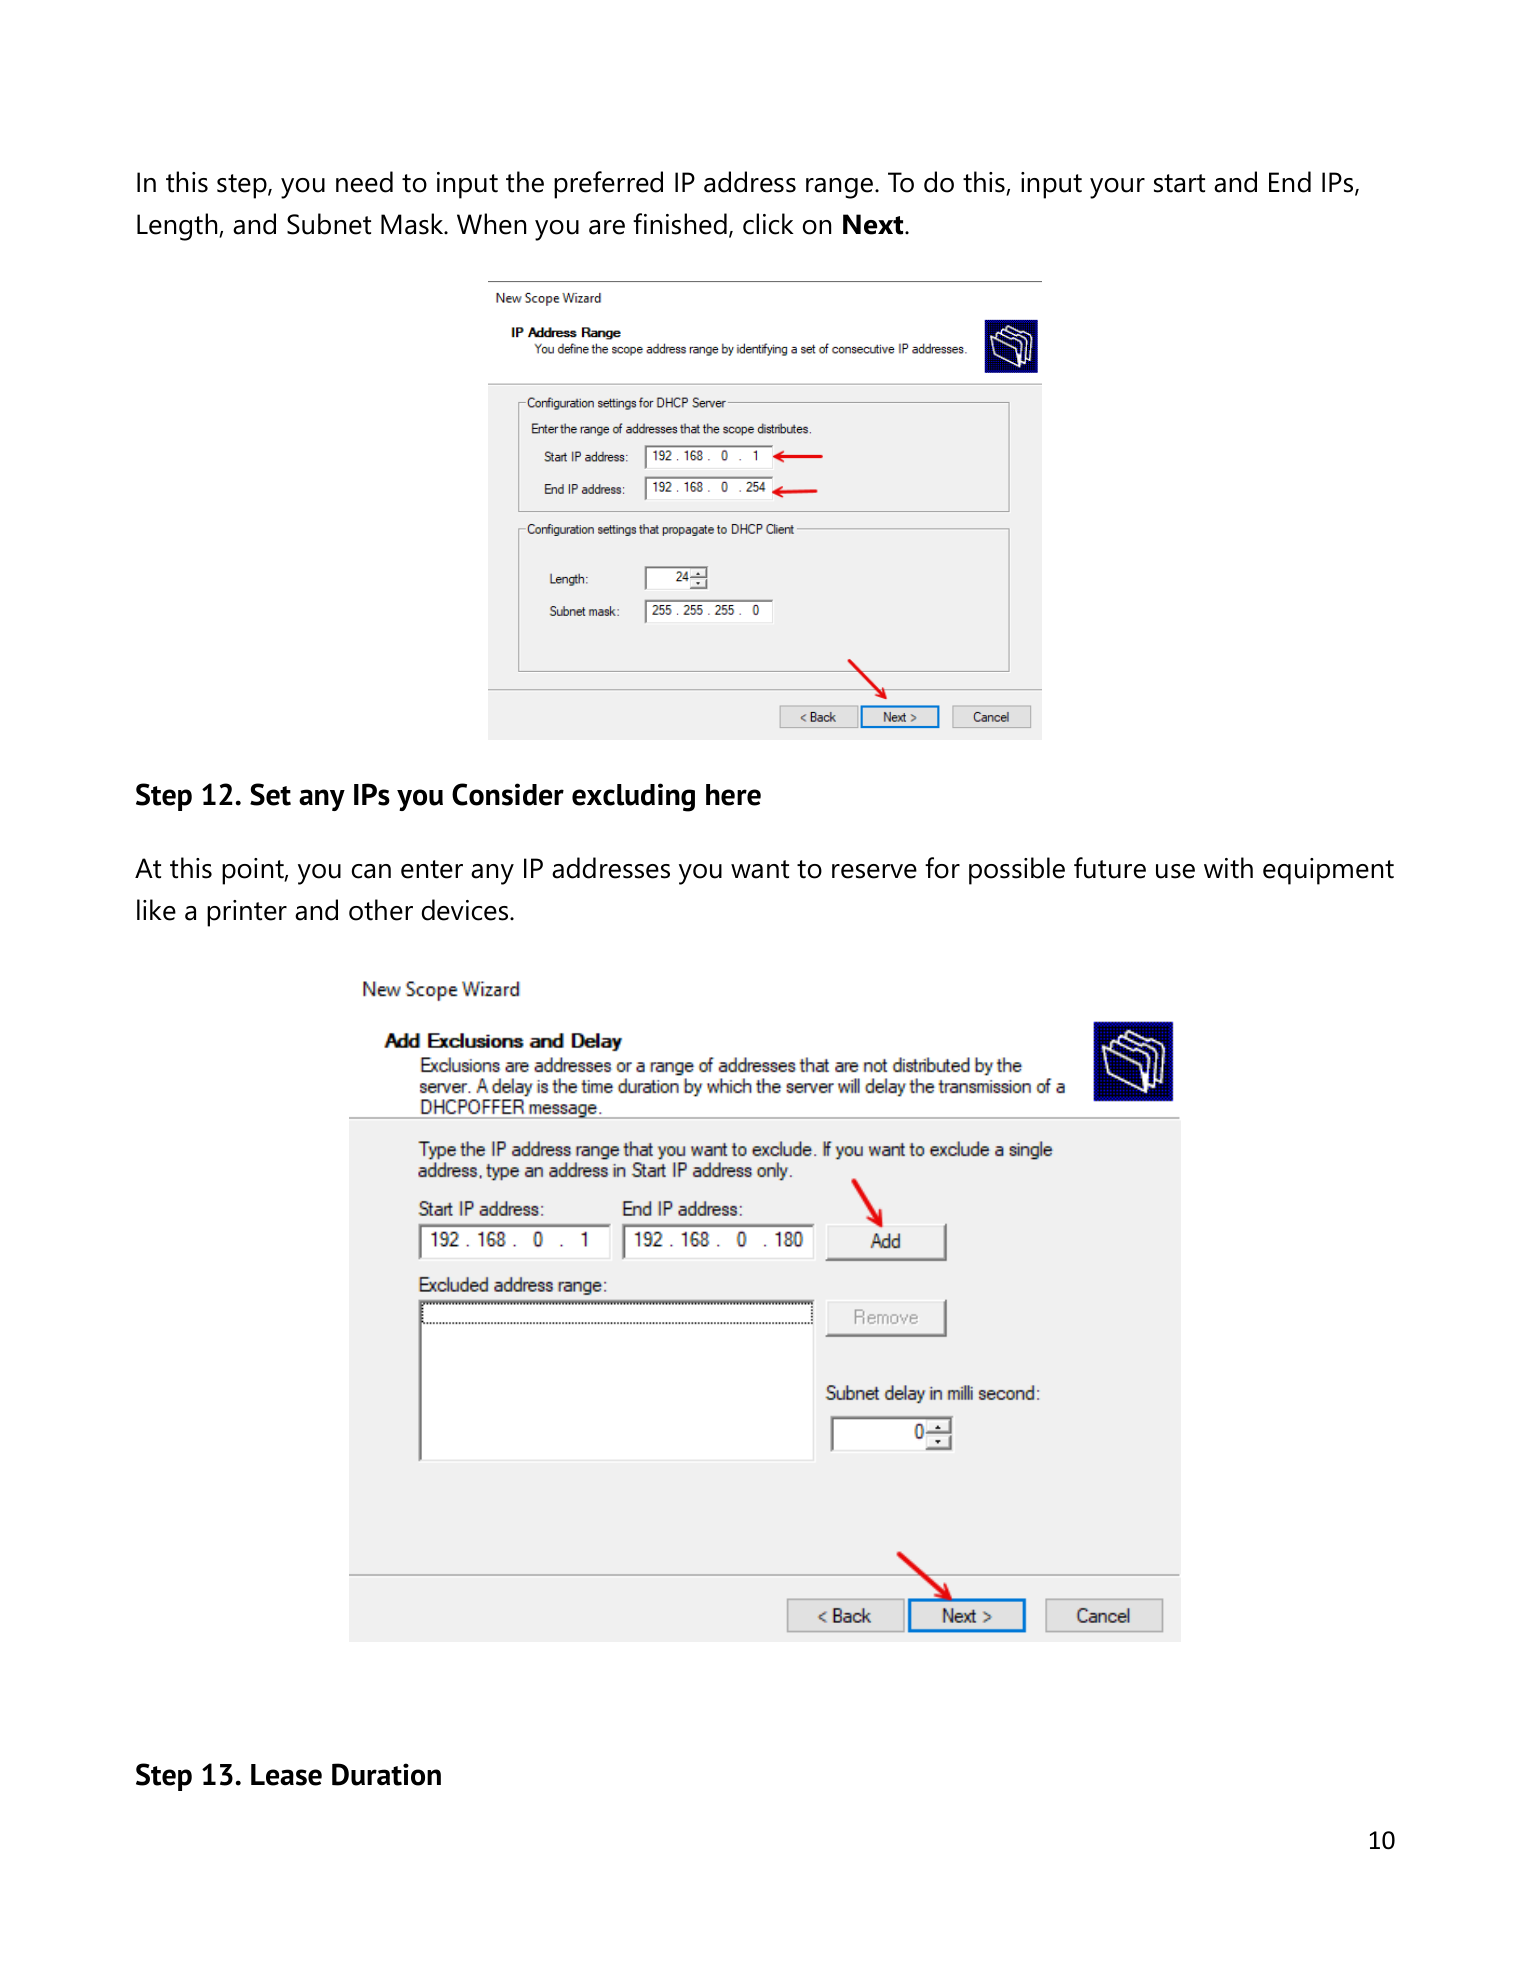
Step 10 — Address range and exclusions
On IP Address Range, enter Start IP and End IP. Verify the auto-derived Subnet Mask — the wizard guesses based on IP class but the guess can be wrong, so override it explicitly. Click Next. On Add Exclusions and Delay, list any addresses inside the scope range that are statically assigned to other devices — printers, switches, infrastructure — so DHCP doesn’t hand them out to dynamic clients.
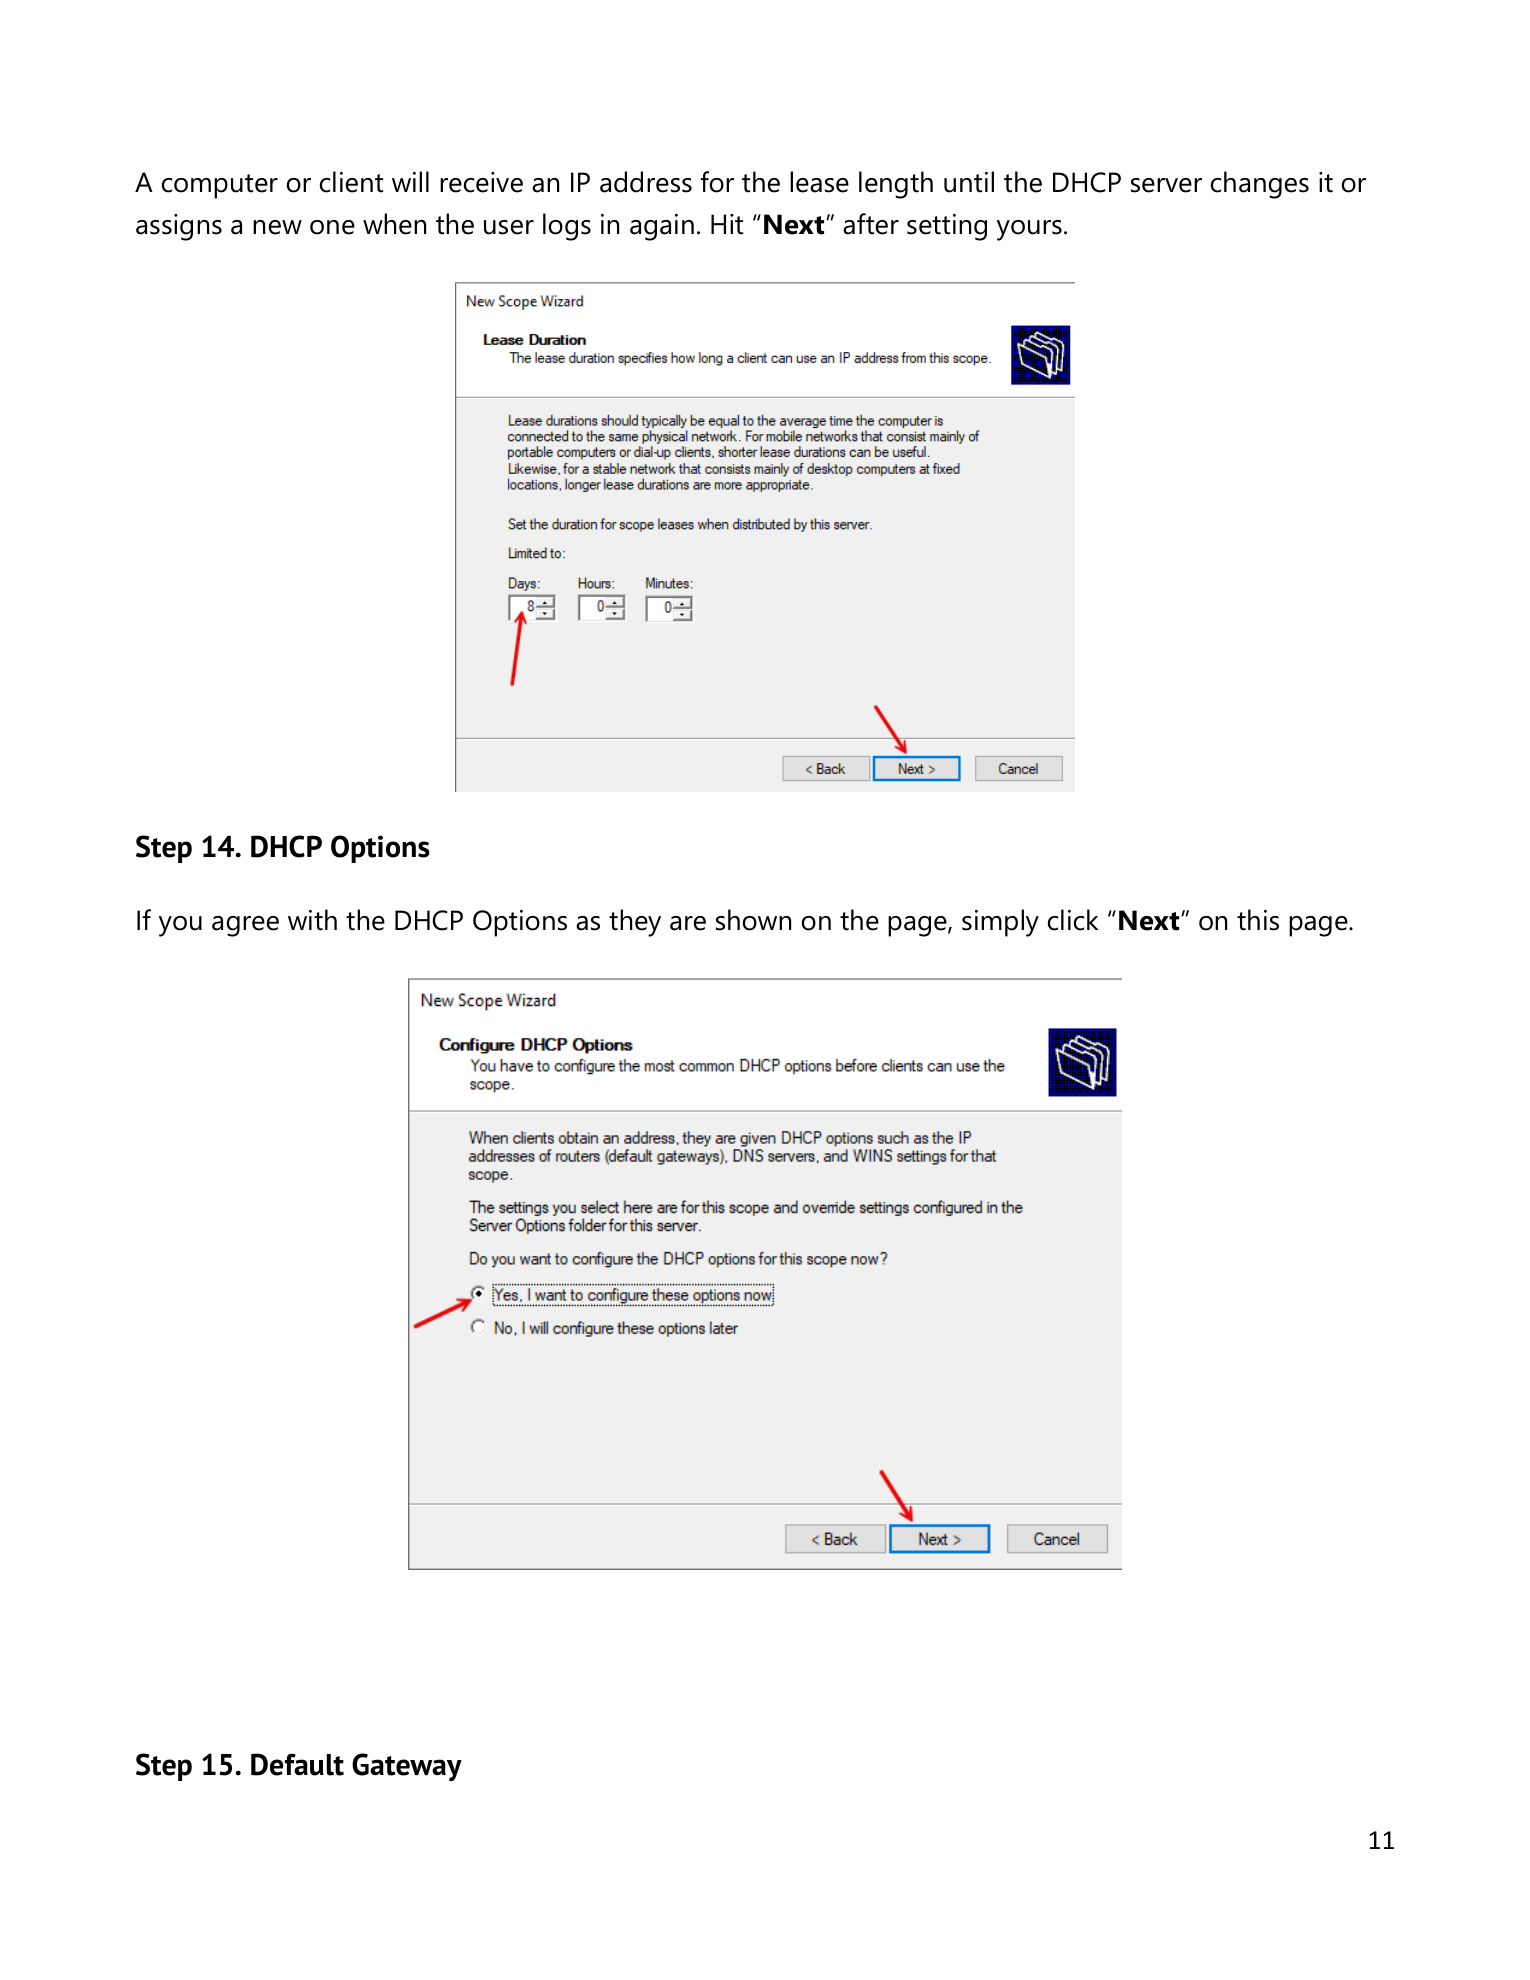
Step 11 — Lease duration; opt to configure options now
On Lease Duration, default 8 days is right for stable wired clients. For wireless or guest networks, drop to 8 hours so addresses recycle quickly. Click Next. On Configure DHCP Options, pick Yes, I want to configure these options now — entering gateway/DNS in the wizard is faster than going back to the console afterward. Click Next.
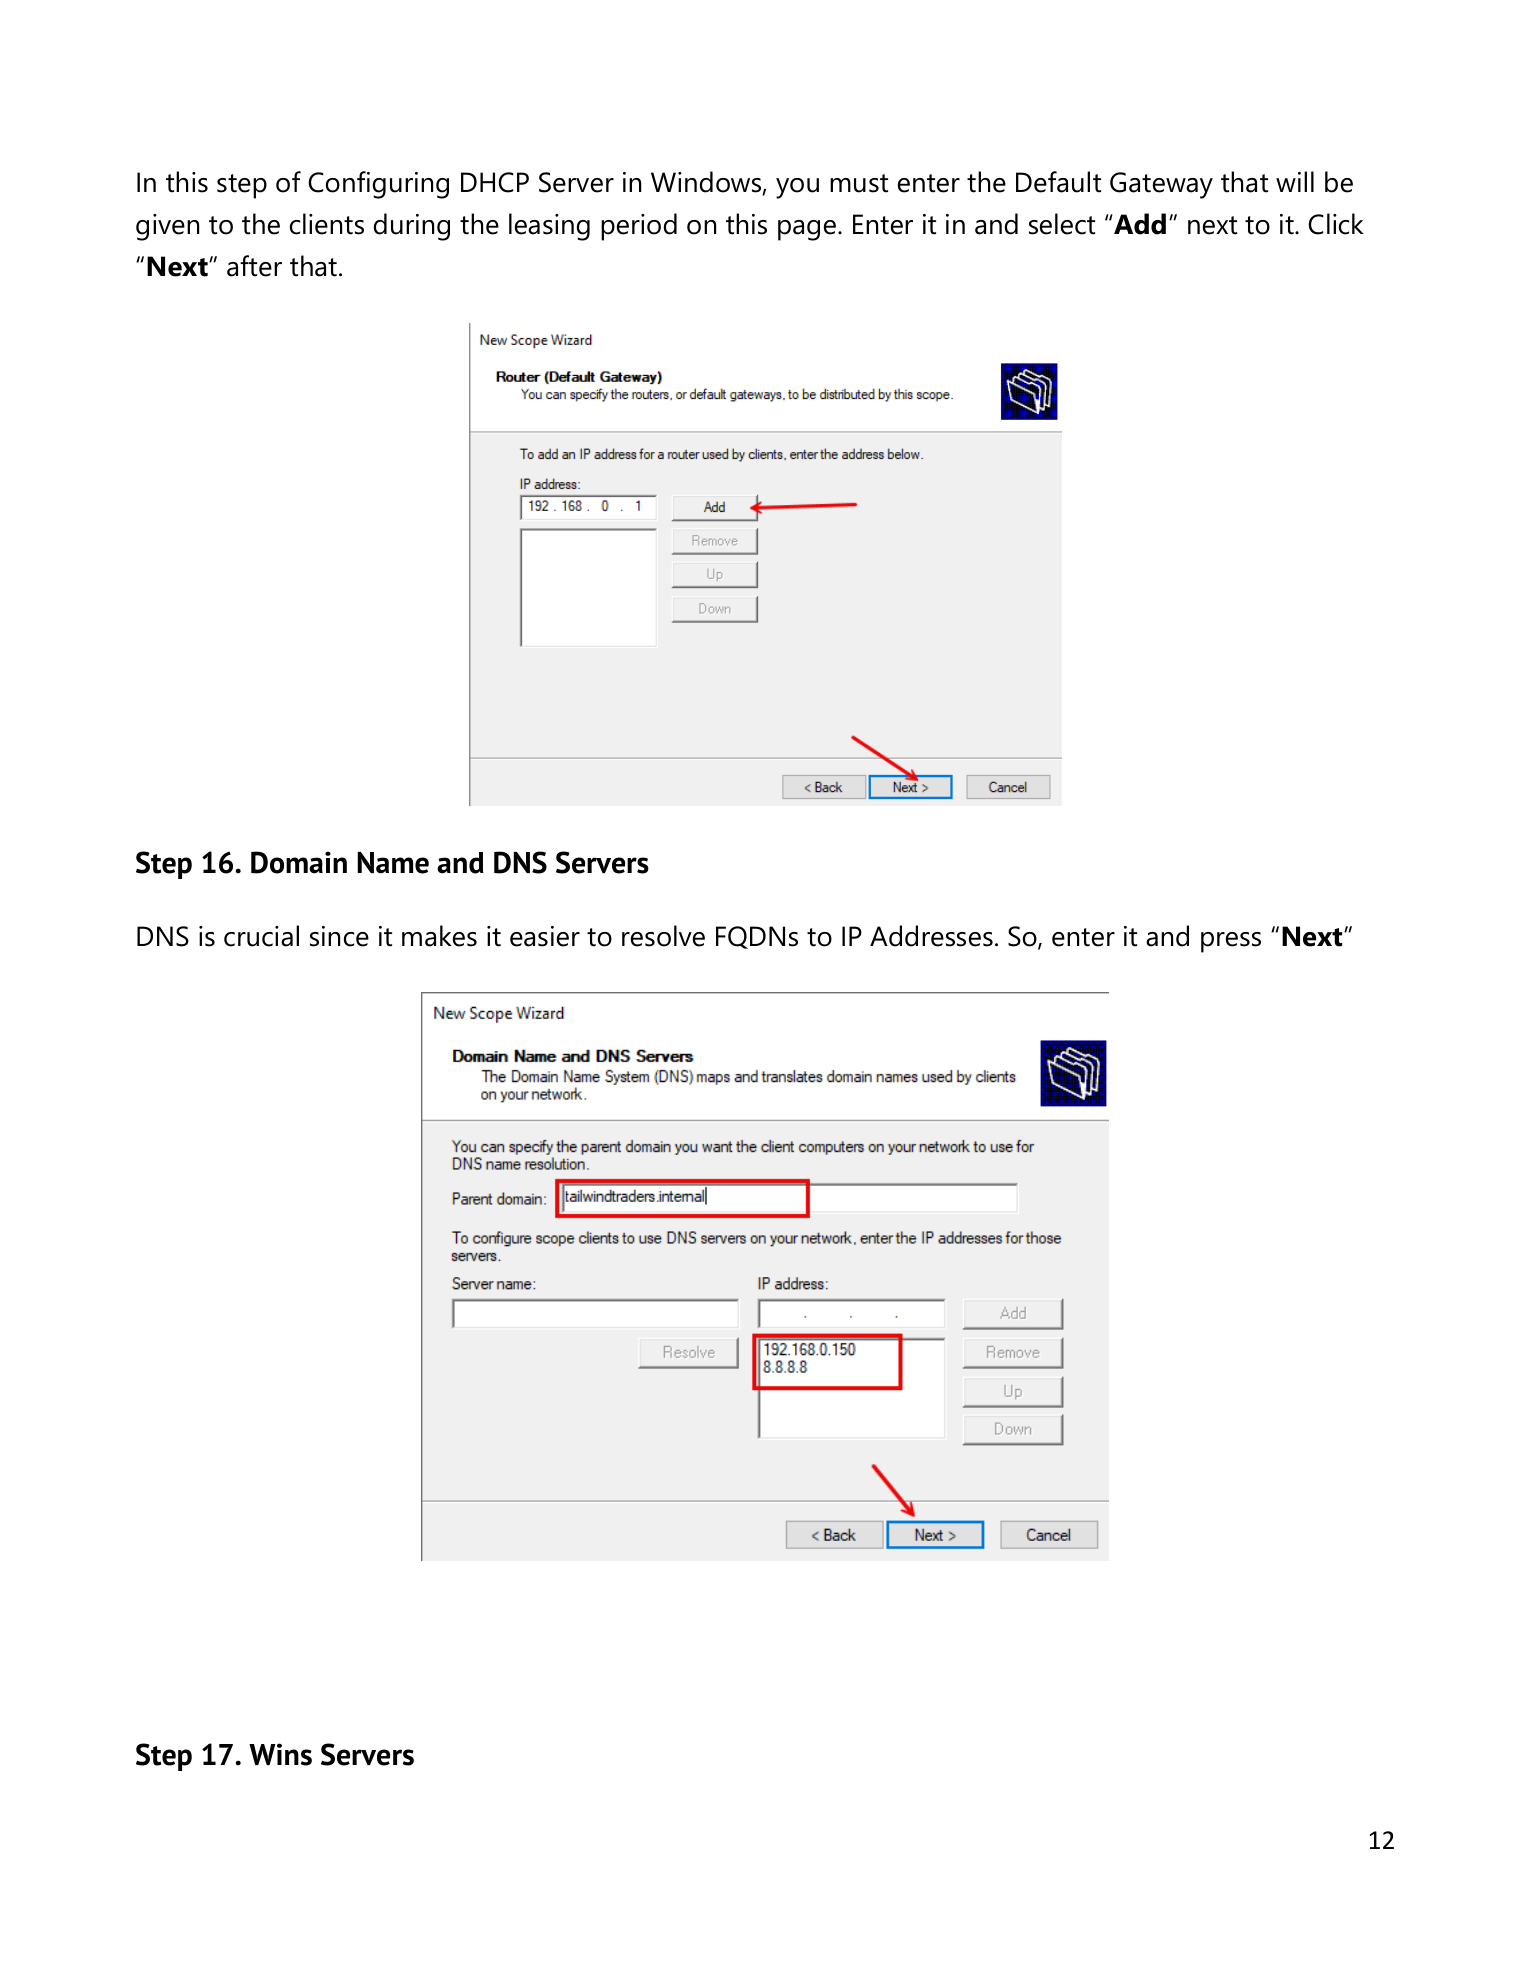
Step 12 — Gateway and DNS
On Router (Default Gateway), type the gateway IP and click Add, then Next. On Domain Name and DNS Servers, enter the parent domain name (or leave blank for non-domain environments) and the DNS server IPs — click Add for each. Click Next.
Step 13 — Skip WINS, activate, finish
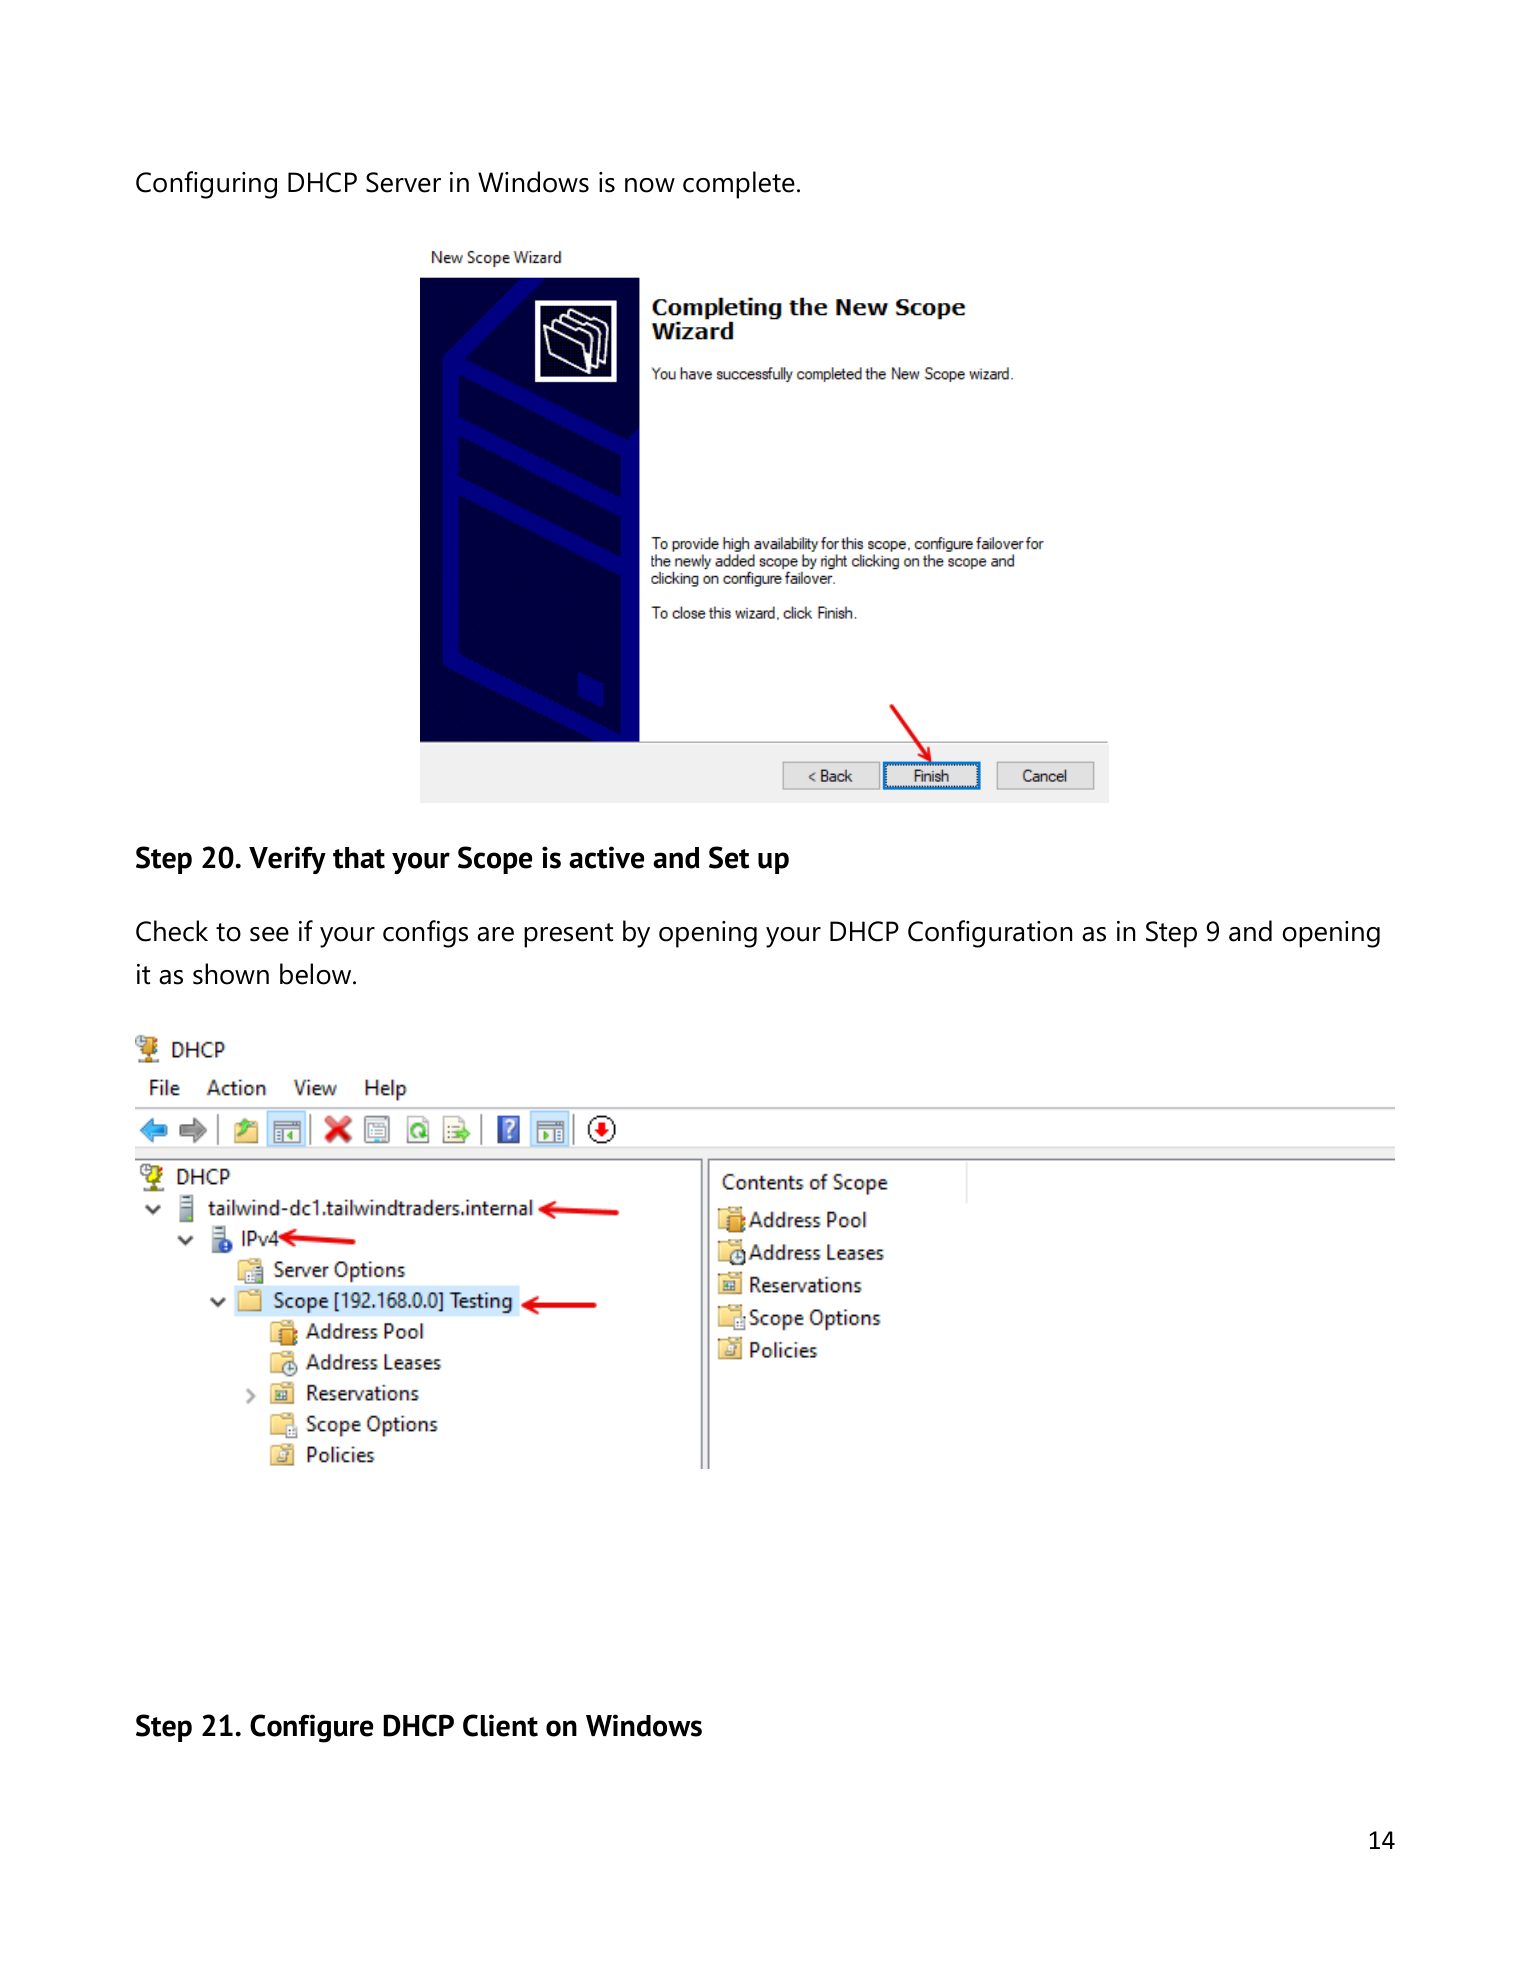
WINS Servers page: leave blank for any modern environment — WINS is a NetBIOS-era name resolution protocol that’s been deprecated for over a decade. Click Next. On Activate Scope, pick Yes, I want to activate this scope now — click Next. Review the summary, click Finish. The scope is now serving leases.

Step 14 — Verify the scope in the console
Back in the DHCP console, expand the server > IPv4. The new scope appears with its range in the node label. Expand it to see the standard sub-nodes: Address Pool, Address Leases, Reservations, Scope Options, Policies. Confirm the Address Pool shows the range you configured.
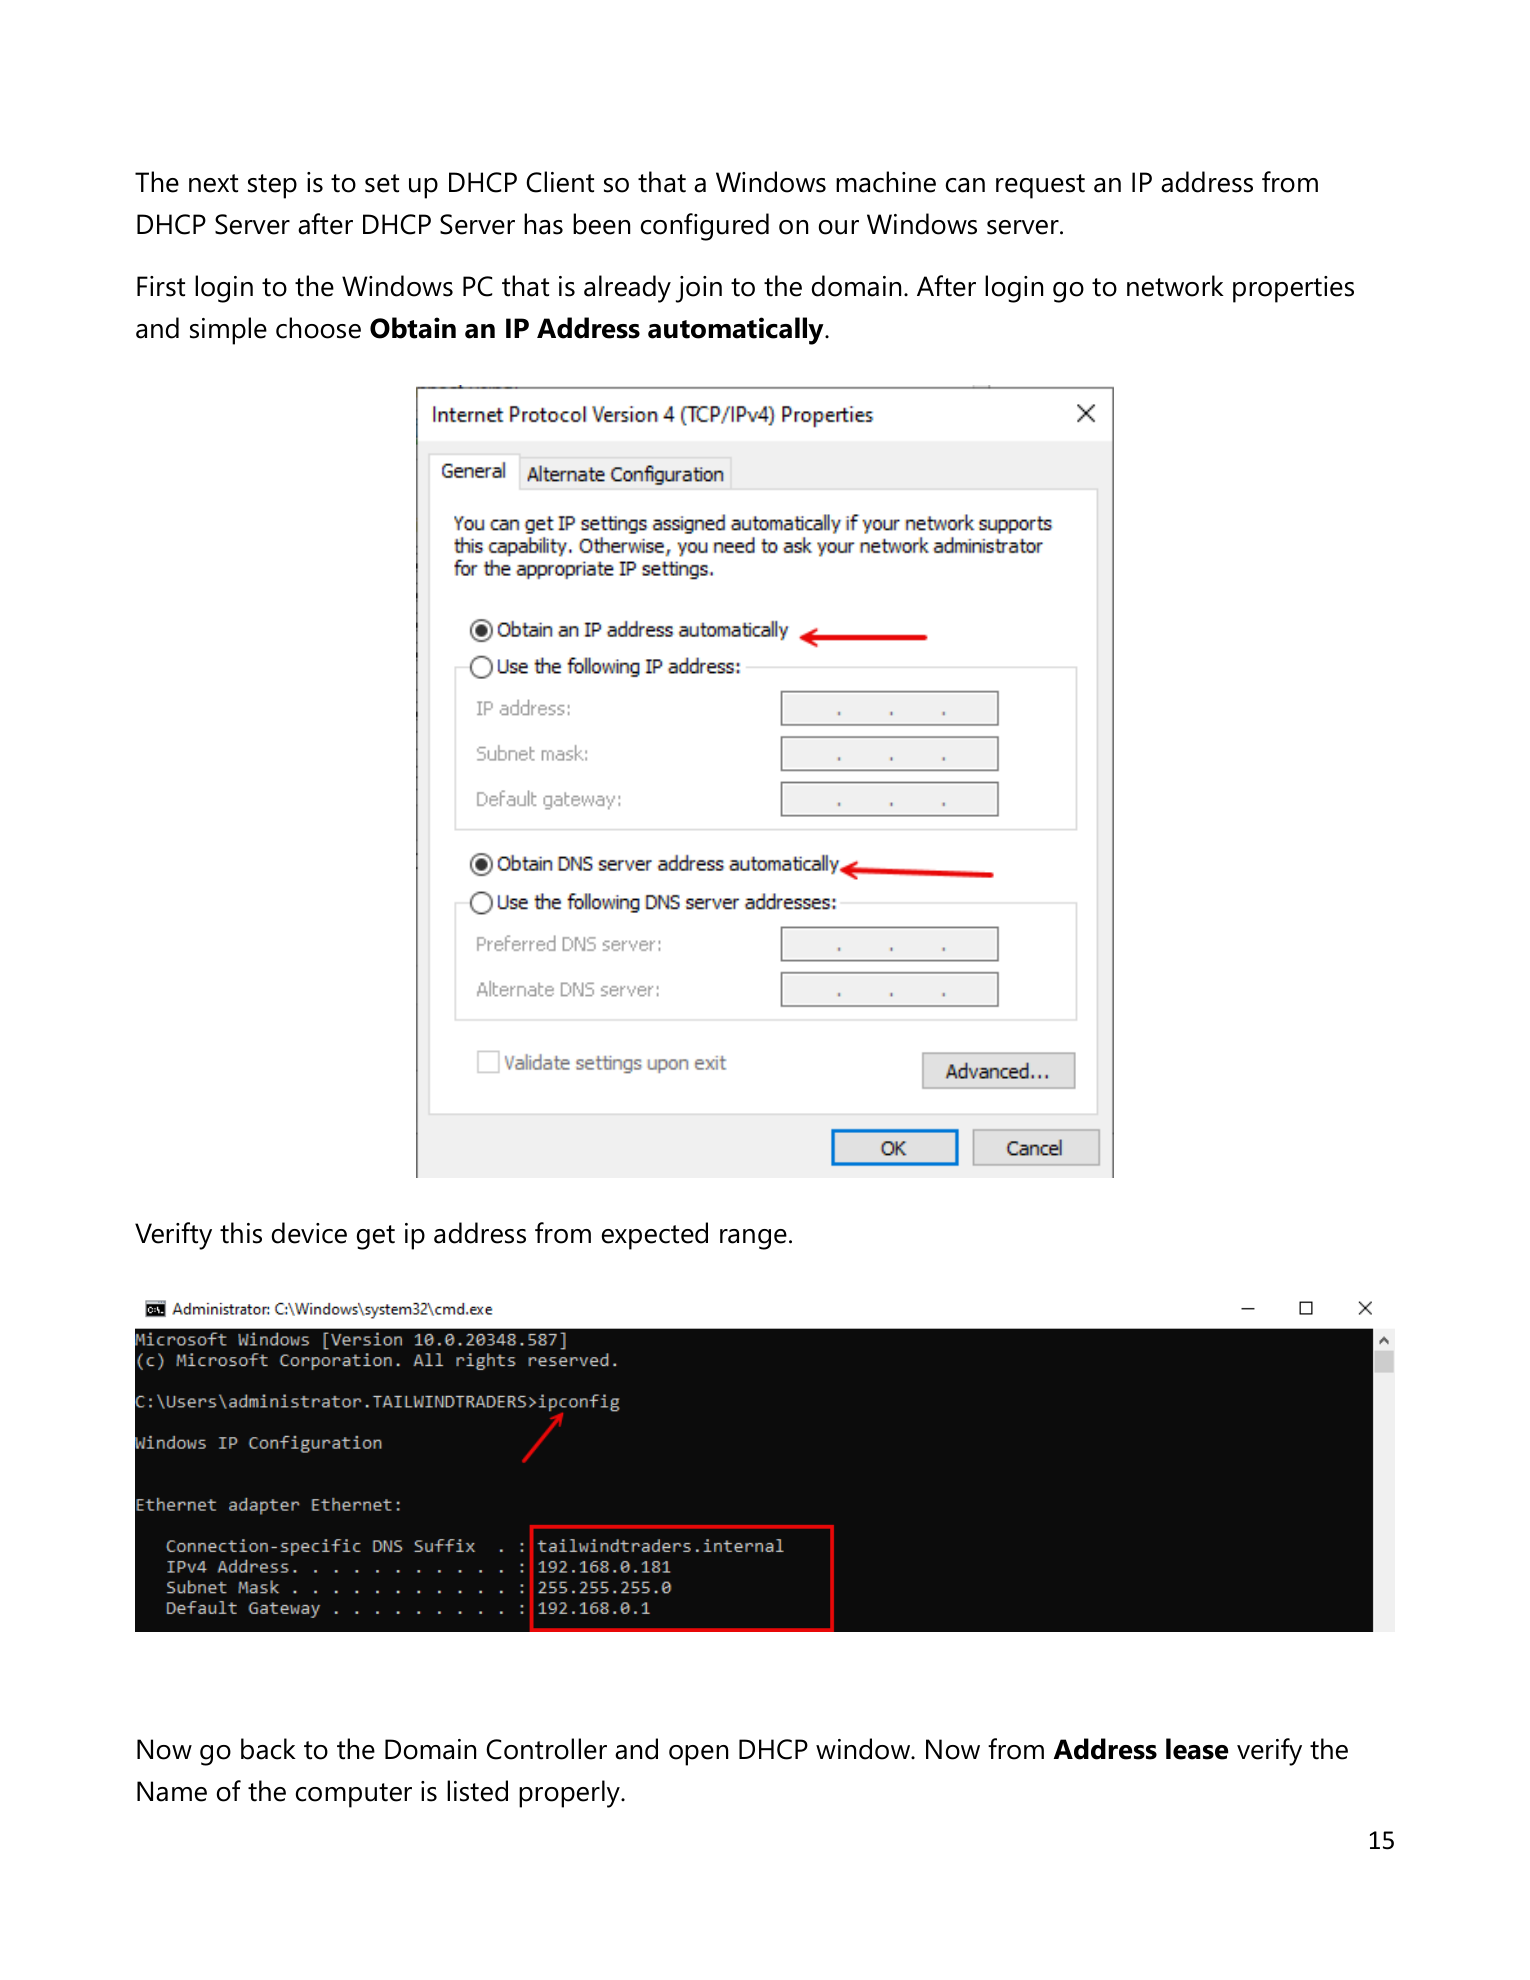
Step 15 — Test from a Windows client
On a client on the same subnet, open Network Adapter Properties > Internet Protocol Version 4 (TCP/IPv4) Properties. Pick Obtain an IP address automatically and Obtain DNS server address automatically. Click OK. From a command prompt, run ipconfig /all and verify:
- The IPv4 Address falls within your scope range
- The Subnet Mask matches what you configured
- The Default Gateway is correct
- The DHCP Server field shows your standalone server’s IP — this proves the lease came from the right server
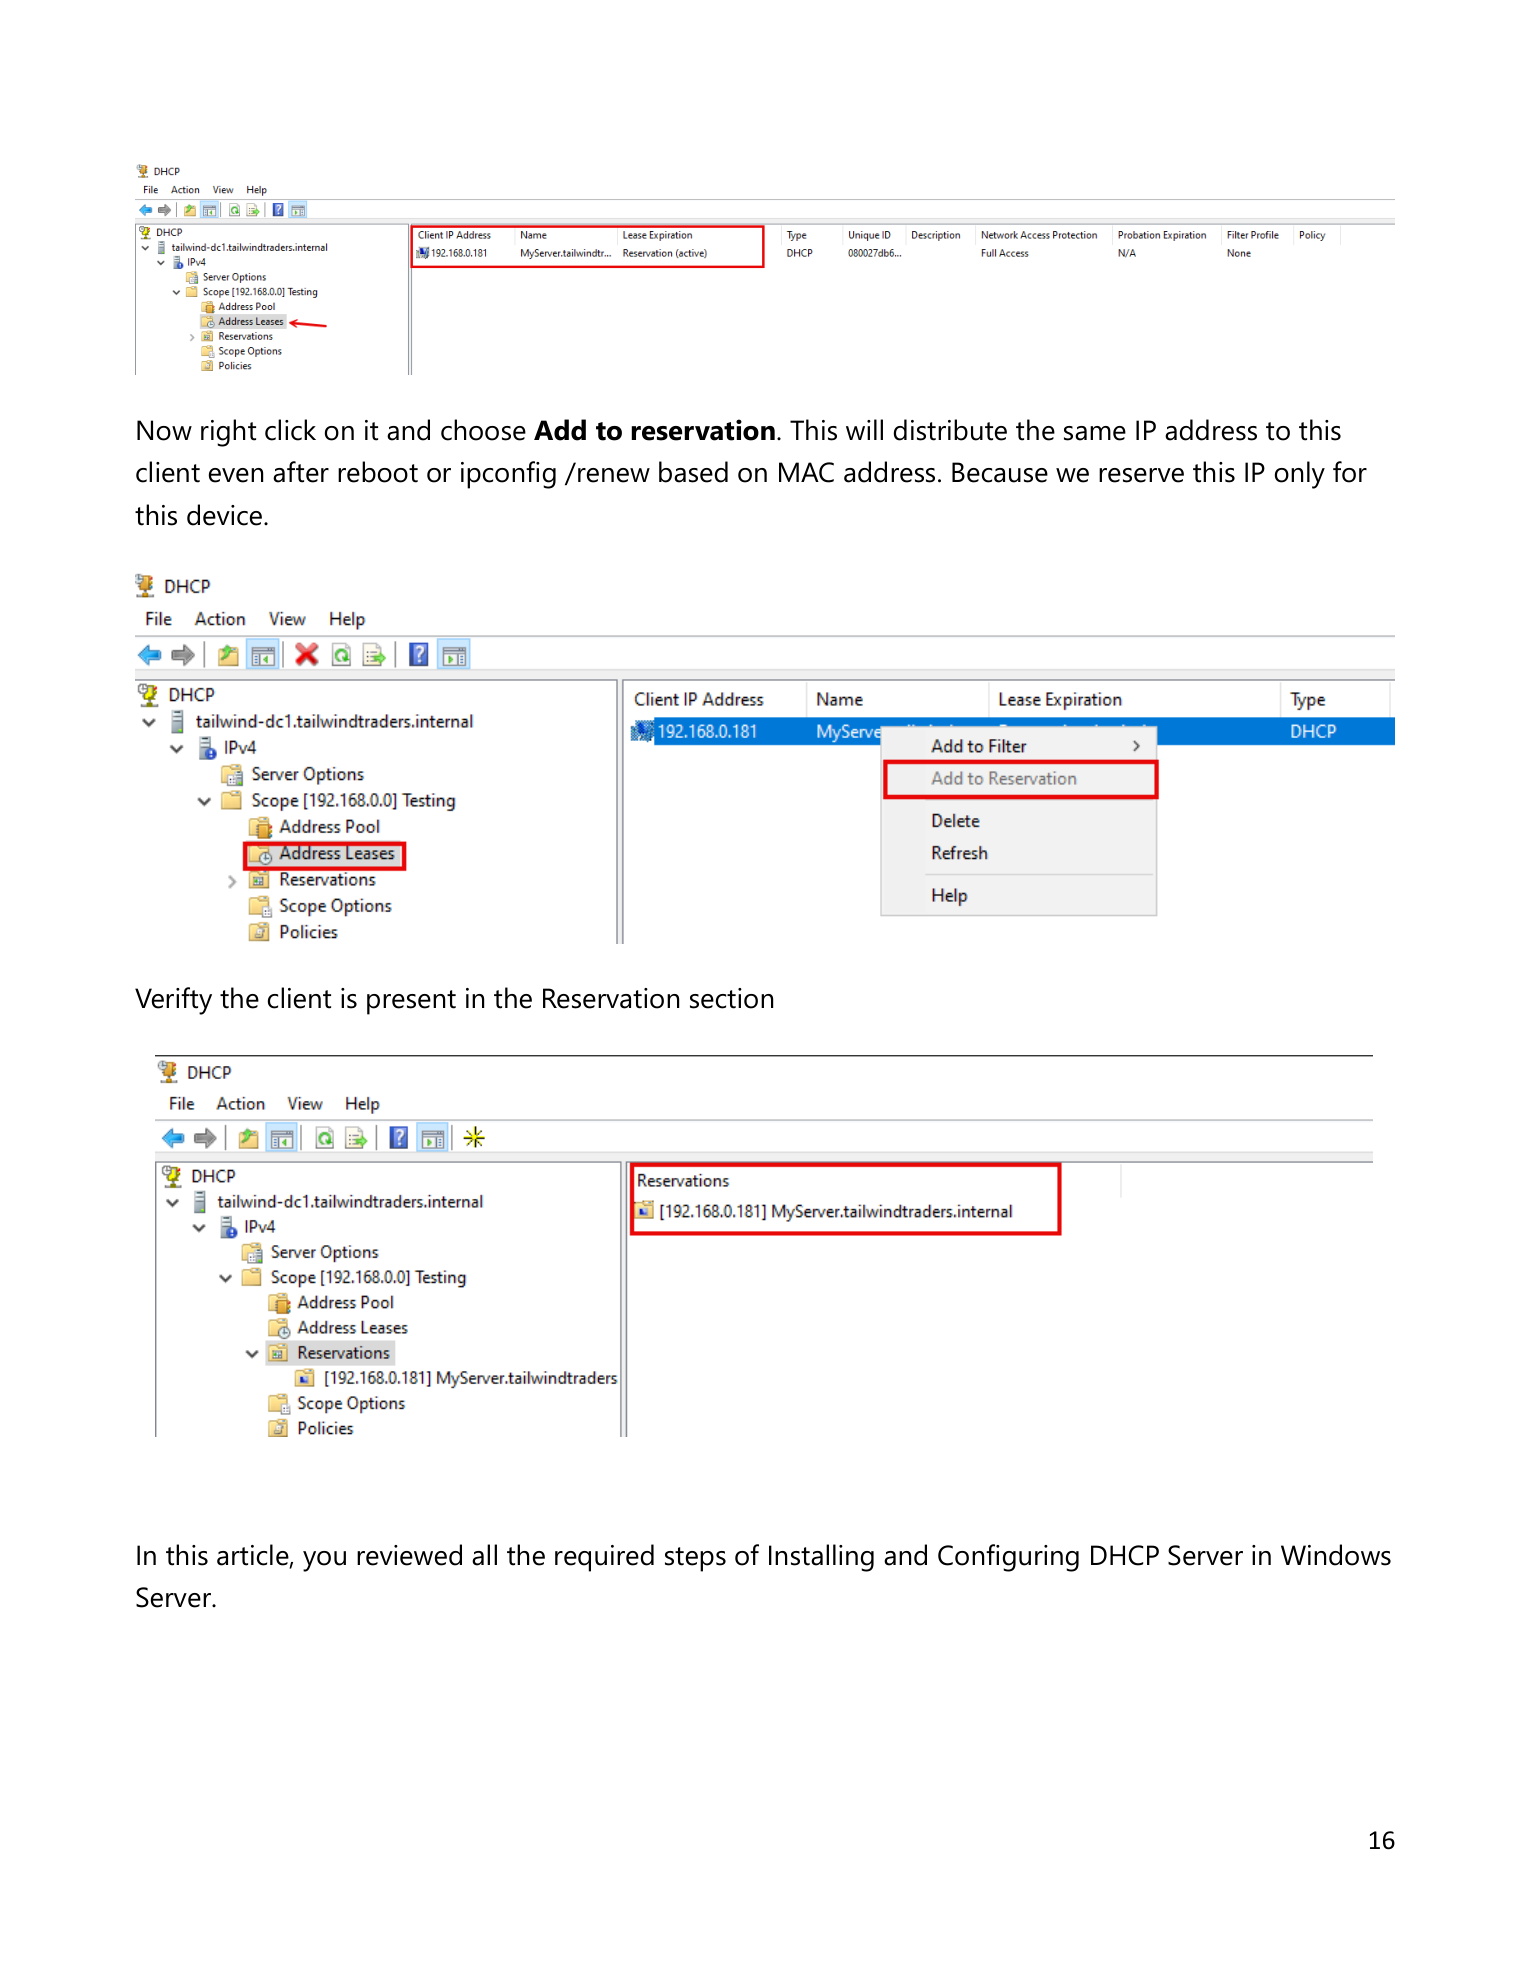
Step 16 — Convert a lease to a permanent reservation
Back in the DHCP console, click Address Leases under the scope. The client’s lease appears with IP, hostname, MAC, and expiration. To pin that IP to that client permanently, right-click the lease > Add to Reservation. The entry moves under Reservations; from now on the client always gets that exact IP. (For more on reservations, see creating and managing DHCP IP reservations.)
Things that bite people in production (standalone-specific)
Keep the server’s IP outside the scope
If your server is at 192.168.0.10 and your scope is 192.168.0.1–192.168.0.50, the server’s own IP is inside the scope — nothing technically wrong, but if you ever forget to add it as an exclusion, the server could try to issue its own address to a client. Cleanest pattern: server at .1 (or .254), scope starts at .100. The server’s address is never at risk.
Document the “Skip AD authorization” decision
If this server is ever joined to a domain later, the unauthorized status will trip up whoever inherits it. Leave a comment in the server’s description, a runbook entry, or a wiki page explaining that authorization was deliberately skipped because of the standalone deployment. Otherwise it looks like a misconfiguration to be “fixed.”
No rogue-server protection
The AD authorization gate is what stops other unauthorized DHCP servers in a domain environment. Standalone DHCP servers don’t honor that gate — if a misconfigured router or someone’s lab VM starts handing out DHCP, your standalone server has no way to suppress it. Be more vigilant about what else might be answering DHCP requests on the same subnet.
No failover partner without AD
DHCP failover requires both servers to be reachable for relationship setup but doesn’t technically require AD — you can pair two standalone DHCP servers. The catch: the management groups created during install are local groups on each server, so delegation has to be done per-server rather than centrally. For small standalone environments this is usually fine.
Plan capacity from day one
Expanding a scope later requires deactivating it briefly, which interrupts existing lease renewals. Size the scope generously upfront — a /24 with 100–200 addresses available is overkill for a small office, but it’s also future-proof.
Where this fits
Standalone DHCP is a focused subset of the broader role. The companion pieces are implementing the DHCP server role for the AD-authorized variant, creating and managing DHCP scopes for deeper scope configuration, DHCP IP reservations for fixed addresses, DHCP high availability, and the broader DNS, DHCP & Networking pathway.