Spreadsheets do not scale to managing IP space across a real network. The moment you have more than one DHCP server, more than one DNS zone, or any subnet shared between two locations, the spreadsheet drifts out of date and the network team starts hand-checking address conflicts before every change. IP Address Management (IPAM) is Microsoft’s built-in answer — a Server Manager feature that crawls your DCs, finds every DHCP and DNS server in the environment, and pulls all of it into one console with utilization stats, scope editing, audit trails, and the ability to push changes back without RDPing to each server.
This walkthrough installs IPAM, provisions it via Group Policy (the right approach — the alternative is touching every server by hand), discovers servers via AD, sets them to managed, generates and links the three IPAM GPOs, and ends with a populated console showing live IP space across the environment.
What you need before starting
- A Windows Server (2012 R2 or later) that’s domain-joined — do not install IPAM on a Domain Controller
- Domain Admin (or delegated equivalent) for the GPO and discovery configuration
- The DCs, DHCP servers, and DNS servers you intend to manage already running and reachable
- Enough disk for the Windows Internal Database that IPAM uses as its store (a few GB; bigger environments need more)
What IPAM actually solves
The pain it addresses: you have ten DHCP servers across three sites, four DNS zones, two domain controllers per site. Every IP allocation question (“is this address free?” “which scope is this from?” “why is this lease showing as conflict?”) requires logging into multiple servers and correlating data manually. IPAM aggregates all of it into a single inventory: you see every IP block, every scope, every utilization percentage, every DNS zone, in one console. Add new ranges, edit existing scopes, audit historical lease activity — without leaving the IPAM window.
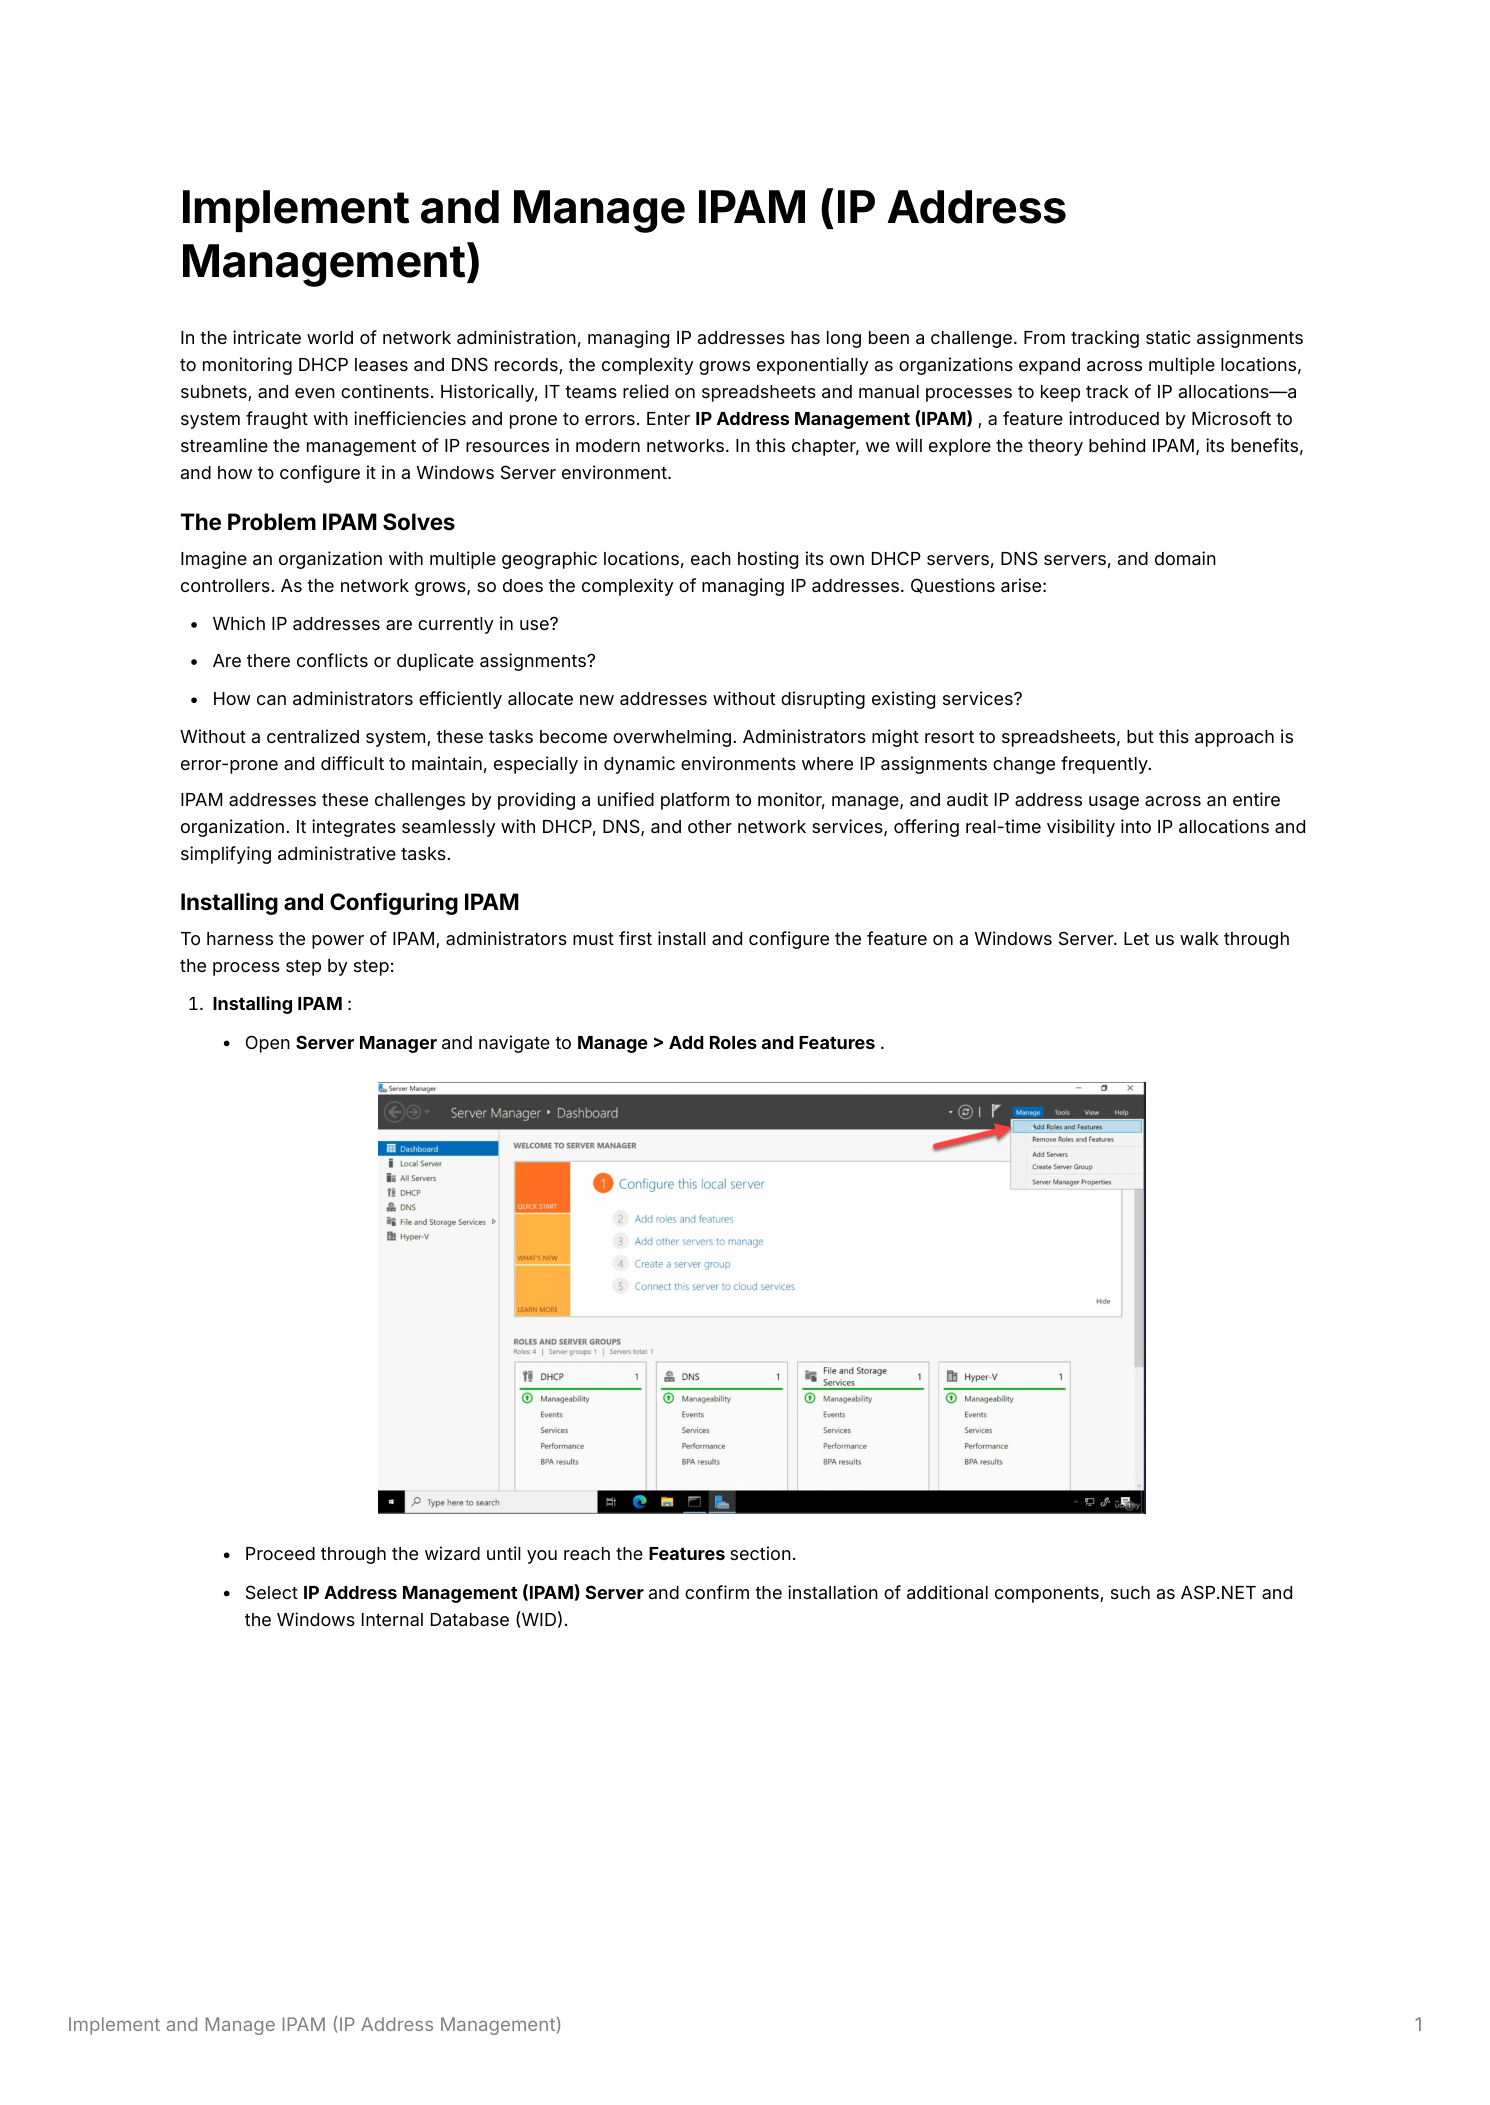
Step 1 — Install the IPAM feature
Open Server Manager > Manage > Add Roles and Features. Click through to the Features page and tick IP Address Management (IPAM) Server. The wizard adds two dependencies automatically — ASP.NET components for the management UI and the Windows Internal Database (WID) as the local store. Confirm both, click Install, wait for completion. No reboot required.
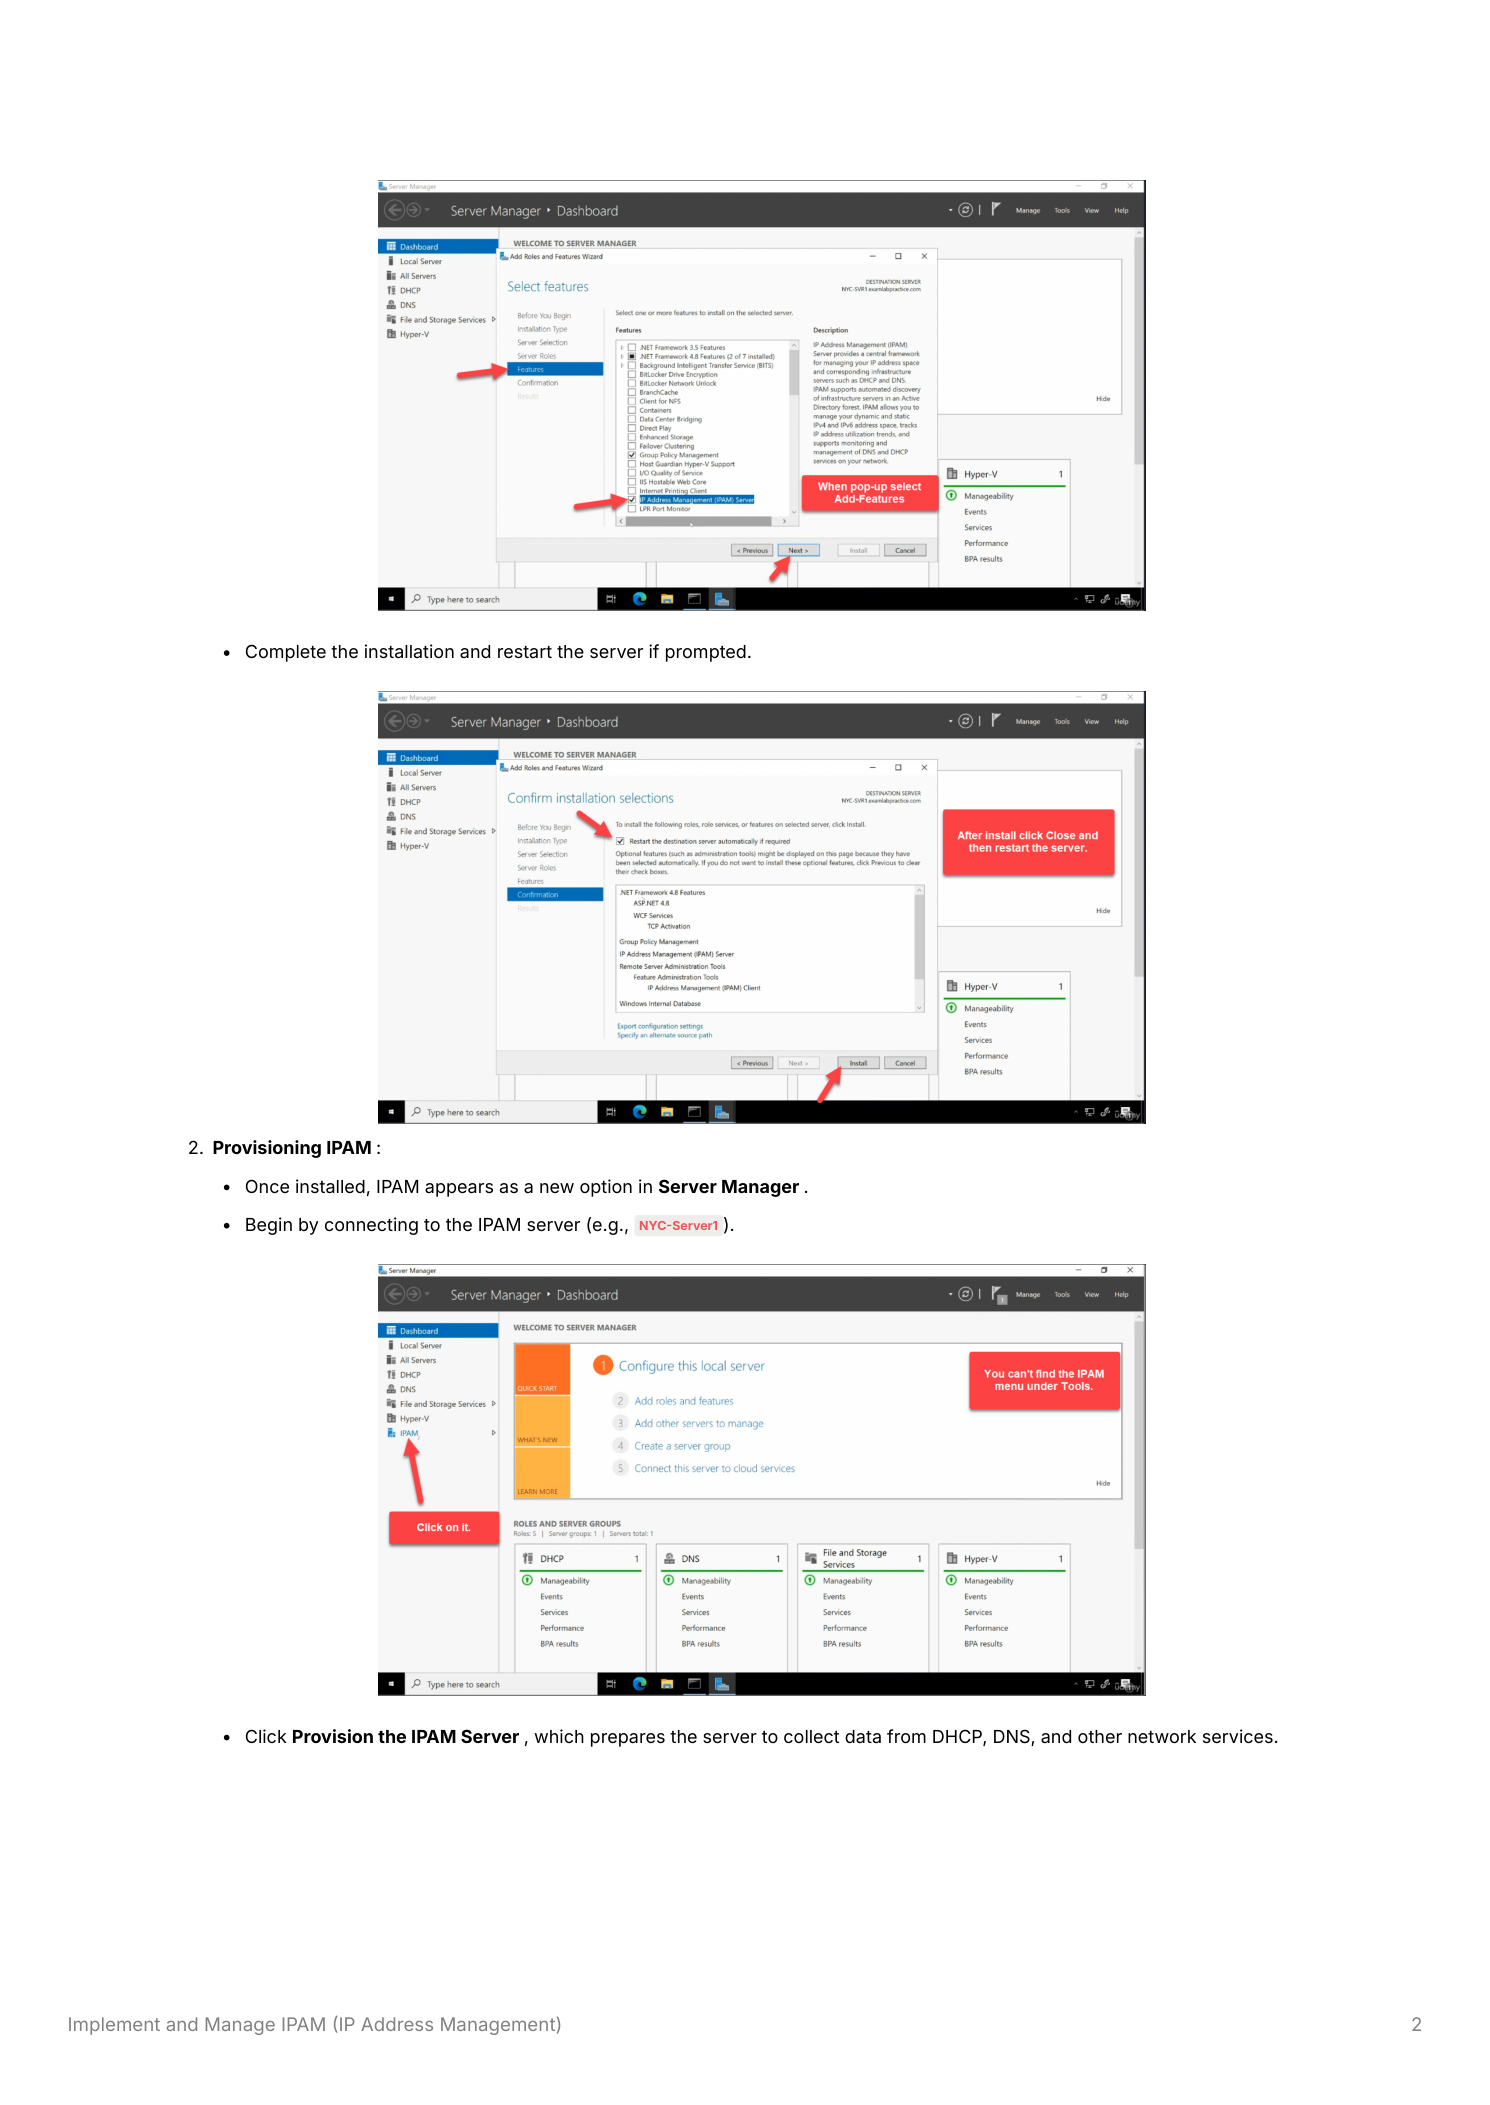
Step 2 — Provision the IPAM server
Click IPAM in Server Manager. The console shows a numbered task list — the IPAM bootstrap walkthrough. The first task is Connect to IPAM Server (which connects to the local server by default). The second is Provision the IPAM Server — this is where the database schema gets created and IPAM picks how it will configure the managed servers.
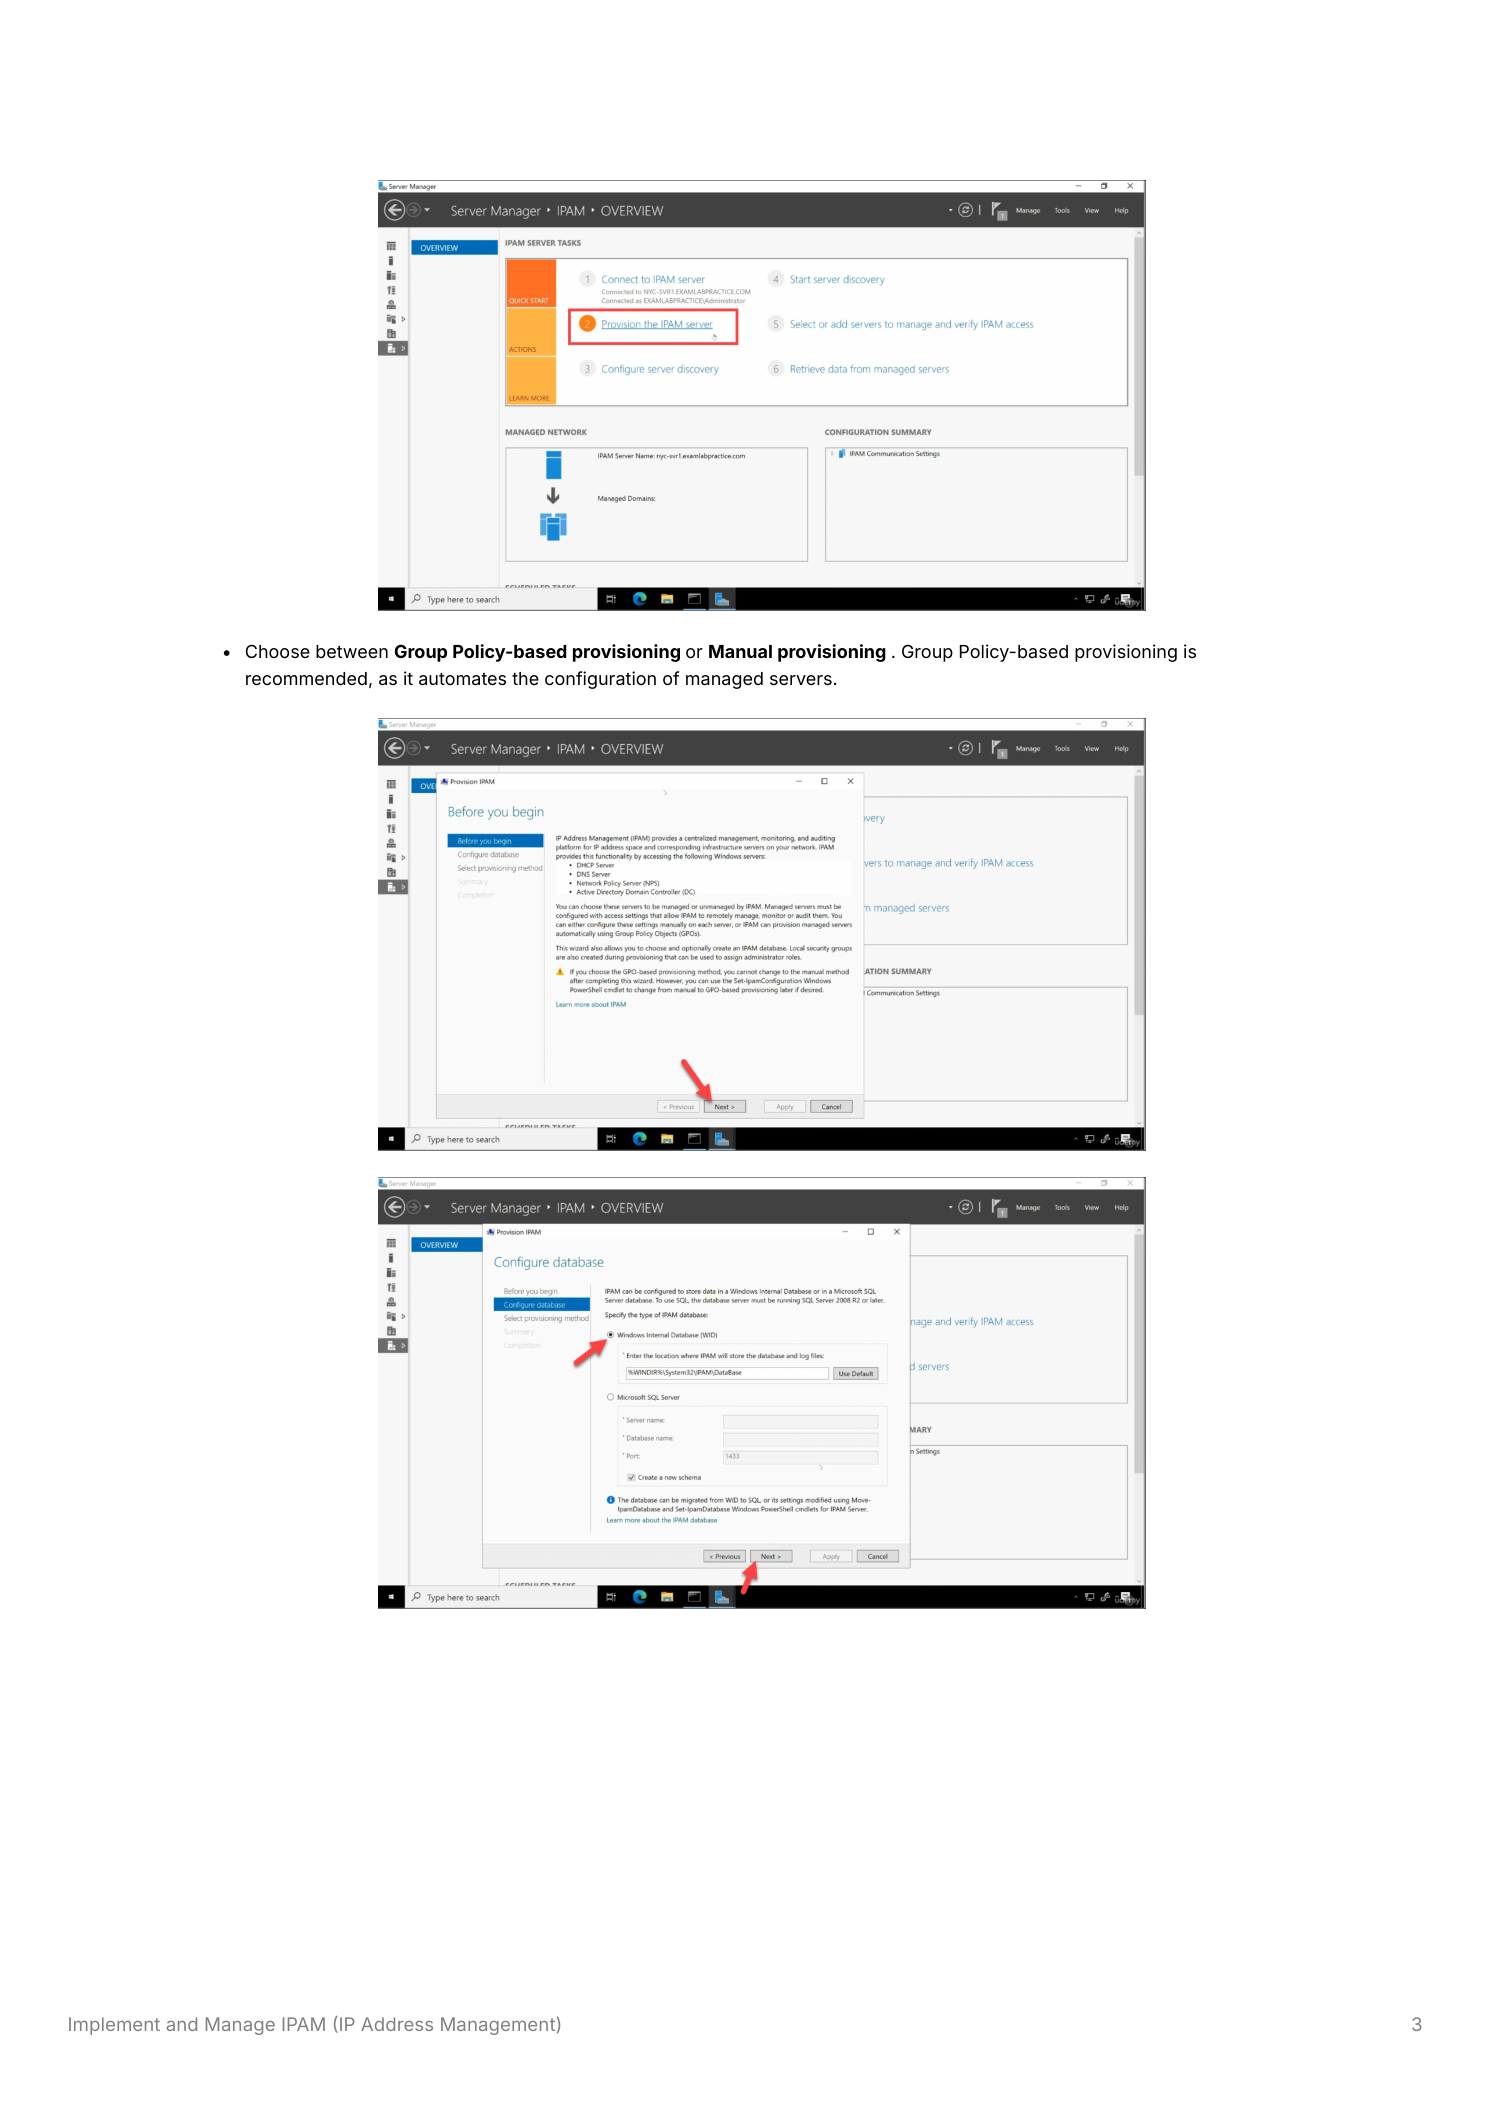
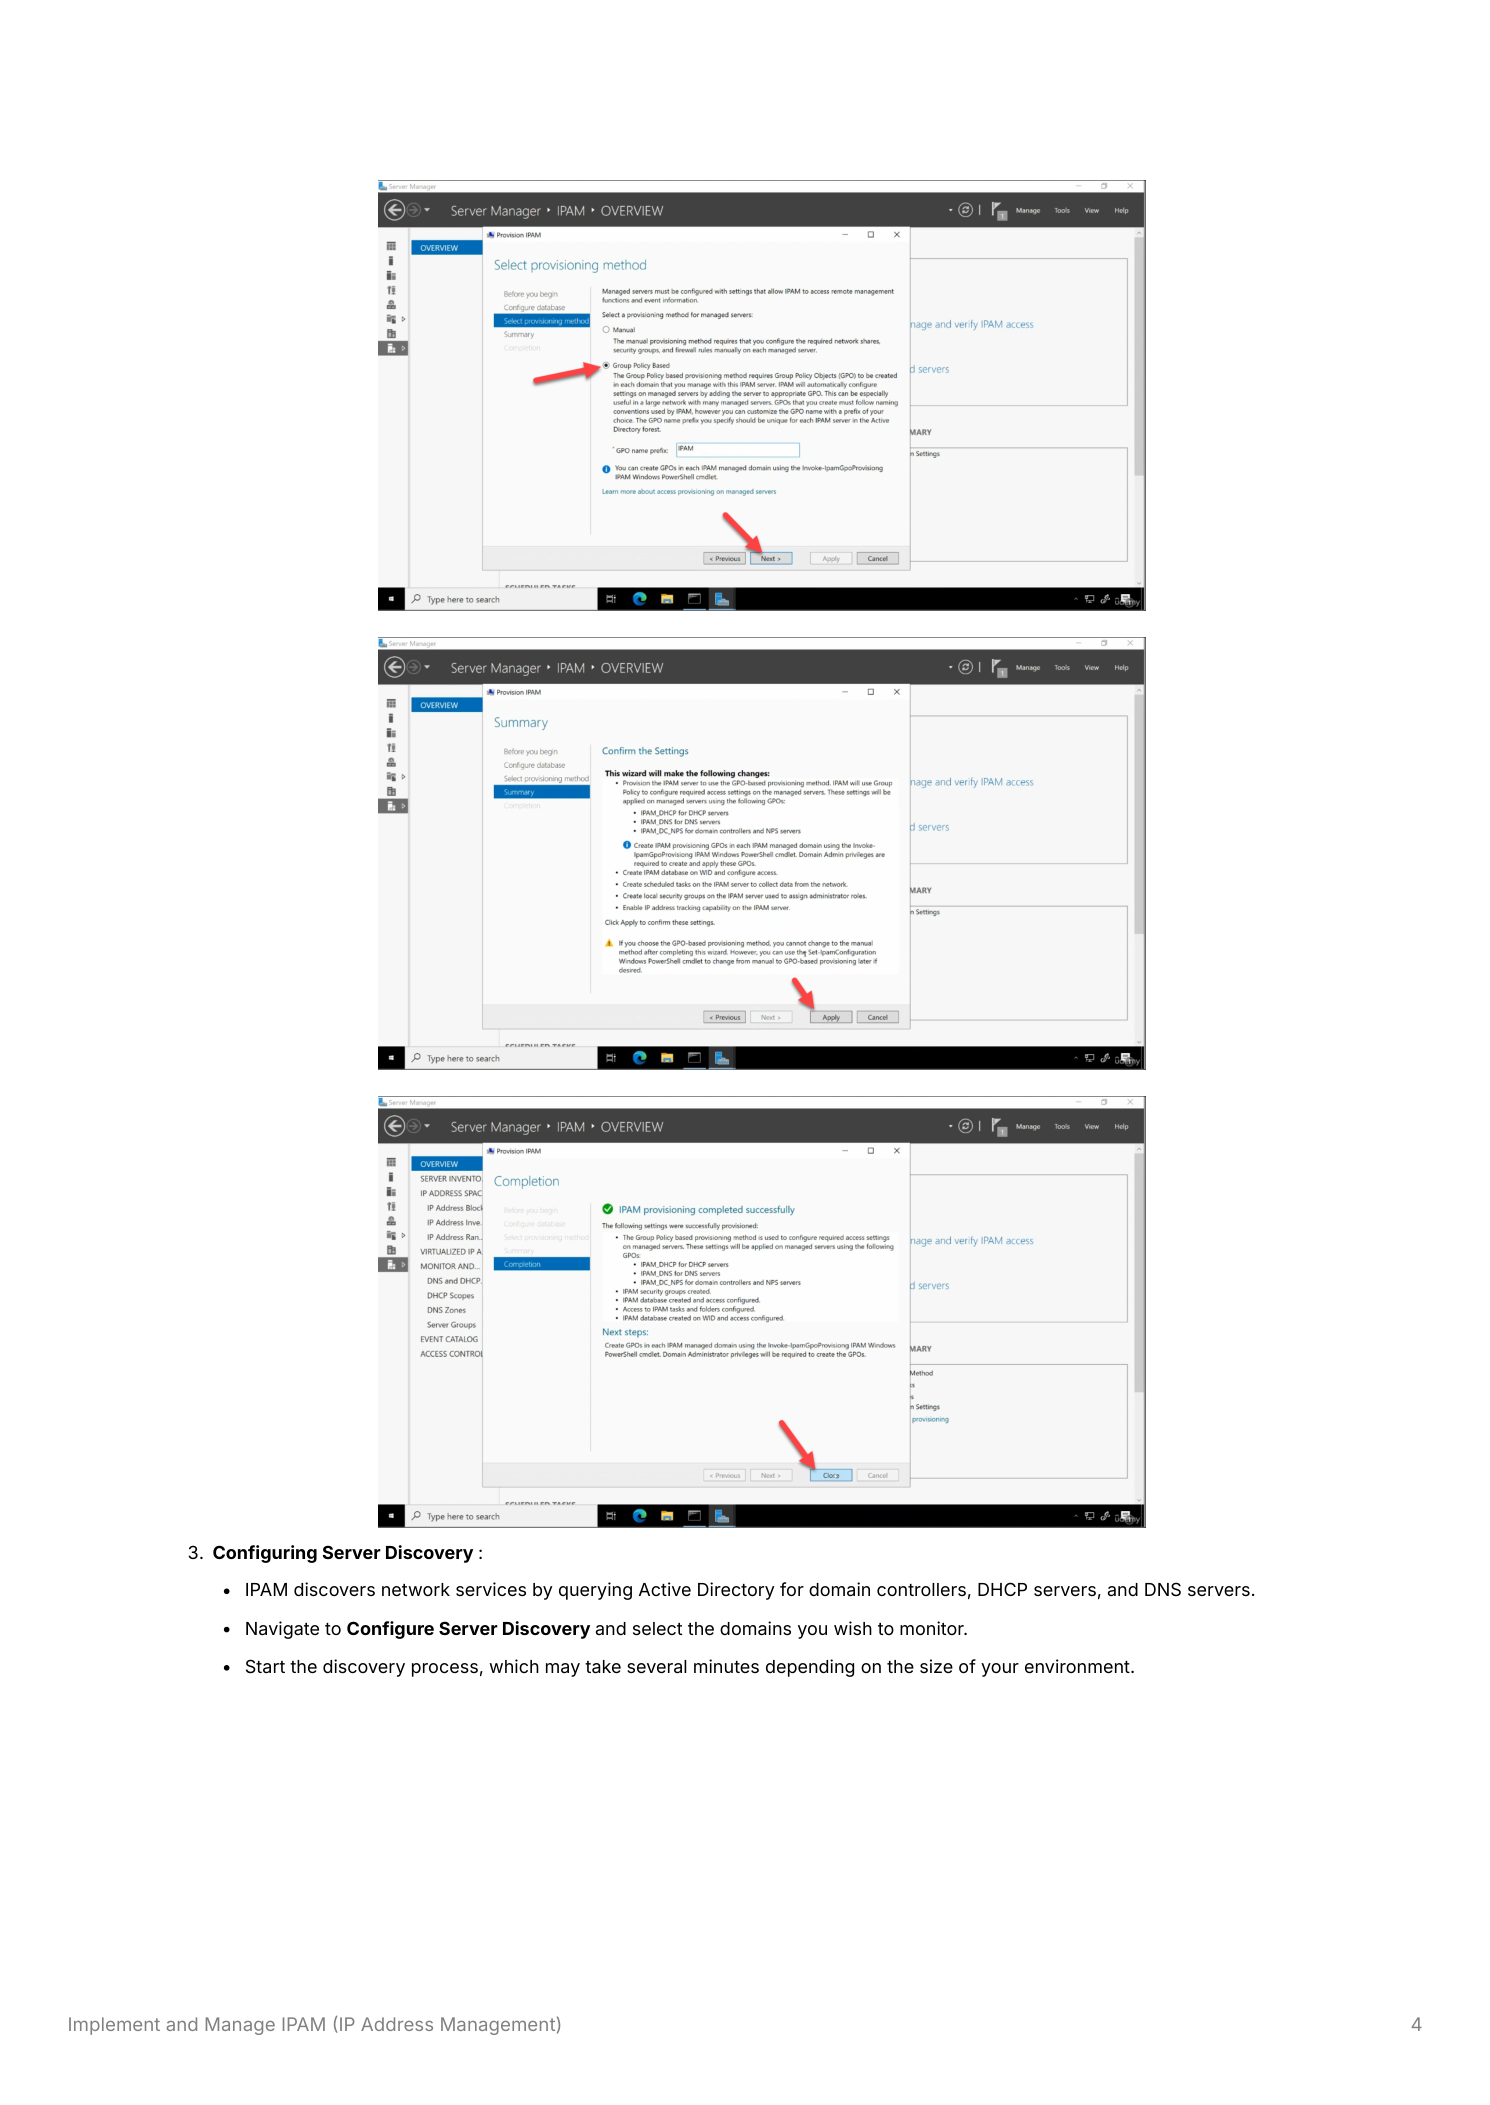
When prompted for the provisioning method, pick Group Policy-based provisioning. The other option (manual) means SSH-equivalent labor on every managed server — firewall rule edits, group memberships, the lot. GP-based provisioning generates three GPOs that handle all of that for you. Enter a GPO name prefix (IPAM is the convention) when asked — this prefix becomes the front of all three GPO names so they sort together in GPMC.
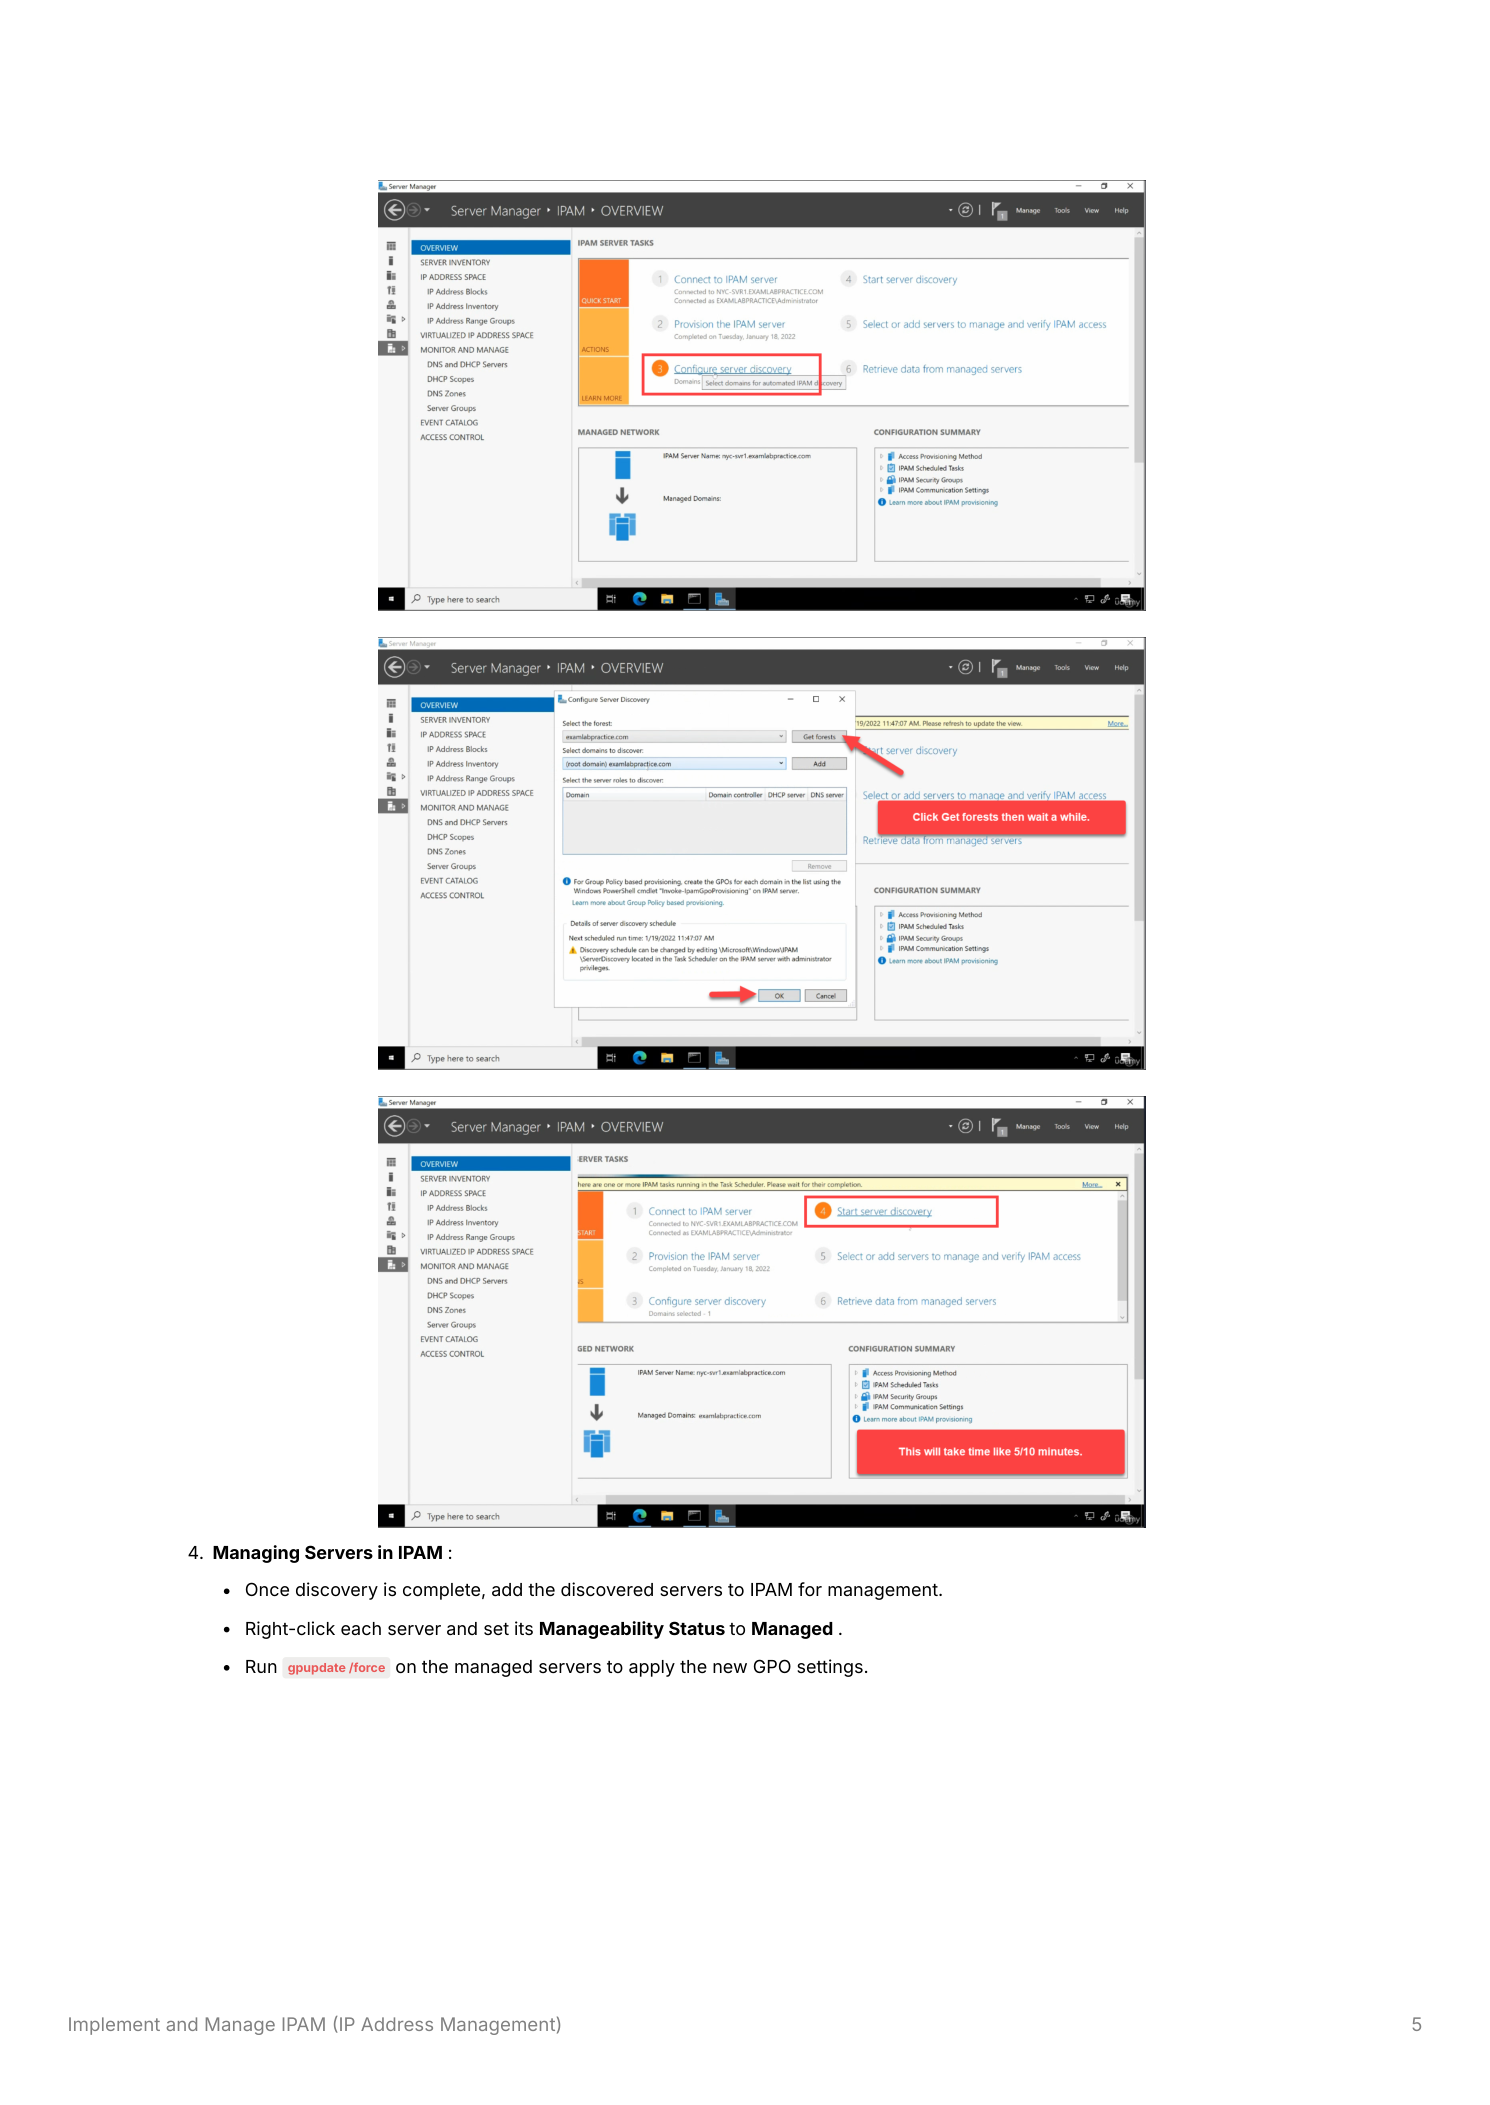
Step 3 — Configure server discovery
Next task: Configure Server Discovery. IPAM finds servers by querying AD — you tell it which domains to search, it pulls back the list of DCs, DHCP servers, and DNS servers. Add the domain(s) you want monitored, click OK, then click Start Server Discovery. Discovery is asynchronous and can take several minutes in larger environments — let it run.
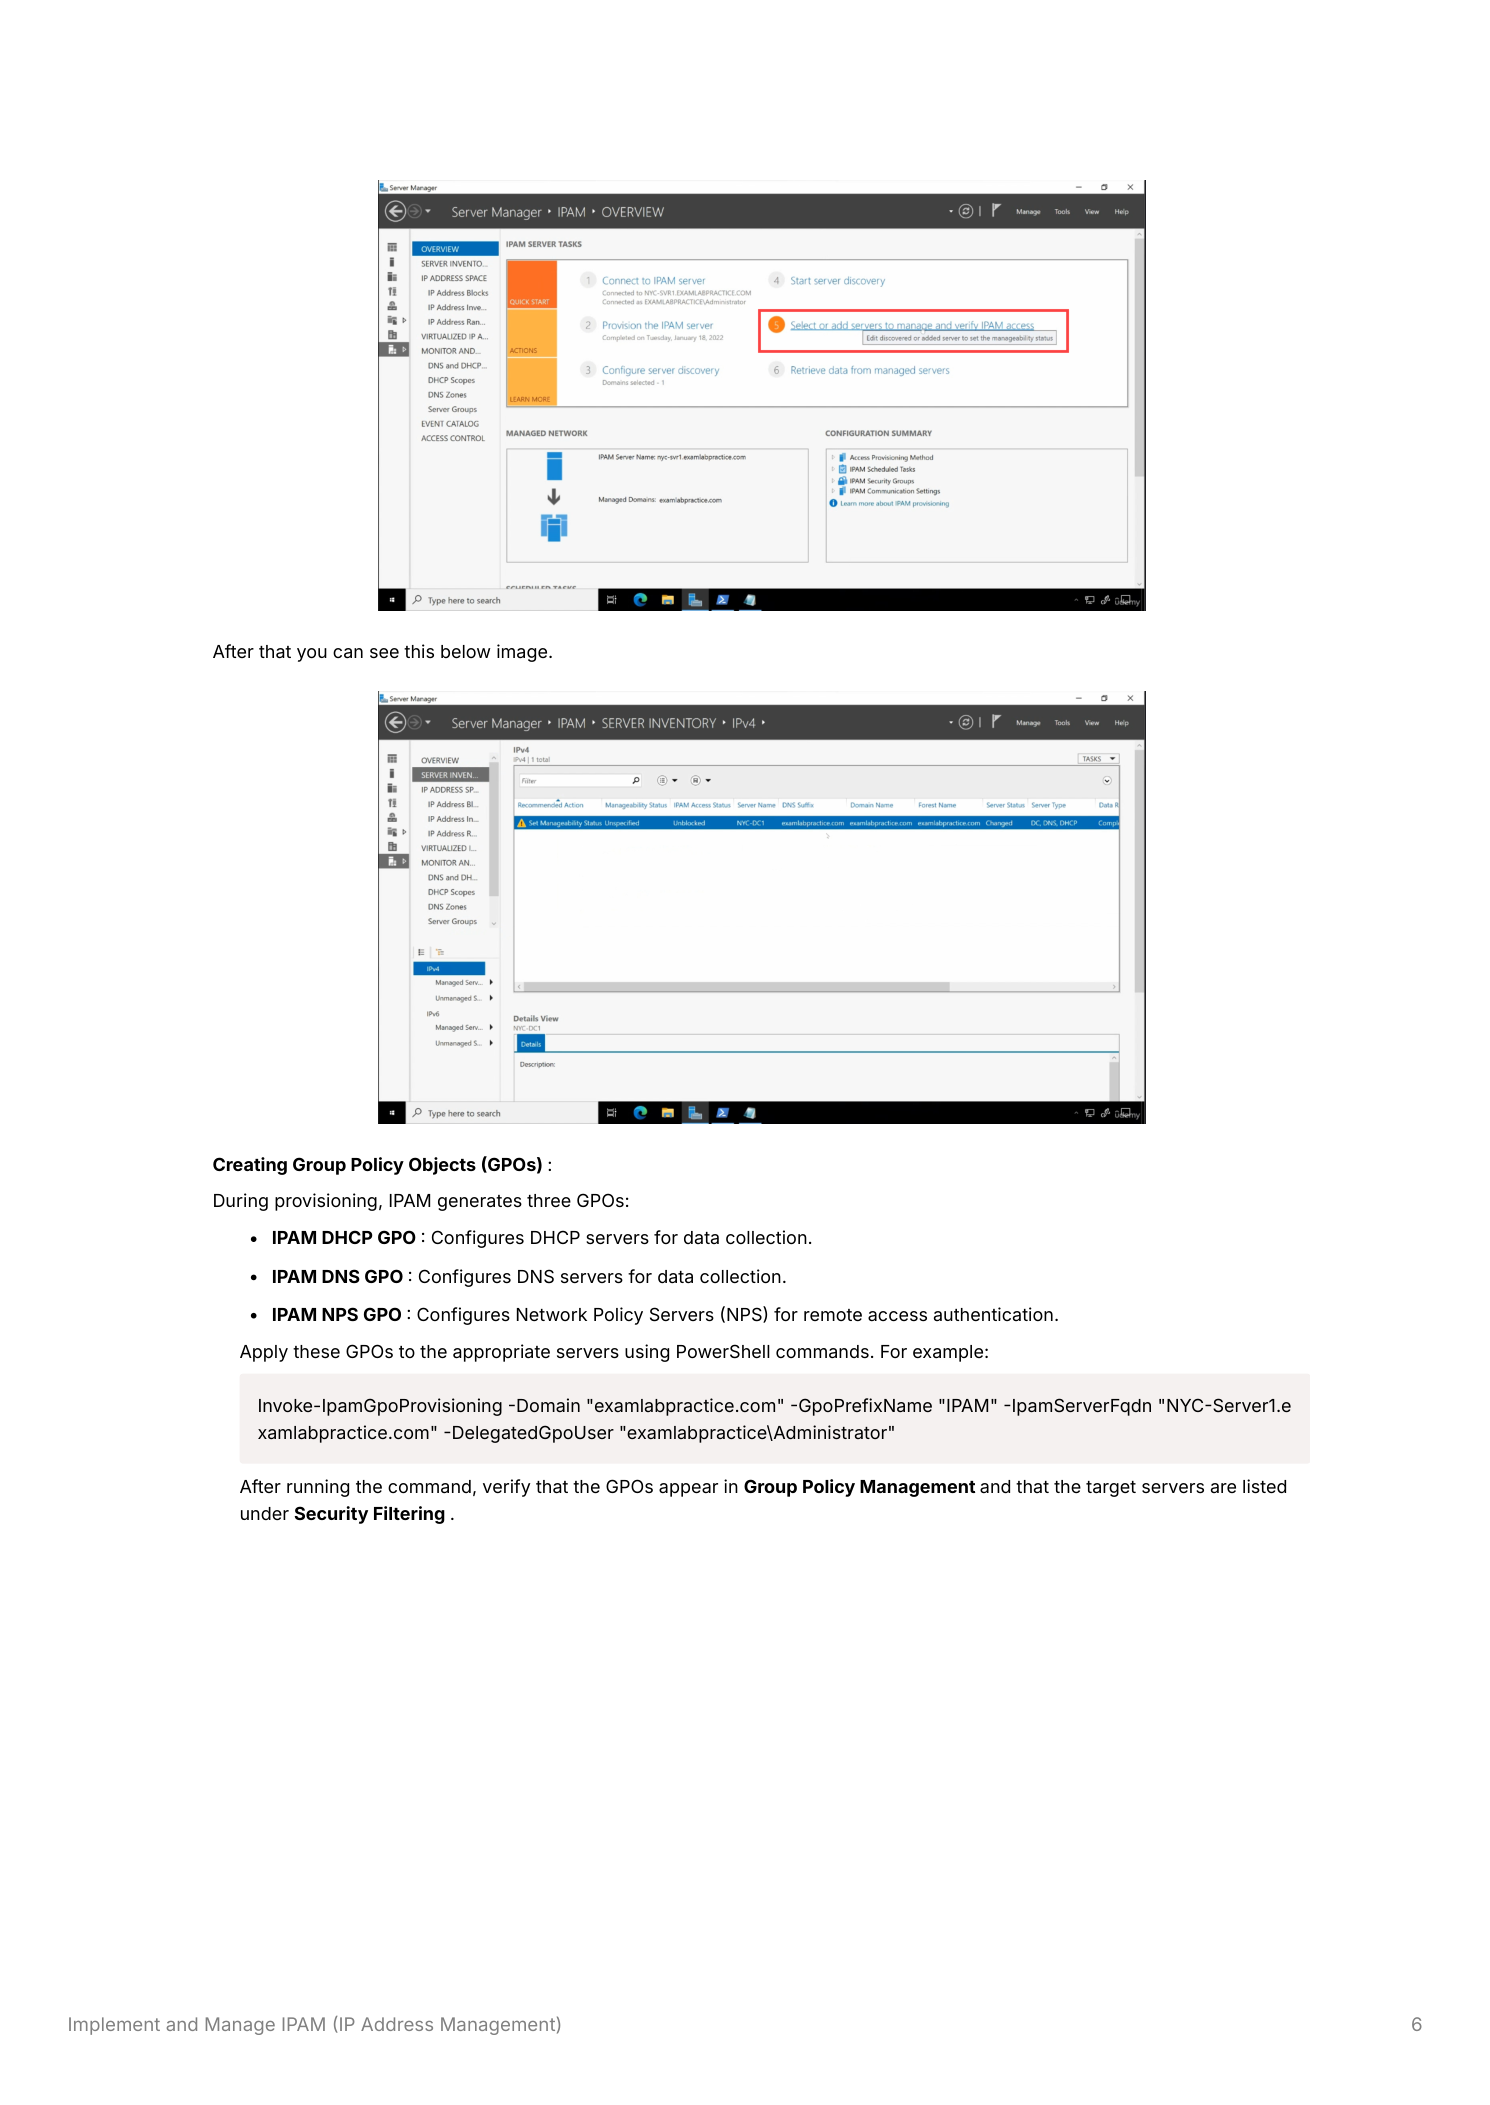
Step 4 — Mark discovered servers as Managed
When discovery finishes, the SERVER INVENTORY view lists every server it found with a Manageability Status of Unspecified. IPAM doesn’t touch any of them until you explicitly opt in. For each server you actually want IPAM to manage, right-click and set Manageability Status > Managed. Then run gpupdate /force on those servers (or wait for the regular GP refresh interval) so the IPAM GPO settings actually apply.
Step 5 — Generate and link the three IPAM GPOs
Provisioning created three GPOs that need to be linked to the OUs holding the managed servers:
- IPAM_DHCP — opens firewall rules and grants IPAM service the access it needs on DHCP servers
- IPAM_DNS — same idea for DNS servers
- IPAM_DC_NPS — covers domain controllers and Network Policy Servers (NPS) where present
Apply them with Invoke-IpamGpoProvisioning:
Invoke-IpamGpoProvisioning -Domain "yourdomain.com"
    -GpoPrefixName "IPAM"
    -IpamServerFqdn "YourIPAMServer.yourdomain.com"
    -DelegatedGpoUser "yourdomain\Administrator"
The cmdlet creates the GPOs and security-filters them to the specific managed servers. Open Group Policy Management to verify all three GPOs appear and that each has the correct managed servers in its Security Filtering.

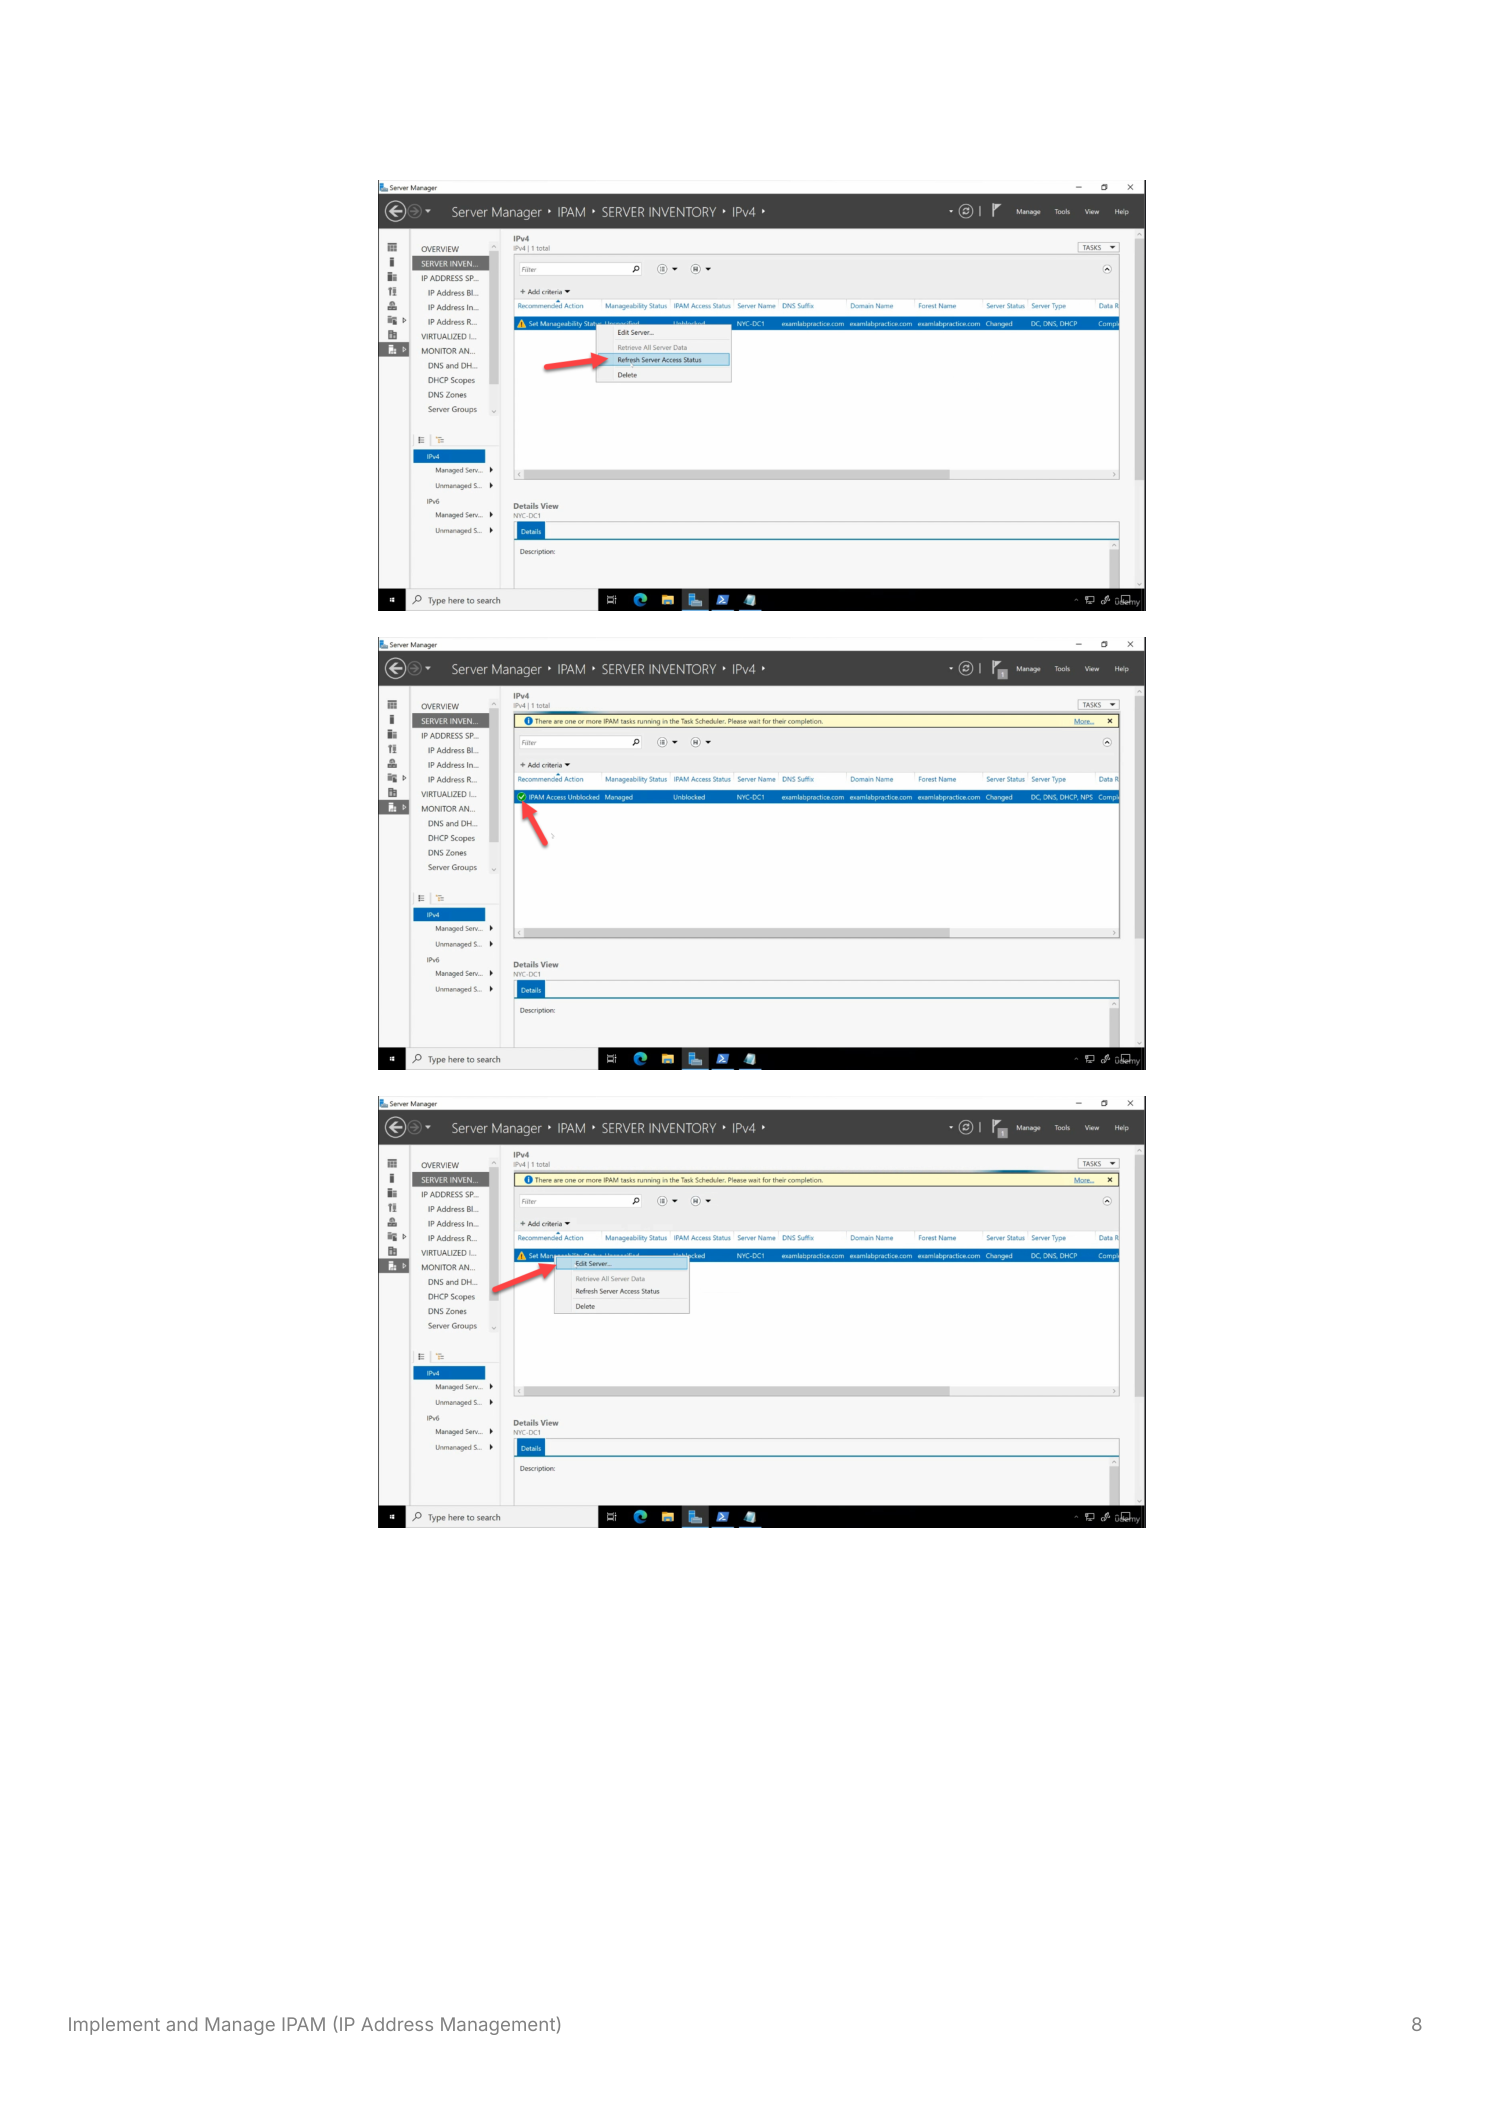
Step 6 — Verify access
With the GPOs applied and gpupdate done, go back to SERVER INVENTORY. Right-click each managed server > Refresh Server Access Status. The IPAM Access Status column should flip to Unblocked — that means IPAM successfully reached the server’s management API. If it stays Blocked, the usual culprits are: GPO didn’t apply (run gpresult /r on the target), required ports blocked by a firewall the GPO doesn’t touch, or the IPAM server’s computer account isn’t in the right local groups on the target (the GPO normally adds it).
Step 7 — Pull the data in
Once everything shows Unblocked, click Retrieve Data from Managed Servers. IPAM hits each server, pulls the IP block and scope inventories, the DNS zone metadata, the per-scope lease utilization, and populates its database. The first retrieval can take a few minutes; subsequent retrievals are scheduled automatically.
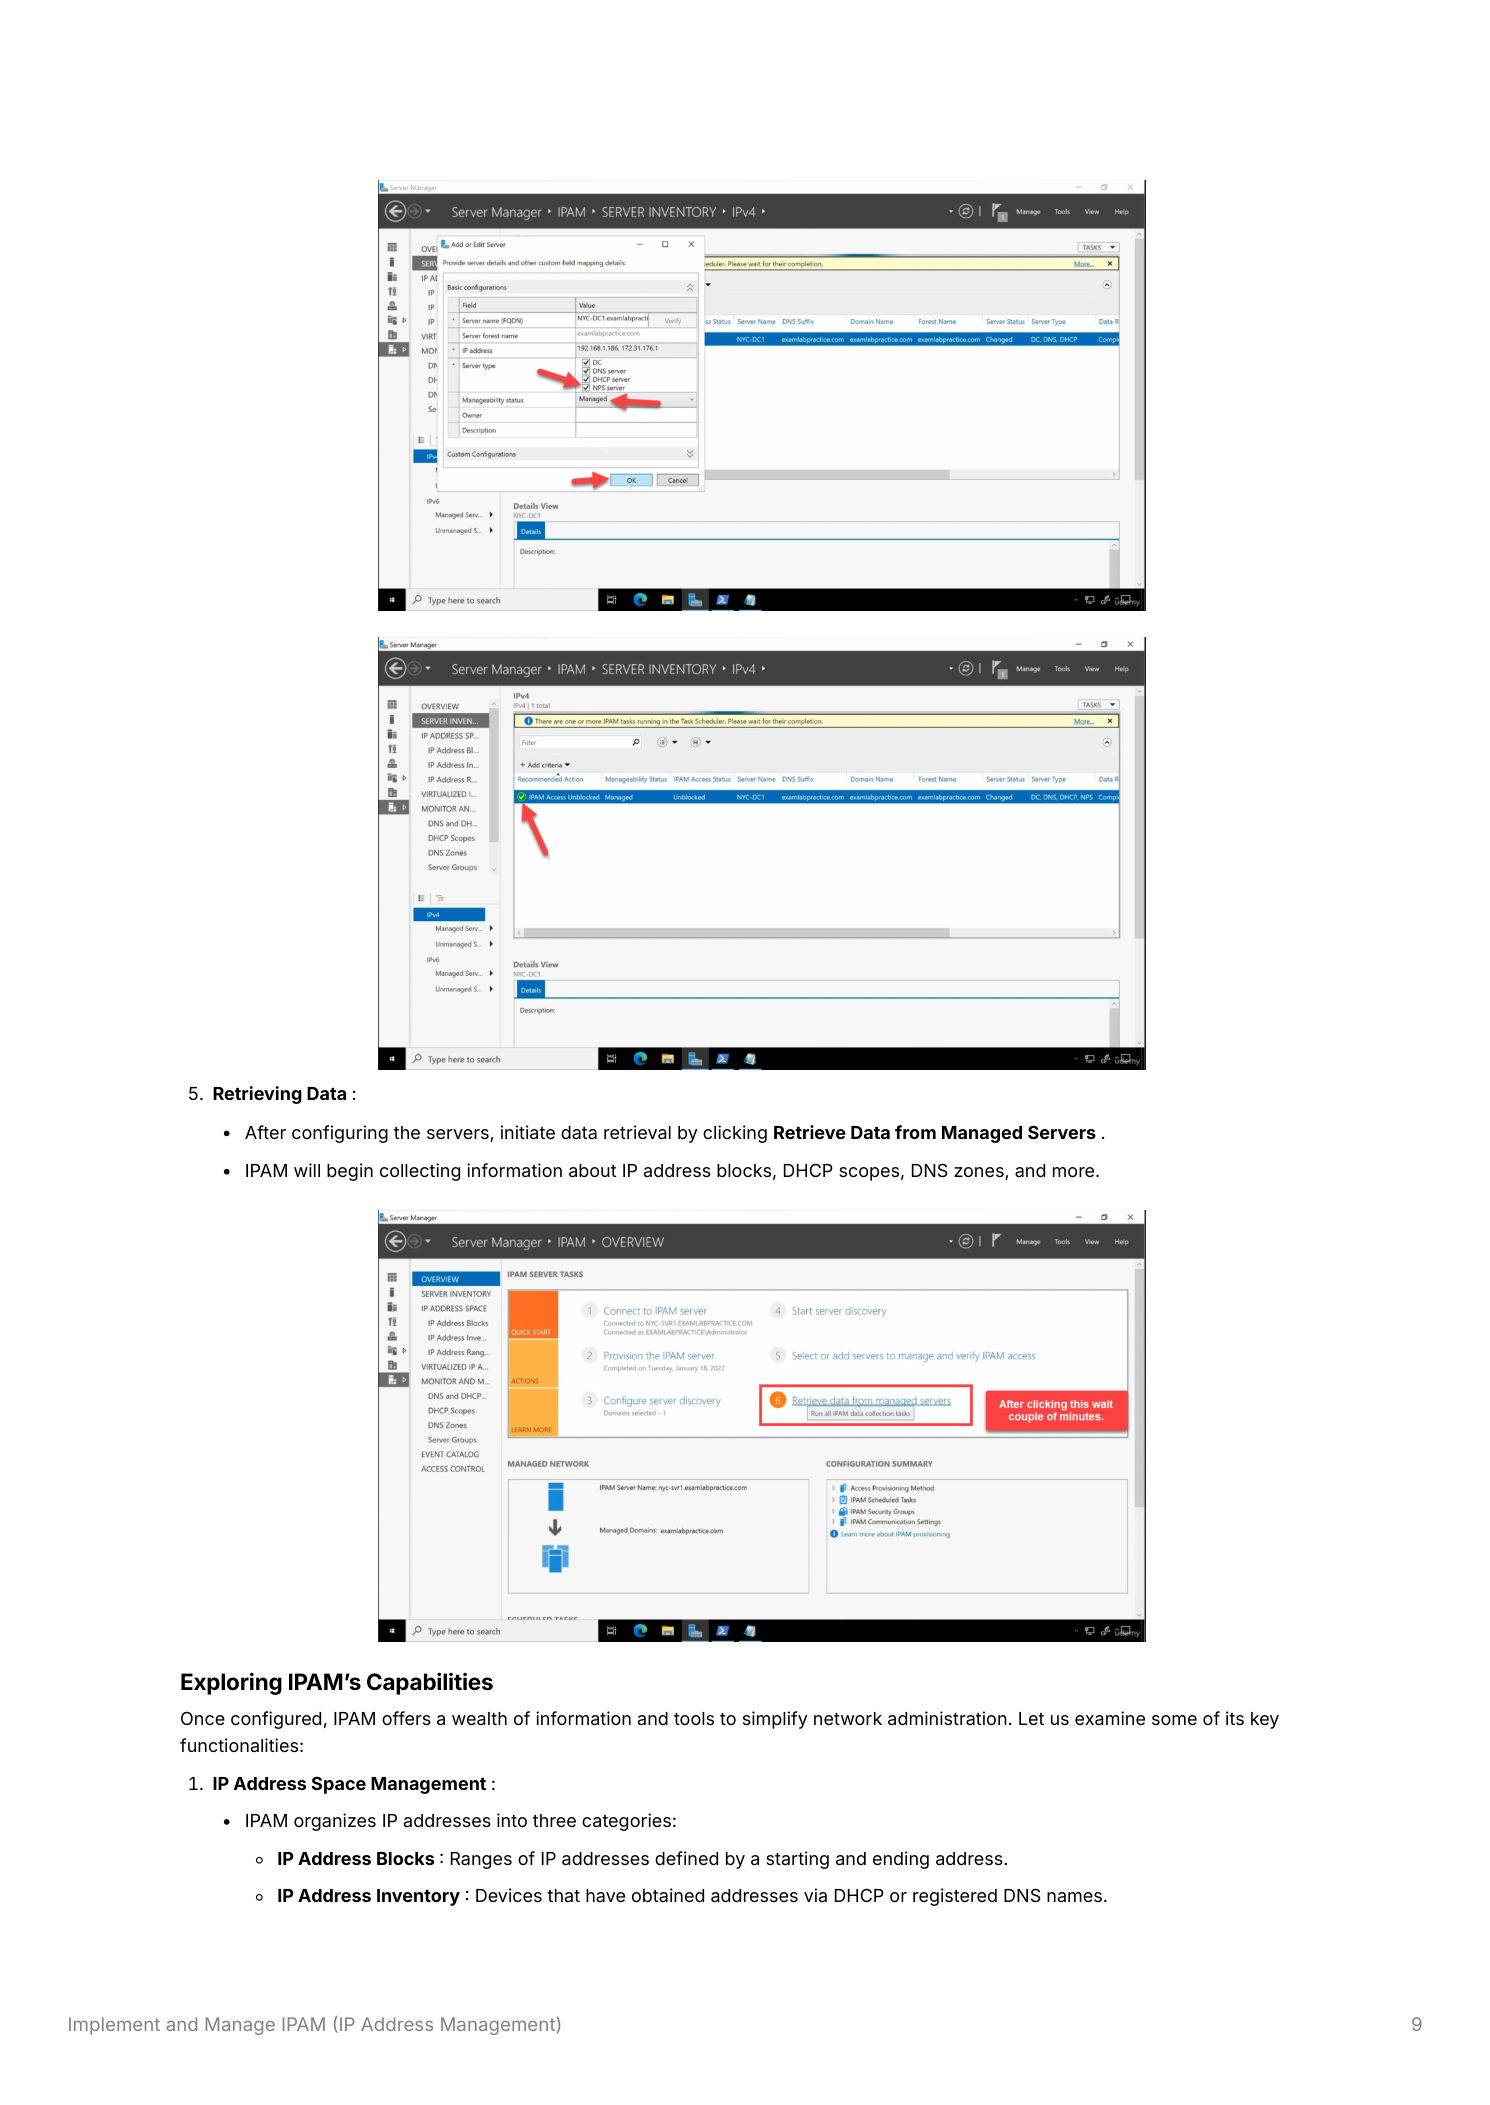
What you can do once it’s populated
Three-tier IP address space view
IPAM organizes IP space into:
- IP Address Blocks — top-level ranges (e.g.
10.0.0.0/8) representing your overall address space - IP Address Inventory — individual assigned addresses, both DHCP-leased and DNS-registered, with the registering server visible
- Range Groups — logical groupings (per-site, per-department, per-tenant) overlaying the technical ranges
You can add static address ranges, mark addresses as reserved for specific purposes, and document which subnets belong to which sites — all from the IPAM console without touching the underlying DHCP servers.
Centralized DHCP scope management
Every DHCP scope across every managed DHCP server, in one list, with utilization percentages. Edit scope properties (range, exclusions, lease duration, scope options) from IPAM and the change replicates to the target DHCP server automatically. Helps a lot when you’re managing dozens of scopes across multiple servers and need to bump lease durations or add a reservation without RDPing in.
DNS zone visibility
IPAM doesn’t manage individual DNS records (A, CNAME, MX) — for that you still use DNS Manager or PowerShell. What it does is associate DNS zones with their related IP address ranges, which makes it trivial to verify a zone’s configured subnet actually matches the DHCP scope serving that subnet (a surprisingly common source of obscure bugs).
Reporting and auditing
IPAM keeps historical data on IP utilization, DHCP lease activity, and DNS zone changes. The reports cover the three jobs that actually matter: capacity planning (which subnets are about to run out?), troubleshooting (which DHCP server gave this lease, when?), and compliance (auditable record of IP-to-user assignments over time).
Limitations to know about
Azure integration is shallow. IPAM tracks IP assignments for Azure VMs reachable via VPN or ExpressRoute, but it doesn’t deeply integrate with Azure’s native IP address management. Cloud-heavy environments need supplementary tooling.
No per-record DNS management. IPAM works at the zone level for DNS, not the record level. For individual A/CNAME/MX management, stay in DNS Manager or PowerShell.
WID has limits. The default Windows Internal Database is fine for small-to-medium environments. Large enterprises can swap it for a SQL Server backend during provisioning — pick that path upfront if you anticipate hundreds of managed servers.
Where this fits
IPAM is the layer above your DHCP and DNS servers. The companion pieces are implementing the DHCP server role, creating and managing DHCP scopes, DHCP high availability, and on the DNS side DNS forwarding and reverse lookup zones. All of these live in the DNS, DHCP & Networking pathway.