Part 1 of this series covered the prerequisites for installing Microsoft Entra Connect. Now Part 2: stage the installer files. The catch — we want TWO versions, not one. The older N-1 version (specifically 2.5.79.0) goes in first to set up the lab as a “legacy” environment, then we upgrade to the latest version later in the series to demonstrate the in-place upgrade flow. This post is just the staging step: where to download both, where to put them, and how to verify both are ready.
Why two versions?
The pedagogical reason: real-world upgrades are the operation people fear most. A clean install on the latest version is straightforward; an upgrade from an older deployment with cached state, OU filters configured, custom rules in place, and a working sync schedule is where things actually break. To teach the upgrade flow properly, we install the OLD version first, get sync running, then upgrade. That requires having both .msi files in hand before we start.
The practical reason: Microsoft hosts only the latest version on the official portal. Older versions vanish from microsoft.com when the new one ships. To simulate an outdated environment, you have to grab the older installer from a community archive that mirrors past versions. We use itpro-tips.com because it’s well-maintained and easy to navigate, but other archives exist (download.aadconnecthealth.azure.com’s historical paths, third-party mirrors).
Why specifically 2.5.79.0?
Microsoft set 2.5.79.0 as the minimum version that will continue to sync after September 30, 2026. Anything older than that gets blocked. Picking 2.5.79.0 as our N-1 means:
- It’s old enough to be visibly different from the latest in the admin UI (you can see the version number difference, the upgrade is visually meaningful).
- It’s new enough to still be supported as a starting state — we’re demonstrating an upgrade path, not an emergency rescue from a deprecated install.
- If you happen to leave the lab running past the deadline, sync will simply stop until you upgrade — clean failure mode, not data corruption.
If you want to use a different N-1 version (say a 1.6.x branch from a few years back), the upgrade path differs. The two-step upgrade pattern Microsoft documents (upgrade through 2.x, then to current) only kicks in for very old branches. For the demonstration flow this series uses, 2.5.79.0 to current is a single hop.
Step 1 — download the N-1 (2.5.79.0) installer
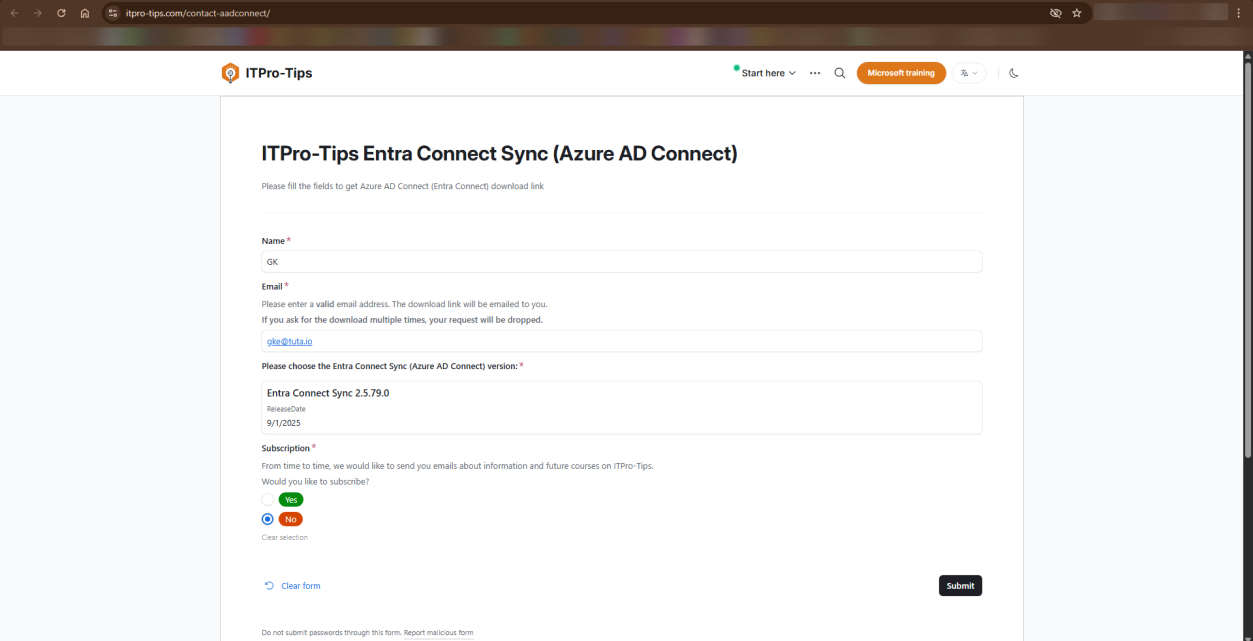
Open a browser and navigate to itpro-tips.com/contact-aadconnect/. The page lists historical Entra Connect (and the older Azure AD Connect) versions with download links to community-mirrored installers.
- Find the row for version 2.5.79.0.
- Click the download link.
- Save the file. Use a path you can type quickly later, e.g.
C:\Installers\Old\AzureADConnect-2.5.79.0.msi. The explicit version in the filename matters once you have two files in flight — you don’t want to double-click the wrong one in 20 minutes.
If your security policy requires it, verify the SHA256 hash against a Microsoft-published hash for that version. The community mirror is well-trusted but it’s not Microsoft-signed delivery; for a production install you’d want hash verification. For a lab, downloading and moving on is fine.
Step 2 — download the latest version from Microsoft
This one comes from the official source.
- Sign into the Microsoft Entra admin centre at entra.microsoft.com.
- In the left navigation, expand Hybrid management. (Or use the top search bar — type “Entra Connect”.)

- Click Entra Connect.
- On the main blade, find the Get started section (or click Manage in the top menu).
- Click Download Entra Connect agent.
- Accept the EULA in the prompt that appears.
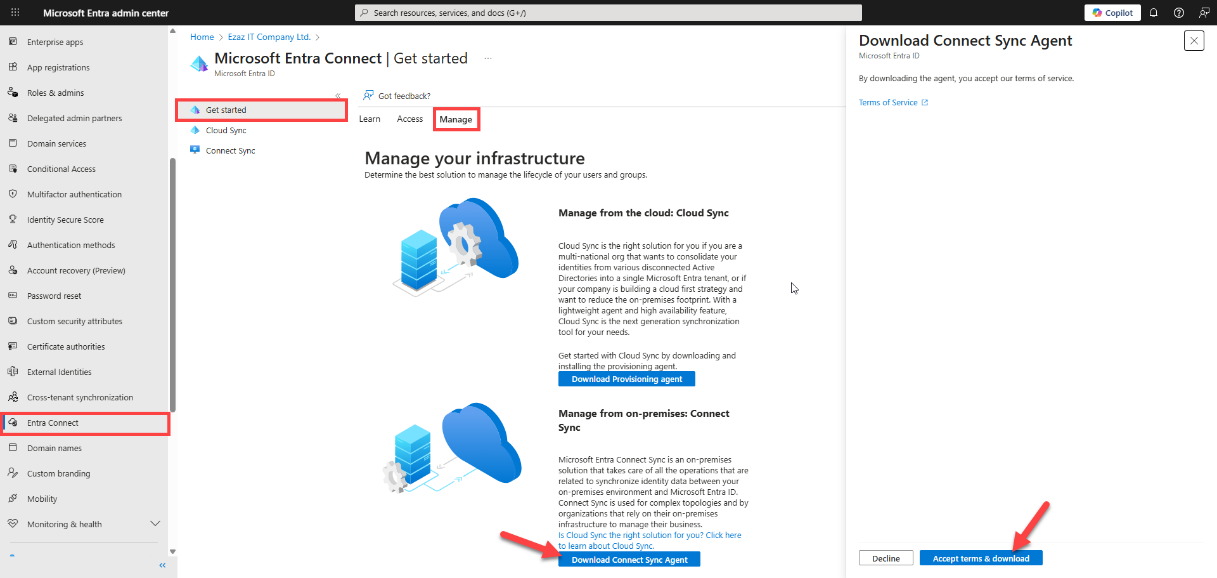
- The latest
AzureADConnect.msidownloads. Save it to a different folder from the N-1 file, e.g.C:\Installers\New\AzureADConnect-latest.msi. Naming the file with “latest” is fine for a lab; for production runbooks, name it with the explicit version number you downloaded so it’s unambiguous in the future.
Step 3 — verify both files are present and distinguishable
Open File Explorer at the parent folder (e.g. C:\Installers\). Both subfolders should be present, each containing one .msi file with a clearly distinguishable name.
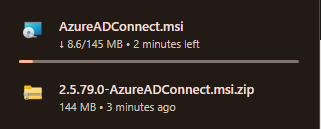
AzureADConnect-2.5.79.0.msi + AzureADConnect-latest.msi) so you can’t accidentally double-click the wrong one when the lab progresses.Sanity checks:
- Sizes look reasonable. Both installers should be in the 30–80 MB range. A truncated download (browser interrupted, network blip) leaves a much smaller file that fails to launch.
- Names are distinct.
AzureADConnect.msiandAzureADConnect.msiin two folders is technically OK but easy to confuse. Rename one or both to embed the version, e.g.AzureADConnect-2.5.79.0.msiandAzureADConnect-2.6.x.msi(use the actual version of the latest you downloaded). - Both .msi files are signed by Microsoft. Right-click > Properties > Digital Signatures should show Microsoft Corporation as the signer for both. If the N-1 file from the archive doesn’t show a Microsoft signature, the file has been tampered with — do not install.
Things that bite people during this step
Wrong N-1 version downloaded
You grab the wrong version from itpro-tips.com (e.g. 2.4.x instead of 2.5.79.0). The lab proceeds but the upgrade path looks different from what the next post documents. Fix: re-download the specific 2.5.79.0 build.
Browser blocks the download as “suspicious”
Modern browsers flag .msi downloads from non-Microsoft sites. Click through the security prompt. If the file gets quarantined by Windows Defender post-download, restore it from quarantine — the file IS the legitimate Microsoft installer, just delivered via a third-party mirror.
Older version rejected by the lab AD
Some lab AD configurations have policies that block installation of unsigned or out-of-date software. If 2.5.79.0 fails to launch with a signature error, check the lab’s AppLocker / WDAC rules. For a lab install you can usually relax these temporarily.
Same filename in different folders confused later
You leave both files named AzureADConnect.msi in different folders. Twenty minutes into the install, you can’t remember which folder is which. The newer cmdlet you ran shows the install came from one path but the file you intended to install was in the other. Solution applied retroactively: rename the files now to embed the version. Solution applied proactively: do this BEFORE running the install.
Latest version downloaded after the lab is already on N-1
Order matters: download both BEFORE installing either. If you install N-1 first and then go to download the latest, the admin centre may have shifted to a new version since you started, or your browser may auto-update something, etc. Have both .msi files staged before you click Install on either.
What’s next
You now have both installers ready. Part 3 covers building out the VM that will host Entra Connect (creating the VM, joining it to the domain, enabling TLS 1.2). After that, the actual install of the N-1 version, then the upgrade demonstration. The full series sits in the Hybrid Identity pathway.
For the broader series context, see Part 1 (Prerequisites) which is what got us to this point.