The series finale. Cluster is built and HA VMs are running. Eventually you’ll need more storage — new VM, growing dataset, etc. This part covers the workflow: provision a new iSCSI virtual disk on the SAN, bring it online on a node, initialize, format, then add it to the cluster (and optionally to CSV for HA VMs).
The 3-step expansion workflow
- SAN side: create a new iSCSI Virtual Disk on the existing target
- Node side: Initiator picks it up automatically; bring online + format on Node-01
- Cluster side: Add Disk in FCM — cluster takes ownership; optionally Add to CSV
Same as the original cluster setup, just an incremental delta.
Step 1 — SAN: create the new LUN
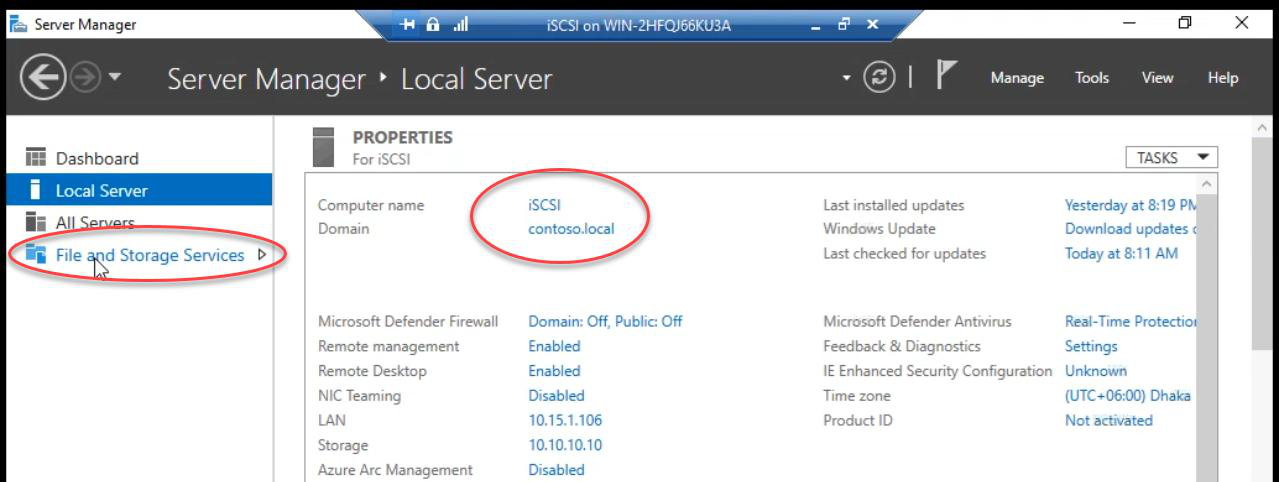

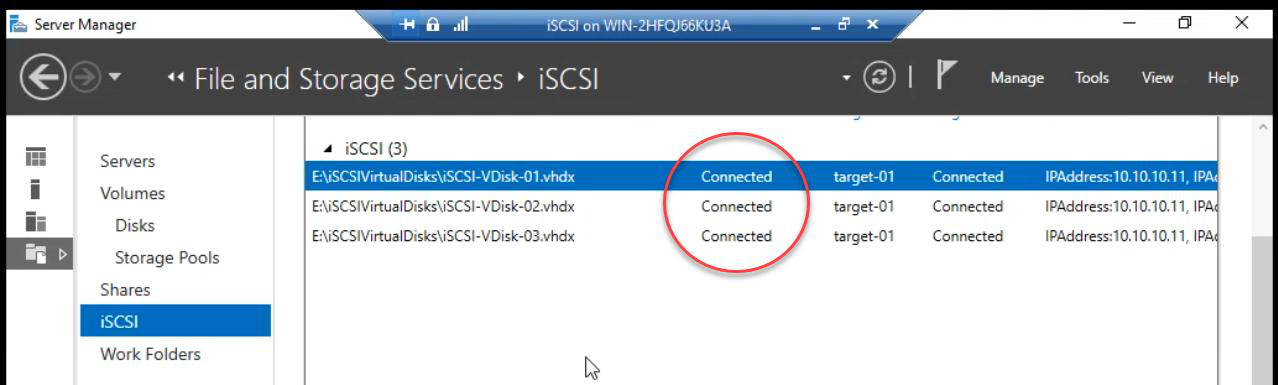
On the iSCSI VM: Server Manager > File and Storage Services. Confirm Disks pane shows the existing physical disks online.
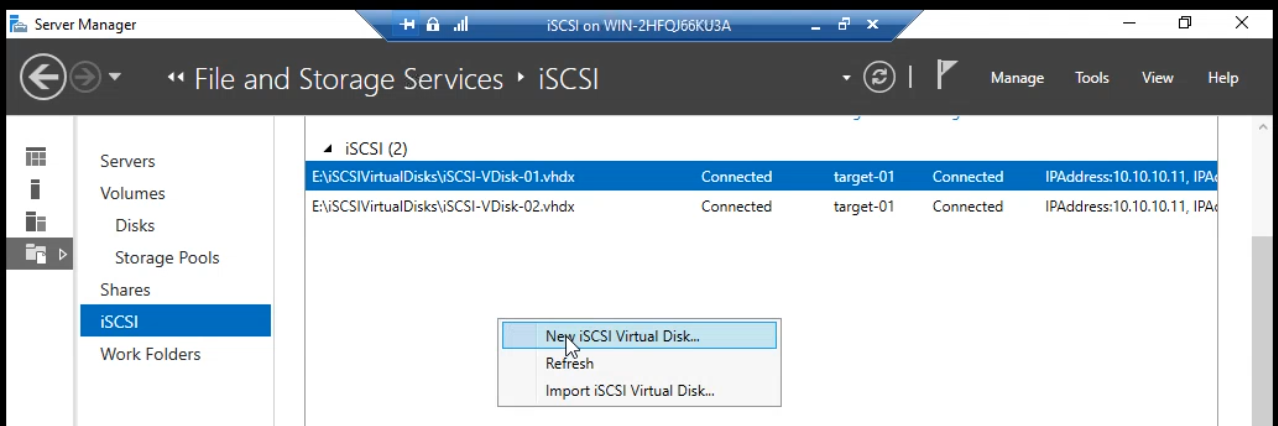
iSCSI tab > right-click iSCSI Virtual Disks pane > New iSCSI Virtual Disk.
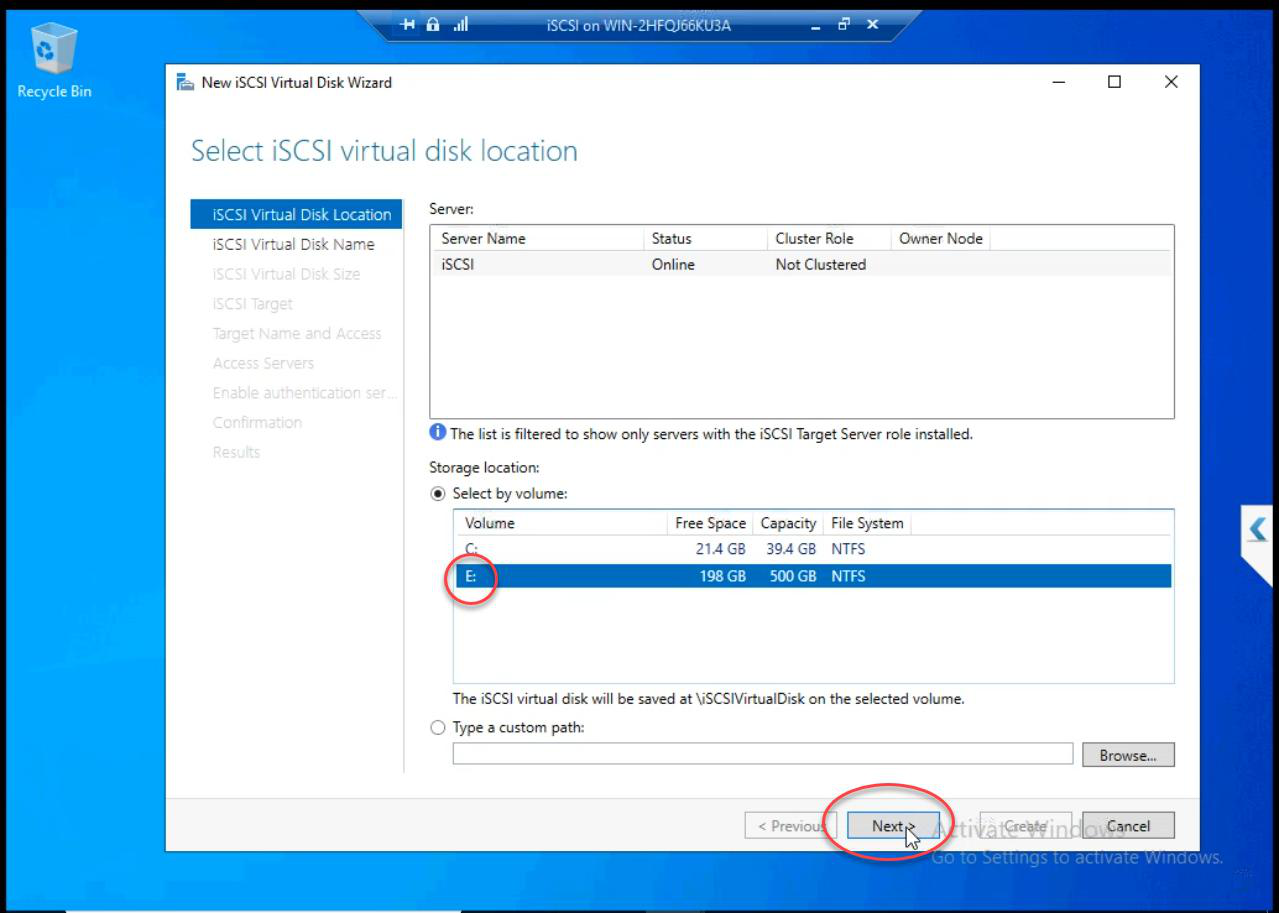
E: — the 500 GB disk where existing LUNs already live.Location: E: (the 500 GB disk where Data and Quorum LUNs already live).
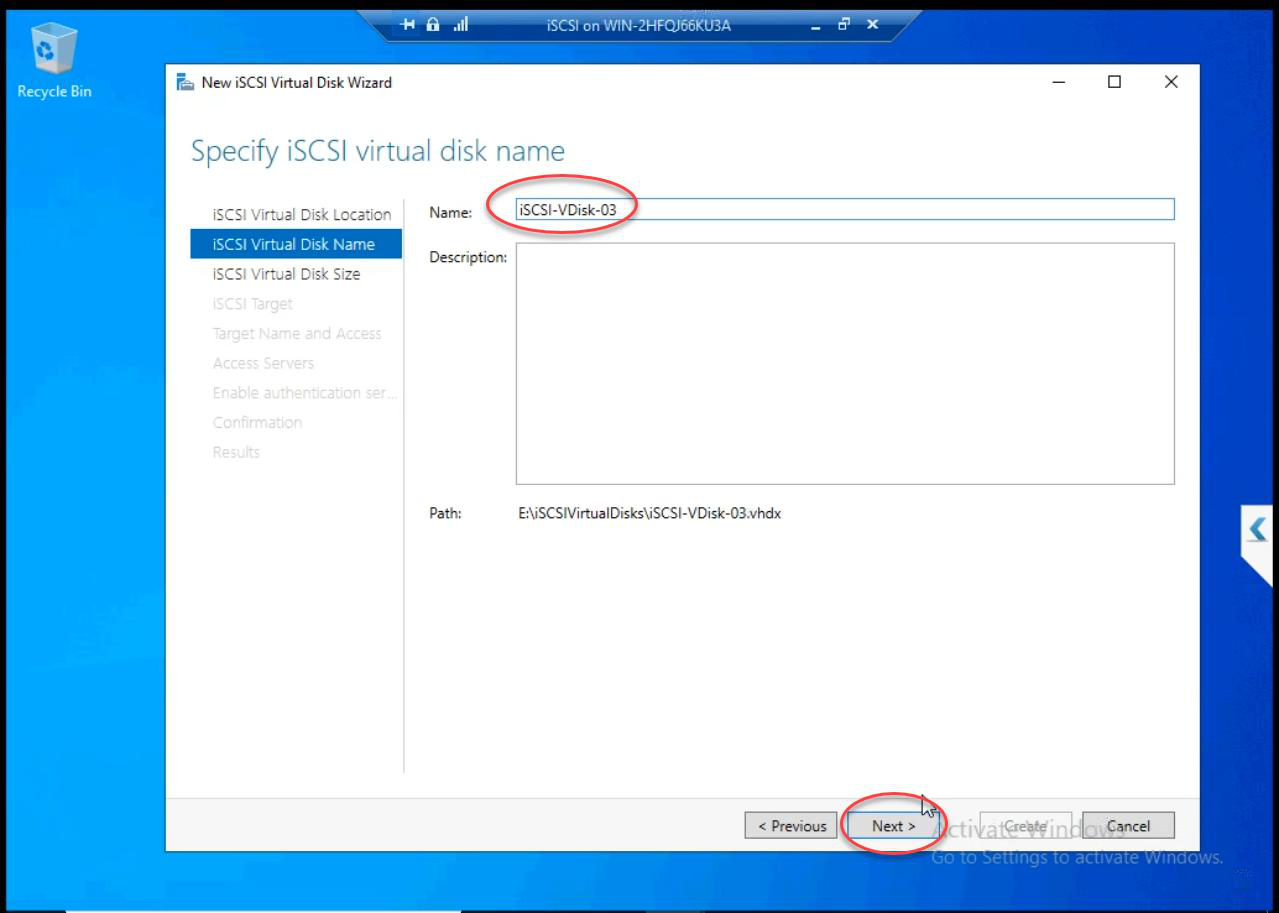
iSCSI-Disk1 (or descriptive). Description optional.Name: iSCSI-Disk1 (or whatever describes the use).
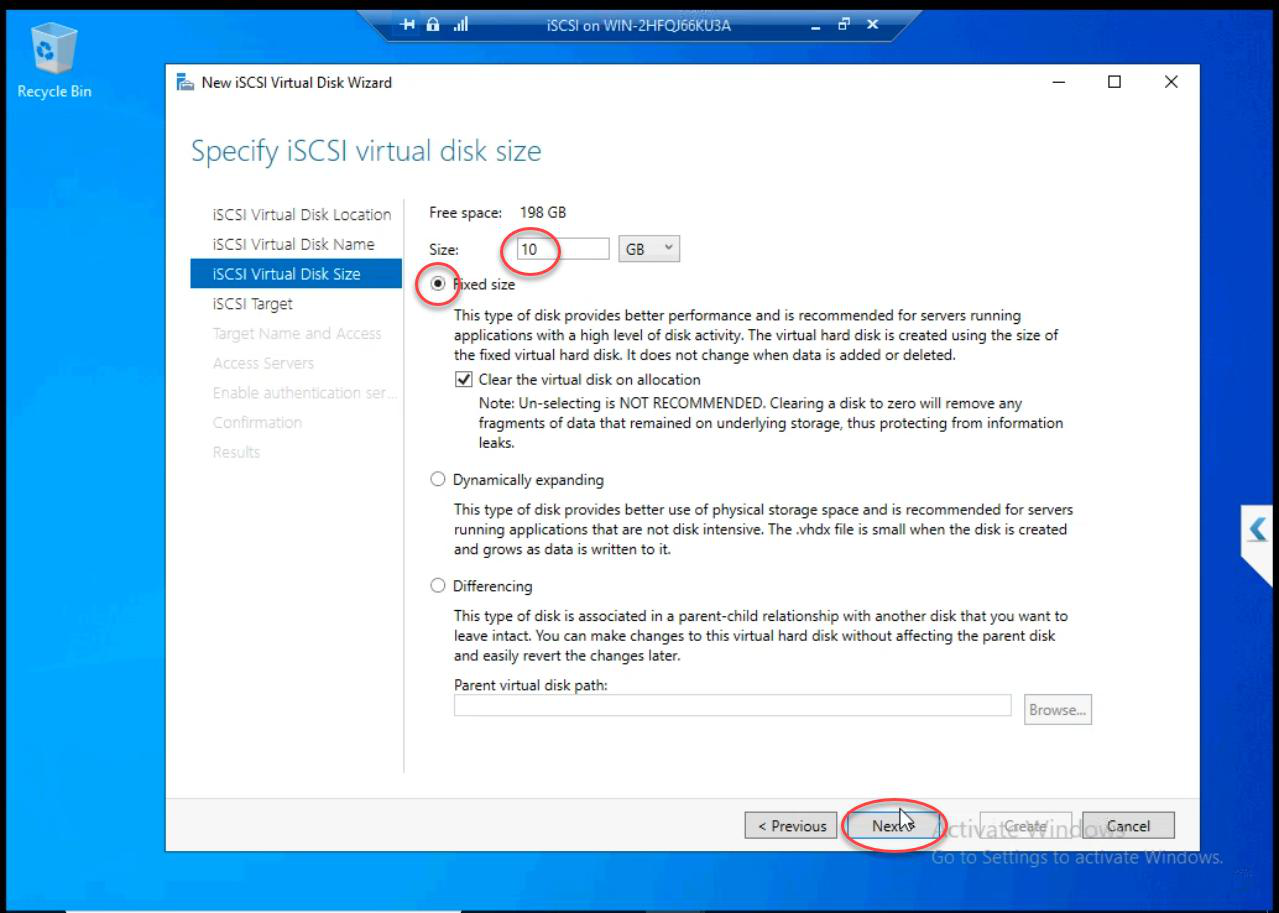
Size: 10 GB Fixed for the demo. Production: size to actual need. Always Fixed for shared storage.
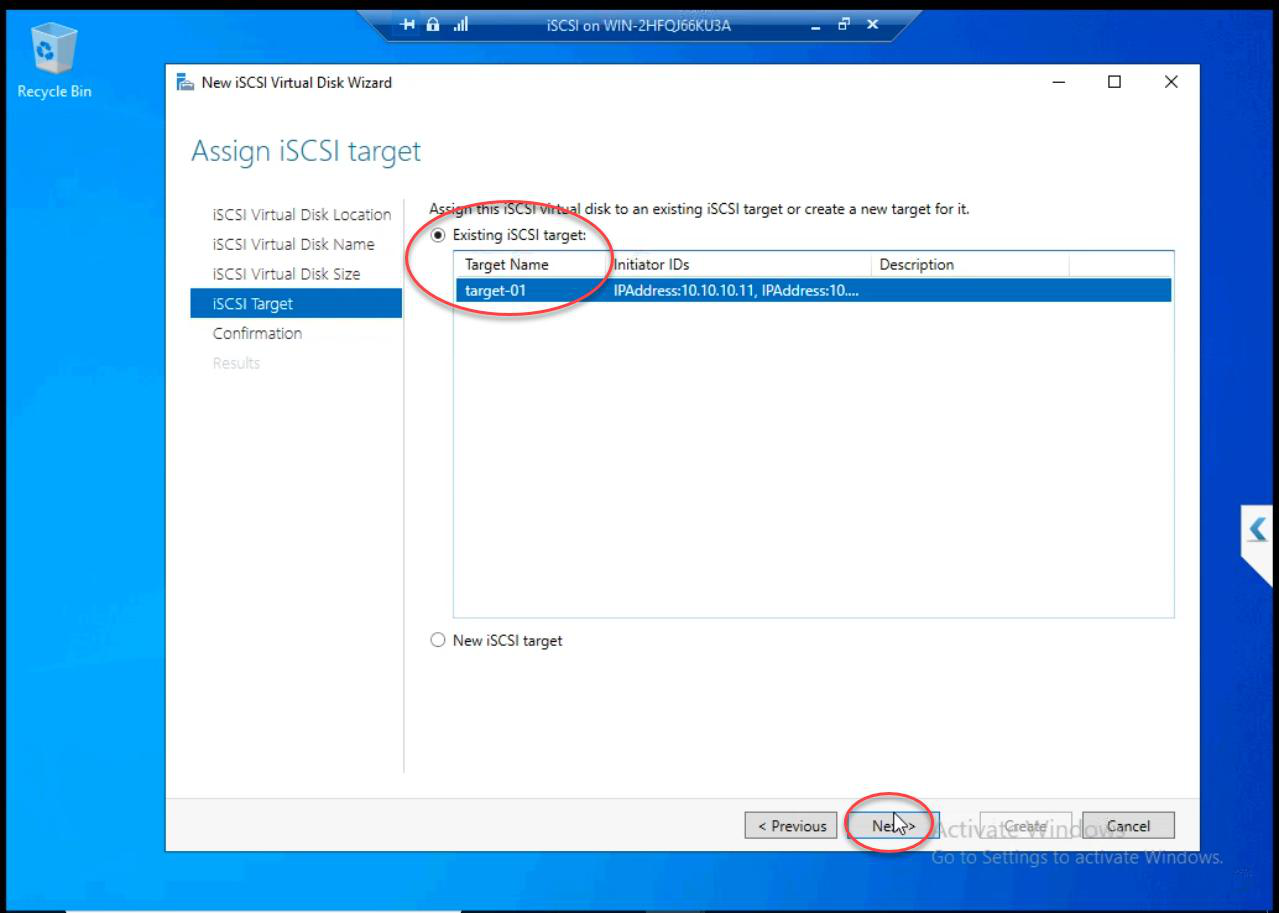
Target-01. Same target keeps related LUNs together.Existing iSCSI Target > Target-01. Same target keeps related LUNs together. The CHAP and IP-based ACL are inherited from the existing target setup — no auth changes needed.
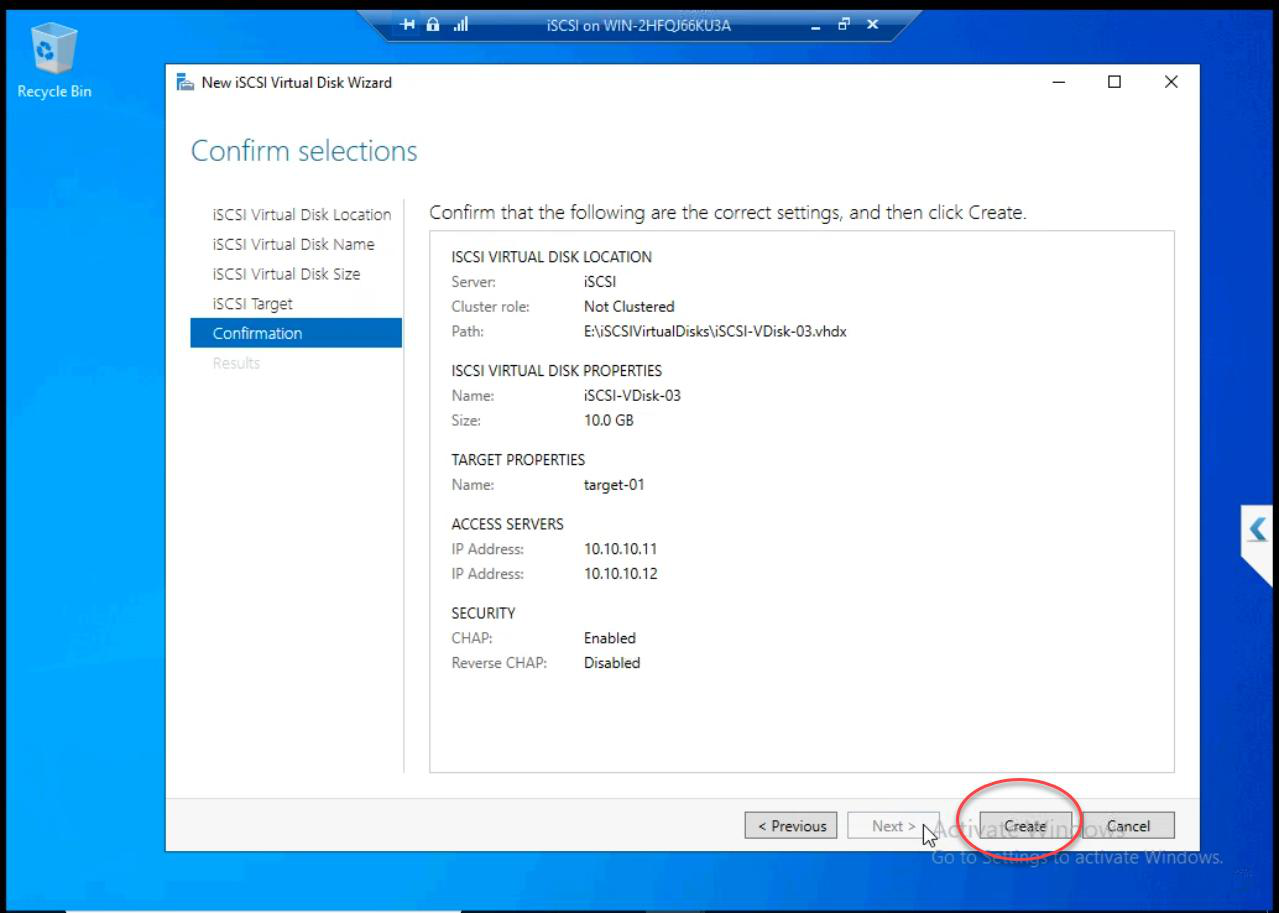
Review and Create.
Step 2 — node: bring online + format
Node-01’s iSCSI Initiator already has a session to the target. The new LUN is automatically discovered — no need to re-initiate.
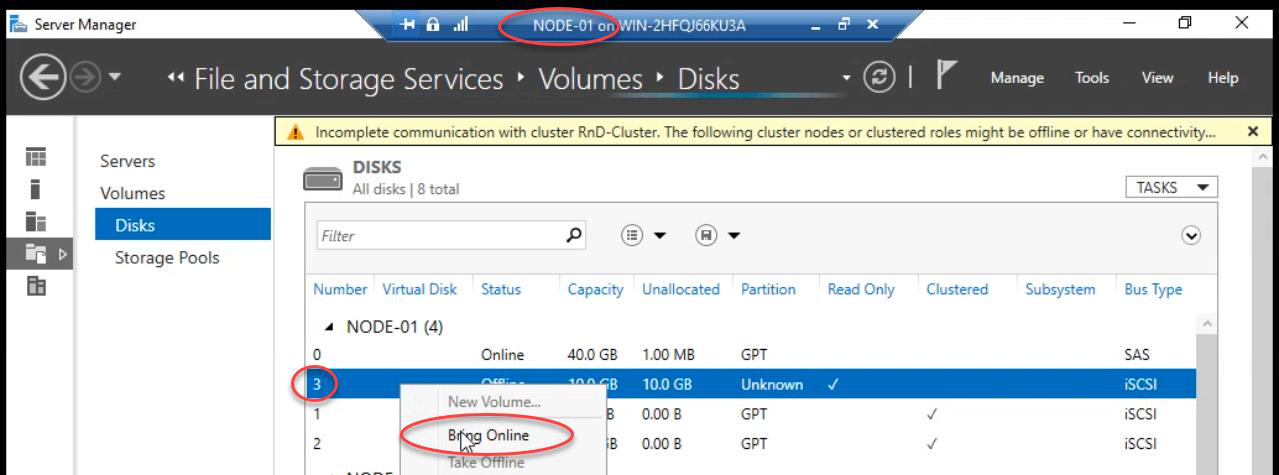
diskmgmt.msc): new disk appears Offline.Disk Management (diskmgmt.msc) on Node-01: new disk appears as Offline.
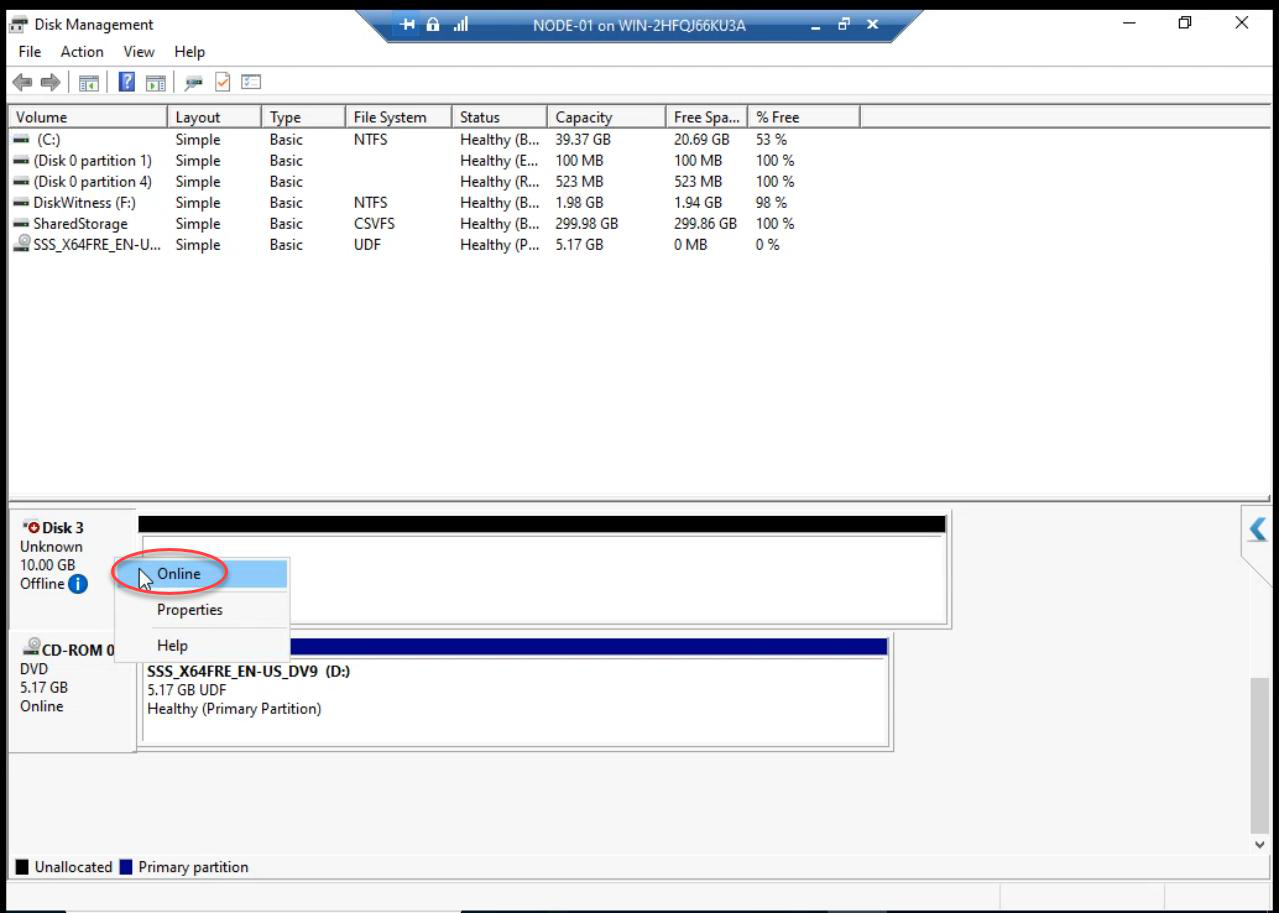
Right-click > Online. OK on any popup.
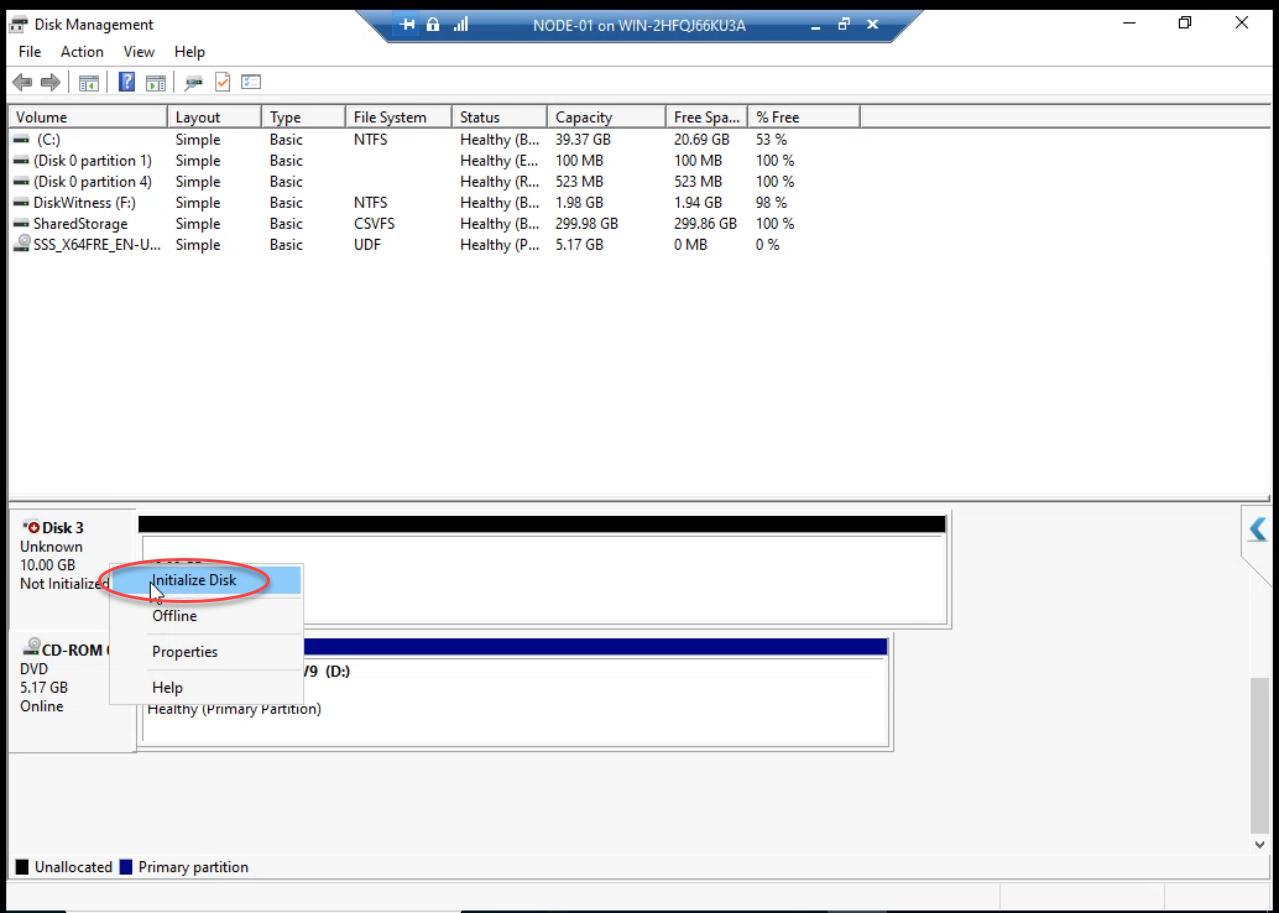
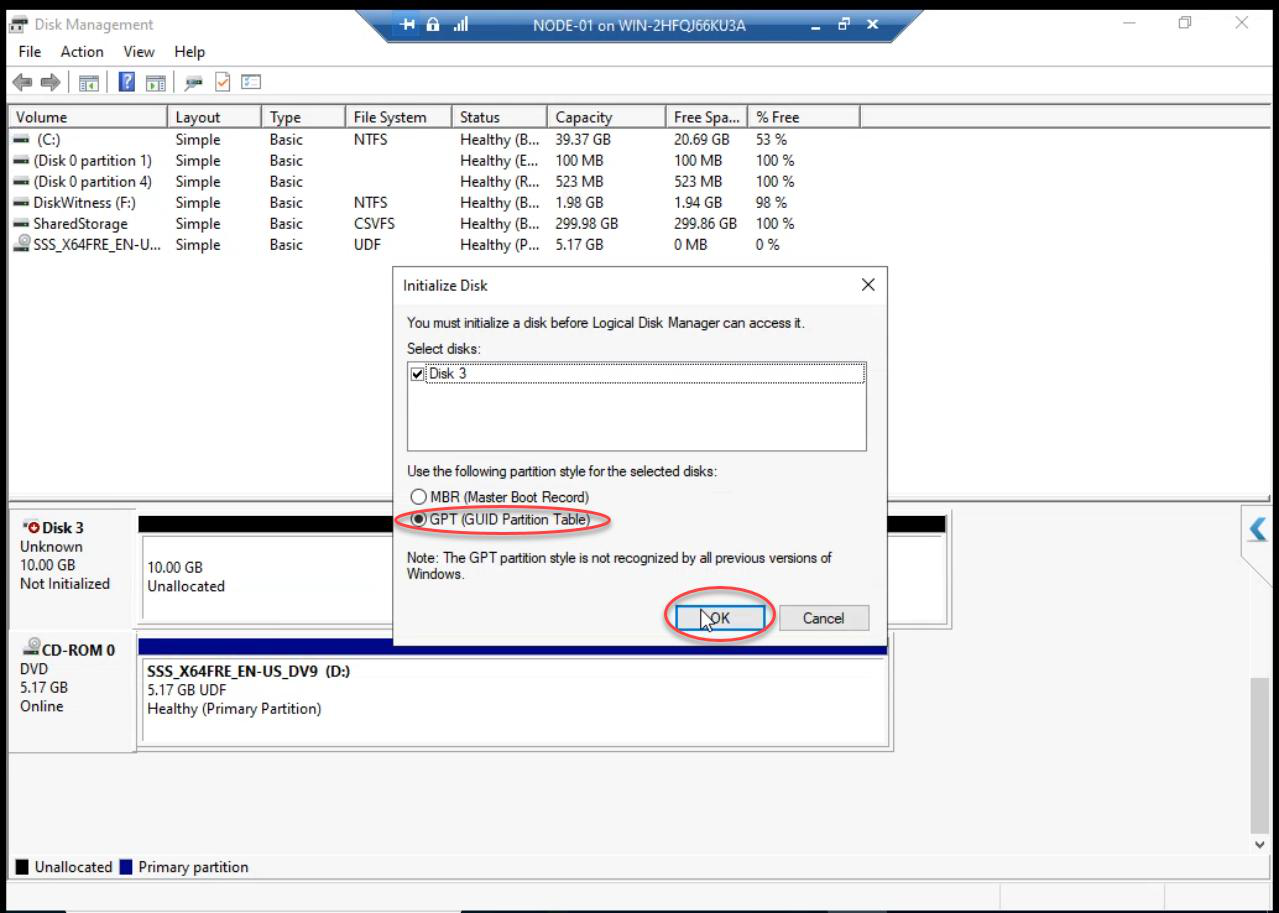
Initialize Disk dialog auto-appears. Pick GPT. (MBR works for <2 TB but GPT is the modern standard and supports up to 256 TB.)
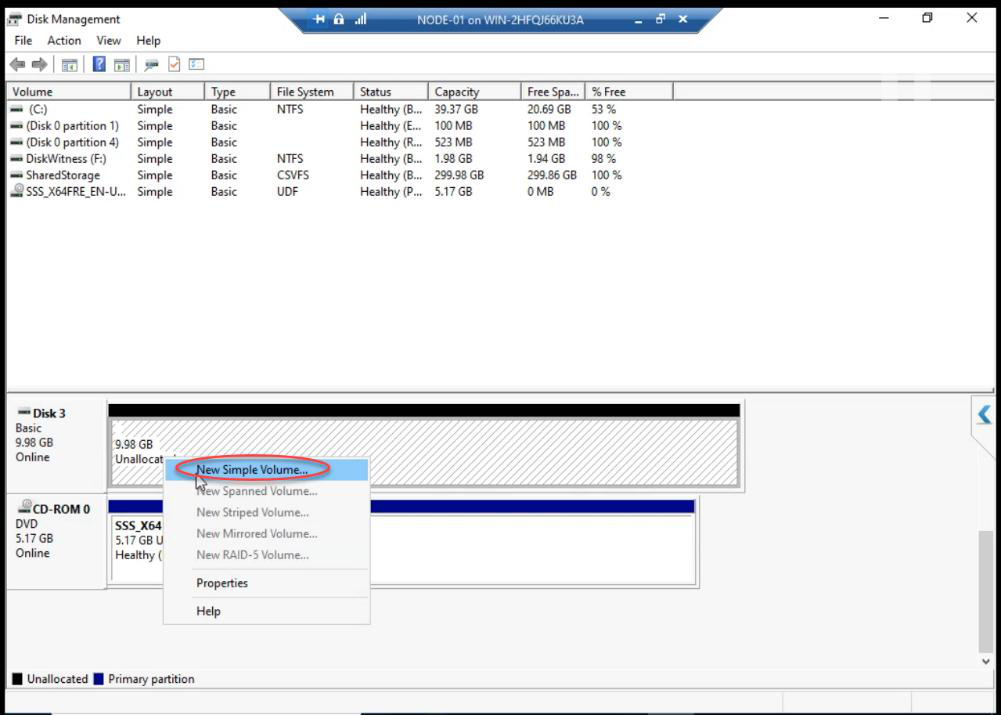
Right-click unallocated space > New Simple Volume.
iSCSI-Volume1.New Simple Volume Wizard:
- Volume Size: max (use entire disk unless partitioning)
- Drive Letter: pick a free letter (e.g.,
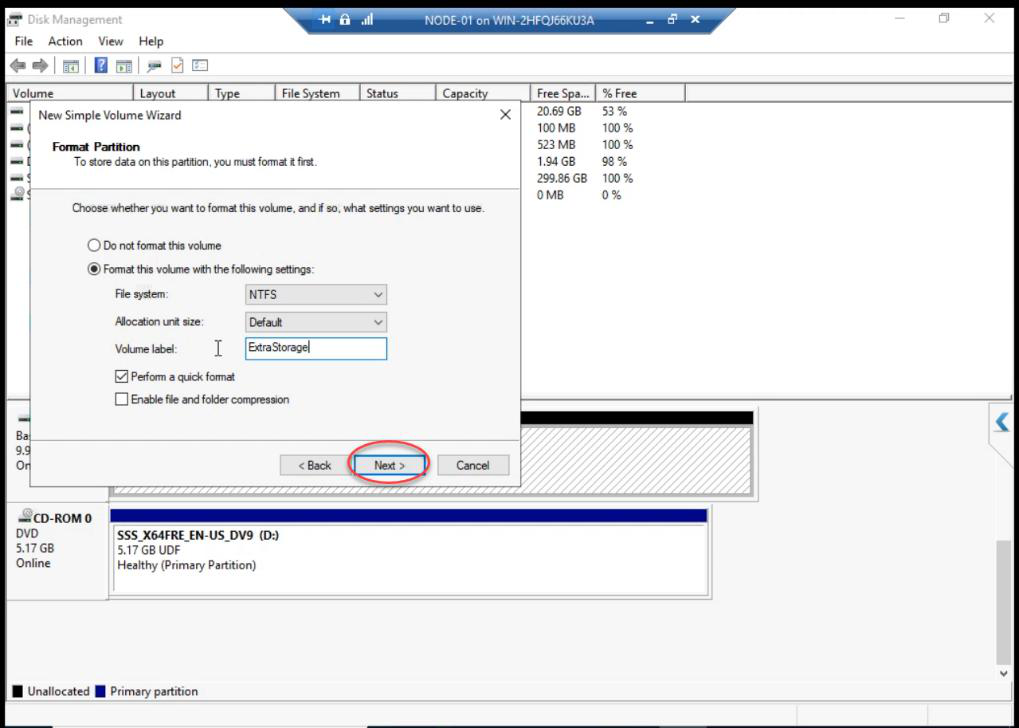
F:) - File System: NTFS, default allocation, Quick format, label
iSCSI-Volume1 - Finish

Volume formatted and online on Node-01. Don’t do this on Node-02 — same cardinal rule from Part 8.
Step 3 — cluster: Add Disk + optionally CSV

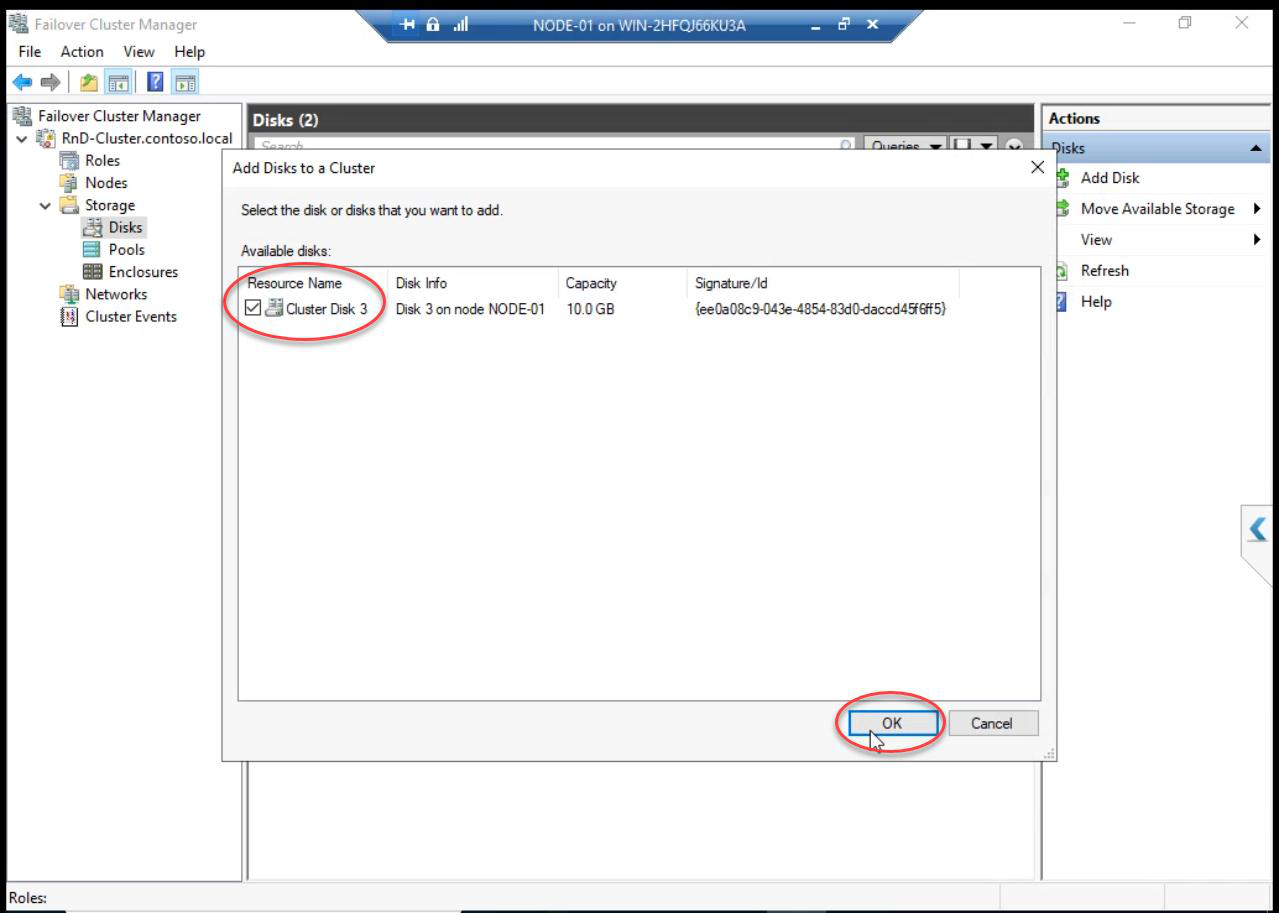
Add Disks to a Cluster dialog: the new disk appears (cluster discovers disks visible to all nodes). Tick > OK.
Cluster now owns the disk. Available for cluster-aware roles.
Optional: Add to CSV
If this disk will host highly available VMs, add it to CSV: right-click the new Cluster Disk > Add to Cluster Shared Volumes. Path becomes C:\ClusterStorage\Volume2 (next sequential).
Production storage growth: add disk vs expand LUN
Two ways to give the cluster more space:
- Add a new LUN (this part’s approach): safer, can be done with VMs running, results in another cluster disk. Application must support multiple disks.
- Expand existing LUN: real SANs (NetApp, Pure, Dell EMC) support online LUN expansion. After SAN-side expand, on Windows: Disk Management > right-click partition > Extend Volume. Risky for online workloads.
For HA VMs: add-disk approach is usually cleaner because each VM can have its own dedicated VHDX, simplifying ownership.
Things that bite people in this part
Disk doesn’t appear in Disk Management
iSCSI Initiator session might be stale. Open iSCSI Initiator > Targets tab > click Refresh. Or re-establish the session: Disconnect + Connect.
Wrong target chosen
If you create a new iSCSI Target instead of using Existing, the new disk presents to a different target. Initiator needs to log in to that new target separately. Use Existing Target unless there’s a specific reason.
Initialize on wrong node
If you accidentally bring the disk online on Node-02 first, you may corrupt the partition table. Take it offline immediately, online on Node-01, initialize there.
Forgot to add to cluster
Disk visible in Disk Management but cluster doesn’t know about it. FCM > Add Disk solves this.
CSV failed because disk not in cluster
Add Disk MUST happen before Add to CSV. Cluster needs to own the disk first.
Series complete
Fifteen parts. From bare VMs to a working two-node Hyper-V Failover Cluster with shared iSCSI storage, segregated networks, CSV for highly available VMs, explicit quorum, and a path to scale storage. You can now:
- Design Hyper-V cluster architecture (Part 1)
- Build cluster nodes and SAN VMs (Parts 2-5)
- Configure cluster networking (Part 6)
- Set up iSCSI shared storage (Parts 7-8)
- Install and create the cluster (Parts 9-10)
- Configure quorum (Part 11)
- Add CSV and install Hyper-V on nodes (Part 12)
- Deploy highly available VMs (Part 13)
- Test failover and grow storage (Parts 14-15)
Thanks for following along. Apply the techniques. Build it in your own lab. Patch it, break it, fail it over — the fastest way to learn clustering is to actually run a cluster. Full series at Hyper-V Failover Clustering pathway.