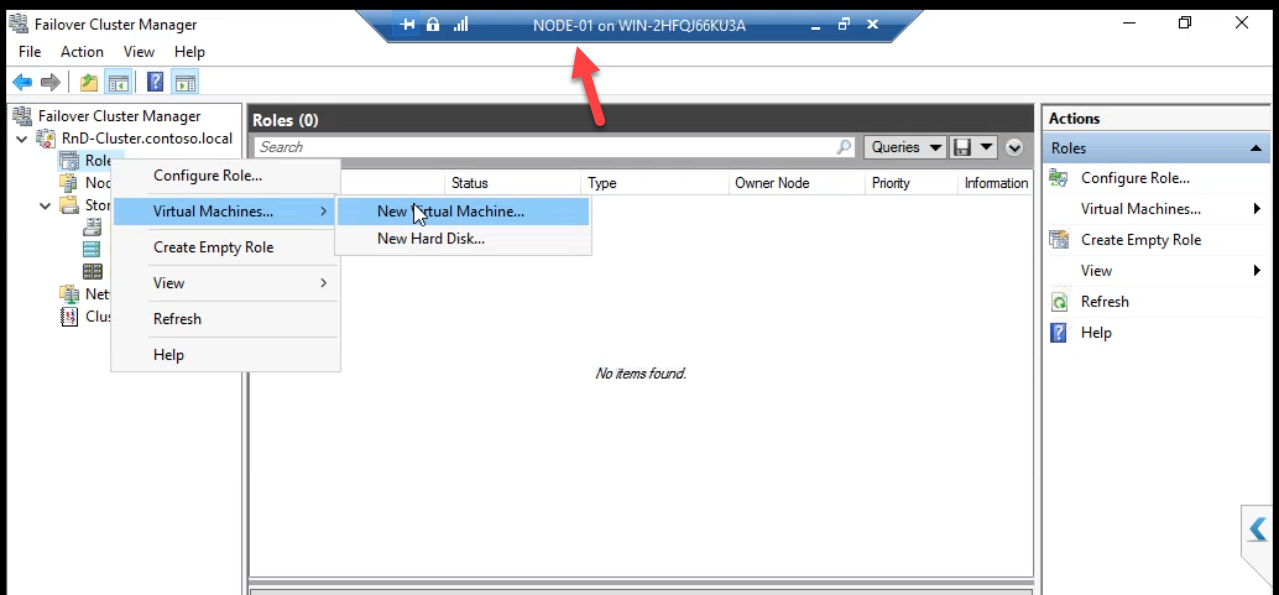
Cluster is fully prepared. Now we create the first highly available VM — one that can failover between NODE-01 and NODE-02. The single most important detail: create the VM via Failover Cluster Manager, not Hyper-V Manager. FCM-created VMs are cluster roles from the start; Hyper-V-Manager-created VMs are bound to one host and require an extra step to make HA.
Step 1 — launch New Virtual Machine via FCM
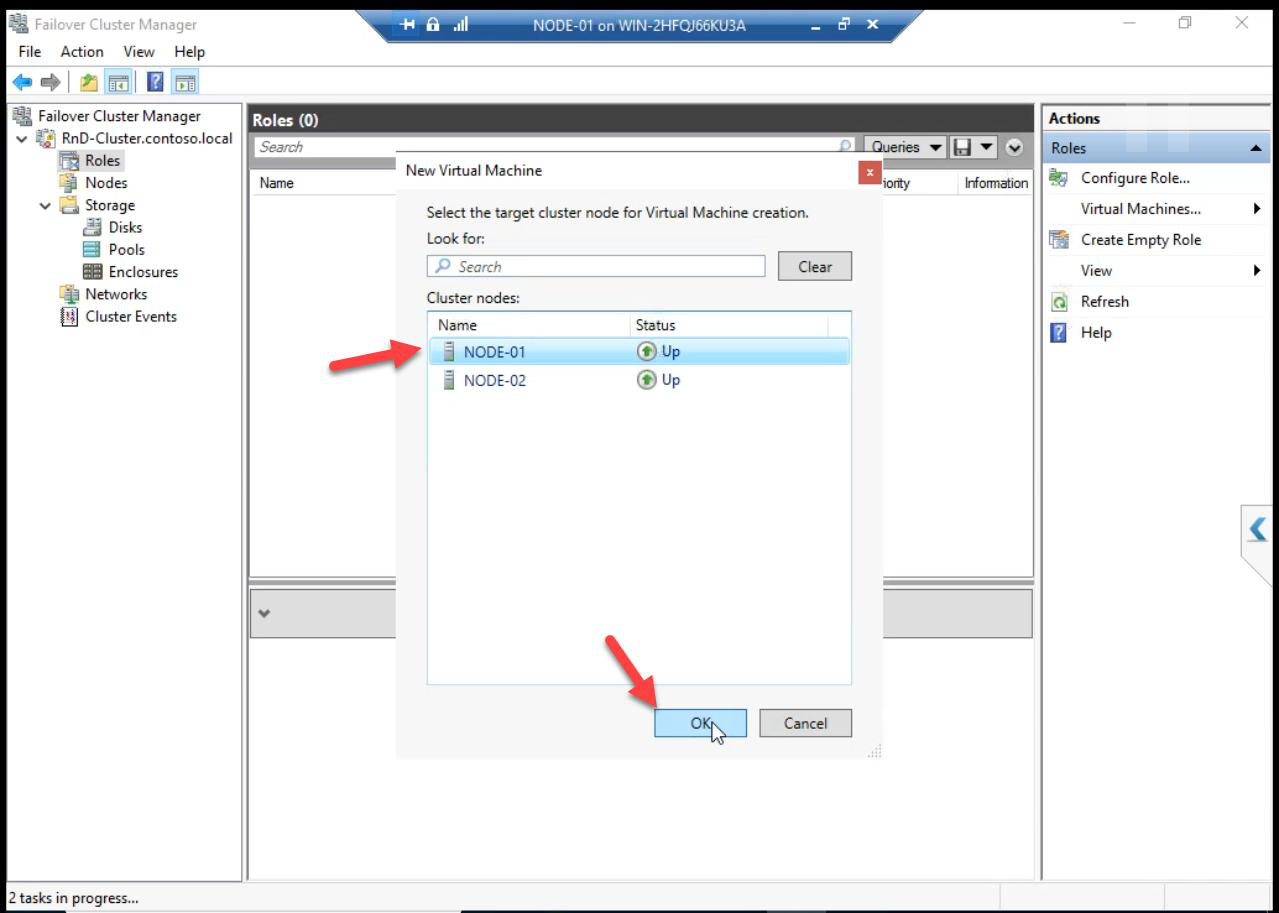
Target Node: NODE-01. The VM will live on this node initially; cluster handles failover later.

Wizard.
Step 2 — specify name and location (THE CRITICAL STEP)
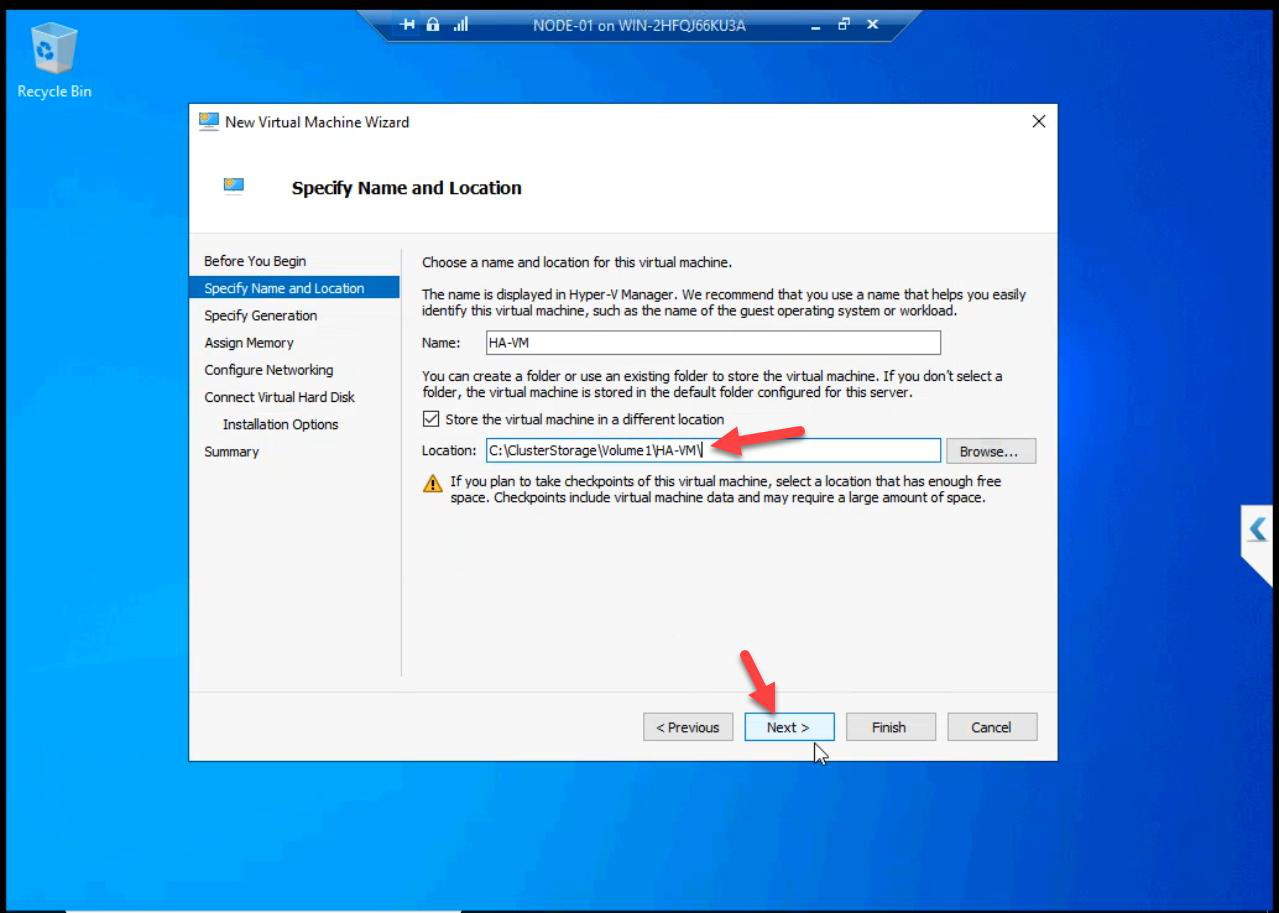
C:\ClusterStorage\Volume1\. Critical: if the VHDX is on a non-CSV path (local C: of a node), the VM CAN’T failover.VM name: anything meaningful. Location: C:\ClusterStorage\Volume1\ — the CSV path.
Why this matters: if the VHDX file ends up on a node’s local C: drive, only that node can read it. Failover to the other node fails because the VHDX file doesn’t exist there. CSV makes the file visible to all nodes simultaneously — the cornerstone of VM HA.
Step 3 — spec the VM
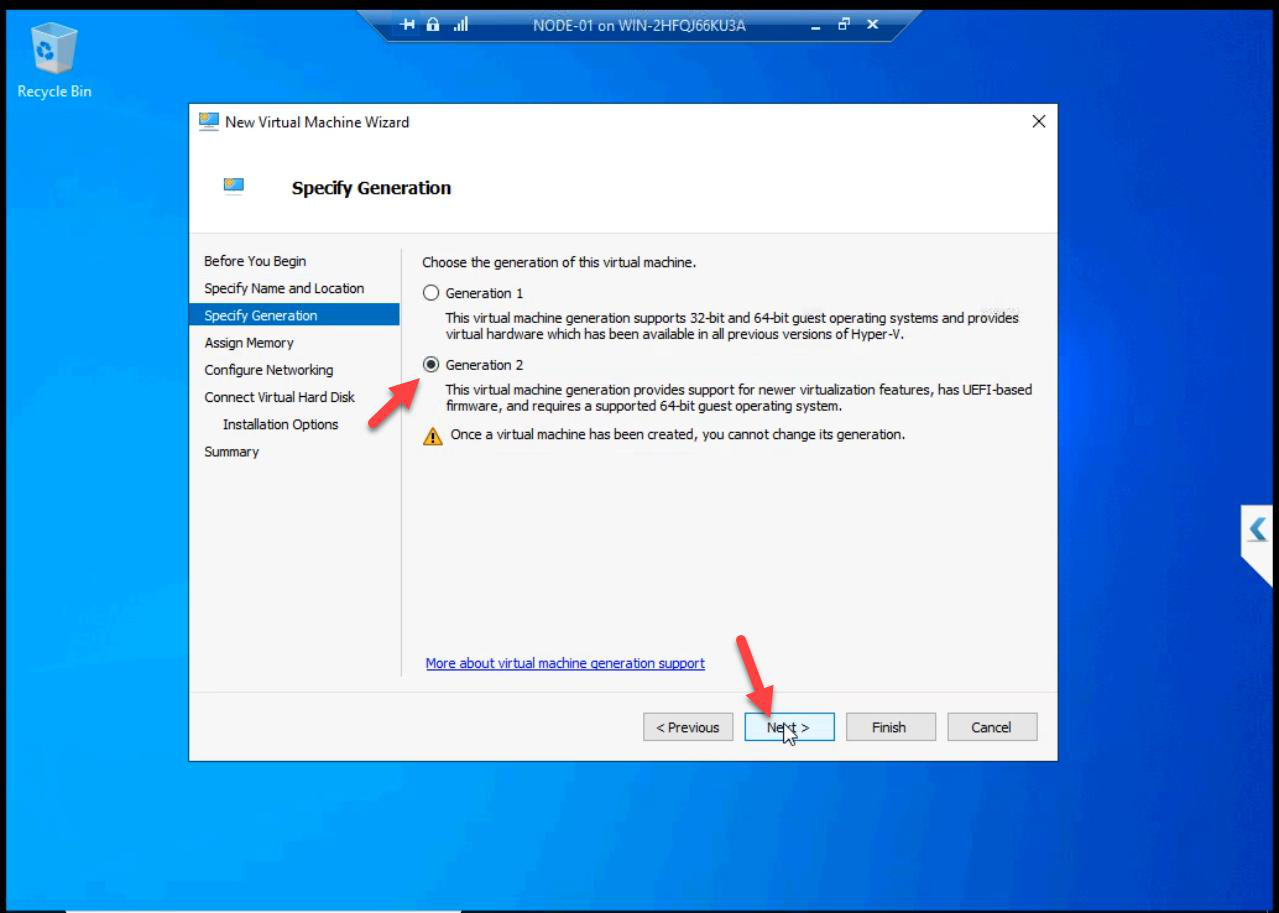
Generation 2. UEFI boot, modern firmware.
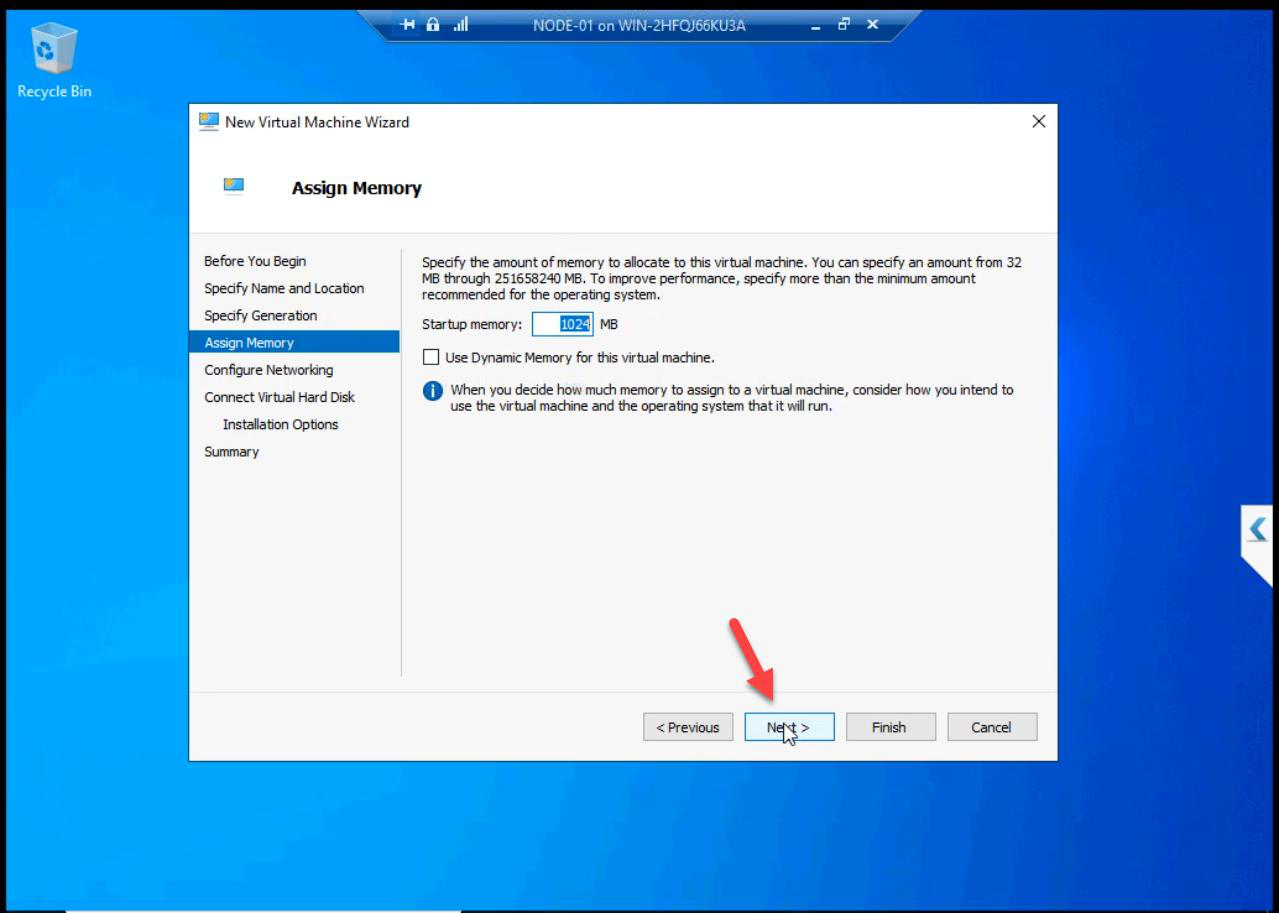
Memory: default for lab demo (this VM doesn’t run a real workload). Production: size for the actual application.

Network: skip for the demo. Production: pick the External vSwitch. Demo VM doesn’t need to talk to anything.
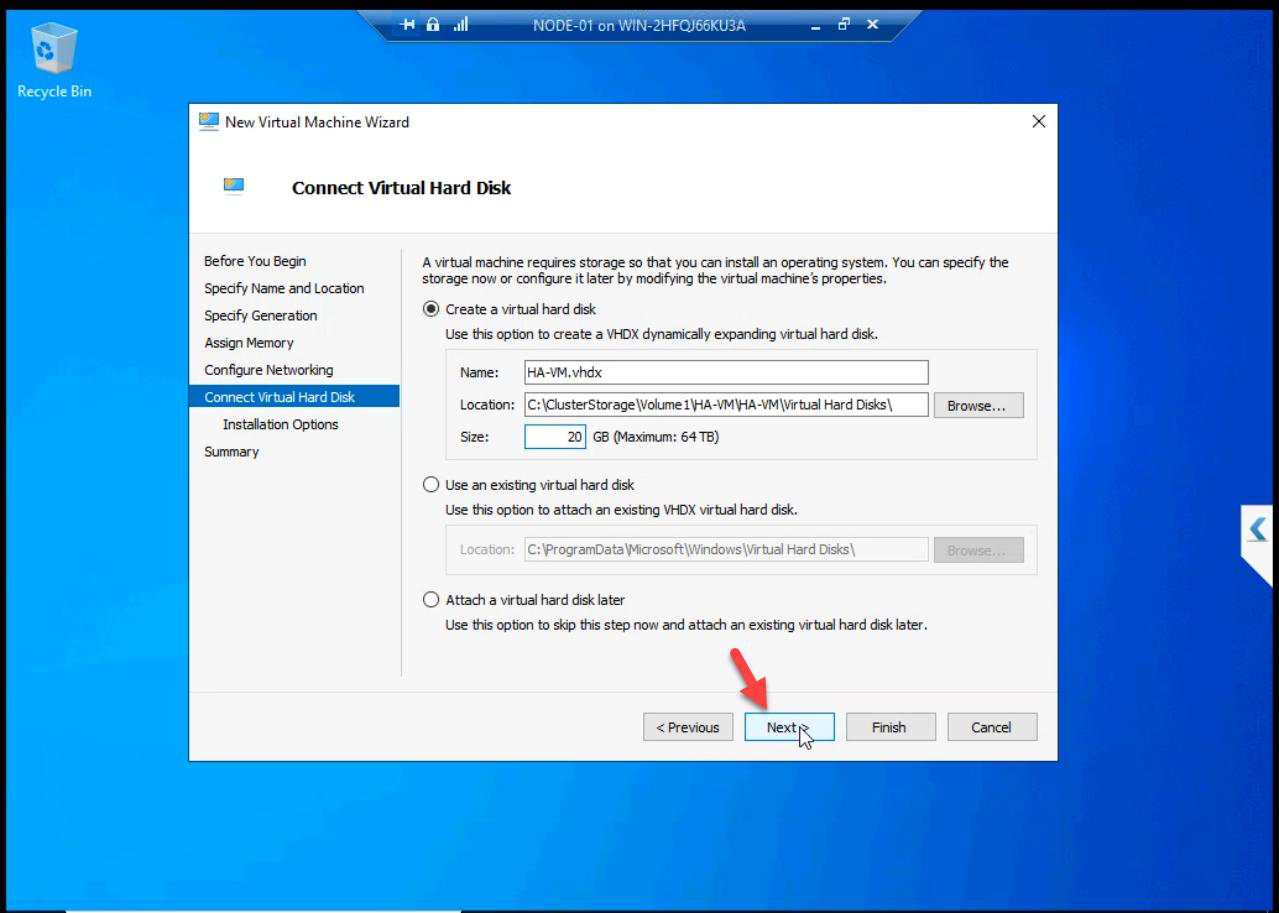
VHD size: any (lab demo). Production: size for OS + application.
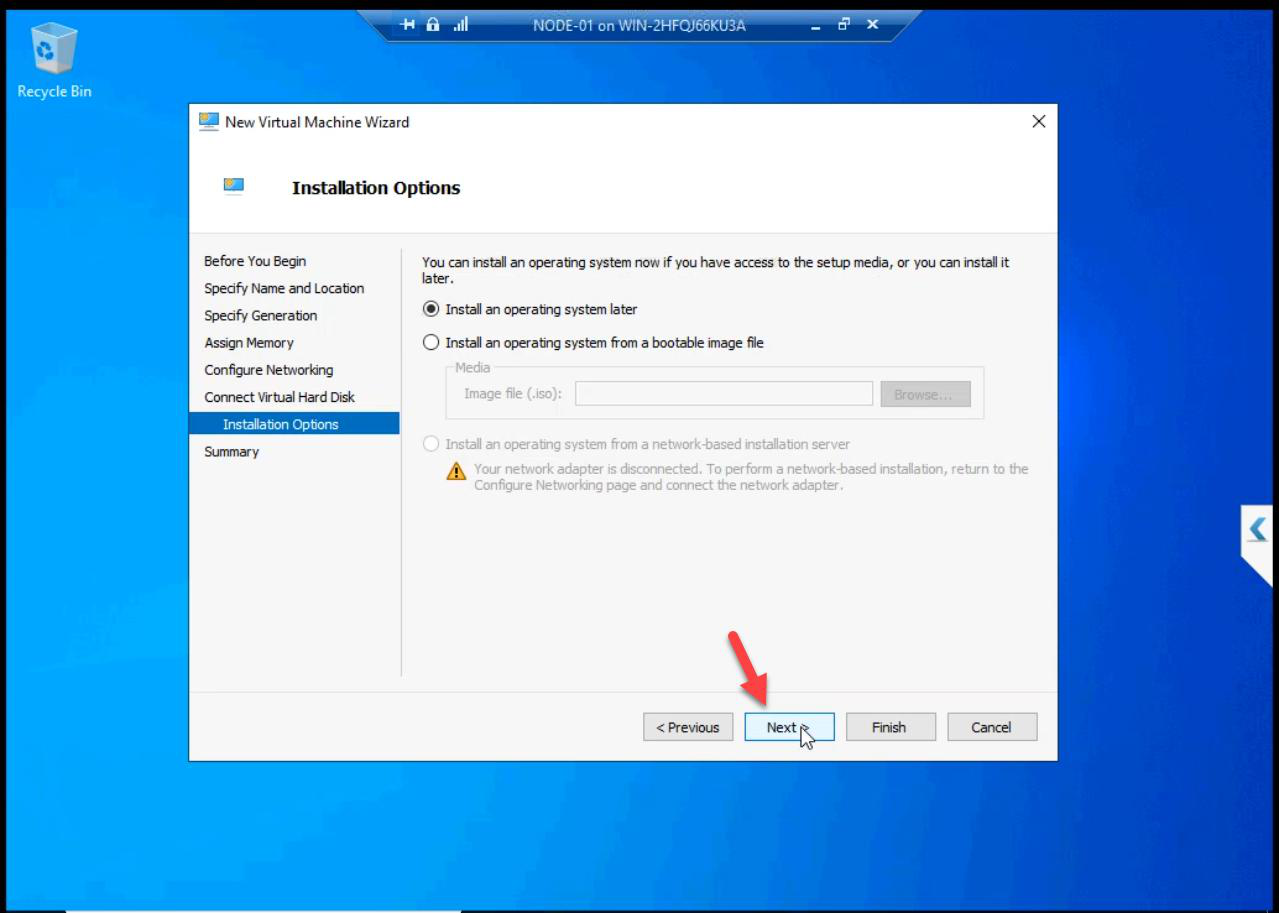
OS install: skip. Demo VM verifies HA mechanism, no OS needed.
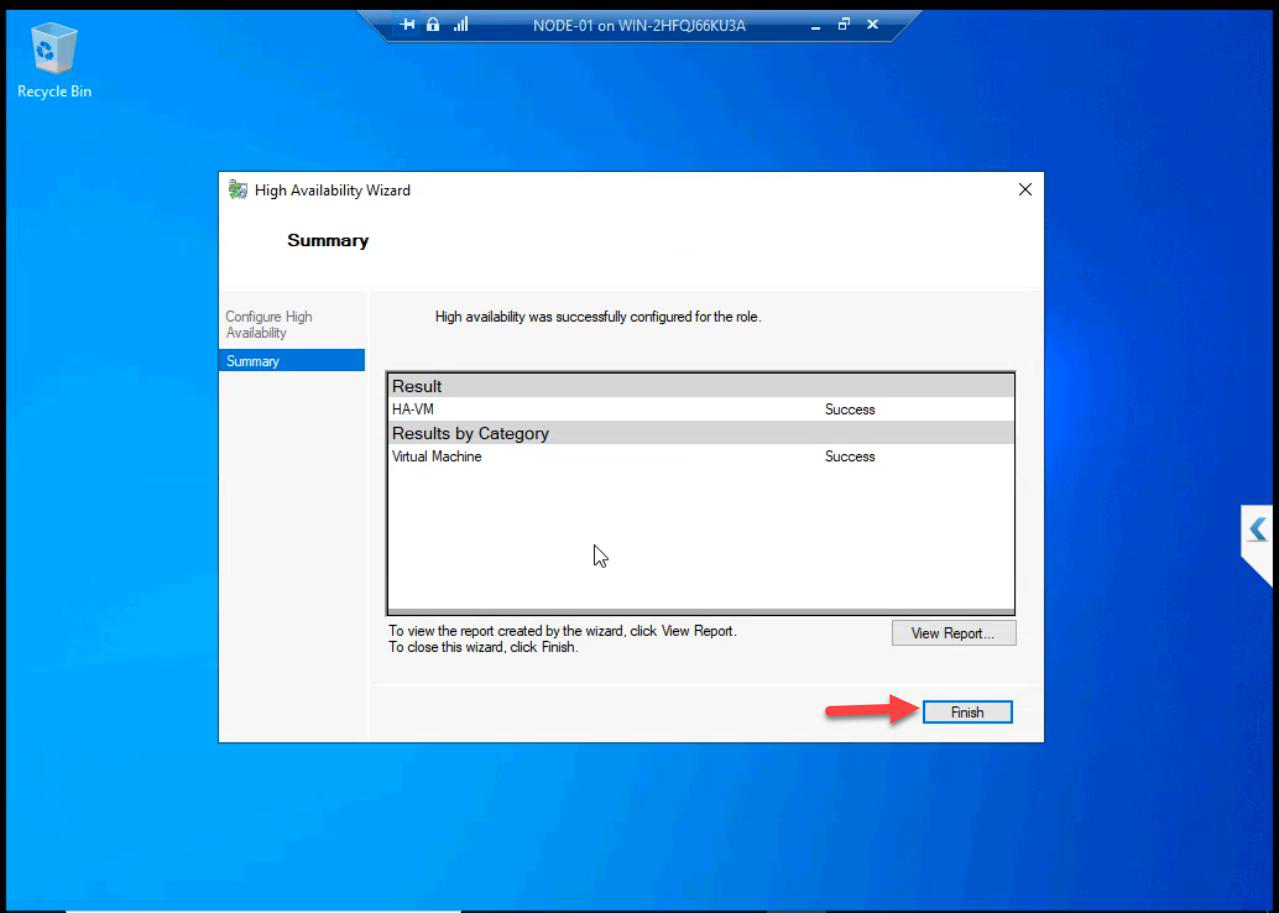
Step 4 — finish + High Availability Wizard auto-runs
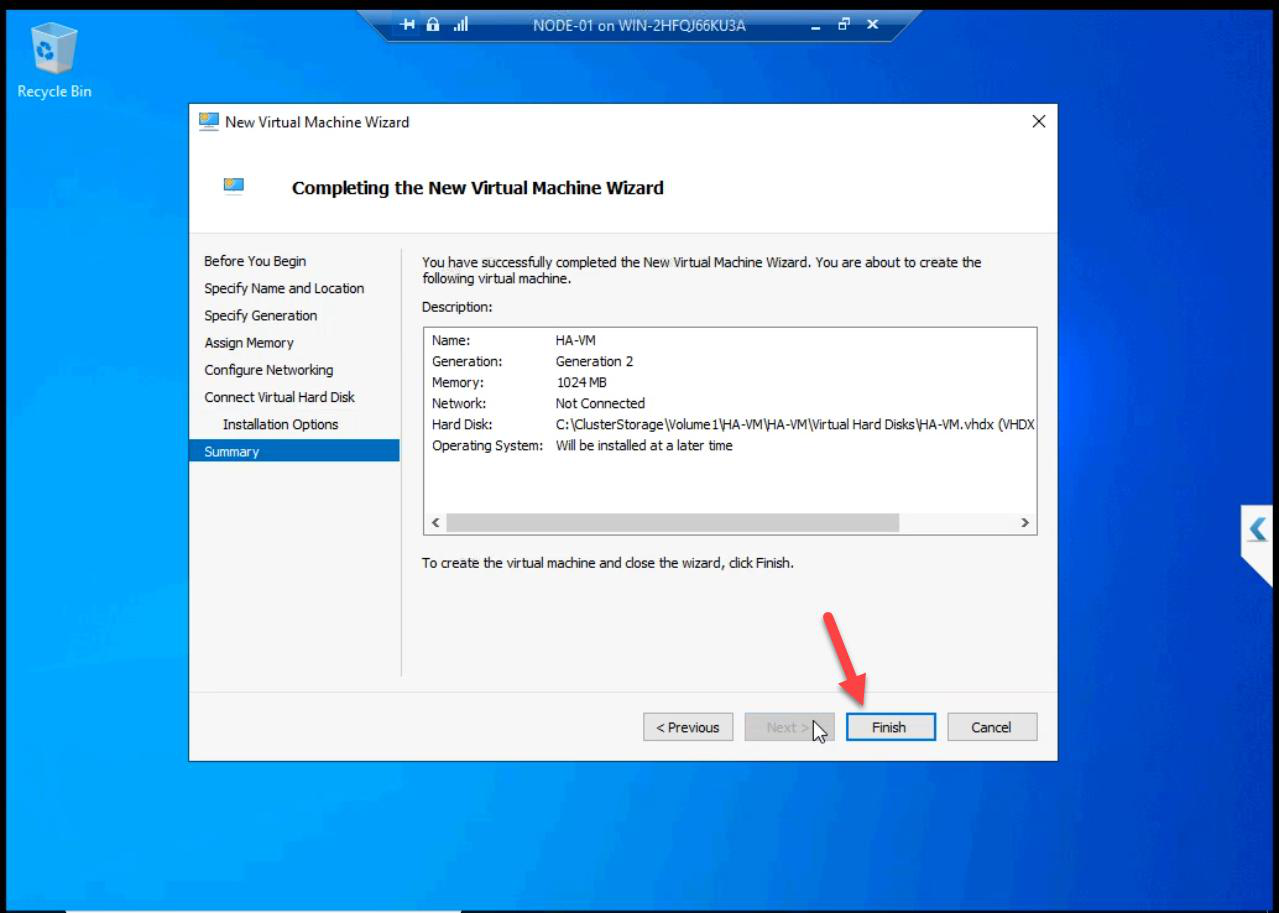
Click Finish. The VM creation completes — then the High Availability Wizard pops up automatically. Click Finish there too. This is the registration step that makes the VM a cluster role.
Behind the scenes:
- VHDX file created on CSV:
C:\ClusterStorage\Volume1\<VMName>\<VMName>.vhdx - VM XML config in
C:\ClusterStorage\Volume1\<VMName>\Virtual Machines\ - Cluster role created: type Virtual Machine, owner Node-01, dependencies on the CSV
- Live Migration enabled by default
Step 5 — start the VM
FCM > Roles. VM listed. Status: Off. Right-click > Start.
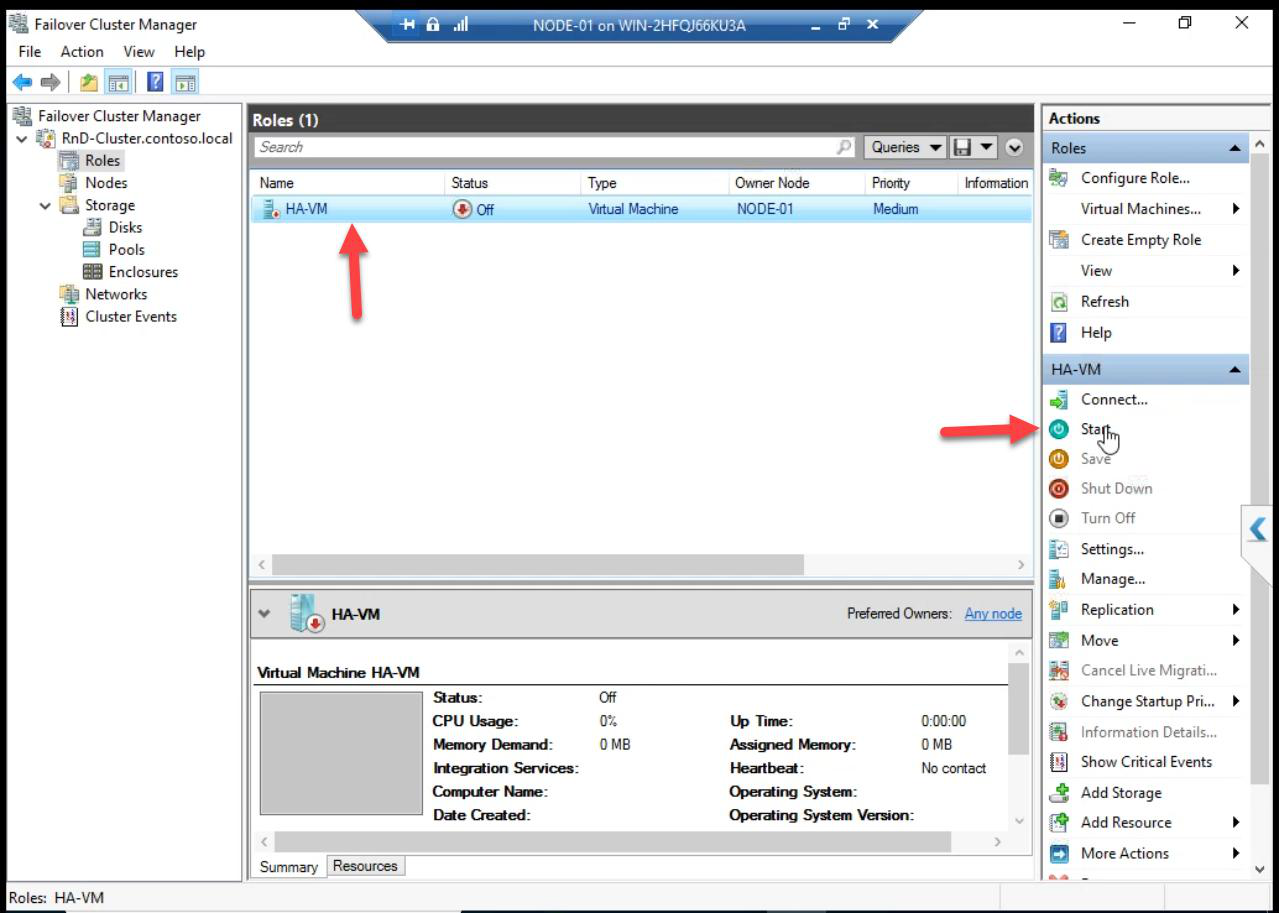
Running. Owner: NODE-01. HA VM alive.
Test failover (Live Migration)
Right-click the VM in FCM > Move > Live Migration > Select Node > NODE-02 > OK.
The VM moves to NODE-02 with zero downtime — no reboot, no state loss, ongoing connections preserved. (For demo VMs without an OS, you won’t see the live aspect — install Windows in the VM if you want to demonstrate it properly.)
FCM-created vs Hyper-V Manager-created — what’s the difference?
| Aspect | FCM-created VM | Hyper-V Mgr-created VM |
|---|---|---|
| Cluster role | Auto-registered | Standalone — needs explicit Configure Role |
| Failover-aware | Yes from start | No until configured |
| Storage hint | Wizard suggests CSV | Wizard suggests local C: |
| Use for | Production HA VMs | Standalone test VMs |
If you accidentally created a VM in Hyper-V Manager and want to make it HA: FCM > Configure Role > Virtual Machine > pick the VM. Cluster registers it as a role. (VHDX must already be on CSV.)
Things that bite people in this part
VHDX on local disk instead of CSV
The most common failure. VM lives on Node-01’s local C: instead of CSV. Failover to Node-02 fails because the VHDX file doesn’t exist on Node-02. Fix: storage migration via FCM > right-click VM > Move > Virtual Machine Storage > pick CSV destination.
Created via Hyper-V Manager by accident
VM works but isn’t a cluster role. To convert: FCM > Configure Role > Virtual Machine. (VHDX must be on CSV first.)
Memory too low for actual workload
Default lab memory is fine for demo. Production VM running SQL Server with 4 GB will OOM constantly. Size memory for the workload.
Network forgotten
If the production VM has no network adapter, clients can’t reach it. Add a network adapter at create time or via Settings later.
What’s next
Part 14 (the missing DOCX) covers Test Failover — demonstrating that the cluster reacts correctly when a node dies. Part 15 covers expanding cluster storage. See the full series at Hyper-V Failover Clustering pathway.