Two ways to assign Microsoft Entra admin roles to a user. Method 1 is role-first — pick a role, add users to it. Method 2 is user-first — pick a user, add roles to them. Both end up in the same place. Both should default to Eligible assignments, not Active.
Prerequisites
Sign in to entra.microsoft.com as Global Administrator or Privileged Role Administrator. Anyone less can’t assign roles.
Method 1 — Roles & Admins menu (role-first)
Use when you know which role you want to assign and want to add one or more users to it.

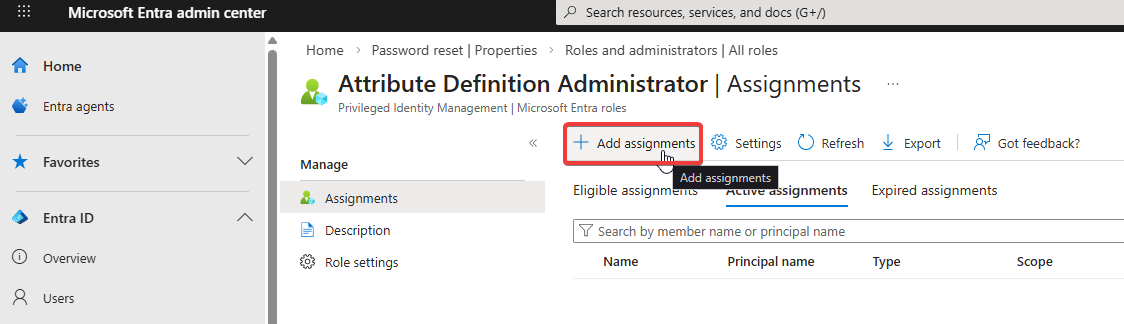
+ Add assignments.
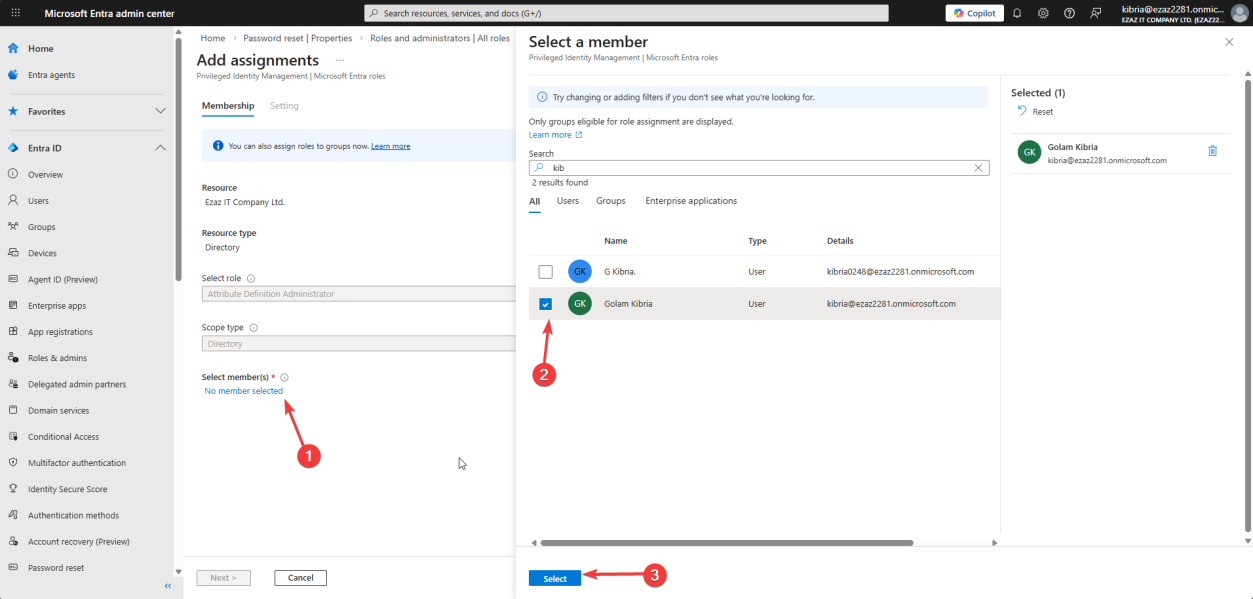
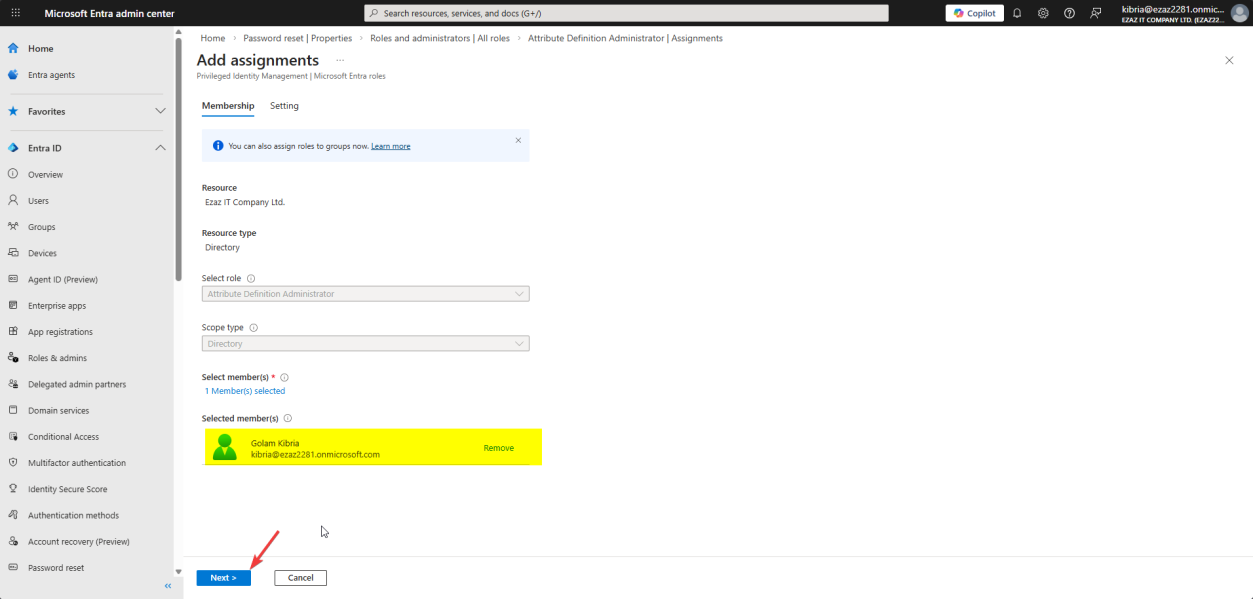
Membership tab > No member selected. Search for and pick the user (jdoe in this demo). Select > Next.
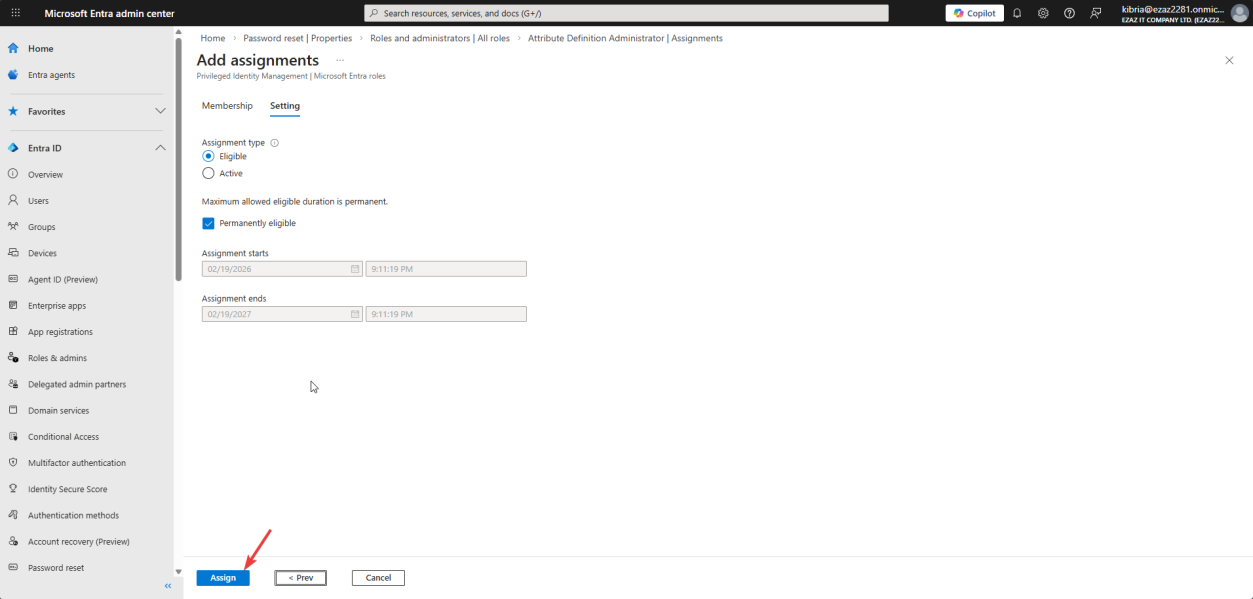
Settings tab. Default values: Eligible assignment type + Permanently eligible. Click Assign.
Method 2 — from user profile (user-first)
Use when you’re already looking at a user and want to give them a role.
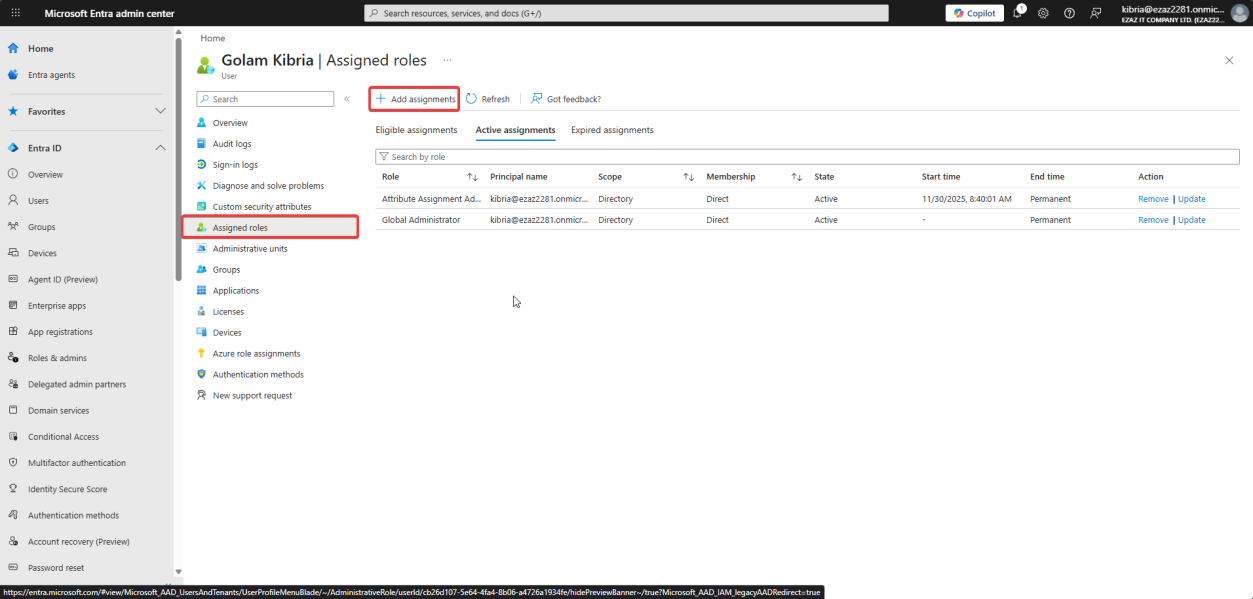

Tick role(s) > Next.
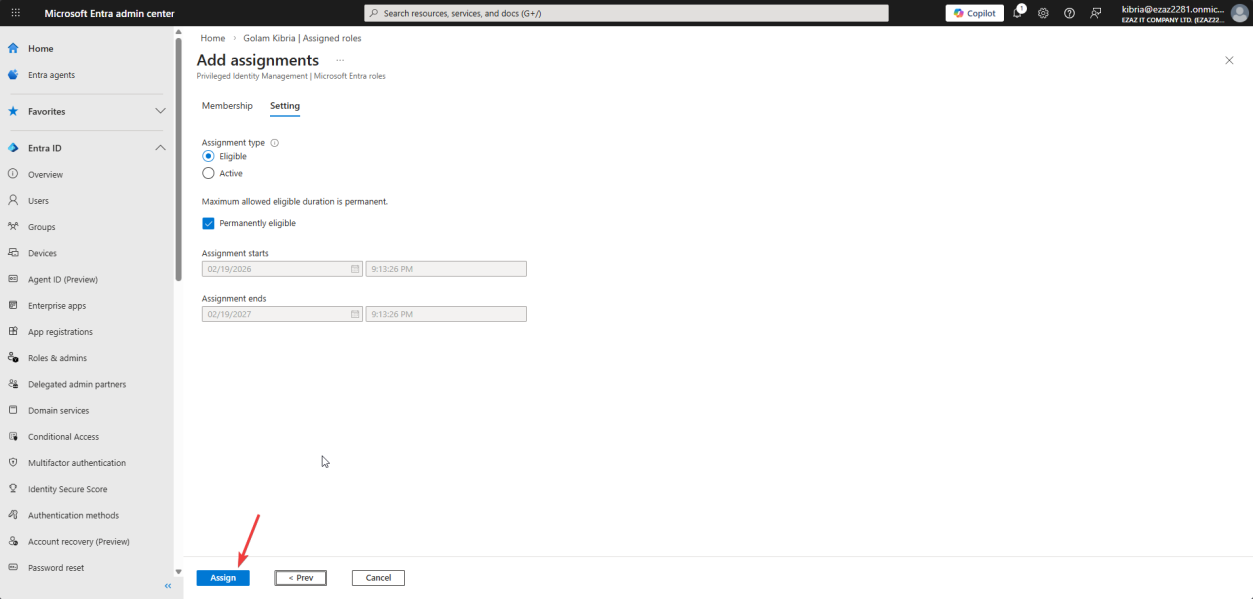
Same Settings: Eligible + Permanently eligible > Assign.
Eligible vs Active — the load-bearing choice
| Eligible (recommended) | Active | |
|---|---|---|
| Permissions | User must activate the role each time | Permissions are on 24/7 |
| Activation | Via Privileged Identity Management (PIM); may require MFA + reason | None — just sign in |
| Audit trail | Strong — every activation logged with reason | Weak — only role assignment is logged |
| Risk if account compromised | Limited — attacker has no admin access without activation | Full admin instantly |
Always Eligible unless you have a specific reason. The activation friction is small (one extra click + reason); the security benefit is large (compromised account doesn’t equal compromised admin).
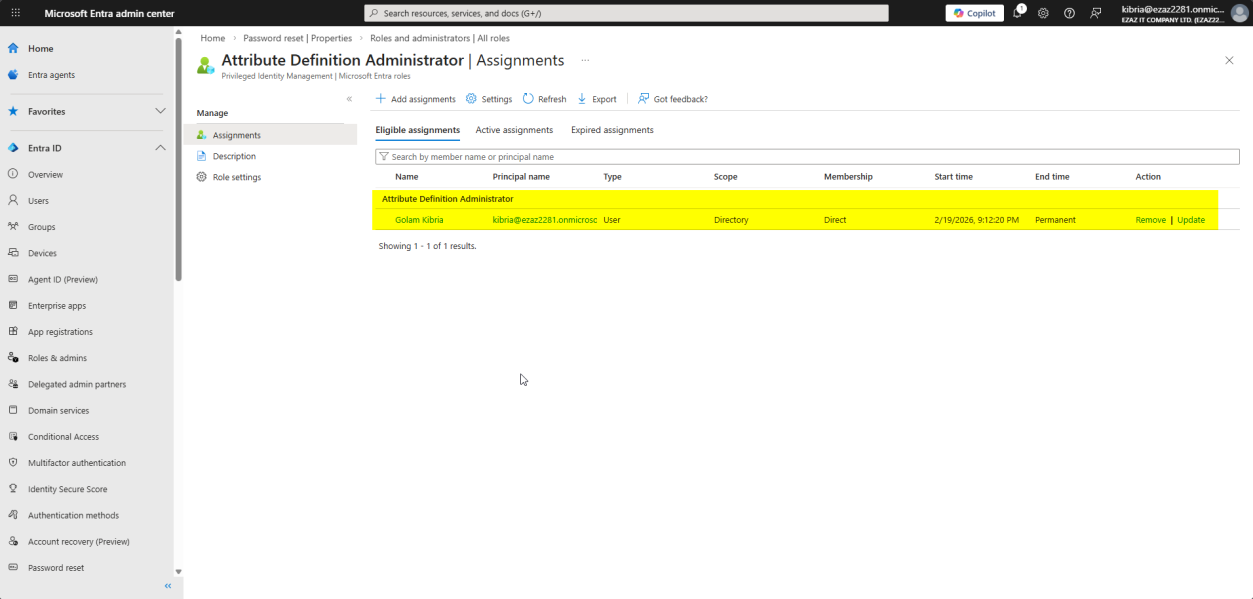
Verify the assignment
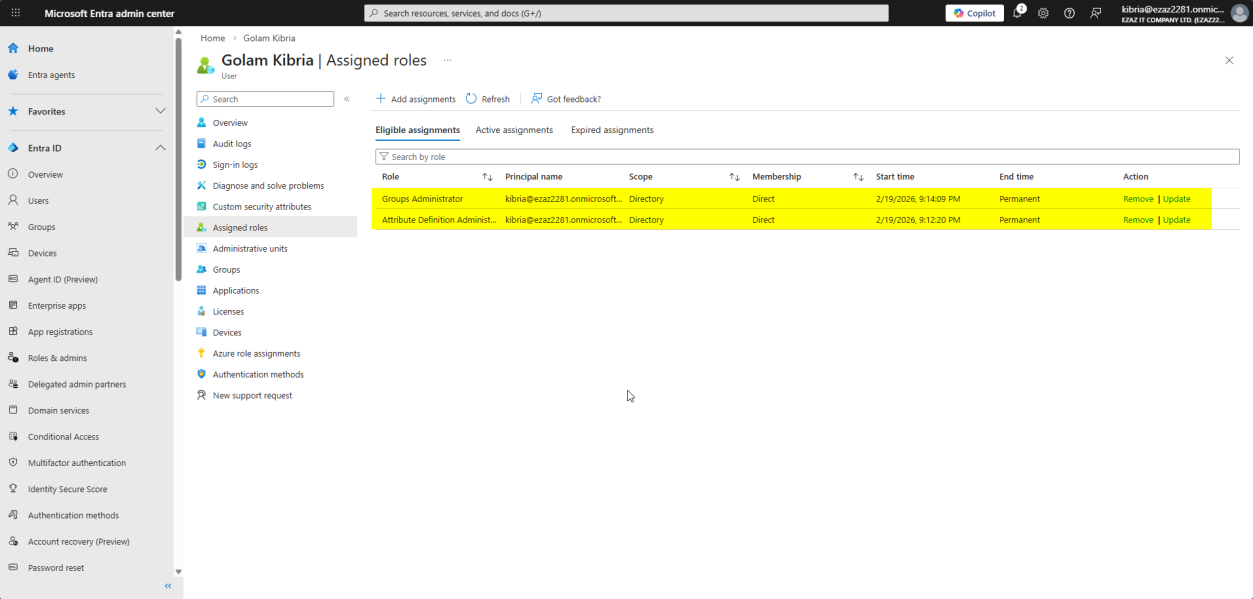
Users > All users > jdoe > Assigned roles. Both roles from Method 1 and Method 2 appear here. This page is the single source of truth for an account’s admin scope.
Things that bite people
Assigning Global Admin instead of a specific role
Most common security regression in Entra. Don’t. There are 100+ built-in admin roles — pick the most specific one (User Administrator, Helpdesk Administrator, Application Administrator, etc.). Global Admin should be reserved for genuine emergencies and break-glass accounts.
Active assignments by accident
If you’re used to clicking through wizards quickly, you might leave the default at Active. Always verify Eligible is selected.
Forgetting to remove roles when people leave
The Assigned roles page is also where you remove. Add a quarterly review — for each user, check assigned roles, remove anything they no longer need.
Permanently eligible vs time-bound
Permanently eligible means the user can activate the role indefinitely. For high-risk roles (Global Admin, Privileged Role Administrator), set a time-bound assignment instead so the eligibility itself expires.
What’s next
Other posts in the Entra ID Security pathway cover MFA enforcement, Conditional Access, PIM workflow, device management, and more.