Microsoft’s number-one recommended baseline Conditional Access policy is require MFA for any administrator. The premise is simple: admin accounts have the keys to the kingdom — if an attacker phishes a Global Admin password and there’s no MFA wall, your tenant is compromised. This guide builds the policy targeting the Security Administrator role as a worked example, but the same shape applies to every admin role you have.
Why target the role instead of the user? Because the role is the privileged surface, not the person. If you target individual users, you have to update the policy every time someone is added or removed from an admin role. If you target the role, the policy auto-applies to anyone in that role — permanently, today, and for every admin you onboard in the future.
Four phases: prep a test user, build the policy, test the user-facing experience, verify the audit trail.
Phase 1 — prep

conaccess@ezaz2281.onmicrosoft.com.Create a test user (conaccess@yourtenant.onmicrosoft.com). Doesn’t matter what name — this is just for testing the policy.

Assign the Security Administrator directory role to the test user during creation (or right after). This is the role the policy will protect.
Phase 2 — build the Conditional Access policy
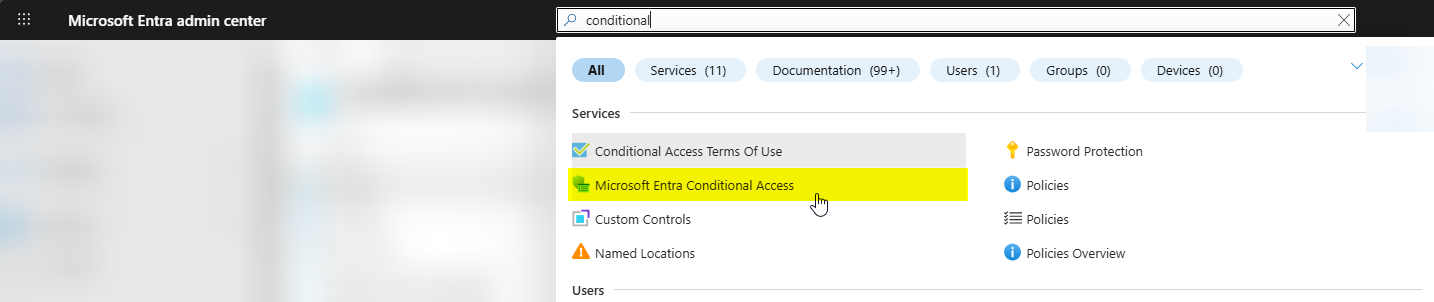
Top search bar > Conditional Access > click the matching service.
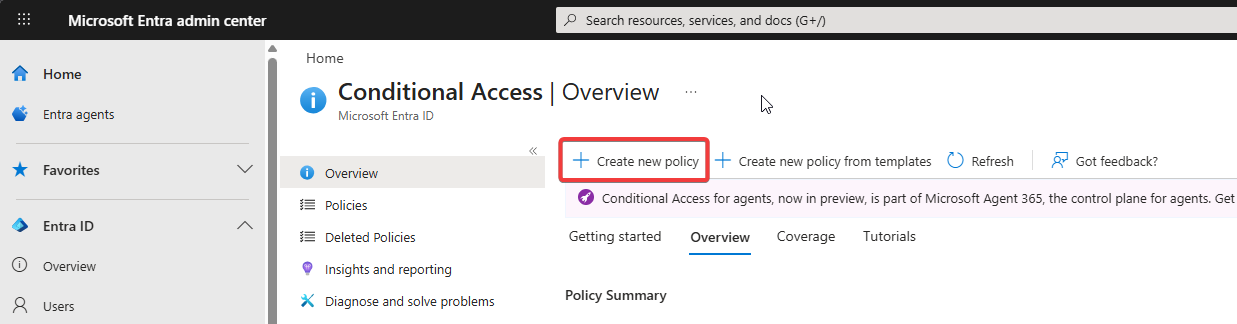
Click + Create new policy.
Name it something self-documenting: “Require MFA for Security Administrators” or just “For security admin roles”. Future-you reading the dashboard will thank you.
Users — target the role, not the people
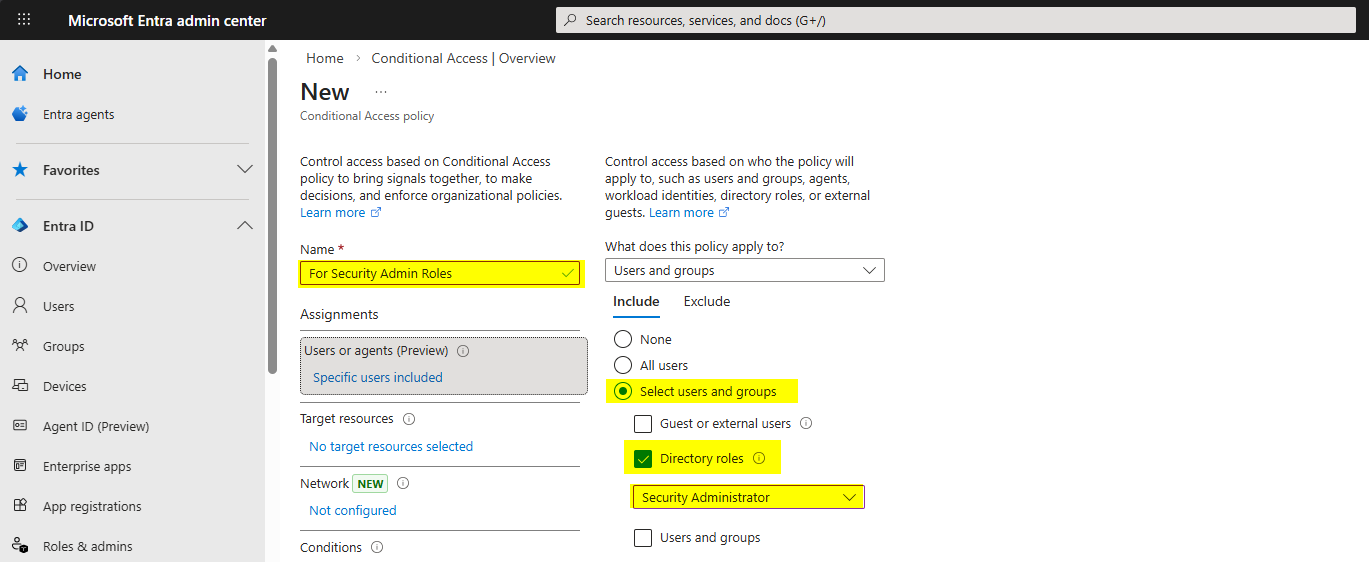
Users > click 0 users and groups selected > Include tab > Select users and groups > tick Directory roles > pick Security Administrator from the dropdown.
Critical: also configure the Exclude tab. Always exclude at least one break-glass / emergency-access account from every CA policy that affects admin roles. If your CA policy goes wrong (typo, MFA service outage, expired certificate), the break-glass account is the only thing standing between you and a full lockout. Don’t use this account day-to-day — just keep it on a printed sticky-note in a safe with a 30-character random password and audit it monthly.
Target resources — All cloud apps
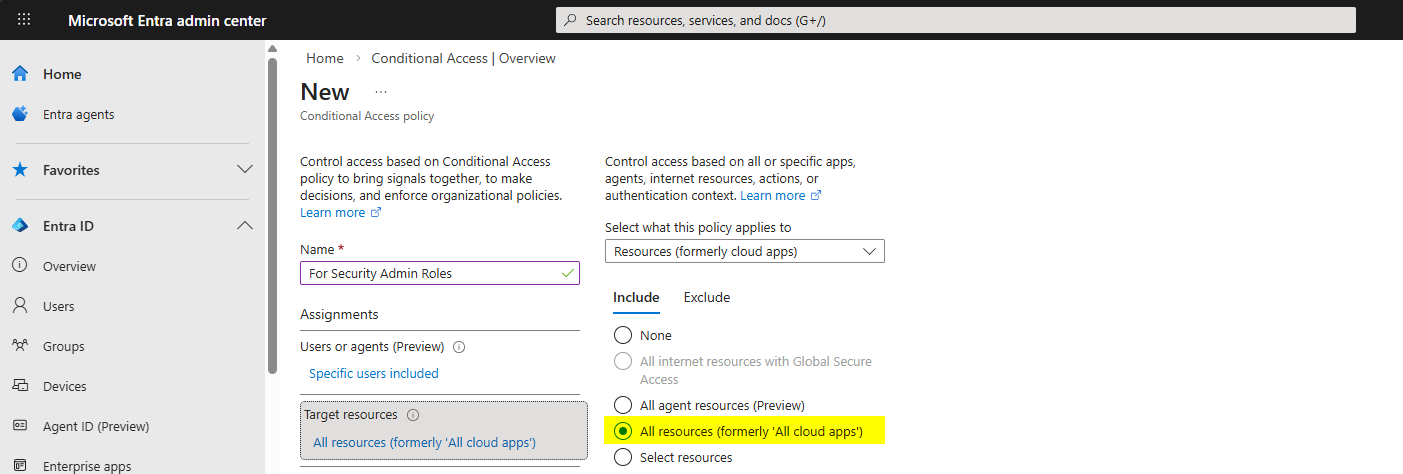
Target resources > All cloud apps.
Why “All cloud apps” and not just the Azure portal? Because admin credentials work everywhere a regular Microsoft 365 user’s creds work — Exchange, SharePoint, Teams, Office.com. If you only protect the Azure portal, an attacker with stolen admin creds will sign in to Office 365 instead, then pivot from there. All cloud apps closes that backdoor with one selection.
Conditions — leave blank
Conditions are exceptions. They let you say “only enforce this if … user is from outside the office” or “only on Windows devices”. For an admin MFA policy, you want it to fire always, no matter the device, network, or location. Leave Conditions empty.
Grant — require MFA
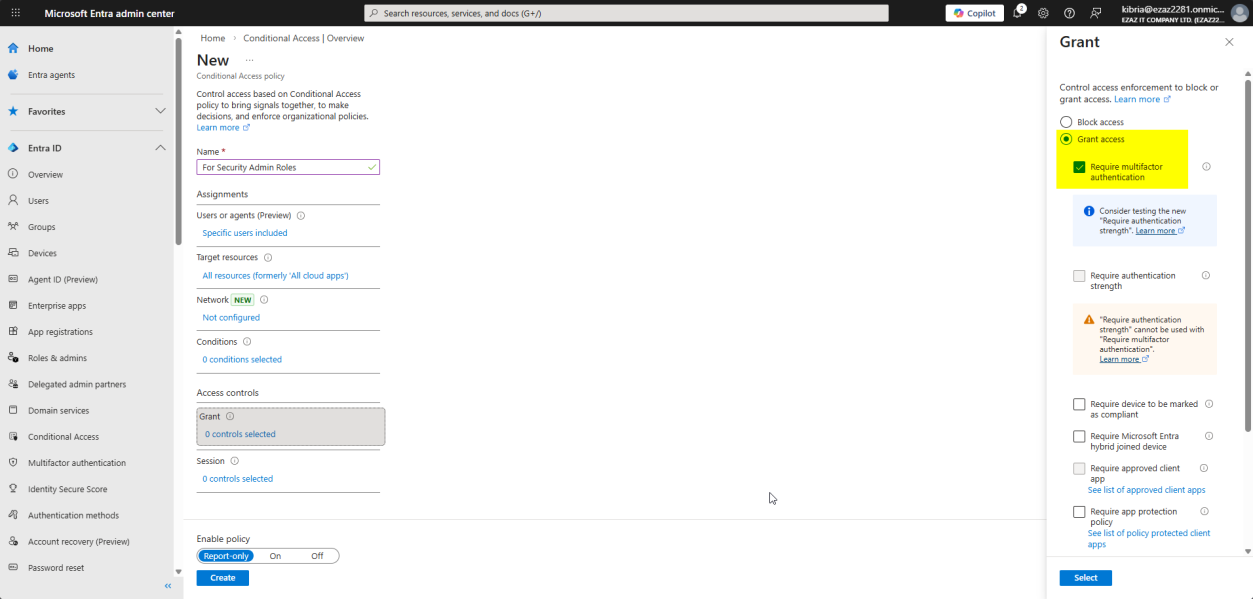
Grant > Grant access > tick Require multifactor authentication > Select.
If you check more than one Grant control (e.g. Require MFA + Require compliant device), there’s a dropdown at the bottom: “Require all the selected controls” vs “Require one of the selected controls”. For a security baseline, “Require all” is right — we want both, not either-or.
Session — leave blank
Session controls dictate post-login behavior — force re-auth every 4h, block downloads, etc. For baseline MFA enforcement, the default Entra session policies are fine. Leave Session empty.
Enable + Create
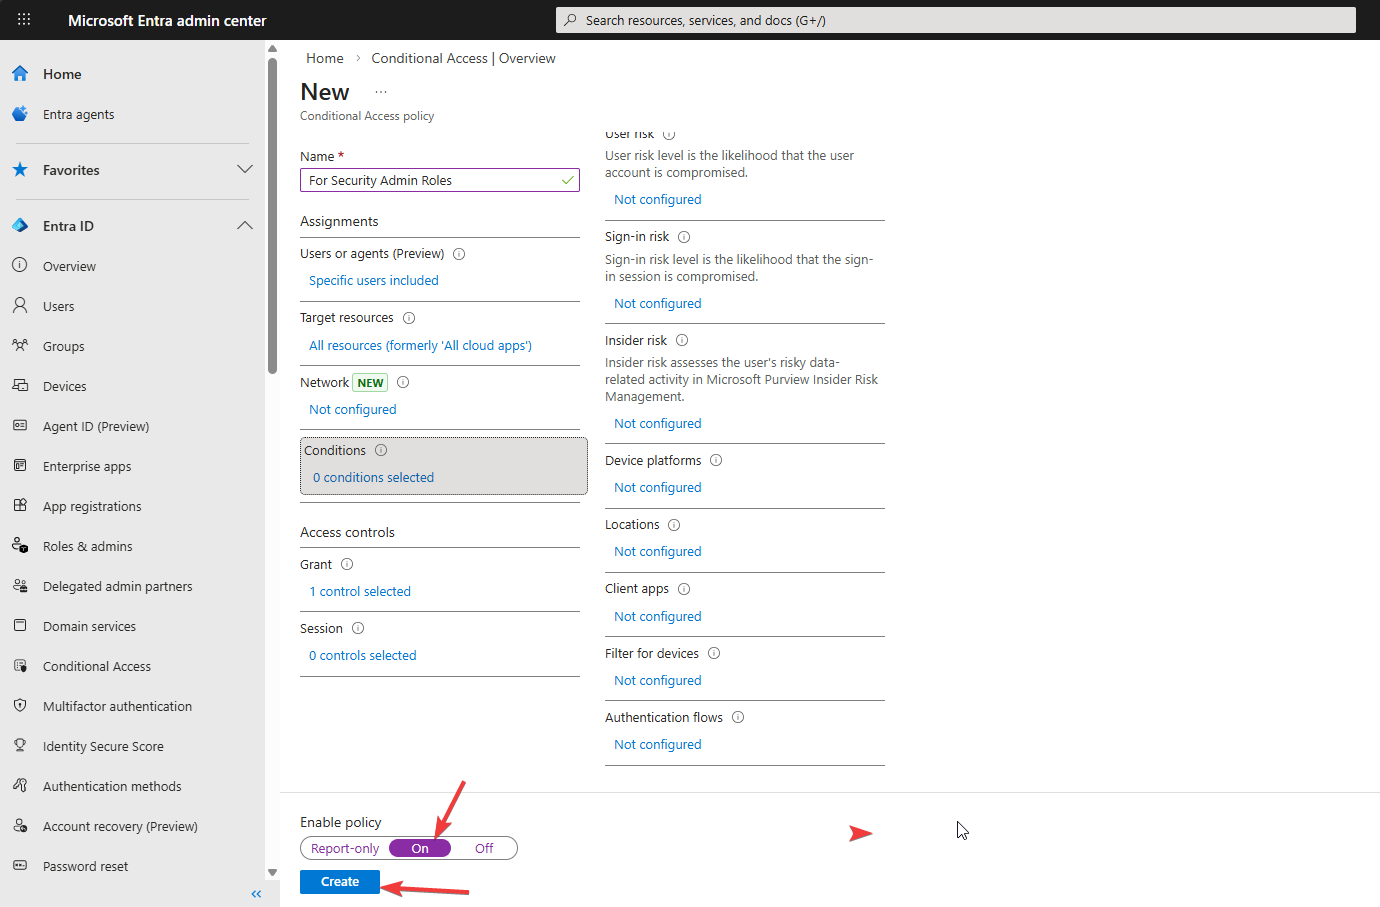
Bottom of the page: Enable policy: On > Create.
For high-impact policies in production, set this to Report-only first, let it run for a week, check the Sign-in logs → Report Only tab to see what would have been blocked, then flip to On. For a small admin role with one test user, On is fine immediately.
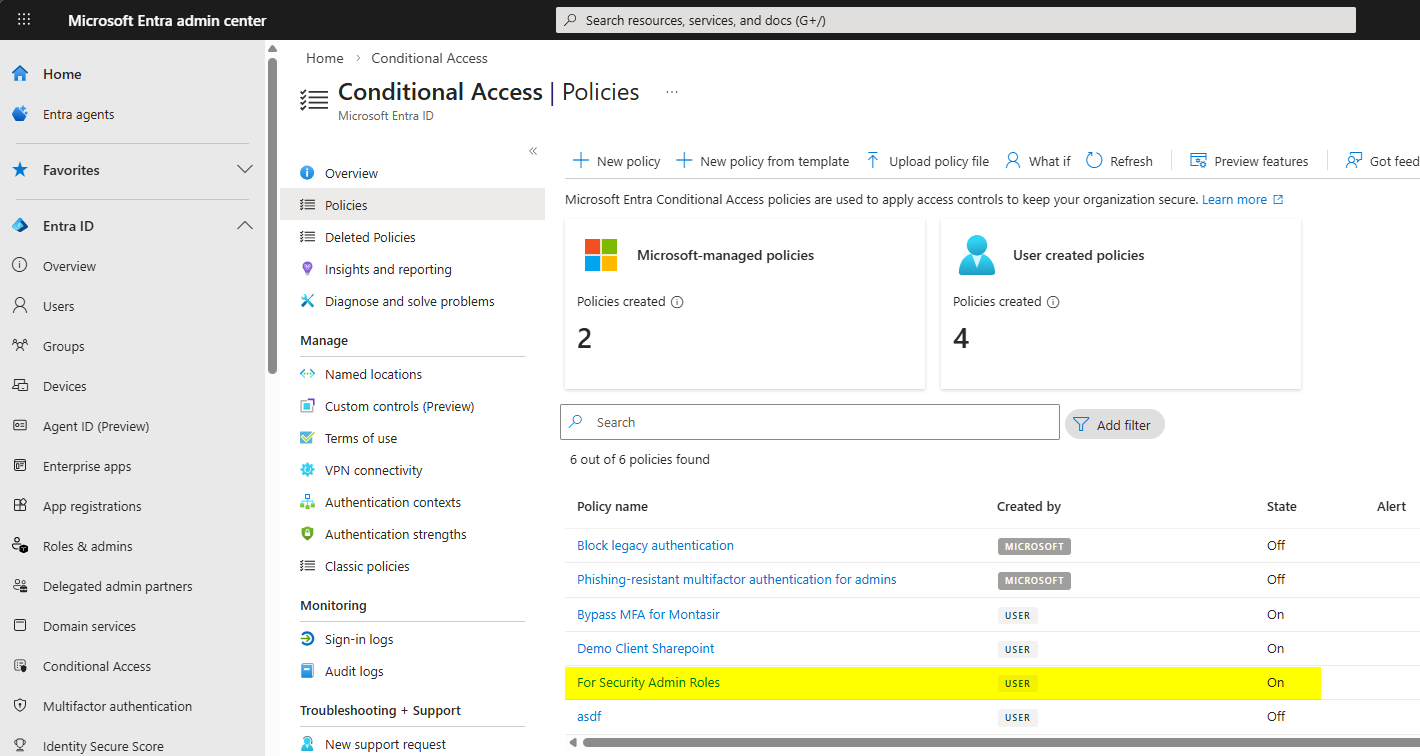
Dashboard shows the new policy. State = On = active.
Phase 3 — test the policy

myaccount.microsoft.com > sign in as conaccess with password.Open an InPrivate / Incognito browser window > myaccount.microsoft.com. Sign in as conaccess with the password.
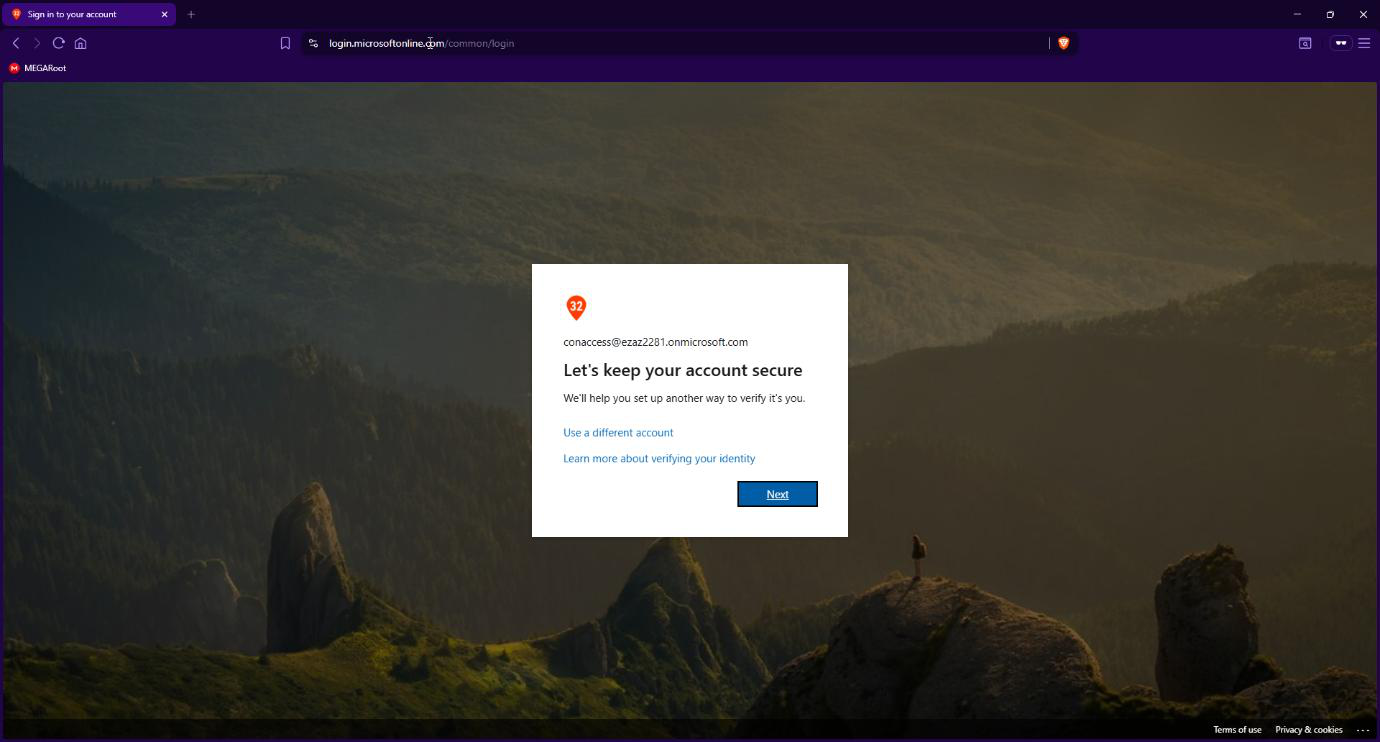
Login is interrupted with “More information required” / “Keep your account secure”. The CA policy fired — the user is required to register MFA before they can complete the sign-in. Click Next.
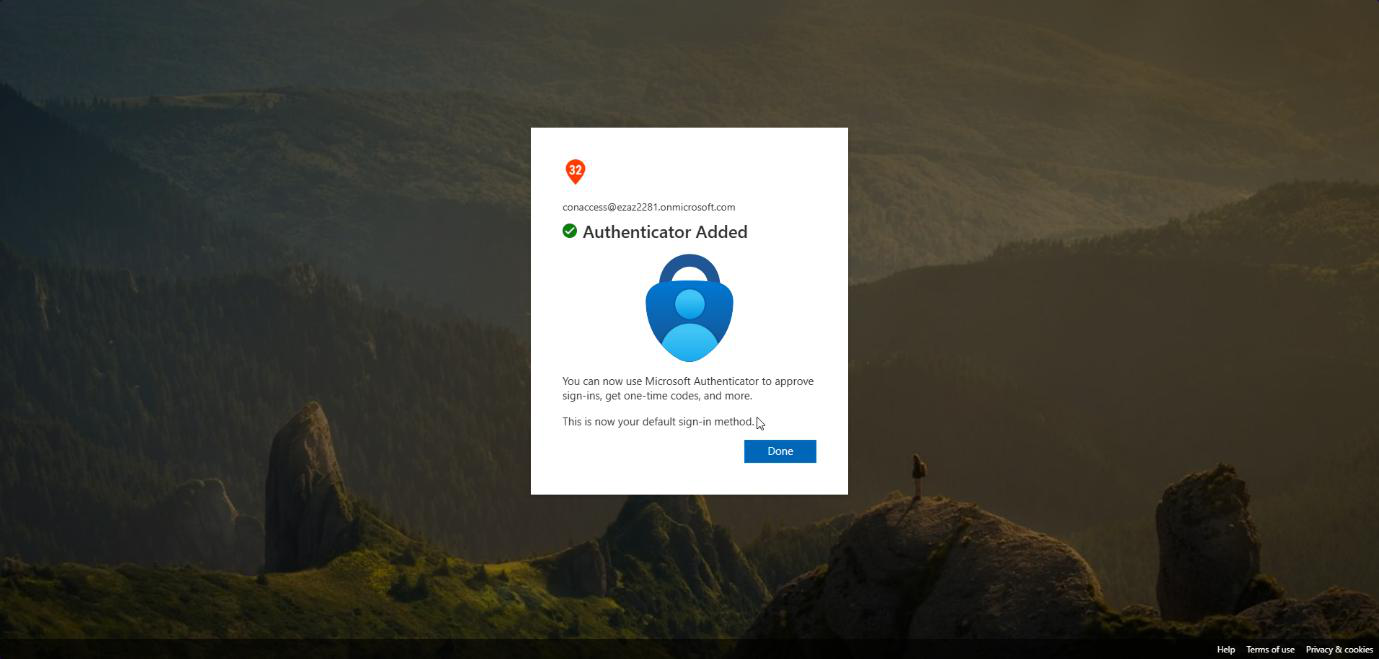
Standard Authenticator registration flow (QR code, scan with phone, number-match approval). Once registered, the user is logged in. Future sign-ins prompt for MFA approval rather than full registration.
Phase 4 — verify the audit trail
You always want to confirm a CA policy actually fired the way you expect. Sign-in logs are how.
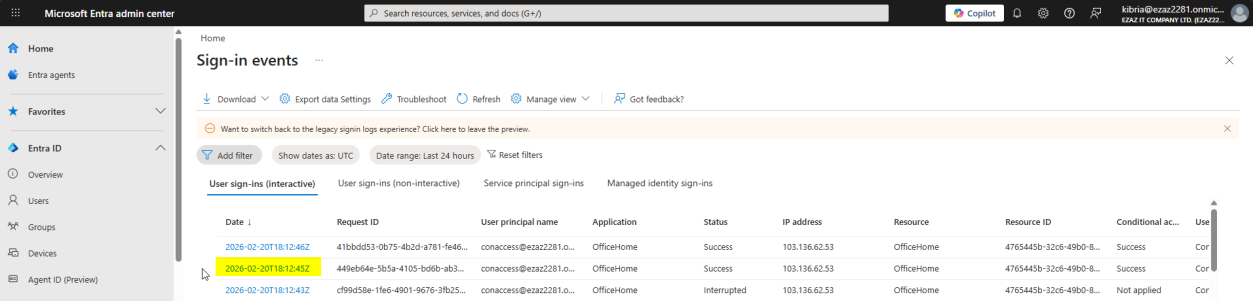
conaccess entry. Wait 2–5 min for ingest if it’s not visible yet.Monitoring & health > Sign-in logs > locate the recent conaccess entry. Allow 2–5 min for ingest delay.
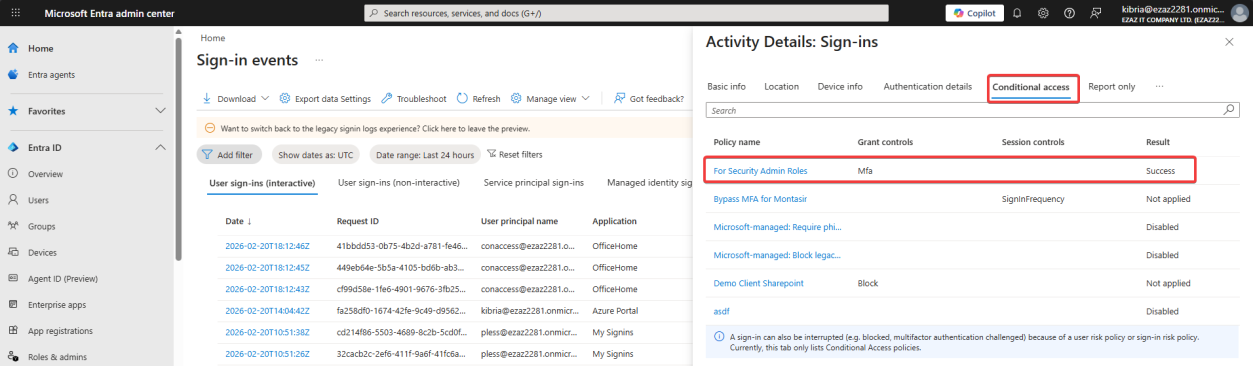
Click the entry > Conditional Access tab. The new policy appears with Result = Success. If you see Failure or Not Applied, the policy didn’t enforce as expected — revisit the User / Target / Grant config.
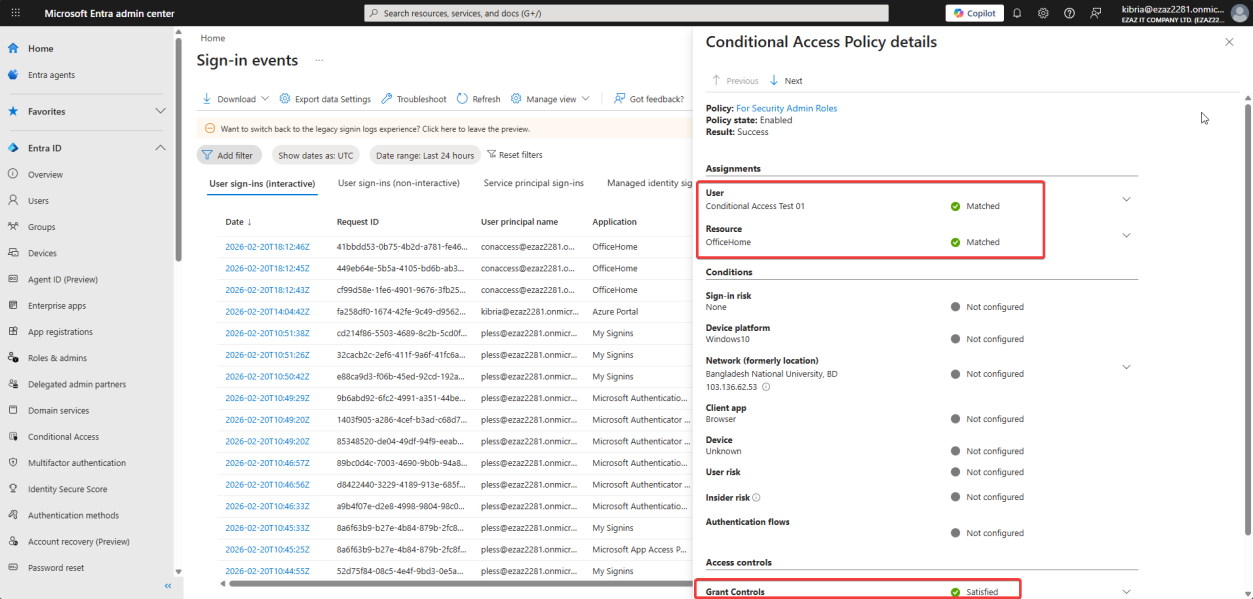
Click the policy name to drill in: User and Resource criteria Matched, Grant Controls (Require MFA) Satisfied. End-to-end audit trail.
Things that bite people
Locked yourself out
The classic disaster: build a CA policy targeting Global Administrator, no exclusions, MFA required — then your MFA service fails / your phone dies / you typo’d the policy. Now no admin can sign in. Always have a break-glass account excluded from every admin-targeting CA policy, with a long random password stored offline.
Service principals affected unintentionally
If you target “All users” instead of a specific role, you might accidentally apply MFA requirements to service principals or workload identities — which can’t do MFA. Use Workload Identities Premium (P2) or scope the policy carefully.
Role-targeting only catches Active assignments by default
If you use PIM (Privileged Identity Management), users with Eligible assignments to Security Administrator aren’t in the role until they activate it. The CA policy still applies because the user is in the role at the moment of sign-in (after activation), but be aware that role-targeting is evaluated at sign-in time, not pre-activation.
MFA fatigue from over-targeting
Don’t apply this policy to all users at once. Start with admin roles. Then expand to specific apps (Azure portal, Microsoft 365 admin center). Then apps with sensitive data. Then everyone. Big-bang rollouts cause helpdesk floods.
Forgot to enable
Common mistake: build the whole policy, click Create, walk away. The policy is saved with State = Off. Always glance at the dashboard after creation to confirm State = On.
What’s next
This policy adds the “require MFA” layer. The next post in the Entra ID Security pathway uses Conditional Access for the opposite end of the spectrum: blocking access from specific IP addresses — useful for excluding known-bad geographies or restricting admin access to office IP ranges only.