The TLS configuration from Part 3 got the server ready. The UPN suffix work in Part 4 got the user identities ready. There’s one more gate before the Entra Connect installer can run: the IdFix tool. Think of IdFix as a spell-checker for your Active Directory. It scans every user object for formatting issues that would cause sync failures — duplicate email addresses, illegal characters in attributes, malformed proxy addresses — and offers to fix them in place. Run it, fix what it finds, run it again until the only remaining errors are the “safe to ignore” category. THEN you install Entra Connect.
Why IdFix is the last gate
Active Directory is permissive. You can put almost anything in almost any attribute and AD won’t complain. Microsoft Entra ID is much stricter — it has hard rules about what characters are allowed in mail addresses, what makes a valid UPN, what counts as a duplicate proxyAddress. When the Entra Connect sync engine encounters a user that violates one of these rules, it doesn’t fail the entire sync — it just skips that user. The user shows up as a sync error in the Entra Connect Health portal hours later, after you’ve already declared the install successful.
Catching these problems with IdFix BEFORE the install means you fix them once, in AD, before Entra Connect ever sees them. Catching them AFTER means you fix them in AD AND wait for the next sync cycle to retry the affected user AND re-verify each one landed cleanly. Pre-flight is much faster.
Step 1 — download and install IdFix
IdFix is open-source and lives on Microsoft’s GitHub. Direct download link:
https://raw.githubusercontent.com/Microsoft/idfix/master/publish/setup.exePaste the URL into your browser on the EC server. The setup.exe downloads automatically.

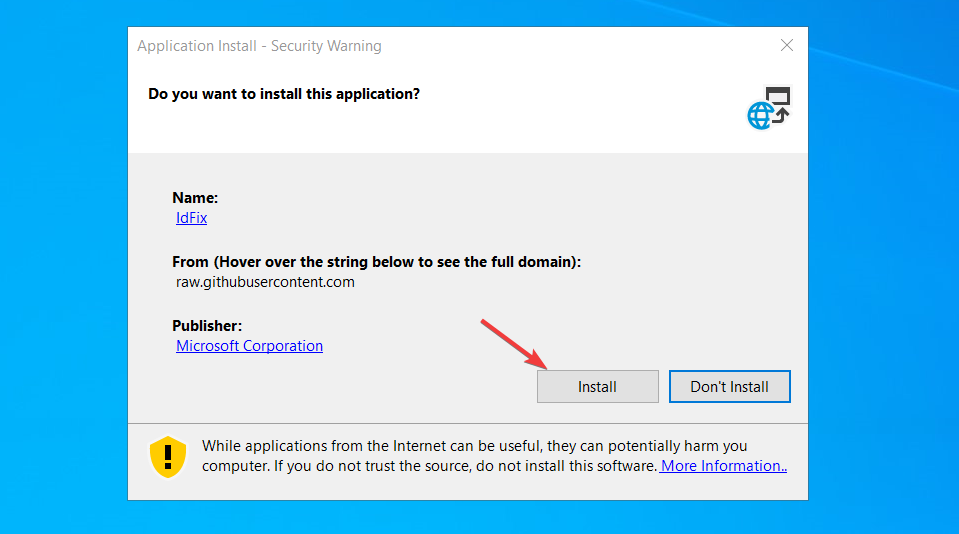
From your Downloads folder, right-click setup.exe > Run as administrator > Install. IdFix installs in a few seconds and launches automatically.
The portable nature is helpful for environments where you can’t install software on the DC itself — you can run IdFix from a workstation with the AD module installed and it’ll connect to whatever DC the workstation knows about.
Step 2 — query your directory
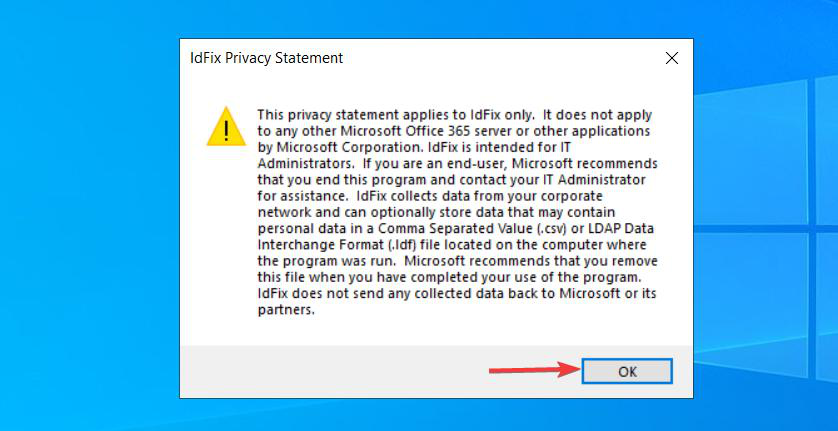
First-launch shows a Privacy Statement modal. Click OK.
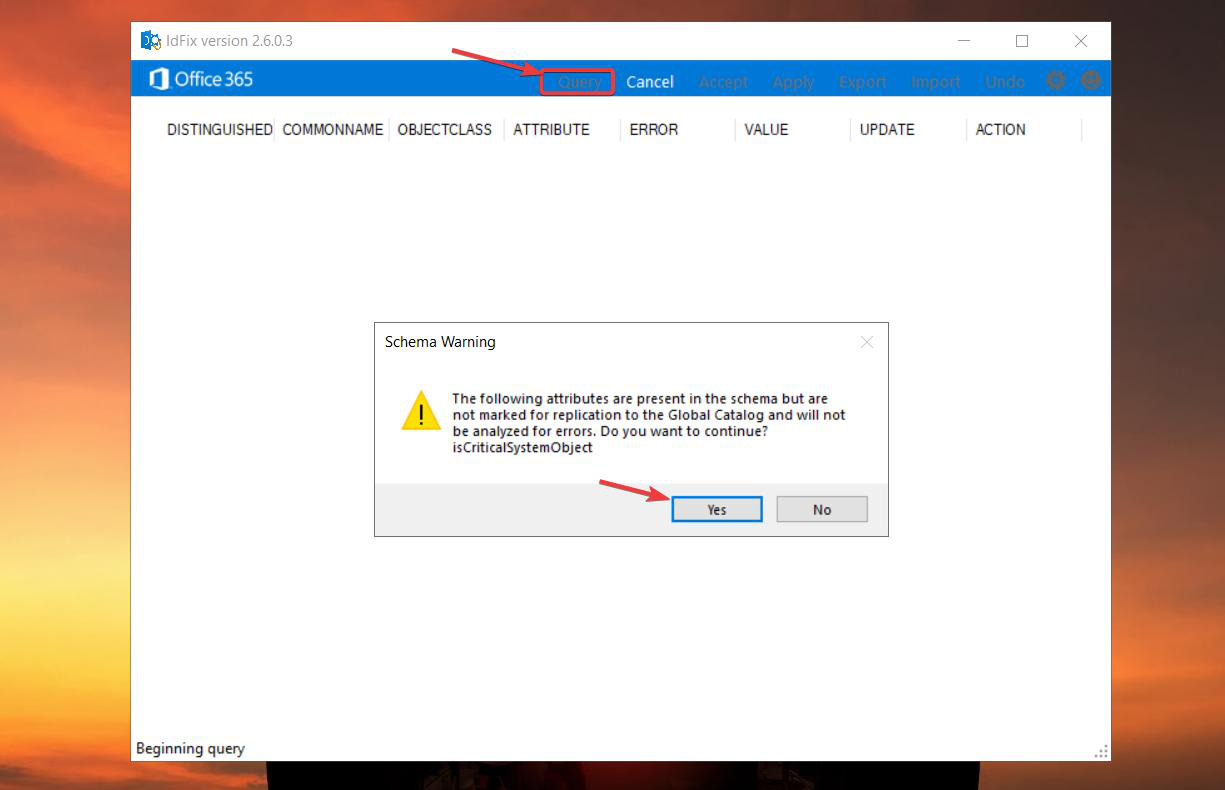
In the main window, click Query in the ribbon. The first Query click triggers a generic warning about “Querying the schema” (some of the attributes IdFix wants to scan aren’t marked for inter-DC replication, which is fine but worth alerting on). Click Yes.
Permissions
To Query (read-only scan), any domain user account works. To Apply (write fixes back to AD) you need an account with write permissions: Domain Admin or Account Operator are the typical roles. Since you’re probably logged in as a Domain Admin already (you’ve been doing setup work on the DC), you have what you need.
The Query takes seconds for small AD environments and minutes for large ones (100K+ users). The progress is non-visual — you just wait for the results pane to populate.
Step 3 — analyze the errors
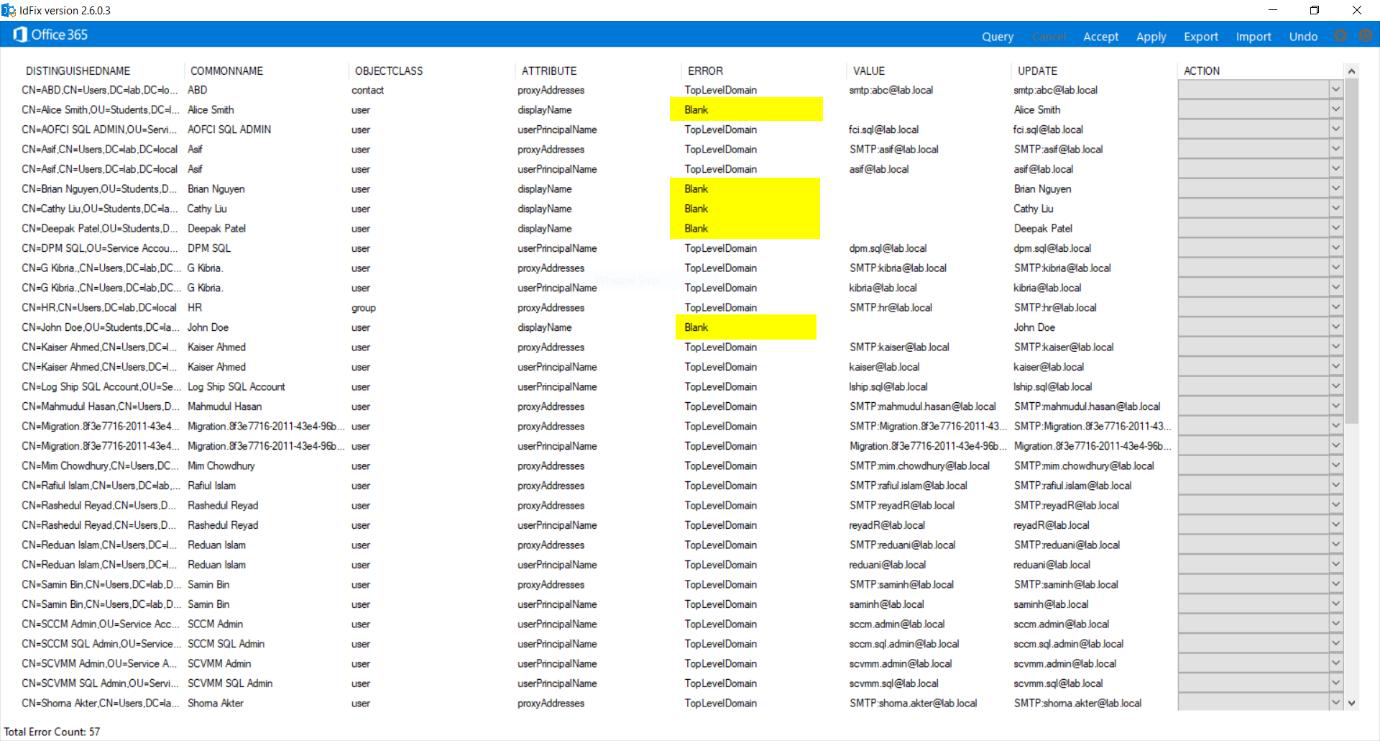
The results grid lists every issue IdFix found. The columns that matter:
- OBJECT — the affected AD object (user / group).
- ATTRIBUTE — which attribute on that object is broken.
- ERROR — the error type. This is what you sort by.
- VALUE — what the attribute currently contains.
- UPDATE — what IdFix suggests to set it to (filled in after Accept).
- ACTION — the result of Apply (filled in after Apply runs).
Error types you’ll see
TopLevelDomain — your AD’s domain ends in .local, .internal, or another non-routable suffix. IdFix flags every user’s UPN with this error because the suffix isn’t a real internet domain. Safe to ignore if you’ve done the UPN suffix prep from Part 4 — the actual UPN values now use your verified external domain; only legacy UPN suffix references remain. If you somehow skipped Part 4, the TopLevelDomain errors are real and need to be fixed via the UPN-suffix-bulk-update path covered there.
Character — an attribute contains characters Entra ID rejects. Common culprits: a space inside an email address, a comma in a displayName, accented characters in a proxyAddress that the sync rules don’t handle. MUST be fixed.
Duplicate — two or more users share the same value for an attribute that’s supposed to be unique (UPN, mail, proxyAddresses). MUST be fixed. Usually means cleaning up an old user record that should have been deleted years ago.
Format — the attribute value is malformed (e.g. a mail address missing the @ sign, or a proxyAddress without the SMTP: prefix). MUST be fixed.
Step 4 — accept the recommendations
For each row you want to fix:
- Click the row to select it. Use Ctrl+Click to multi-select; ignore the TopLevelDomain rows.
- Click Accept in the ribbon.
- The UPDATE column populates with IdFix’s suggested fix value.
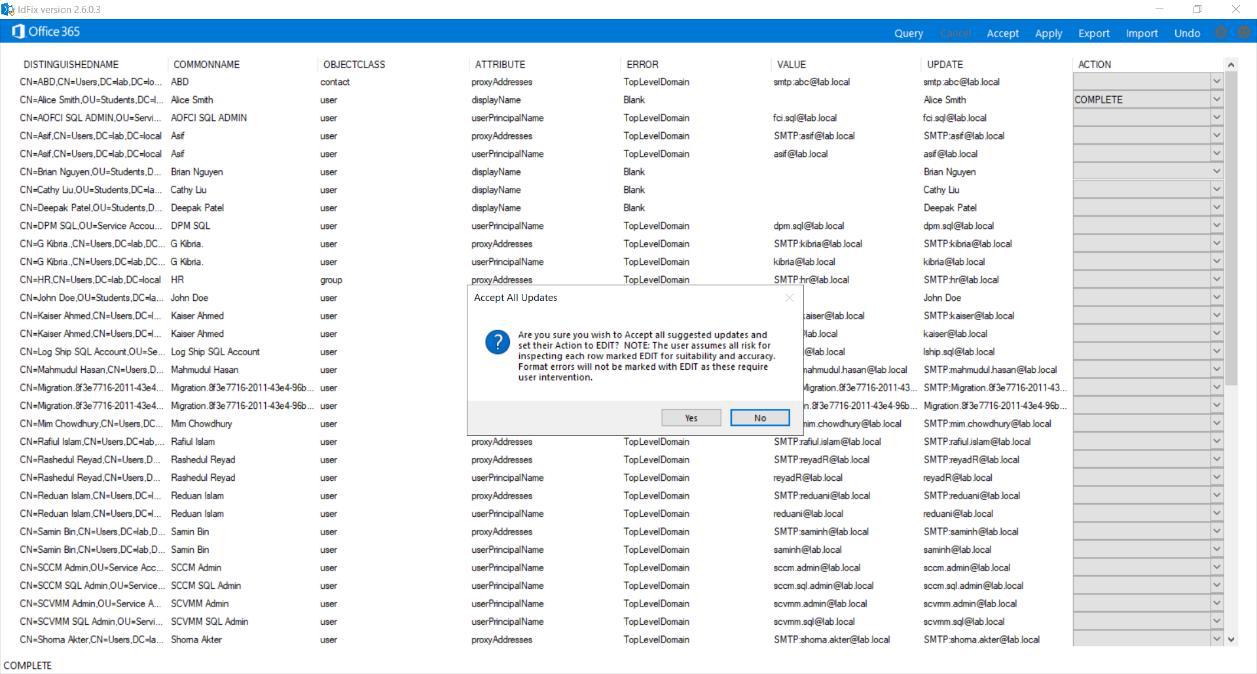
Accept doesn’t write to AD — it just queues the change. You can review the proposed updates before committing.
If you disagree with IdFix’s suggestion (it suggested removing a character but you’d rather replace it with something else), edit the UPDATE column directly to override.
Step 5 — apply the fixes
Once the UPDATE column reflects what you want for every row, click Apply in the ribbon. Confirm Yes on the prompt.
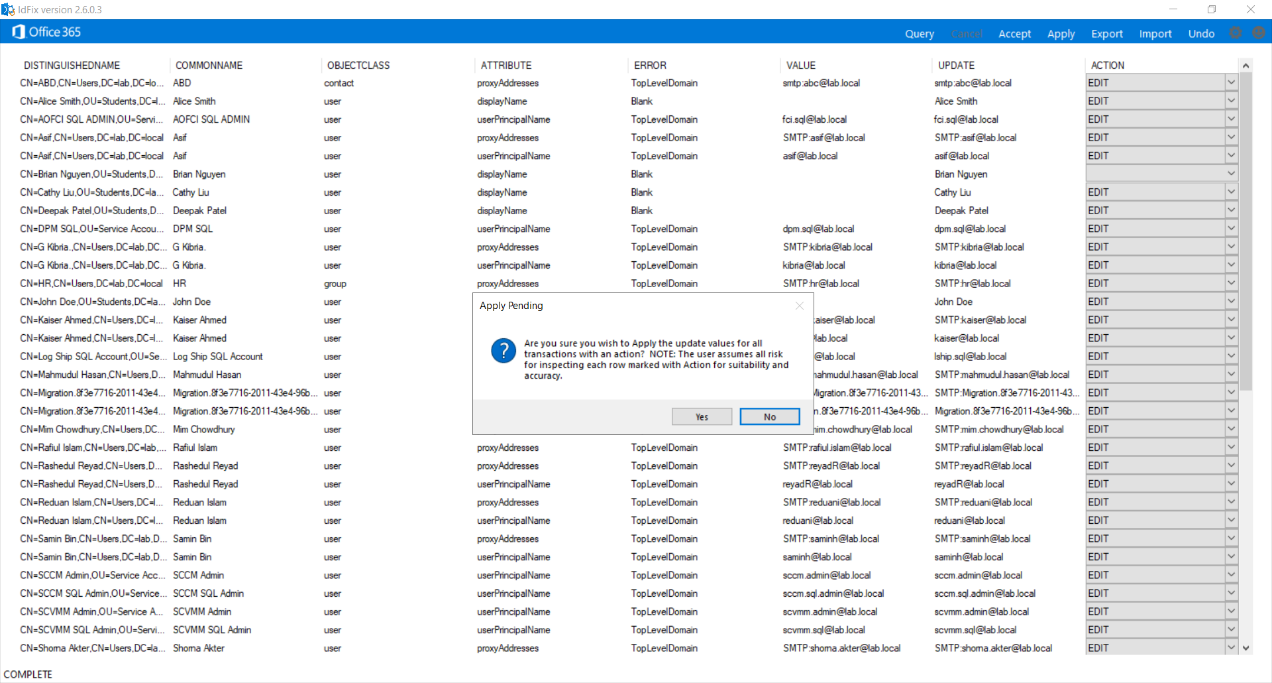
This is the irreversible step — IdFix writes the changes to AD. There’s no undo button. If you need to revert, you have to manually fix the affected attributes in ADUC or via PowerShell.
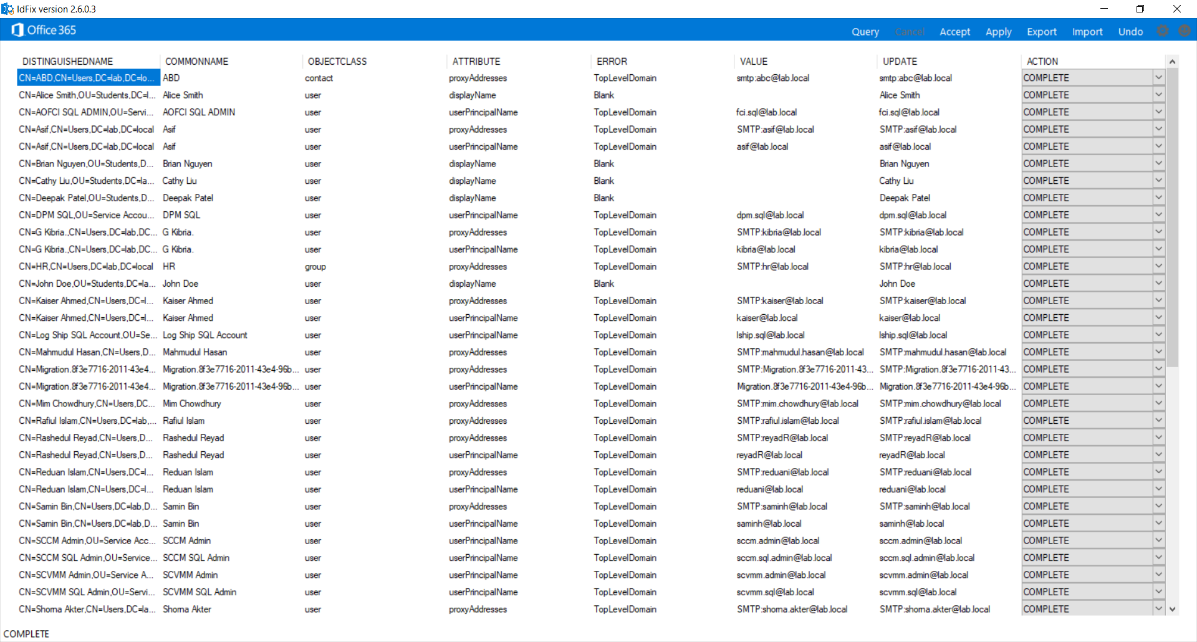
After Apply completes, the ACTION column updates per row:
- COMPLETE — the change was written to AD successfully.
- An error message — the change failed (usually a permission issue or a constraint violation; rare).
Verify by opening ADUC and looking at the affected user’s attribute in the GUI. If IdFix removed a space from a mail address, the user’s mail attribute should now be space-free.
Step 6 — verify with a re-query
Don’t trust your work without verification. Click Query again.
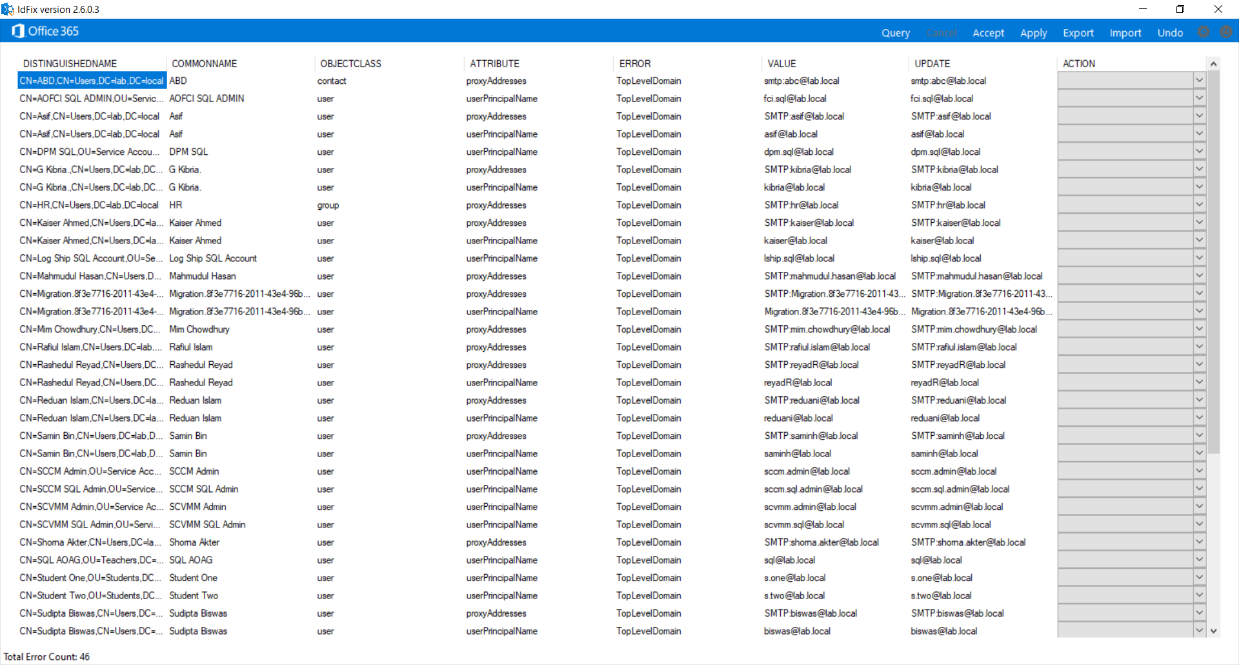
The expected outcome: only TopLevelDomain rows remain. Every Character / Duplicate / Format error you fixed should be gone. If new errors appear (rare; usually means a fix you applied introduced a new problem), iterate — Accept and Apply again, then Re-Query, until the grid is clean.
Once you’re at “only TopLevelDomain remains,” the AD is ready for Entra Connect sync.
Things that bite people
Apply fails because of insufficient permissions
You ran IdFix with a user account that has read but not write to the affected OUs. Apply succeeds for some rows and fails for others. The ACTION column shows access-denied errors. Re-launch IdFix with an account that has write access (Domain Admin) and re-Apply.
IdFix scans the DC IdFix is connected to, not the entire forest
IdFix queries one DC at a time. For multi-domain forests, you may need to run IdFix once per domain, pointing at a DC in each. The tool offers a Settings dialog where you specify the target DC and the search base (which OU to scan from).
Spaces in displayName getting auto-removed
IdFix sometimes suggests removing a space from a displayName when really you wanted to keep it. The Accept step lets you override the UPDATE column — type the value you actually want. Don’t blindly Accept everything.
Re-Query shows the SAME errors after Apply
If the ACTION column showed COMPLETE but Re-Query still shows the errors, you’re looking at the wrong DC. AD replication takes time — the DC you’re querying from may not have replicated the change yet. Wait 5 minutes, Re-Query again. Or point IdFix at the DC you wrote to.
TopLevelDomain errors that AREN’T safe to ignore
If you skipped Part 4 (the UPN suffix prep), the TopLevelDomain errors are real and ARE blocking. Either go back and do Part 4, or accept that synced users will land with .onmicrosoft.com UPNs.
IdFix doesn’t catch every possible Entra-rejection rule
IdFix knows the most common rules but not all. Occasionally a sync error surfaces post-install for an attribute IdFix considered fine. The fix is the same as for an IdFix-flagged error: edit the value in AD, wait for the next sync cycle. Document any new patterns for future runs.
Schema warning on first Query
The “Querying the schema” warning isn’t actionable — just click Yes. It’s informing you that some attributes IdFix wants to check aren’t marked for replication, which is normal for things like password attributes.
Forgetting to save the Query log
IdFix doesn’t auto-save the results. If you Query, get a list of 200 errors, fix them, then realise later that one was wrong, you can’t see what the original value was. Habit: File > Save Result Log after every Query, before Apply. Useful audit trail.
What’s next
The AD is clean. Server has TLS 1.2. UPN suffixes are right. Both installer files are staged. Part 6 takes a step back to cover the Entra Connect architecture — what the components are, how data flows, what each service does — before Part 7 walks the actual Entra Connect MSI install. Full series in the Hybrid Identity pathway.