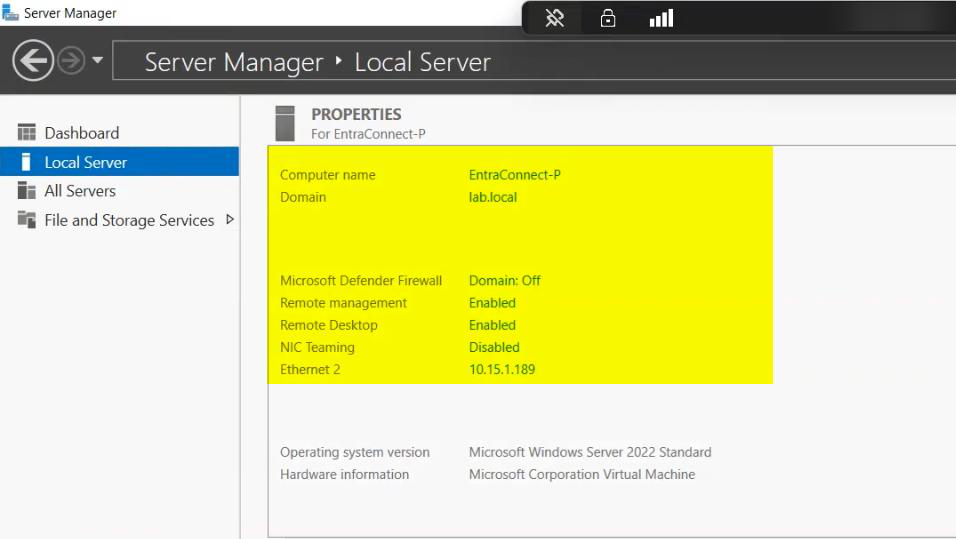
Six posts of preparation; one post of actual install. With the prereqs validated (Part 1), installer staged (Part 2), TLS 1.2 enforced (Part 3), UPN suffixes fixed (Part 4), AD cleaned (Part 5), and the architecture understood (Part 6), running the Entra Connect installer is straightforward. This post walks the wizard end-to-end — 11 steps, ~15 minutes — and verifies sync is working in three places before declaring success.
Why Custom mode (not Express)
The wizard offers Express and Custom paths. Express is a one-button install that:
- Uses Password Hash Sync as the sign-in method.
- Syncs the ENTIRE AD forest — every user, every group, every computer, every OU.
- Auto-creates AD service accounts.
- Enables a default set of features.
For a small lab, Express is fine. For anything else, you almost certainly want to NOT sync everything. Service accounts, computer accounts, test users, deprecated OUs, security groups for internal-only purposes — none of those belong in the cloud. Custom mode lets you pick exactly which OUs sync. The trade-off: Custom adds about 4 extra wizard pages versus Express. The control is worth it.
Pick Custom on the Express Settings page. The rest of this post walks the Custom path.
Step 1 — download and run the installer
The .msi from Part 2 is staged on the EC server. Right-click > Run as administrator.
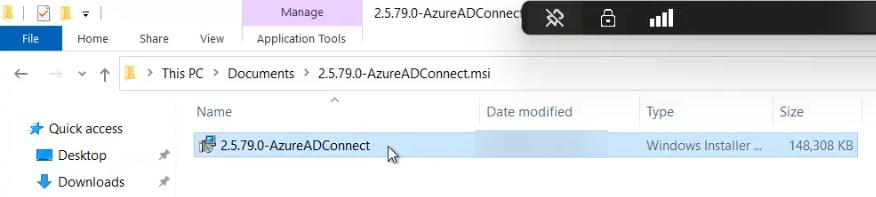
Without elevation, the install fails partway through registering Windows services. The error message is opaque (something about access denied to a registry key); the fix is just running with admin rights.
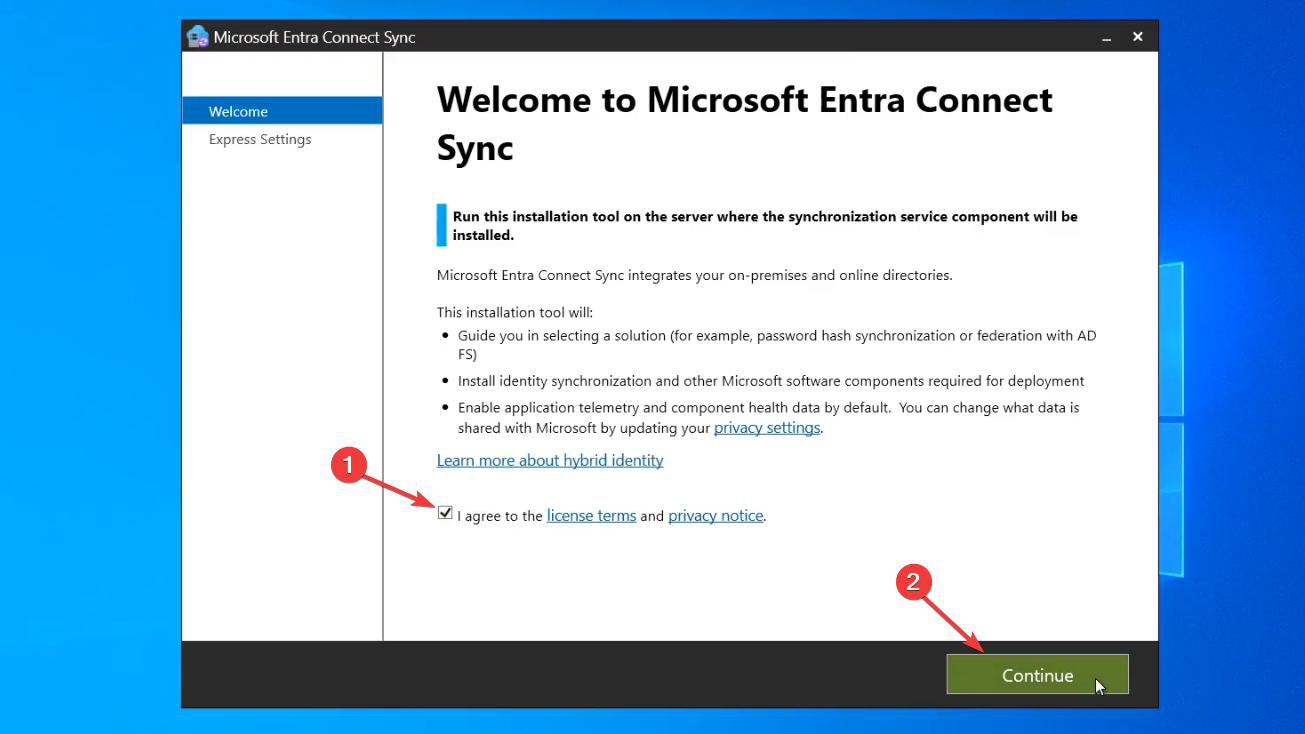
Tick the License Terms checkbox, click Continue.
Step 2 — pick Custom (the load-bearing choice)
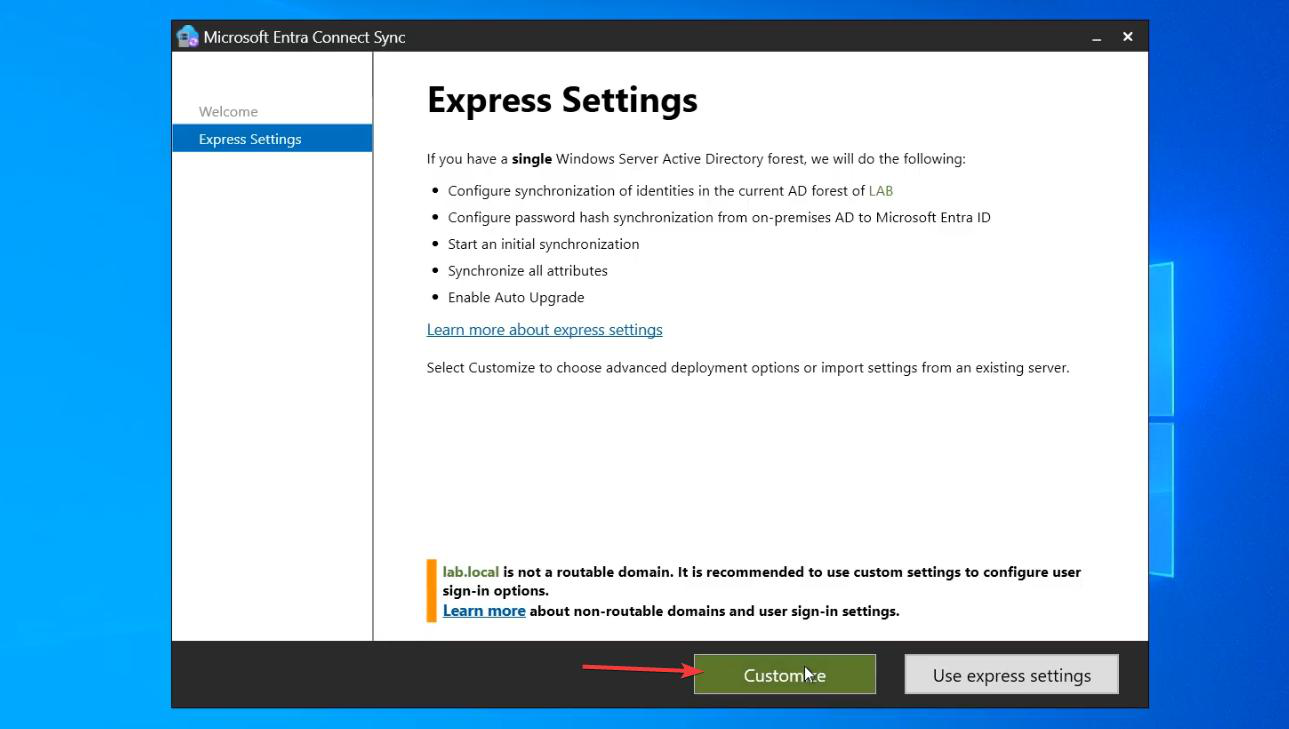
Express Settings is the default; click Customize at the bottom. There’s no recovering from picking Express other than starting over — so pick Customize even if you’re unsure. Worst case, you take the defaults on every Custom page (which lands you close to Express, with the bonus of having seen the actual options).
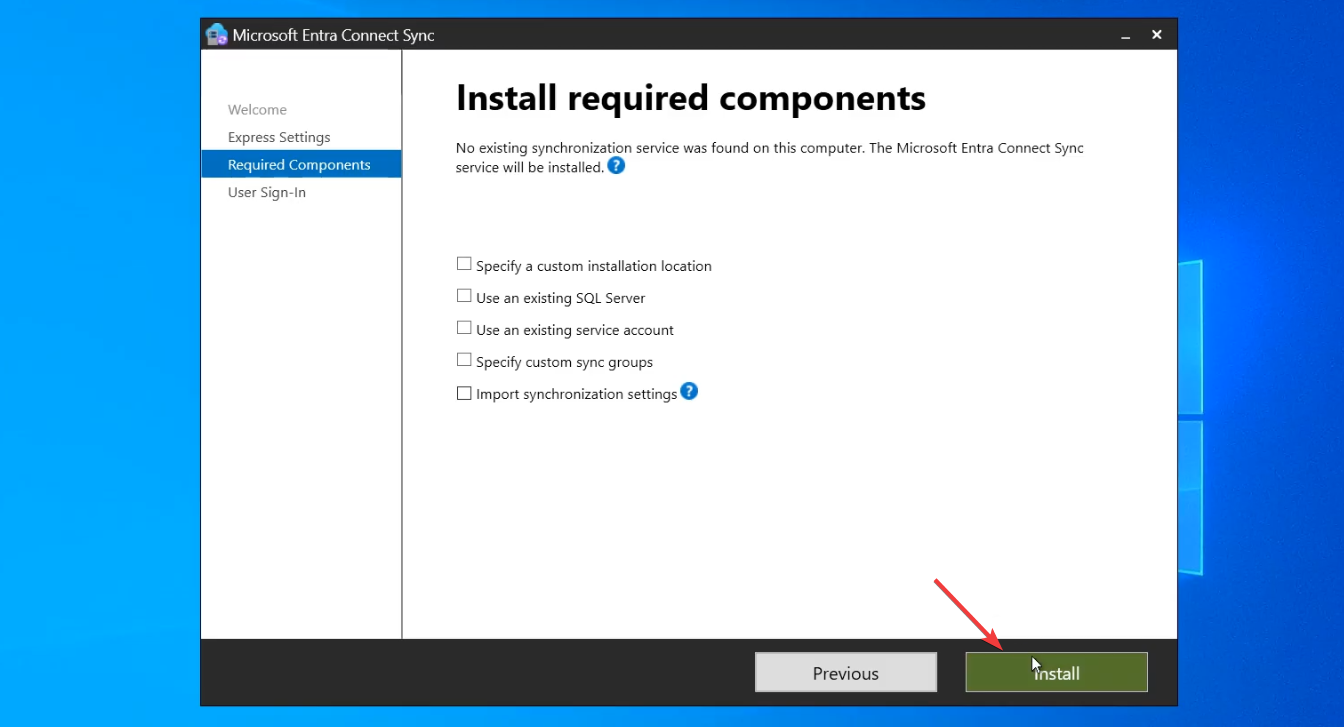
Required Components page — click Install. Wizard installs the sync engine + LocalDB. ~3 minutes.
Step 3 — pick the sign-in method

Three options:
- Password Hash Synchronization (PHS) — recommended. Hashes of user passwords are uploaded to the cloud, allowing same-password sign-in to M365 without sending plaintext. Survives on-prem AD outages (cloud has its own copy of the hash).
- Pass-through Authentication (PTA) — password validation happens on the on-prem DC at sign-in time. No hashes leave AD. Sign-in fails if the EC server or DC is unreachable. Use when policy requires no password material in the cloud.
- Federation with AD FS — full identity federation via AD FS or third-party. Most complex; rarely the right choice today.
Pick PHS unless you have a specific reason for one of the others.
Step 4 — cloud credentials
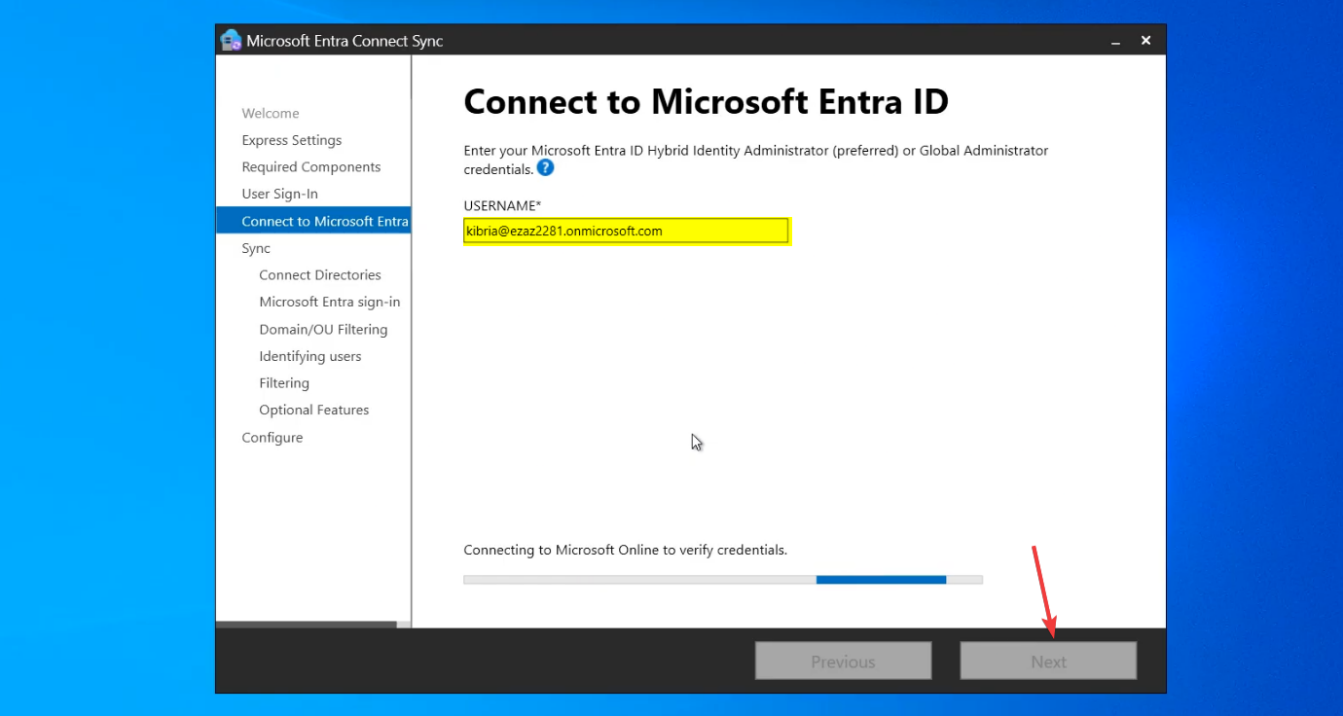
Sign in with a Global Administrator account in the target Entra ID tenant. Complete MFA. The wizard provisions the cloud-side service principal that the sync engine will use forever after.
If MFA hangs, check that https://secure.aadcdn.microsoftonline-p.com is in your Trusted Sites (a prereq from Part 1). If sign-in fails with an unexpected error, check that the account has the role assigned DIRECTLY (not via a group — same gotcha as Part 1).
Step 5 — on-prem AD credentials
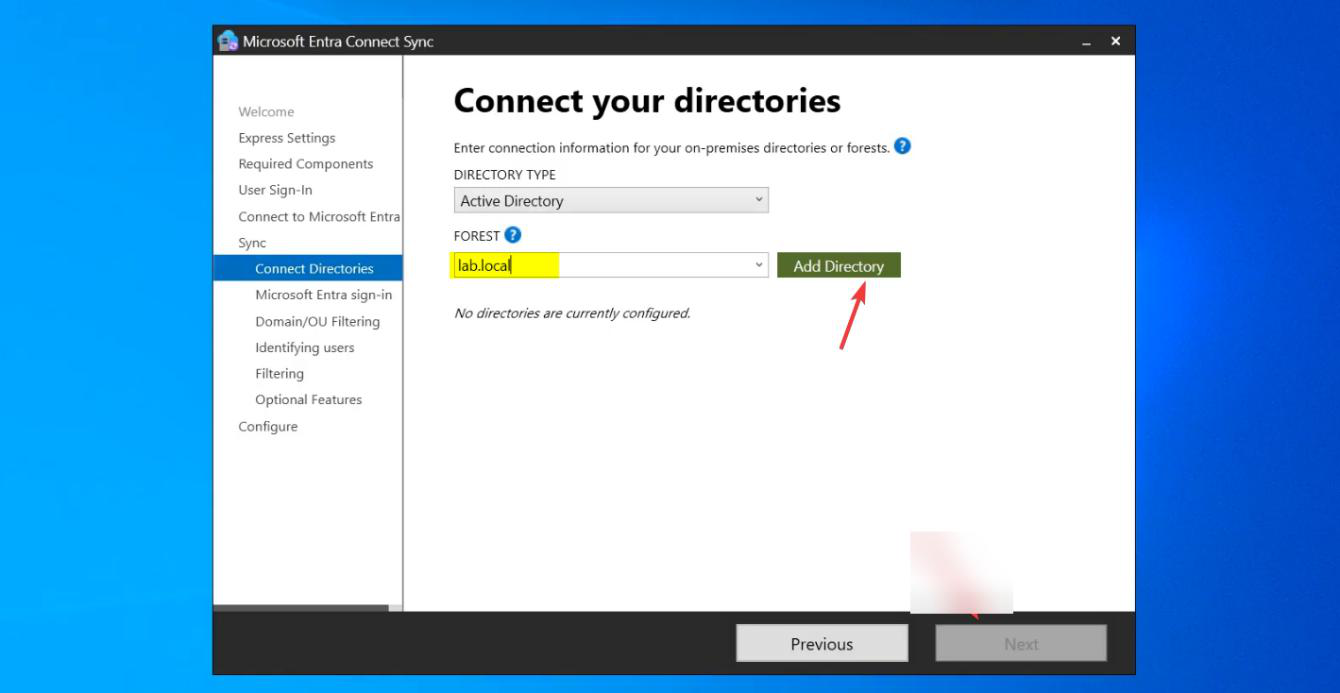
Click Add Directory. Pick your AD forest from the dropdown.
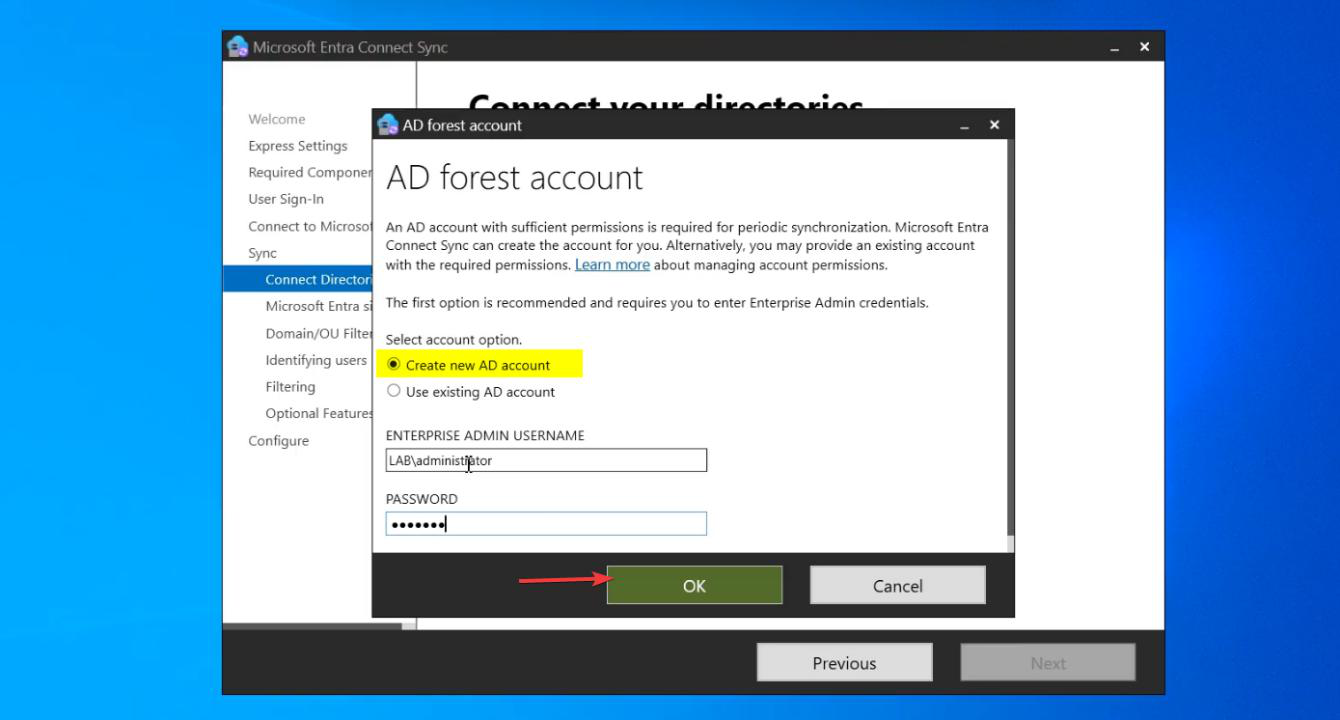
In the dialog: pick Create new AD account. Enter Enterprise Admin credentials.
The wizard creates a service account named MSOL_xxxxxxxx (random suffix) in AD’s Users container. This account gets the specific permissions Entra Connect needs (read-everything; write-back specific attributes if features like password writeback are enabled later). Your Enterprise Admin creds are used ONLY for this one-time creation; ongoing sync runs as the MSOL account.
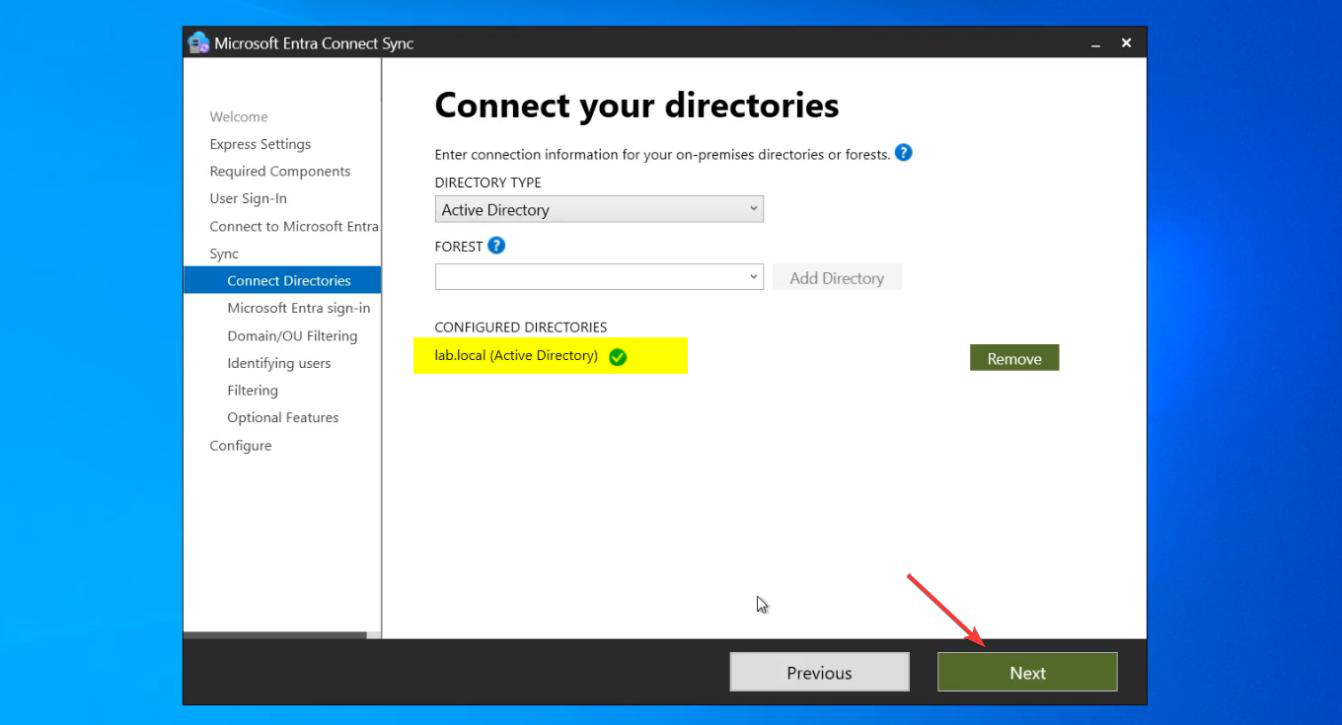
Directory added. Next.
Step 6 — UPN suffix warning (probably skip)
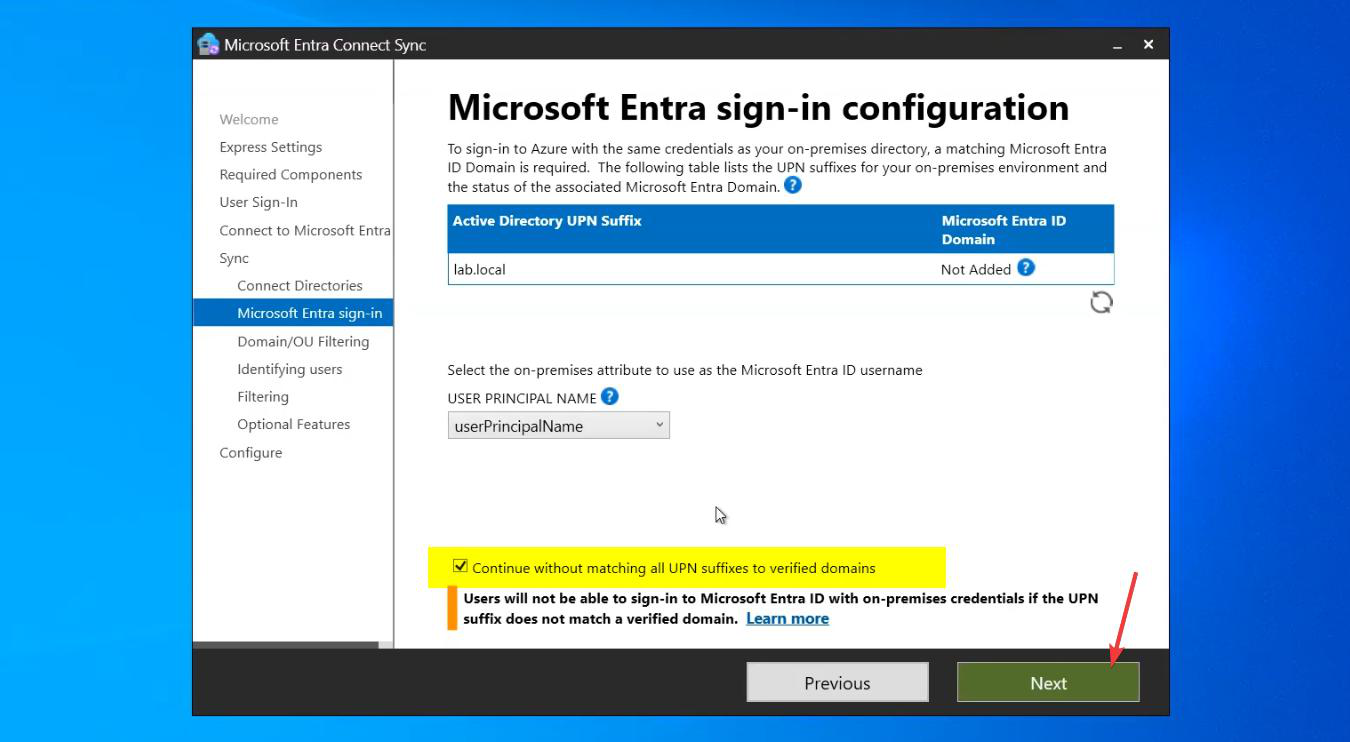
If you did Part 4, most users should have UPNs ending in your verified domain (e.g. jdoe@infotechninja.com). But there are usually some exceptions: service accounts that you didn’t change, or special-purpose users still on infotechninja.local.
The wizard surfaces a warning. Tick Continue without matching all UPN suffixes to verified domains. Users with non-verified UPNs will sync with the .onmicrosoft.com fallback — not ideal but not blocking.
Step 7 — OU filtering (the other load-bearing choice)
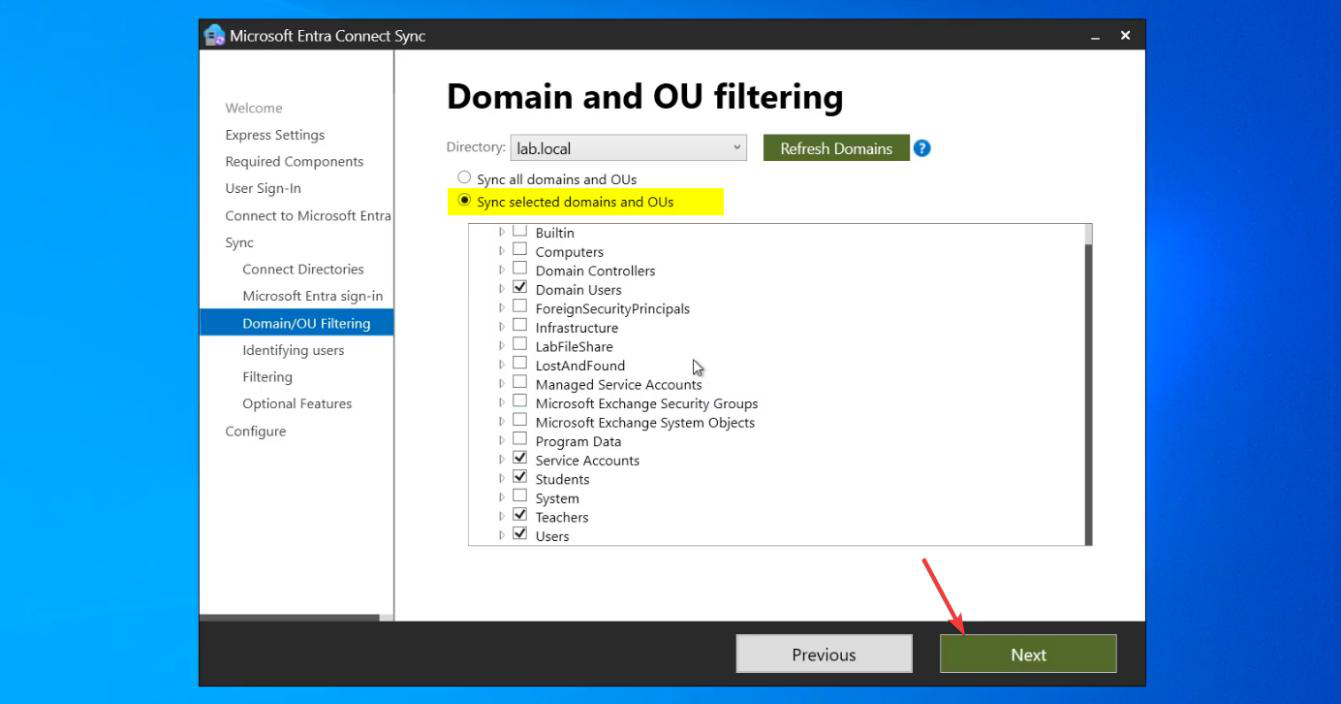
Pick Sync selected domains and OUs. The tree shows your AD’s OU structure.
UNCHECK the root (your domain name at the top) to clear all selections. Then individually CHECK only the OUs containing users you want in the cloud:
- OUs of human users you want in M365: tick.
- Service account OUs: don’t tick (those identities don’t belong in cloud).
- Computer-only OUs (Workstations, Servers): don’t tick (Entra Connect doesn’t sync computer accounts in the standard config).
- Security groups OUs: tick if you want those groups synced; don’t if they’re internal-only.
- The Users container (default location for new users): be careful — ticking this syncs everything created without an OU specified, including some service accounts.
Be deliberate. The OUs you tick here will sync; everything else stays on-prem only.
Step 8 — identifying users (defaults)
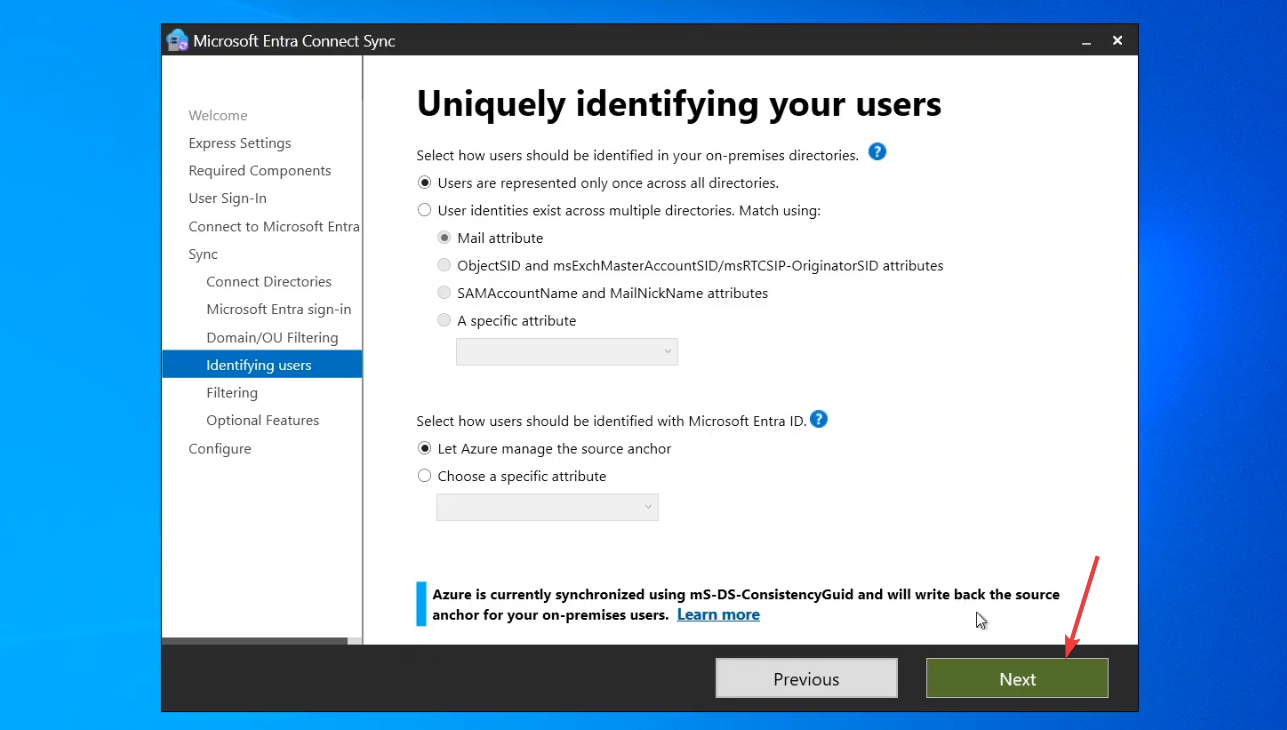
Source Anchor: mS-DS-ConsistencyGuid (default, recommended). This is the AD attribute that uniquely identifies users; the source anchor is what links the on-prem and cloud copies of each user.
Matching attribute: UserPrincipalName. Default. Don’t change unless you have a specific reason.
Step 9 — filter scope + optional features
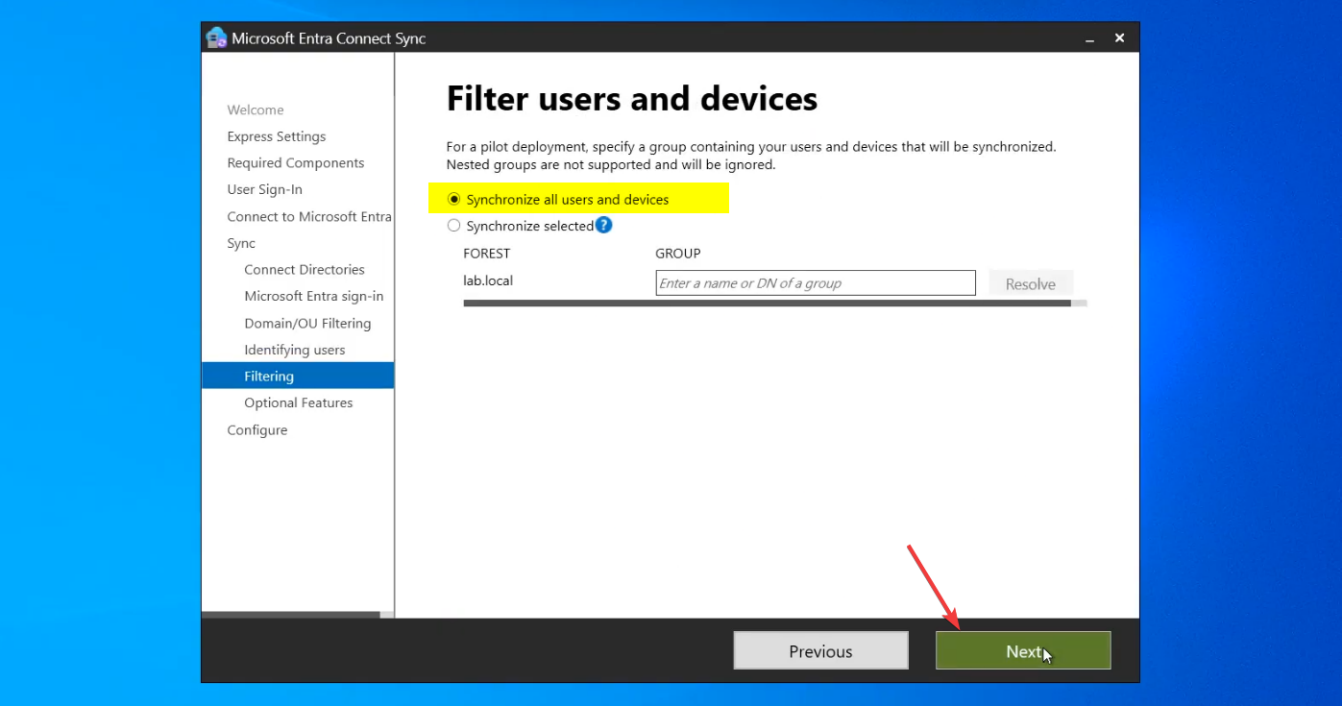
Filter Users and Devices: pick Synchronize all users and devices. The OU filter from Step 7 already limits scope; this filter is for further narrowing rarely needed.
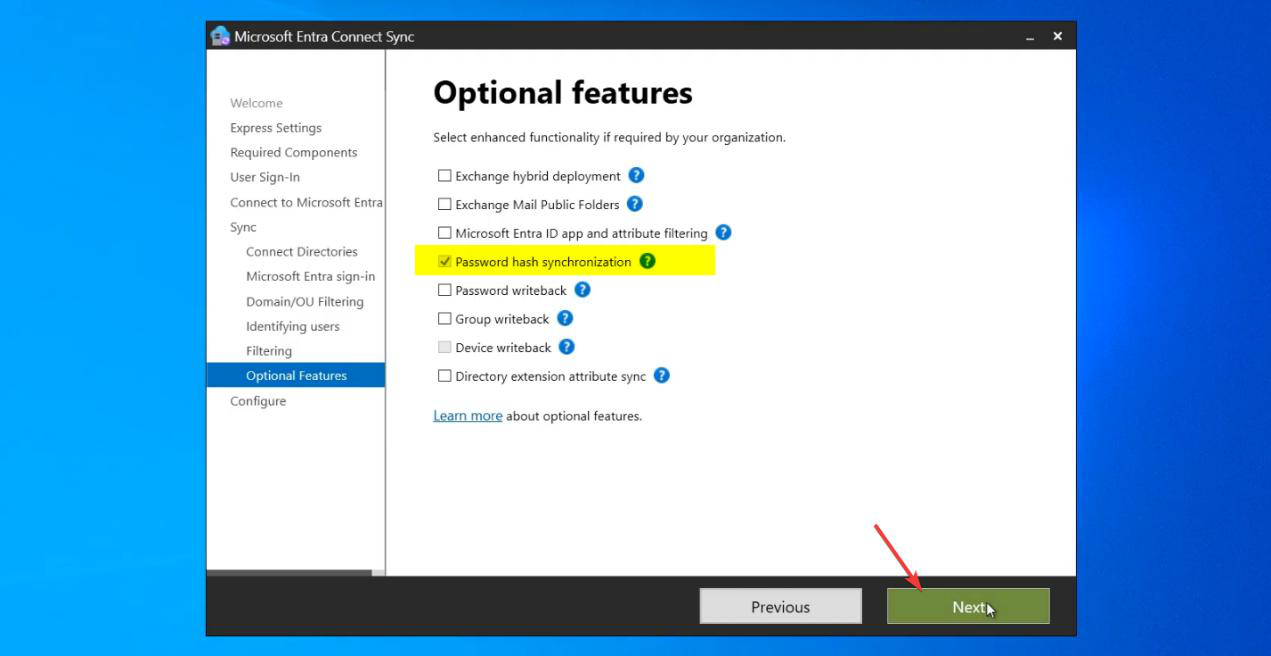
Optional Features — leave everything blank except Password Hash Synchronization (which is auto-selected from Step 3).
Why skip Exchange Hybrid Deployment
If you tick Exchange Hybrid, Entra Connect writes attributes back to AD that are needed for an on-prem Exchange Server / Office 365 hybrid mailbox setup. If you don’t HAVE on-prem Exchange (or don’t plan a hybrid mail migration), ticking this clutters AD with attributes nothing reads. Removing them later is harder than not adding them now. Don’t tick unless your migration plan specifically calls for it.
Why skip Group Writeback
Cloud-created groups get written back to AD. Useful for a small set of scenarios (e.g. distribution lists managed in M365 that on-prem Exchange needs to see). Most environments don’t need it.
Why skip Directory Extension Attributes
Custom AD attributes get extended into Entra. Useful when M365 apps need to read custom AD data; rarely needed at install time. Can be enabled later.
Step 10 — configure and finish

Ready to Configure page. Review settings:
- Tick Start the synchronization process when configuration completes. (Untick if you want manual control of when first sync runs; for most people the auto-start is fine.)
- Click Install.
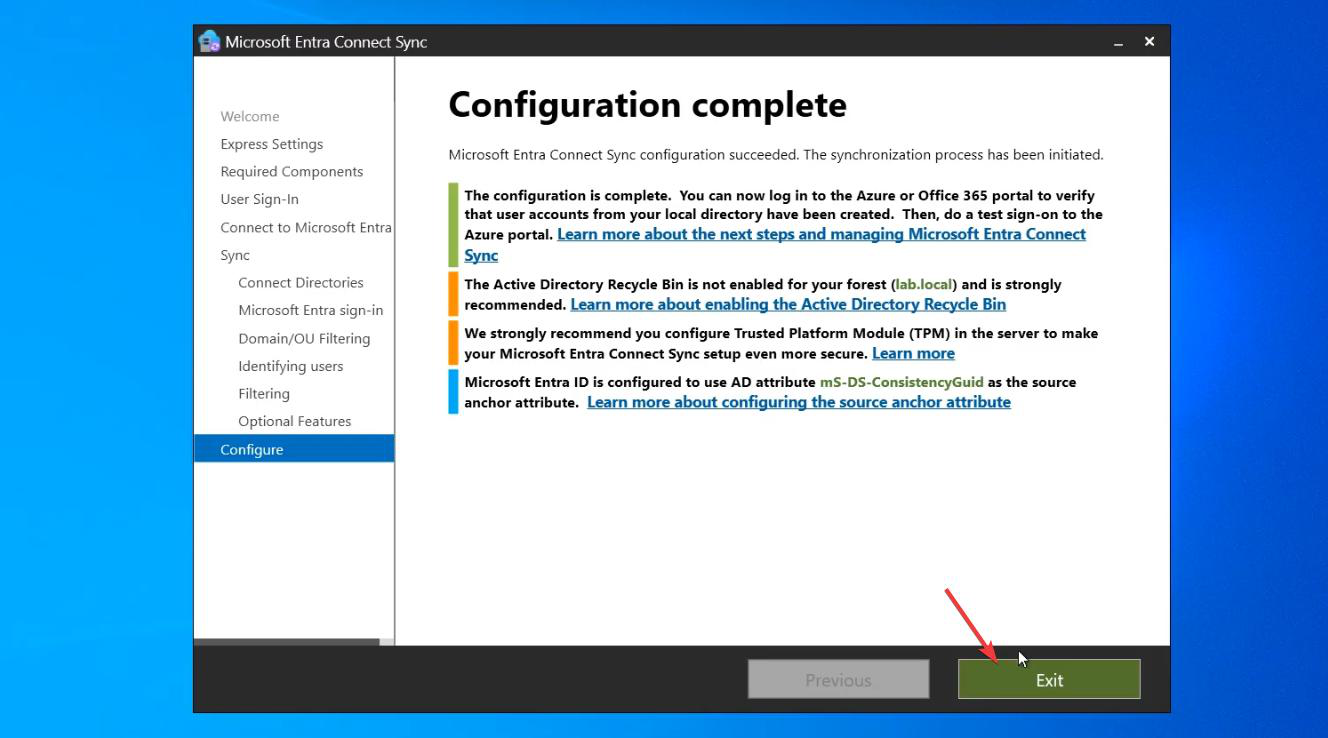
Configuration runs. ~3 minutes. The wizard updates AD (creating the MSOL_ service account permissions), Entra ID (provisioning the sync service principal), and the EC server itself (registering services, configuring SQL).
Configuration Complete page. Click Exit. Initial sync is already running in the background.
Step 11 — verify in three places
Don’t trust “configuration complete” without verification. Sync may have started but might be failing silently. Check three places.
Method 1 — Synchronization Service Manager (on the EC server)

On the EC server, open Synchronization Service from the Start menu. The Operations tab shows recent sync runs.
Look for:
- Run Profiles for both Import (from AD, from Entra) and Export (to AD, to Entra).
- Status: Success on each.
- An export to
[your-tenant].onmicrosoft.comwith a non-zero Adds count.
![Synchronization Service Manager Export Statistics for the [tenant].onmicrosoft.com run profile showing Adds count and a list of newly synced users](https://infotechninja.com/wp-content/uploads/2026/05/post240-fig-20.png)
Click into the export run. Bottom-right Export Statistics shows Adds / Updates / Deletes counts.
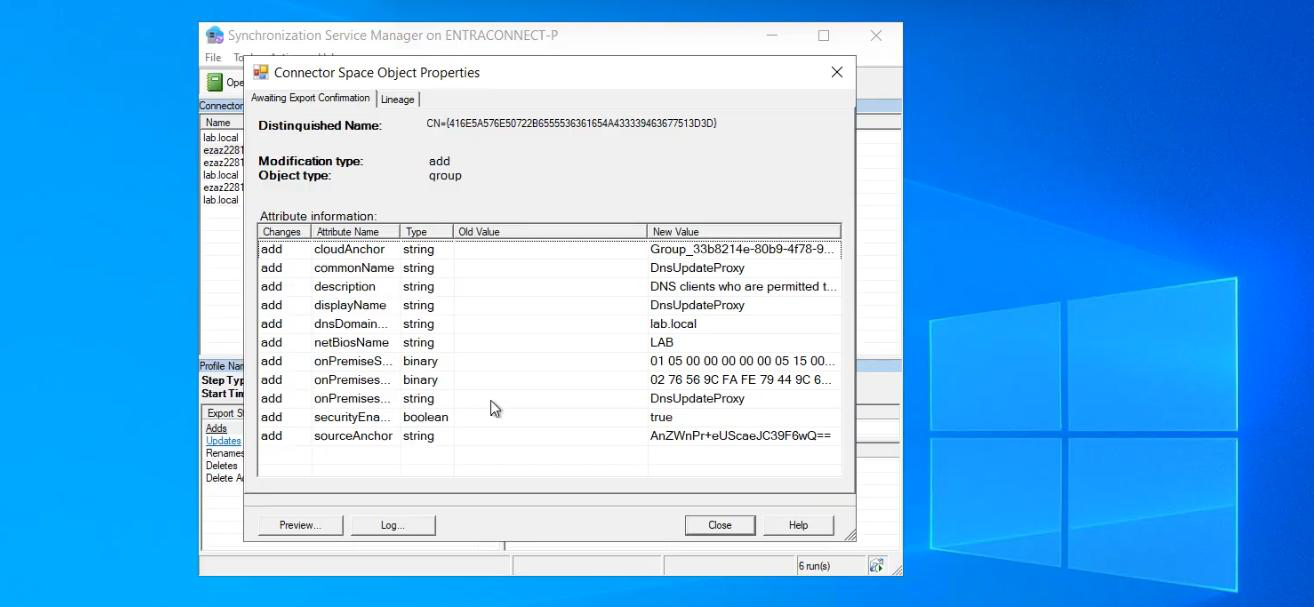
Click Adds to drill into the user list. Spot-check a few users by their Distinguished Name. If the right users with the right attributes are listed, the sync engine is working.
Method 2 — M365 Admin Centre
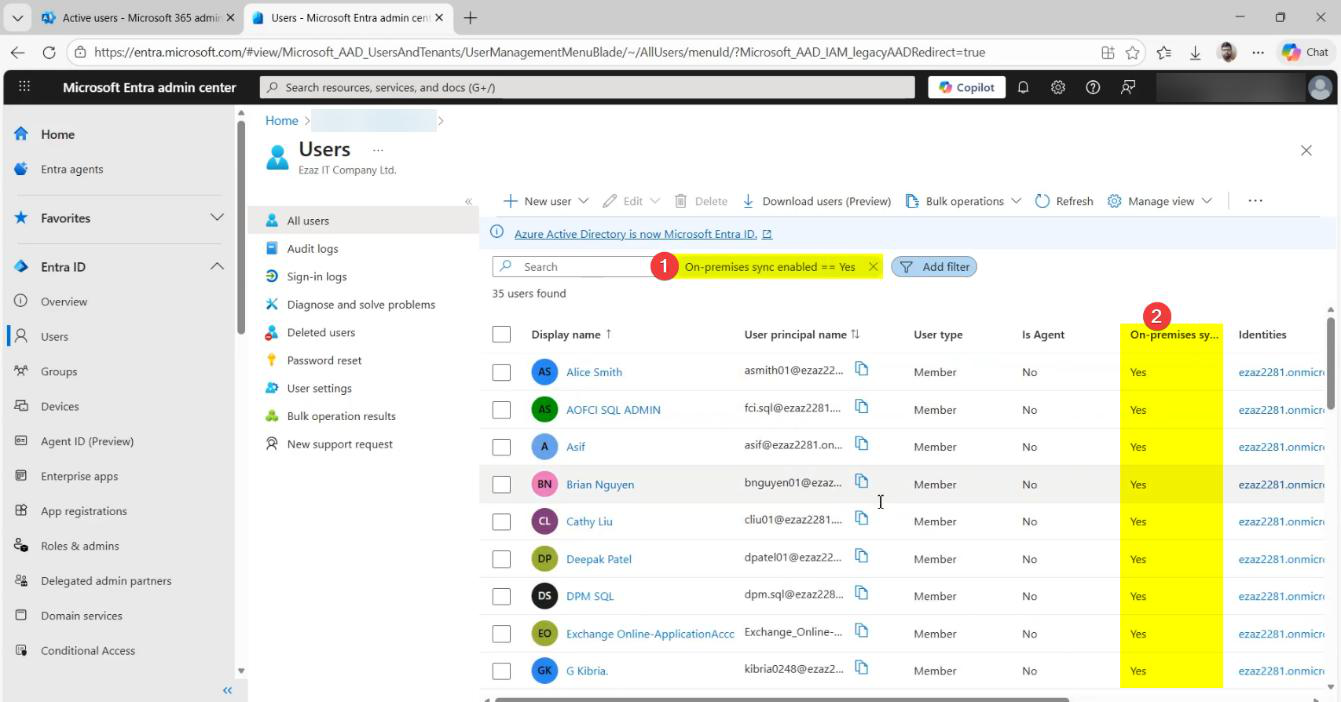 admin.microsoft.com. Users > Active Users. The synced on-prem users appear here.
For each one, the Identity Source column reads “Synchronized with Active Directory”. Cloud-only users (created directly in M365) read “Cloud”. The two coexist; you can have both types in the same tenant.
Method 3 — Entra Admin Centre
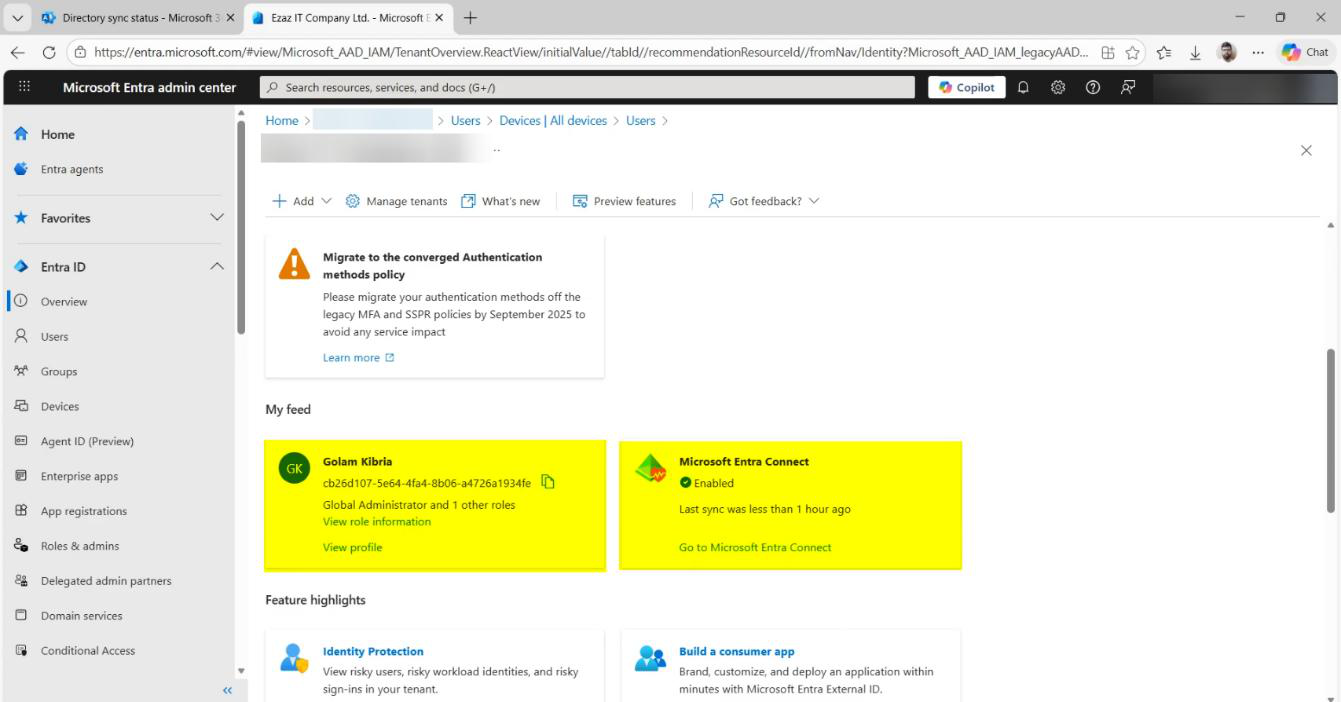 entra.microsoft.com. Hybrid management > Entra Connect. The blade shows:
- Sync Enabled: Yes.
- Last Sync: a recent timestamp (within the last 30 minutes).
- EC server: the hostname you installed on.
- Sync Health: Healthy.
If any of these reads otherwise — Sync Disabled, Last Sync >1 hour ago, Health: Warning — investigate before declaring done.
Things that bite people
Express picked accidentally
You blew through the wizard and clicked Express. Now everything in your AD is syncing to the cloud, including OUs you didn’t want. Fix: re-run the wizard in Custom mode and reconfigure the OU filter; the next sync respects the new filter.
Global Admin role assigned to a group
The role check happens at install time. If your install account got the role via group membership rather than direct assignment, the wizard fails Step 4 with a permission error. Fix: directly assign the role to the user (not via group) and re-run.
MSOL_ account creation fails
Step 5 needs Enterprise Admin to create the MSOL_ service account. If your Enterprise Admin creds got rejected, check (a) you typed them right, (b) the account is in the forest root’s Enterprise Admins group, (c) account isn’t locked.
UPN warning is more than a few users
You ticked “Continue without matching” and now hundreds of users land with .onmicrosoft.com UPNs. This means Part 4 didn’t catch them — usually because they’re in OUs you didn’t target with the bulk Set-ADUser. Either fix the UPNs and re-sync, or accept the cloud-only UPN for those users.
Exchange Hybrid ticked by mistake
You absent-mindedly ticked Exchange Hybrid in Step 9. Now Entra Connect is writing attributes back to AD that nothing reads. Re-run the wizard, untick Exchange Hybrid. The previously-written attributes stay in AD until you manually clean them up; usually they’re harmless leftovers but auditors hate them.
First sync export fails
Configuration complete, but Synchronization Service Manager shows the export failing. Common cause: a user has an attribute that violates Entra ID’s rules — usually something IdFix should have caught but didn’t. Click into the failed run profile to see which user(s) failed; fix the attribute in AD; re-run the sync via Start-ADSyncSyncCycle PowerShell cmdlet on the EC server.
OU filter forgotten
You skipped Step 7 (OU filter) by accident. Now the entire AD is syncing. Re-run the wizard, configure the OU filter, save. Next sync respects it. Users that were previously synced from now-excluded OUs will be soft-deleted in the cloud (recoverable for 30 days) on the next sync.
Sync Health shows warnings hours later
Initial sync looked successful. A few hours in, Sync Health in the Entra portal shows warnings. Usually transient (network blip during a delta sync) but worth investigating — click into the alert for the specific failure. Persistent warnings need fixing.
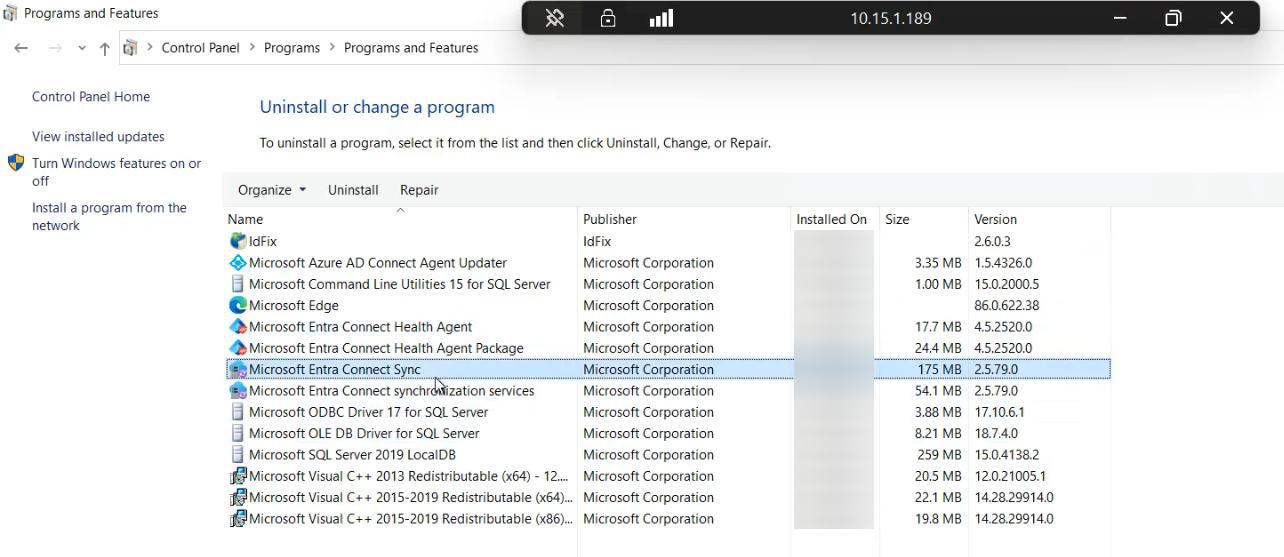
What’s next
Sync is running. Users are in the cloud. Part 8 covers the day-2 operations: how to find your Entra Connect server, find the version, find the service accounts — the things you’ll need on every troubleshooting call. After that: OU filter changes, in-place upgrades, server migration, and high availability. Full series in the Hybrid Identity pathway.