The grand finale. Twelve parts of building — this part is about tearing down gracefully when nodes need to be replaced or decommissioned. Plus advanced cluster moves: shuffling individual disks, relocating Core Cluster Resources. Cleanup is as important as setup — and the order of operations matters.
The correct order: SQL first, Windows second
Removing a node from a SQL FCI cluster is a two-step process:
- Phase 1: Run SQL Setup in Maintenance mode on the target node and choose Remove Node. This unregisters SQL from that node but leaves Windows clustering intact.
- Phase 2: Use FCM to Evict the node from the Windows Failover Cluster.
Doing it in this order is critical. If you evict from the Windows cluster first, the SQL Add Node metadata gets orphaned and you have to clean it up manually with PowerShell. If you do SQL first, both layers stay consistent.
Phase 1 — remove SQL from Node-03
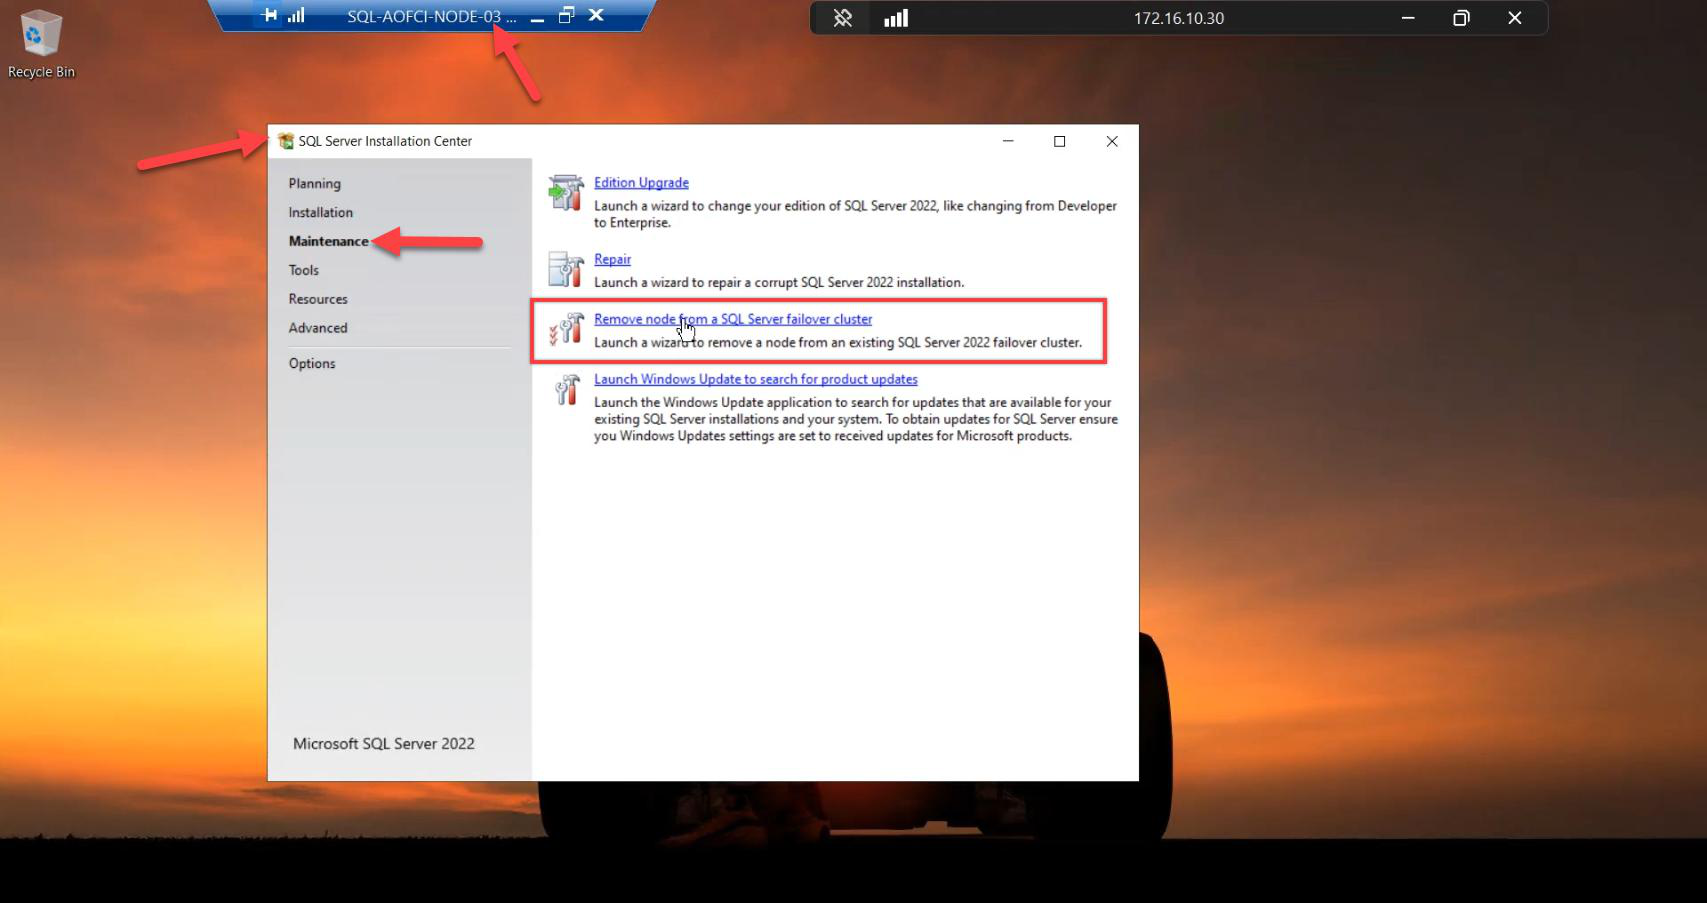
Sign in to Node-03. Mount SQL Server 2022 ISO. Run setup.exe as Admin.
Go to the Maintenance tab (left nav, NOT Installation). Click Remove node from a SQL Server failover cluster.
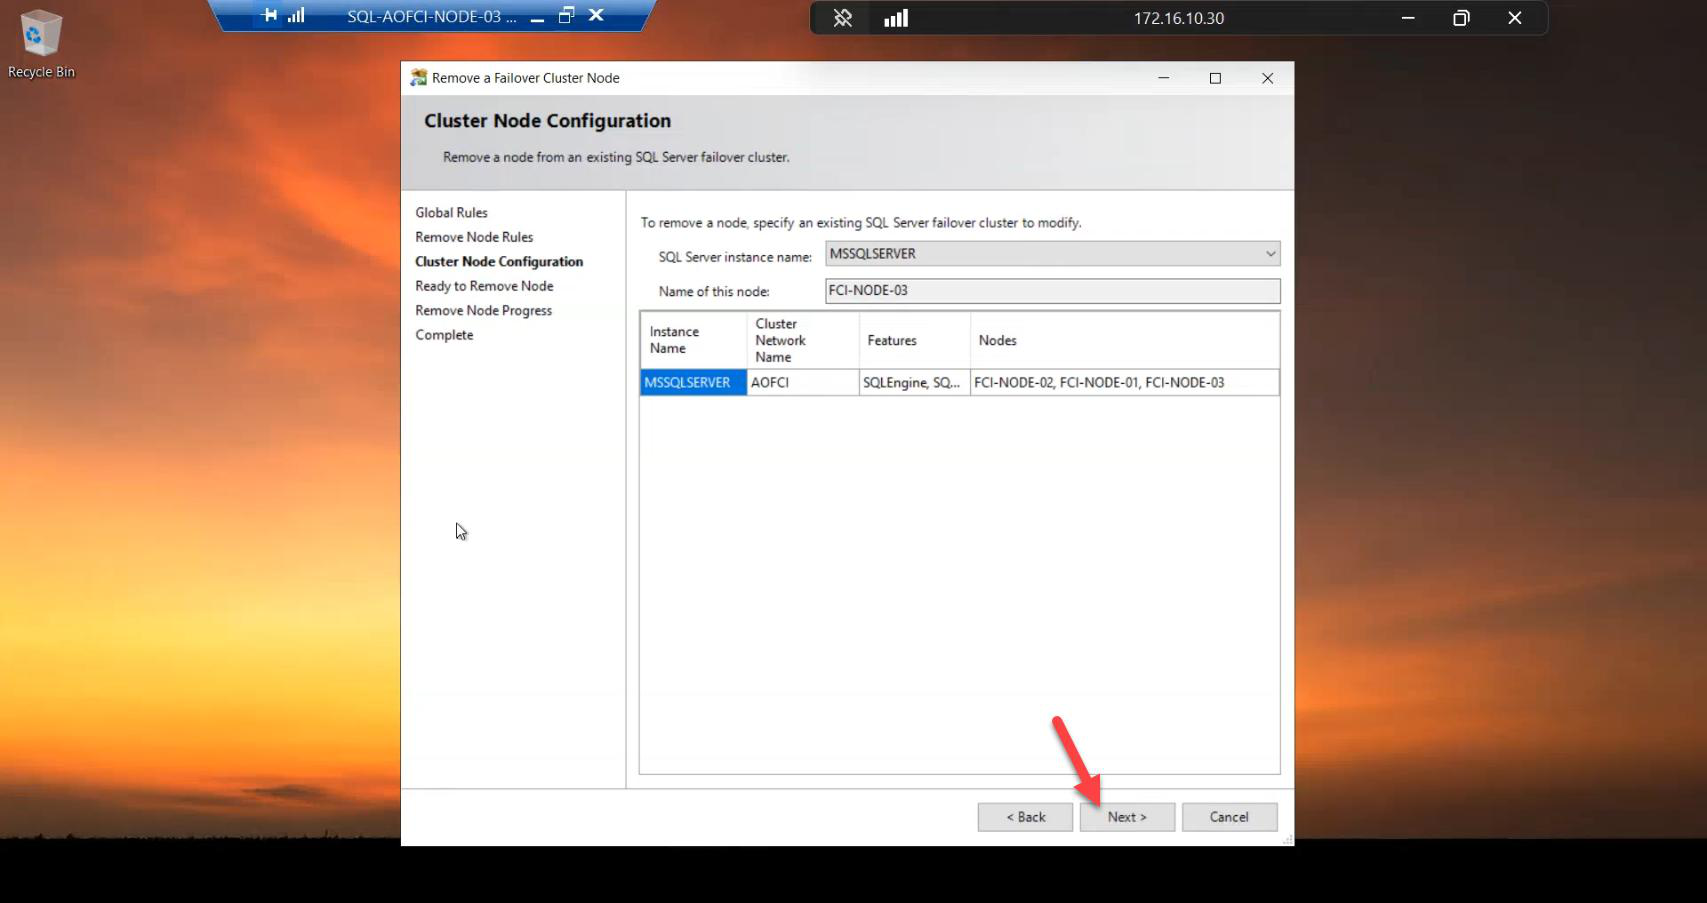
Cluster Node Configuration: wizard auto-detects Node-03. Confirm.
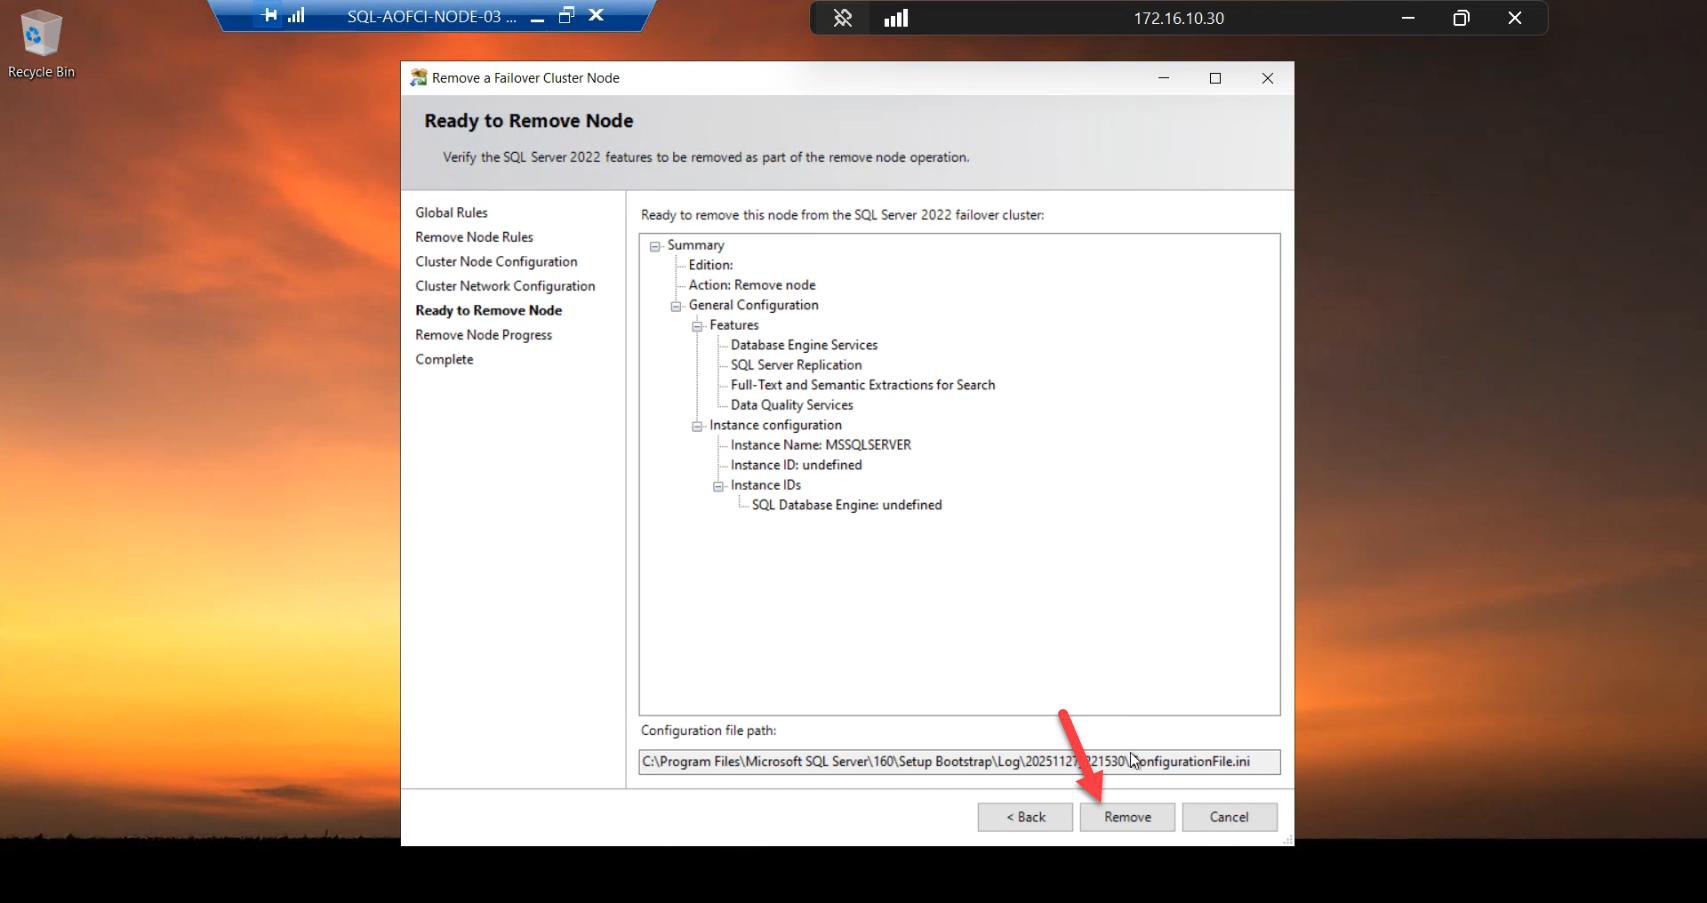
Click Remove. SQL gets cleanly unregistered from this node.
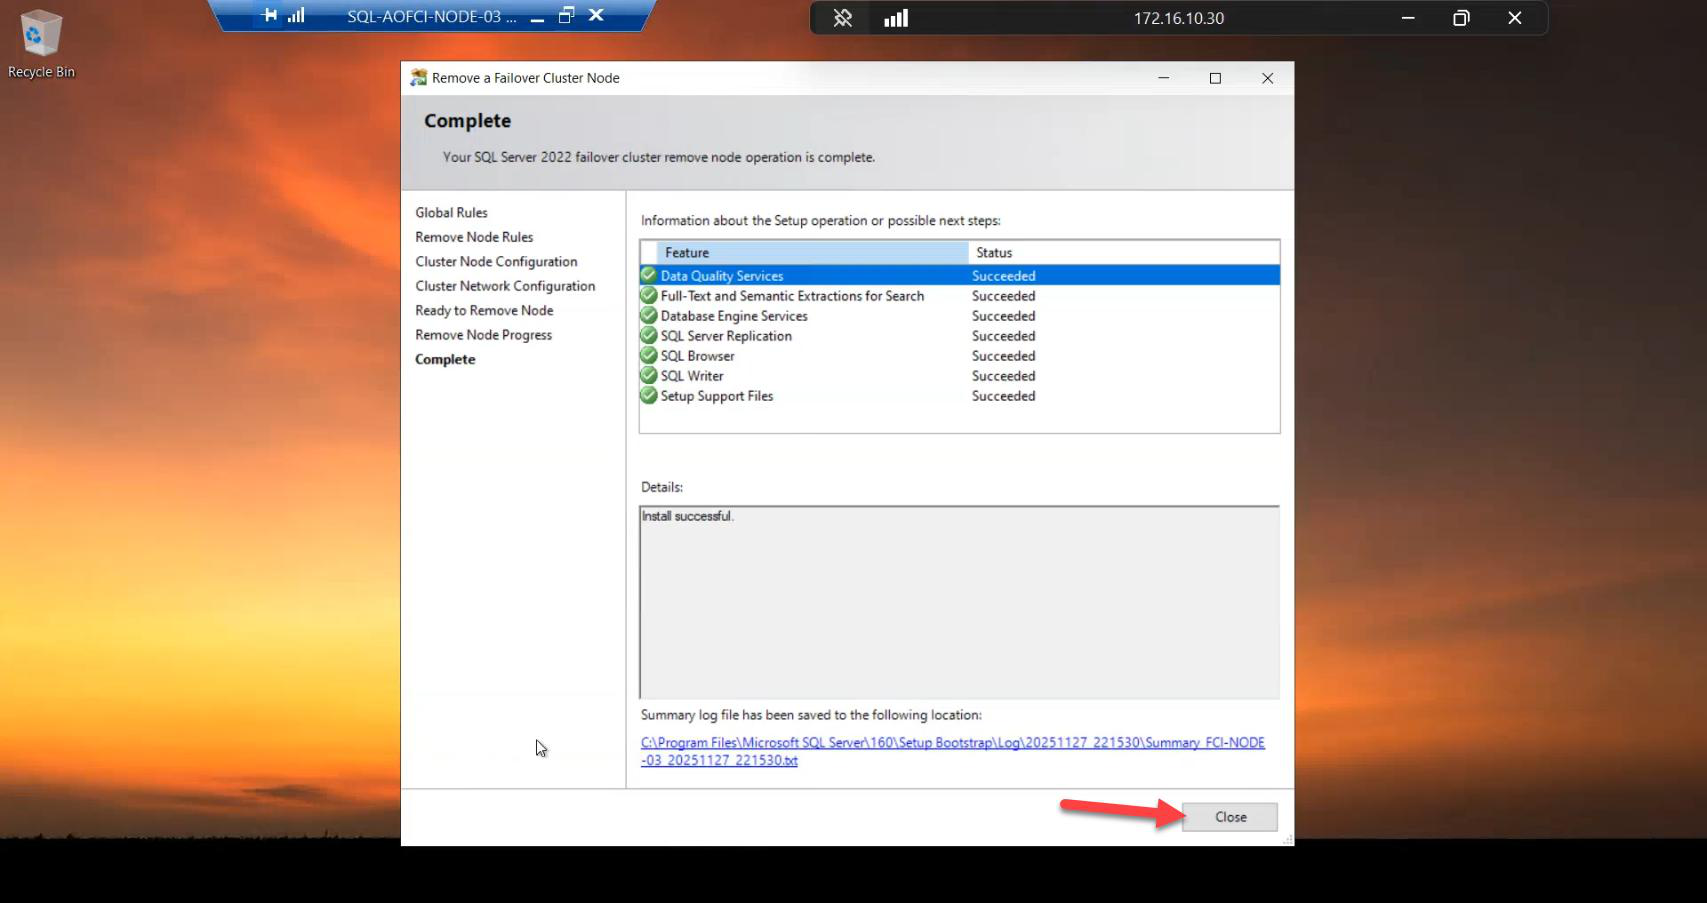
Done. Node-03 still has SQL binaries on disk, still has Windows clustering, still has iSCSI access — but it’s no longer in the SQL FCI Possible Owners list. SQL won’t failover to it.
If you wanted to keep Node-03 in the cluster (e.g., for a different clustered role), stop here. If you’re fully decommissioning, continue.
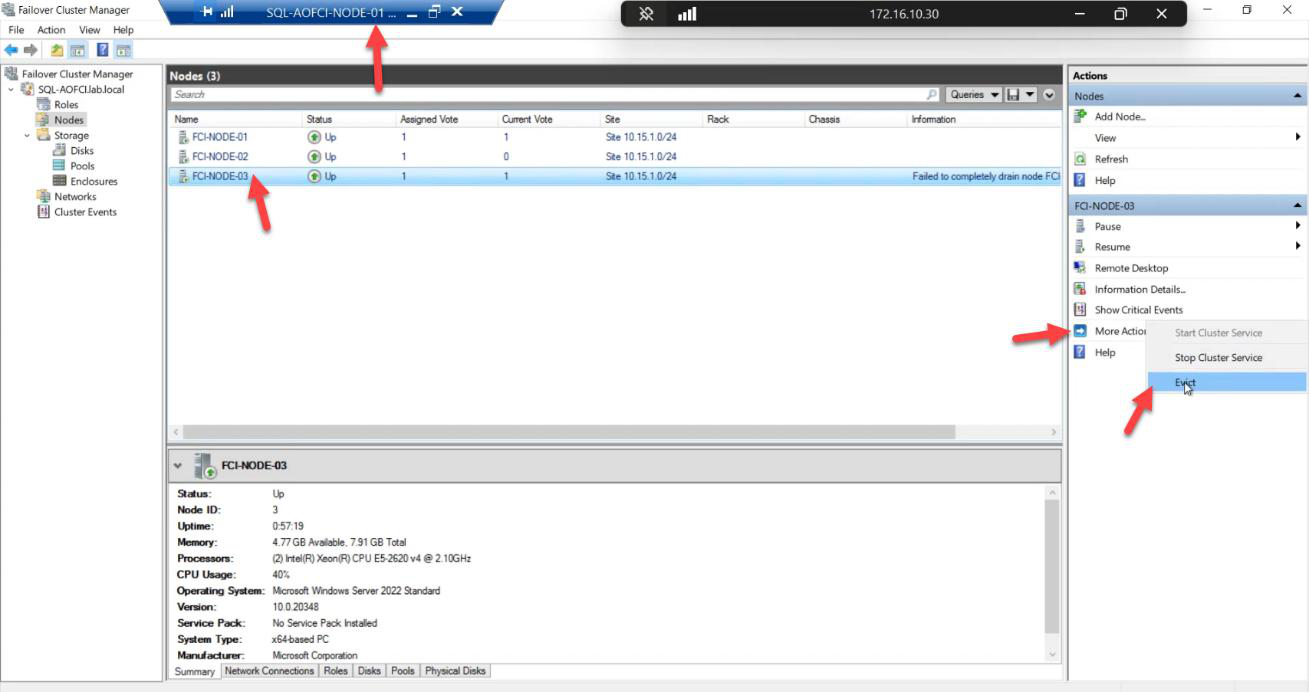
Phase 2 — evict Node-03 from the Windows cluster
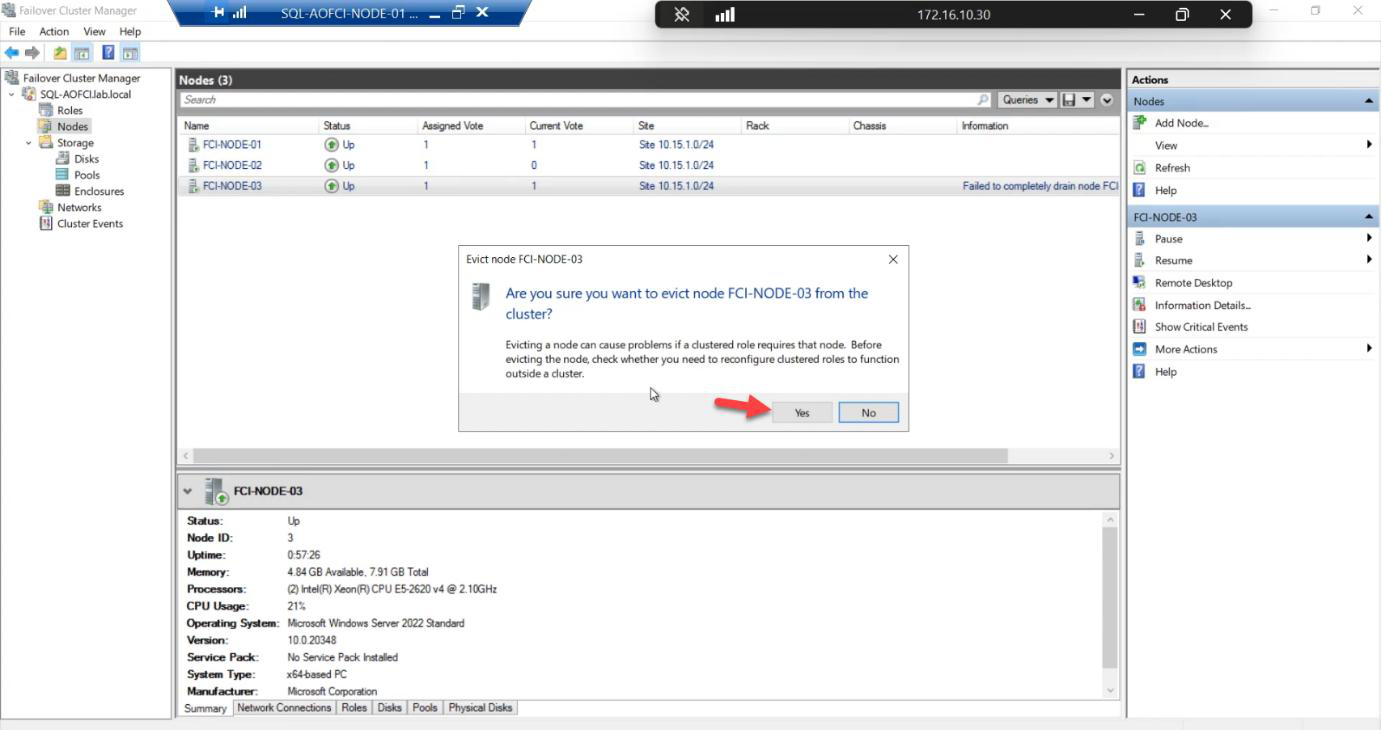
Confirmation: Yes.
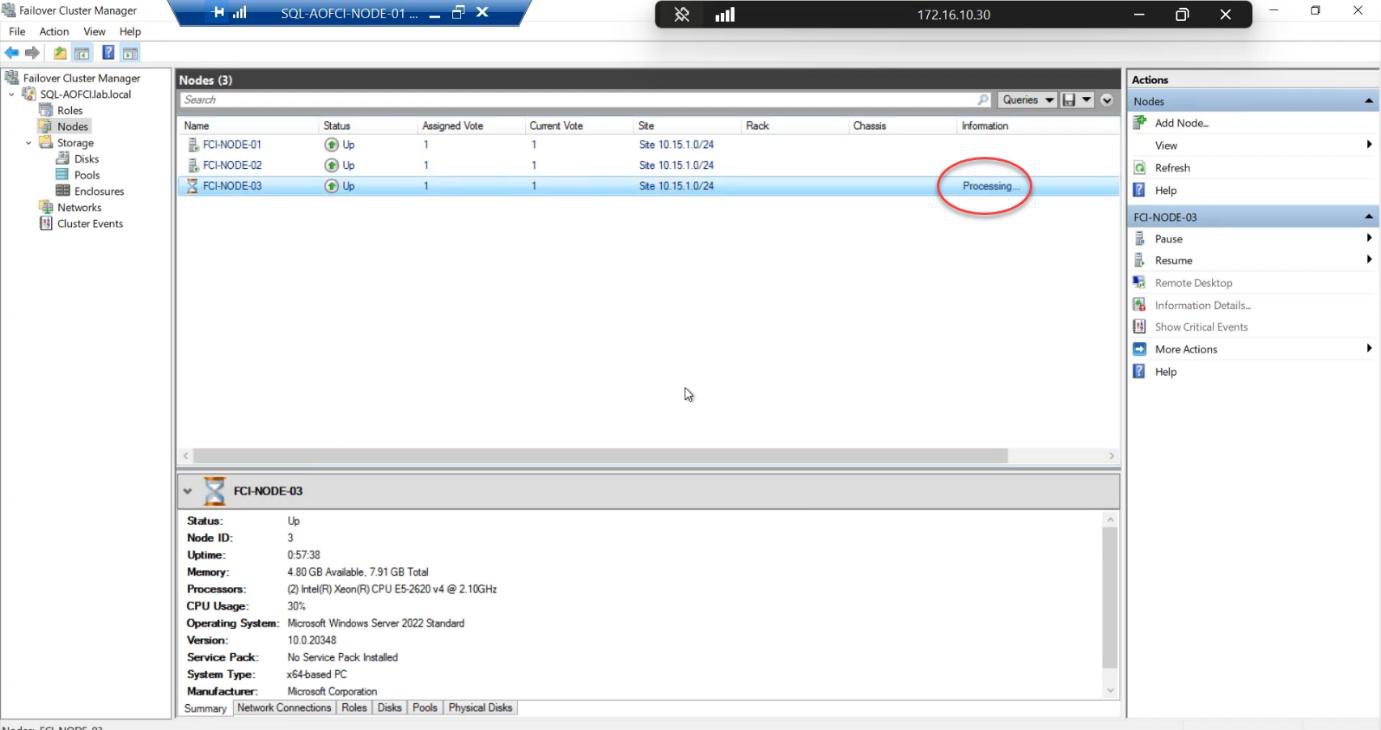
Status briefly Processing. The cluster service removes all references to Node-03.
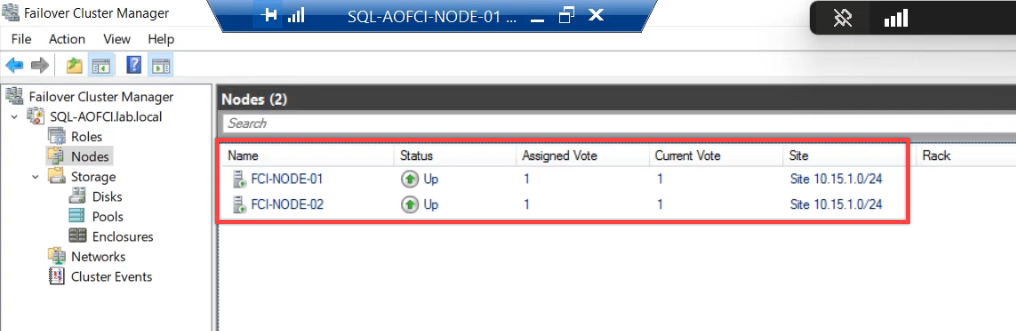
Done. Only Node-01 and Node-02 remain. Node-03 is now a regular domain-joined server with no cluster membership. You can shut it down, reinstall it, repurpose it — whatever the decommission plan requires.
Phase 3 — reconfigure the quorum
Cluster shrunk 3 → 2 nodes. The vote calculation has changed. With 3 nodes + witness = 4 votes, you tolerated 2 failures. With 2 nodes + witness = 3 votes, you tolerate 1 failure. The witness disk is essential again.

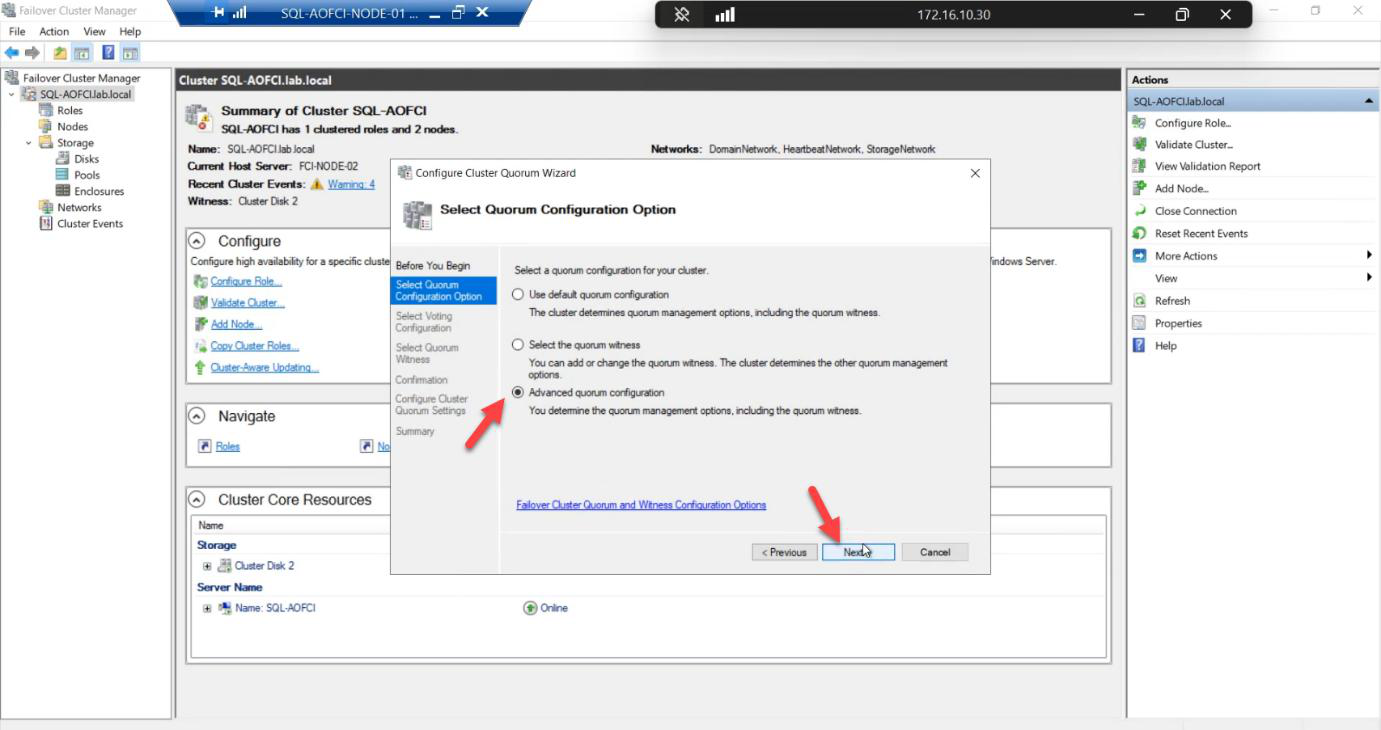
Advanced quorum configuration. Gives explicit control.

Voting Nodes: tick Node-01 and Node-02. Both vote.

Witness: Disk witness. Back to even node count, need the tie-breaker.
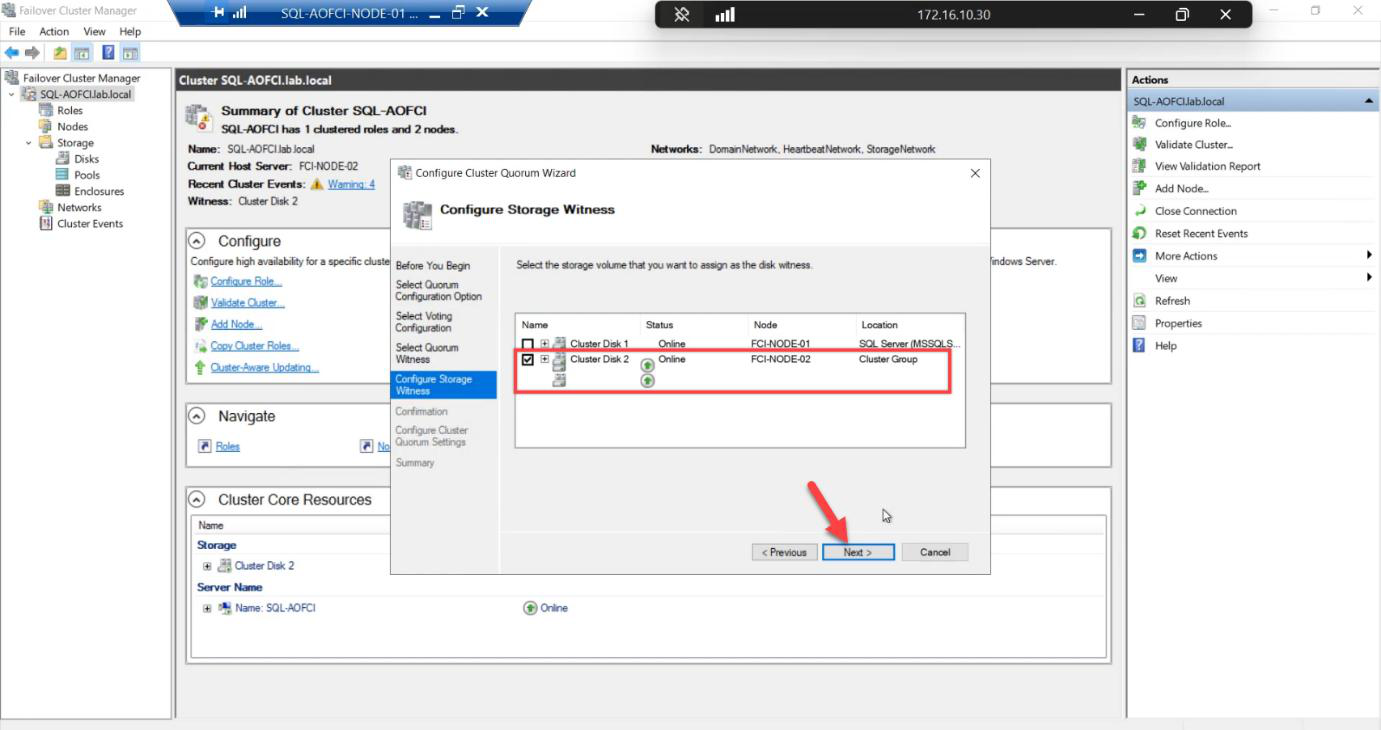
Pick the 2 GB Quorum disk explicitly.
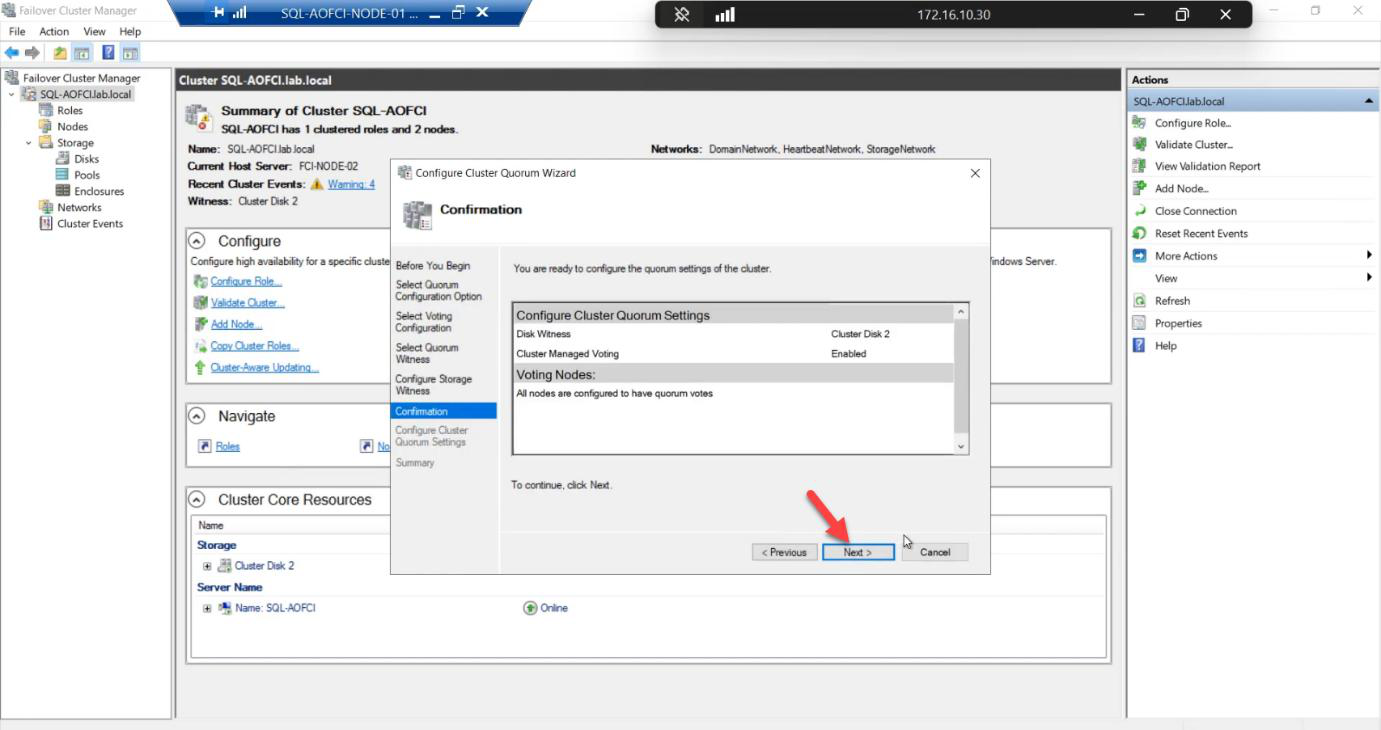
Confirmation: 2 votes + 1 witness = 3 votes total. Tolerates 1 failure of any kind.
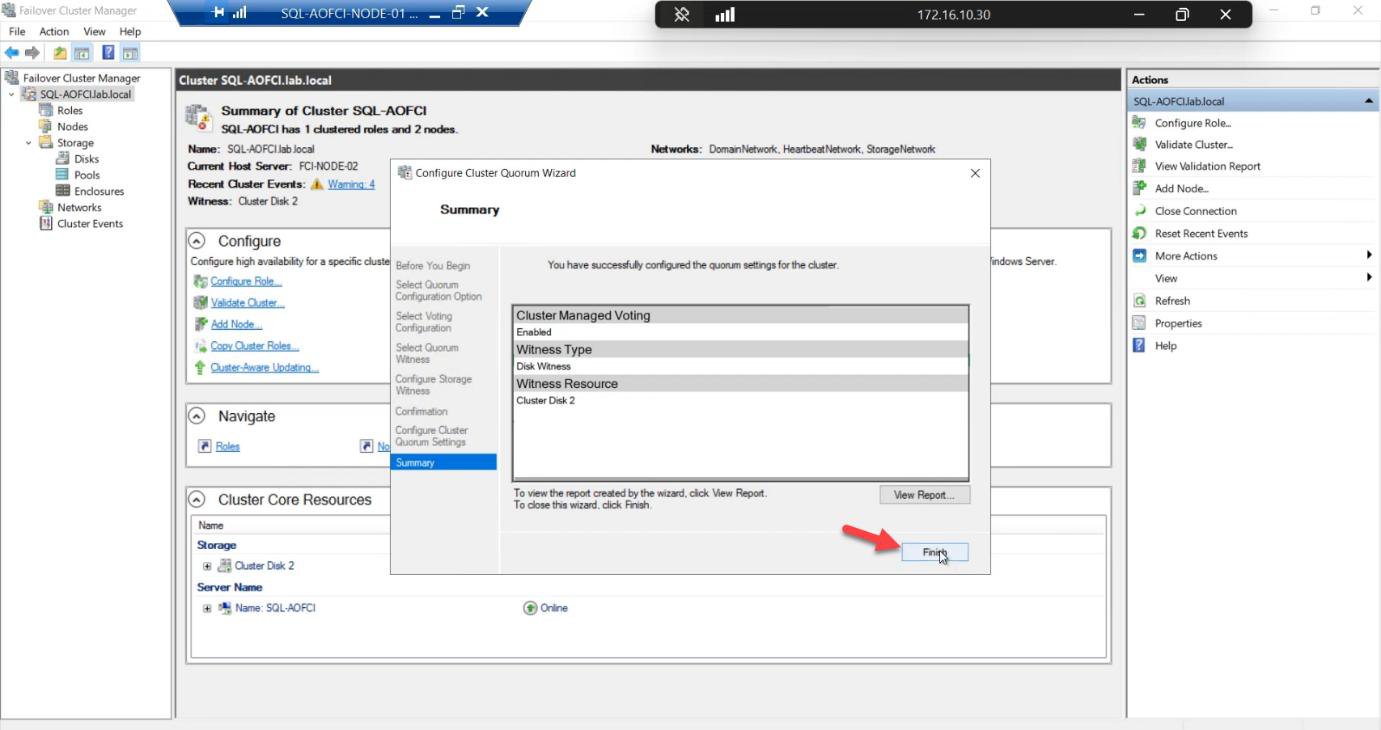
Done. Quorum healthy for the 2-node configuration.
Phase 4 — advanced: move individual disks
So far we’ve always failed over the entire SQL role (which moves all dependent disks together). But sometimes you need to move just one disk — e.g., for storage maintenance, or to test a path on a specific node.

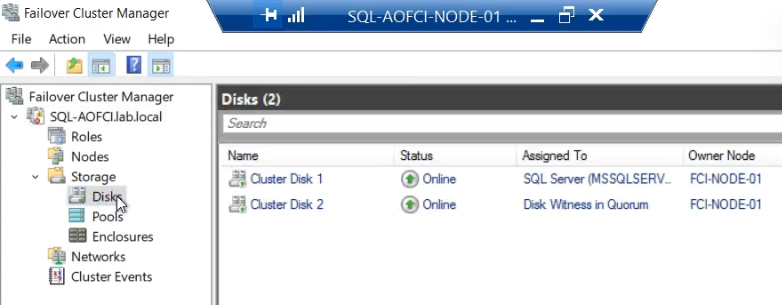
Disk ownership moves. SQL role stays where it is — doesn’t failover. Useful when you need to test storage paths or when SQL doesn’t depend on the disk you’re moving.
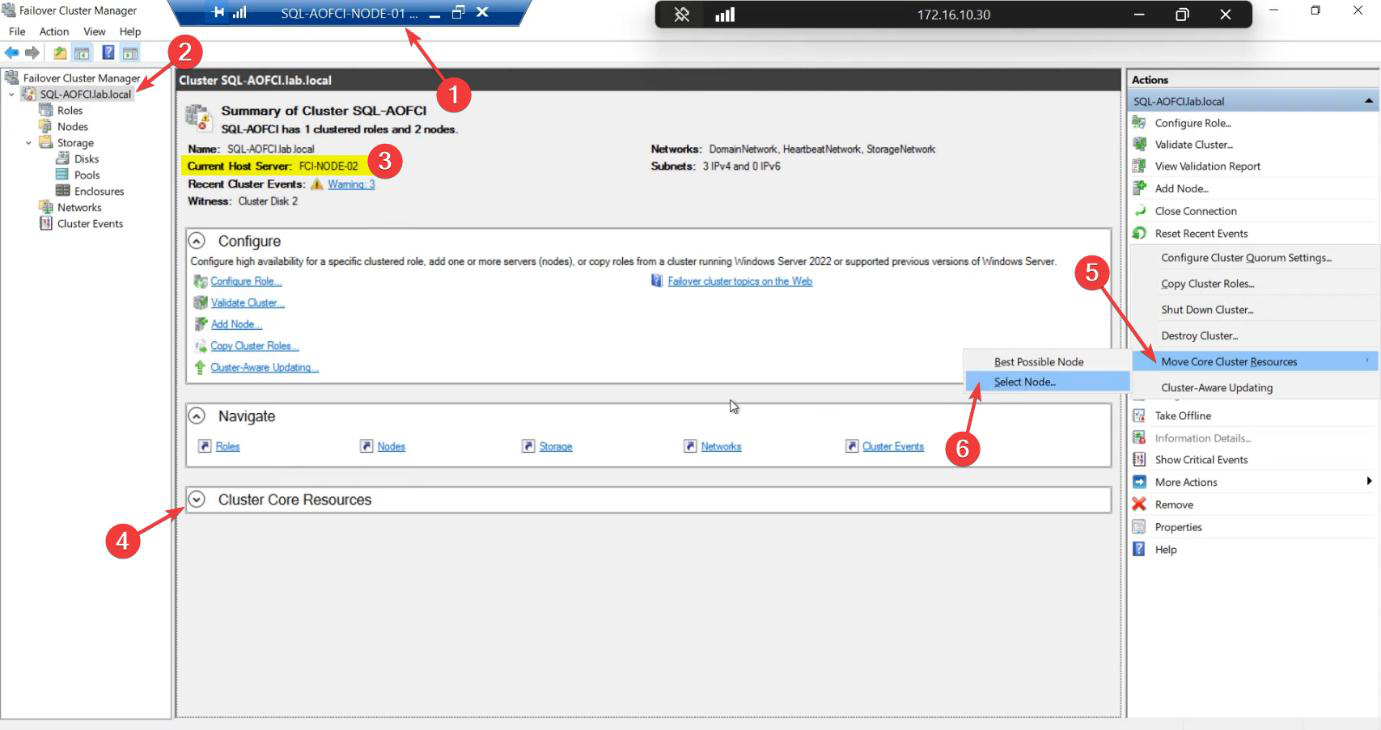
Phase 5 — advanced: move Core Cluster Resources
The cluster itself has a name and an IP — the CNO from Part 5 (ITN-CL-01, 10.15.1.45). These are separate from the SQL role’s name and IP. The CNO has its own owner.
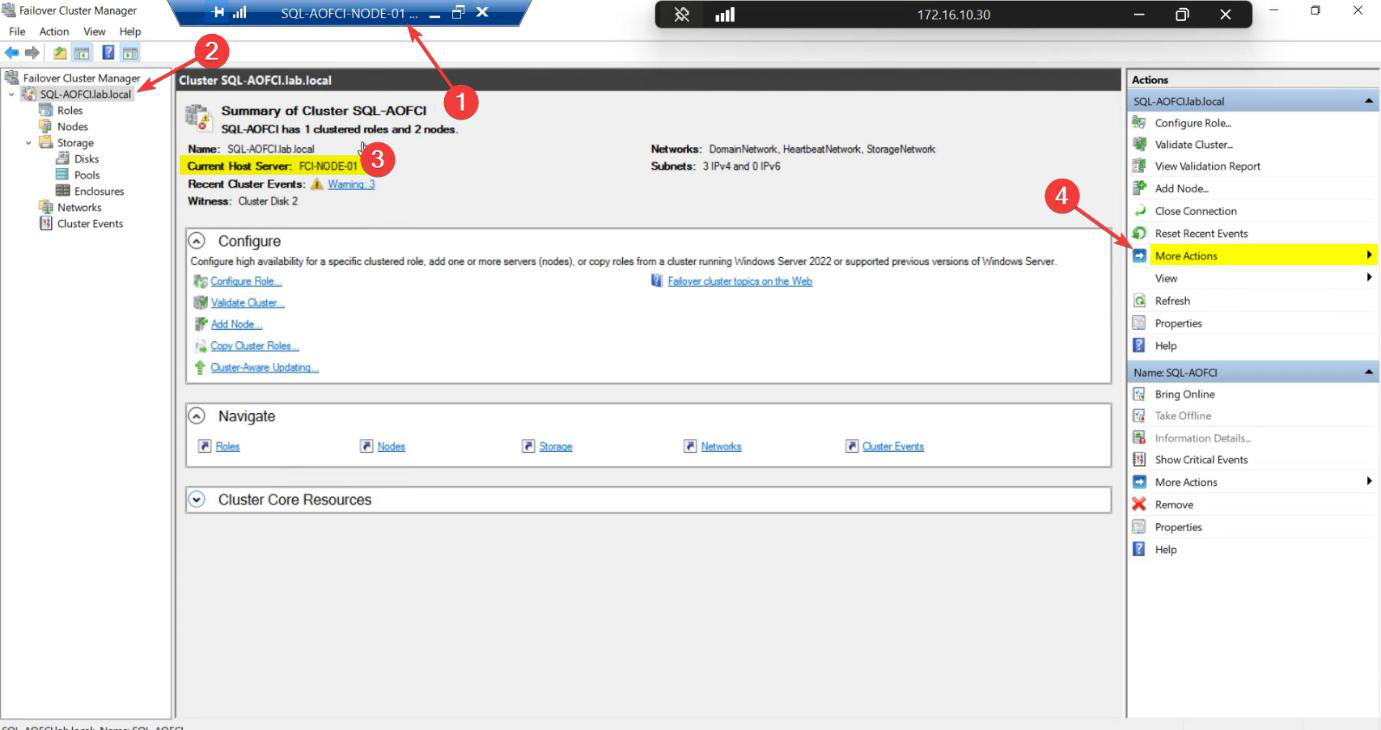
FCM > click cluster name (top of tree) > centre pane > Cluster Core Resources. Note Current Host Server.
 SQL Server Clustering pathway. Apply the techniques. Build it in your own lab. Patch it, break it, fail it over. The fastest way to learn clustering is to actually run a cluster.
Happy clustering. Thanks for following along.