3-node FCI is built. Now we use it. This part covers the real-world “go-live” flow: migrate a database from a legacy standalone SQL Server into AOFCI via backup/restore, then perform a manual failover with a continuous ping running so you can see exactly how much downtime there isn’t.
Phase A — lift & shift the database
Step 1: prepare a transfer share
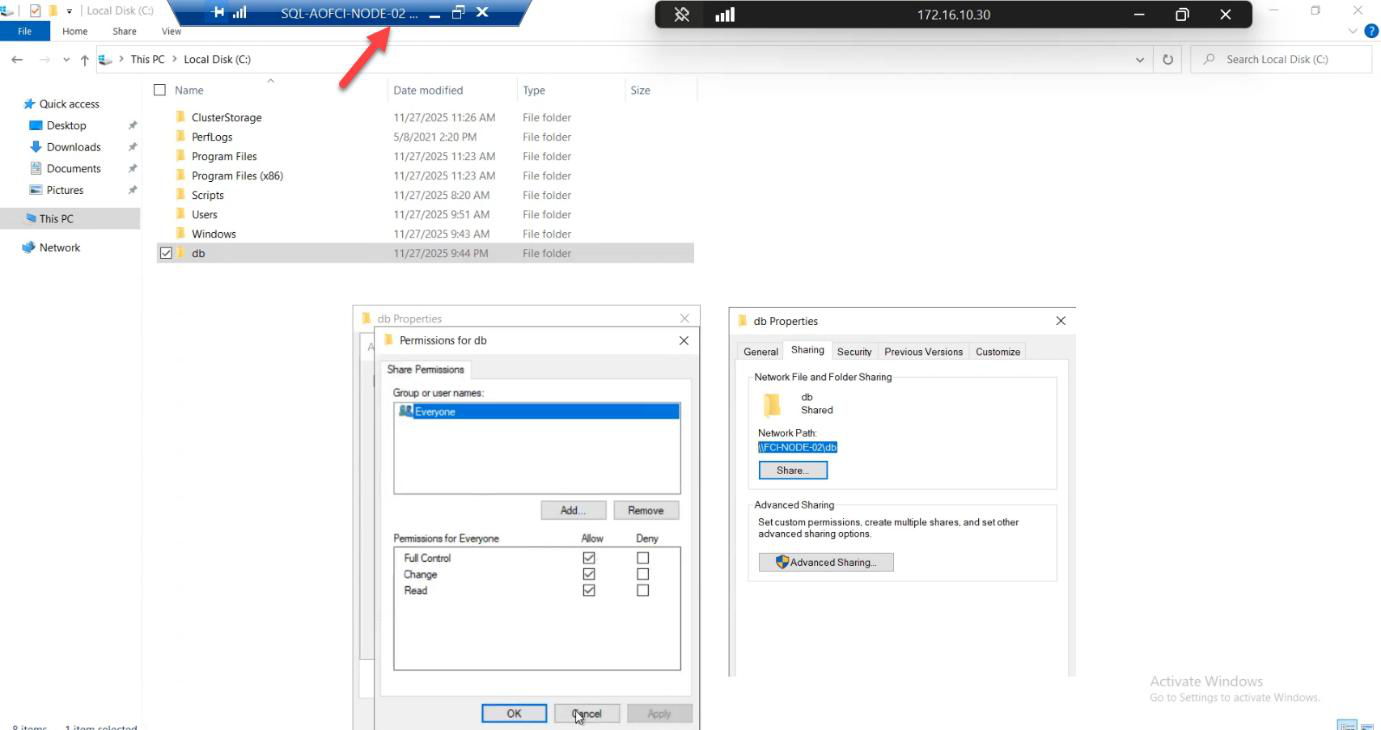
C:\DbBackups and share it. Lab: Everyone — Full Control. Production: restrict to specific service accounts.On Node-02 (the current FCI owner): create C:\DbBackups and share it. Lab: Everyone — Full Control. Production: grant only to the service account doing the migration.
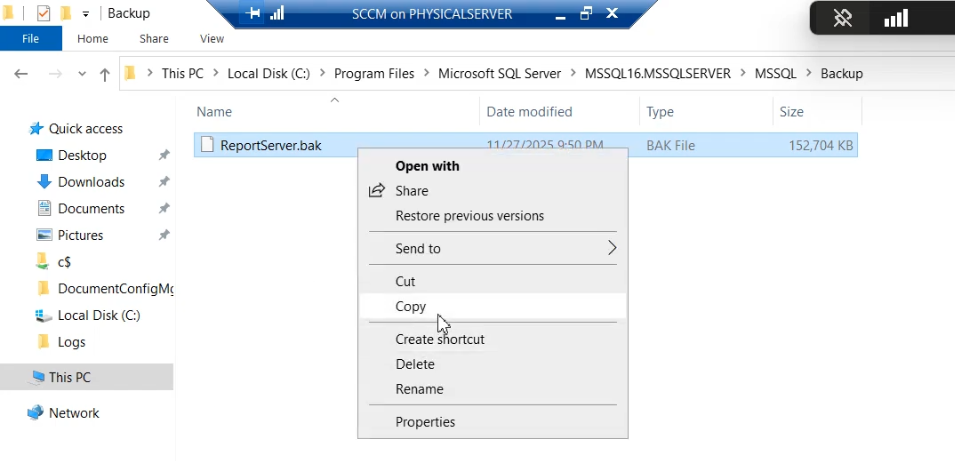
Step 2: backup the source database
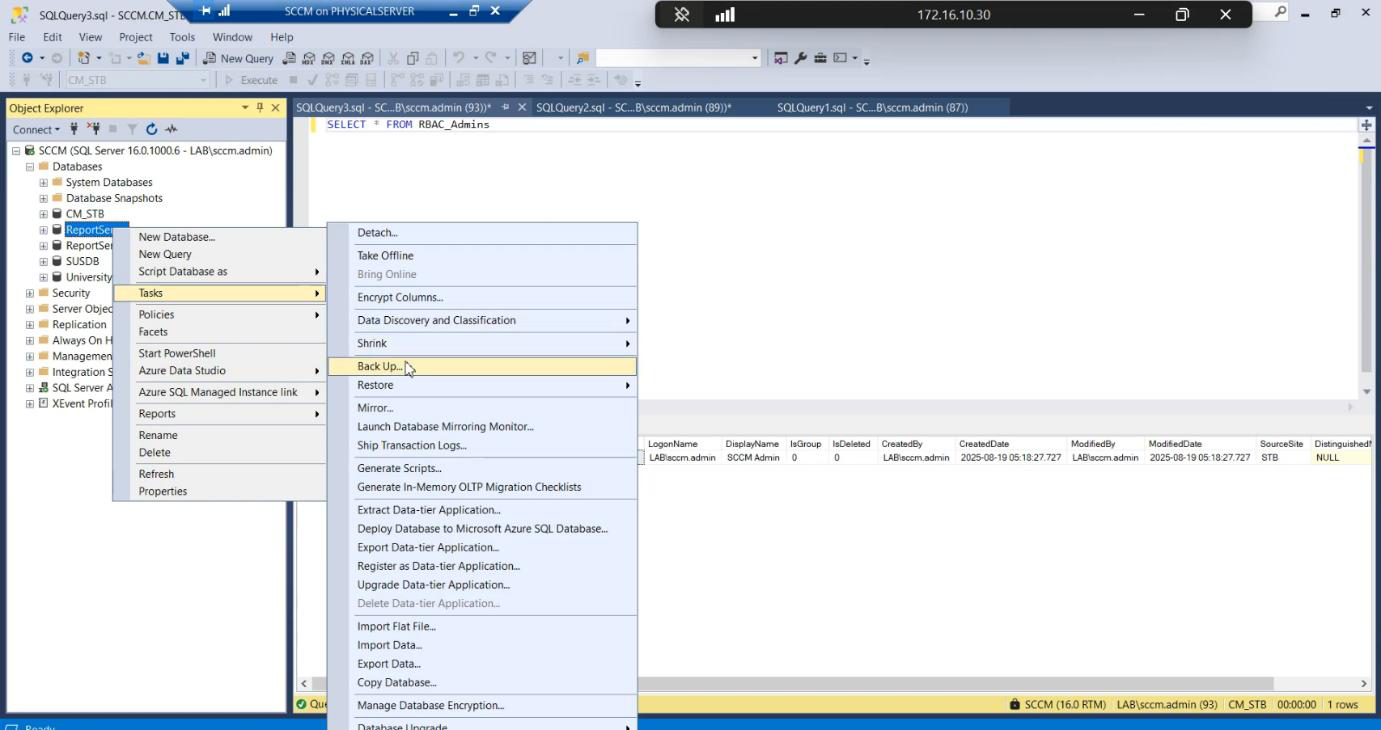
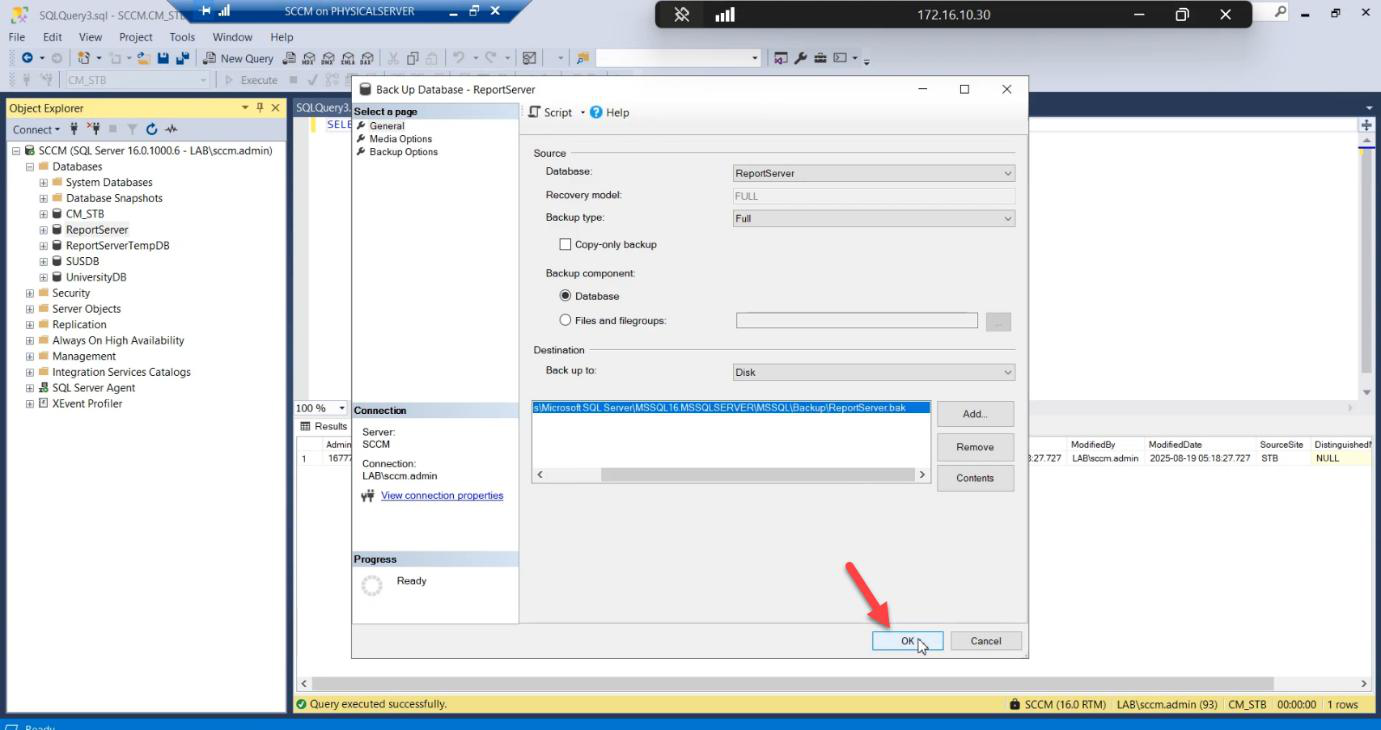
.bak file to a known location.Destination: a known local path. .bak file.
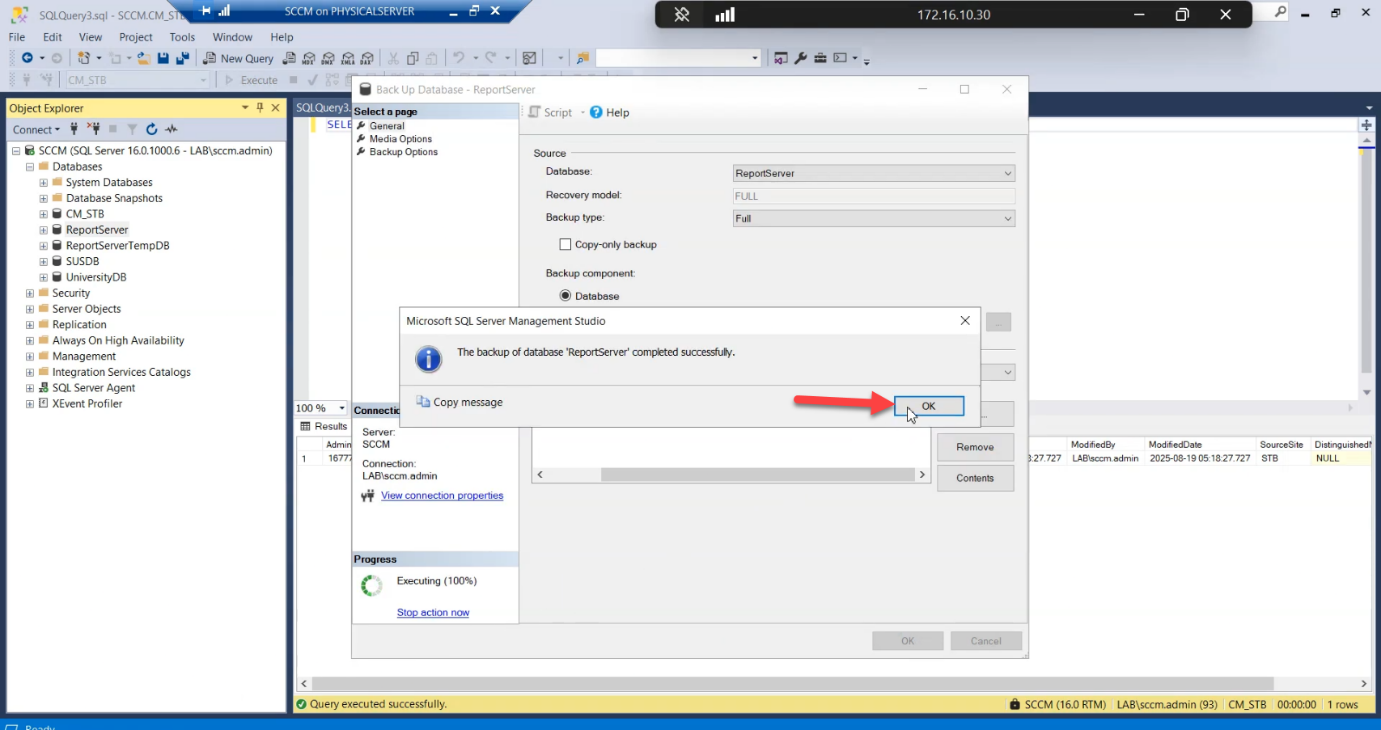
Backup completes successfully on the source.
Step 3: copy backup to the cluster share
.bak from the legacy server to \\Node-02\DbBackups.Drag the .bak from the legacy server to \\Node-02\DbBackups.
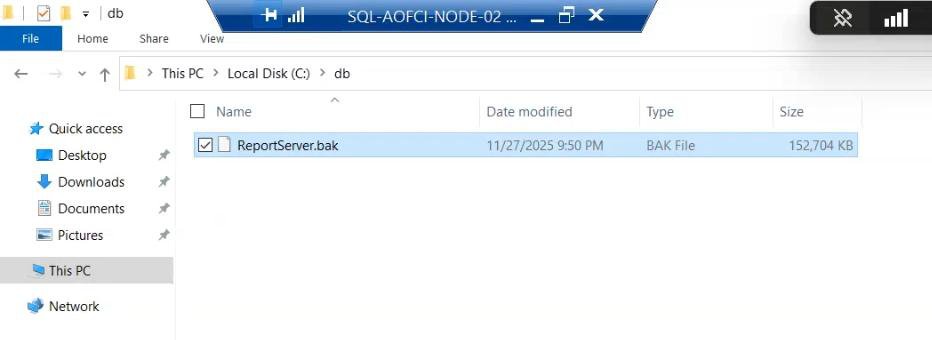
File arrives on Node-02.
Step 4: restore on the cluster (THE CRITICAL STEP)

SSMS on Node-02 connected to AOFCI: right-click Databases > Restore Database.
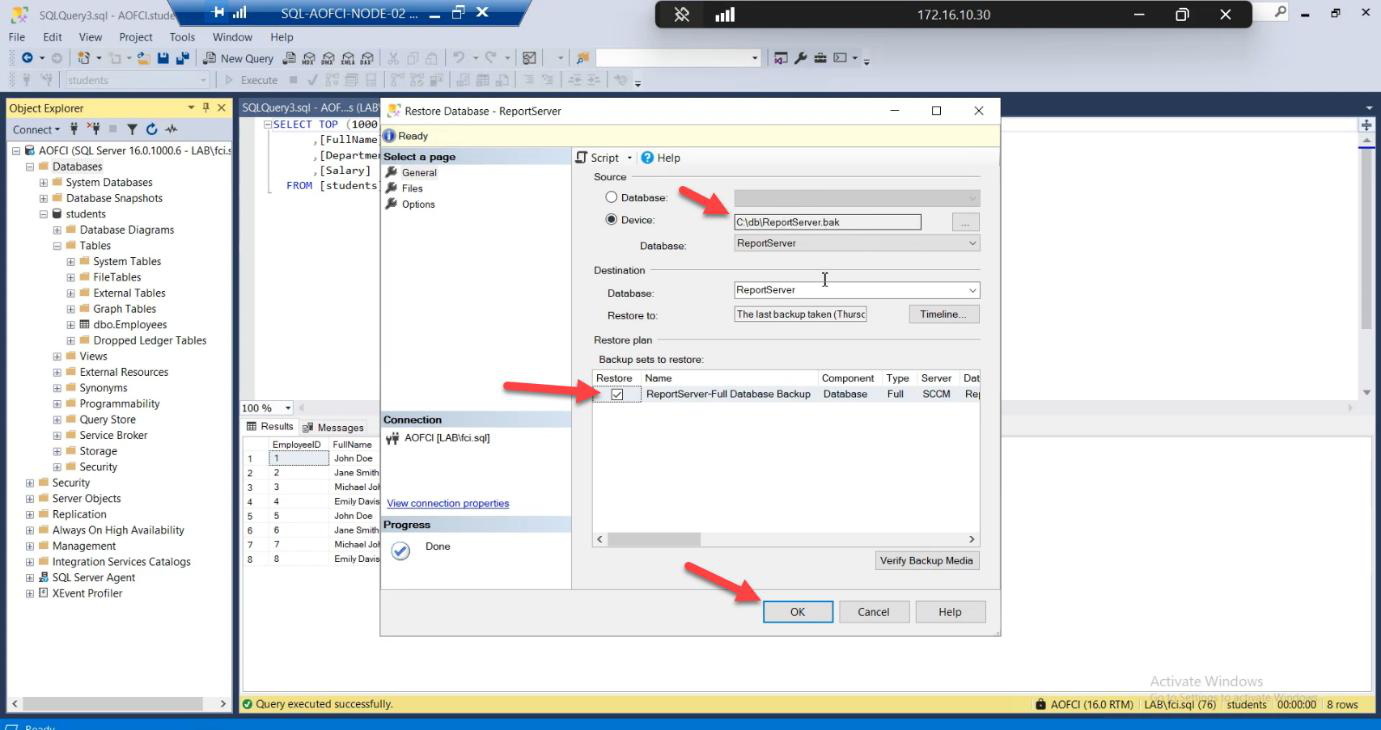
.bak file.Device > browse to the .bak.

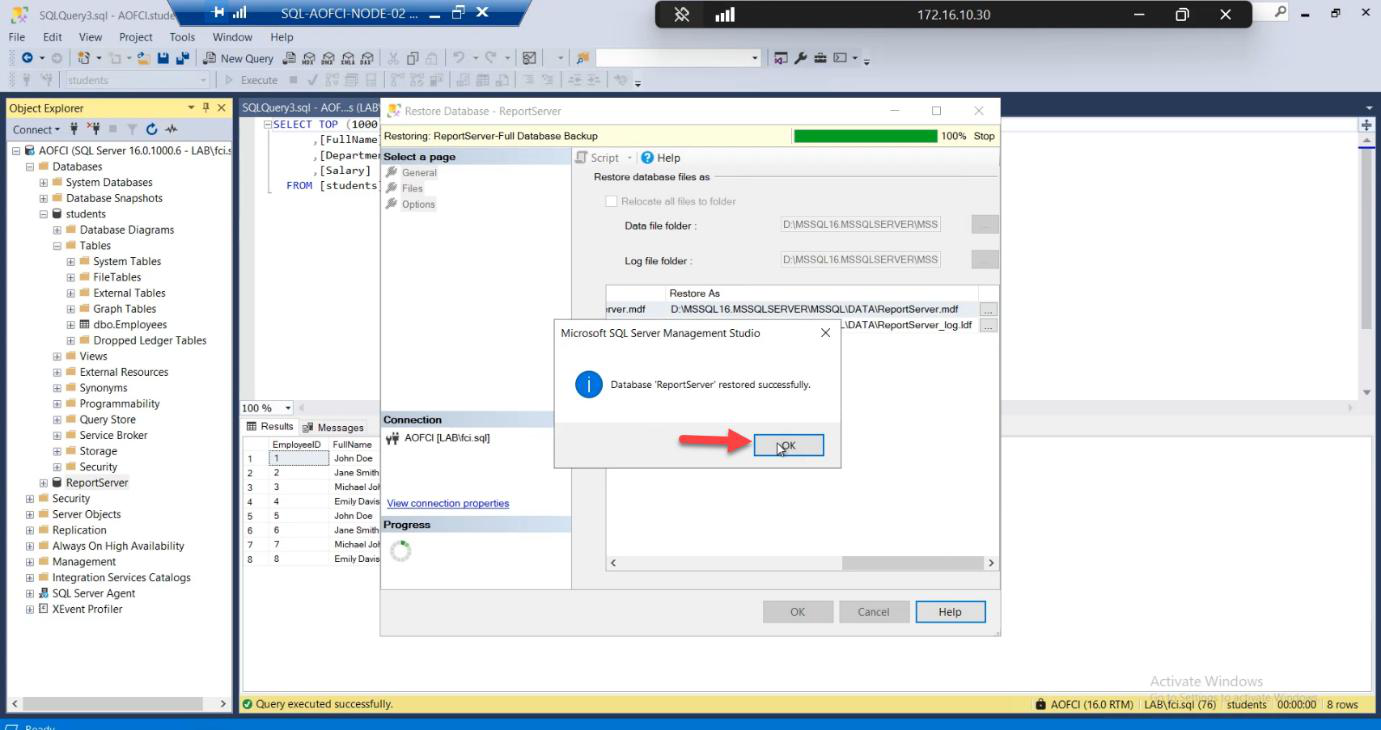
S:\MSSQL\DATA\ (or wherever your cluster disk is mounted). Restore to local disk = data is lost when failover happens.Files page — the load-bearing step. Default Restore As paths point to a LOCAL path (e.g., C:\Program Files\Microsoft SQL Server\...\DATA\). Change them to point to the cluster shared disk — e.g., S:\MSSQL\DATA\filename.mdf and S:\MSSQL\LOG\filename.ldf.
Why this matters: if you restore to local disk, the data files live on Node-02’s C: drive. When SQL fails over to Node-01, those files don’t exist there — database goes into Recovery Pending, then offline. The whole point of FCI is shared storage. Use it.
Review options. Click OK.
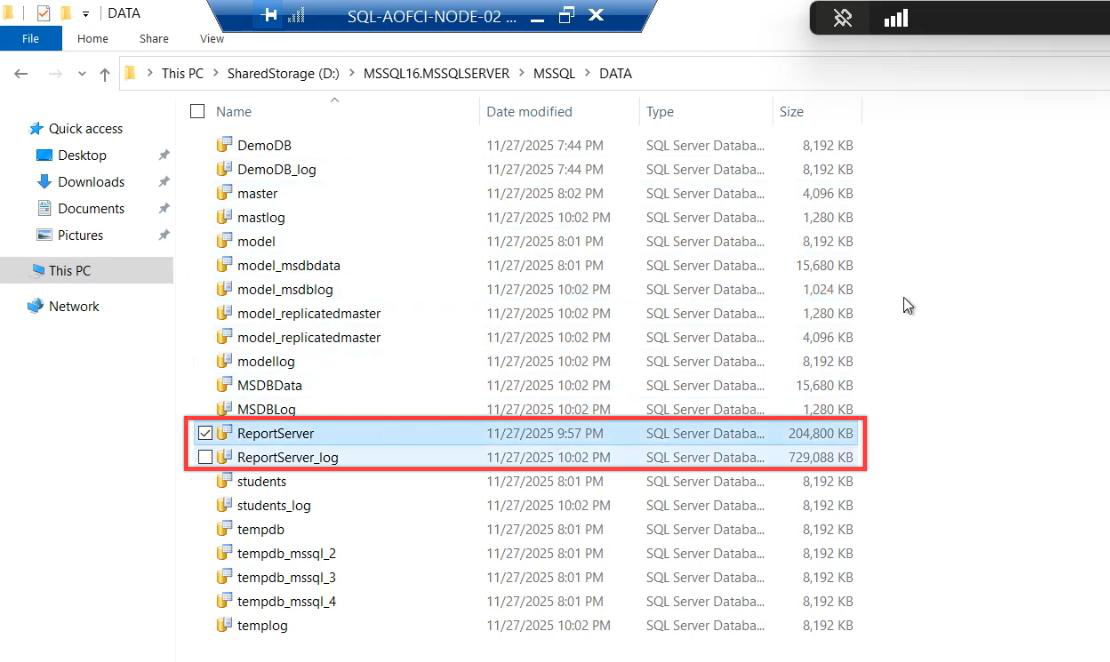
Restore successful. Database lives on shared cluster storage.
Step 5: verify from another node
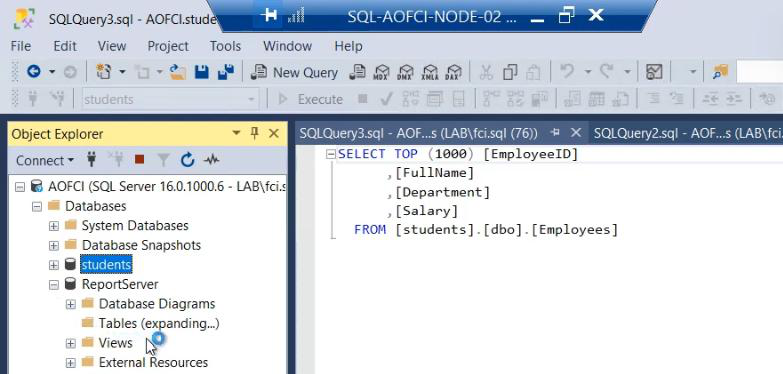
Switch to Node-03. Open SSMS, connect to AOFCI. The new database is immediately visible. Why? Shared storage. Every node sees the same data because the SAN holds it.
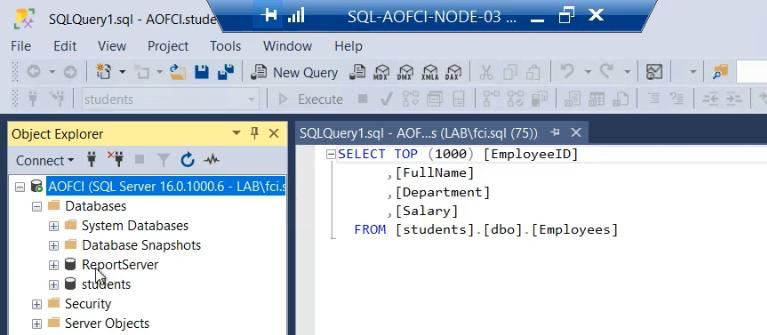
Query the migrated database from Node-03 — data flows. The migration is complete and resilient.
Phase B — the failover demo
Setup: continuous ping
On a neutral machine (your laptop, a workstation, anything but the cluster nodes):
ping 10.15.1.200 -tThis pings the cluster VIP continuously. We’ll watch this window during the failover.
The move
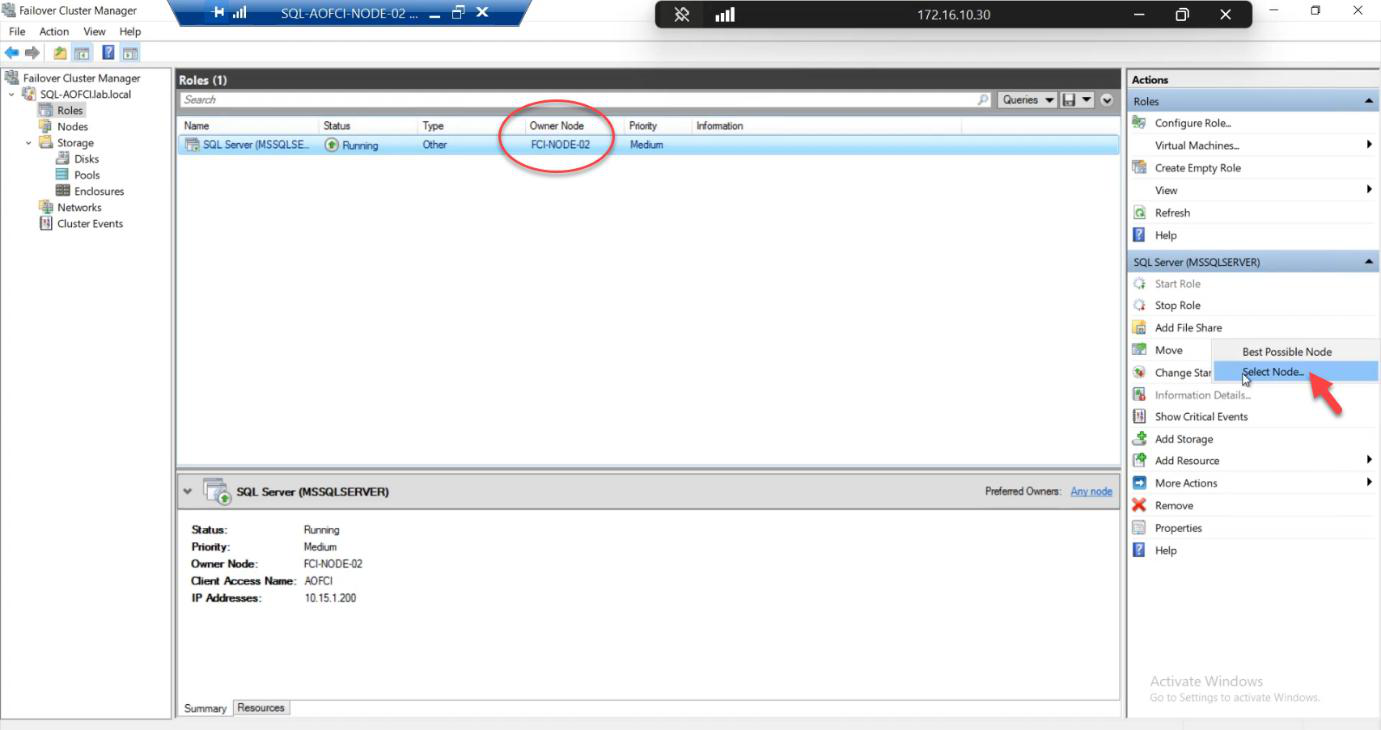
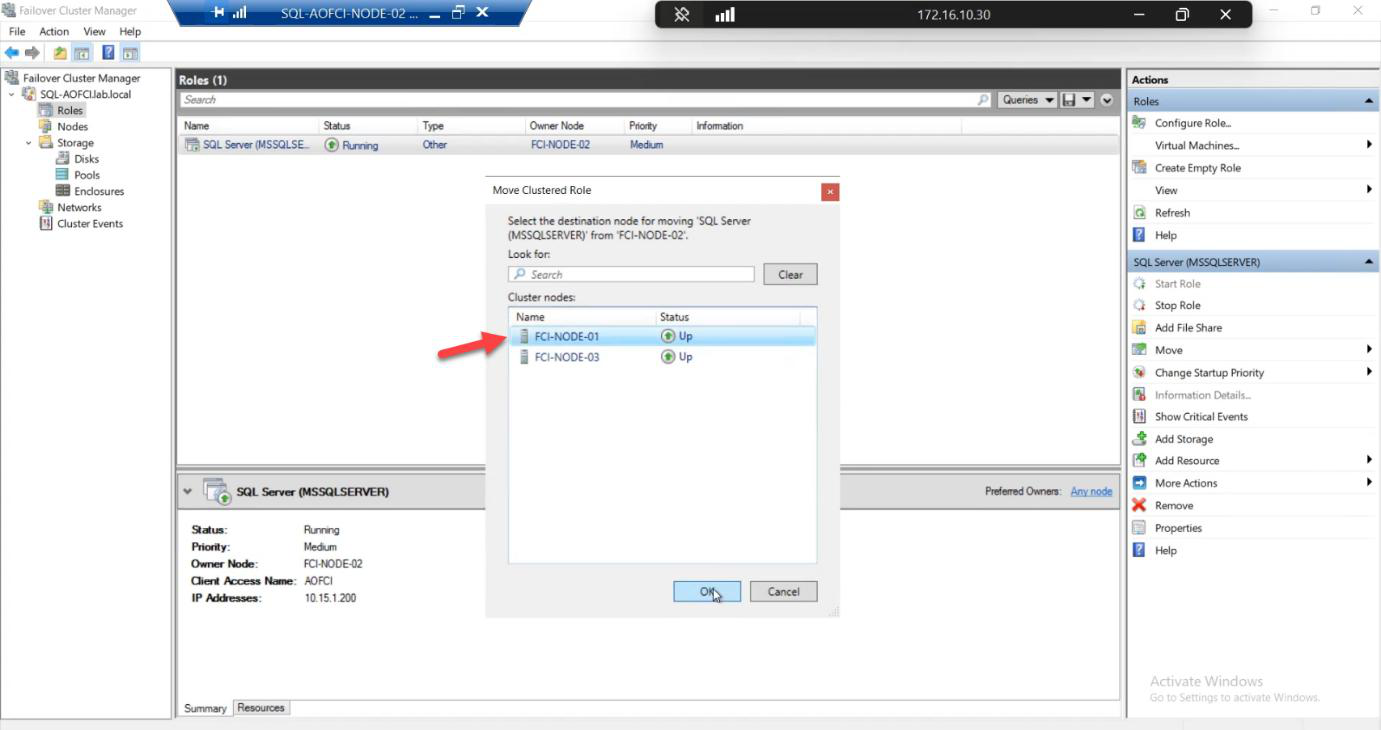
Choose Node-01. Click OK.
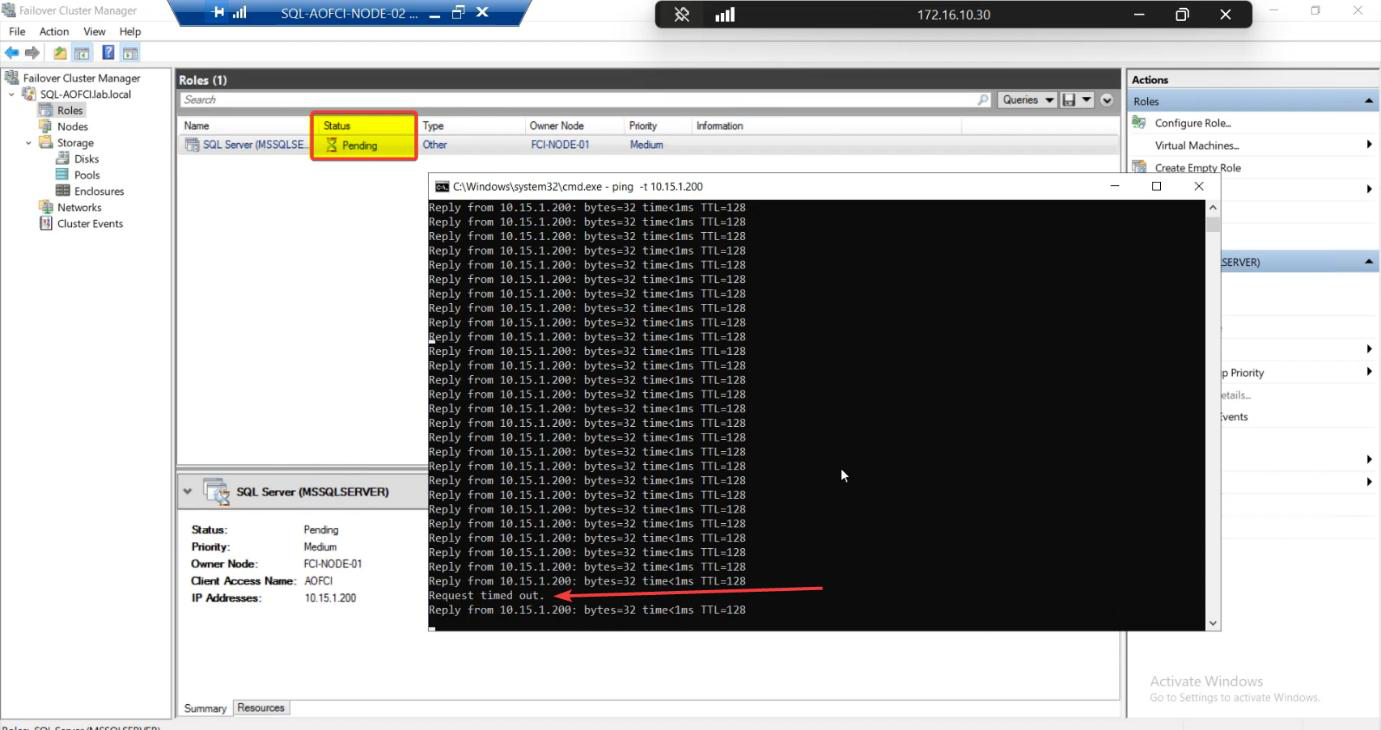
Watch the ping window. Typical result: zero dropped packets, sometimes one Request Timed Out. SQL Server, an entire enterprise database engine, just moved from Node-02 to Node-01 in less time than you can finish reading this sentence.
This is graceful failover (manual move). Cluster Service drains the role: brings disks offline cleanly on N2, mounts them on N1, starts SQL service on N1, retargets the VIP. ~5-15 seconds. That’s the gap you’re trying to catch with the ping.
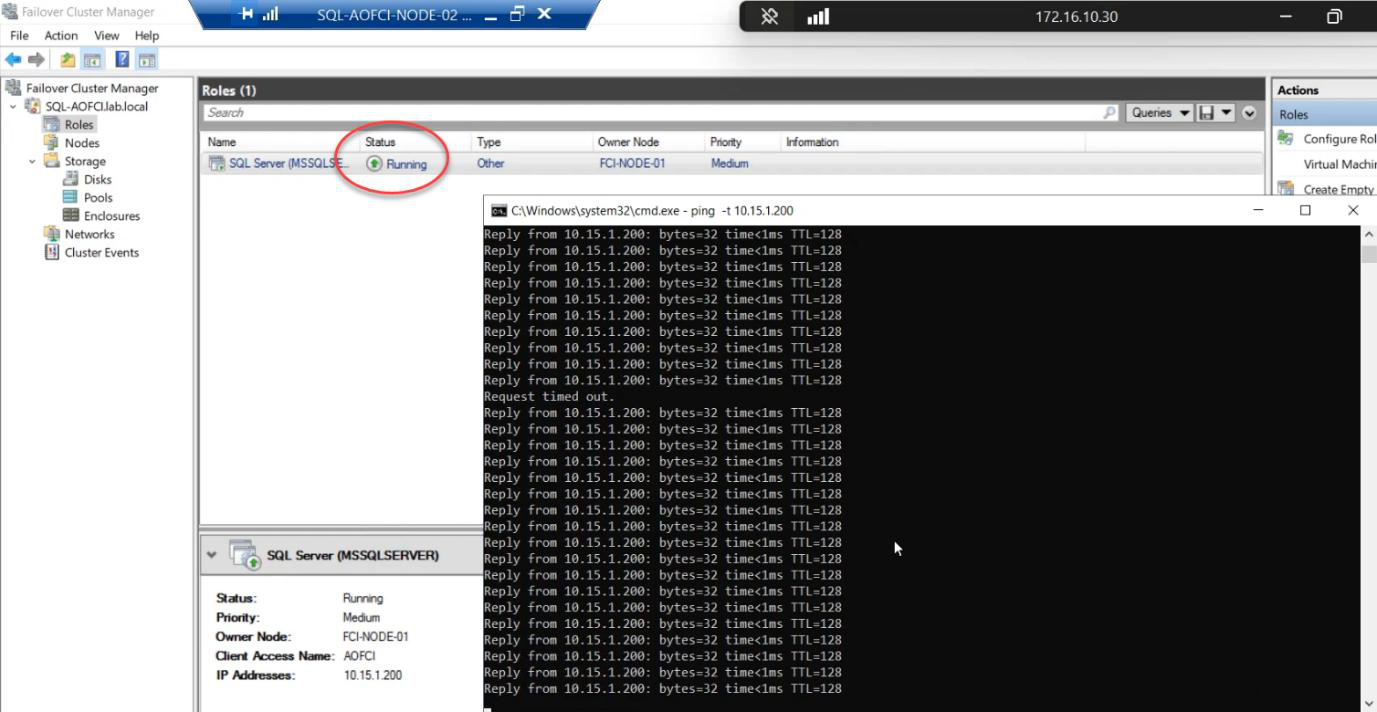
FCM Roles: status briefly Pending, then Running. Owner Node: Node-01.
Post-failover verification

Cluster disks now Online on Node-01.
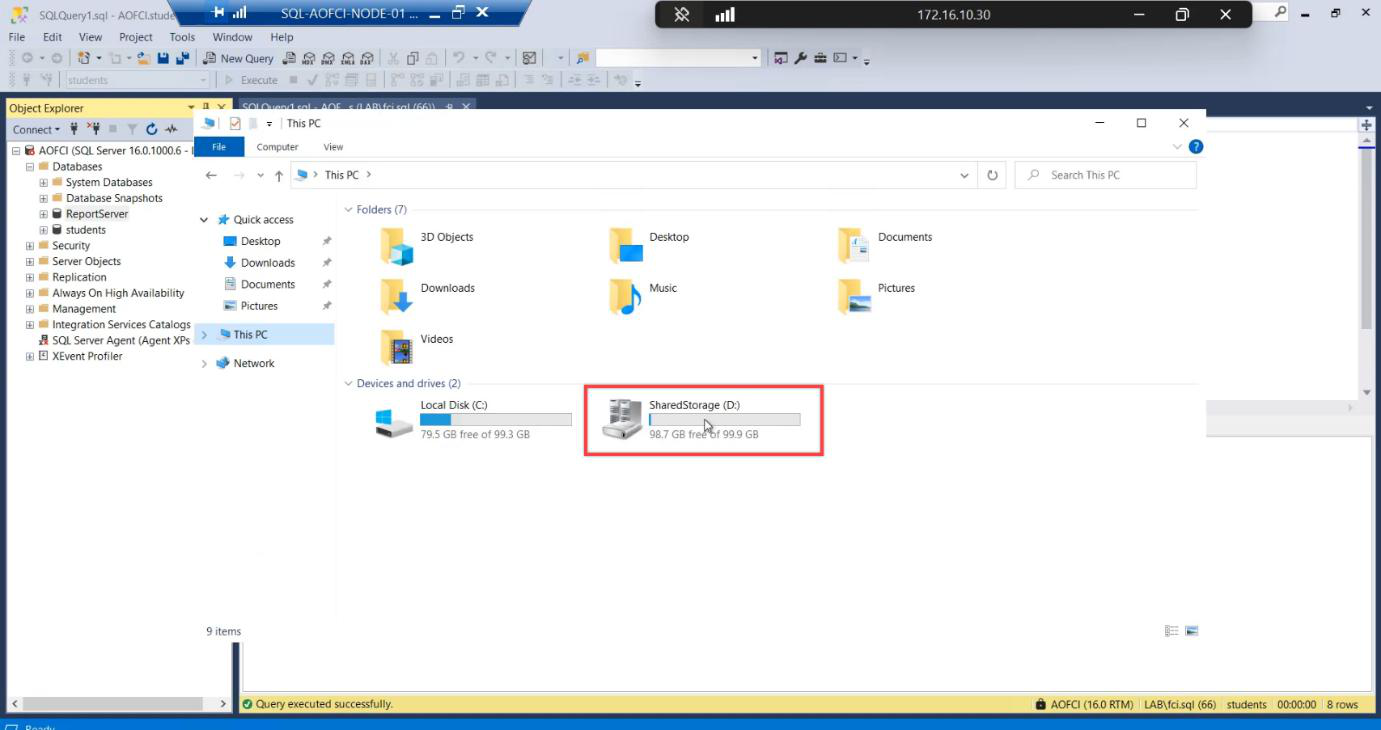
File Explorer proof:
- Node-01: shared drives mounted, accessible
- Node-02: shared drives gone
Cluster Service atomically unmounted from N2 and mounted on N1. Same data, different host. Clients connecting to AOFCI just keep working.
Manual vs auto failover — what’s the difference?
| Aspect | Manual Move | Auto Failover (crash) |
|---|---|---|
| Trigger | Admin clicks Move | Node failure detected |
| Drain | Graceful: complete current transactions, flush buffers, dismount cleanly | None: hard cut, recovery on new node |
| Downtime | ~5-15 seconds | ~30-90 seconds |
| Use for | Patching, planned maintenance, load balancing | Crashes, hardware failures |
Both work. Manual is gentler. Auto is non-negotiable when N1 is on fire.
Things that bite people in this part
Restored data files on local disk
The single most common mistake. Default Restore As path is local. Database restores fine, queries work fine, until the first failover. Then the database is unrecoverable on the new node because the .mdf/.ldf files don’t exist there. Always change Files paths to cluster disk.
BAK file too large for local C:
If the database backup is 50 GB and Node-02’s C: drive only has 30 GB free, the copy fails. Solutions: copy to the cluster disk directly (S:\Backups\), or extend the C: drive, or use a separate file share.
Restore over an existing database fails
If a database with the same name already exists on AOFCI, the restore needs WITH REPLACE. The dialog has a checkbox for this; missing it gives a misleading “file in use” error.
Login mappings broken after migration
The .bak only contains the database. SQL Logins (server-level) live in master. After restore, users may exist in the database but no matching login on AOFCI. Fix: EXEC sp_change_users_login 'Auto_Fix', 'username' for each, OR migrate logins separately via sp_help_revlogin or the script-out-logins approach.
Move target offline
If you try to Move to a node that’s currently Down, the wizard greys out that target. Need to bring the node back up first.
The ping shows nothing dropped — is failover real?
Yes. Modern Windows + cluster + SQL is genuinely that fast for graceful moves. If you want to see the gap, watch the FCM Roles status — it briefly shows Pending. SSMS connections in flight may experience a single retry that succeeds.
What’s next
You have a 3-node FCI with real data, demonstrably failing over with near-zero downtime. Final post in the series — Part 13 — covers scaling DOWN: removing nodes, advanced cluster management, decommissioning. See the full series at SQL Server Clustering pathway.