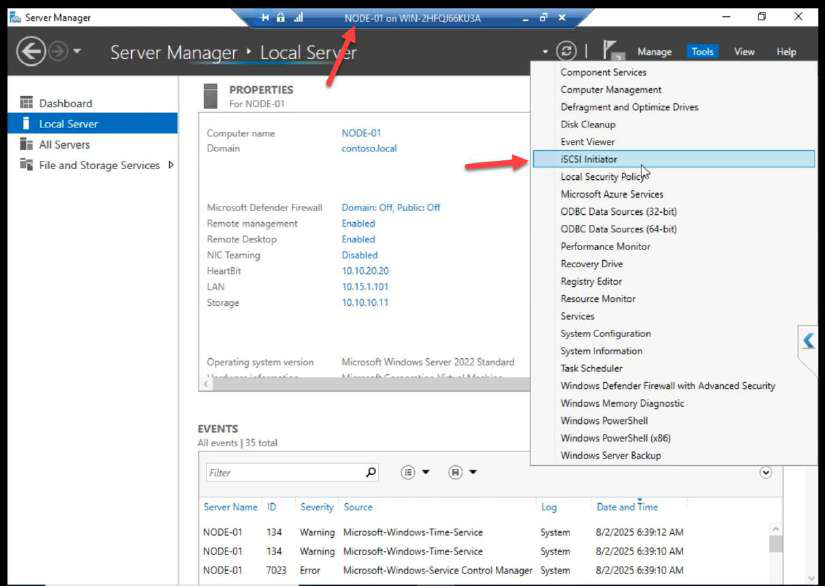
SAN built in Part 7. Now we connect the cluster nodes. Same pattern as the SQL FCI series — bind iSCSI Initiator to the Storage NIC, log in with CHAP, mount the LUNs. Critical: only NODE-01 brings the disks online and formats them. NODE-02 leaves them Offline. Cluster Service takes over orchestrating ownership in Part 9.
The cardinal rule
In a Windows Failover Cluster, only one node owns a disk at a time. Forcibly bringing a disk online on a non-owning node while the owner is writing = filesystem corruption within seconds. The wizard won’t stop you. Don’t do it.
Phase 1 — NODE-01 (the formatter)
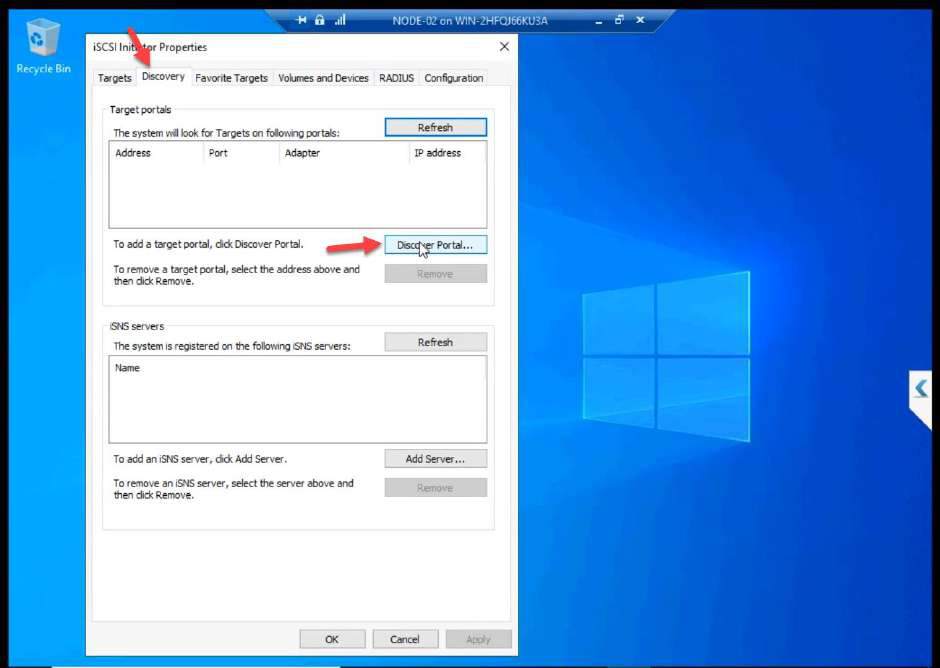
Discover + connect with CHAP
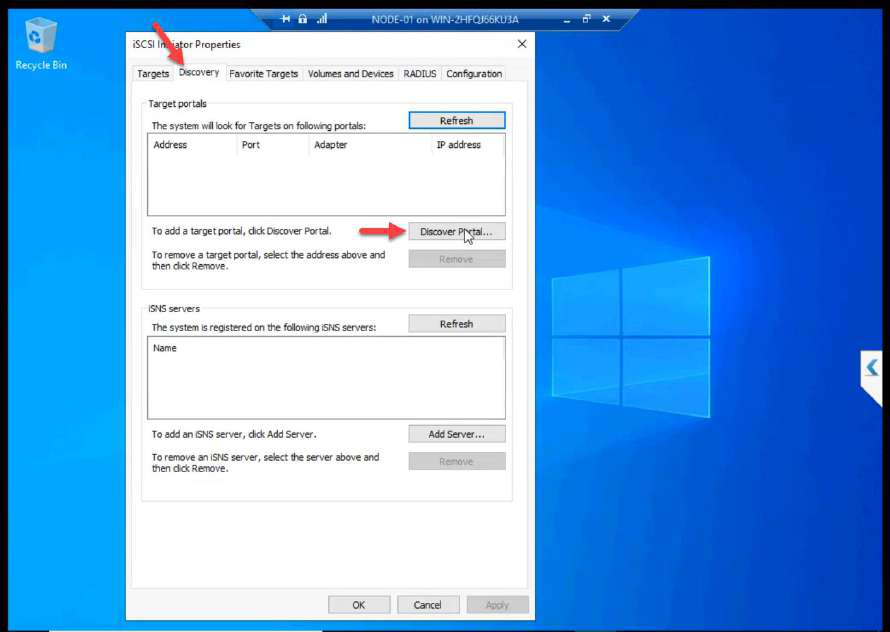
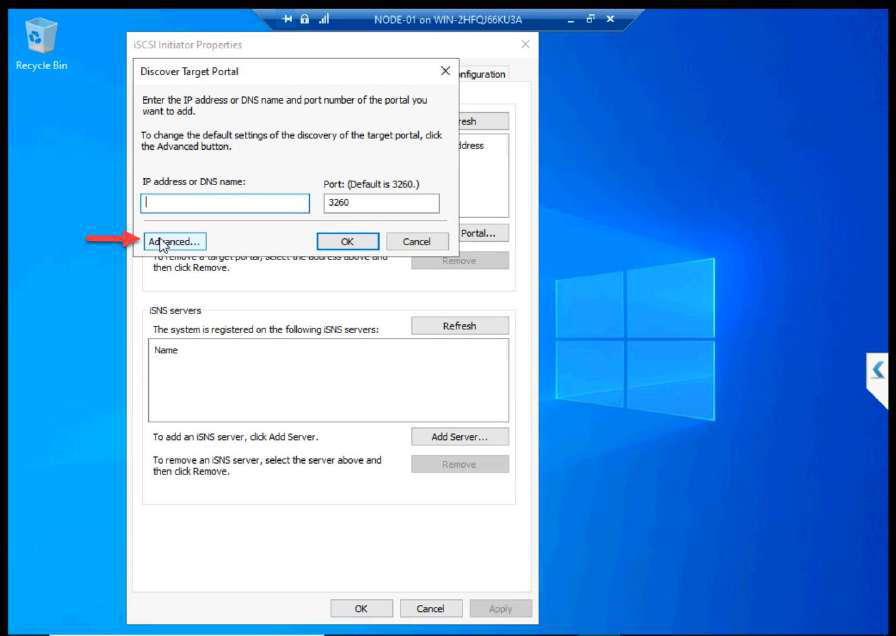

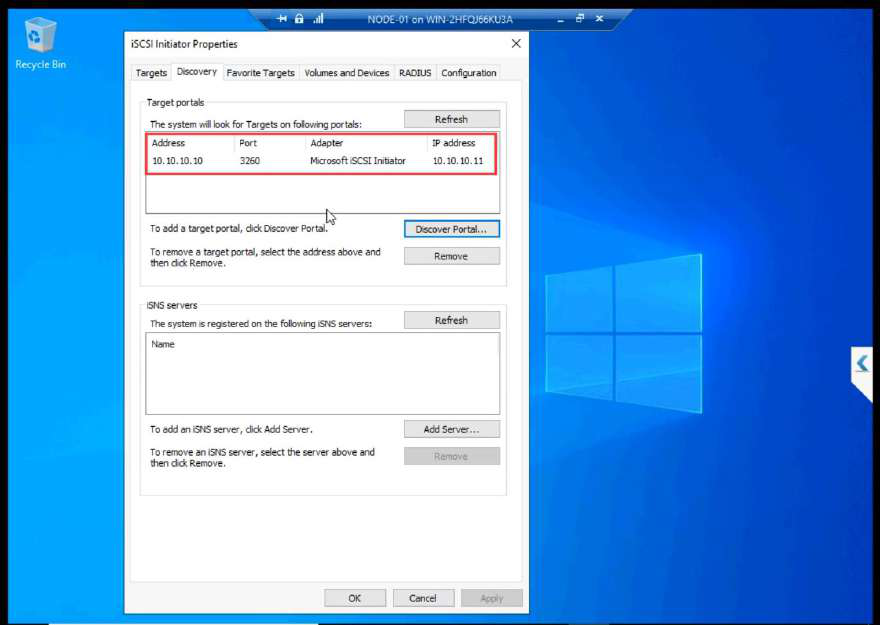
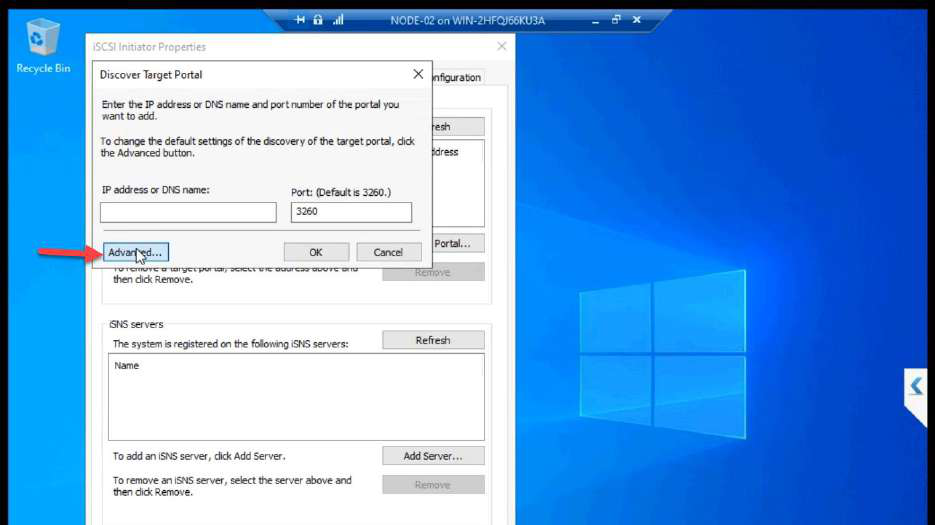
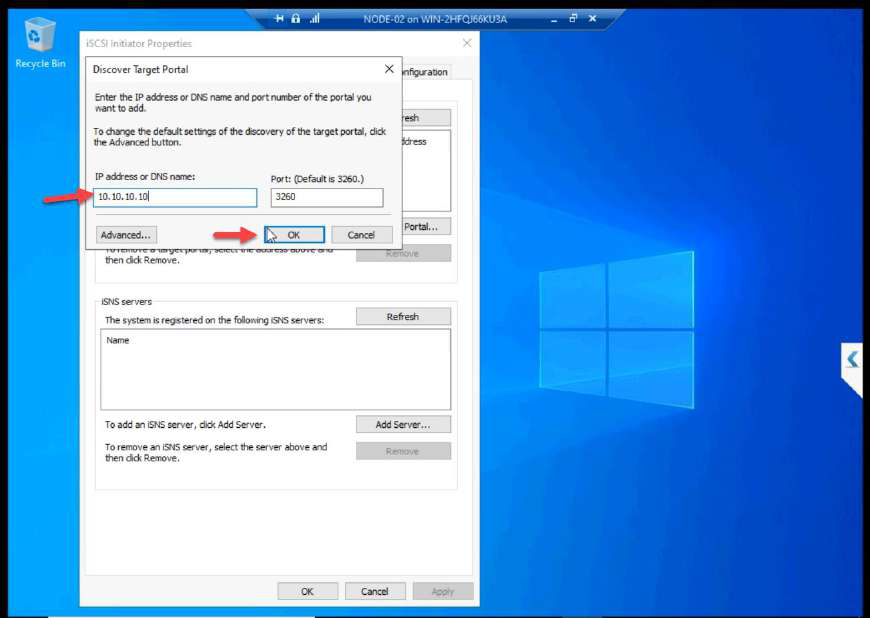
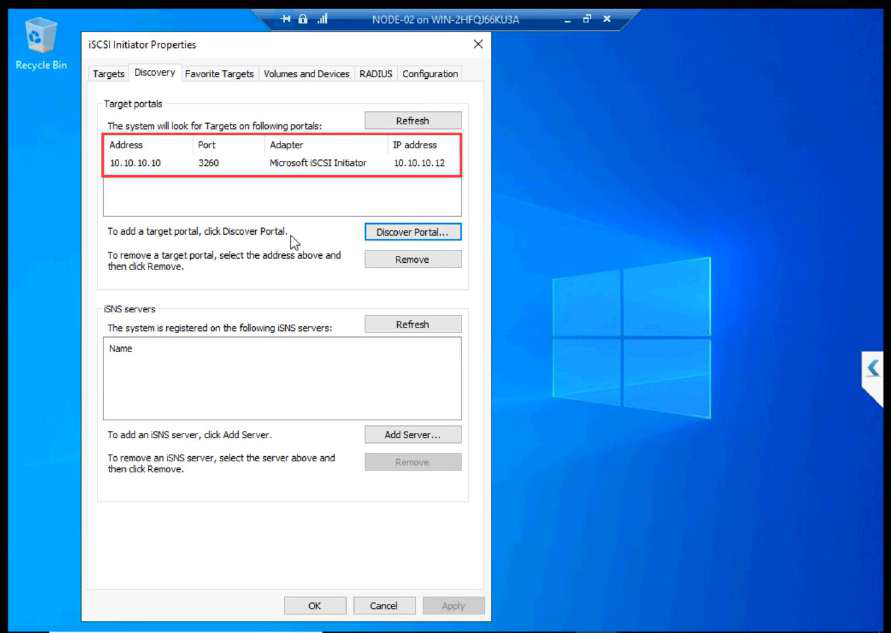
10.10.10.11 (NODE-01 storage NIC). OK.Discover Portal > Advanced. Initiator IP: 10.10.10.11 (Storage NIC). This step is the most-skipped one in lab guides. Without it, Windows uses any NIC for iSCSI — storage traffic ends up on the public wire.
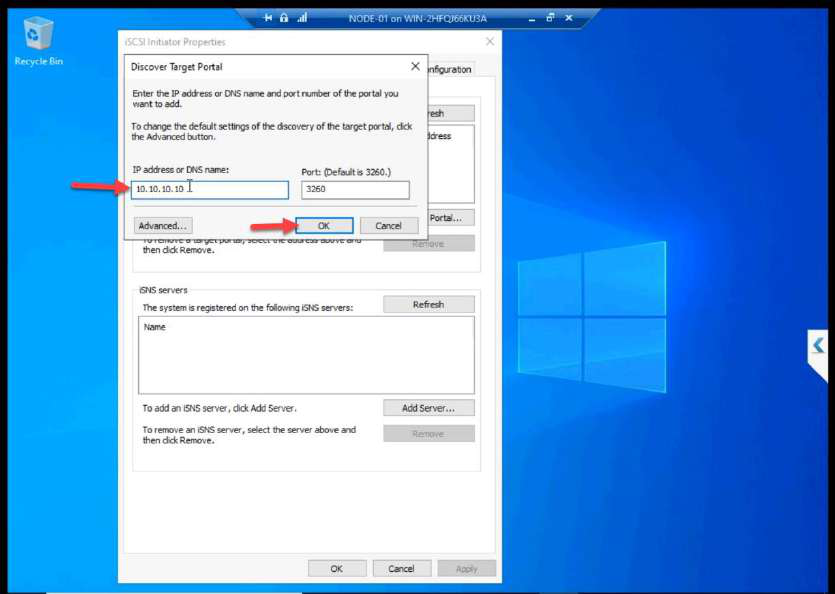
10.10.10.10. OK.Target IP: 10.10.10.10.
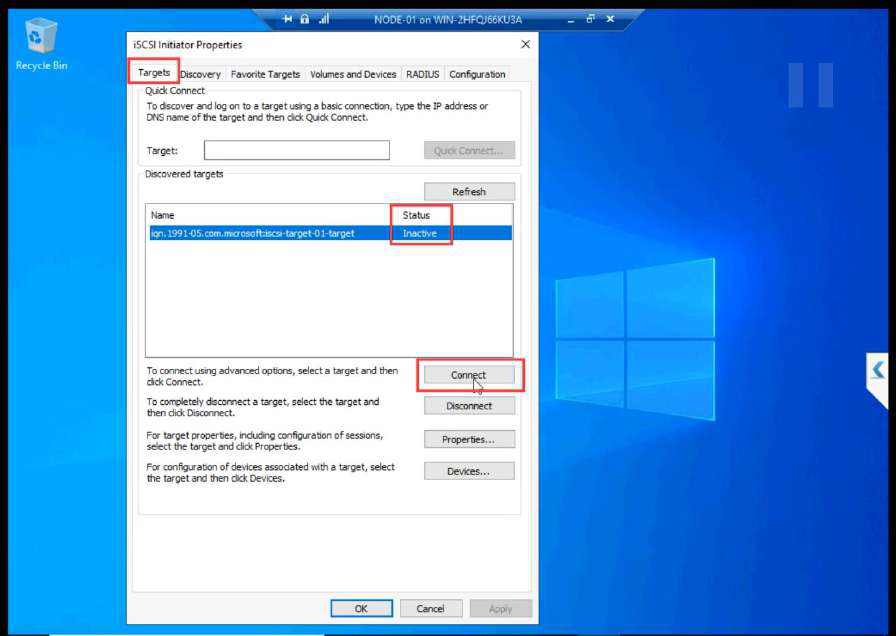
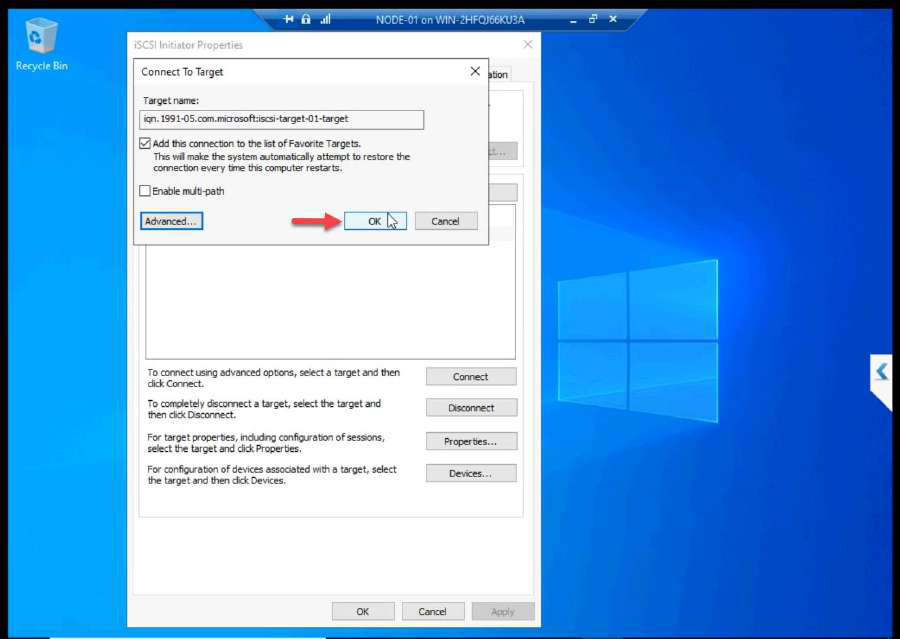
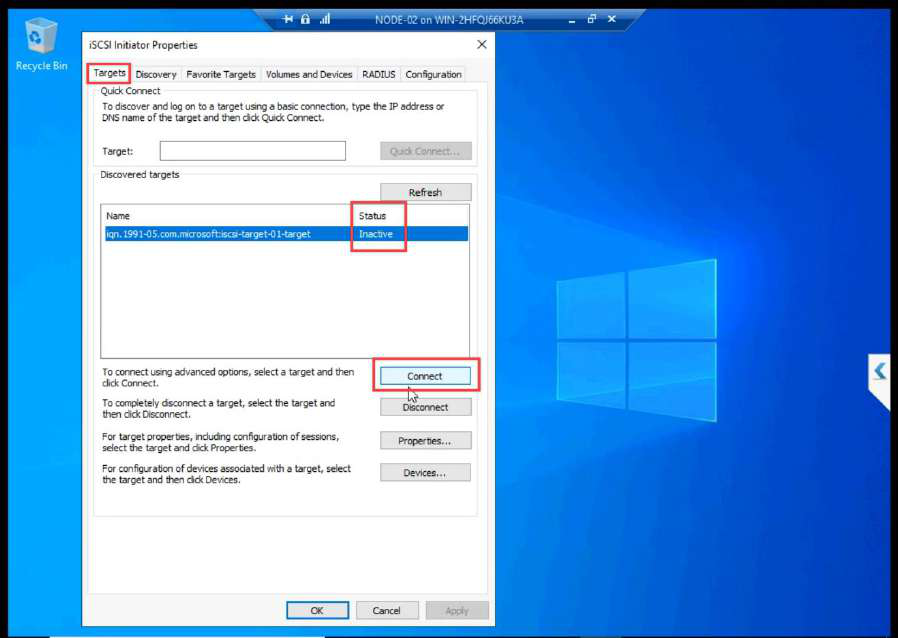
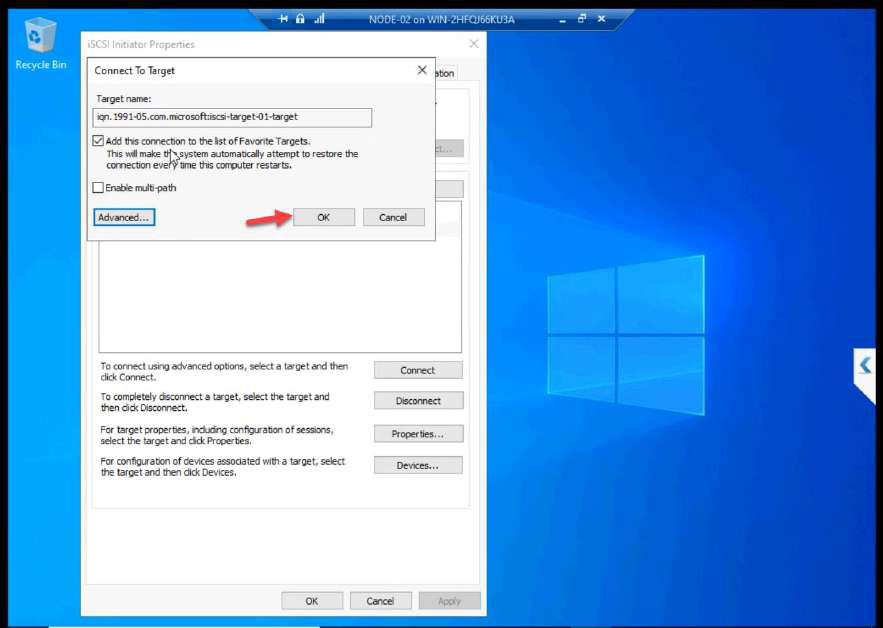
Targets tab > Connect.
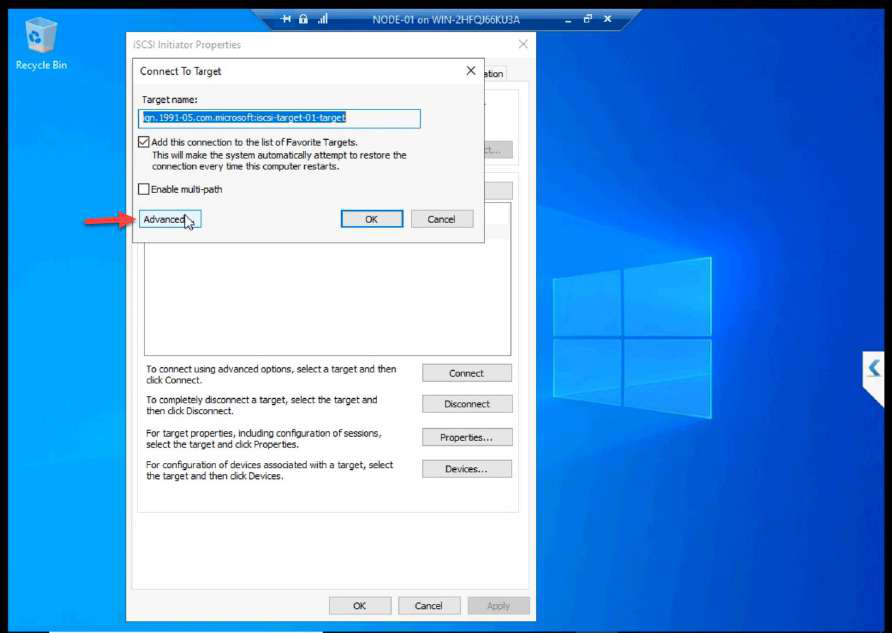
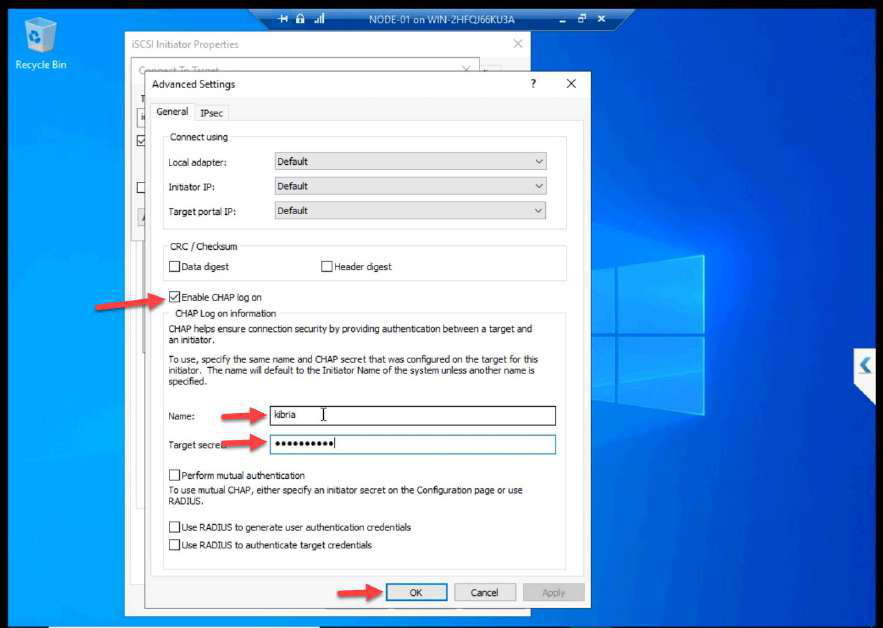
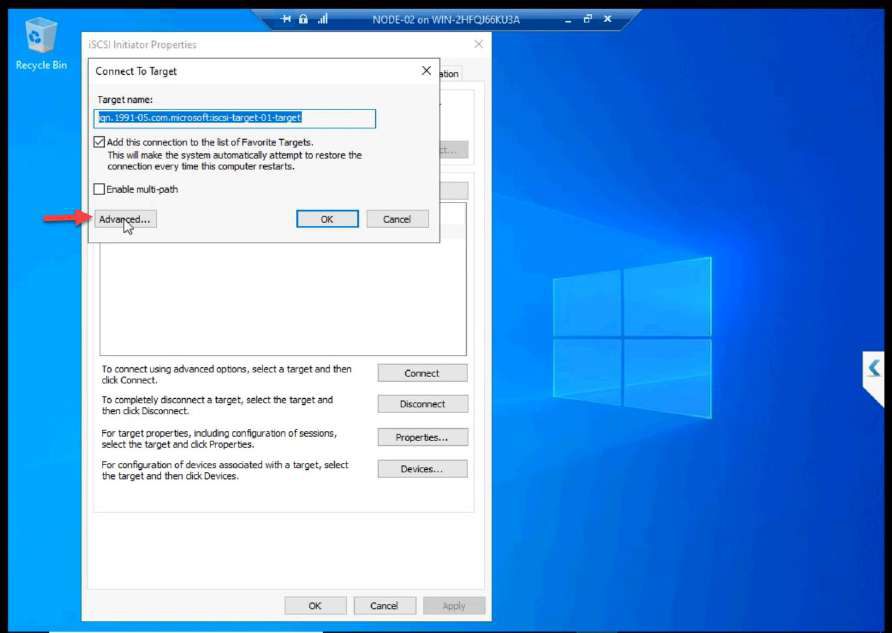
Advanced > Enable CHAP log on. Enter the name + secret from Part 7. Without these, the SAN refuses the login.
OK + OK.
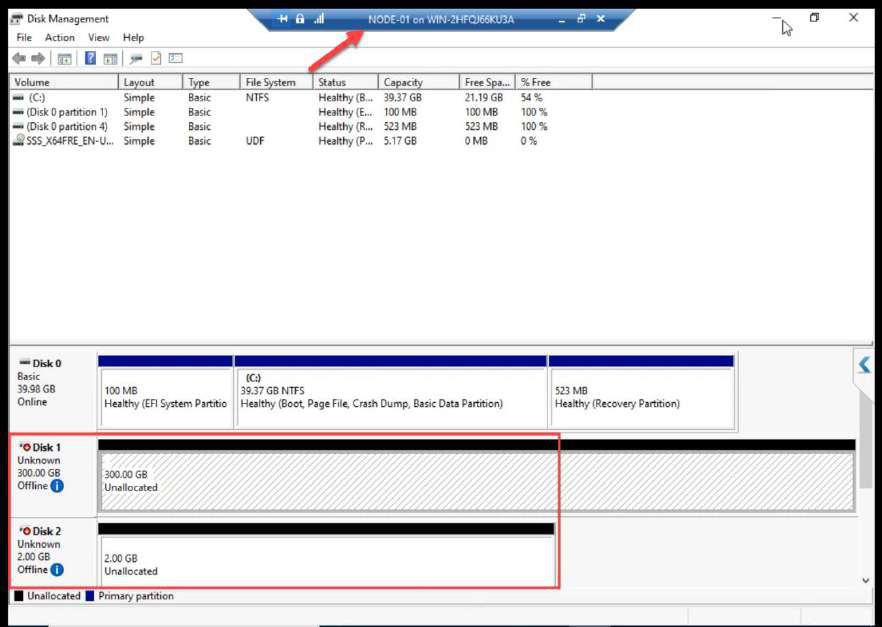
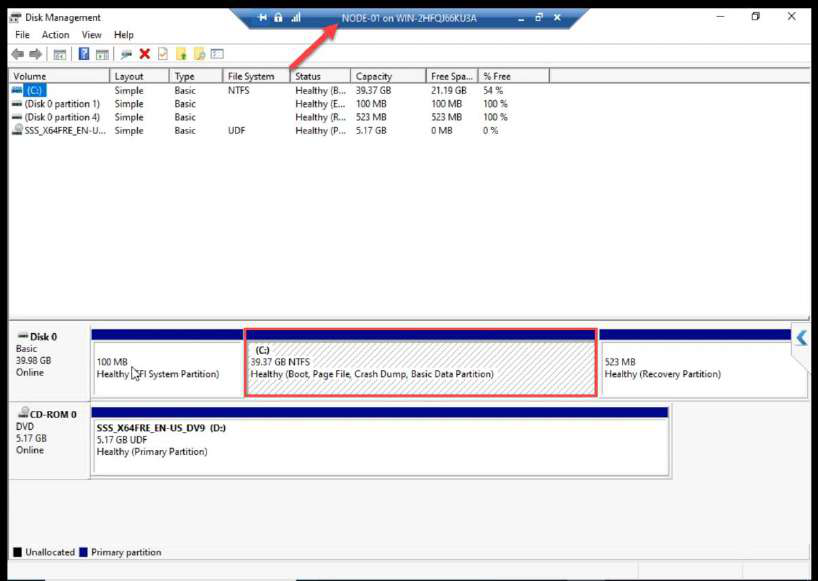
Disk Management on NODE-01: both LUNs appear as Offline. Expected.
Phase 2 — NODE-02 (same setup, leave disks alone)
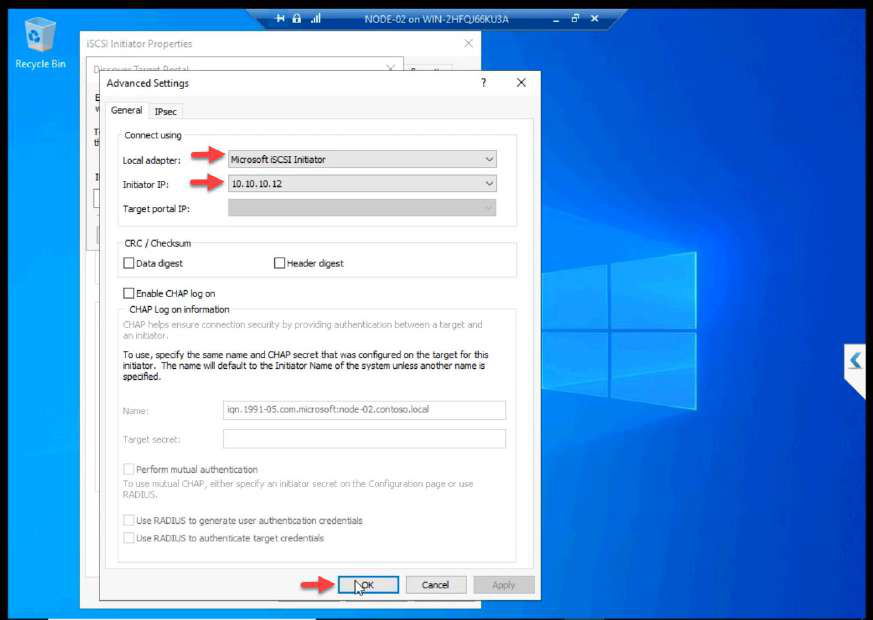
10.10.10.12 (NODE-02 storage NIC).Same iSCSI Initiator setup — just the Initiator IP differs. 10.10.10.12 for NODE-02.
10.10.10.10.Target IP: 10.10.10.10.

Connect > Advanced > CHAP with the SAME credentials as NODE-01.
OK + OK.
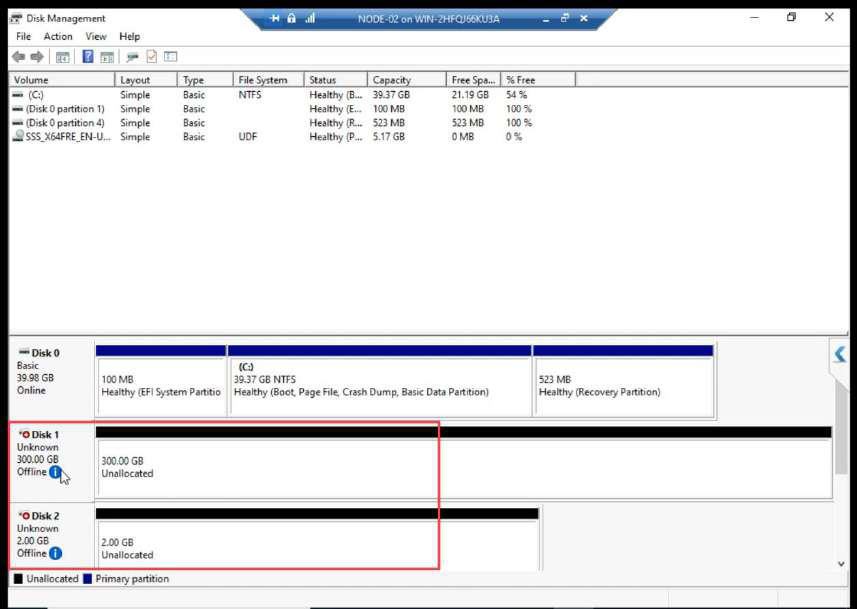
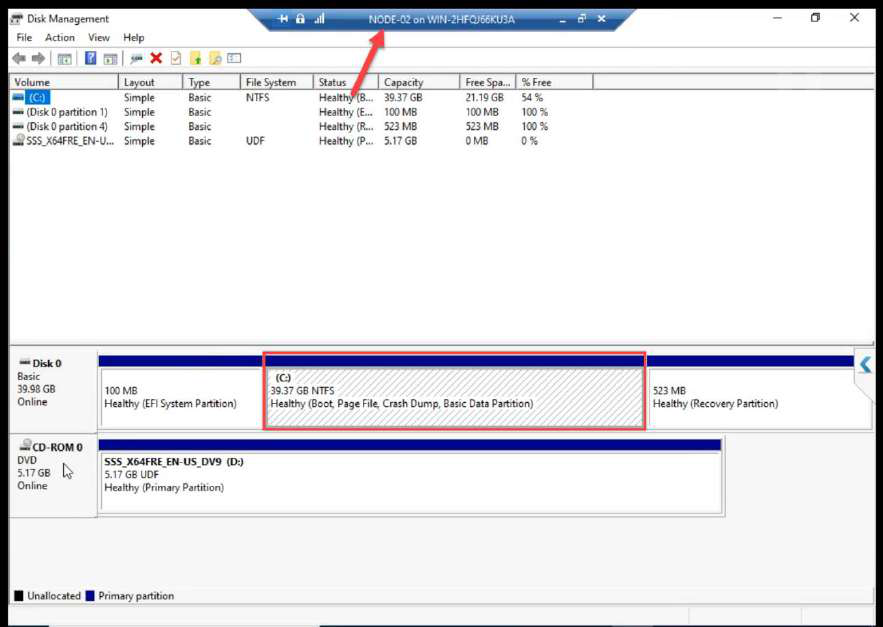
Disk Management on NODE-02: both LUNs Offline. STOP HERE. Do not bring online.
Phase 3 — verify on the SAN side
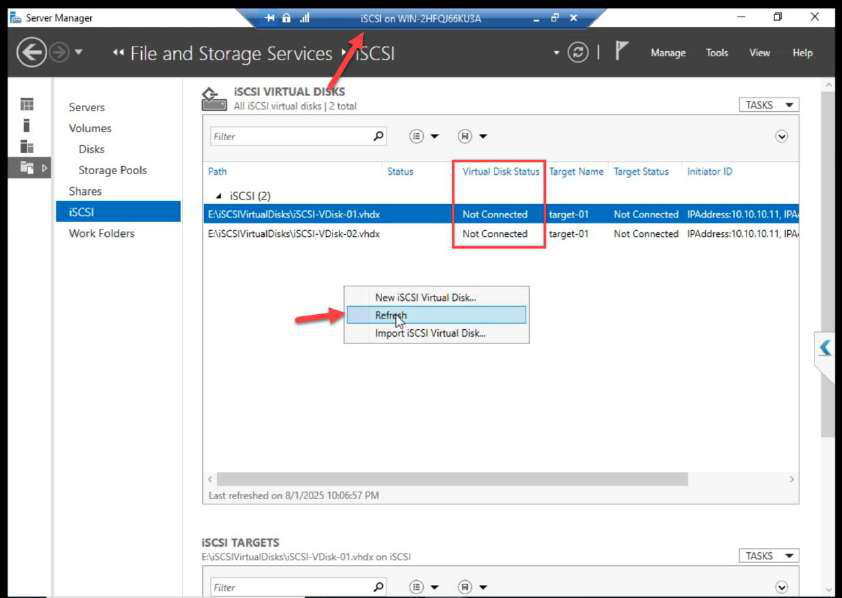
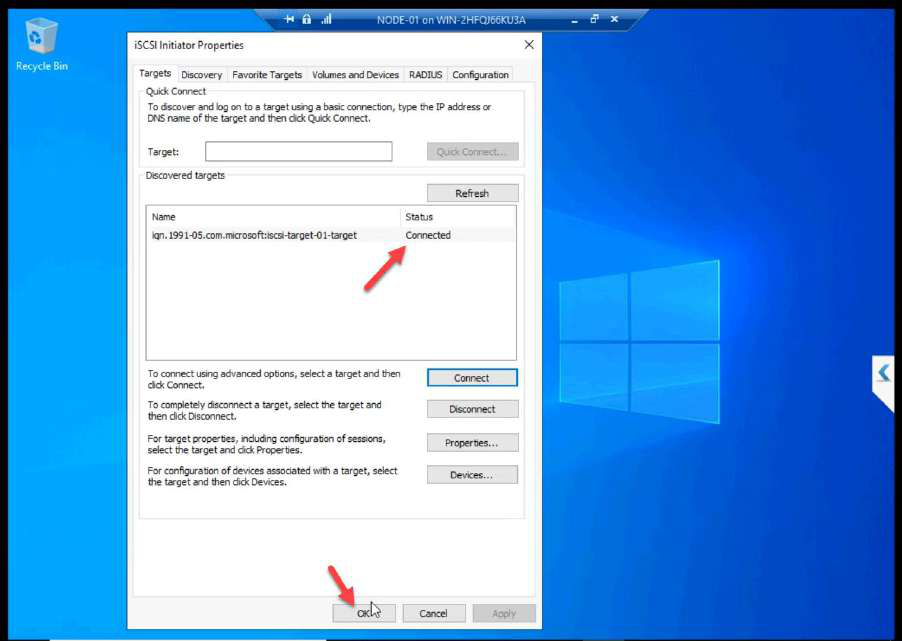
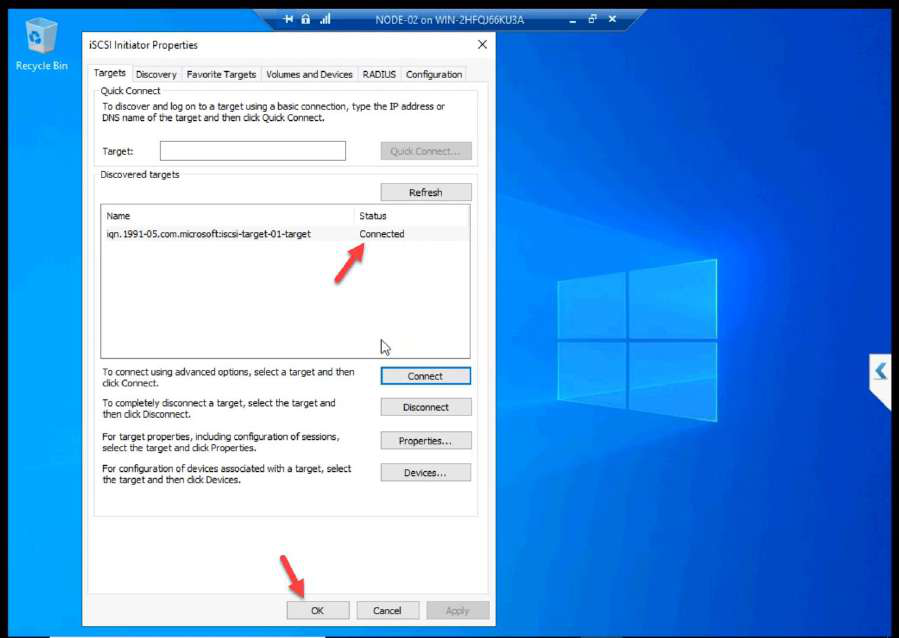
iSCSI VM > Target may show Not Connected at first because the cache is stale. Click Refresh.
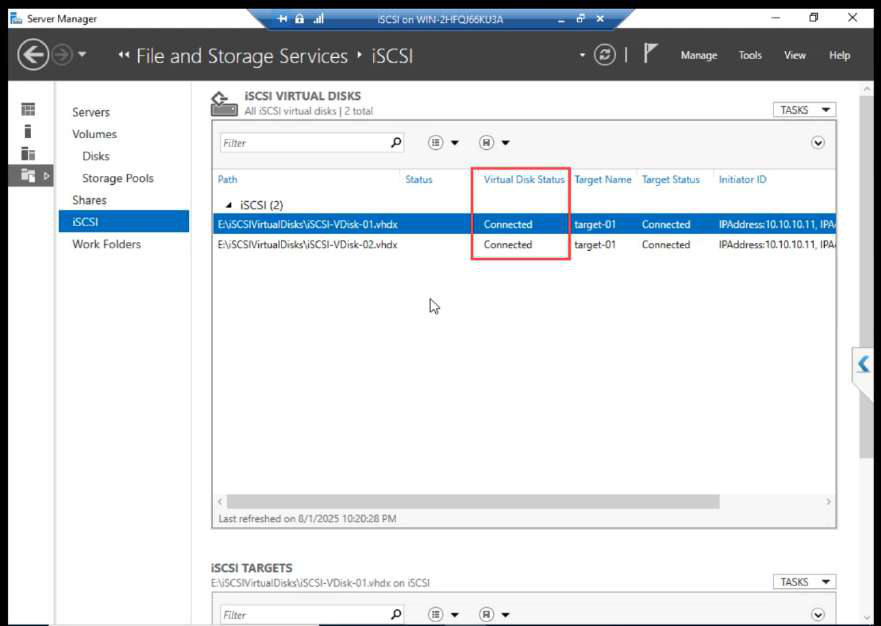
After refresh: Connected. Both initiator sessions visible.
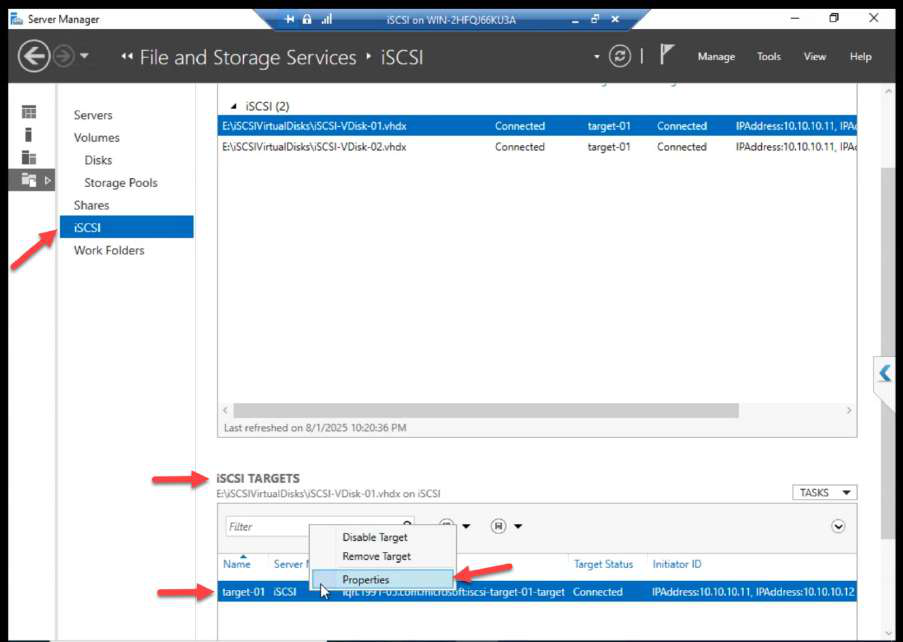
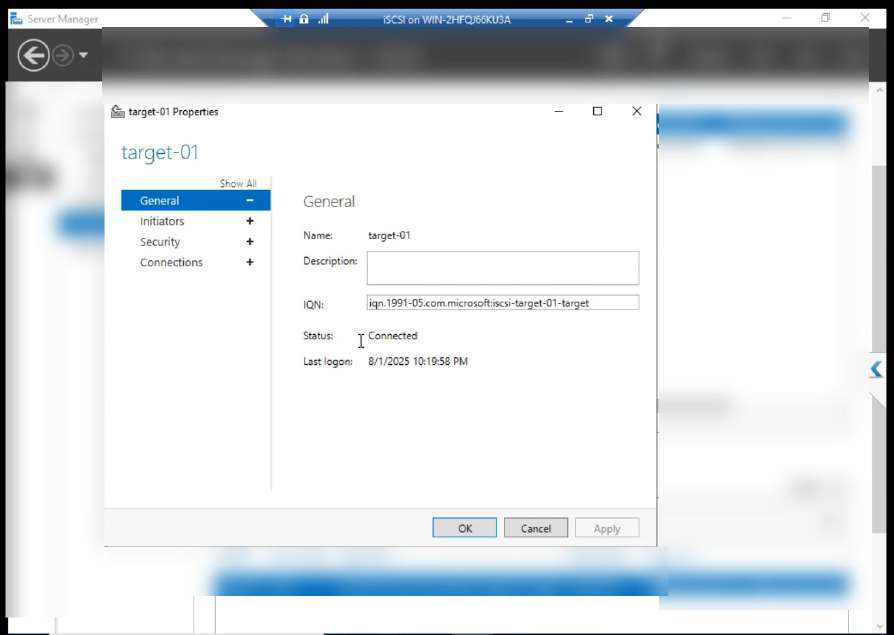
Properties dialog shows authentication, sessions, portals.
Phase 4 — format the LUNs (NODE-01 ONLY)
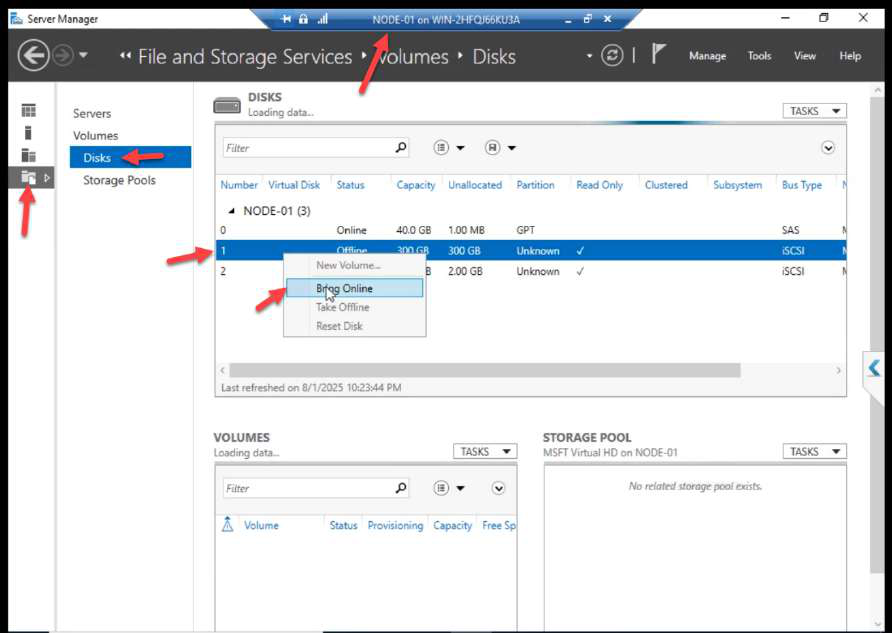
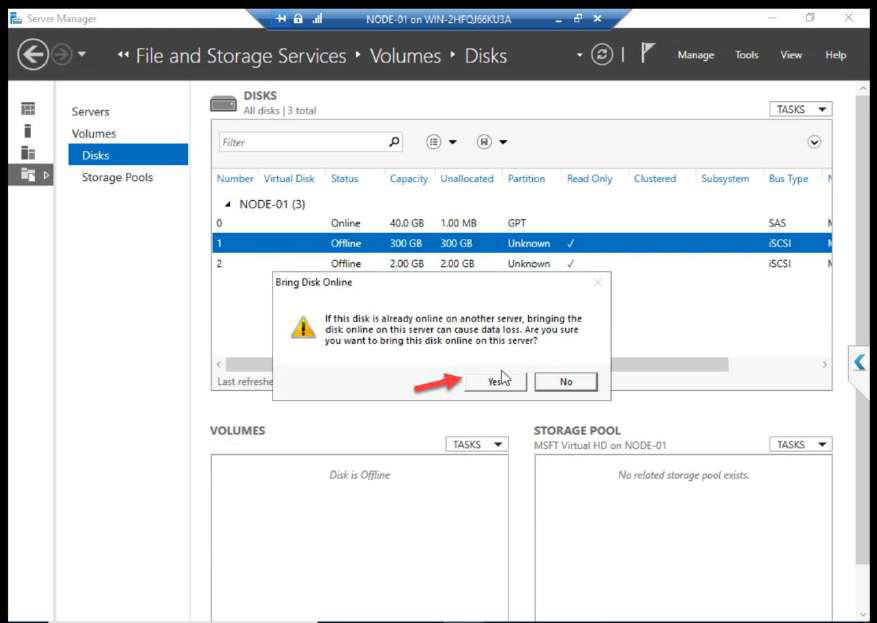
Back on NODE-01. Disk Management. Right-click the 300 GB disk > Bring Online.
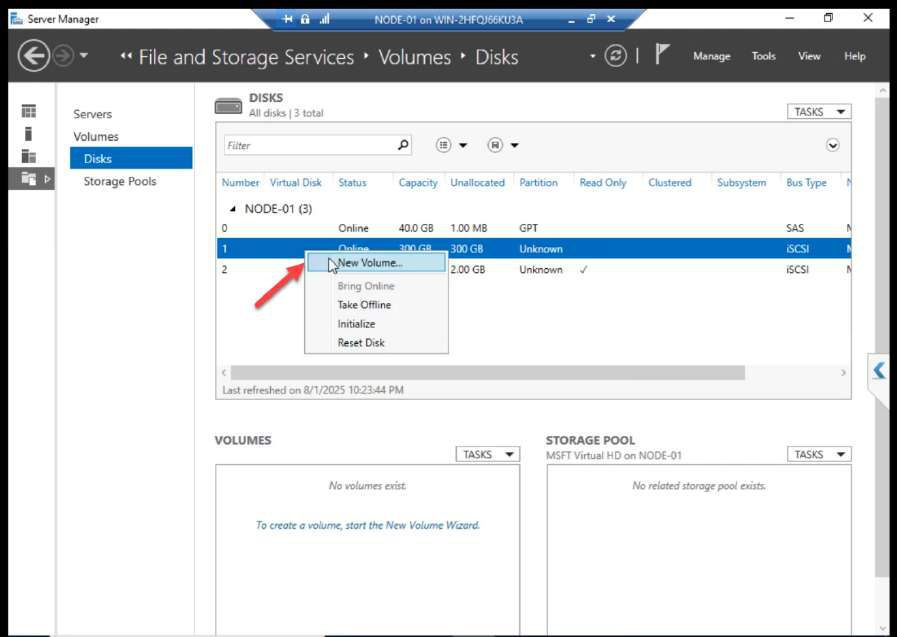
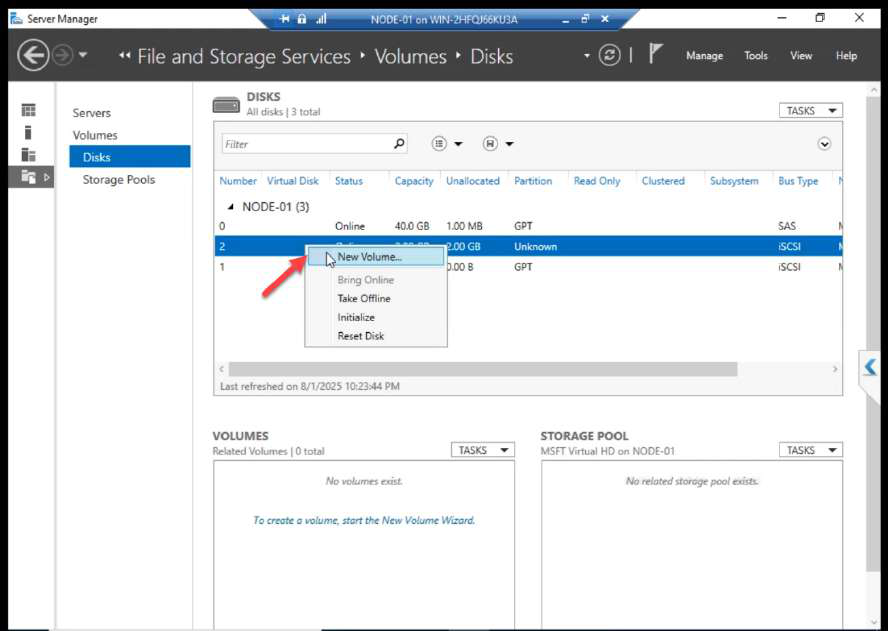
Right-click again > New Volume.
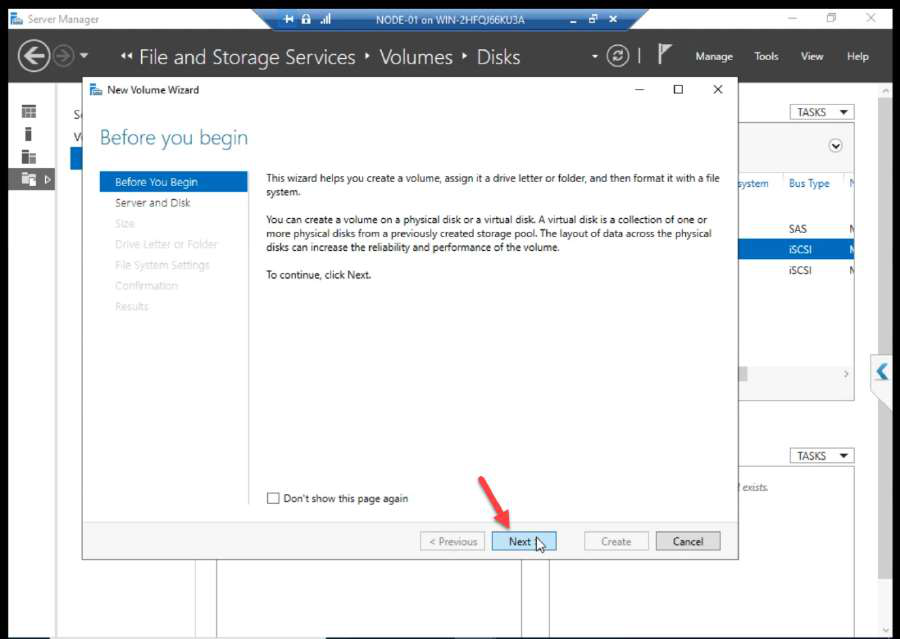
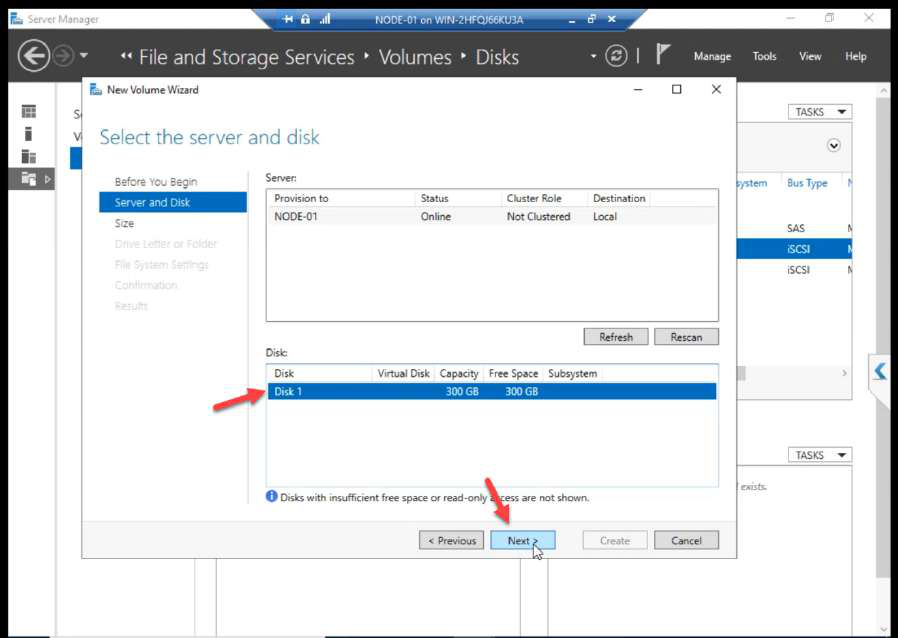
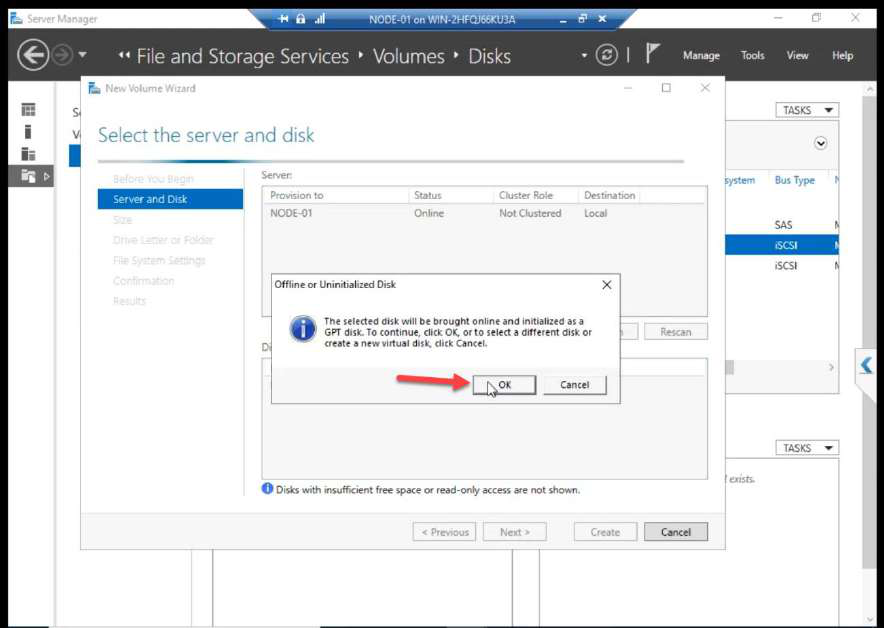
Wizard: server, disk selection, initialize confirmation.
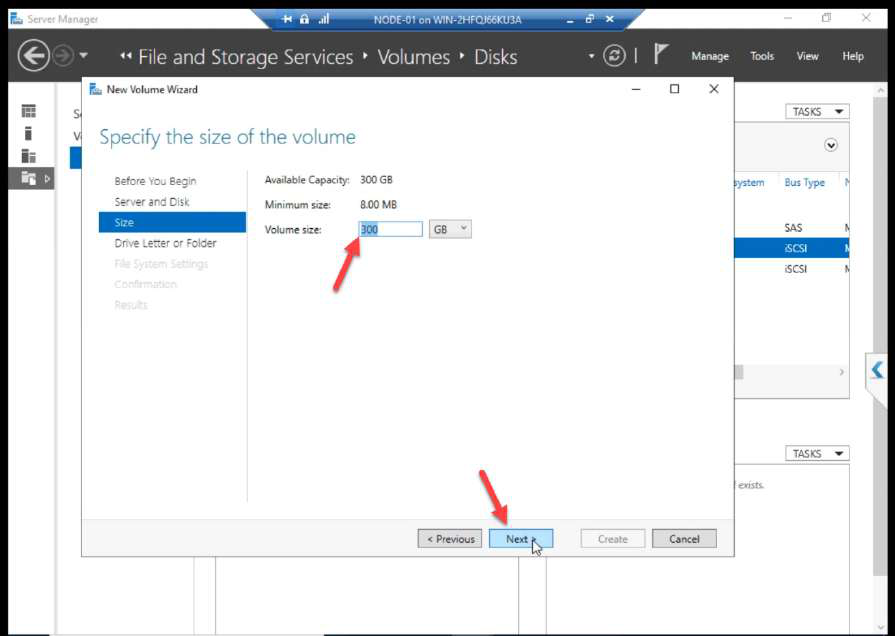
Volume size: accept default.
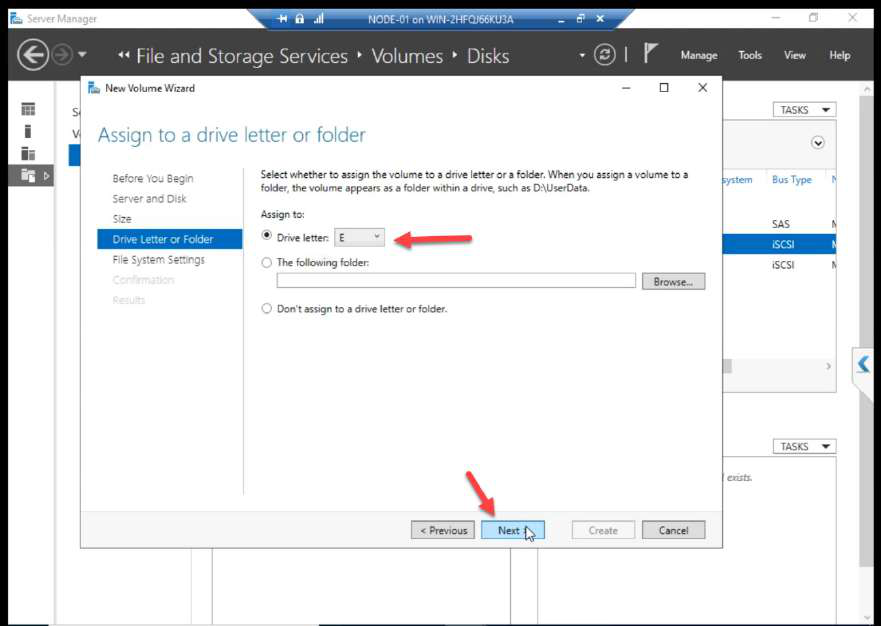
D:).Drive letter: e.g. D:.
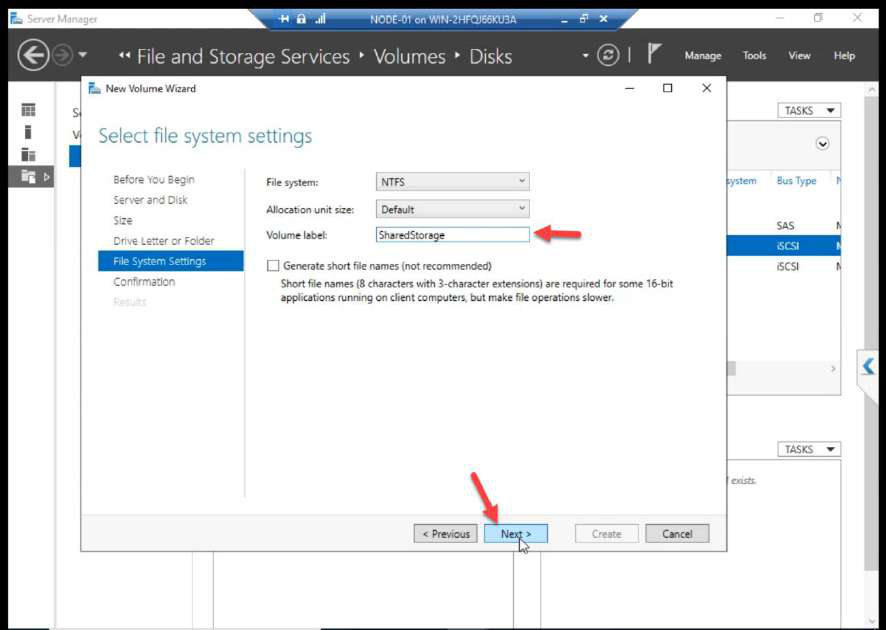
ClusterData.Label: ClusterData.
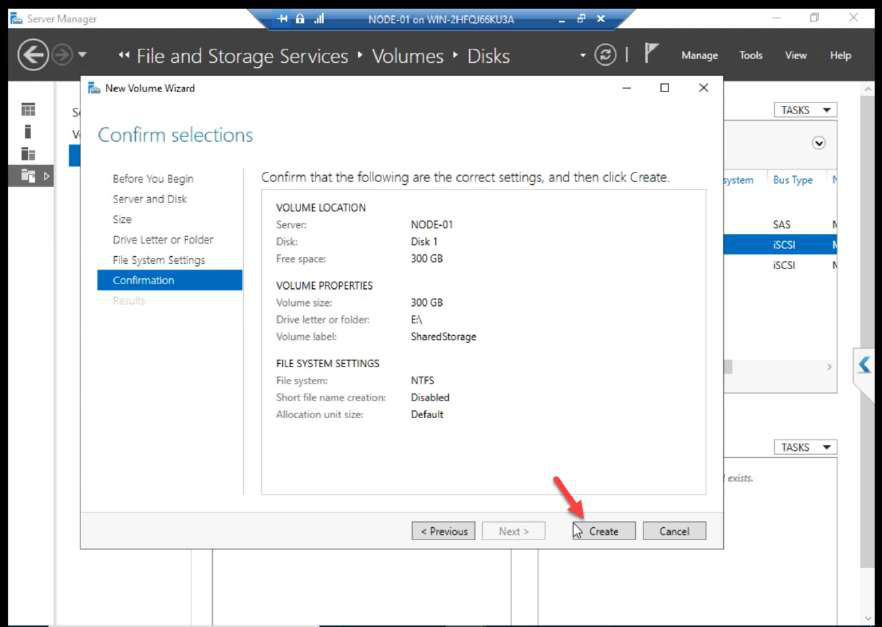

Create + Close.
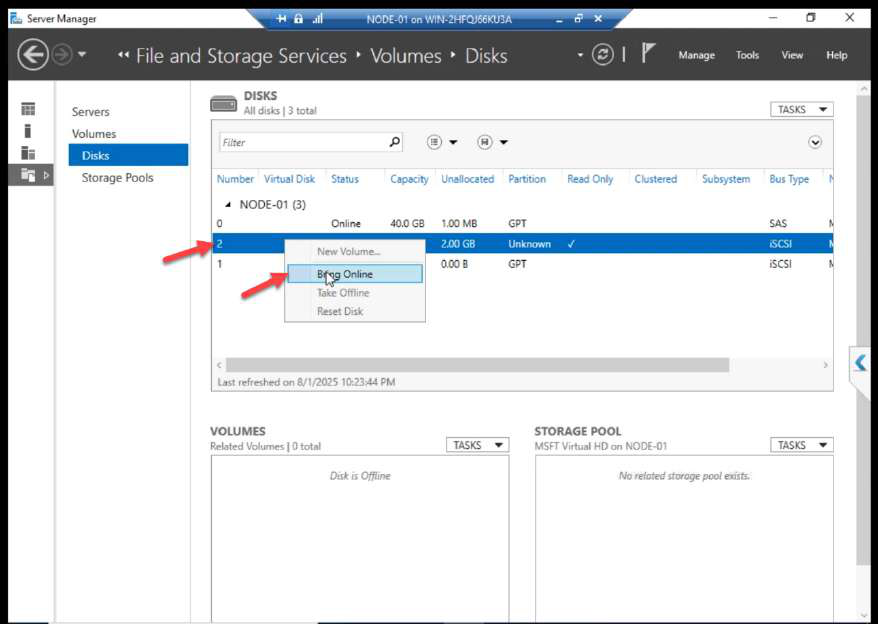
Repeat for Disk 2 (2 GB Quorum). Bring Online.
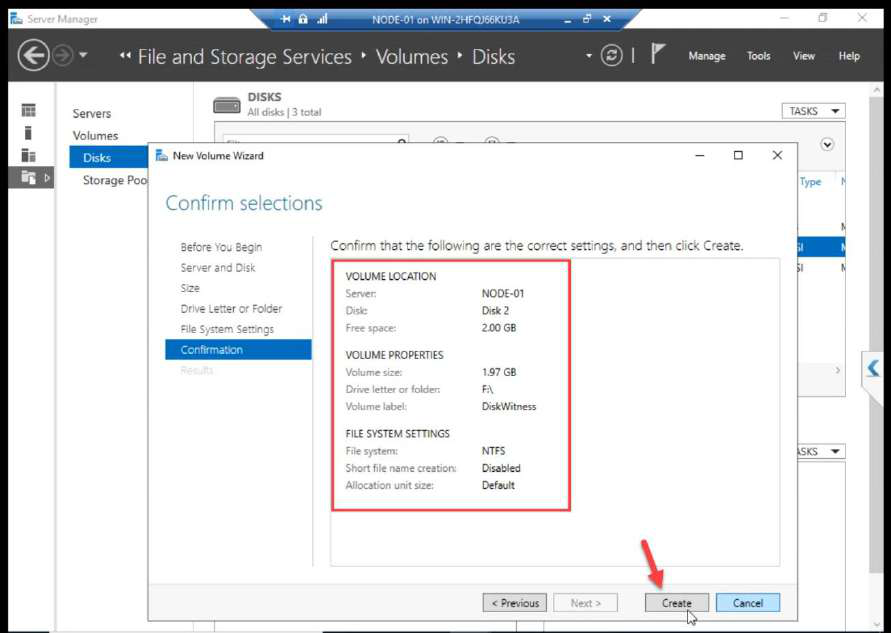
Q:), label ClusterQuorum.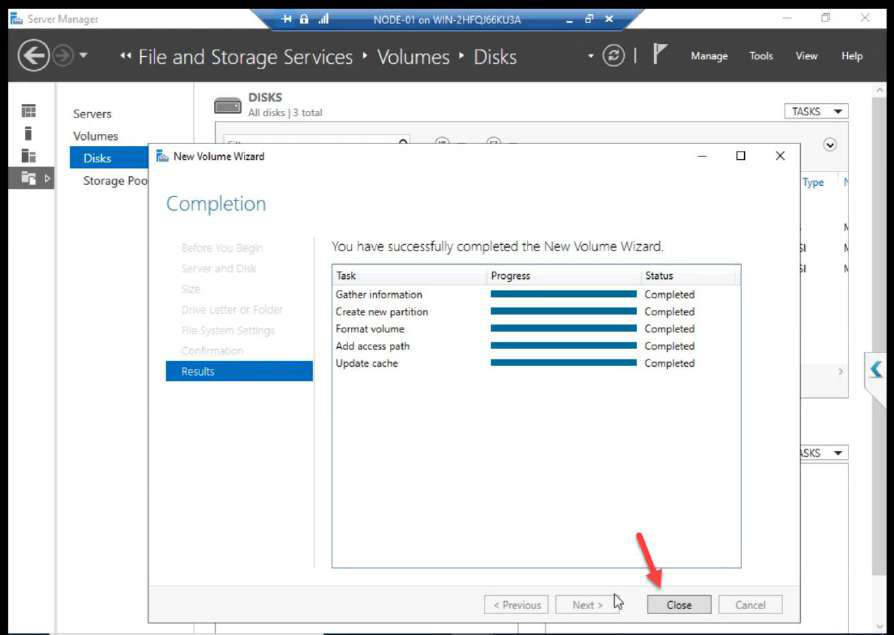
New Volume > same wizard > drive letter (e.g. Q:), label ClusterQuorum.
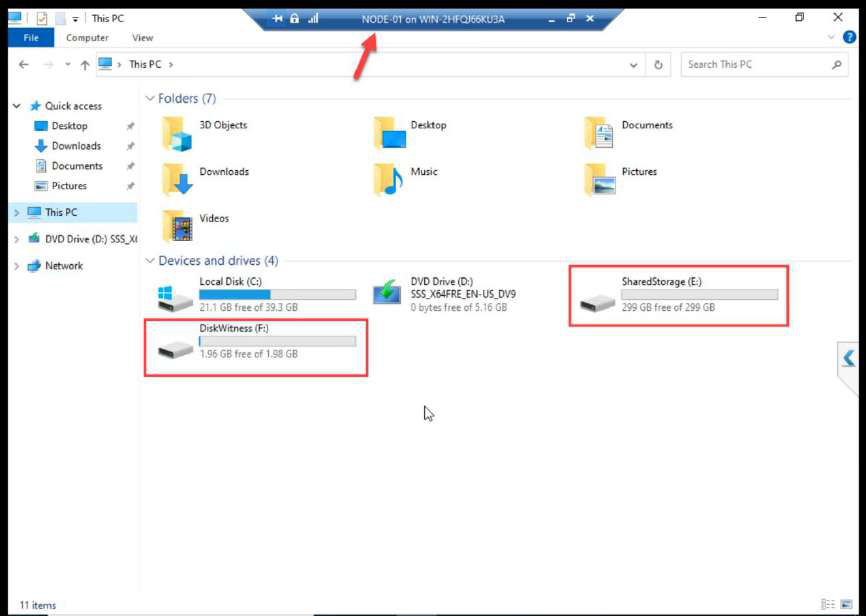
NODE-01 File Explorer: both volumes mounted. Done from NODE-01 only.
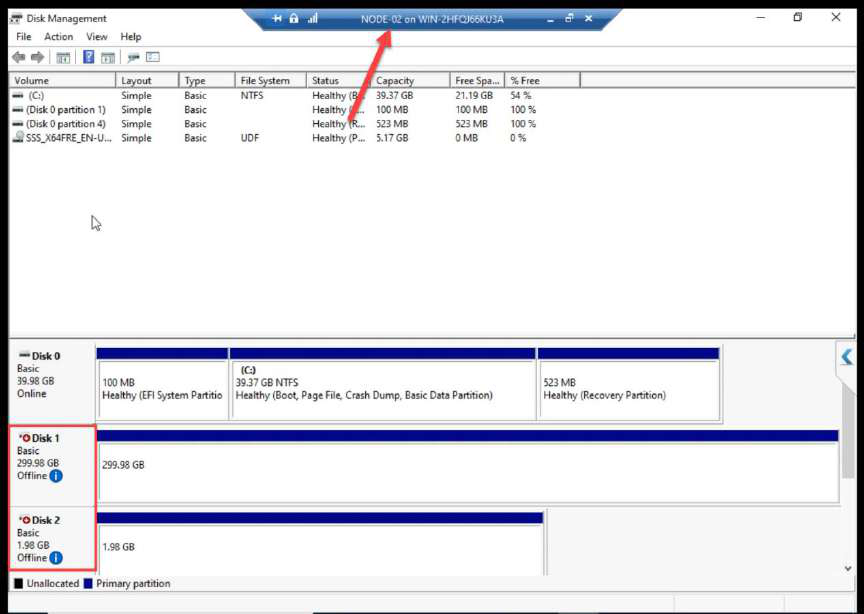
NODE-02 Disk Management: both disks STILL Offline. Correct. Cluster Service will manage ownership transitions starting in Part 9.
Things that bite people in this part
Initiator IP not set explicitly
Most common configuration error. Hit Discover Portal, type SAN IP, OK. Looks fine until storage traffic ends up on the wrong NIC. Always go through Advanced and set Initiator IP to the Storage NIC explicitly.
CHAP credentials lost or mismatched
If the secret on N1 differs from the secret on N2, only one node can log in. If neither matches the SAN, neither logs in. Document the credentials in a vault.
Bringing disks online on NODE-02
Already covered above. Do not. If you accidentally did, take them offline on N2, reboot N2, let N1 ownership reassert. If both nodes wrote during overlap, restore from backup.
Forgot Favorite Targets
The series source doesn’t mention this explicitly, but tick the “Add this connection to Favorite Targets” option during Connect. Otherwise the iSCSI session drops on reboot and the cluster comes up with no shared storage.
Drive letters drift
If D: is in use on N1 but not N2, and you assign D: on N1, after failover the cluster tries to map D: on N2 but it’s already taken there. Standardise drive letters across nodes BEFORE assigning.
What’s next
Compute ↔ storage wired. Part 9 installs the Failover Clustering feature on both nodes and runs cluster validation. See the full series at Hyper-V Failover Clustering pathway.