Disk fills up. Storage gets retired. A workload outgrows its tier. Whatever the trigger, sooner or later you need to move a Hyper-V VM’s files off one disk and onto another — and ideally without taking the guest down. Hyper-V’s built-in Move wizard handles this case live, copying the VHDX and configuration files to a new path while the guest keeps running, and cutting over at the end with no perceptible interruption. This post walks the same-host storage move (different disk on the same Hyper-V host) end-to-end and explains where each option fits.
The four flavours of Hyper-V move — pick the right one
Hyper-V’s “move” functionality bundles four distinct operations under one wizard. They’re named confusingly similarly so it’s worth being explicit about which one you want before you click anything:
- Quick Migration — clustered hosts, briefly suspends the VM during failover. Used when you can tolerate a few seconds of pause but want low complexity.
- Live Migration — clustered hosts, no downtime. The VM moves between hosts while running; storage stays on shared storage (CSV).
- Storage Migration — same host, different disk. The VM stays on the host; only the VHDX and friends move. Live, no downtime. This is what this post covers.
- Shared Nothing Live Migration — standalone hosts (no shared storage), no downtime. Moves both compute state AND storage between two hosts that share nothing in common except a network. The next post in this pathway covers this case.
Storage Migration is the most common operation by a wide margin. It’s the answer to “the C: drive is full and I need to move some VMs to D:” without taking the workload offline.
Pick the right move mode
The Storage Migration path itself has three sub-modes:
- Move all VM data to a single location — everything (VHDX, configuration, checkpoints, smart paging) goes to one folder. Use this 95% of the time. Simplest, easiest to manage afterwards.
- Move VM data to different locations — specify separate paths for the VHDX vs configuration files vs paging vs checkpoints. Useful when you have tiered storage (fast NVMe for VHDX, slower SATA for paging and checkpoints) and want to physically distribute the components.
- Move only the virtual hard disk — just the VHDX moves; configuration files stay put. Rarely the right choice in practice; the small files are easier to keep with the VHDX than to manage separately.
The wizard makes you pick. There’s no “default” — even for the simplest case you have to actively select “all to one location.” Plan the destination layout before you start.
Before you start
- Pick the destination drive. Confirm it has space for the VHDX (and any future expansion). For a 60 GB VHDX, leave at least 100 GB of free space — growth headroom + temporary space the wizard uses for delta sync during the move.
- Decide the destination folder structure. Convention: one folder per VM under a top-level Hyper-V or HyperV-VMs directory. Predictable for backup software, predictable for the next admin.
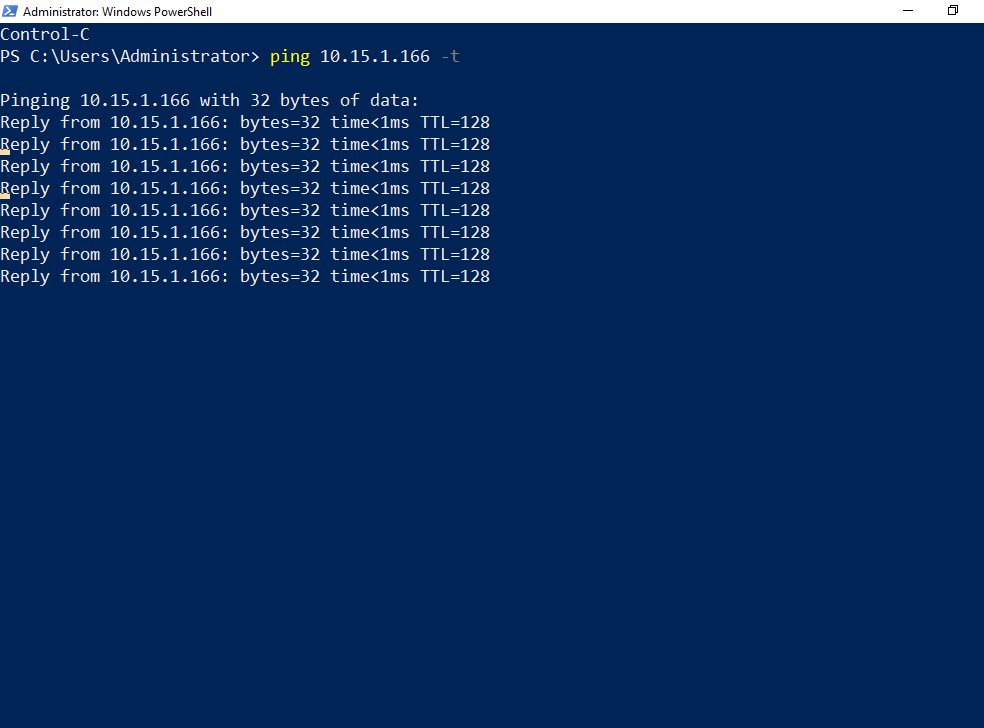
- Set up downtime monitoring. A continuous ping is the simplest possible check. The expected result during the move is zero dropped packets — if you see any loss, something is wrong with the live-move path.
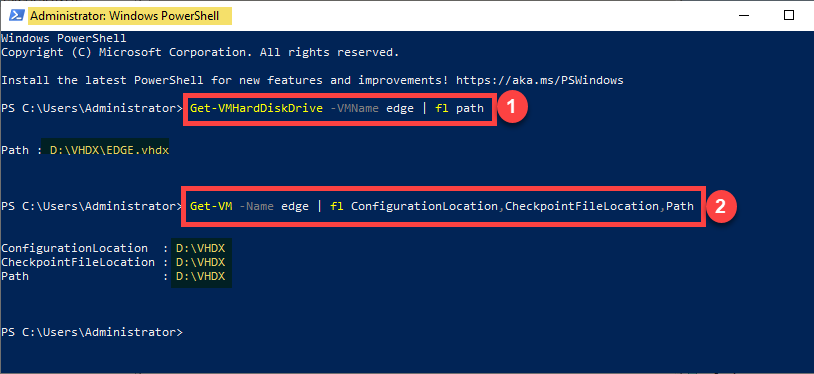
- Note the current path. Open Hyper-V Manager > right-click the VM > Settings > Hard Drive. Write down where the .vhdx lives now. After the move you’ll compare against the new path.
Step 1 — start the downtime monitor
Open an elevated PowerShell or cmd window on the host (or another machine on the same network as the guest). Start a continuous ping against the guest’s IP:
ping 10.15.1.166 -tReplace 10.15.1.166 with the actual guest IP. Leave the window visible alongside Hyper-V Manager throughout the migration. The expected output is an unbroken stream of Reply lines — ZERO Request timed out entries.
If the guest doesn’t respond to ICMP (firewall rule, security policy), substitute a TCP-based check: Test-NetConnection 10.15.1.166 -Port 3389 in a loop, or curl https://10.15.1.166/ against any web service the guest exposes. The point is continuous probing — the specific protocol doesn’t matter as long as it would notice an interruption.
Step 2 — open the Move wizard
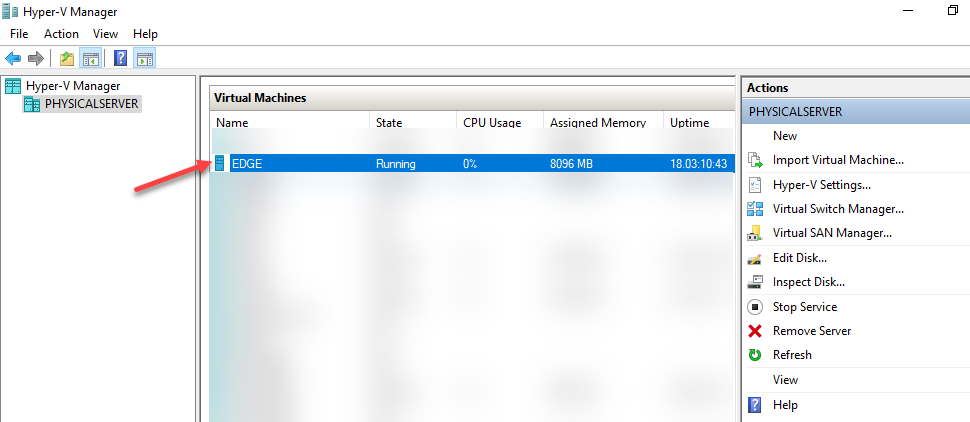
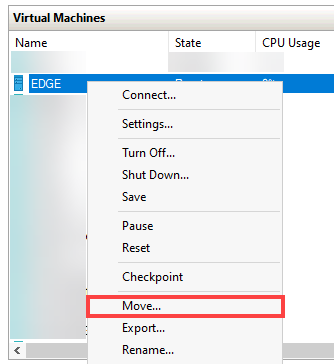
In Hyper-V Manager, right-click the VM (EDGE in the screenshots, but yours will be different) and select Move.
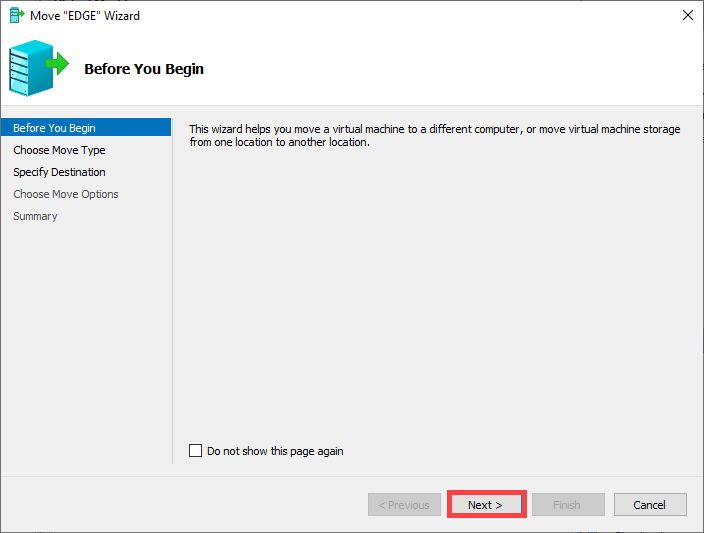
The wizard opens with an introduction page. Click Next.
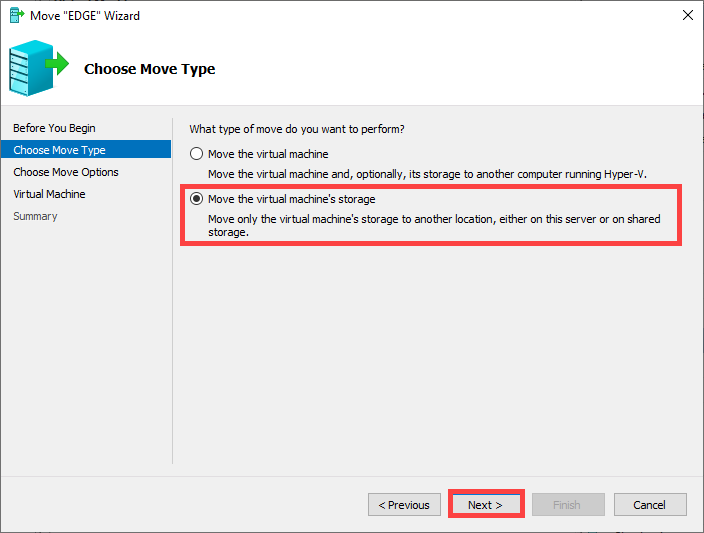
Step 3 — choose move type
Two options on this page:
- Move the VM to another computer — this is Shared Nothing Live Migration; covered in the next post.
- Move the VM’s storage to a new location — this is Storage Migration. Pick this one for the same-host scenario.
Select the second option and click Next.
Step 4 — choose move mode
Three radio buttons:
- Move all of the VM’s data to a single location — pick this one for the textbook scenario.
- Move the VM’s data to different locations — pick this when you have a tiered storage layout planned.
- Move only the VM’s virtual hard disks — rare; usually not what you want.
Pick the first option and click Next.

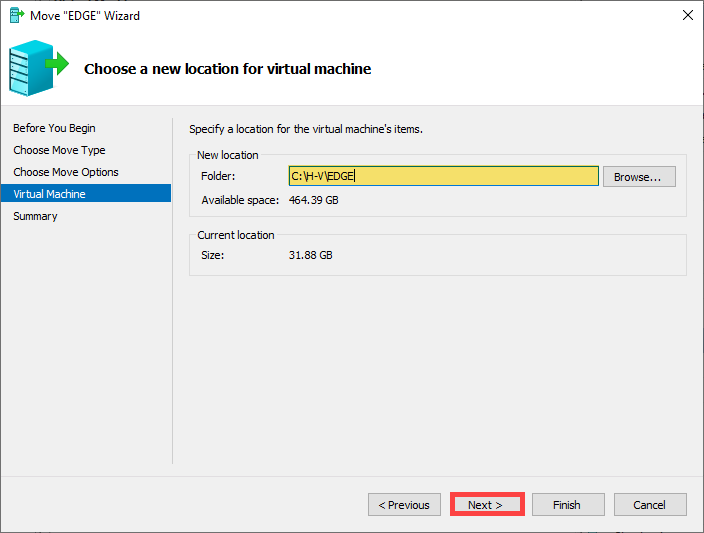
Step 5 — specify the destination path
Click Browse and navigate to the destination drive. Create a new folder for this VM if one doesn’t exist yet (the wizard’s browse dialog has a “Make New Folder” button).
Select the folder and click Next. The wizard now shows the destination path it’s about to use.
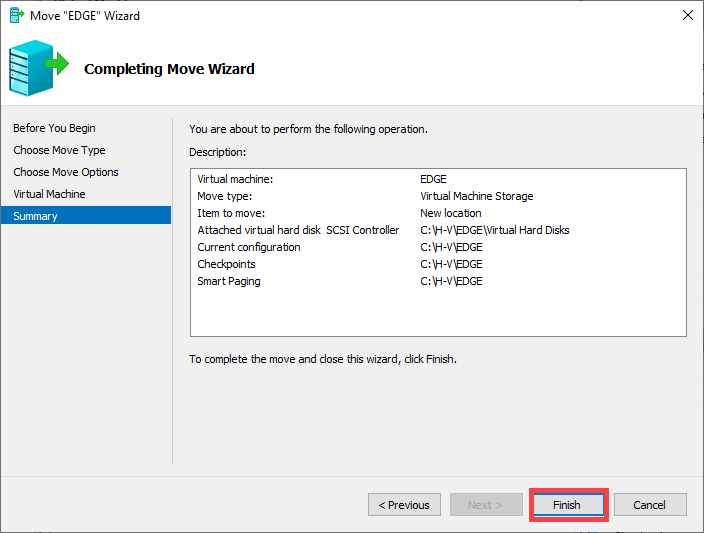
Step 6 — confirm and start
The Summary page shows the source path, the destination path, and the move-mode selection one last time. This is your “last chance to bail” screen — review carefully:
- Is the source path actually the one you intended to move?
- Is the destination path on the right drive?
- Is the destination folder empty (or at least, doesn’t already contain a different VM)?
If everything looks right, click Finish. The bytes start flowing immediately.
Step 7 — watch the migration progress
Hyper-V Manager shows the percentage in the Status column on the VM row. The percentage is real — it’s the actual bytes-copied counter, not a placeholder. For a 60 GB VHDX on local SATA, expect ~10 minutes; on local NVMe, ~3 minutes; on iSCSI or SMB, depends entirely on the network path.

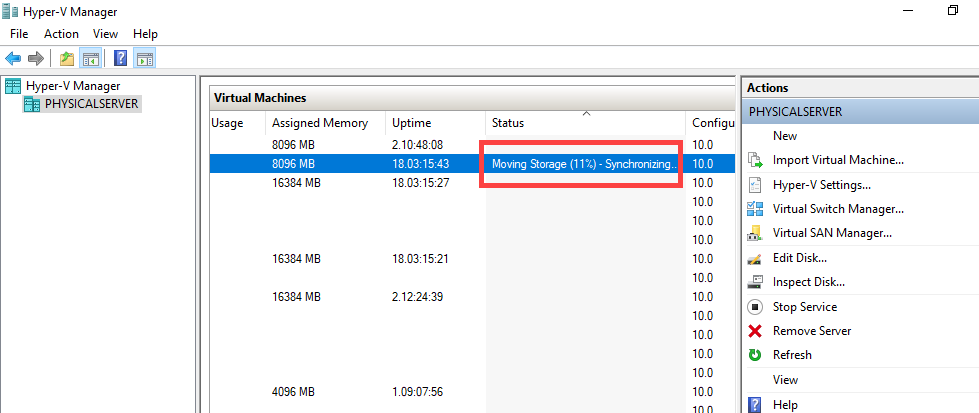
Throughout the progress, the VM stays in Running state. The guest doesn’t notice the migration is happening — reads still come from the source disk, writes land in both places (source AND destination) until the cutover at the end.
Step 8 — verify zero downtime
Switch to the ping window. The stream of Reply lines should be unbroken throughout the move — no Request timed out entries.
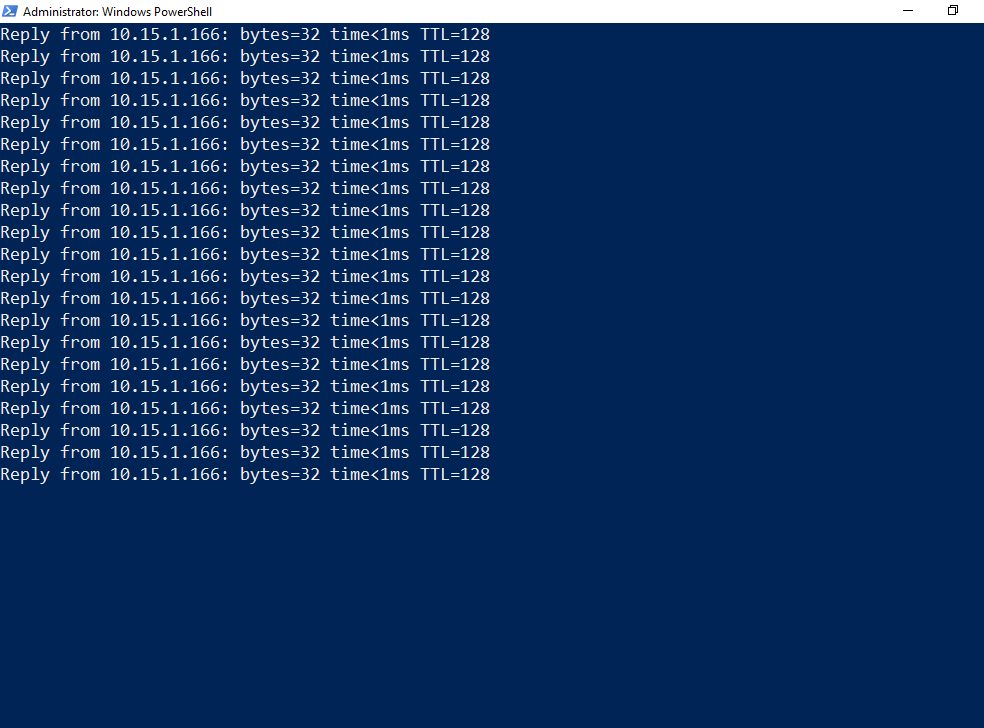
This is the load-bearing verification. If you see ANY packet loss during the move, something went wrong with the live-move path. Most likely cause: the cutover at the end took too long because the source disk was so heavily loaded that the delta sync couldn’t keep up with the rate of new writes. Stop the ping, document the loss, and investigate before doing this on another VM.
Step 9 — verify the new path
Once the wizard reports success, open the VM’s Settings dialog. Navigate to the Hard Drive page — the .vhdx path should now be the destination you specified. Check the Smart Paging Folder page too — same thing.
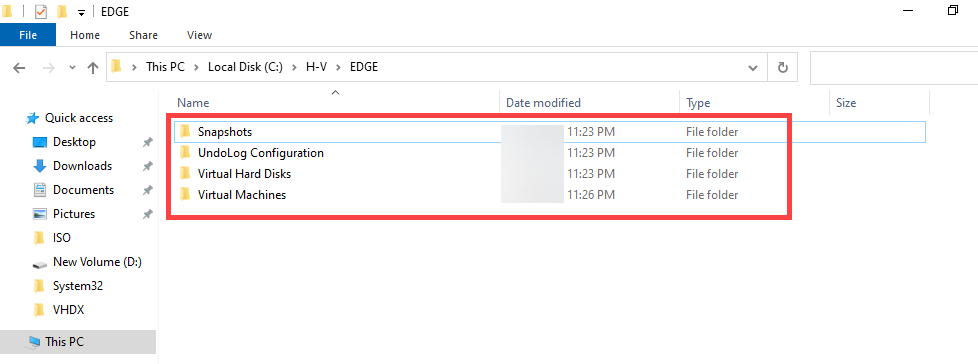
If either page still shows the old path, the move was incomplete. This is rare (the wizard usually fails loudly if it can’t complete) but possible. If you see it, the recovery is to stop the VM, manually fix up the paths via Set-VM cmdlets, and re-validate.
Step 10 — stop the ping and confirm
Stop the ping with Ctrl+C. Look at the statistics summary at the bottom:
Sent = 420, Received = 420, Lost = 0 (0% loss)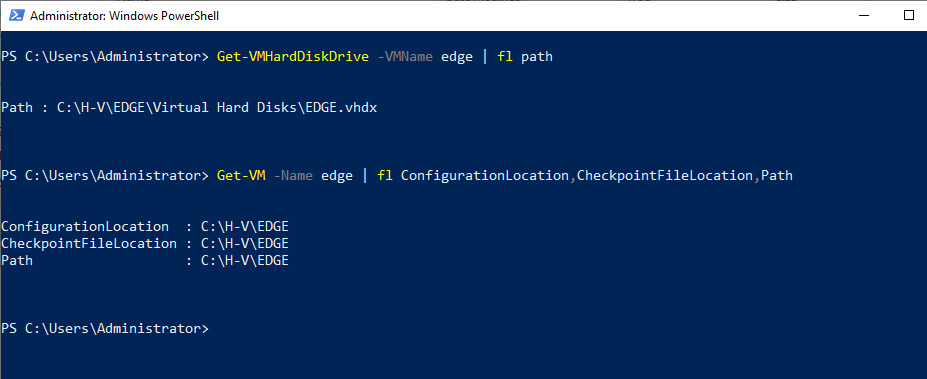
Sent and Received should match exactly, Lost should be 0. That’s the “zero downtime” promise made concrete. The VM moved between disks while users kept working against it without noticing.
Where Storage Migration sits vs Shared Nothing Live Migration
Storage Migration (this post) and Shared Nothing Live Migration (next post) sound similar but solve different problems:
| Scenario | Use this |
|---|---|
| Same host, move to a different disk on the same host | Storage Migration |
| Two standalone hosts, no shared storage, move VM between them | Shared Nothing Live Migration |
| Clustered hosts, move VM between cluster nodes (storage stays on CSV) | Live Migration |
| Clustered hosts, brief downtime acceptable | Quick Migration |
The decision tree is: clustered or standalone? same host or different host? same disk or different disk? The right answer is one of the four operations above and the wizard structure follows the same logic.
Things that bite people
Source disk runs out of space mid-move
The migration writes deltas to BOTH the source and the destination during the live-move phase (so that a failure mid-move doesn’t leave the VM stranded). If the source disk fills up during this period, the move stalls and may fail. Counter-intuitive: even though you’re moving OFF the source, you need free space ON the source for the move to complete cleanly. Free up some space on the source before starting if it’s very tight.
Destination is on a slow disk
The move is bottlenecked by the slowest disk in the path. If you’re moving to a USB external drive (slow), the move takes hours. If you’re moving to a network share over a gigabit link, the move takes hours. Test-write the destination first — copy a 1 GB file and time it — to size expectations before starting on a 200 GB VM.
Differencing disks need their parents to move with them
If the VHDX is a differencing disk (it has a parent), the parent VHDX moves automatically with it. But if the parent is on a different volume, the wizard might not let you proceed cleanly. Check Get-VM | Get-VMHardDiskDrive | Get-VHD before starting; if the chain spans volumes, consolidate first via Merge-VHD or pick a destination that can hold the entire chain.
Checkpoints prolong the move significantly
If the VM has checkpoints, EACH checkpoint is its own VHDX file and ALL of them have to move. A VM with 5 checkpoints takes ~5x as long as the same VM with no checkpoints. If you don’t need the checkpoints, delete them before the move (Remove-VMSnapshot). Hyper-V will merge them with the base VHDX, leaving you with one file to move.
Anti-virus on the host slows the copy
Some host-based anti-virus products scan VHDX files as they’re being written. This can slow the copy by 50% or more. Either temporarily exclude the VM’s destination folder from the AV scanner (and the source folder if you’re seeing slow reads), or schedule the move for a maintenance window when AV impact is acceptable.
The wizard runs as your account, not as the system
This means: your account needs read access to the source path AND write access to the destination path. Failures with “access denied” messages partway through the move usually trace back to a missing permission on the destination folder. Right-click the destination folder > Properties > Security and confirm your account can write before starting.
Pause/resume during the move can leave the VM in odd states
Don’t pause or save the VM during a Storage Migration. The wizard handles state transitions internally; if you intervene with the VM’s state from outside the wizard, the move might fail and recover the VM to a state that doesn’t match either the source or destination cleanly.
Where this fits
Storage Migration is the day-to-day workhorse of Hyper-V file management — you’ll do this dozens of times across the life of any non-trivial Hyper-V deployment. For the cross-host case (Shared Nothing Live Migration), see the next post in the Hyper-V Virtualization pathway. For the broader story on Hyper-V VM management, the same pathway covers VM creation, golden images, checkpoints, and the rest of the lifecycle. For the underlying storage performance characteristics that drive when you’d want to move VMs between disks, see the storage-related posts in the Windows Server Administration pathway.