The Create Cluster wizard auto-picks a quorum config based on heuristics. For a 2-node cluster it usually picks Node Majority + Disk Witness, but the wizard’s “auto” choice depends on disk availability at create time. Be explicit: tell the cluster which disk to use as the witness so you know it’s correct.
Why quorum matters — the split-brain story
Cluster Service uses heartbeat to know which nodes are alive. If heartbeat fails between two nodes but BOTH can still see the storage, both nodes assume the other is dead and try to take ownership of the shared disks. Both nodes write to the same filesystem simultaneously — corruption within seconds.
The Quorum (witness) is the third “vote” that breaks the tie. With 2 nodes + 1 disk witness = 3 votes total. The cluster needs majority (2 of 3) to function. So:
- Node-01 alive + Node-02 alive + Witness OK = 3 votes → cluster healthy
- Node-01 alive + Node-02 dead + Witness OK = 2 votes → cluster healthy on Node-01
- Node-01 dead + Node-02 alive + Witness OK = 2 votes → cluster healthy on Node-02
- Both nodes alive + Witness lost = 2 votes → cluster healthy
- Both nodes alive + heartbeat broken between them + Witness reachable from one only = 2 votes on the side with witness, 1 vote on the other side → the side with 2 votes survives, the other side’s services go offline
The witness prevents both sides from claiming “I’m the survivor” in a partition.
Step-by-step
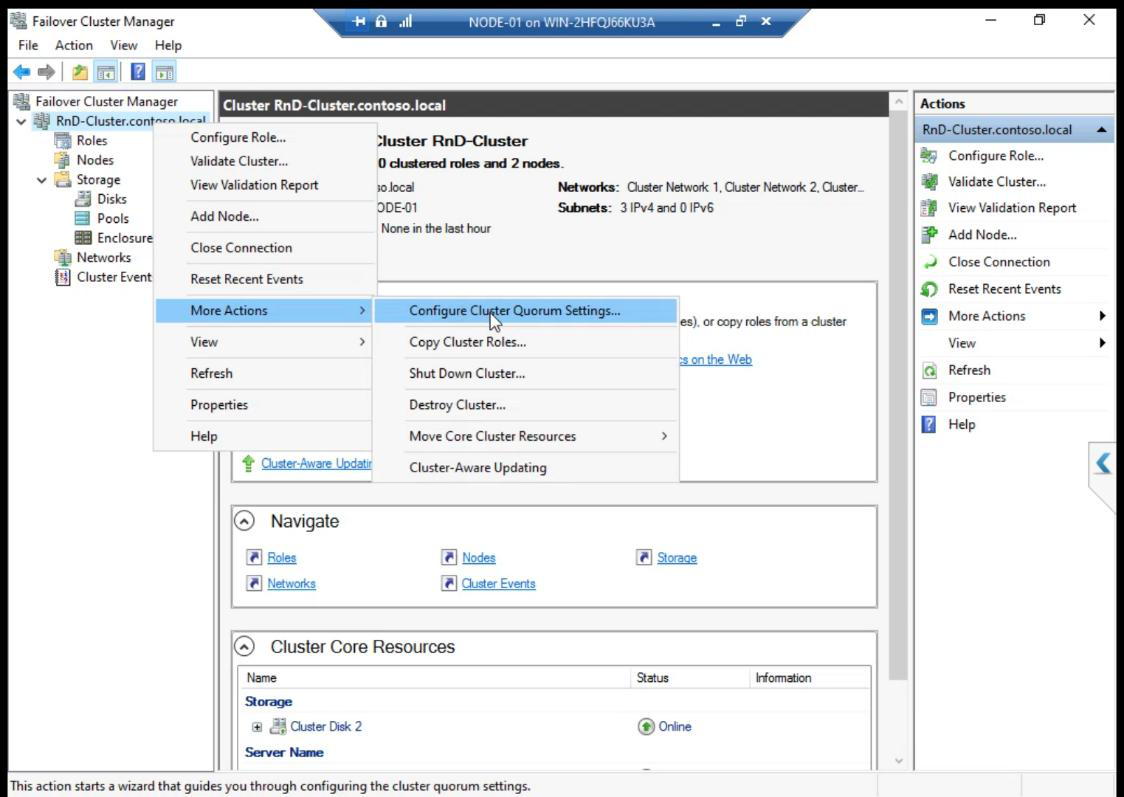
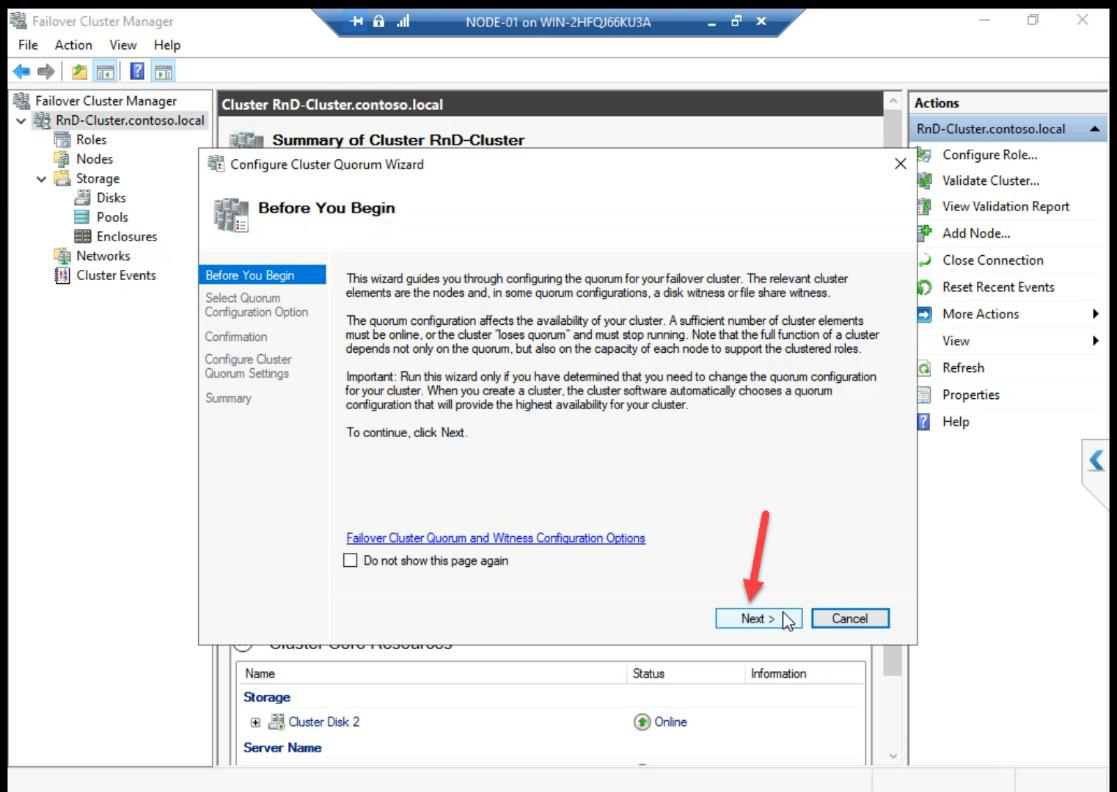
Wizard Before You Begin: Next.
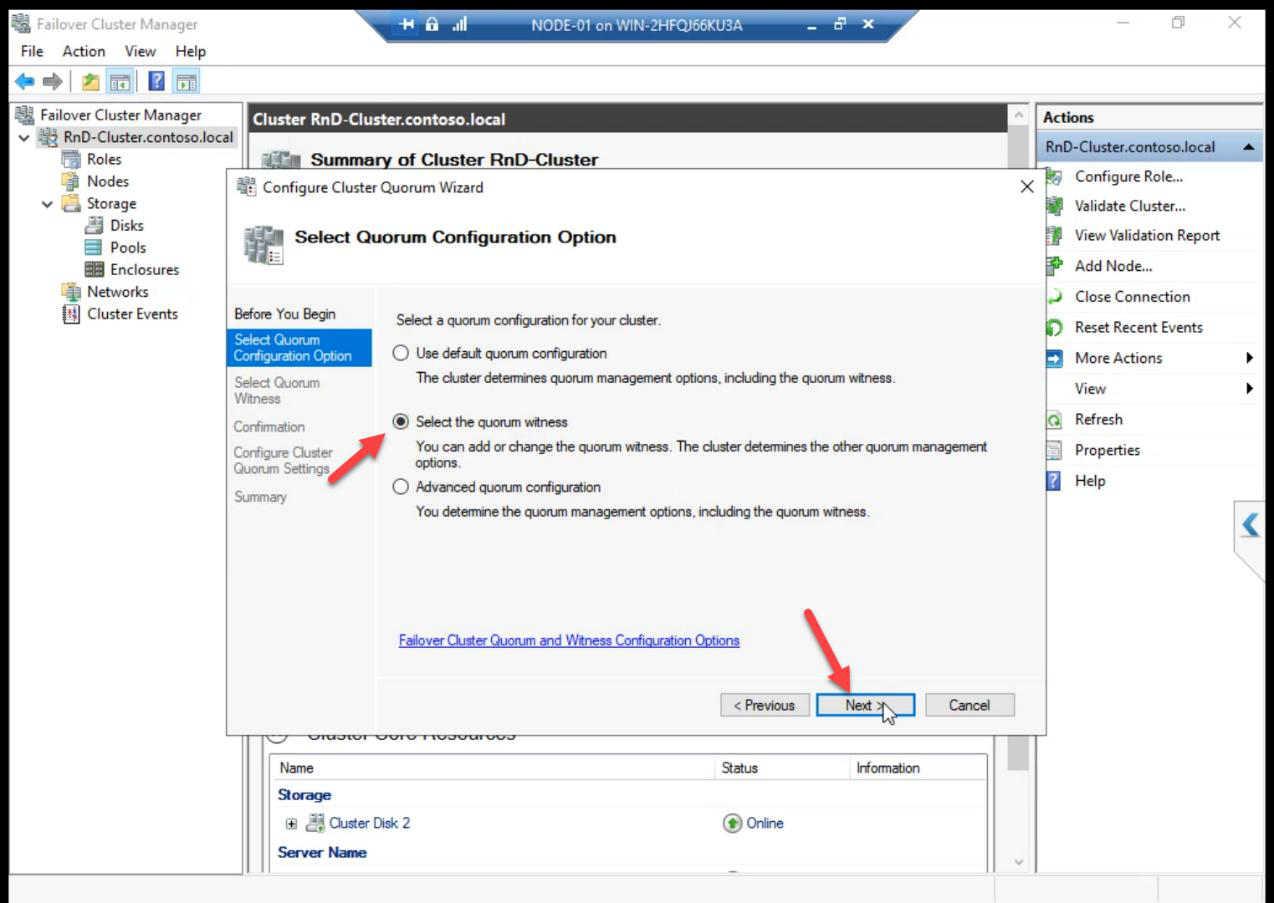
Choose Select the quorum witness. (Other options: Use default quorum configuration — the auto-pick from create time, or Advanced quorum configuration — for changing voting nodes too.)
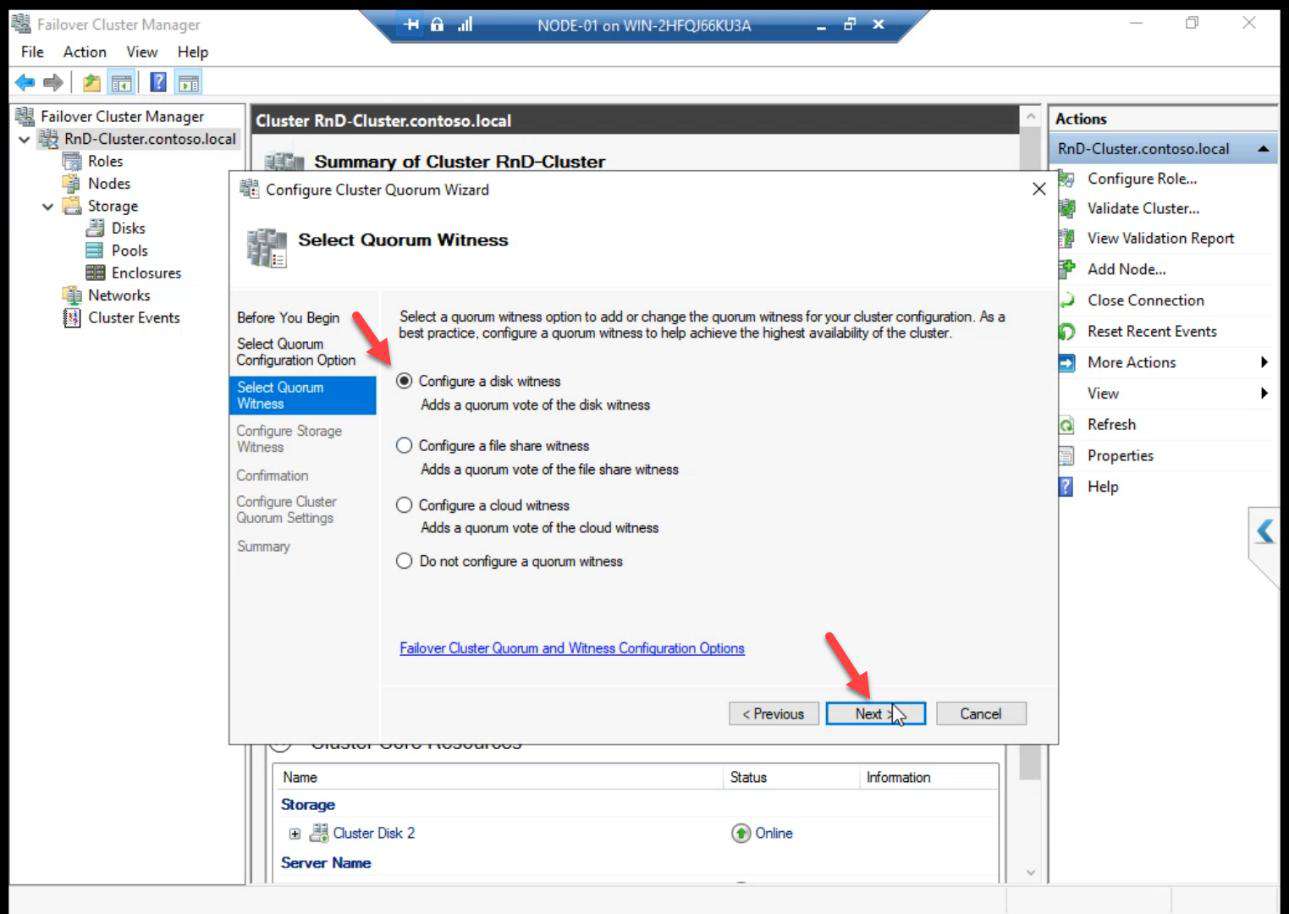
Configure a disk witness. Other types:
- File share witness — SMB share on a separate server. Good for stretched clusters where shared storage isn’t practical.
- Cloud witness — Azure storage account. Good for cloud-only or hybrid clusters.
For a single-site lab with shared iSCSI storage, disk witness is the standard.
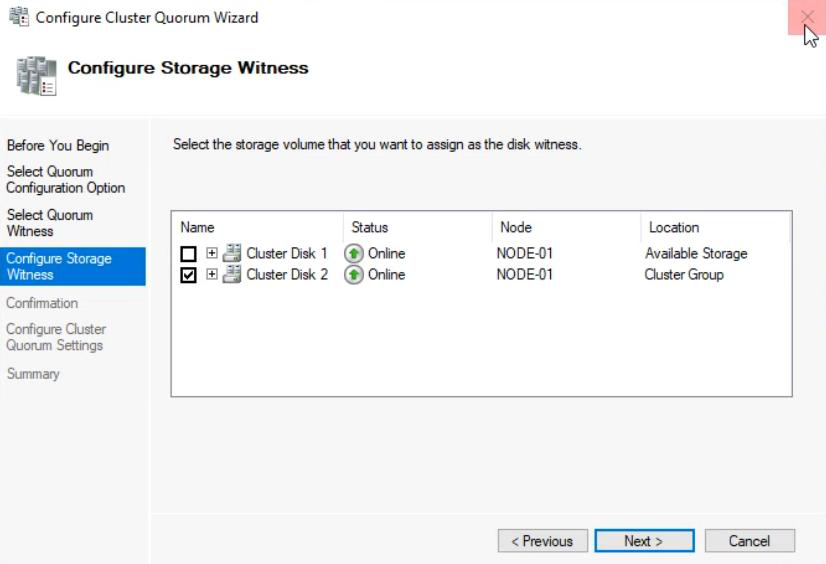
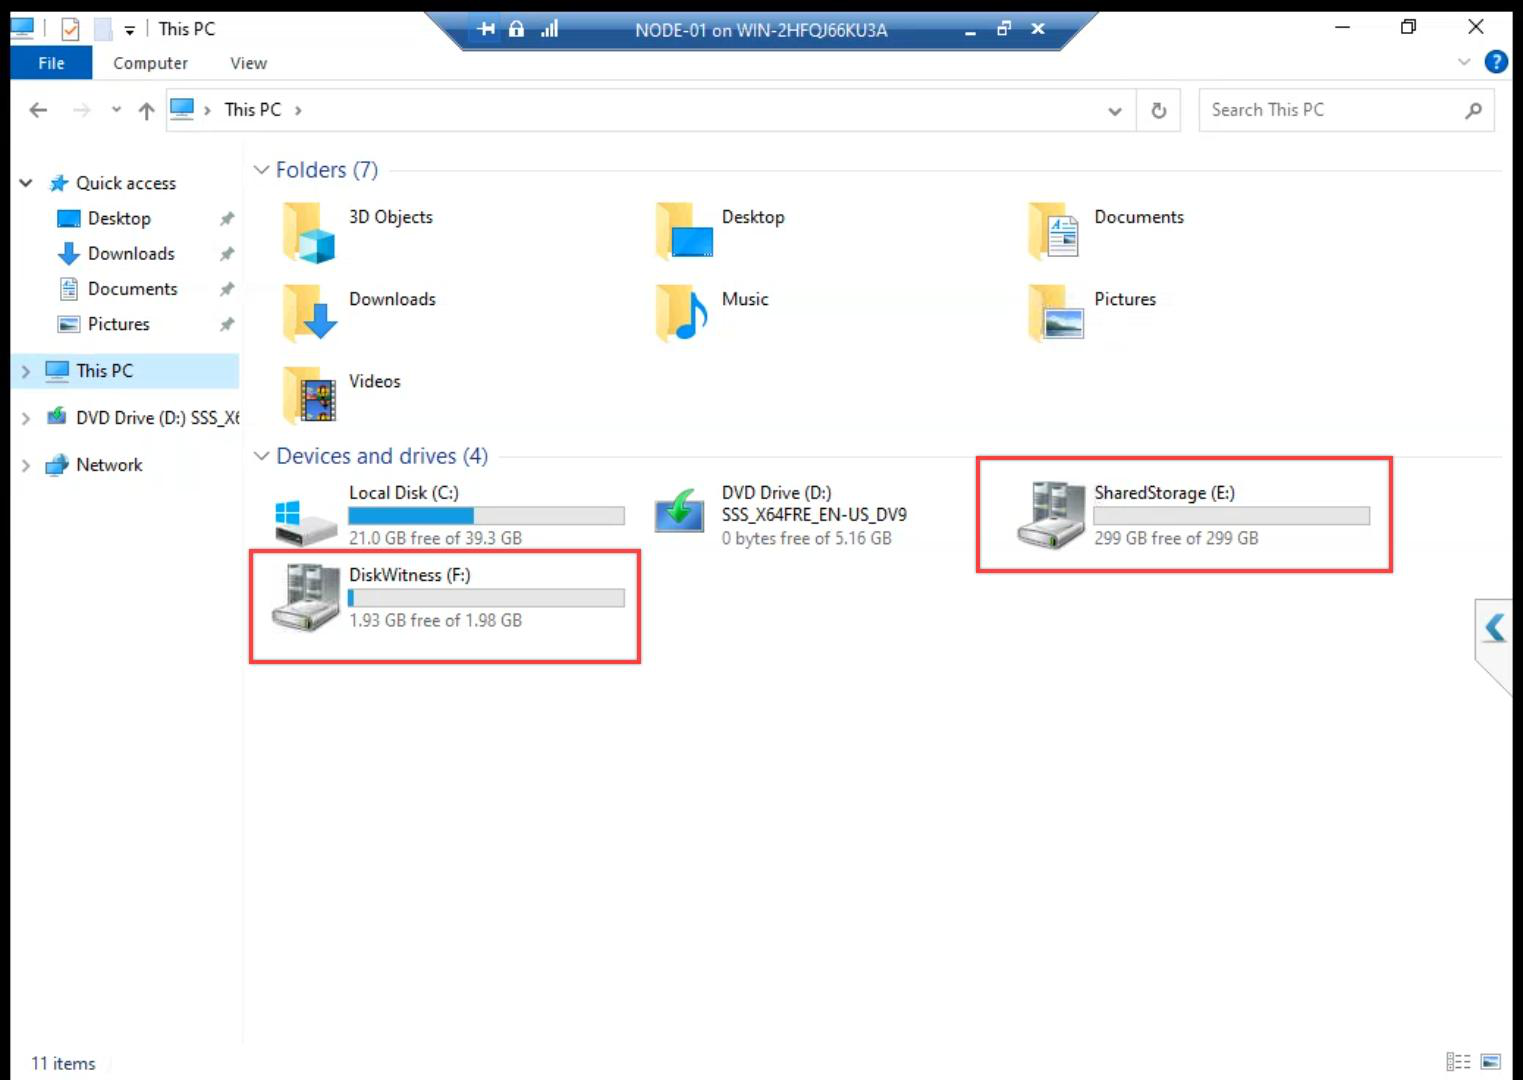
Pick the 2 GB Cluster Disk explicitly. The wizard typically pre-selects the smallest disk; verify it’s the Quorum disk you provisioned, not the Data disk.
PowerShell alternative: Set-ClusterQuorum -DiskWitness "Cluster Disk 2"
Review and Finish.
What’s on the witness disk

After configure, the witness disk gets a \Cluster\ folder with three file types:
- hive — the cluster database (registry of cluster config)
- container — metadata about cluster objects and resources
- *.blf — Base Log File, transaction log of cluster changes
If both nodes die simultaneously and you bring them back up, the witness disk is how the cluster reconstructs its state. Never delete these files manually. Cluster Service manages them.
Things that bite people in this part
Wrong disk picked as witness
Auto-config sometimes picks a Data disk instead of the dedicated Quorum disk — especially if the Quorum disk wasn’t online at create time. Always reconfigure explicitly to be sure.
Skipping explicit configuration
The Create Cluster wizard’s auto-quorum can pick the wrong mode (e.g., Node Majority alone if no disk was eligible at the moment). Explicit reconfig in this part guarantees correct behaviour.
Witness disk lost (rare)
If the witness disk goes offline (SAN failure), the cluster keeps running with degraded quorum. Get-ClusterQuorum shows current state. Replace the witness when you can.
Forgetting that quorum changes need re-validation
After changing quorum config, re-run cluster validation: Test-Cluster -Include Quorum — confirms the new config is supported.
What’s next
Cluster created with explicit quorum. Part 12 covers cleanup tasks: rename the generic Cluster Network 1/2/3 names, add Cluster Shared Volumes (CSV), and enable nested virtualisation on the cluster nodes. See the full series at Hyper-V Failover Clustering pathway.