What a Hyper-V Checkpoint Actually Is
A Hyper-V checkpoint is a point-in-time snapshot of a VM’s disk and (optionally) memory state, taken without shutting the VM down. It looks like a single “save point” you can come back to, but the underlying mechanism is a differencing-disk chain: at the moment you take a checkpoint, Hyper-V freezes writes to the parent VHDX, creates a new AVHDX file as a child differencing disk, and from that point on every write the VM does goes into the new AVHDX. The parent VHDX never changes.
Take three checkpoints in a row and you have a four-deep chain: parent.vhdx → ckpt1.avhdx → ckpt2.avhdx → ckpt3.avhdx → live.avhdx. Reads walk the chain top to bottom, finding the most recent version of each block; writes always land in the topmost (live) AVHDX. Reverting a checkpoint discards the AVHDX layers above it; merging collapses them down into the parent permanently.
This article covers the theory (so the configuration steps make sense), the GUI walkthrough for create / revert / apply / merge, the Production vs Standard distinction, the PowerShell equivalents, and the production warnings you should care about.
Why Use Checkpoints
- Lab and test rollback. Take a checkpoint before a risky configuration change. If the change goes wrong, revert. The VM is back to exactly its pre-change state in 30 seconds.
- Patching dry-runs. Snapshot a VM, install Patch Tuesday updates, validate the apps still work, then either keep the changes (delete the checkpoint to merge) or revert.
- Demos and training. Run a class through a complex procedure, revert to the starting point between groups.
- Short-term “oh no” insurance. Just before any change you are not 100% sure of, take a checkpoint. Cost is one click, value is a free undo button for the next half hour.
What checkpoints are not: a backup. They live on the same physical storage as the VM. They cannot survive disk failure, ransomware, or accidental deletion of the VM. Real backup needs a tool that copies the VHDX off-host (Veeam, Windows Server Backup, Azure Site Recovery, etc.). Use checkpoints for short-lived, reversible changes; use backups for everything that matters.
Production vs Standard Checkpoints
Hyper-V supports two checkpoint flavors. The setting is per-VM and lives in VM Settings > Checkpoints:
- Production checkpoints (default since Server 2016). Use the guest’s Volume Shadow Copy Service (VSS) to quiesce running applications before the snapshot. Result: an application-consistent snapshot — SQL Server, Exchange, AD all see a clean shutdown-ish state, not a memory-frozen one. Reverting boots the VM as if it had been gracefully shut down at the checkpoint instant. Safe to use in production.
- Standard checkpoints (legacy, formerly “snapshots”). Capture the entire VM memory state. Reverting brings the VM back to the exact running state — same processes, same TCP connections, same in-memory data. Lab/test only — reverting a Standard checkpoint to a domain-joined VM violates Active Directory’s USN-rollback rules and breaks replication permanently.
Default to Production. Switch to Standard only when the workload is non-AD and you specifically need the in-memory state preserved. Active Directory, Exchange, SQL Server, and any database with a transaction log all need Production checkpoints (or no checkpoints at all in a real production environment).
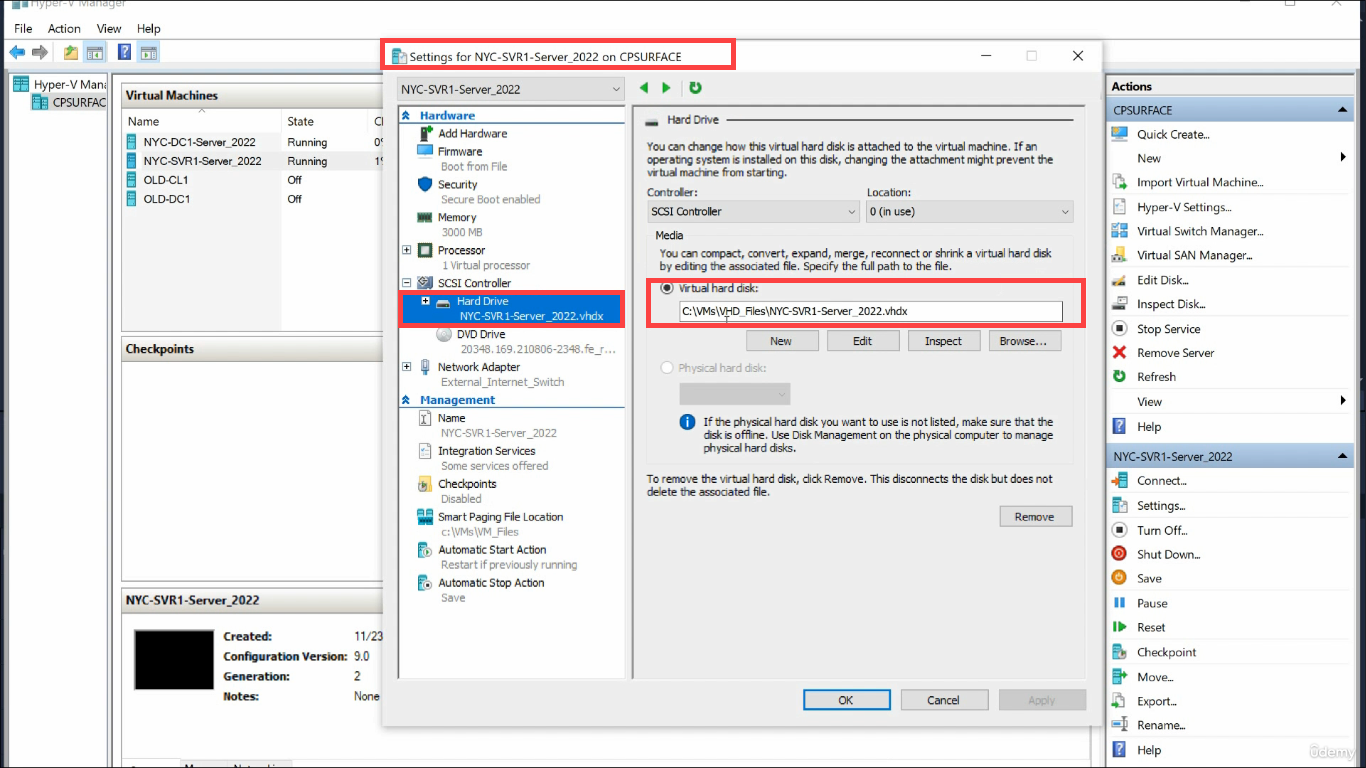
Step 1 — Locate the Parent VHDX
Open VM Settings > Hard Drive. The Virtual hard disk field shows the path to the parent VHDX:
Browse to that folder in File Explorer to see the parent file:
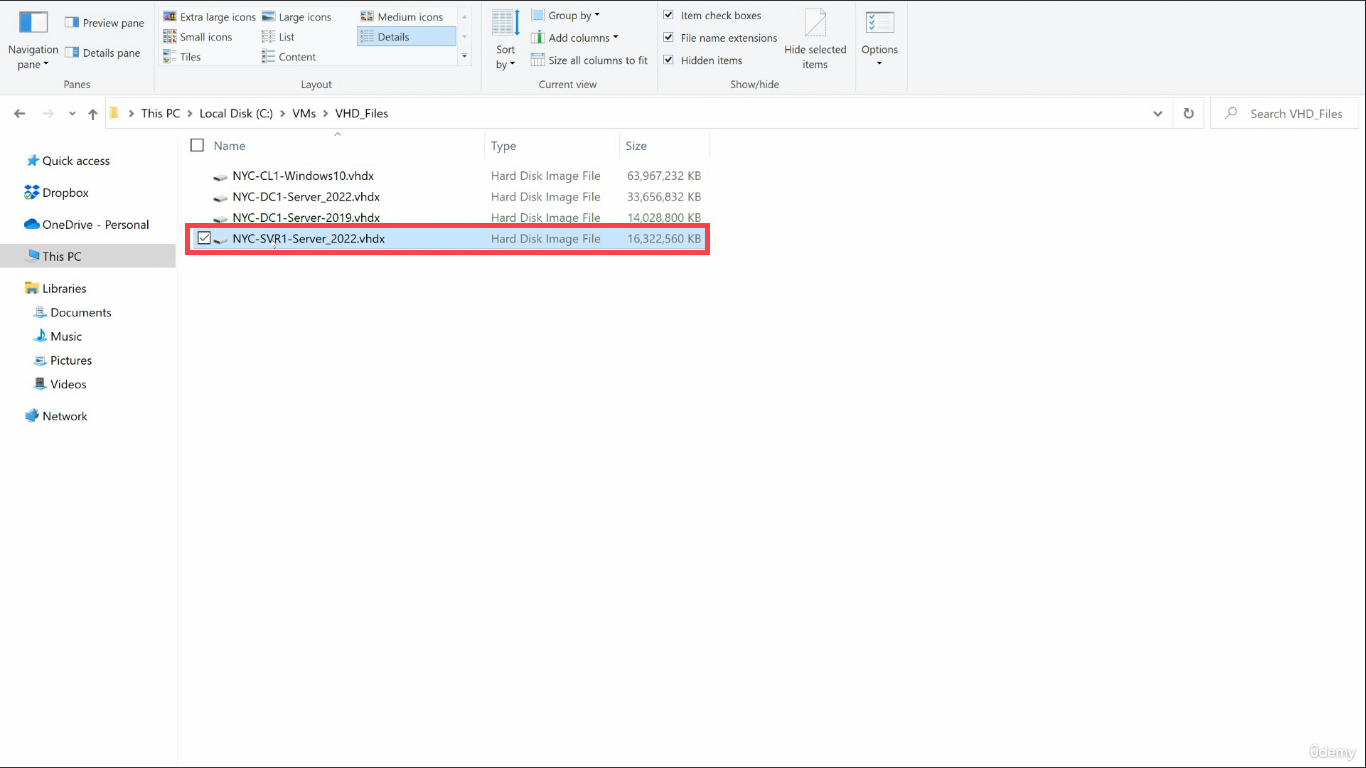
After your first checkpoint, AVHDX files appear alongside the parent — one per checkpoint. Their filenames include a GUID (e.g. NYC-SVR1_ABCD1234-...avhdx) and they are typically much smaller than the parent because they only hold writes since the checkpoint was taken.
Step 2 — Configure Checkpoint Behavior
Still in VM Settings, switch to the Checkpoints pane:
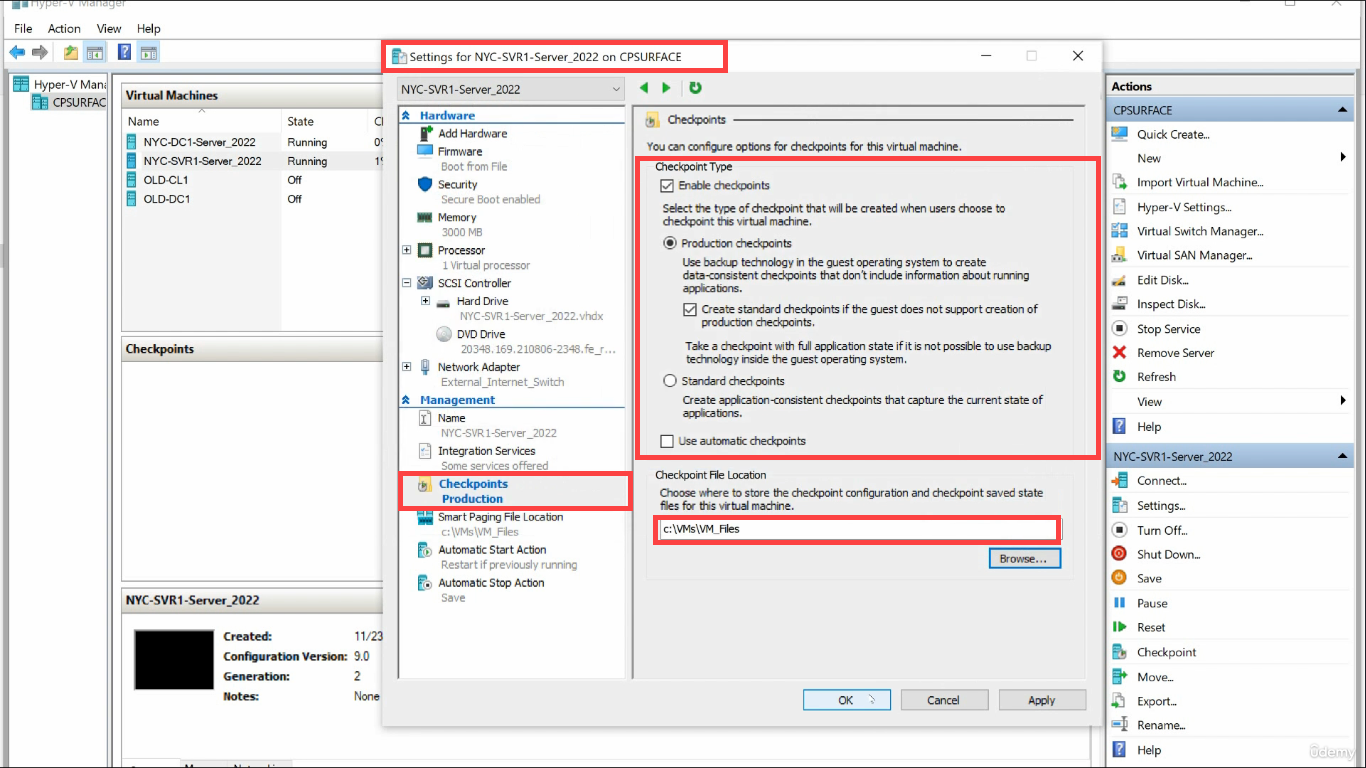
Decide three things:
- Enable checkpoints — on/off. Some production VMs disable checkpoints entirely to prevent accidental snapshots that violate compliance.
- Production checkpoint or Standard — per the comparison above. Production is the default and the right choice 95% of the time.
- Use automatic checkpoints — new in Server 2019+. Hyper-V auto-takes a checkpoint when the VM starts, deletes it on graceful shutdown. Useful for client/dev VMs; turn off on servers.
- Checkpoint File Location — where the AVHDX files land. By default, alongside the parent VHDX. You can move them to a different (faster) volume if checkpoint I/O is hot, but for most workloads this is fine to leave alone.
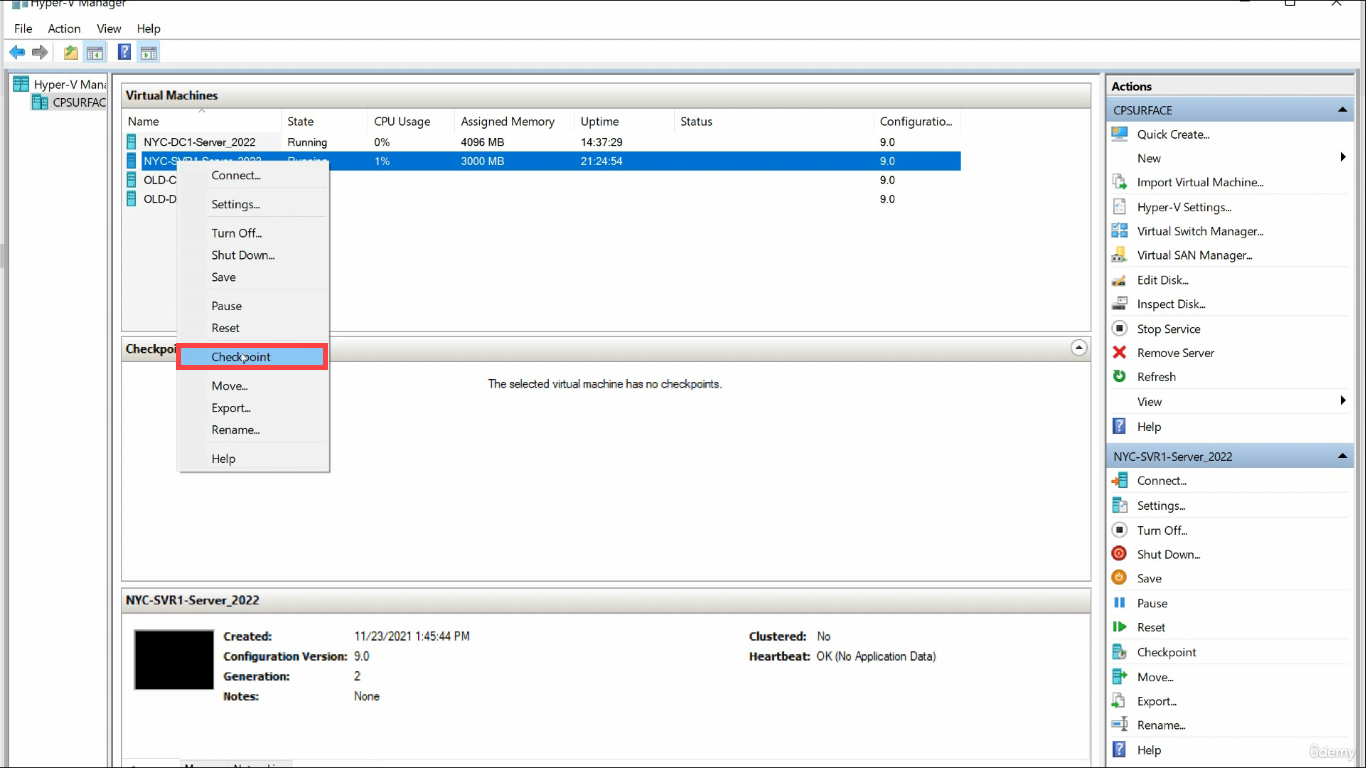
Step 3 — Create a Checkpoint
Right-click the running VM in Hyper-V Manager and choose Checkpoint:
Checkpoint-VM in PowerShell.The VM keeps running — no pause, no reboot. A few seconds later the new checkpoint appears in the Checkpoints pane with a timestamp:

From this moment on, every write the VM does is going into the new AVHDX, not the parent VHDX.
Step 4 — Test the Revert Path
The whole point of a checkpoint is the undo button. Test it:
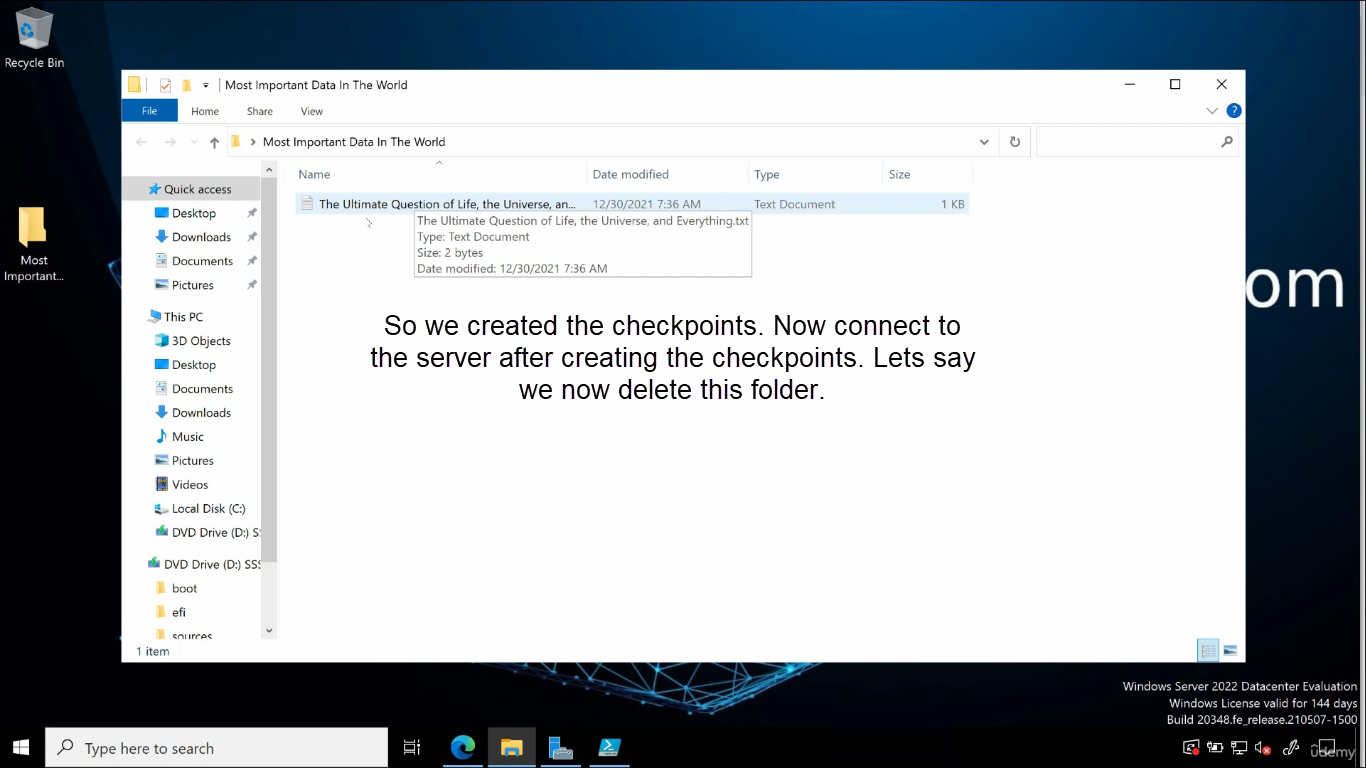
Inside the guest, do something destructive (delete a folder, change a config file, install a bad update):
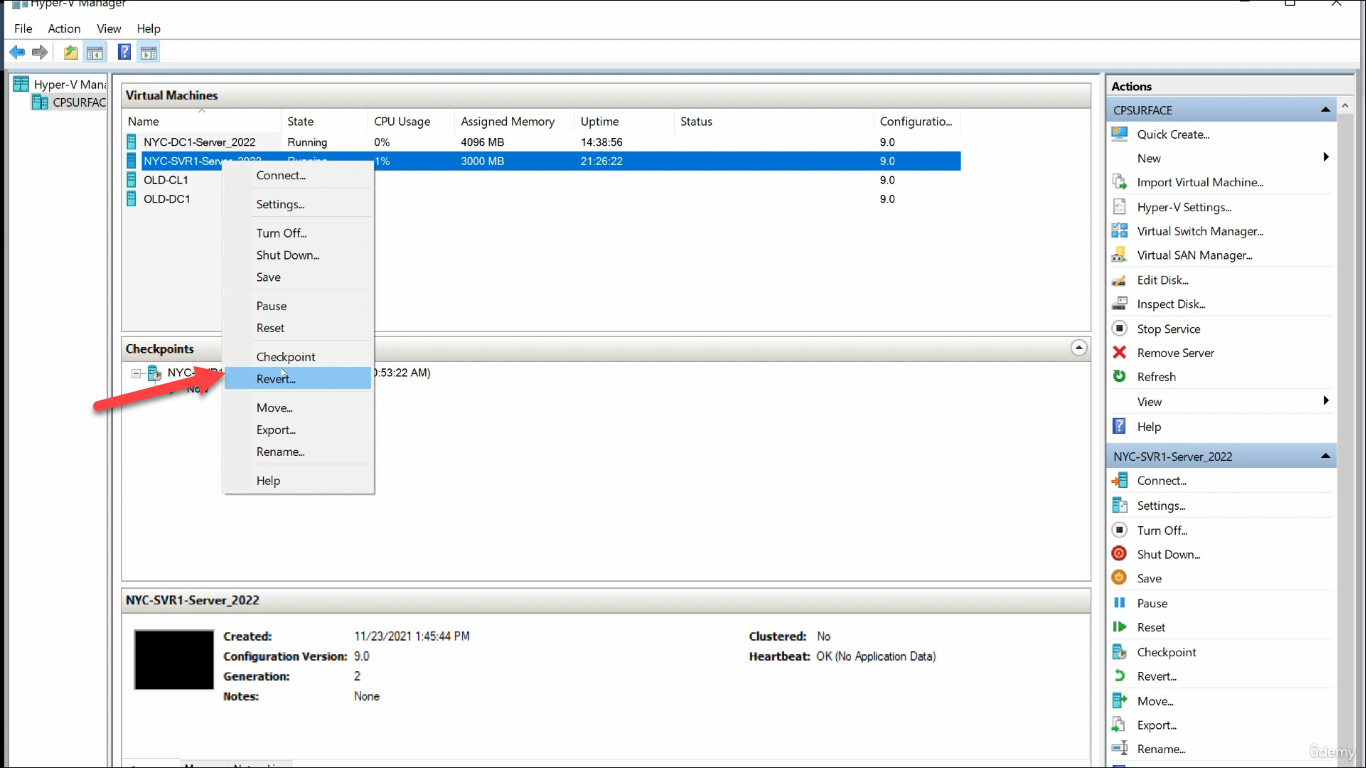
Back in Hyper-V Manager, right-click the checkpoint and choose Revert:
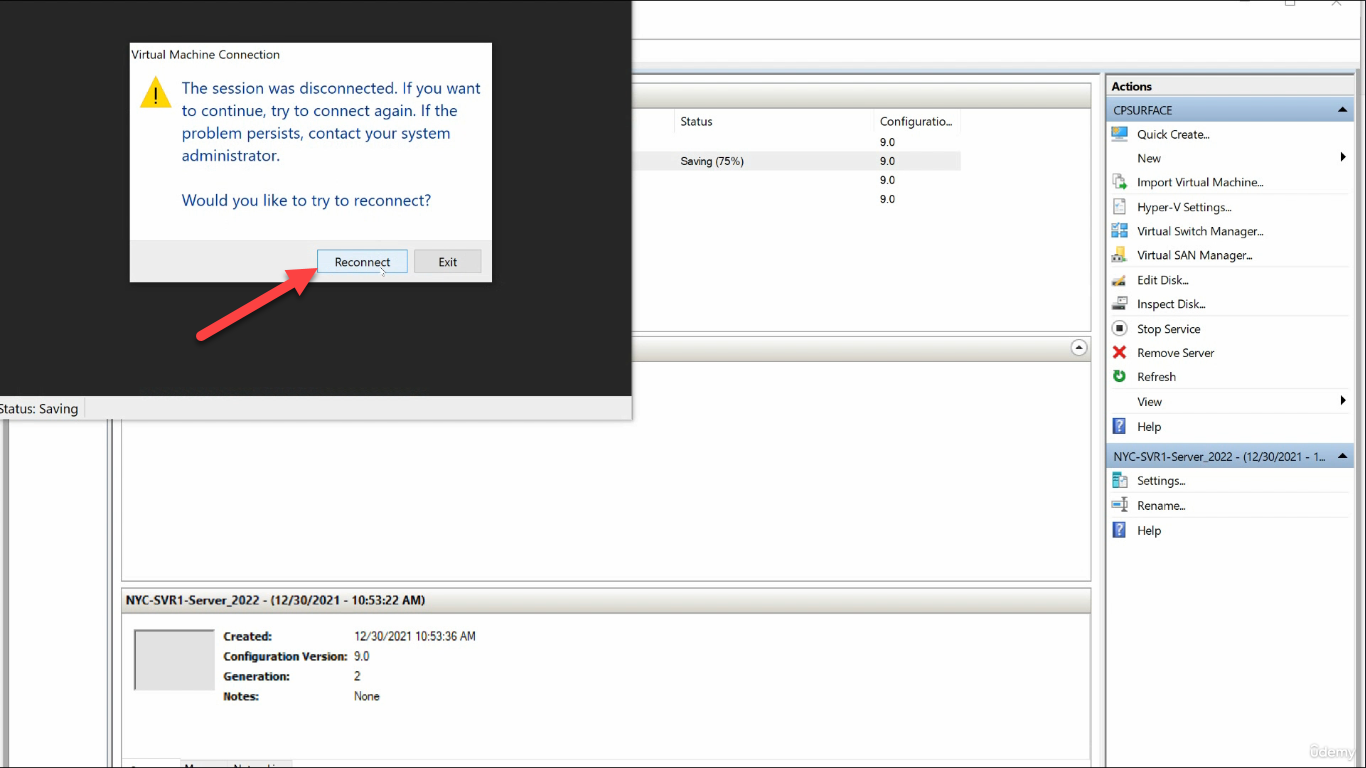
The VM reboots back to the checkpoint state. The console disconnects briefly:
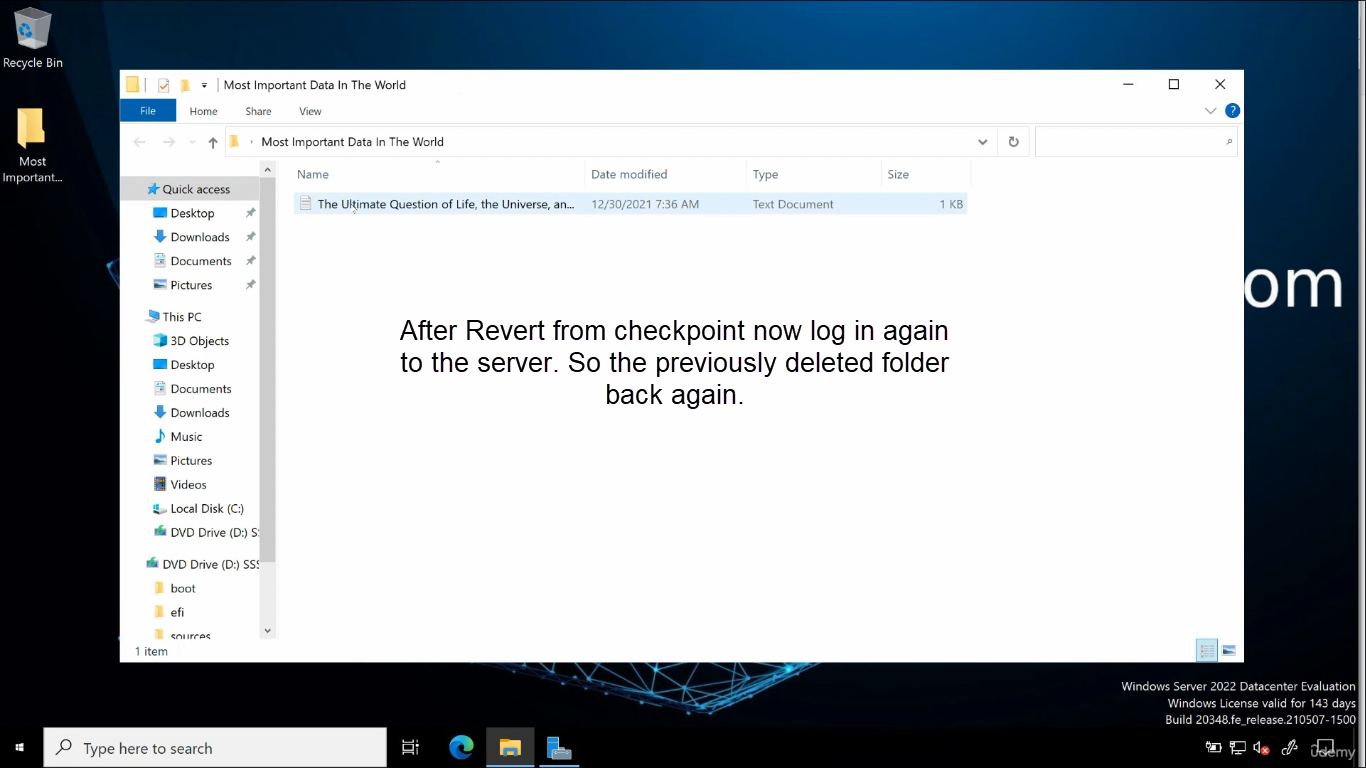
Reconnect after a few seconds — the deleted folder is back, every change since the checkpoint is gone:
This is the “four arrow up” / “Ctrl-Z” for an entire VM. Powerful for lab work; treat it with respect on anything close to production.
Step 5 — Merge (Commit) a Checkpoint
The opposite of revert: merge collapses the AVHDX layers down into the parent VHDX, making the changes permanent. Two ways to do this:
5a. Delete the checkpoint in Hyper-V Manager
Right-click the checkpoint > Delete Checkpoint. Hyper-V automatically merges the AVHDX into the parent in the background. The VM keeps running. Once the merge completes (can take seconds to hours depending on AVHDX size), the parent VHDX has all the changes and the AVHDX file is gone.
This is the normal way to merge. The Edit Disk wizard below is the manual fallback when something has gone wrong.
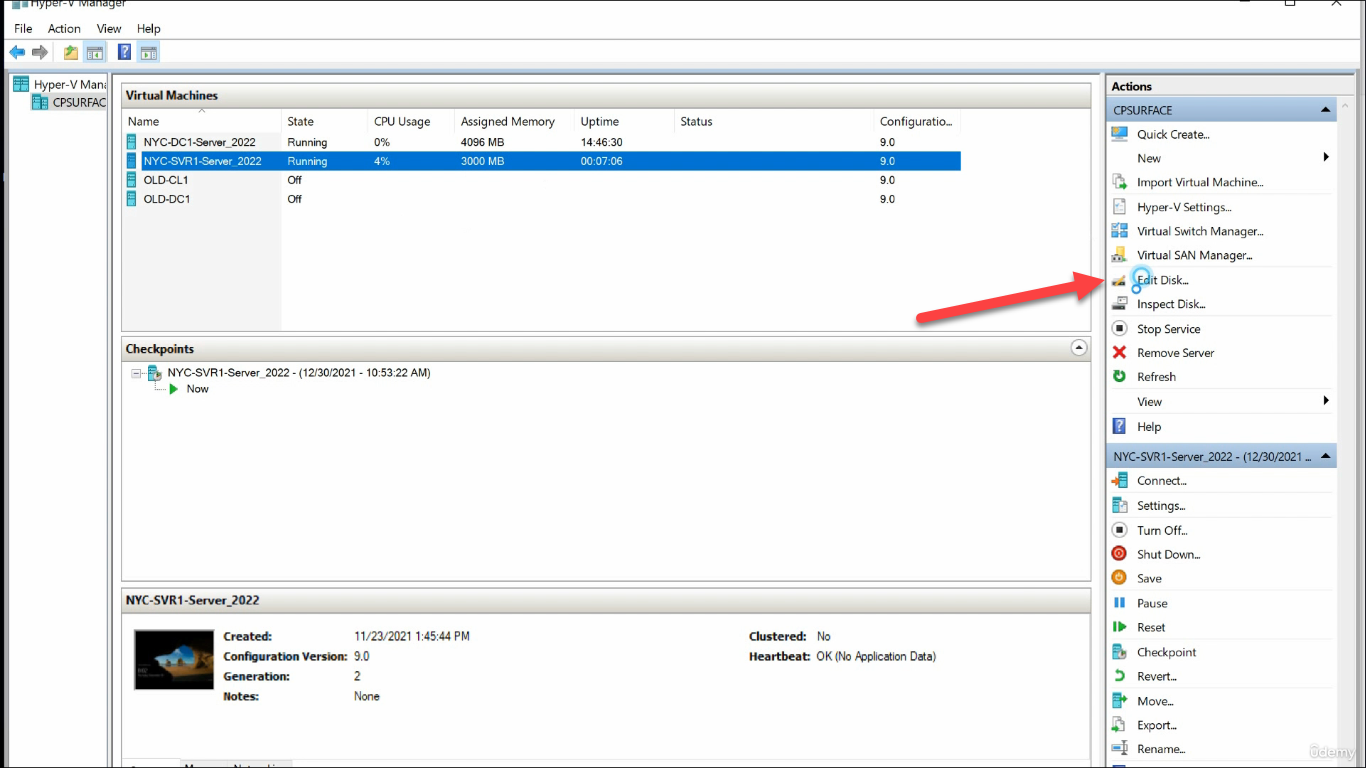
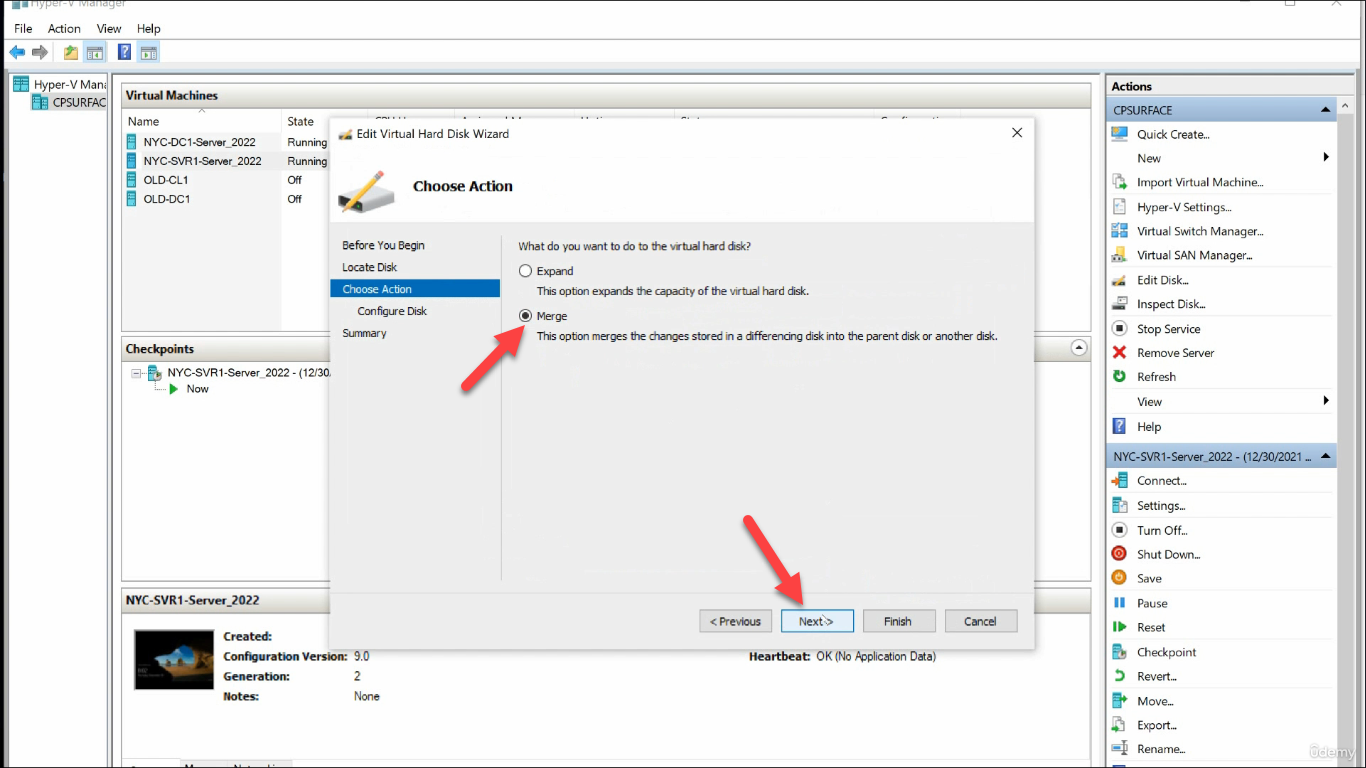
5b. Edit Disk wizard (manual merge)
If the VM is offline, or if the automatic merge failed and left orphaned AVHDX files, use the wizard. From Hyper-V Manager Actions pane, click Edit Disk:
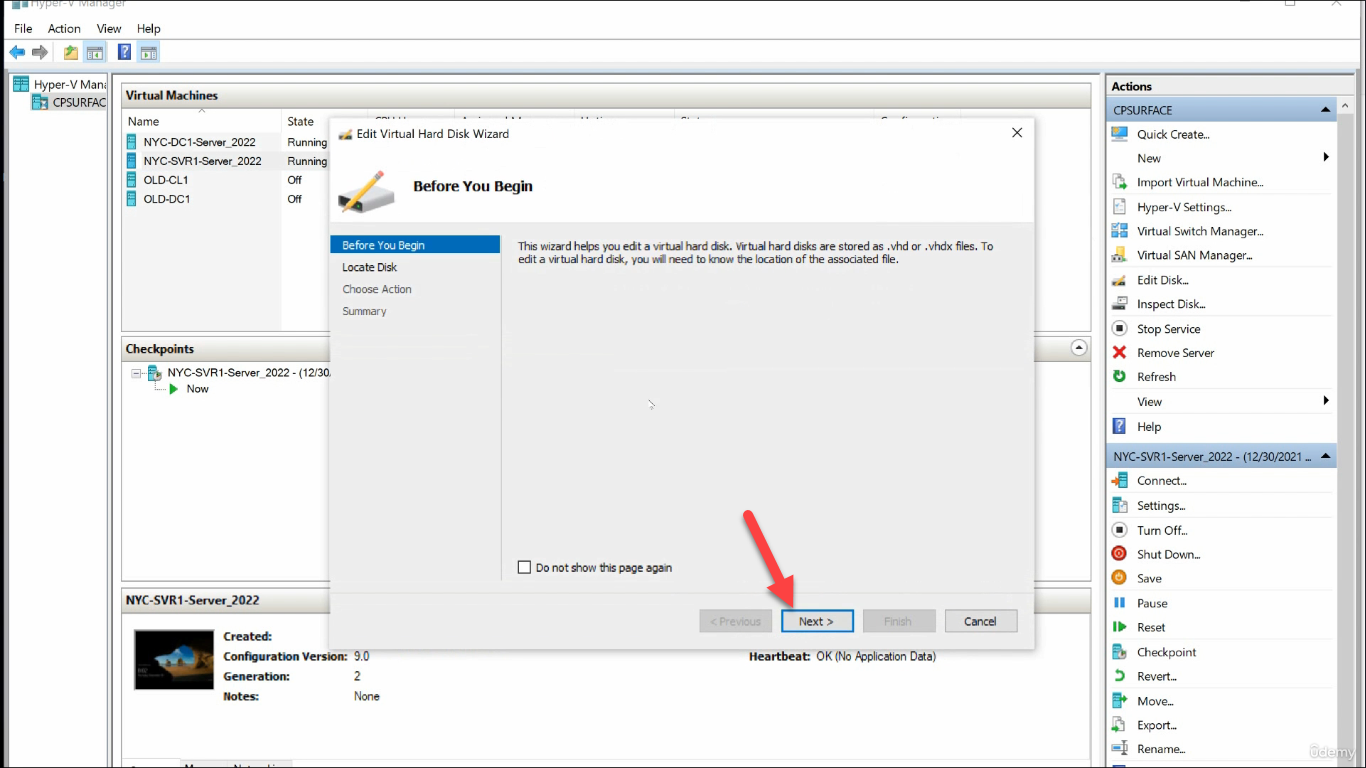
The wizard opens at Before You Begin:
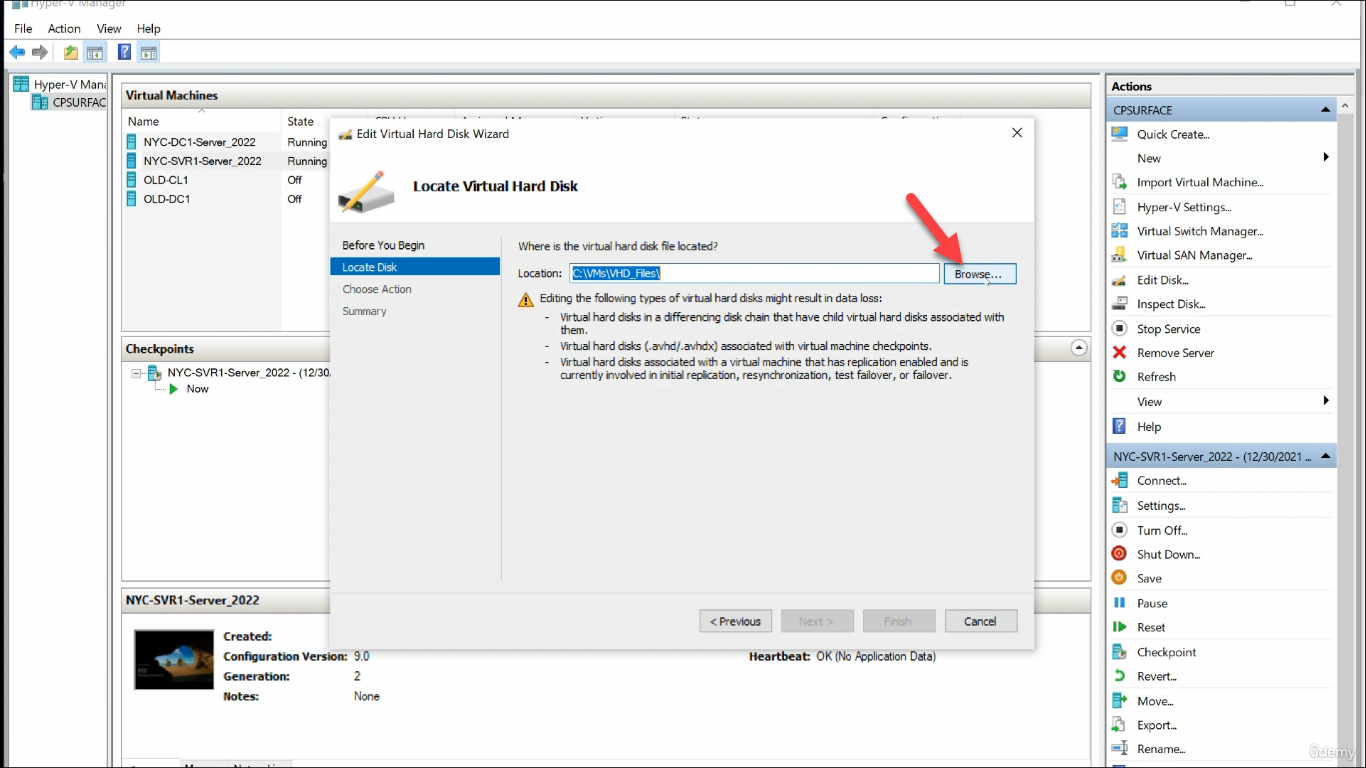
Locate Virtual Hard Disk — click Browse:
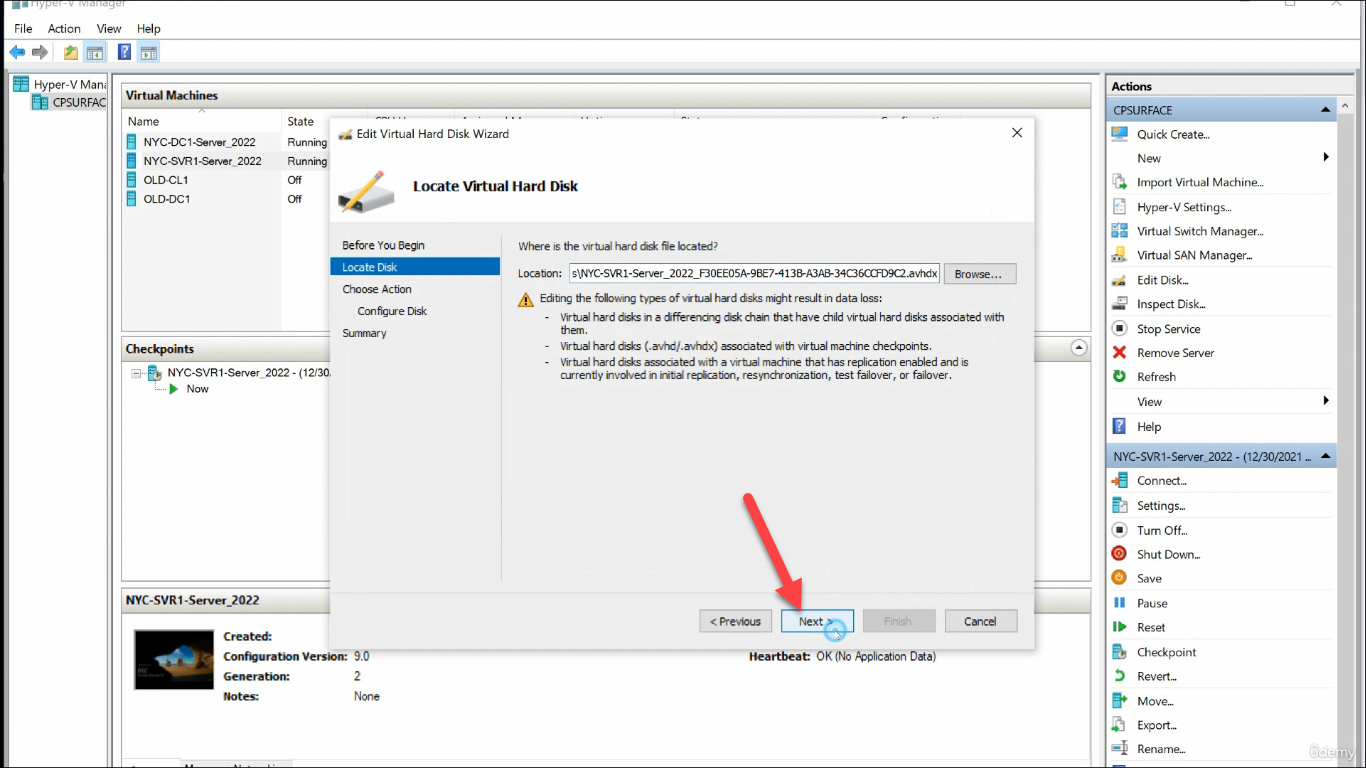
Pick the most recent AVHDX in the chain. The wizard walks the chain backward from there:

Confirm the selected file:
On Choose Action, select Merge:
On Merge Changes from Differencing Disk, select To the parent virtual hard disk:
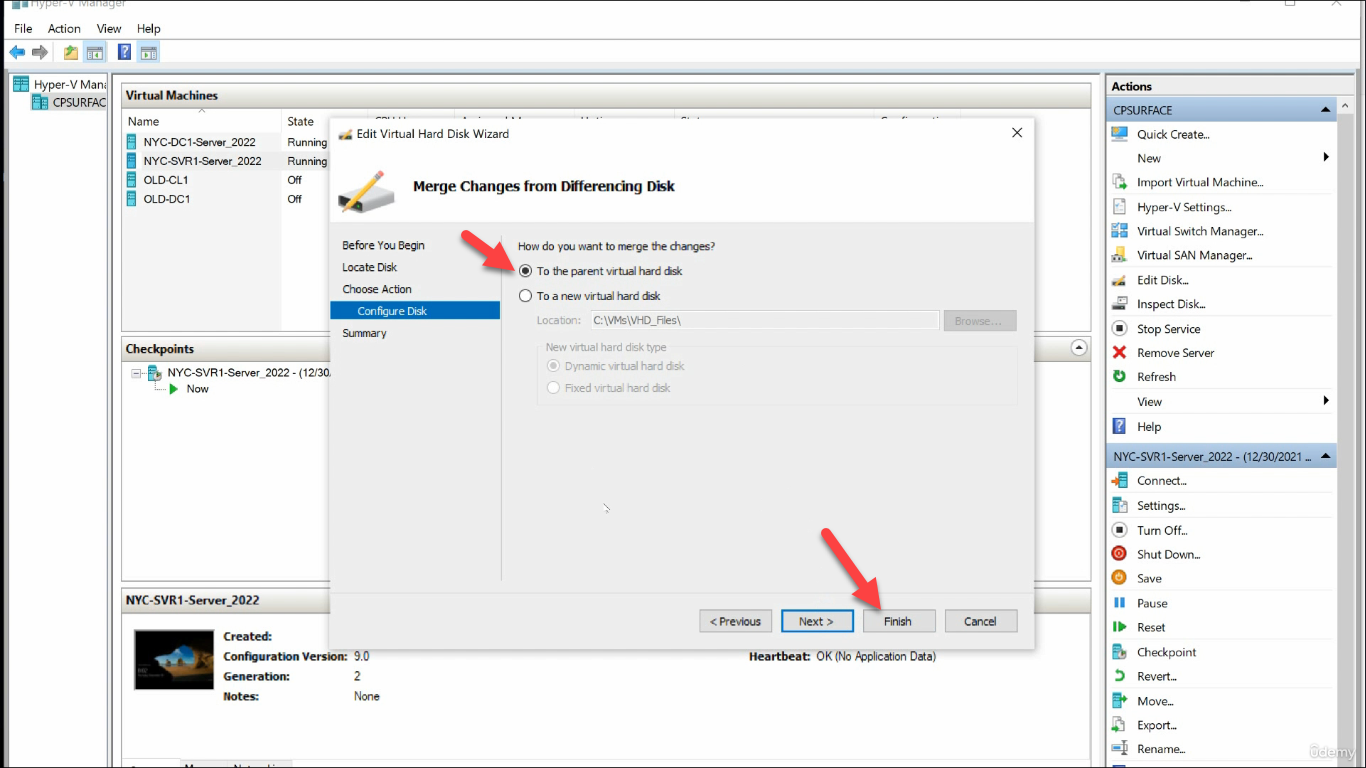
Click Finish. The wizard collapses every AVHDX layer down into the parent VHDX. After completion, the AVHDX files are gone and the parent contains everything.
The PowerShell Equivalent
For scripted workflows:
# Configure checkpoint type for a VM
Set-VM -Name "NYC-SVR1" -CheckpointType Production -AutomaticCheckpointsEnabled $false

# Create a checkpoint
Checkpoint-VM -Name "NYC-SVR1" -SnapshotName "Pre-patch baseline"

# List checkpoints for a VM
Get-VMSnapshot -VMName "NYC-SVR1" |
    Select-Object Name, CreationTime, ParentSnapshotName, SnapshotType

# Apply (revert to) a checkpoint - moves the VM back, AVHDX above it gets deleted
Restore-VMSnapshot -VMName "NYC-SVR1" -Name "Pre-patch baseline" -Confirm:$false

# Delete (merge) a single checkpoint - keeps the changes
Remove-VMSnapshot -VMName "NYC-SVR1" -Name "Pre-patch baseline"

# Delete every checkpoint and merge them all
Get-VMSnapshot -VMName "NYC-SVR1" | Remove-VMSnapshot

# Inspect the resulting VHDX chain (after operations complete)
Get-VHD -Path "C:\VMs\VHD_Files\NYC-SVR1.vhdx" |
    Select-Object Path, ParentPath, FileSize, VhdFormat, VhdType
The cmdlets do exactly what the GUI does — same WMI providers underneath. Checkpoint-VM is the standard wrapper; for finer-grained control over the snapshot type per call, use -CheckpointType on the cmdlet.
Common Pitfalls
- Used checkpoints on a Domain Controller. The classic mistake. A reverted DC introduces a USN rollback that other DCs in the forest detect; the rolled-back DC’s replication is permanently quarantined and the only fix is to demote and re-promote the DC. Even Production checkpoints have this problem if the revert moves the DC backward in time. Don’t snapshot DCs. Use Windows Server Backup or a directory-aware backup tool.
- Snapshotted SQL/Exchange/AD-FS with a Standard checkpoint. Same USN-rollback class of issues for SQL Always On replicas, Exchange DAG, AD-FS farms. Production checkpoints are safer for these but still not a substitute for application-aware backup.
- Left checkpoints running for weeks. Every write goes into the AVHDX while a checkpoint exists. The longer the checkpoint sits, the bigger the AVHDX gets and the slower I/O becomes (chain depth = read amplification). Take a checkpoint, do your test, merge or revert within hours. Treat checkpoints as ephemeral.
- Disk space crunch. An AVHDX that grows to the same size as its parent doubles the storage footprint. Monitor checkpoint folder free space; alert when it goes below a comfortable margin.
- Tried to revert with the VM running. Hyper-V actually handles this fine — it pauses, swaps, reboots — but in-memory state is gone. If you need to keep memory state across the revert, use Standard checkpoints (lab only).
- Confused checkpoint with backup. They are not the same. A checkpoint lives on the same volume as the VM and dies with it. A backup is a copy on different storage that survives the VM’s loss.
- Forgot a checkpoint existed. Multi-checkpoint chains where each is months old and 30 GB are a real performance problem. Run
Get-VMSnapshot -VMName *on the host periodically to find old chains and merge them.
Conclusion
Three actions, one wizard, one PowerShell verb each — Checkpoint-VM to take, Restore-VMSnapshot to revert, Remove-VMSnapshot to merge. The mechanism is a differencing-disk chain; the right way to use it is for short, reversible changes; the wrong way is as a substitute for real backup or on stateful directory services.
Pair this with a real backup strategy for the VMs that matter, and you have the cheapest possible undo button for everything else.