Why Disk and Volume Configuration Matters
Adding storage to a Windows Server is one of the most basic admin tasks — and one of the most common places to make a quiet mistake that surfaces months later. Initialize the disk MBR instead of GPT and the volume cannot grow past 2 TB. Format with the wrong file system and you forfeit checksums (ReFS) or compression (NTFS). Skip the Server Manager flow for the Disk Management snap-in and you miss the Storage-Spaces-aware path. Each individual decision is small; the cumulative effect is what makes one server “runs forever” and another “why is the data drive full again?”
This article walks the full pipeline: hot-plugging a virtual disk on a Hyper-V VM, bringing the new disk online, initializing it, creating two volumes (one NTFS, one ReFS), and the differences between the two file systems. Same procedure works on physical hardware — the only difference is you skip the Hyper-V steps and start at “the OS sees a new disk.”
Step 1 — Add a New Disk to the Server
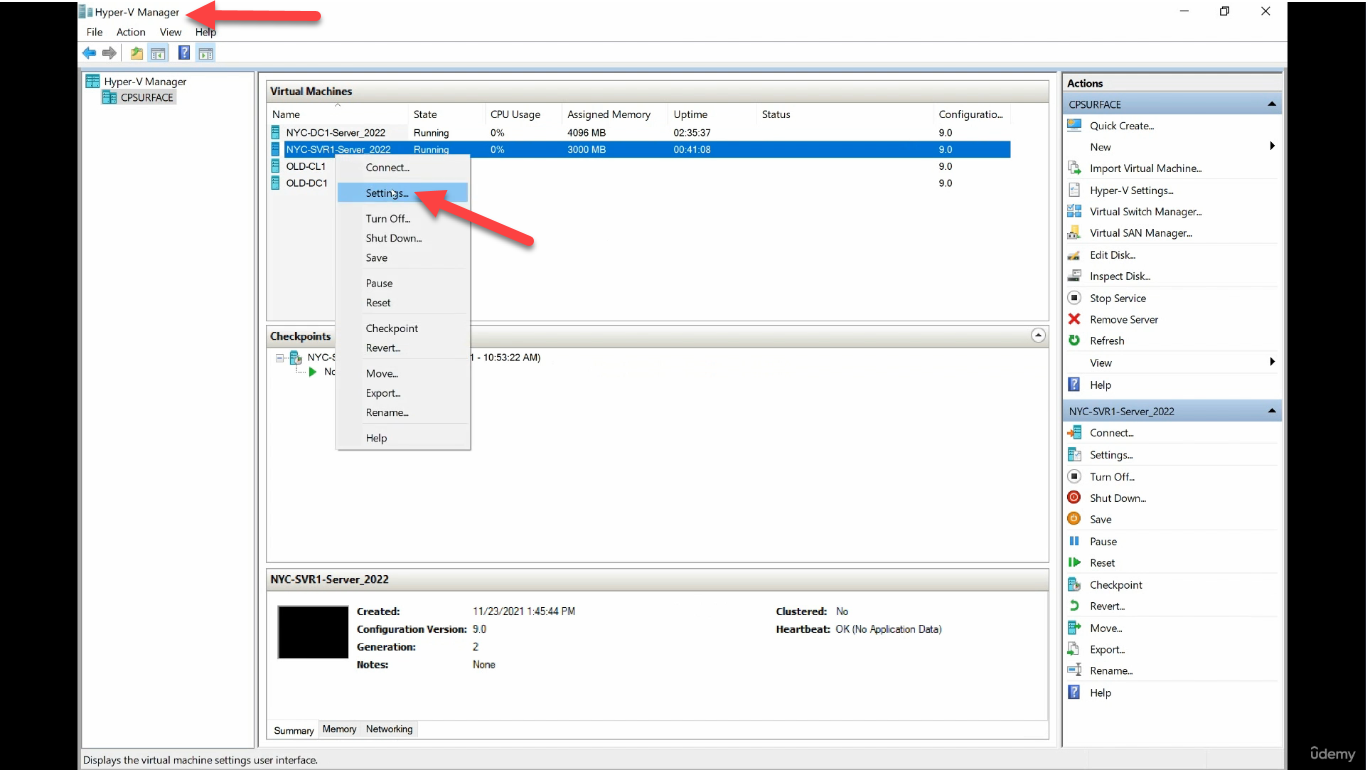
For a Hyper-V VM, add the disk through Hyper-V Manager. Right-click the VM and choose Settings:
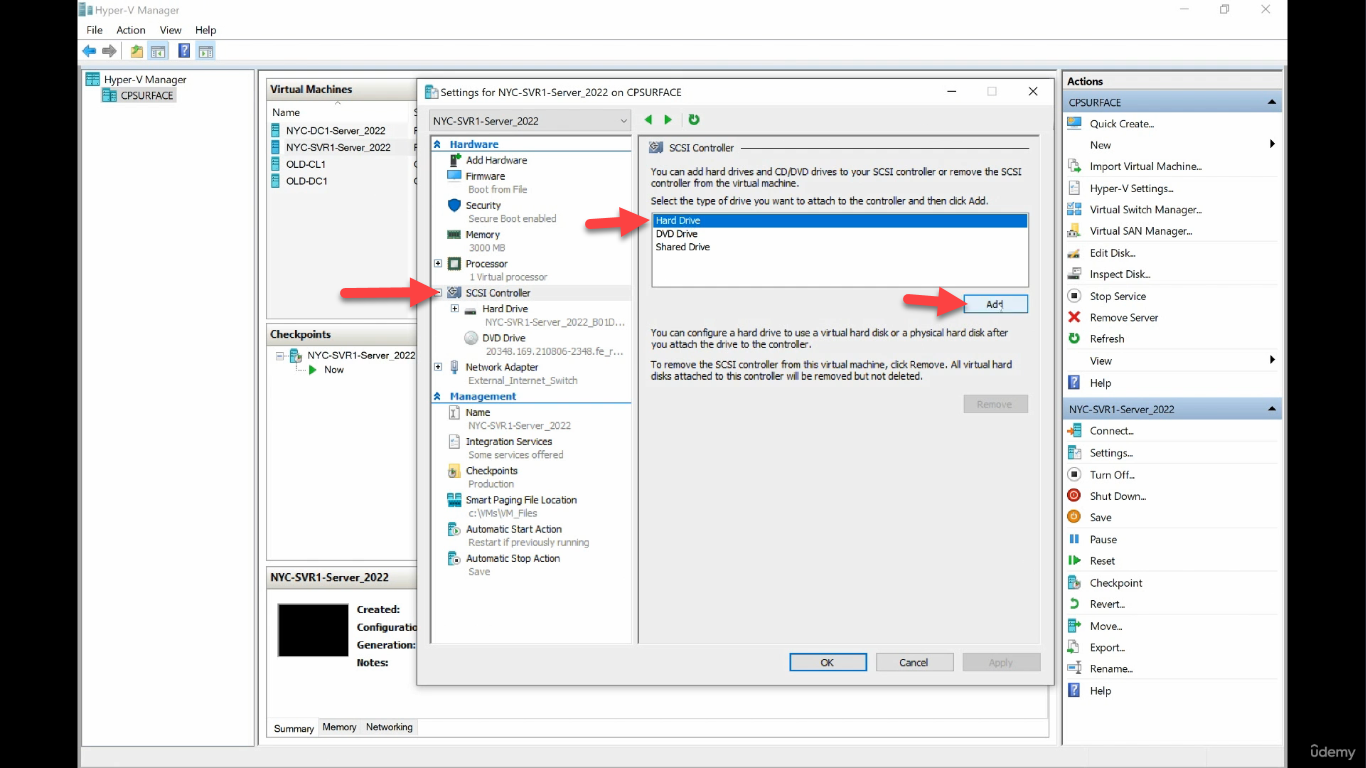
Select SCSI Controller in the left pane (not IDE Controller — SCSI supports hot-add and is the default for modern guests). Click Hard Drive and Add:
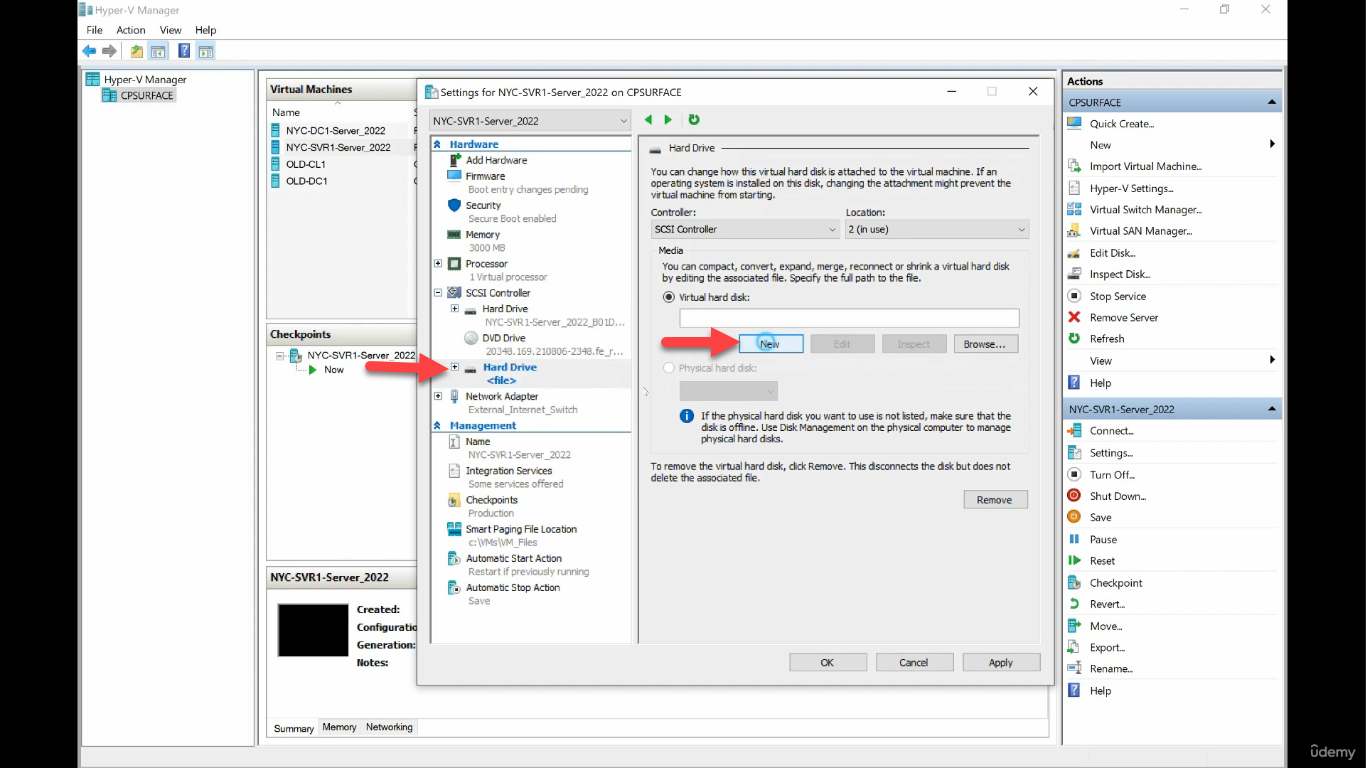
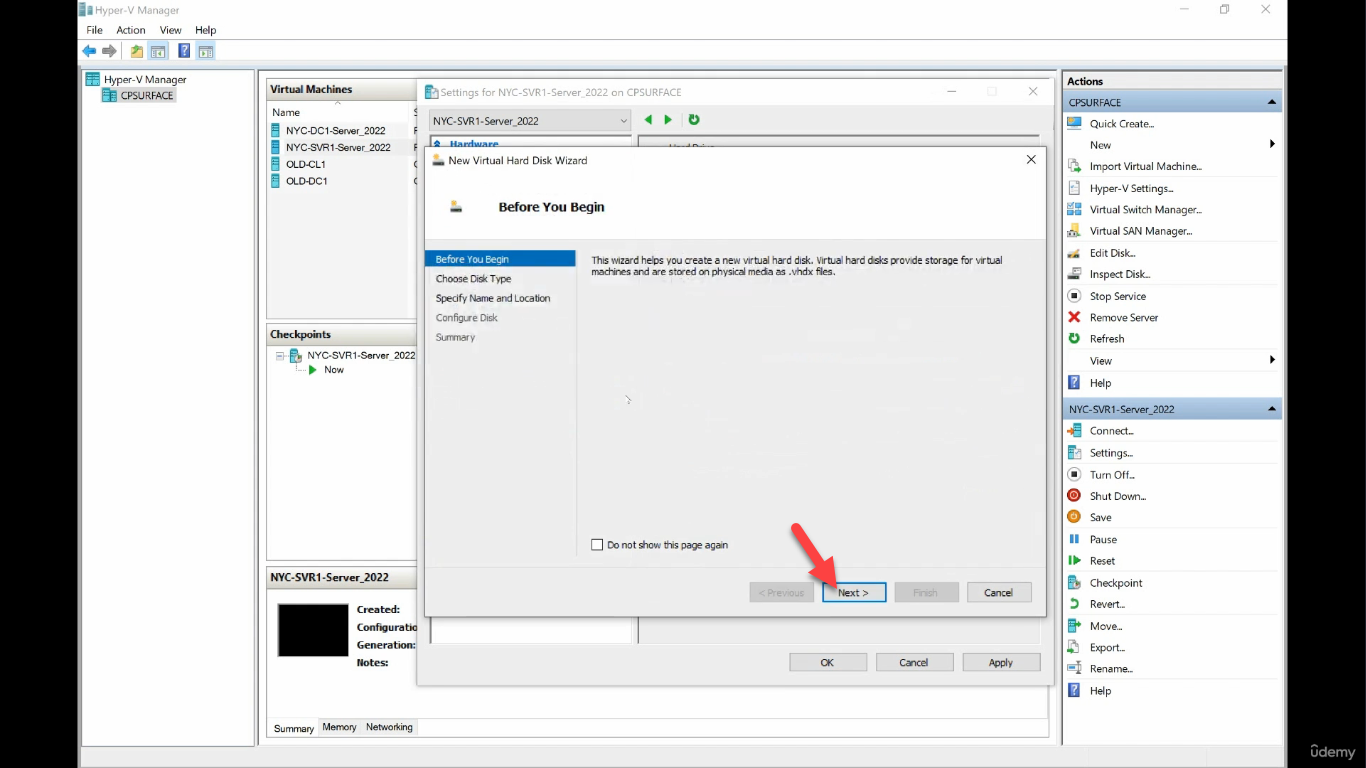
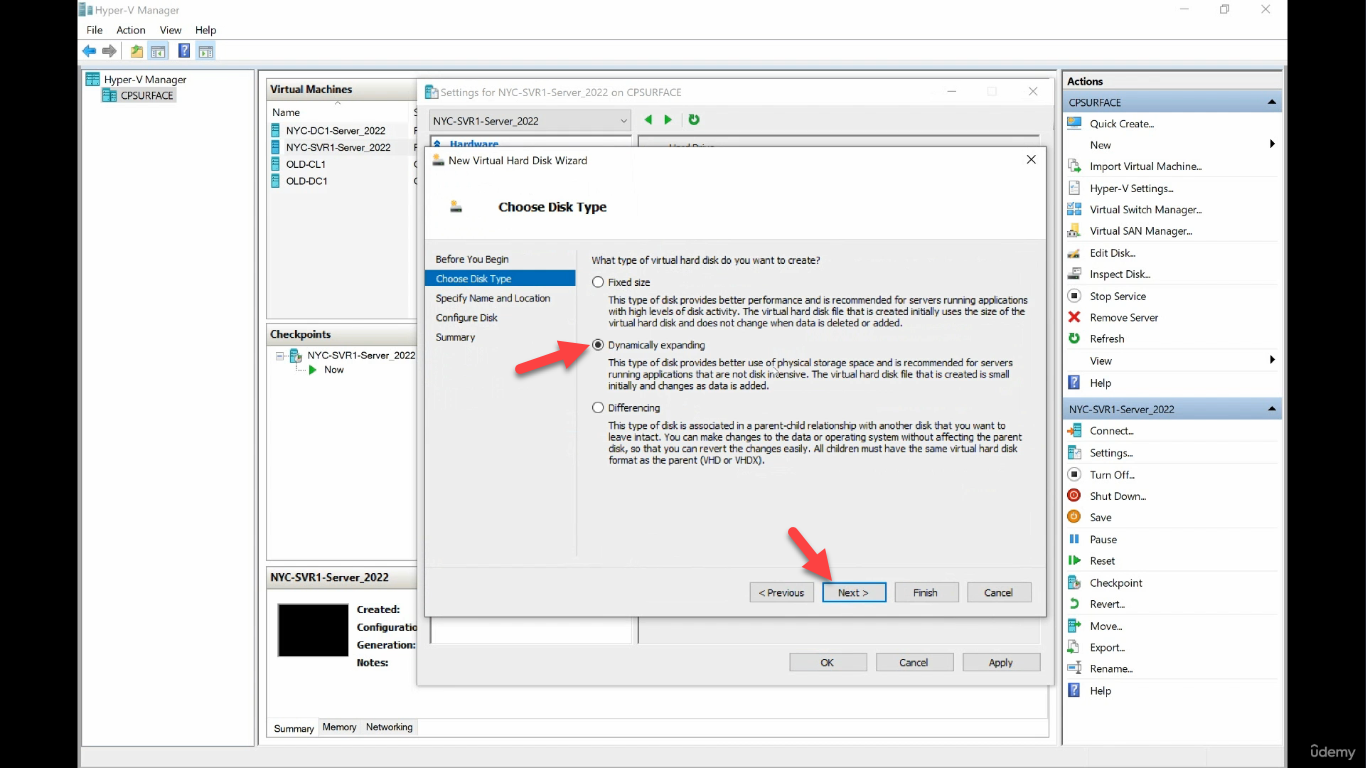
The New Virtual Hard Disk Wizard opens:
Choose Dynamically expanding (grows on demand, common for lab and most workloads) or Fixed size (pre-allocates the full file at create time, gives more predictable I/O for production). Differencing disks are for parent-child VHD chains and not relevant here.
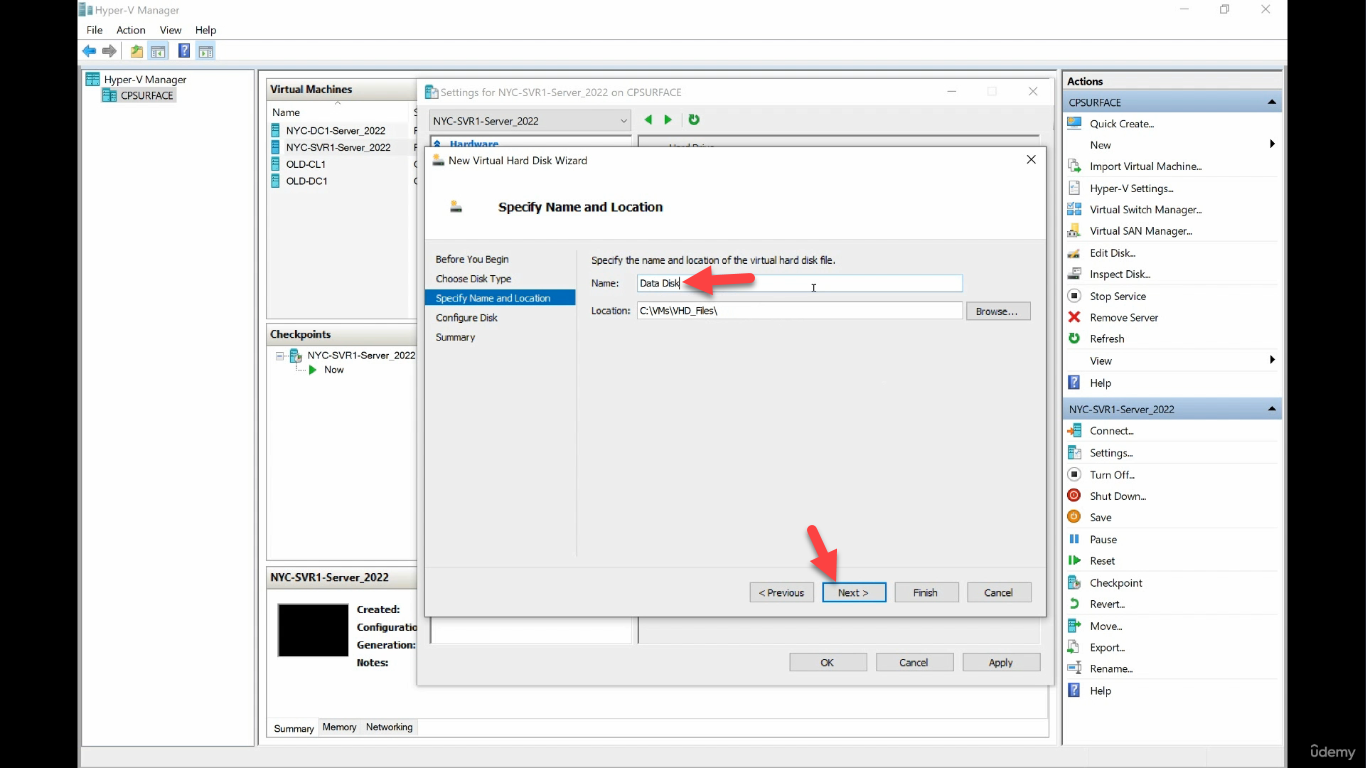
Name the file (Data Disk) and pick a location. Default is fine for the lab.
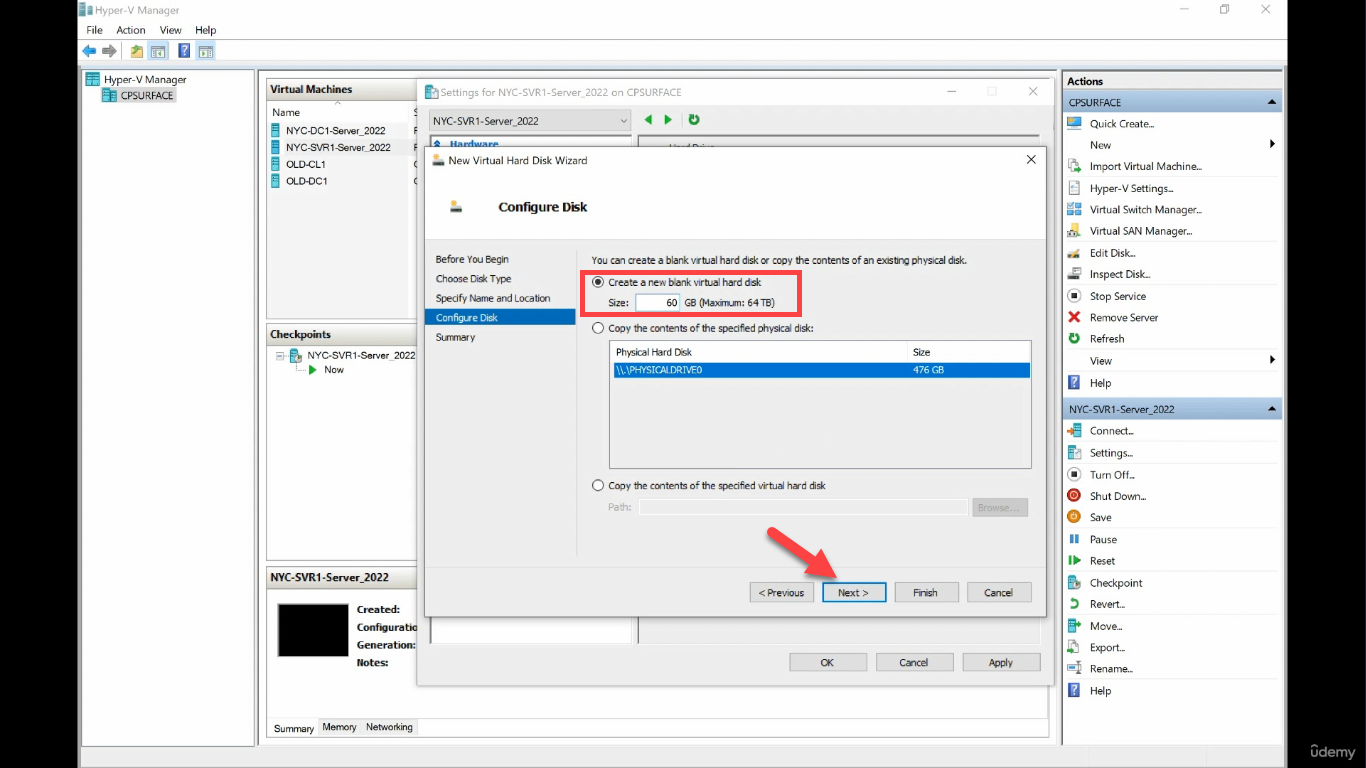
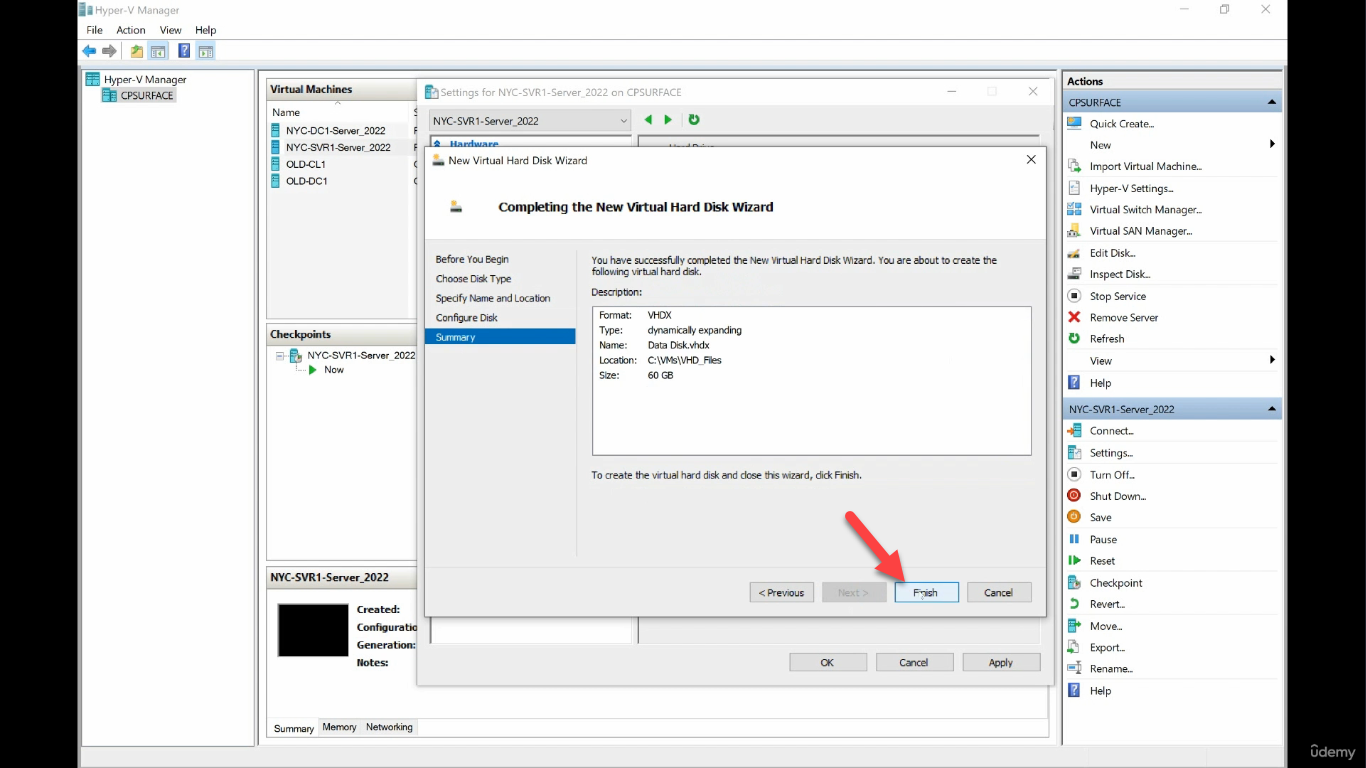
Configure the disk — Create a new blank virtual hard disk, 60 GB.
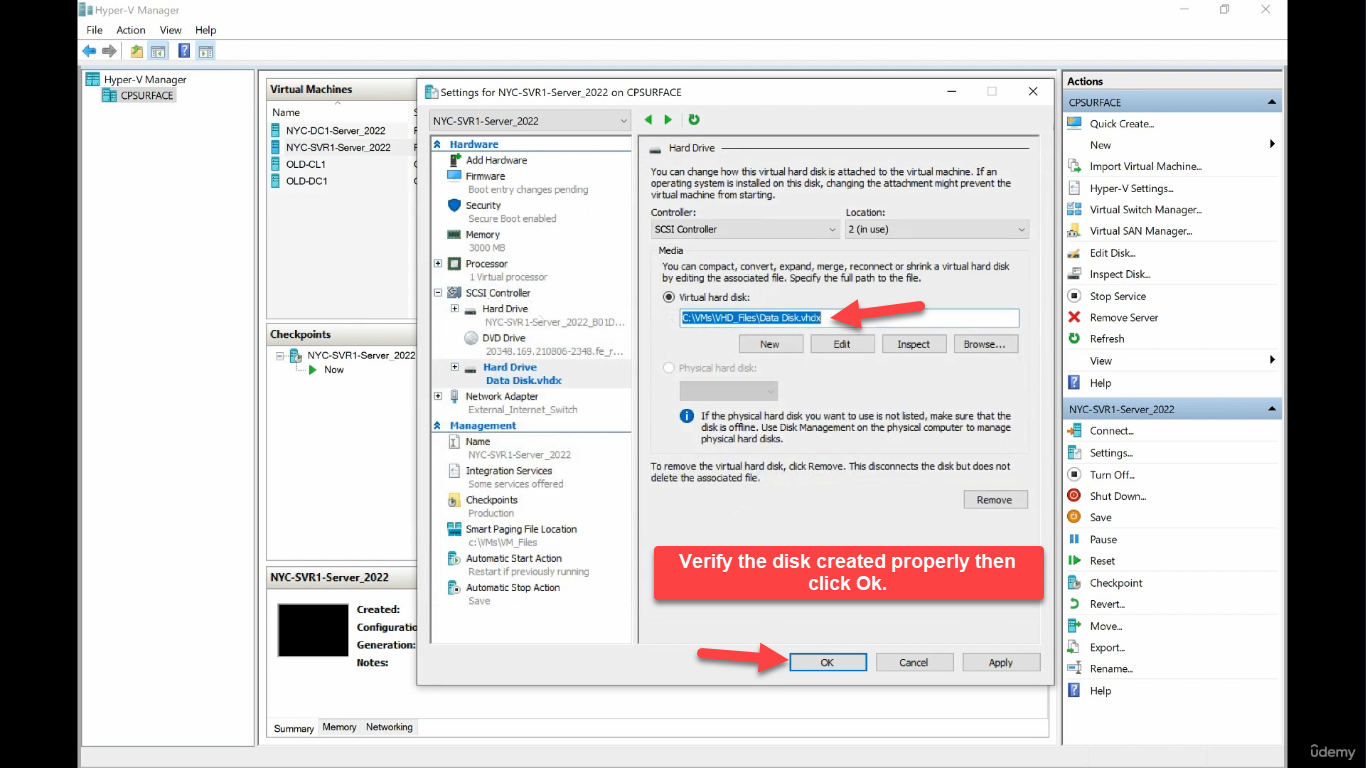
Back in VM Settings, the new Hard Drive shows up under SCSI Controller. Click OK:
For a physical server, the equivalent step is whatever your hardware supports — pop a new disk into a hot-swap bay, attach an iSCSI LUN, present a SAN volume, plug in a USB drive. Once Windows sees the new block device, the rest of the procedure is identical.
Bring the Disk Online
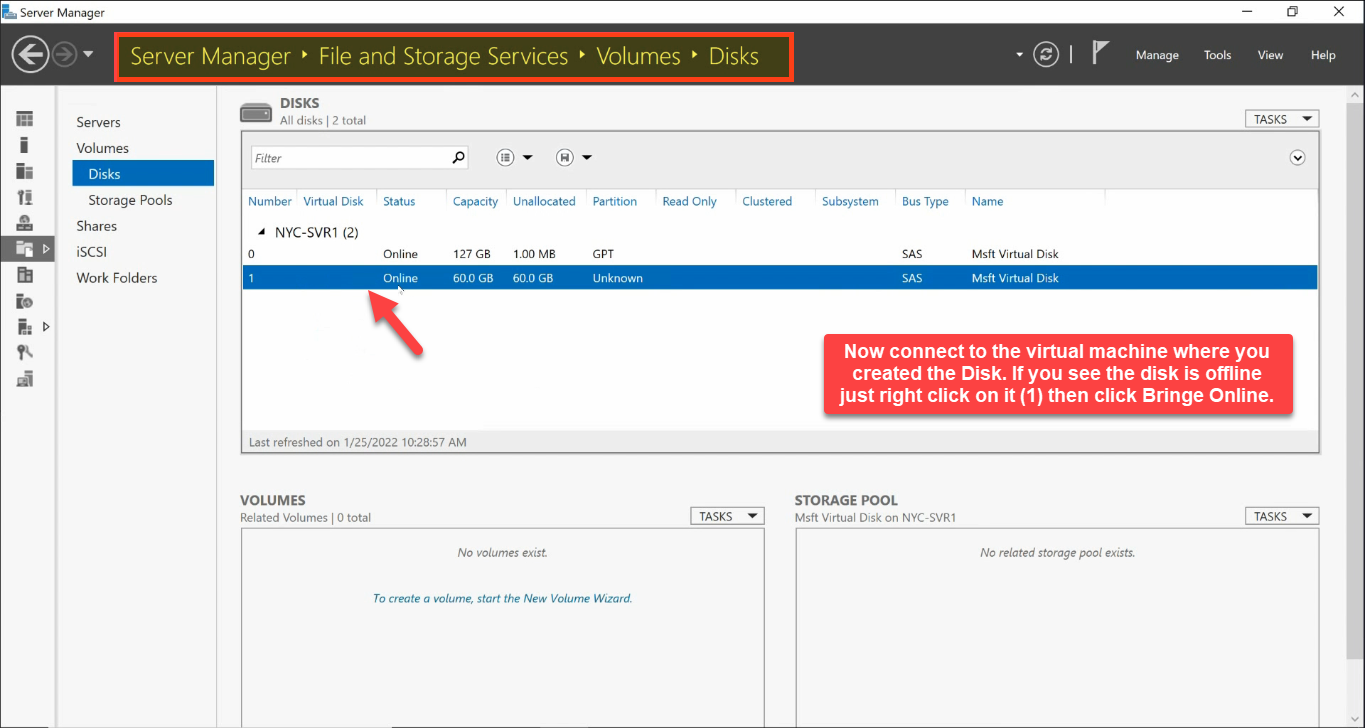
Inside the guest, open Server Manager > File and Storage Services > Volumes > Disks. The new disk shows up but is Offline and Unknown — Windows refuses to mount a disk it has never seen before until you confirm it is yours.
Right-click the disk and choose Bring Online:
Step 2 — Initialize the Disk (MBR vs GPT)
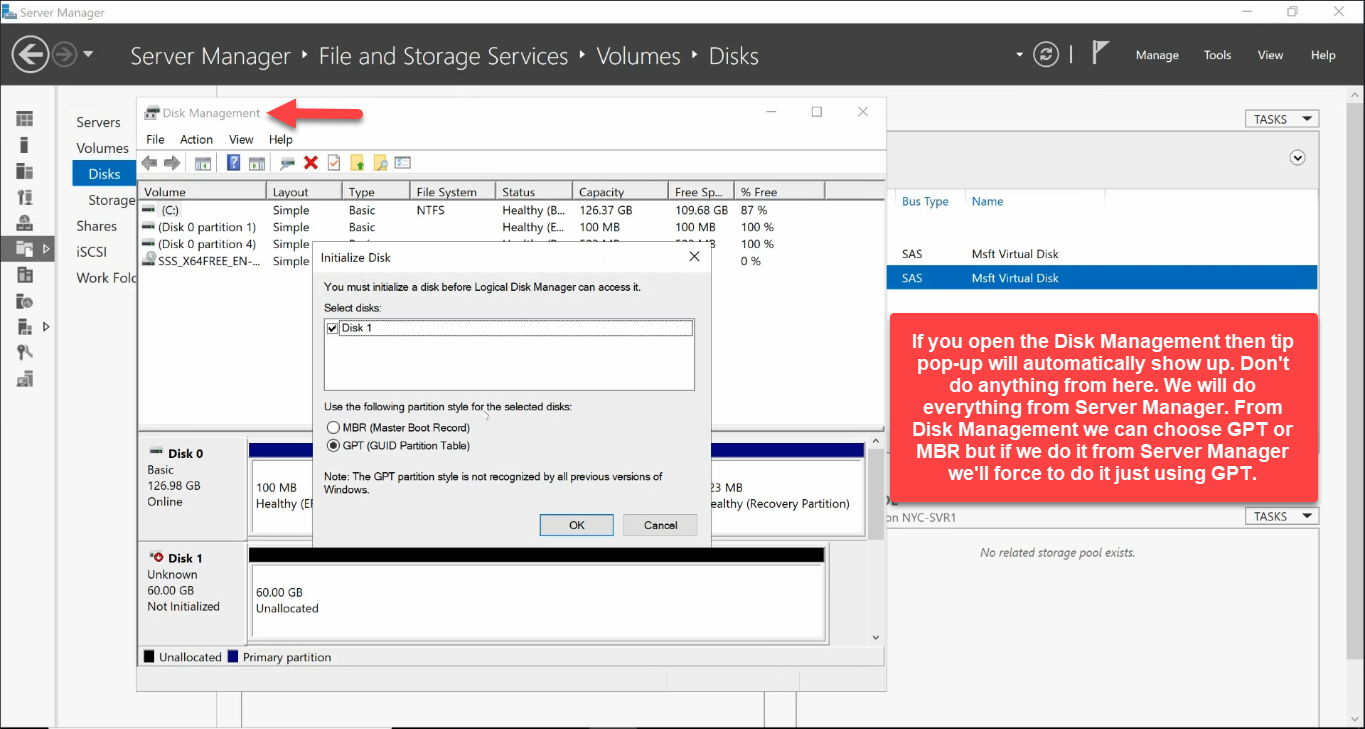
Once online, the disk is still uninitialized — no partition table, no volumes. Windows can show two different popups depending on which tool you used to bring it online; if you double-click the disk in Disk Management you may see this:
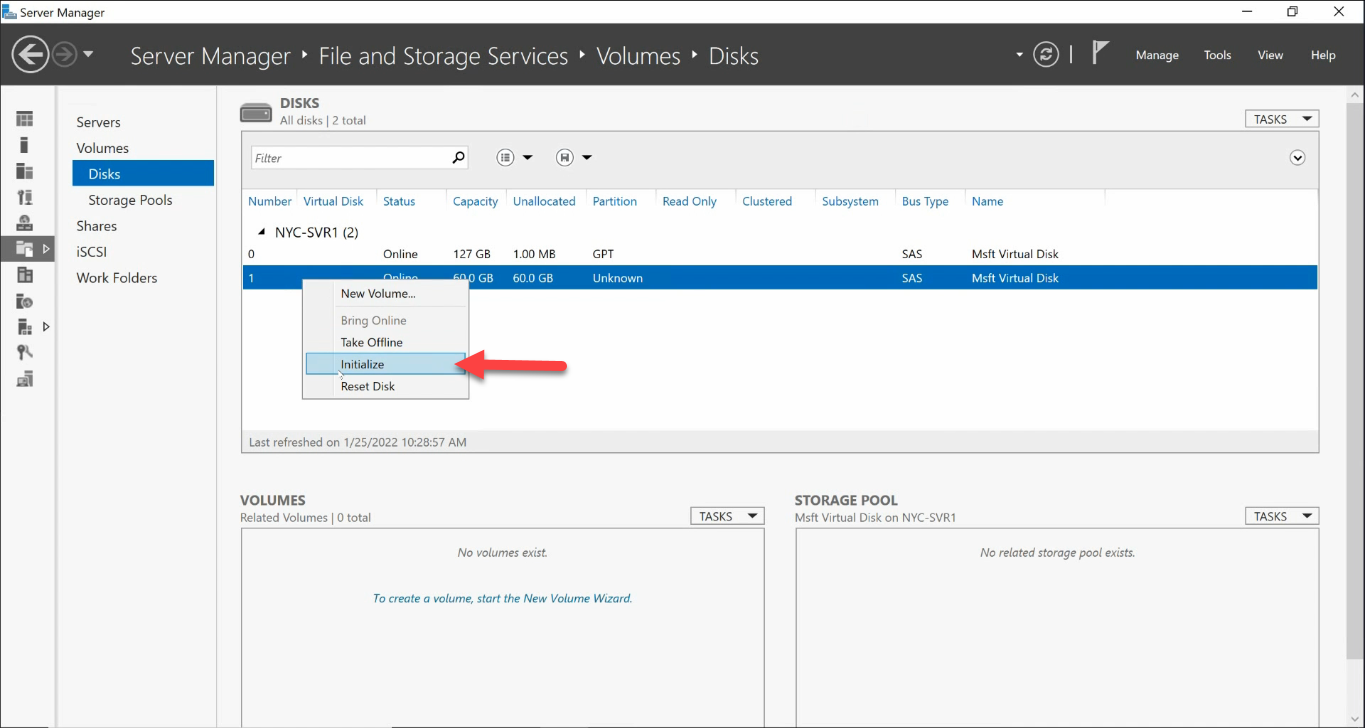
Stick with Server Manager — right-click the disk > Initialize:
Choose the partition table format:
- GPT (GUID Partition Table) — default for any modern Windows Server. Supports disks > 2 TB, supports up to 128 primary partitions, has a redundant backup of the partition table at the end of the disk. Required for booting on UEFI.
- MBR (Master Boot Record) — the legacy format. Limited to 2 TB volumes and 4 primary partitions. Use only when you specifically need to boot a legacy BIOS system or when a third-party tool requires it.
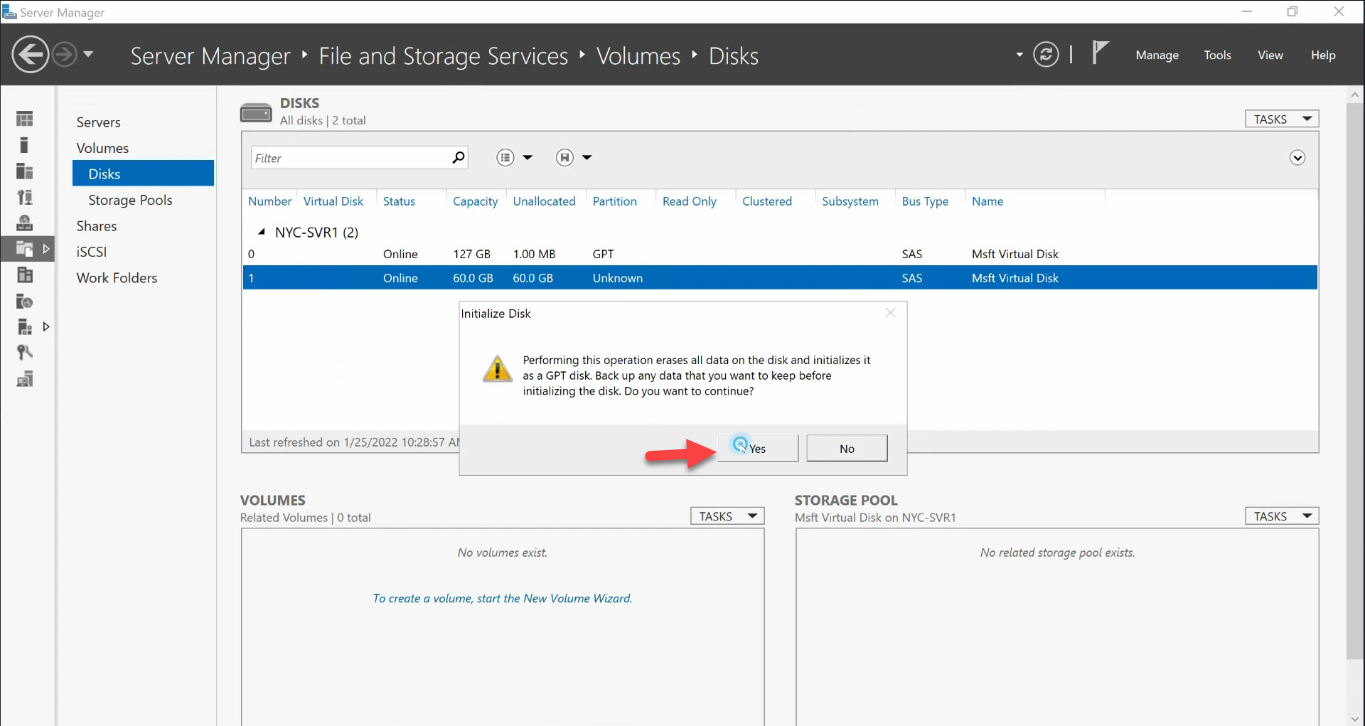
For data disks on Server 2012 and later, GPT is always the right choice. Click Yes to confirm.
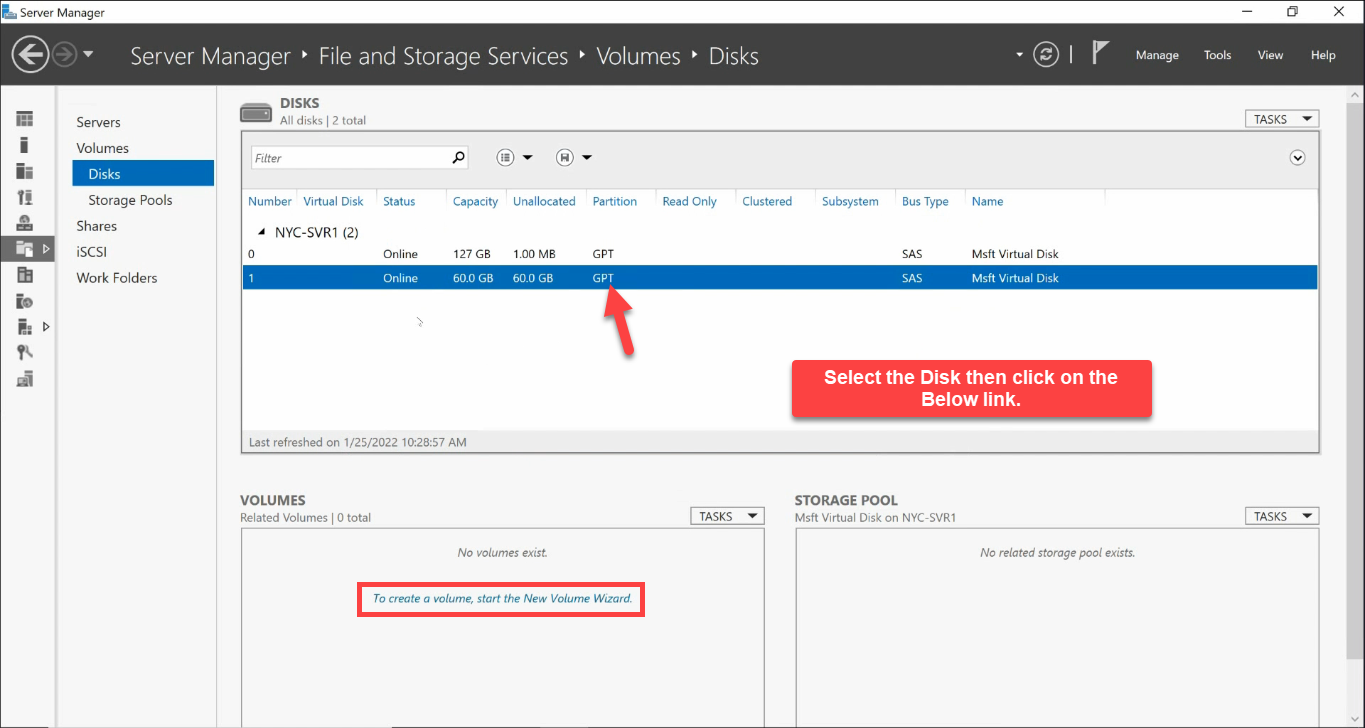
Step 3 — Create the First Volume
With the disk initialized, the Disks pane has 60 GB of unallocated space. Click the To create a volume, start the New Volume Wizard link in the bottom panel:
The wizard walks six pages:
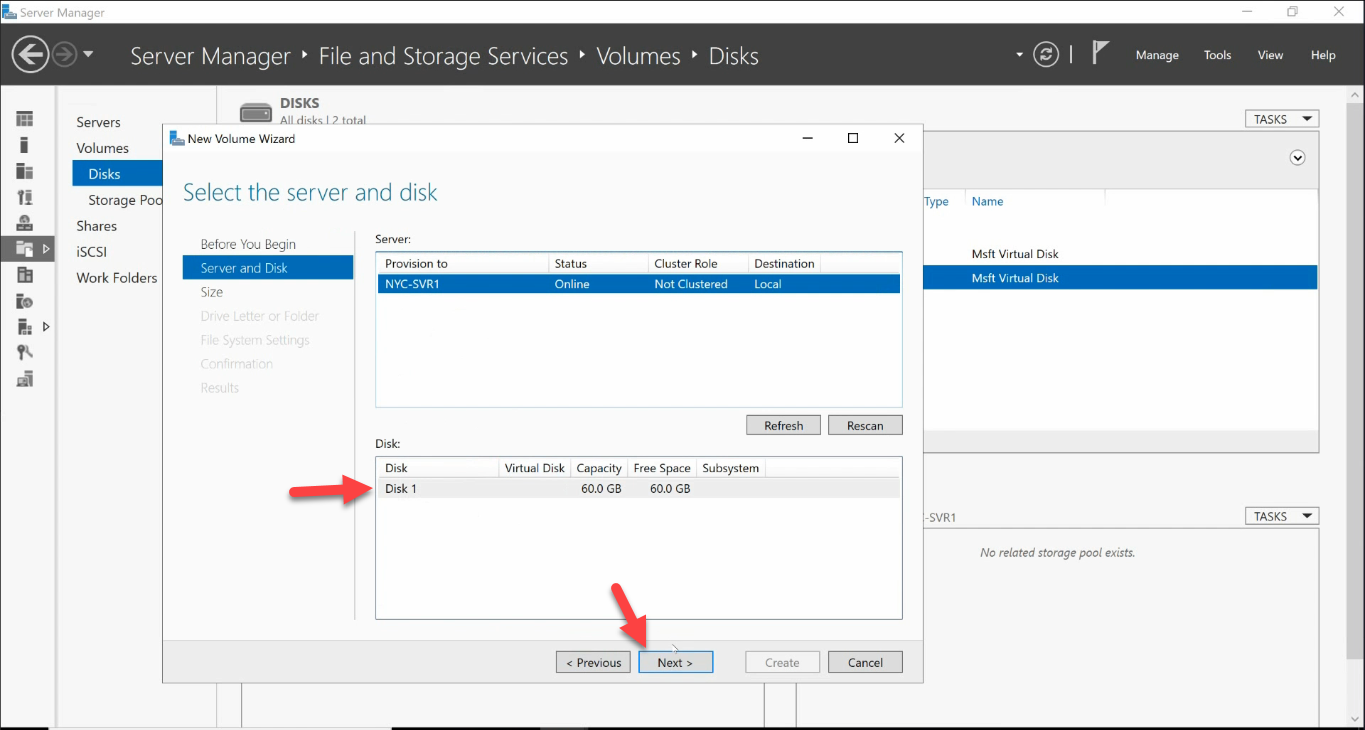
Server and Disk
The wizard auto-fills the local server and the freshly-initialized disk:
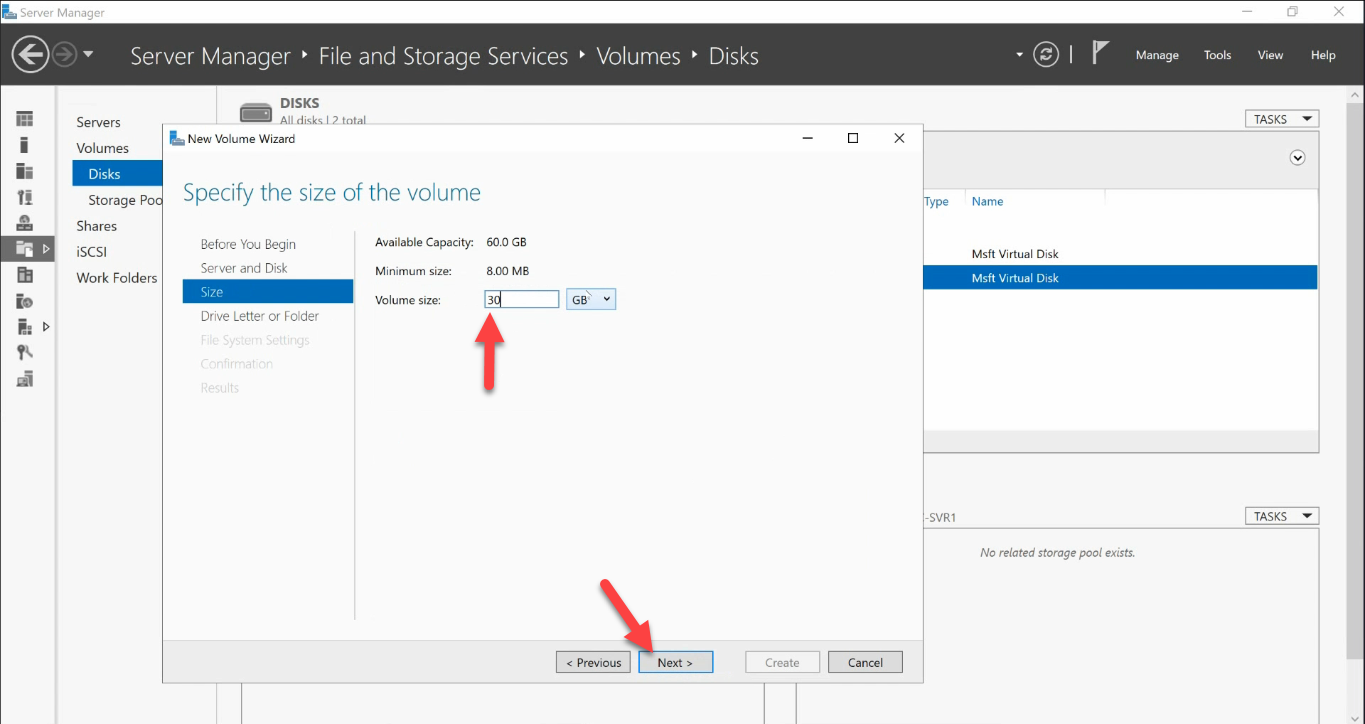
Size
Pick how much of the disk this volume claims. Don’t default to using the whole disk for one volume — multi-volume layouts give you flexibility (different file systems per volume, different recovery scopes, the ability to grow one without affecting another). For this walkthrough, 30 GB:
Drive Letter
Assign a free letter. E: is the typical first non-system data drive. (Alternatively mount as a folder under an existing volume — useful for very many small volumes — but most environments stick with letters.)
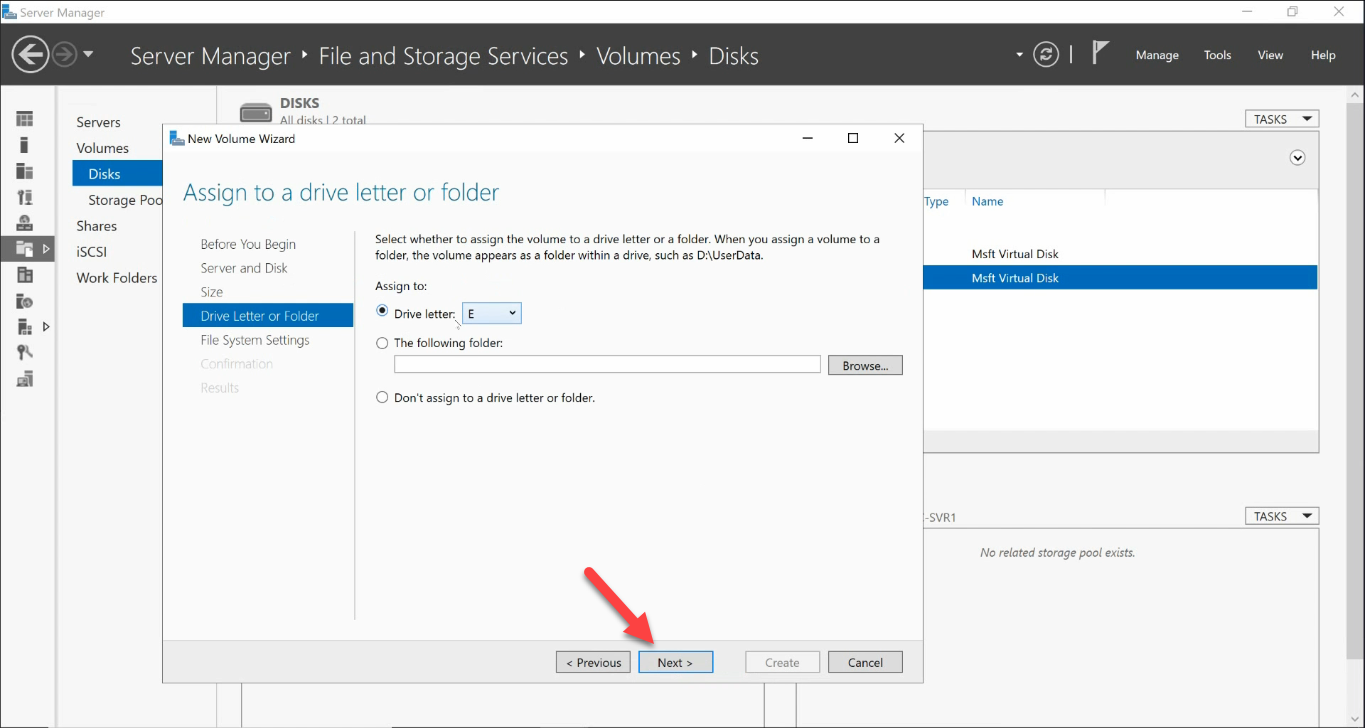
E:).File System
Two choices for the file system:
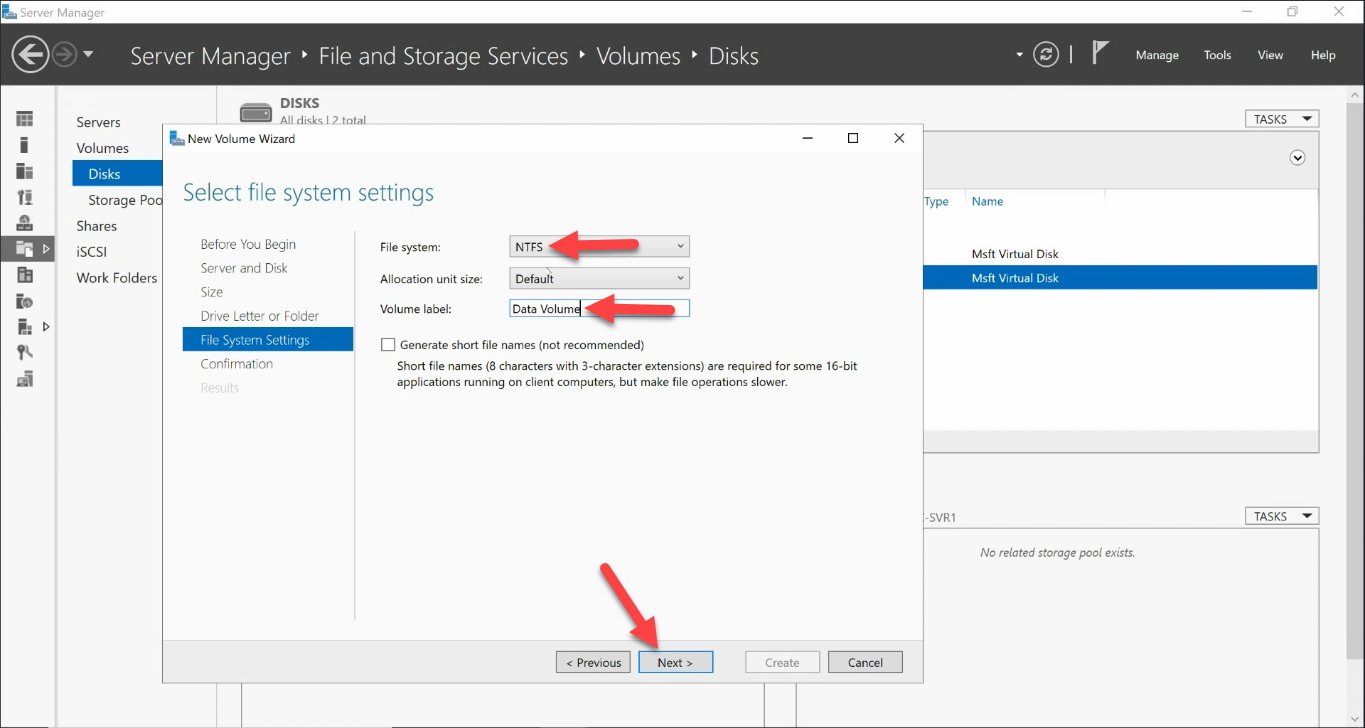
The differences matter and are covered in the next section.
Confirmation and Completion
Review every choice on the Confirmation page:
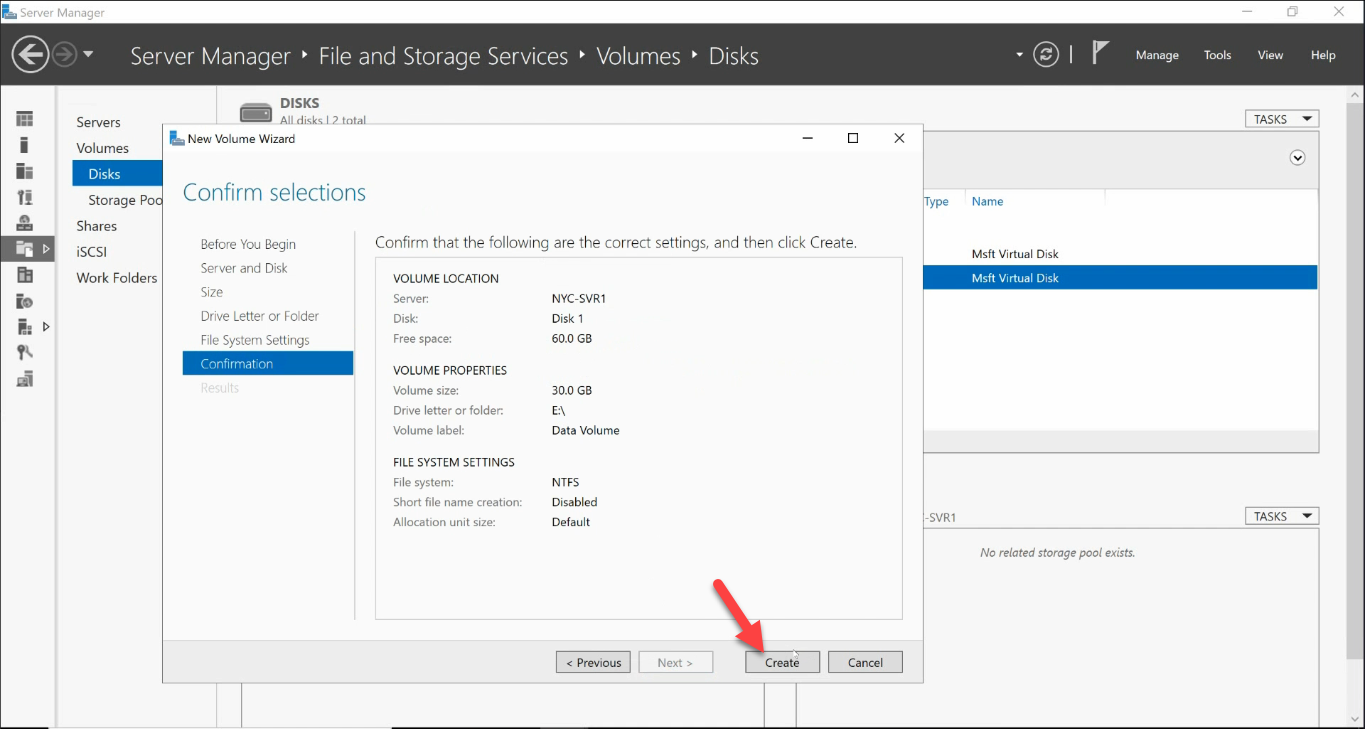
Click Create. The wizard creates the partition, formats the volume, and mounts it — in one pass:

Back in the Disks pane, the new volume shows up:
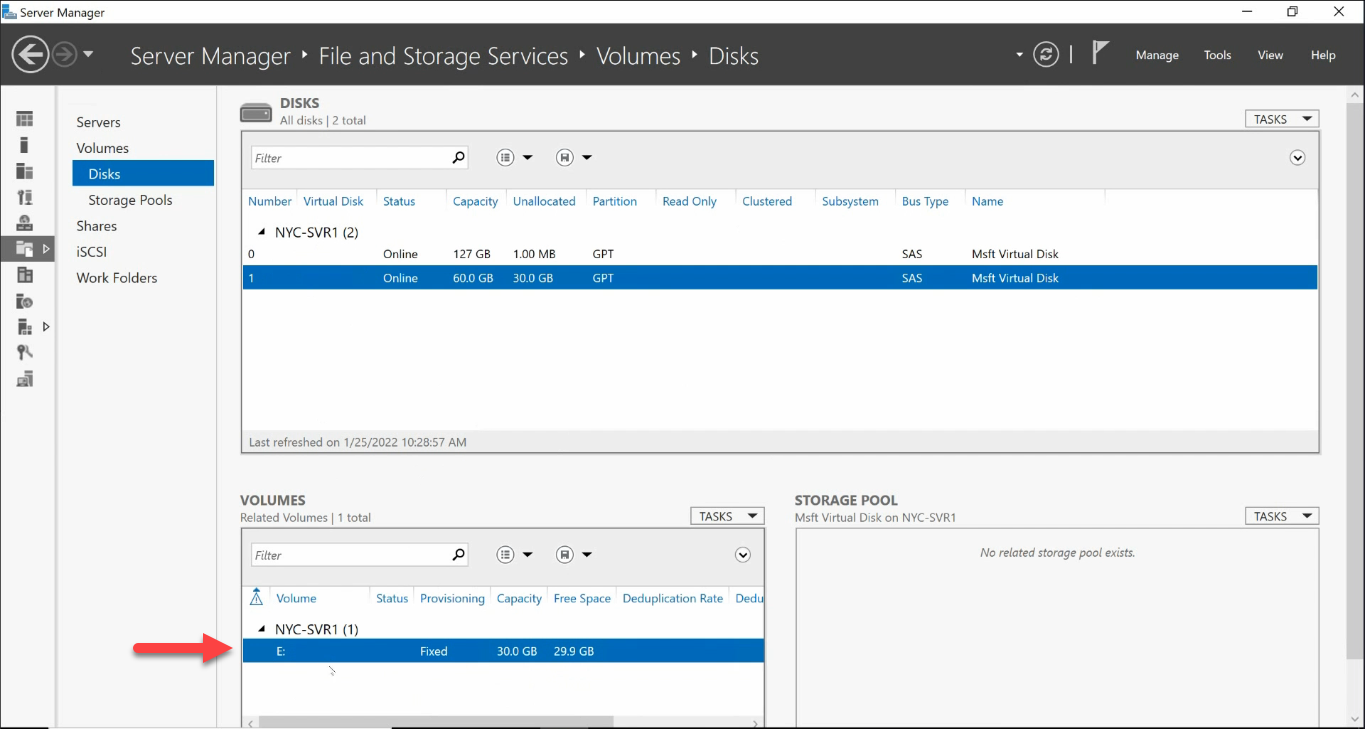
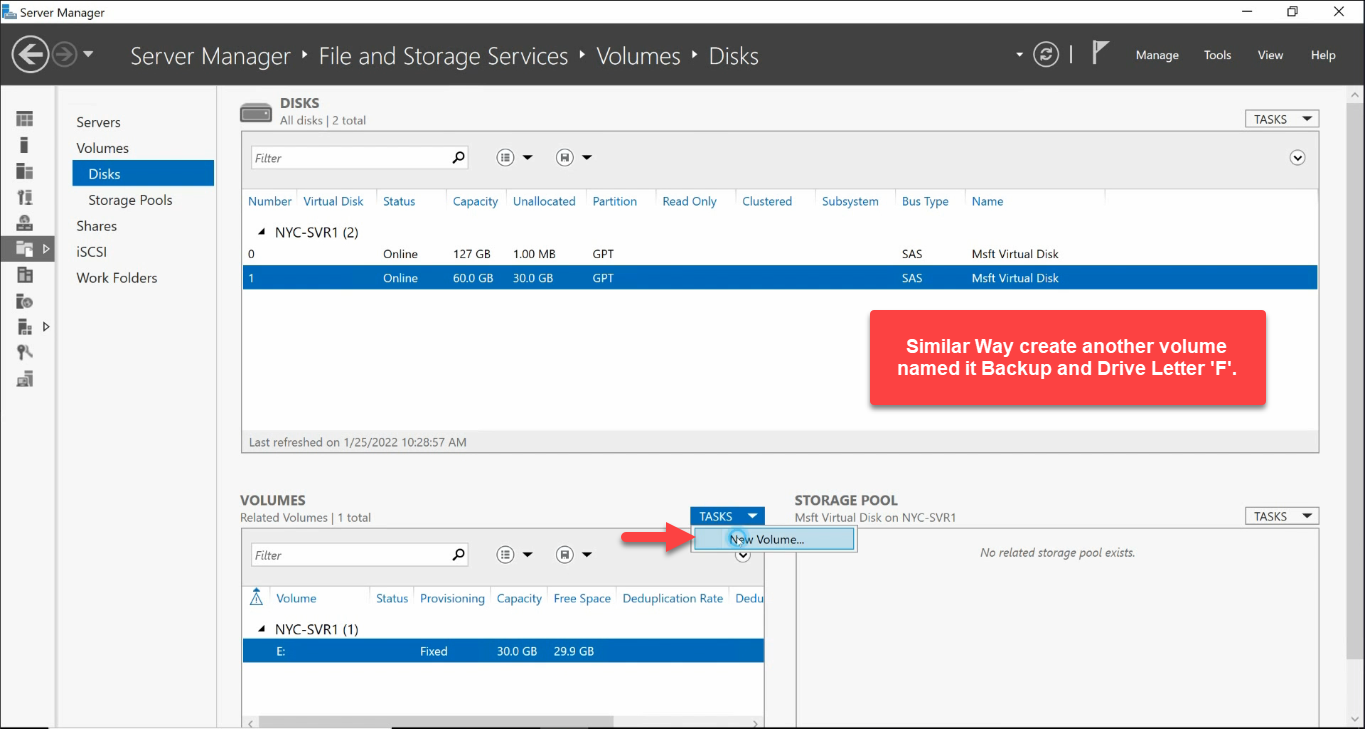
E: volume is live. The remaining 30 GB is still unallocated, ready for the second volume.Step 4 — Create a Second Volume on the Same Disk
The 30 GB unallocated remainder hosts the second volume. Repeat the wizard — same disk, label Backup, drive letter F:, this time pick ReFS as the file system:
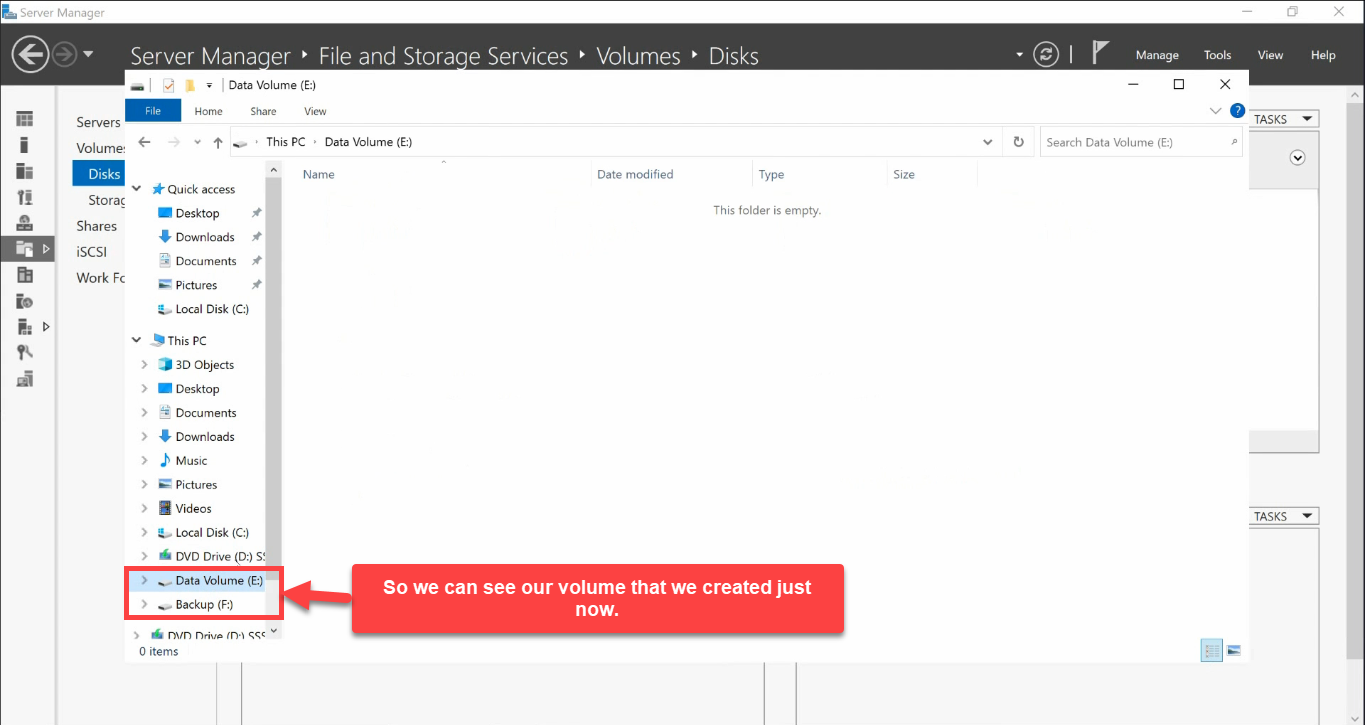
F:, ReFS, 30 GB.Open File Explorer and both volumes appear with their labels:
NTFS vs ReFS — Which to Pick
NTFS has been the Windows default for 25 years; ReFS shipped with Server 2012 and is now production-ready for most workloads. They have very different design goals.
- NTFS — the default for general-purpose volumes.
- Compression, encryption (EFS), file-level quotas, hard links, junction points, extended attributes, transactional NTFS — the full feature set.
- Bootable; system volumes must be NTFS.
- Cluster size 4 KB by default; supports up to 256 TB volumes (with 64 KB clusters).
- Works with every Windows tool ever written, every backup product, every recovery utility.
- ReFS — the resilient file system for storage workloads.
- Block-level checksums on metadata (and optionally on file data) detect silent corruption; ReFS automatically repairs from a Storage Spaces mirror or parity copy if available.
- Allocate-on-write for metadata changes — never overwrites in place, so a torn write cannot corrupt the file system itself.
- Faster for very large volumes (multi-PB) and for VHDX-on-volume workloads (Hyper-V hosts).
- No compression, no EFS, no quotas, no file-level boot. Cannot be used for the system volume.
Rule of thumb: NTFS for general-purpose, ReFS for backup volumes and Hyper-V hosts. If the volume holds VM disk files, backup repositories, or large data sets where integrity matters more than feature breadth, ReFS wins. For everything else, NTFS.
The PowerShell Equivalent
The wizard is great for the first time you do this in a new environment. After that, scripted is faster:
# See the new disk (offline, raw)
Get-Disk | Where-Object PartitionStyle -eq 'RAW'

# Bring online + initialize as GPT
Get-Disk -Number 1 |
    Set-Disk -IsOffline $false -PassThru |
    Set-Disk -IsReadOnly $false -PassThru |
    Initialize-Disk -PartitionStyle GPT

# First volume - 30 GB, NTFS, drive letter E:, label "Data Volume"
Get-Disk -Number 1 |
    New-Partition -Size 30GB -DriveLetter E |
    Format-Volume -FileSystem NTFS -NewFileSystemLabel "Data Volume" -Confirm:$false

# Second volume - rest of the disk, ReFS, drive letter F:, label "Backup"
Get-Disk -Number 1 |
    New-Partition -UseMaximumSize -DriveLetter F |
    Format-Volume -FileSystem ReFS -NewFileSystemLabel "Backup" -Confirm:$false

# Verify
Get-Volume | Select DriveLetter, FileSystemLabel, FileSystem,
    @{n='SizeGB';e={[math]::Round($_.Size/1GB,1)}},
    @{n='FreeGB';e={[math]::Round($_.SizeRemaining/1GB,1)}}
The cmdlets do exactly what the wizard does — same WMI providers underneath. Bake them into your post-install configuration script and every new server gets identical disk layout in seconds.
Common Pitfalls
- Initialized as MBR by accident. The Disk Management snap-in’s “new disk” popup defaults to MBR on some configurations. Once initialized, converting MBR ↔ GPT preserving data needs
mbr2gpt.exeor third-party tools; easier to delete the partition first if the volume is empty, then re-initialize as GPT. - Used Disk Management instead of Server Manager on a Storage Spaces server. Disk Management does not understand Storage Spaces; if the disk you are looking at is part of a virtual disk in a storage pool, the snap-in shows it as a regular physical disk and you can do harmful things. Use Server Manager > File and Storage Services on Storage Spaces hosts.
- Picked NTFS for the Hyper-V host. ReFS is now Microsoft’s recommendation for Hyper-V VHDX storage volumes — checksums catch silent corruption that would otherwise corrupt VM disk files invisibly. NTFS still works, but ReFS is the better default for that one workload.
- Picked ReFS for the backup repository on a server that runs the backup software locally. Veeam, Veritas, Rubrik, etc. mostly support ReFS as a backup target, but check your backup vendor’s compatibility matrix before committing — some features (block clone, faster synthetic full) require specific Windows Server versions and ReFS metadata block sizes.
- Forgot to bring the disk online after a reboot. Disks remain in whatever state they were when the server shut down. If you set Take Offline for testing and rebooted, the disk is still offline and the volume is unmounted.
Get-Disk | Where-Object IsOfflinefinds them. - Used the same drive letter as a removable device. If
E:is in use by a USB stick when you assign it to a volume, Windows quietly remaps the volume to the next free letter. The wizard does not warn loudly. CheckGet-Volumeafter creating volumes. - Forgot to enable Trim/UNMAP on SSD-backed volumes. Both NTFS and ReFS support Trim, but it has to be enabled on the volume and the underlying storage has to be reported as SSD. Run
fsutil behavior query DisableDeleteNotify— should return 0 for SSDs.
Conclusion
Five steps, one disk, two volumes — the standard pattern for adding storage to any Windows Server. The wizard makes the first time easy; the PowerShell version makes the hundredth time fast. Pick GPT, pick NTFS for general data and ReFS for backup / VM volumes, and the box is ready for whatever you put on it.