Plumbing is in. Storage is connected. Time to merge two standalone servers into a single Windows Failover Cluster — the brain that orchestrates failover for SQL Server (and any other clustered role we add). Four moves: install the feature on both nodes, run validation (Microsoft’s “is this supported?” gate), create the cluster, configure the Quorum witness disk explicitly.
Step 1 — install Failover Clustering on both nodes
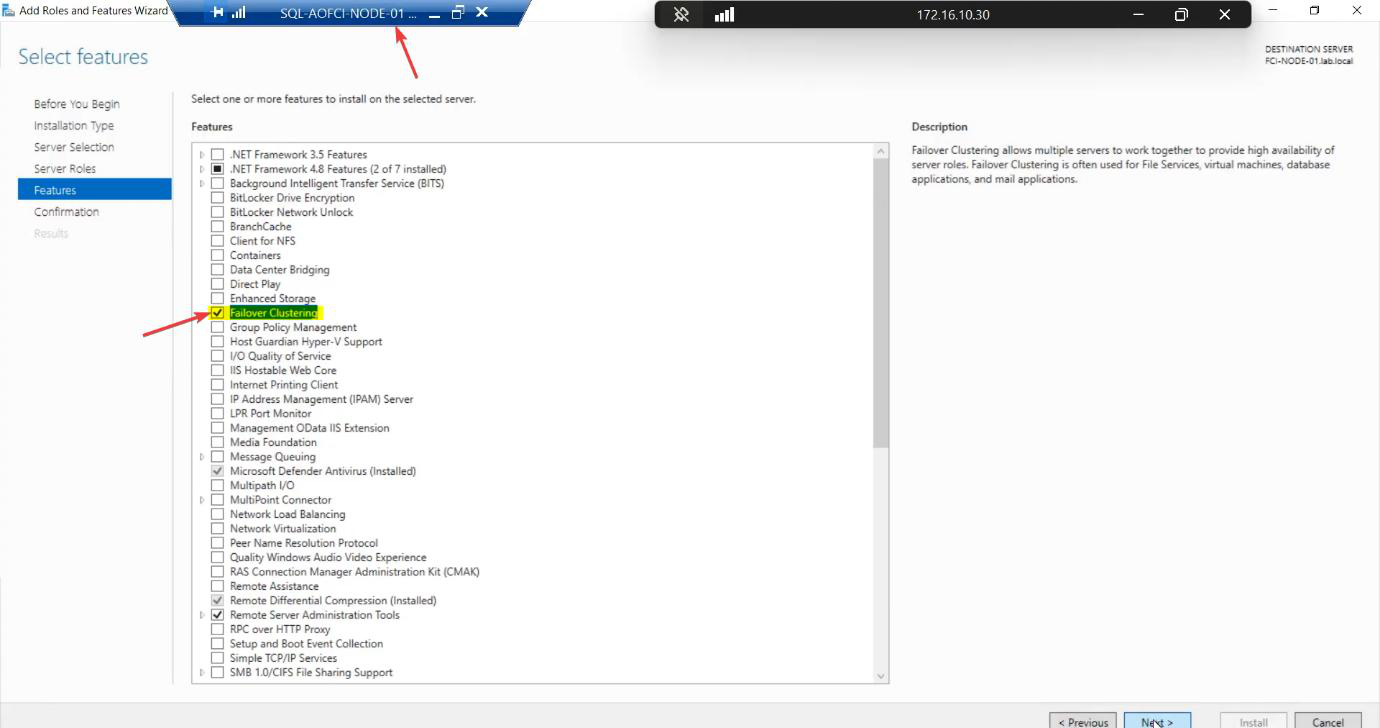
Node-01: Server Manager > Manage > Add Roles and Features > Features > Failover Clustering. Tick. The wizard auto-selects management tools. Install.

Repeat exactly on Node-02. The cluster service must exist on both before validation can run.
PowerShell shortcut if you prefer: Install-WindowsFeature -Name Failover-Clustering -IncludeManagementTools on each node.
Reboot may be requested. Both nodes online before continuing.
Step 2 — validate the configuration
The validation wizard runs ~30 tests covering Inventory, Network, Storage, and System Configuration. Microsoft only supports clusters that have passed validation — meaning zero failures. Warnings are usually acceptable.
Skip this step and you’re running an unsupported cluster. If you ever open a Microsoft support case, the first thing they ask for is the validation report. No report, no support.
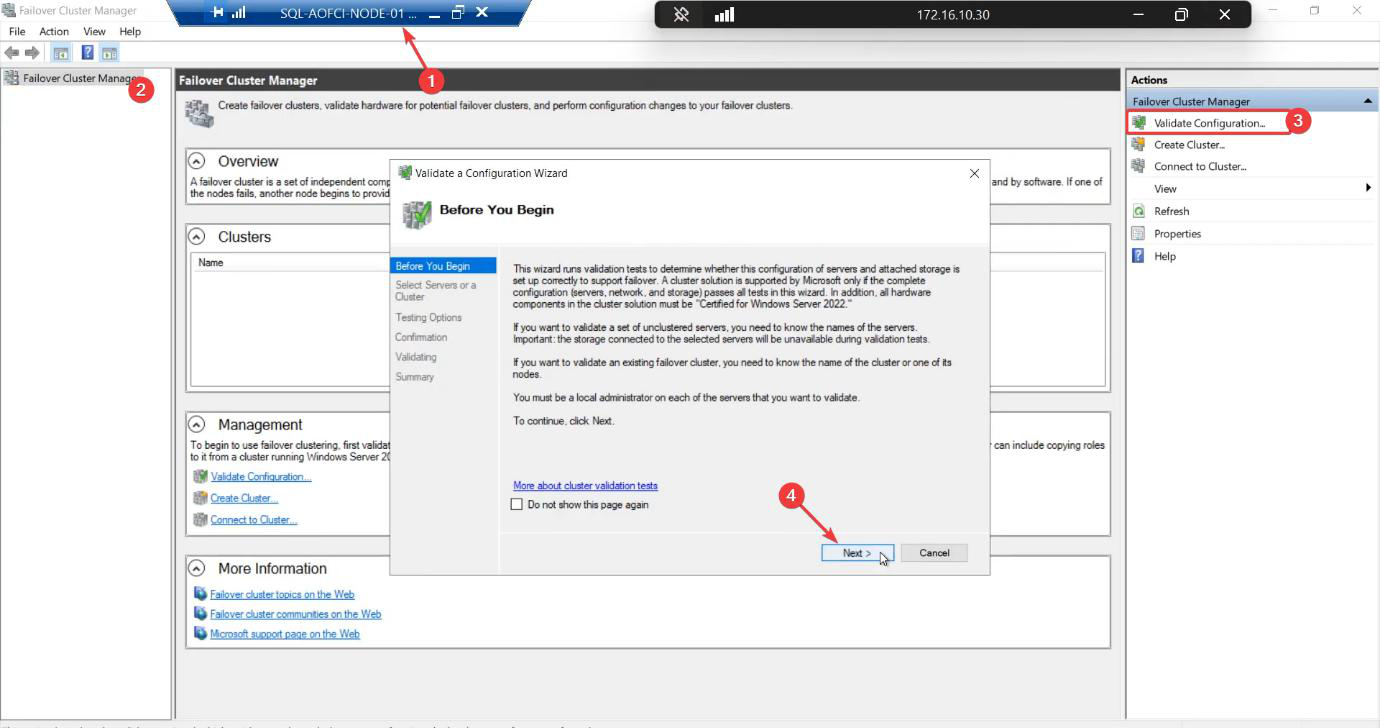
From Node-01, open Failover Cluster Manager (Tools menu). Click Validate Configuration.
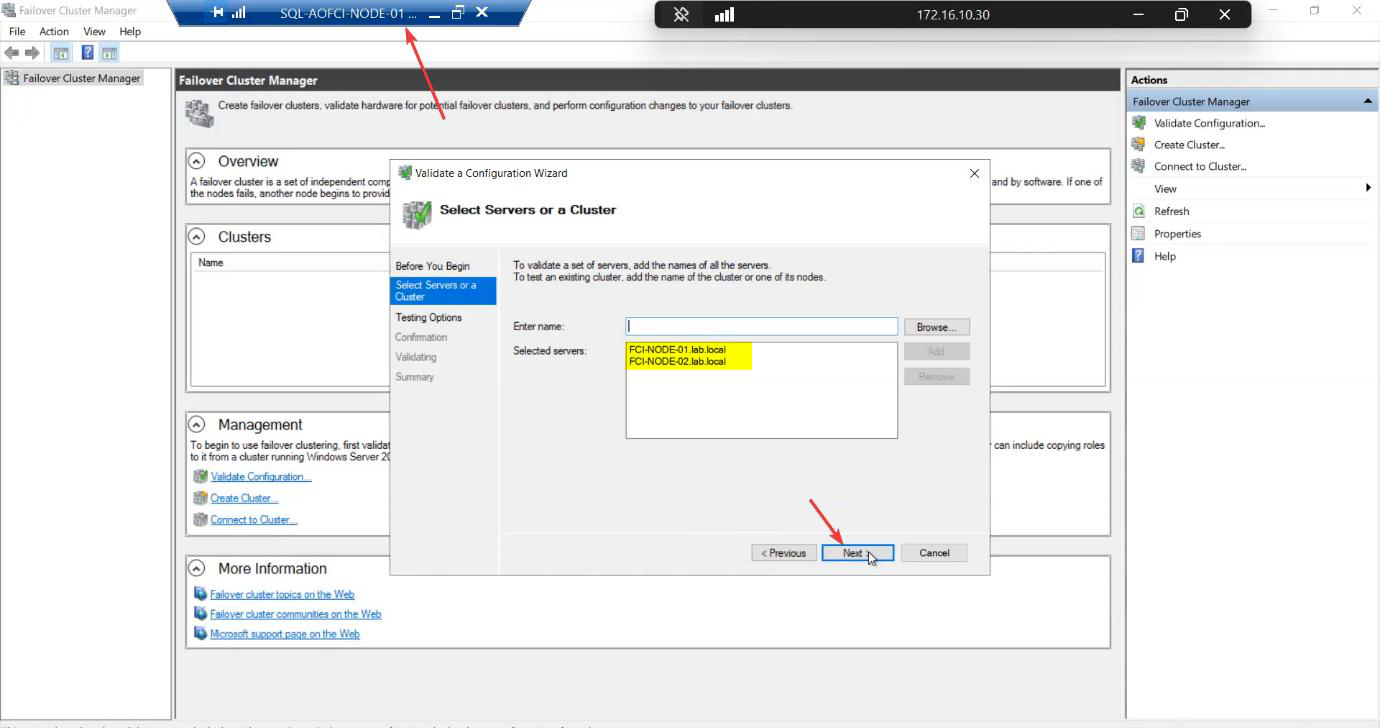
Add both nodes by FQDN.
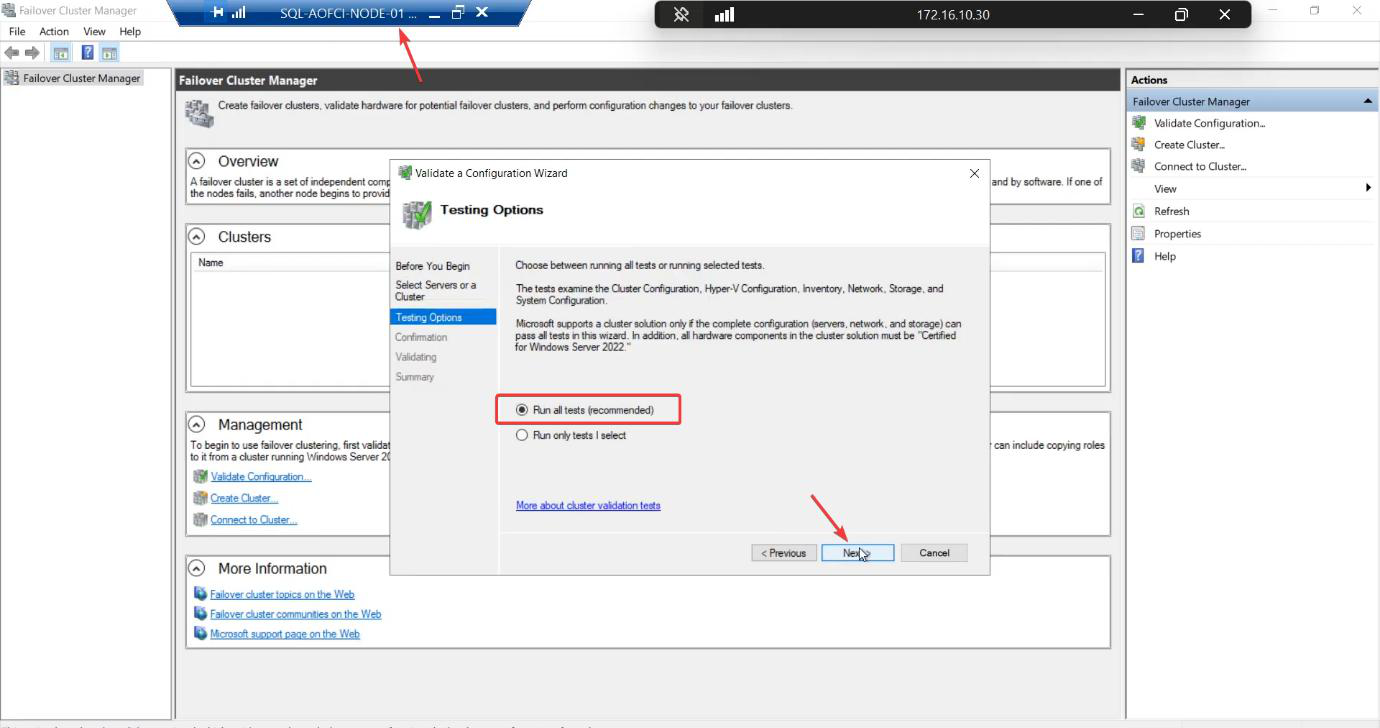
Run all tests. The shorter suites skip storage IO tests — which is exactly where most issues hide.
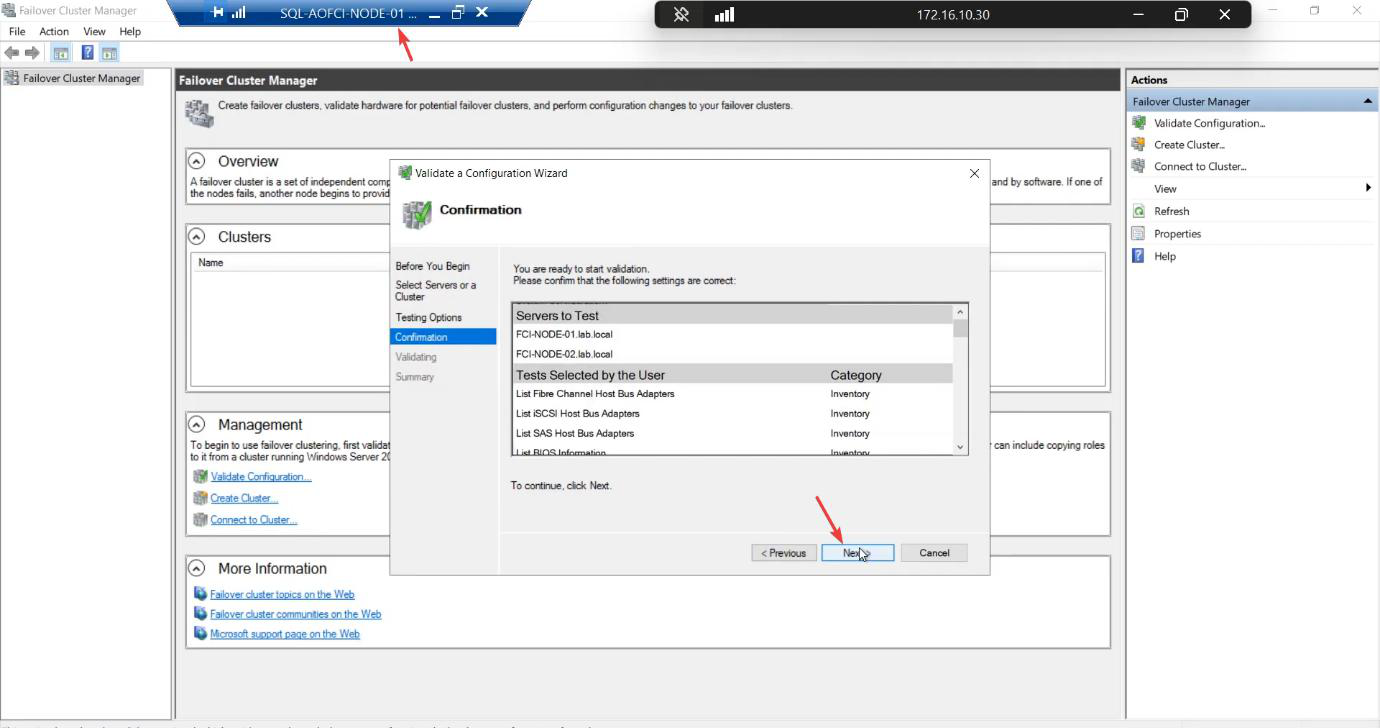
Confirm and start. The wizard performs real read/write IO against your shared disks — takes 5-15 minutes.
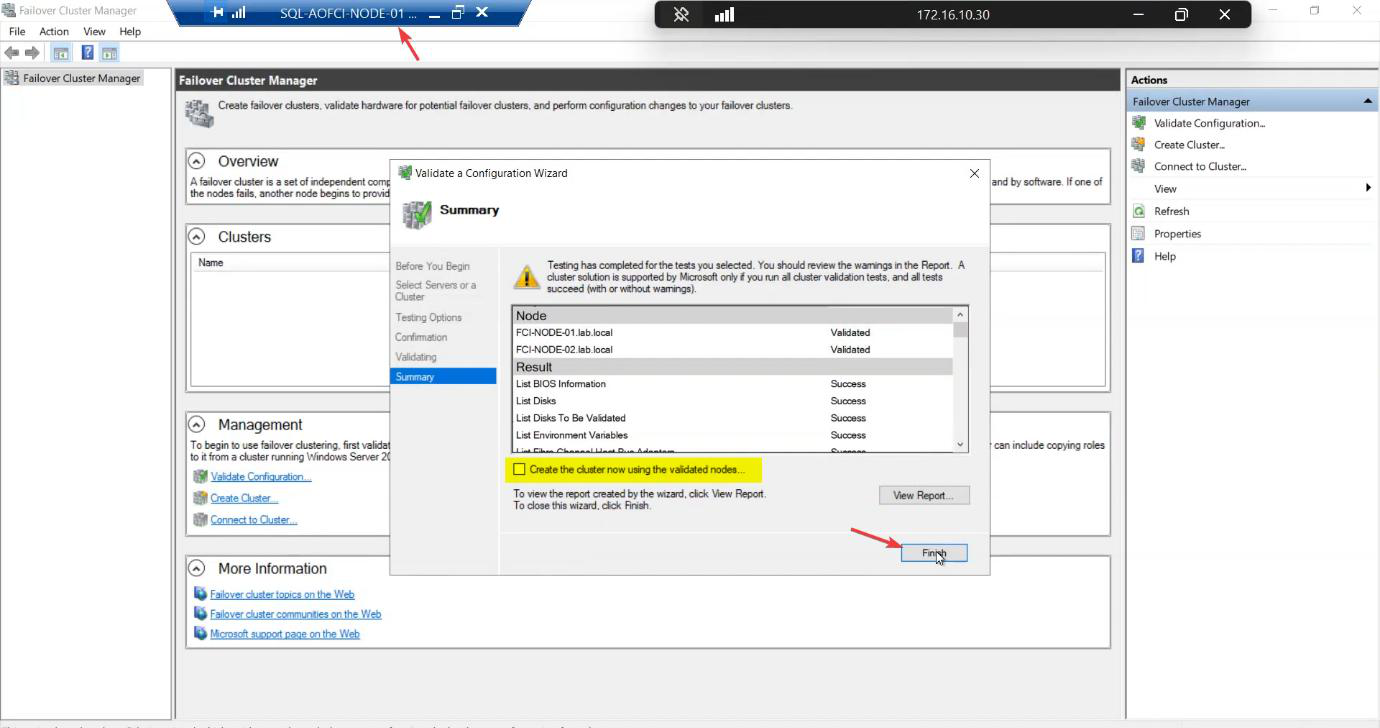
When complete, review the report. Common findings:
- Warnings about heartbeat redundancy — expected in a 1-NIC heartbeat lab; production should have 2 heartbeat NICs.
- Warnings about “persistent reservation” on storage — usually a hint to enable SCSI-3 persistent reservations on the SAN; iSCSI Target supports this.
- Failures — STOP. Read each, fix, rerun.
Untick “Create the cluster now using the validated nodes.” We do that step manually for clarity. Finish.
Step 3 — create the cluster
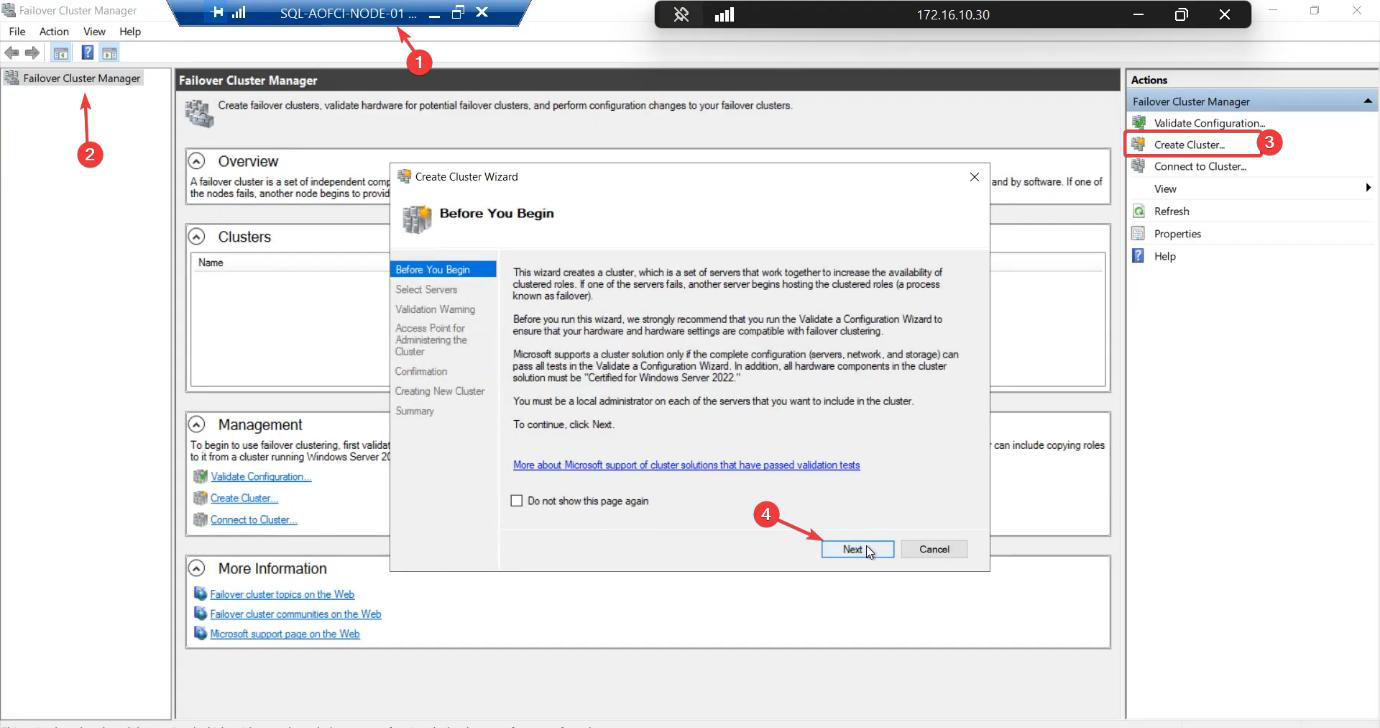
FCM Action pane > Create Cluster.
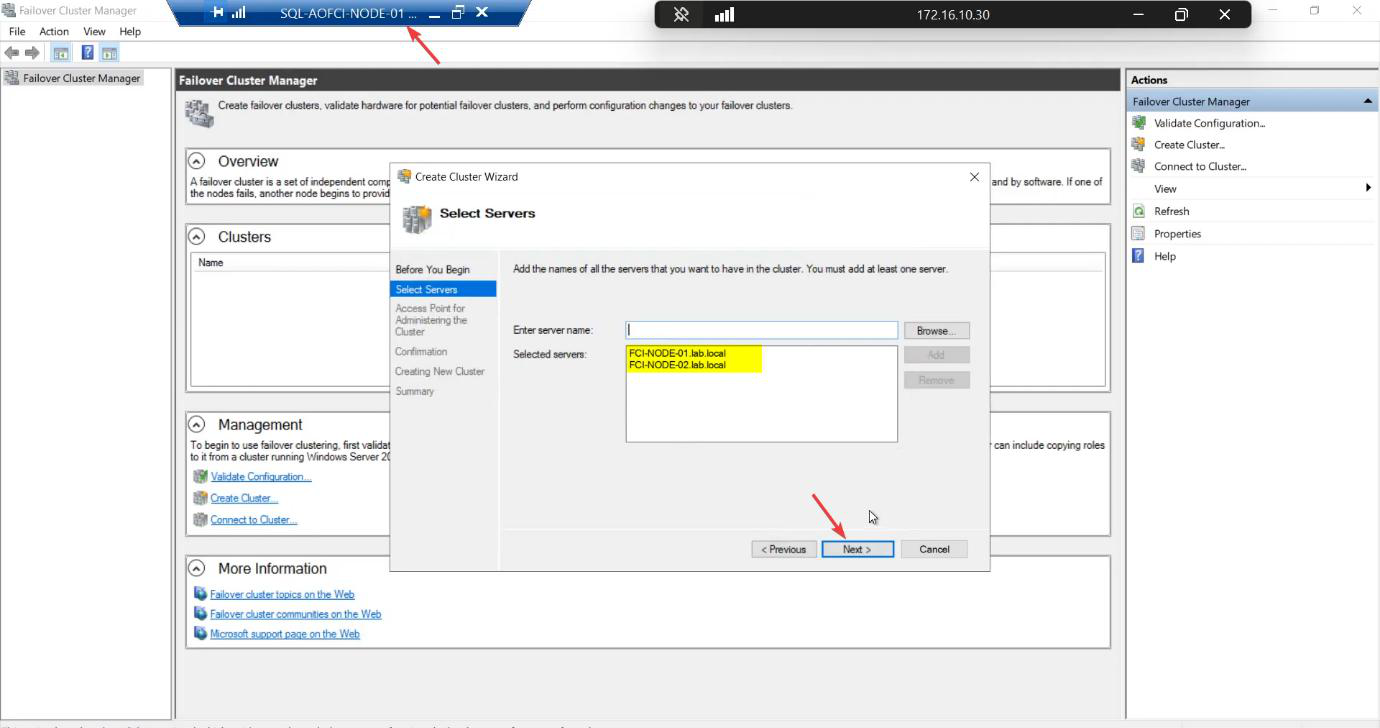
Add both nodes.
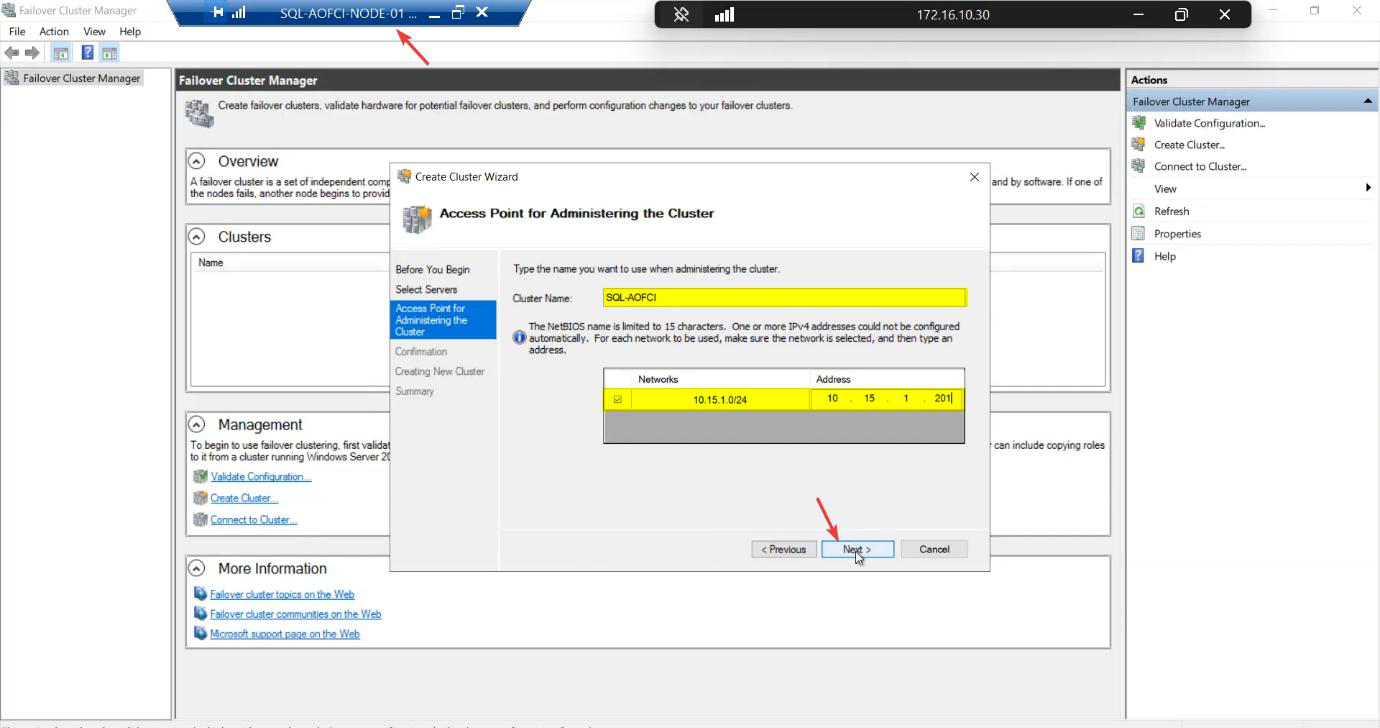
ITN-CL-01. Cluster IP: 10.15.1.45 (free IP on the public/domain subnet). The cluster gets its own AD computer object (CNO) and DNS entry — clients eventually connect to ITN-CL-01.infotechninja.local.The Access Point step:
- Cluster Name:
ITN-CL-01— this becomes the CNO (Cluster Name Object) in AD and a DNS entry. Clients eventually connect toITN-CL-01.infotechninja.local. - IP Address:
10.15.1.45— a free IP on the Public/Domain subnet. The cluster claims this IP; failover keeps it on whichever node owns the cluster role.
AD permission: the user creating the cluster needs Create Computer Objects on the OU where the CNO will live. Default Computers container works for labs; locked-down environments often delegate this to a specific OU. Get this wrong and the wizard fails with an opaque AD error.
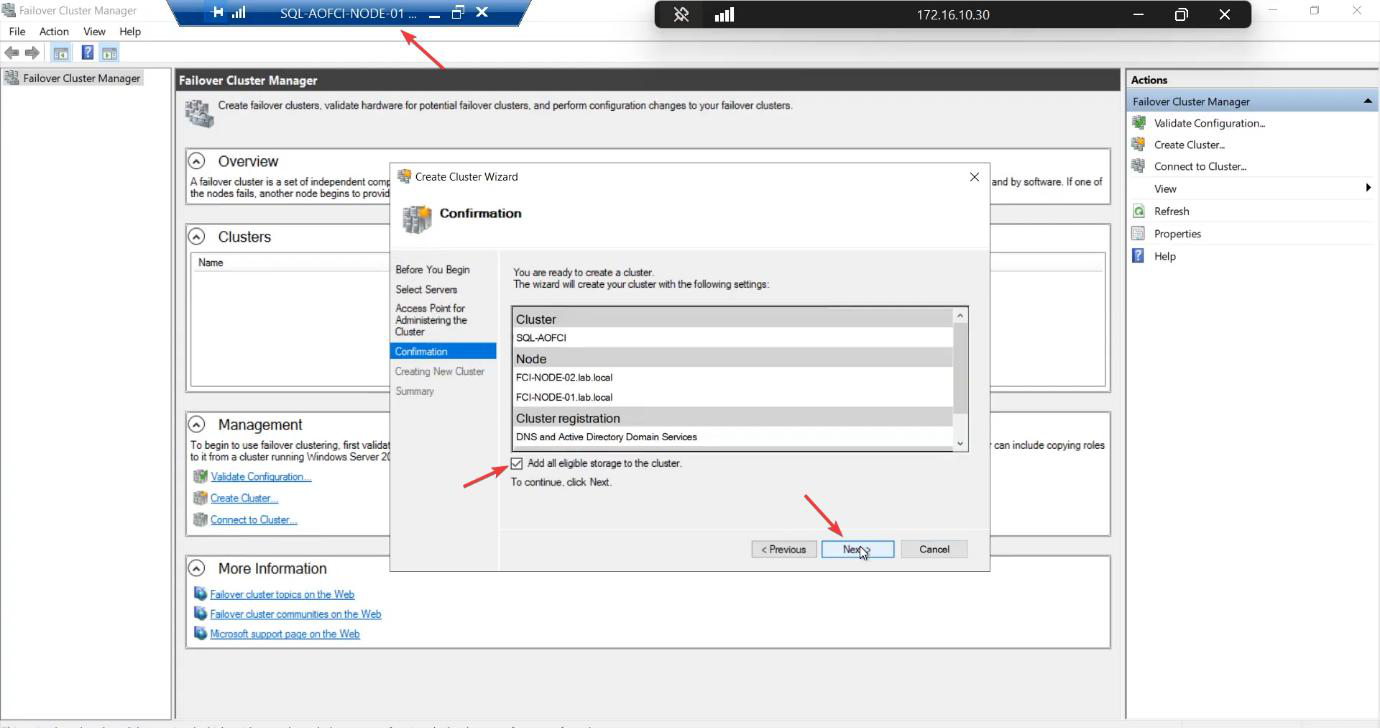
Confirmation: tick Add all eligible storage to the cluster. The wizard pulls in the iSCSI LUNs automatically.
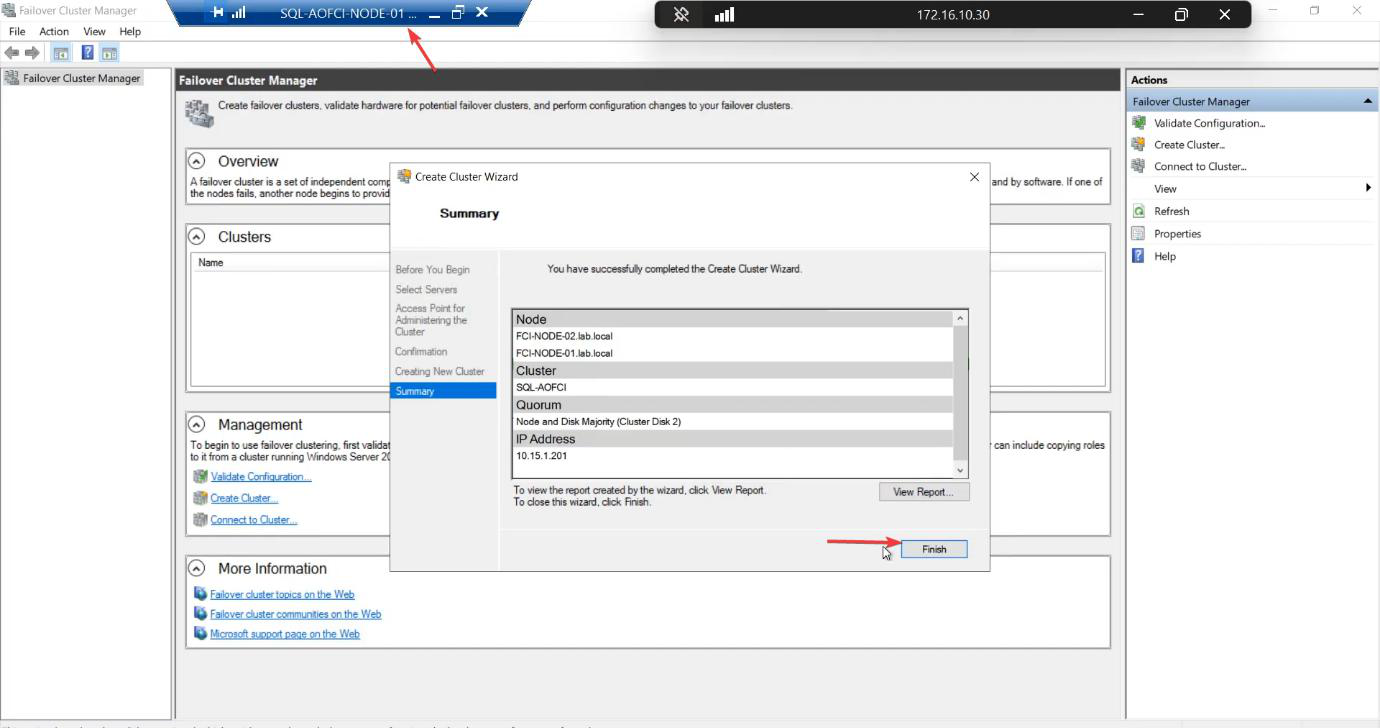
Created. The cluster object exists in AD, both nodes joined, both disks owned by the cluster.
Step 4 — verify the cluster

FCM > Nodes. Both nodes Up.
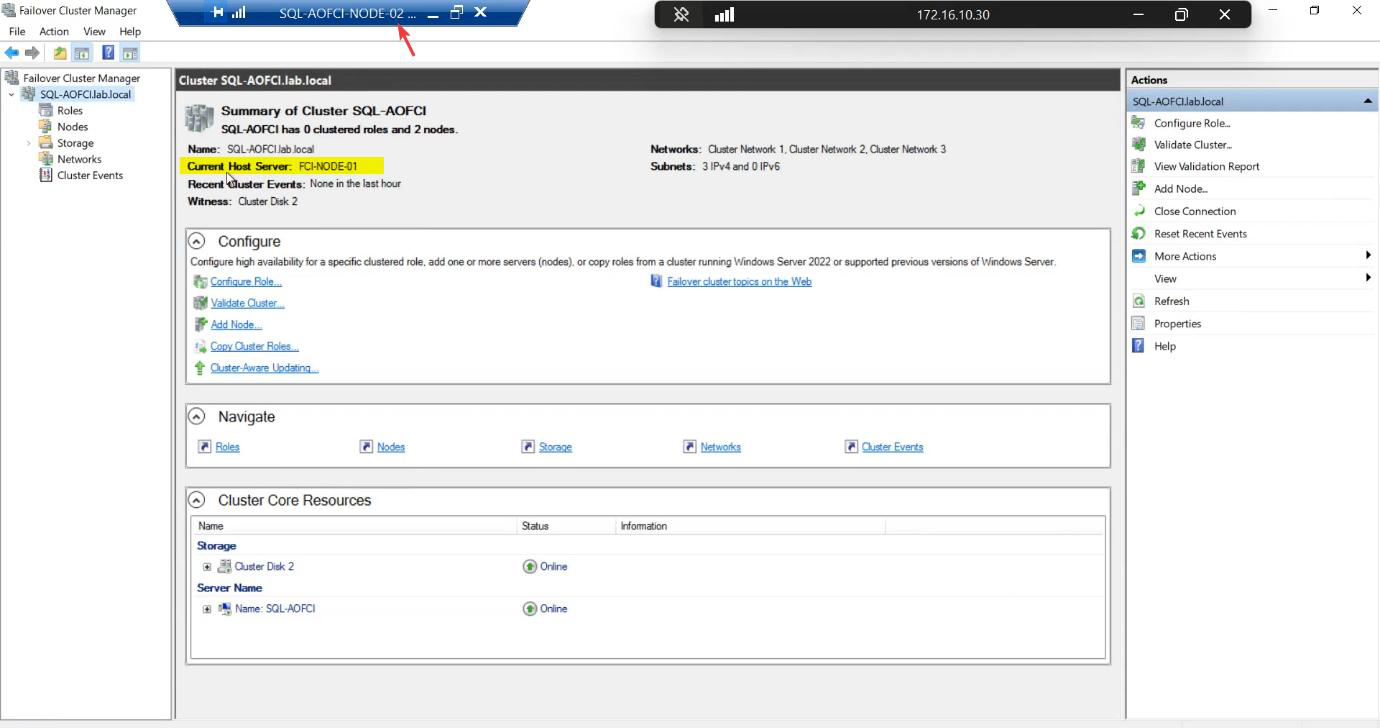
Cluster main pane: Current Host Server is Node-01. That’s the active node. Failover would flip this to Node-02.
Visual confirmation: cluster disk icons
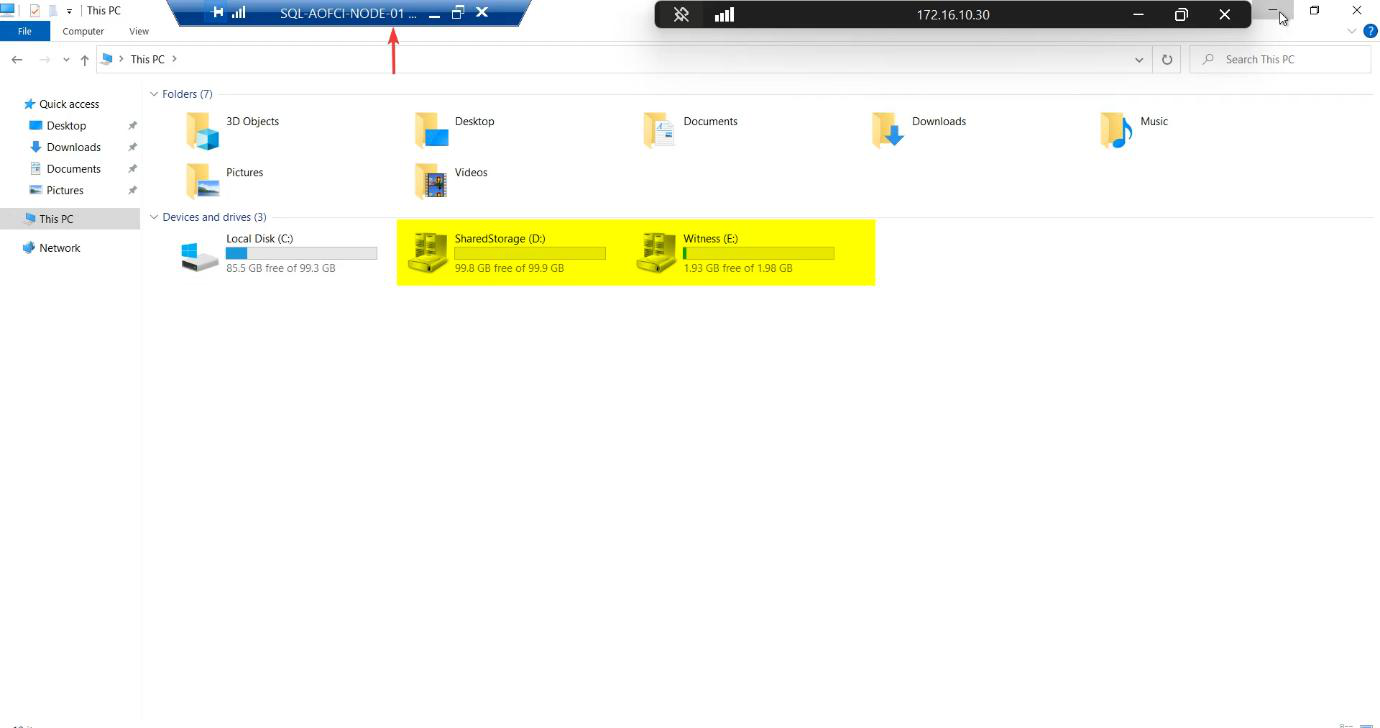
Open File Explorer on Node-01 (the active node). The drives have the distinctive cluster disk icon — a hard drive with a small chain link overlay. That’s Windows telling you Cluster Service owns these disks now, not the local OS.
On Node-02, these drives don’t appear in File Explorer. Correct. Only the active node sees the shared storage.
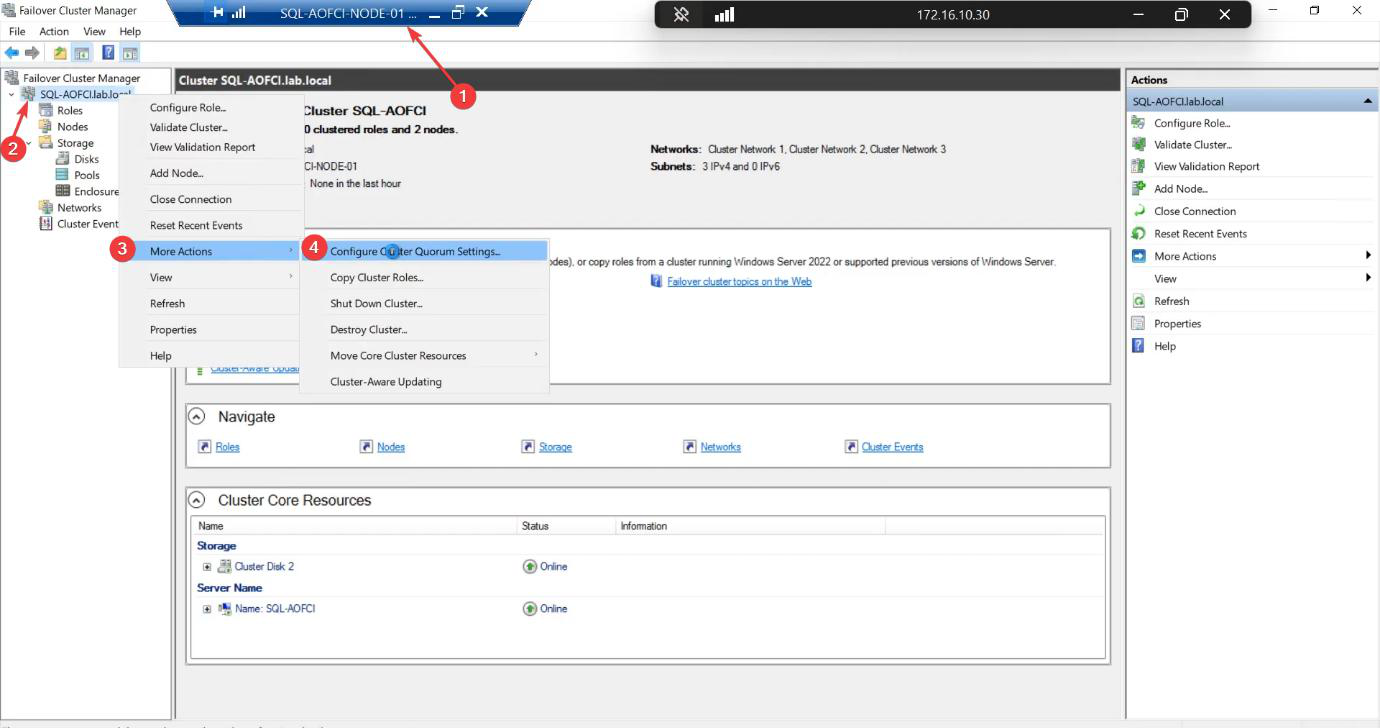
Step 5 — configure the Quorum witness explicitly
The cluster wizard auto-picks a quorum config. For 2-node clusters, it usually picks Node Majority + a witness, but the “auto” choice depends on disk availability at create time. Be explicit.
Quorum exists to prevent split-brain — the scenario where the heartbeat link breaks but both nodes can still see storage. Without a tiebreaker, both nodes try to take ownership simultaneously and the data corrupts. The witness disk is the third “vote” that decides the winner.

Select the quorum witness.
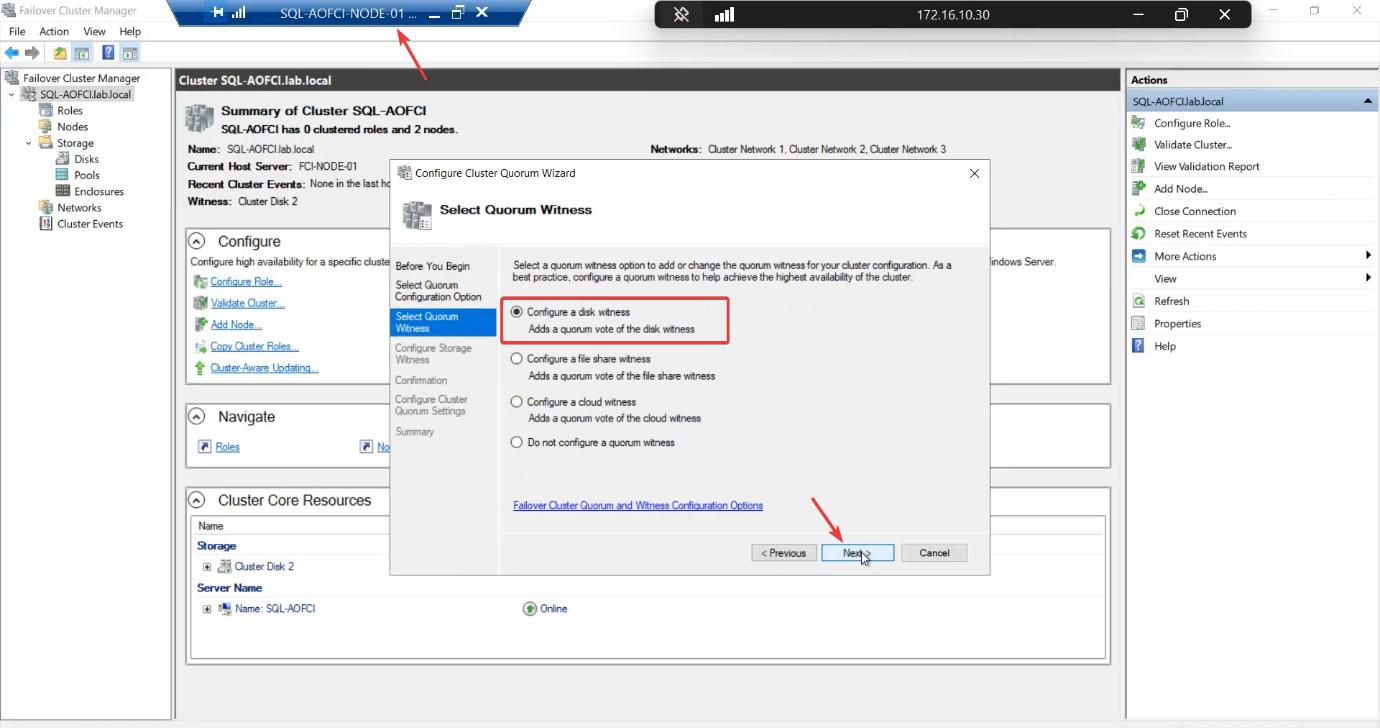
Configure a disk witness. Other options: file share witness (good for stretched clusters) or cloud witness (Azure storage account, good for cloud-only or mixed). For a single-site lab with shared iSCSI storage, disk witness is the standard.
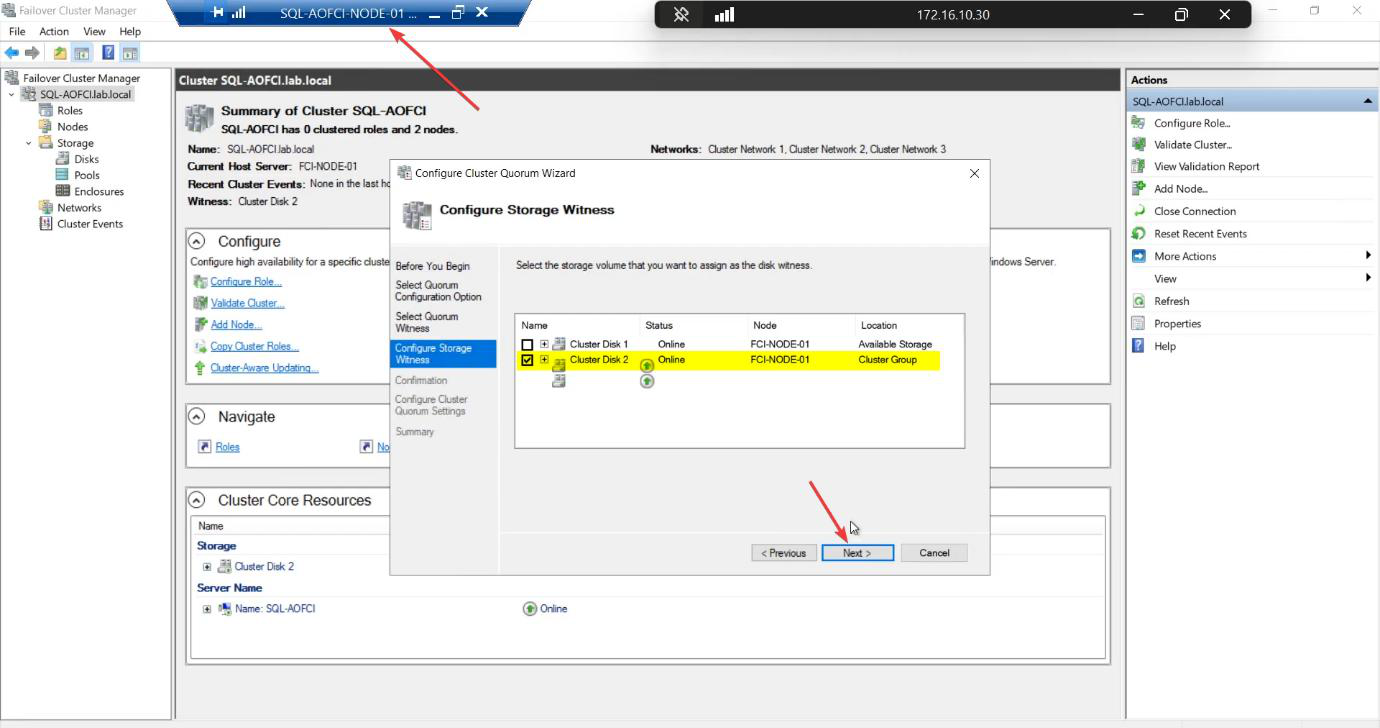
Pick the 2 GB Cluster Disk explicitly. Don’t let the wizard accidentally use SQL-Data.
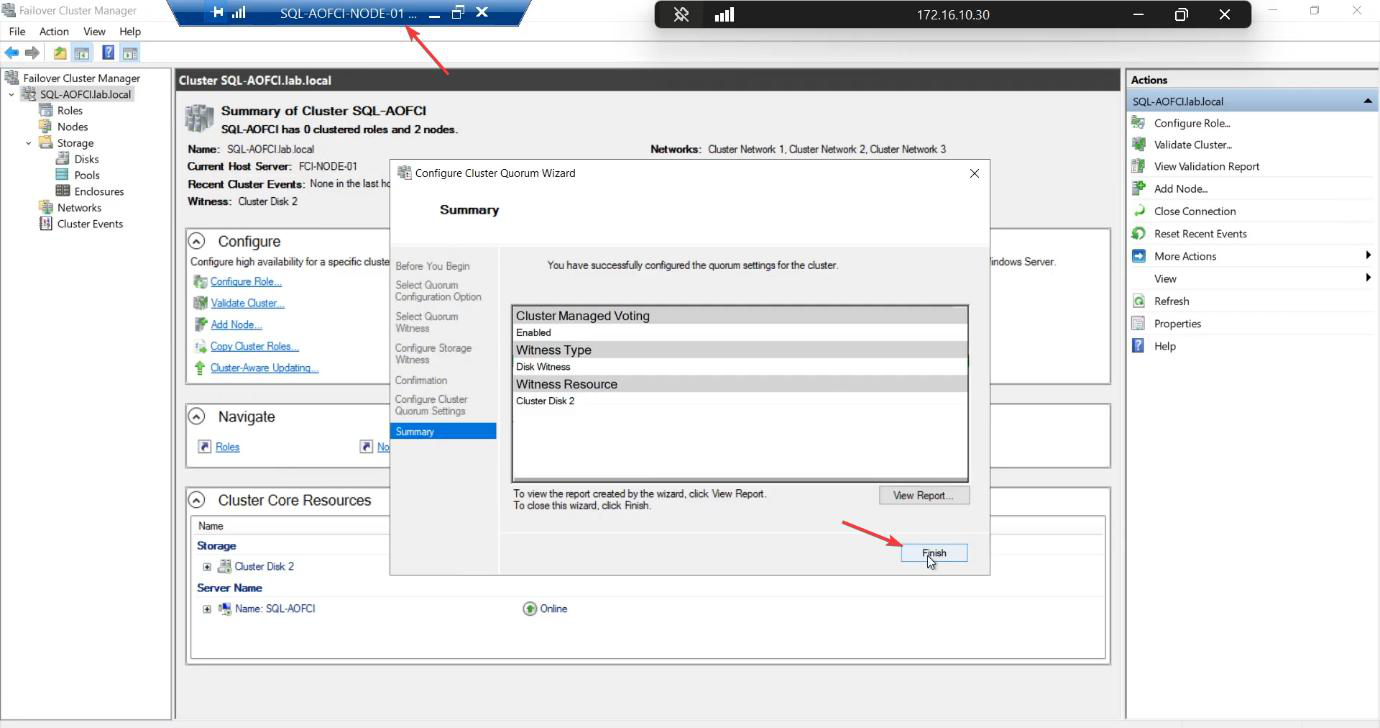
Done. The cluster now has explicit tie-breaker logic.
Things that bite people in this part
Validation failures with no useful message
Common causes: ICMP blocked on the storage subnet (firewall rule), nodes at different OS patch levels, missing CNO permission on the target AD OU. Read the full HTML report — click into each failure for the verbose explanation.
Pre-staged CNO
Locked-down environments often pre-stage the CNO (an admin creates a disabled computer object in AD ahead of time). The cluster create wizard then needs Modify permission on that object — not Create. If pre-staging, ensure the right delegation.
Witness picked the wrong disk
Auto-config sometimes picks the SQL-Data disk as witness (it’s small relative to total — the heuristic gets confused). Always configure explicitly.
Cluster IP conflicts
10.15.1.45 must be free. DHCP scope exclusions, IPAM, or just a quick ping 10.15.1.45 from anywhere on the subnet — if it answers, pick a different IP.
SAN reboot during cluster create
If the iSCSI Target VM is rebooted during cluster creation, the disks may go offline and the wizard panics. Don’t touch the SAN during create.
Checking validation later via PowerShell
You can re-run validation any time without recreating the cluster: Test-Cluster -Node N1, N2 -Include Network, Storage. Useful before adding a third node or changing storage.
What’s next
The cluster is alive. Part 6 installs SQL Server itself on Node-01 as the first node of an FCI — this is the moment SQL gets aware of the cluster and creates its virtual network name. See the full series at SQL Server Clustering pathway.