Welcome to part 1 of a 13-part deep dive into SQL Server Always On Failover Cluster Instance (FCI). Before any wizard screens, before any PowerShell, you need the architecture in your head. This post lays out exactly what we’re building — nodes, networks, shared storage, the domain plumbing — so the next 12 parts make sense as moves on a board you already understand.
What FCI actually is (and isn’t)
SQL Server has two HA technologies that get confused constantly:
- FCI — Failover Cluster Instance. One SQL Server instance, shared storage, owned by exactly one cluster node at a time. On node failure, the SAME instance starts on another node, attached to the SAME disks. Clients reconnect to the cluster’s virtual network name and find the instance running — same databases, same logins, same everything — just on a different host.
- Always On Availability Group (AG). Multiple instances, no shared storage. Databases are replicated between instances at the log-record level. Each replica owns its own copy of the data.
Both have their place. This series is FCI. Shared storage is the defining feature. If your environment can’t give you shared block storage (SAN, iSCSI, S2D), you can’t do FCI — AG is your route.
The lab inventory
| Hostname | Role | Public/Domain IP | Storage IP (iSCSI) | Heartbeat IP |
|---|---|---|---|---|
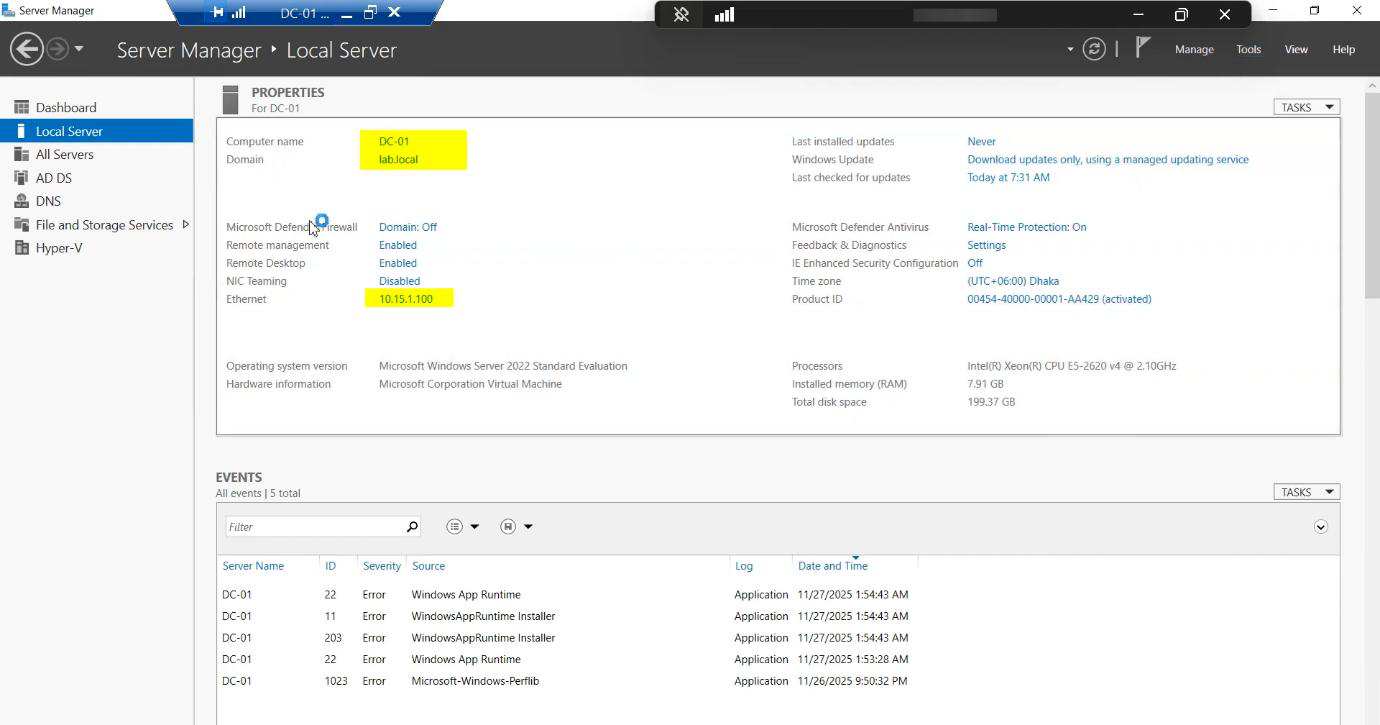
| DC-01 | Domain Controller | 10.15.1.10 | — | — |
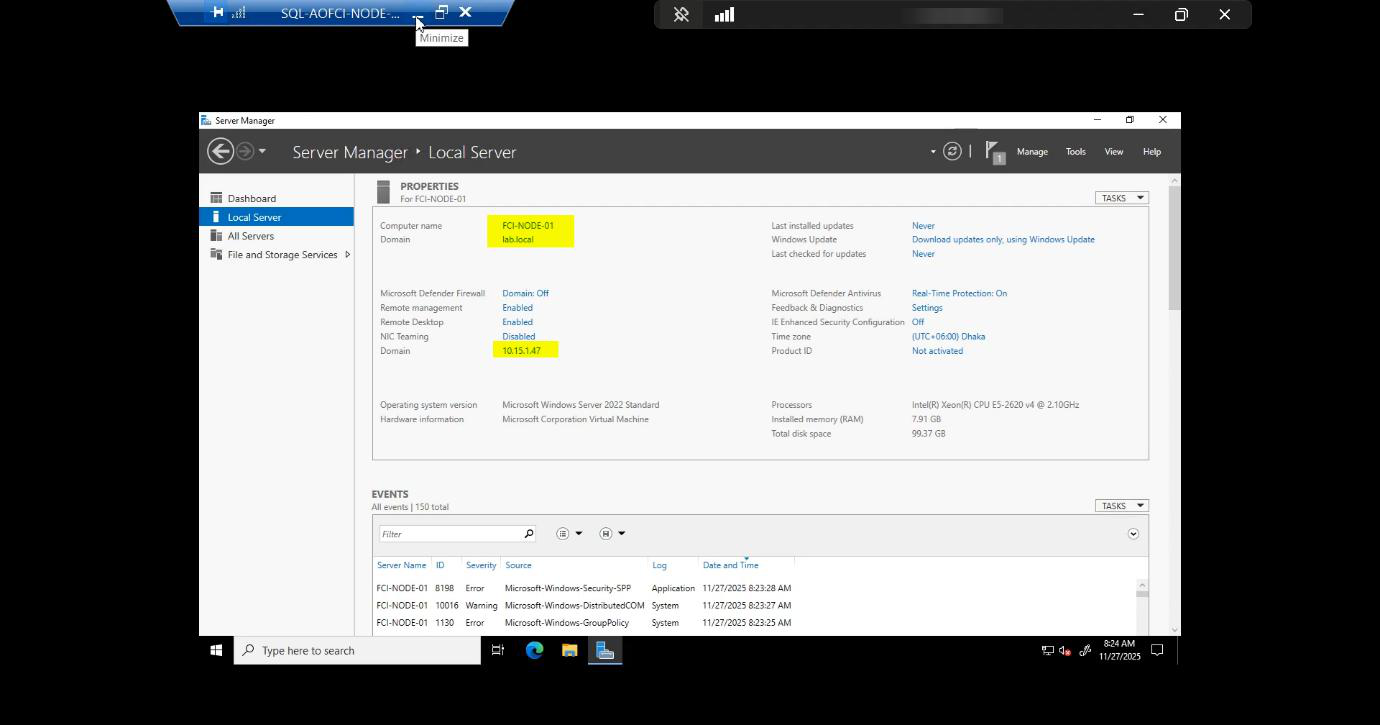
| Node-01 | Cluster Node (active) | 10.15.1.47 | 10.10.10.11 | 10.10.20.20 |
| Node-02 | Cluster Node (passive) | 10.15.1.48 | 10.10.10.12 | 10.10.20.21 |
| Node-03 | Future Node (Part 9-11) | 10.15.1.50 | 10.10.10.13 | 10.10.20.22 |
| iSCSI-Target | SAN Emulator | 10.15.1.49 | 10.10.10.10 | — |
Domain: infotechninja.local. All cluster nodes are joined.
Domain controller and service account
FCI requires Active Directory. The cluster needs to create a Cluster Name Object (CNO) and a Virtual Computer Object (VCO) for the SQL FCI’s network name. Both live in AD.
svc_sql sits in a dedicated Service Accounts OU so its rights and password policy are explicit.One thing that bites people: the user creating the cluster needs the Create Computer Objects permission on the OU where the CNO will live. Default Computers container works, but locked-down environments often delegate this differently. Get this wrong and cluster validation fails with an opaque AD permission error.
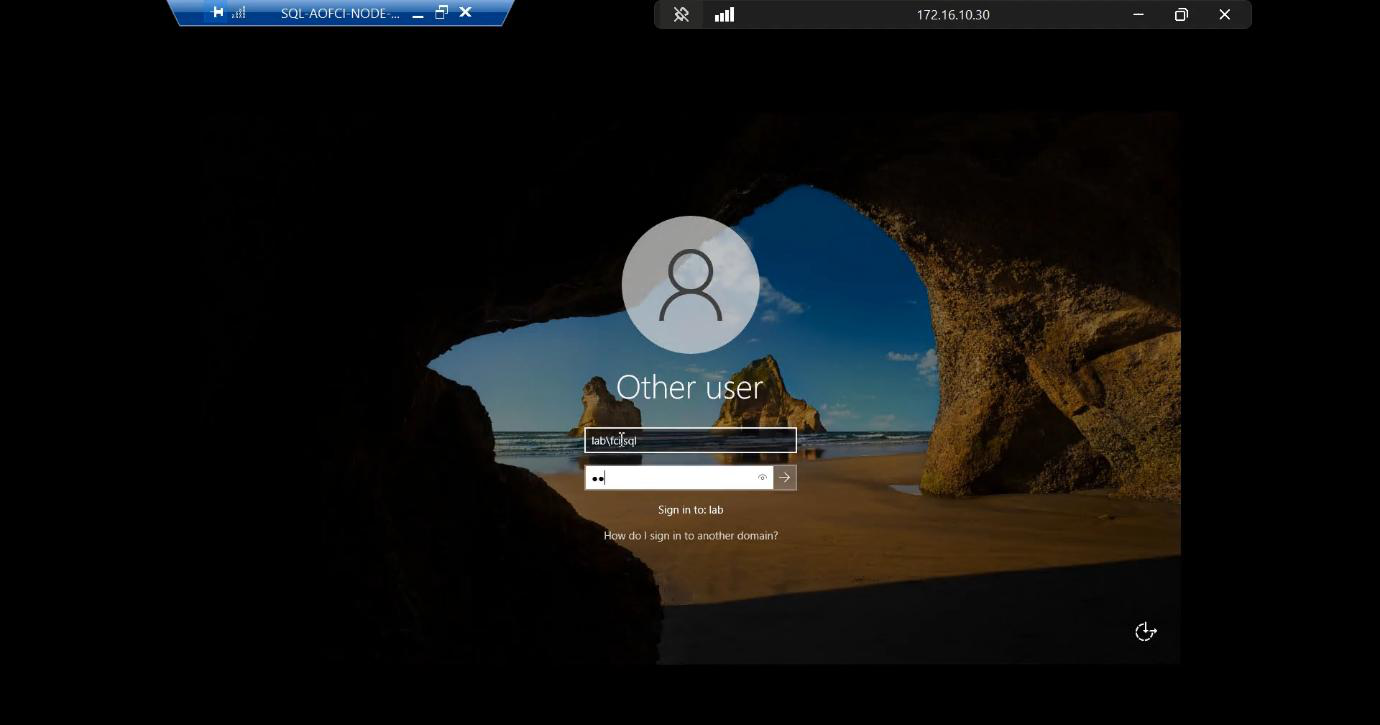
Service account — never use Administrator for SQL services. Create a dedicated account.
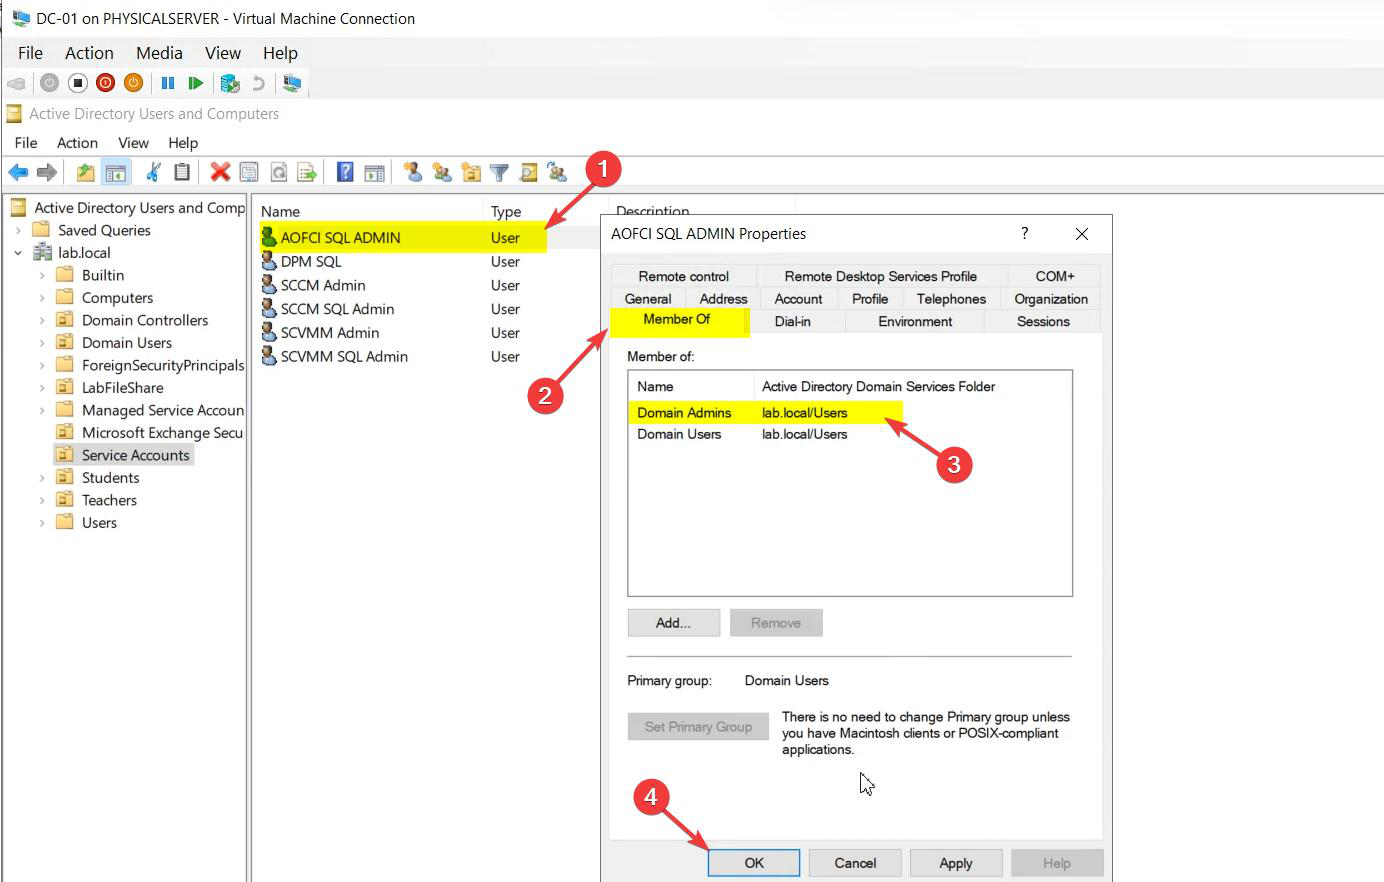
svc_sql@infotechninja.local. Display name flagged as service.Properties matter:
- Password never expires — standard for service accounts so a forced expiry doesn’t silently break SQL Agent jobs at 02:00.
- User cannot change password — ticked. Only the admin rotates it via a controlled procedure.
- Logon hours / workstations — in production, scope these to the cluster nodes only.
Group memberships — intentionally empty of Domain Admins / privileged groups. SQL setup will grant the required local rights on each node automatically. Adding the service account to Domain Admins because “something didn’t work” is the most common security regression in FCI deployments. Don’t do it — figure out which scoped right is missing instead.
The two cluster nodes
Node-01 and Node-02 are identical: same OS (Windows Server 2022 in this lab), same patch level, same SQL build. Identical hardware specs in production; identical VM specs in this lab. Asymmetric nodes work but introduce subtle bugs at scale — one node can sustain workload the other can’t and you find out at 03:00 during a failover.
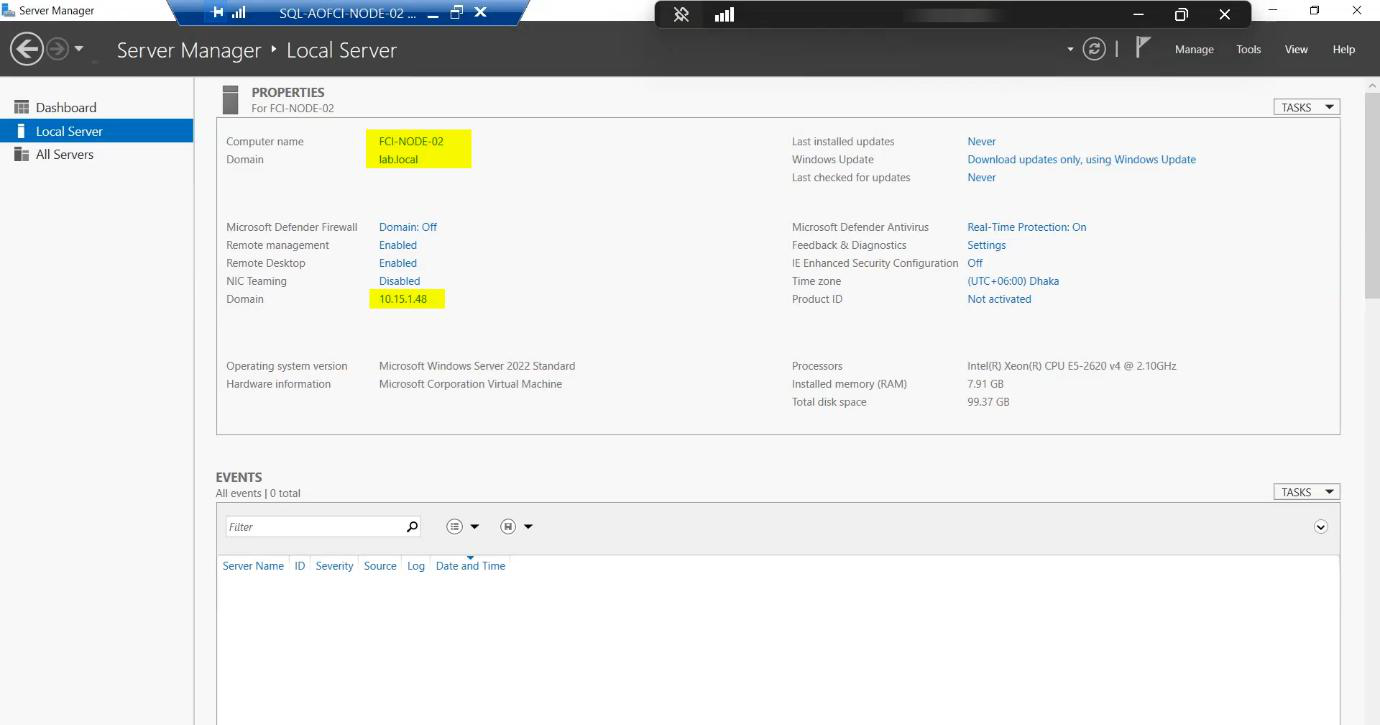
Each node has THREE NICs by design:
- Public/Domain (10.15.1.0/24) — client connections, AD authentication, DNS, replication. The face the world sees.
- Storage / iSCSI (10.10.10.0/24) — dedicated, isolated. iSCSI is bandwidth-hungry and latency-sensitive; sharing it with client traffic causes both to suffer.
- Heartbeat (10.10.20.0/24) — private network just for the nodes to ping each other. The cluster service uses this to detect node liveness. If you collapse this onto the public NIC and the public NIC saturates, the cluster thinks the other node is dead and triggers a failover — split-brain, the most dangerous failure mode in clustering.
Shared storage — iSCSI Target as SAN
FCI needs shared block storage. In production, that’s a SAN over Fibre Channel or iSCSI (NetApp, Pure, Dell EMC, HPE 3PAR, etc.). In a home / lab, that’s a Windows Server VM running the iSCSI Target role — functionally equivalent for learning, just slower.
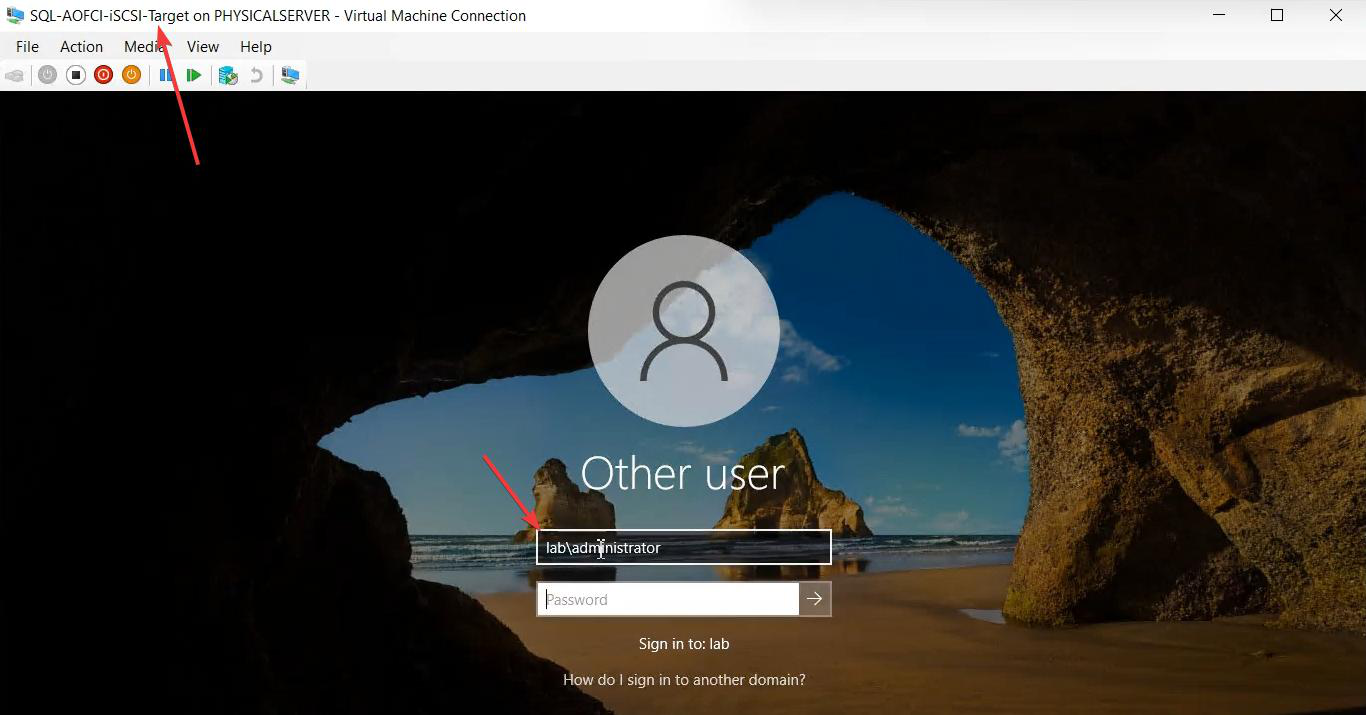
The iSCSI Target VM presents virtual disks to the cluster. Each cluster node connects via its Storage NIC and sees the disks as if they were locally attached. The cluster then takes ownership of those disks and only ONE node holds them at a time. On failover, ownership transfers atomically.
Disks we’ll need (configured in Parts 3-4):
- Quorum / Witness — small (~1 GB). Tie-breaker for cluster-vote calculations.
- SQL Data — primary database files. Sized to your workload + growth.
- SQL Logs — transaction log files. Separate disk for I/O isolation; logs are sequential write, data is random.
- SQL TempDB — recommended separate, often local SSD-tier in production for SQL 2019+ which can use local TempDB.
- MSDTC — if you need cross-instance distributed transactions.
Note on the iSCSI Target VM: it’s managed with the standard Administrator account in this lab — it’s NOT a cluster member, just a service provider.
Why three networks (the split-brain story)
Cluster Service uses the heartbeat network to send small “are you alive?” packets between nodes. If a heartbeat is missed for ~5 seconds (configurable), the surviving node assumes its partner is dead and initiates a failover — takes ownership of the shared disks, brings the SQL instance online.
If both nodes can talk to the storage but can’t talk to each other (e.g., the heartbeat NIC dies but the storage NIC works), they BOTH try to own the storage. That’s split-brain, and it can corrupt the data files. The Quorum/Witness mechanism prevents this — in a 2-node cluster, the witness is the third “vote” that decides which node wins.
Three NICs aren’t a luxury — they’re structural defense against the most dangerous cluster failure mode. Don’t collapse them.
What’s next
Architecture in your head? Good. Part 2 configures the network adapters and prepares both nodes. We’ll set the Storage and Heartbeat NICs to the right binding order, disable NetBIOS where appropriate, and confirm node-to-node connectivity on the private subnets before installing any cluster bits. See the full series at SQL Server Clustering pathway.