Why Changing a DC’s IP Is Risky
The Domain Controller is the most important box in the directory — every authentication, every Kerberos ticket, every Group Policy refresh, every DNS query for an internal name eventually touches it. Changing its IP is one of those operations that looks like a five-second click in Network Connections, but the second-order effects last hours: every DC in the forest has to learn the new IP via replication, every DNS zone needs the SRV records updated, every domain-joined client has to re-resolve the DC’s name, and any third-party device hard-coded with the old IP (printers, network appliances, legacy apps) needs reconfiguring.
If you are doing this for a real reason — subnet move, DC migration, IP-collision cleanup, addressing scheme overhaul — this article is the cleanest path. If you are doing it because someone asked you to “just change the IP real quick,” pause first and confirm why; the answer often is “the application team thinks they need a static IP somewhere else,” and the right fix is a DNS record they query, not a DC IP change.
Pre-Flight
- Run a second DC. If this is the only DC in the forest, the IP change interrupts authentication for everyone for the seconds-to-minutes the change takes plus the DNS-propagation window. Stand up a second DC first — see Add a Domain Controller to an existing domain — even if you only intend to keep it for the duration of the change.
- Use console access, not RDP. The instant you click OK on the new IP, the existing TCP connection to the DC drops. If that connection is your RDP session, you lose your session at exactly the wrong moment. Use the hypervisor console (Hyper-V Connect, vSphere Console, iLO/iDRAC) so the IP change does not knock you off.
- Audit downstream consumers. Anything pointed at the old DC by IP rather than name will keep talking to the old IP after the change. Run
Get-DnsClientServerAddressfrom a sample of clients; check printers, NTP clients, third-party LDAP integrations, and any monitoring system. Note them all so you can update them in Step 3. - Replication is healthy. A DC IP change replicates as updates to the configuration partition (server object), the schema partition (rare for IP), and the DNS partition (NS / A / SRV records). Confirm with
repadmin /replsummary— if replication is broken, the new IP propagates to some DCs and not others, which is the root cause of half the “mysterious authentication failures” that show up after an IP change. - Snapshot or back up. Especially if it is a virtual DC. Standard advice: avoid AD-aware checkpoints (they create USN-rollback risk), but a pre-change image of the DC’s system state is cheap insurance.
Step 1 — Change the IP Address
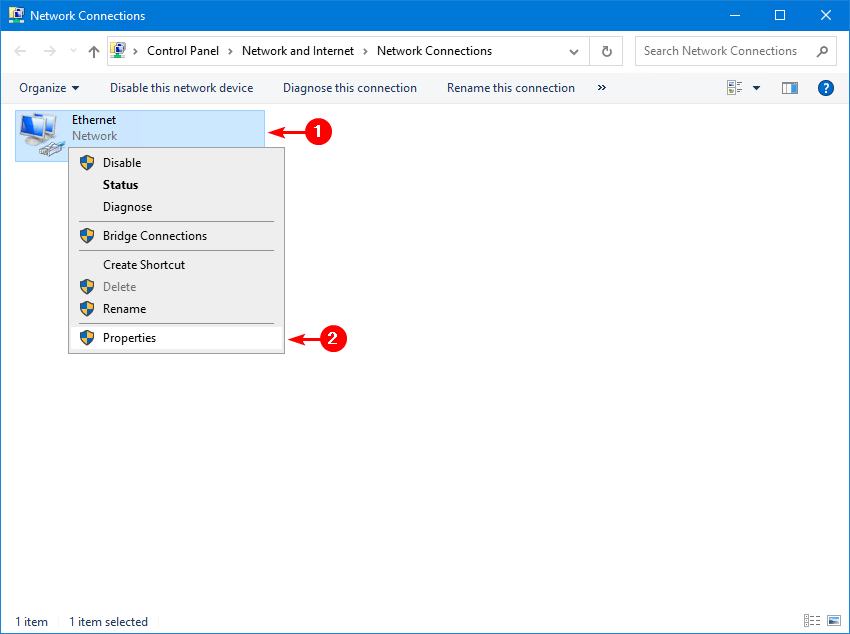
Console-sign in to the Domain Controller (not RDP). Open Network Connections:
ncpa.cplRight-click the adapter and choose Properties:
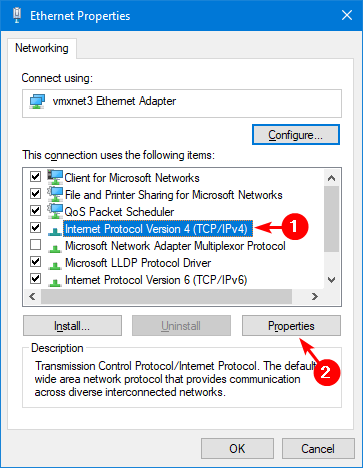
Select Internet Protocol Version 4 (TCP/IPv4) and click Properties:
Set the new IP address, subnet mask, default gateway, and DNS server addresses:
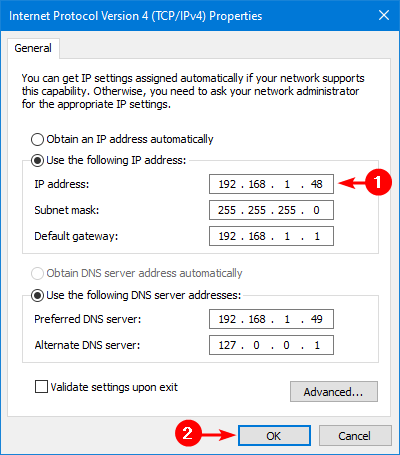
DNS pointer matters. A common mistake is leaving the Preferred DNS as the DC’s old IP — that record will not exist after the change. Set it to a peer DC’s IP as Preferred, and the loopback (127.0.0.1) as Alternate. The DC keeps resolving its own name through the loopback even if the peer is offline.
Click OK twice to apply. The connection drops for a couple of seconds while Windows binds the new address.
Step 2 — Register the New IP in DNS
Open Command Prompt or PowerShell as administrator. Run these in order:
ipconfig /flushdnsClears the local DNS resolver cache. The DC will not see its own old A record after this.
ipconfig /registerdnsTells the DC to register its host (A) record with the DNS server it now points at as Preferred. Same as the dynamic update that fires every 24 hours, but immediate.
nltest /dsregdnsnltest goes further: it forces re-registration of every service (SRV) record this DC owns — the LDAP, GC, Kerberos, Kpasswd records under _msdcs that domain clients use to find this DC by service rather than by name. Without this step, clients keep finding the DC at the old IP via stale SRV records until those records age out.
dcdiag /fixRuns the directory diagnostic tests and repairs any dynamic-DNS registration issues it finds along the way. Read the output carefully — a clean run is “passed test” for every category.
Confirm the records landed by querying the new DNS server directly:
# A record for the DC
Resolve-DnsName -Server newdns.infotechninja.local -Name dc01.infotechninja.local -Type A

# LDAP SRV records for the domain
Resolve-DnsName -Server newdns.infotechninja.local -Type SRV -Name _ldap._tcp.dc._msdcs.infotechninja.local
Step 3 — Update Anything That Hard-Coded the Old IP
The change is replicated forest-wide; clients that resolve the DC by name pick up the new IP automatically. The clients that don’t are anything that stored the old IP literally:
- Printers — many corporate printers point at a specific DC IP for LDAP-based address books.
- NAS / SAN appliances — if AD-integrated, often configured with a fixed DC IP.
- Linux / Unix machines —
/etc/resolv.confentries, sssd configs. - Monitoring systems — Nagios / Zabbix / SCOM probes.
- Legacy applications — anything that LDAP-binds to a specific server rather than to the domain.
- DHCP scopes that hand out specific DNS server IPs — if the DC is also a DNS server, the scope option may need updating.
- Site-to-site VPN ACLs — if AD traffic is allowed by IP rather than by hostname.
Walk through the list you built during pre-flight (Step 3 of the pre-flight) and update each one to the new IP — or, better, to a DNS name so this is the last time you have to do it.
Verification
After the change, run:
# Confirm the DC resolves to the new IP
Resolve-DnsName dc01.infotechninja.local -Type A

# Confirm replication is still happy
repadmin /replsummary

# DC health snapshot
dcdiag /v
If anything in dcdiag fails, the most likely culprits are: stale DNS records the registration cmdlets did not catch, DNS server pointing at the old IP and unable to find itself, or a downstream peer DC still trying to replicate from the old IP. The fixes are in that order: re-run nltest /dsregdns, fix the local DNS pointer, and check repadmin /showrepl on every peer.
For a richer health snapshot, run Get-ADHealth.ps1 — it reports the IP, FSMO status, and dcdiag results in one HTML page that is easy to compare against the pre-change baseline.
The PowerShell-Only Way (No GUI)
If you prefer to script the whole thing — useful when you have to change IP on multiple DCs or when the GUI is unavailable:
# Inspect current
Get-NetIPInterface | Where-Object AddressFamily -eq IPv4
Get-NetIPAddress  -AddressFamily IPv4 -InterfaceAlias 'Ethernet'
Get-DnsClientServerAddress -InterfaceAlias 'Ethernet'

# Remove the old IP cleanly
Remove-NetIPAddress -InterfaceAlias 'Ethernet' -IPAddress 192.168.1.48 -Confirm:$false

# Set the new IP + gateway
New-NetIPAddress -InterfaceAlias 'Ethernet' `
    -IPAddress 192.168.10.10 -PrefixLength 24 `
    -DefaultGateway 192.168.10.1

# Set new DNS servers (peer DC + loopback)
Set-DnsClientServerAddress -InterfaceAlias 'Ethernet' `
    -ServerAddresses 192.168.10.20, 127.0.0.1

# Re-register with DNS
ipconfig /flushdns
ipconfig /registerdns
nltest /dsregdns
dcdiag /fix
The cmdlets do exactly what the GUI does — same WMI providers underneath. Run the whole block in one paste from a console session and the change is atomic.
Common Pitfalls
- Did it over RDP. Lost the session, can’t reach the box, have to drive to the data centre or fire up the hypervisor console anyway. Always use console access.
- Pointed Preferred DNS at the DC’s own old IP. The cmdlet succeeds, but DNS resolution from the DC is now broken (it cannot find itself). Use a peer DC’s IP as Preferred, loopback as Alternate.
- Skipped
nltest /dsregdns. The A record updates withipconfig /registerdns, but the SRV records under_msdcsonly refresh on the DC’s next netlogon registration cycle. Clients get the right A record but still find the wrong DC for service-based lookups for hours. Runnltest /dsregdnsto force the SRV refresh. - Forgot peer DCs that replicate from this one. Other DCs in the forest cache replication-source IPs in their respective topology objects. After your change, run
repadmin /showreplon each peer; if they show the old IP, runrepadmin /kccto force the KCC to rebuild the topology. - Didn’t update DHCP scope options. If the DC also runs DNS for the network and DHCP hands out a specific DNS IP via Scope Option 6, that option still points at the old IP. Update DHCP scope options after the change.
- The DC is also the FSMO holder. Doesn’t matter for IP change — FSMO roles are tied to the server object, not the IP. But if you have any chance of cabling this up wrong and the DC needs to be force-demoted, the FSMO seizure is harder. Transfer FSMO away first if the change is risky.
- Stale records persist for hours. The default scavenging interval on AD-integrated DNS zones is 7 days. Old records do not delete instantly. If something keeps finding the old IP, scavenge that zone manually: right-click the zone in DNS Manager > Scavenge stale resource records.
Conclusion
Three GUI clicks to change the IP, four CLI commands to re-register with DNS, and one downstream-consumer audit afterwards — that is the whole procedure. The work that catches people out is rarely the IP change itself; it is the cleanup of every system that hard-coded the old address.
Pair this with the Get-ADHealth.ps1 health snapshot before and after so you can compare the “known good” baseline against the post-change state. If anything regresses, you see it immediately and have a window to roll back the change before users notice.