SmartScreen is the cloud-backed reputation check Windows runs against URLs and downloaded files: clicked links route through Microsoft’s phishing-and-malware database, downloaded executables get a hash lookup against known-good and known-bad sets, and unrecognised files trigger a warning prompt before they execute. By default it’s a per-machine setting, switchable in Windows Security by any local user. That makes it useless as a security baseline — the protection only works if everyone leaves it on. Group Policy fixes that: enable the SmartScreen setting in a GPO, link the GPO to the OU or domain that contains your managed machines, and the toggle becomes admin-controlled and greyed-out for the user. This post walks the lab build — AD DS forest, domain join, GPO with SmartScreen enabled, verify on the joined client — with the Notion source’s Azure-VM-based steps adapted to any Windows Server lab.
What you need before starting
- A Windows Server box that’ll be the domain controller (the lab uses one named
dc) - A separate Windows client/server to be the domain-joined target (the lab uses one named
vm) - Local administrator rights on both
- Network reachability between the two boxes (the lab uses 10.0.0.0/24 with the DC at 10.0.0.4)
- Azure VMs work; so do Hyper-V VMs, VMware VMs, or bare-metal hardware — the platform is irrelevant once both boxes can talk to each other
Why GPO-enforced SmartScreen matters
Out of the box, SmartScreen is a security feature most users leave on out of inertia. The problem cases:
- A user disables it because of a benign-but-flagged download, then forgets to re-enable.
- A new build of Windows ships with SmartScreen tightened, and a user who’s annoyed by a new prompt turns it off entirely.
- An attacker who lands on a workstation with admin rights disables SmartScreen as part of pre-attack reconnaissance to remove a defensive layer.
- An audit can’t prove that SmartScreen is on across the fleet because the setting is per-machine and per-user.
The GPO version replaces all of that with one centrally-managed setting. The GPO turns it on; the user can’t turn it off; auditors point at the GPO and the audit clears.
Phase 1 — Stand up the AD DS environment
The Notion source uses an Azure-VM lab, but the steps map cleanly to any Windows Server pair on a routable network.
Confirm the DC’s IP is static
Domain controllers cannot run on DHCP-assigned addresses — the SRV records point at the DC’s IP, and a changing IP breaks every client’s ability to resolve the domain.
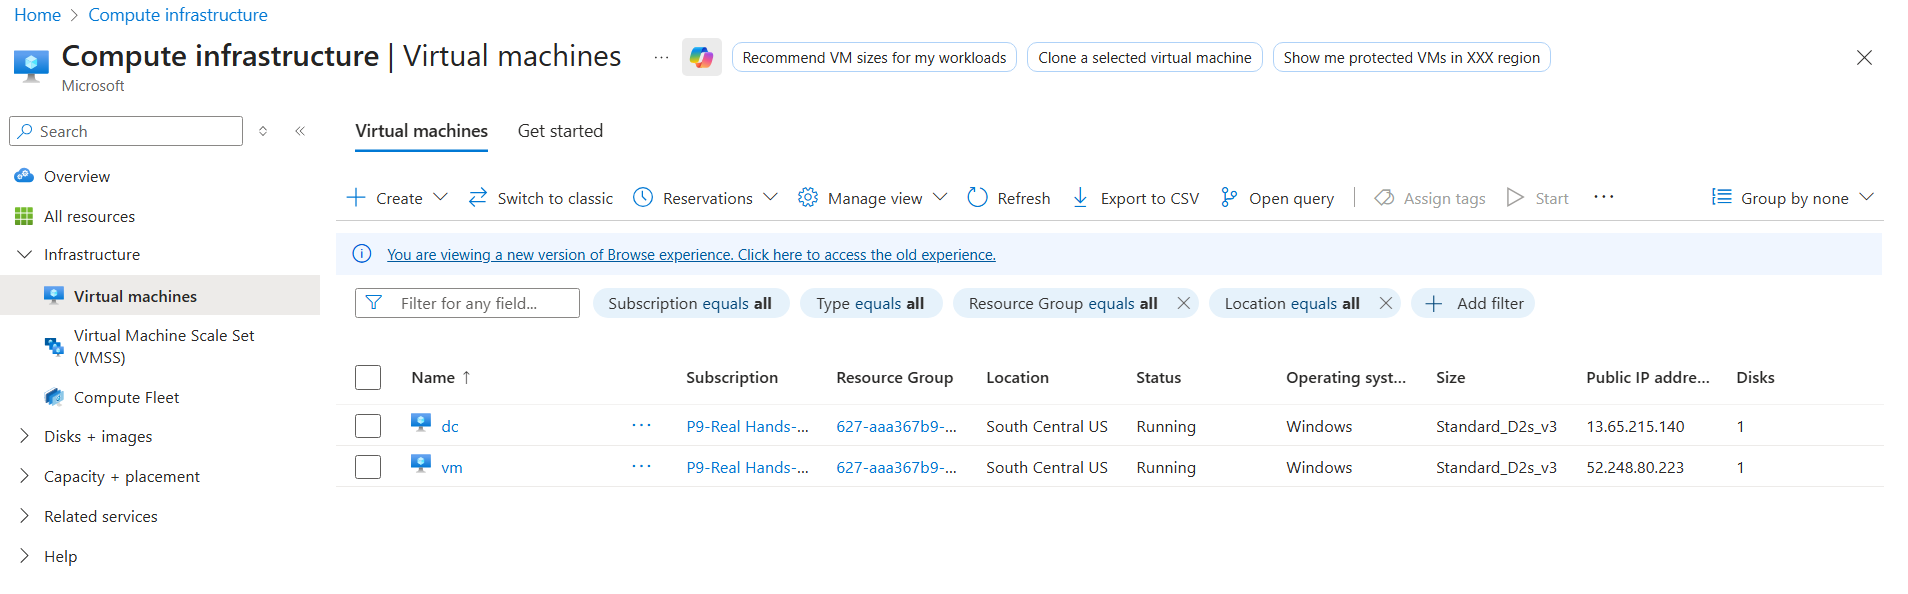
dc VM. The lab uses Azure but the same flow works on any Hyper-V or bare-metal host that can run Windows Server with the AD DS role.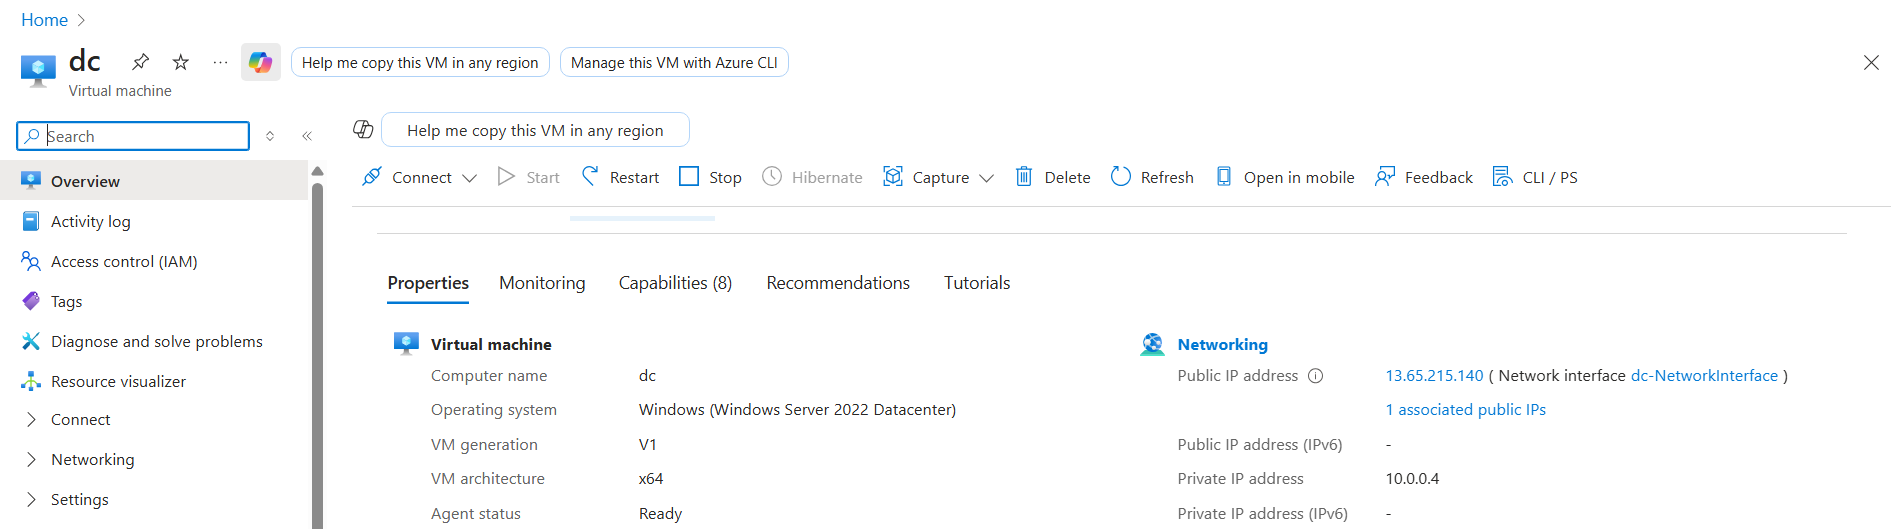
dc-NetworkInterface link in Networking. We need to confirm the DC’s private IP is static before promoting; a DHCP-assigned address will break domain joins on reboot.- Open the DC’s network configuration (in Azure: portal → the VM → Networking → the NetworkInterface → IP configurations; on Hyper-V/bare metal:
ncpa.cpl→ the active adapter → Properties → IPv4). - Confirm the IP is set to a fixed value (the lab uses
10.0.0.4) with the Static label visible. - If it’s DHCP, switch to Static and assign an address from the same subnet but outside the DHCP range.
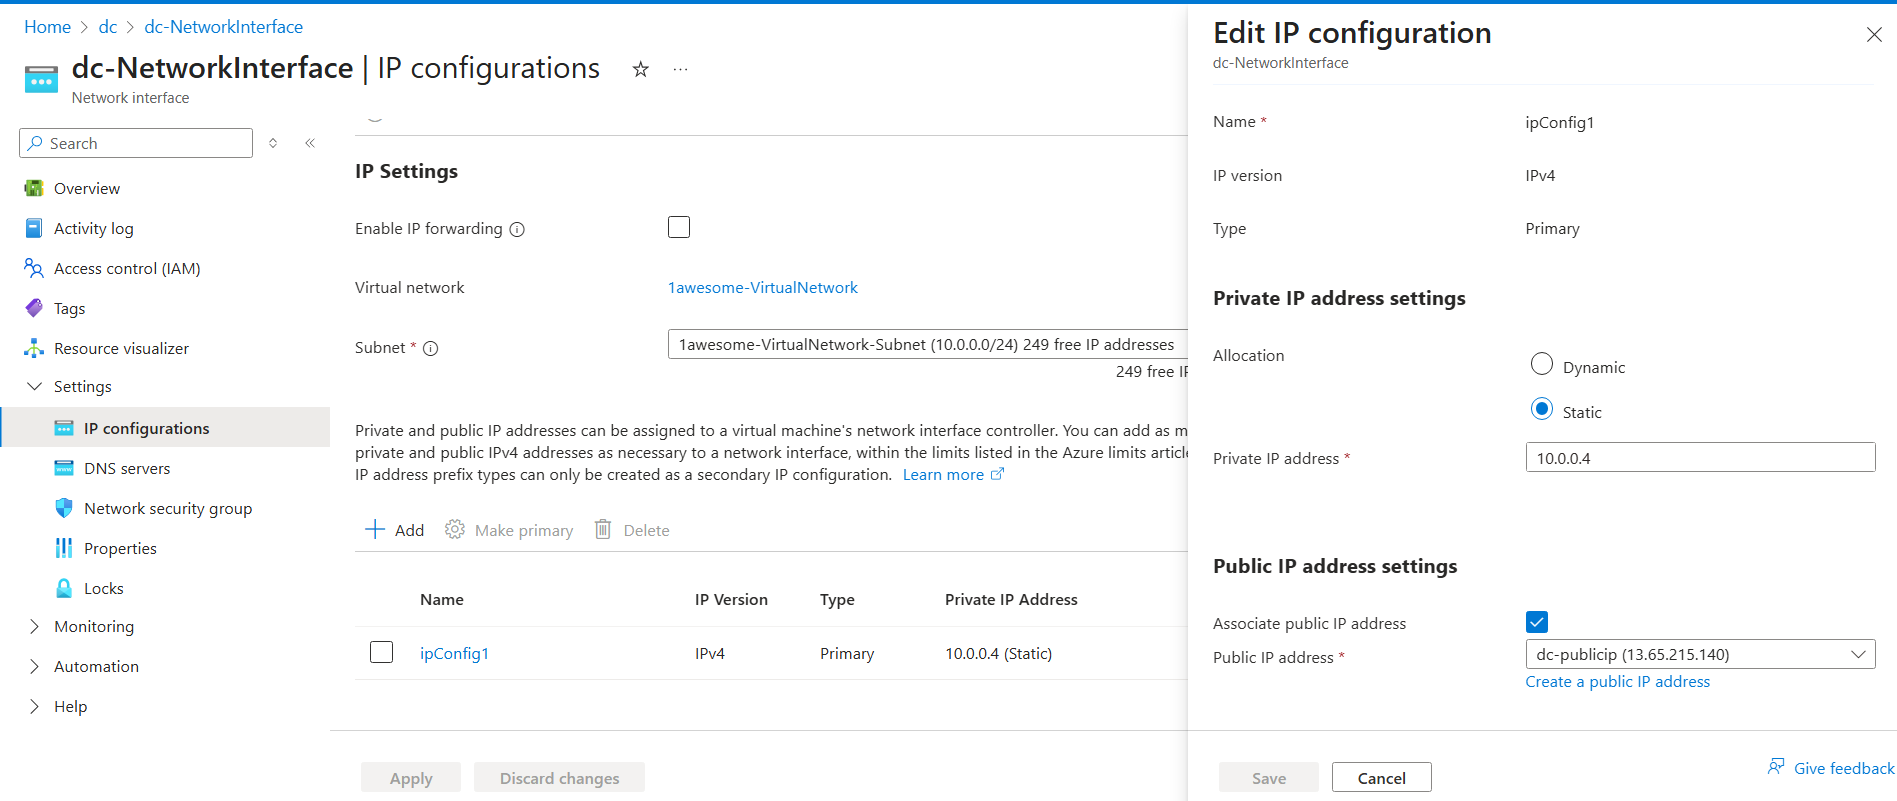
10.0.0.4. The (Static) suffix is the visual signal that DHCP isn’t in play.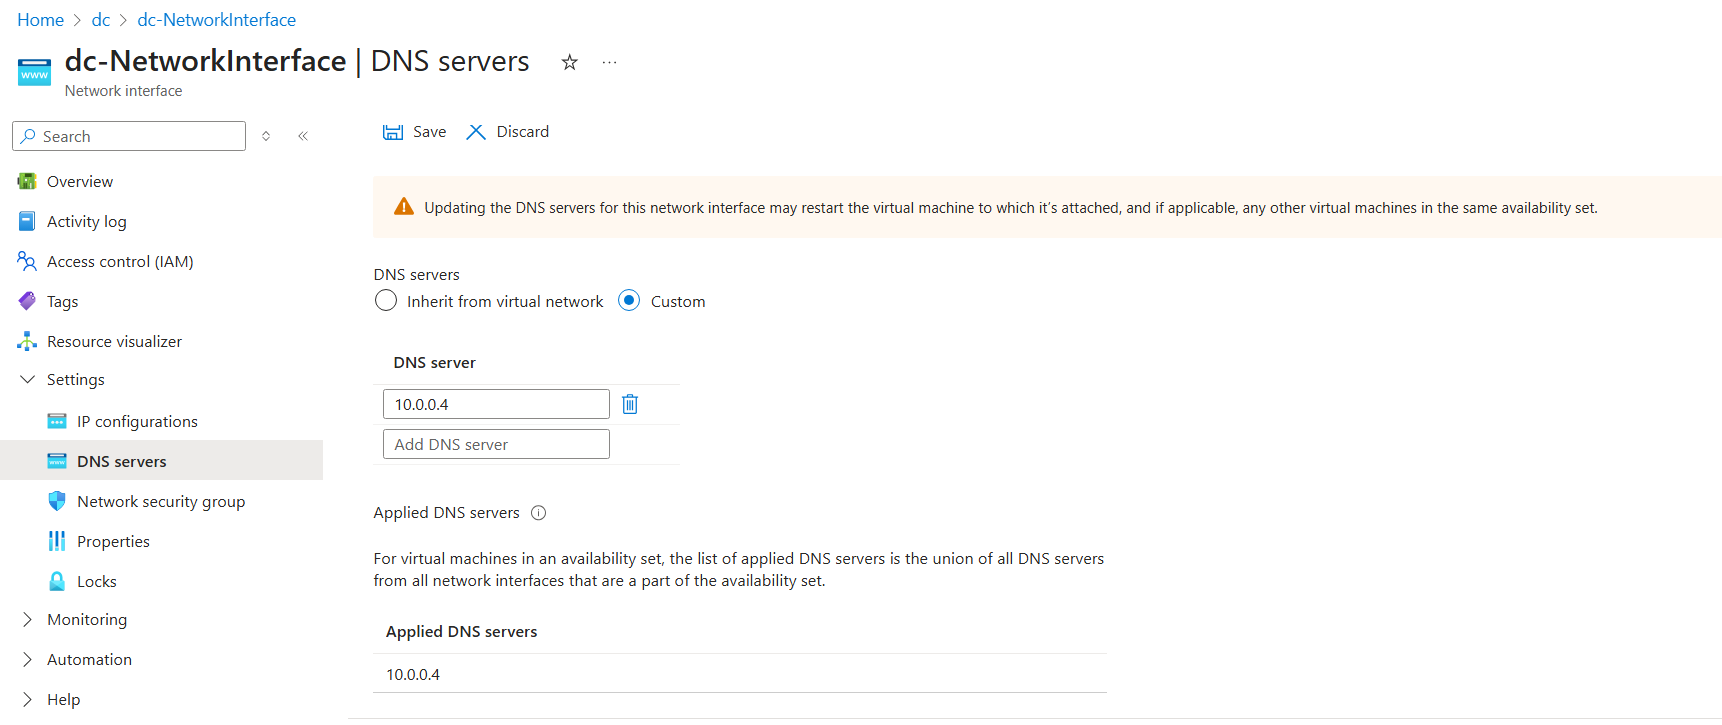
Install AD DS on the DC and promote the forest
RDP into the dc machine. Server Manager opens automatically. From an elevated PowerShell ISE, run the AD DS install + forest-promotion script:
# Install AD DS and configure forest
$ProgressPreference = 'SilentlyContinue'
$WarningPreference = 'SilentlyContinue'
Install-WindowsFeature 'AD-Domain-Services' -IncludeManagementTools | Out-Null
$pw = ConvertTo-SecureString 'p@55w0rd' -AsPlainText -Force
Install-ADDSForest -DomainName 'awesome.com' -SafeModeAdministratorPassword $pw -DomainNetBIOSName 'CORP' -InstallDns -Force -NoRebootOnCompletion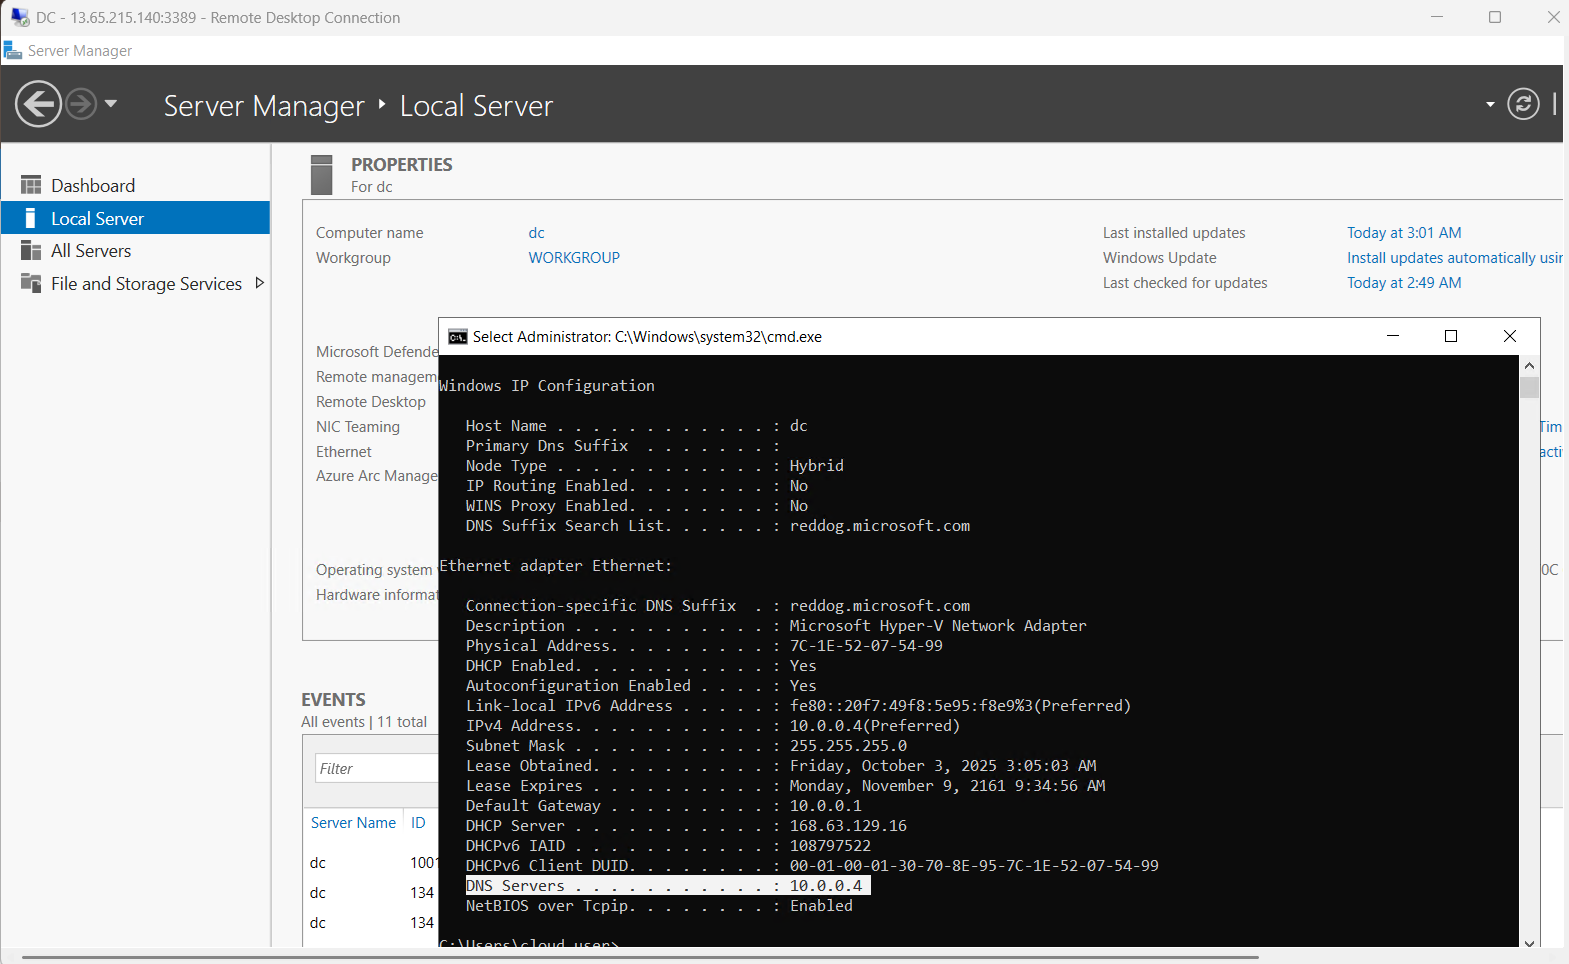
dc. Leave it open — the AD DS install + management tools surface here.The script installs the role + management tools, sets the DSRM password, and promotes the box as the first DC in a new forest named awesome.com with NetBIOS name CORP. The promotion takes 10–15 minutes; reboot the VM after the script completes (Azure portal → Restart, or Restart-Computer -Force from PowerShell).
For production deployments, use stronger passwords than p@55w0rd — the lab value is convenient but not safe outside a throwaway environment.
Create a domain admin account
Reconnect to dc after reboot. Open PowerShell ISE again and run:
# Create Domain Admin
$pw = ConvertTo-SecureString 'p@55w0rd' -AsPlainText -Force
New-ADUser -Name 'awesomeadmin' -Description 'lab domain admin' -Enabled $true -AccountPassword $pw
Add-ADGroupMember -Identity 'Domain Admins' -Members awesomeadmin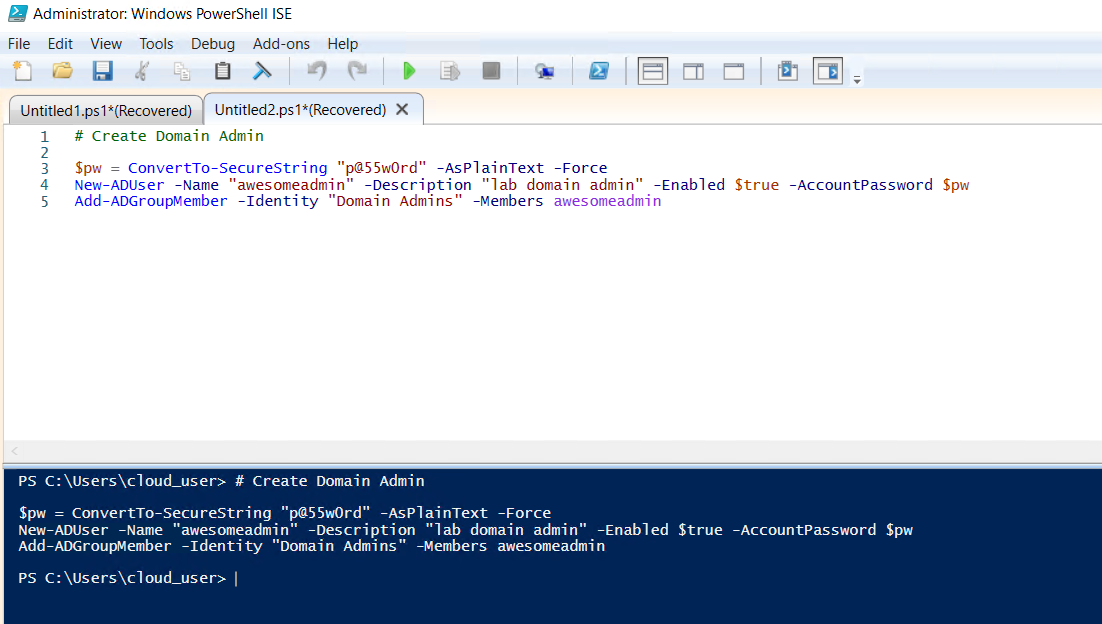
dc with the domainadmin script ready to create awesomeadmin and add to Domain Admins.This creates awesomeadmin as a Domain Admin. The lab uses this account for the domain join + GPO management. In production, separate the day-to-day admin account from the break-glass DA — this lab simplifies for clarity.
Set DNS on the future domain member
The vm machine has to resolve awesome.com via the DC’s DNS service. Set its primary DNS to the DC’s private IP:
- On
vm’s NIC properties (or in Azure: VM → Networking → the NetworkInterface → DNS servers), pick Custom and set the DNS server to10.0.0.4.
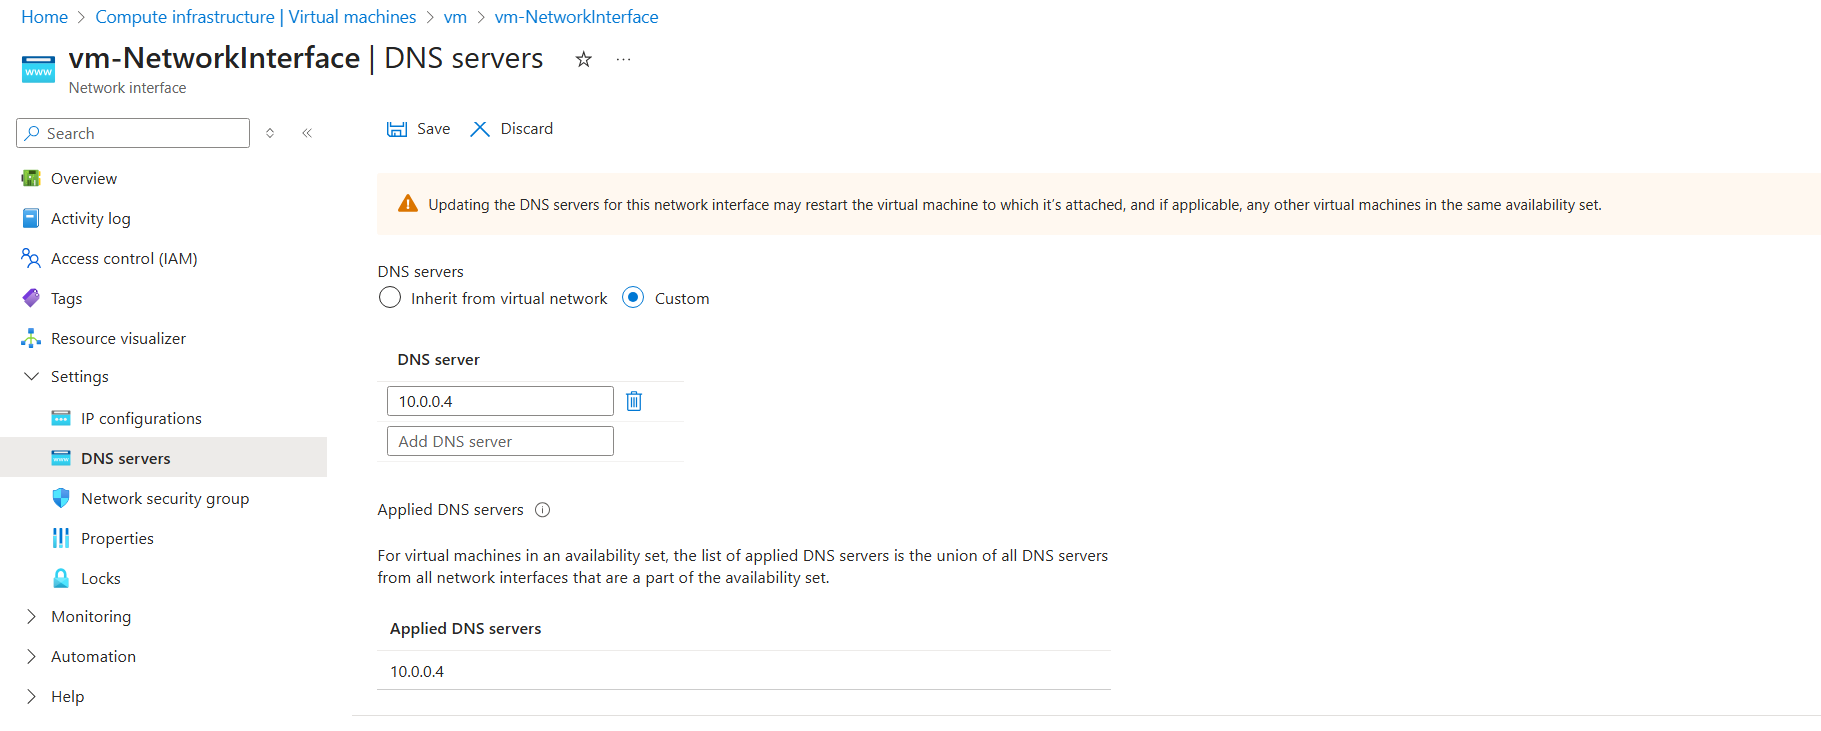
vm, set DNS to the DC’s private IP (10.0.0.4). Domain join requires that DNS resolves the _ldap._tcp.<domain> SRV records, and only the DC’s DNS knows them.Join the vm to the domain
RDP into vm. PowerShell ISE again:
# Join computer awesome.com domain
$pw = 'p@55w0rd'
$joinCred = New-Object pscredential -ArgumentList ([pscustomobject]@{
    UserName = 'CORP\awesomeadmin'
    Password = (ConvertTo-SecureString -String $pw -AsPlainText -Force)[0]
})
Add-Computer -Domain 'awesome.com' -Credential $joinCred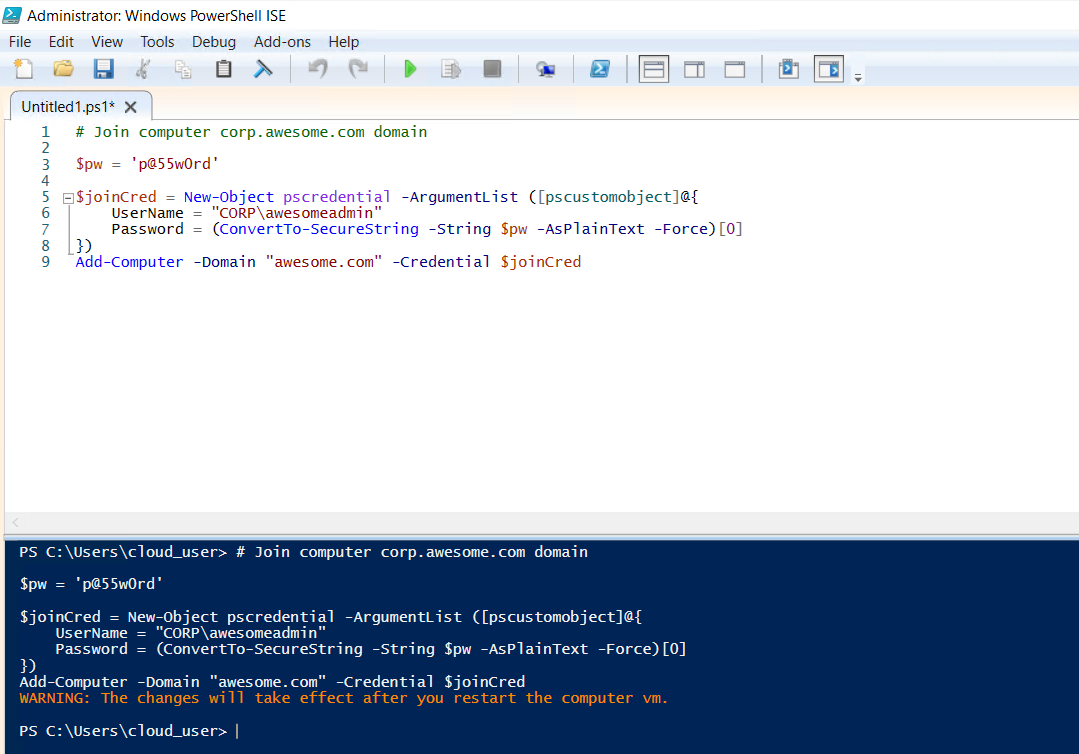
vm. The script wraps Add-Computer with credentials for the lab admin account; on real deployments this is interactive instead of script-driven.Reboot the vm. After it comes back, Server Manager → Local Server should show awesome.com in the Domain field.
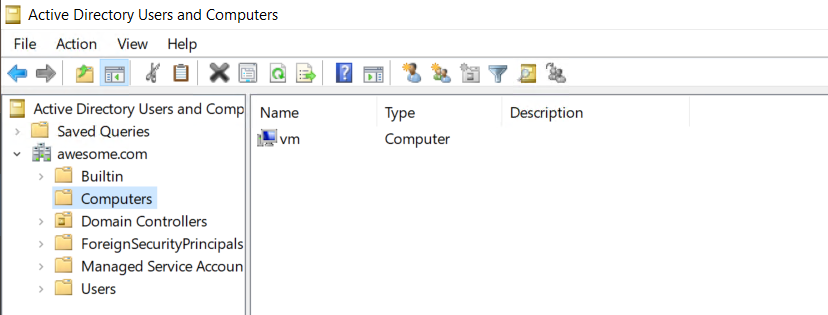
vm after reboot. Domain field reads awesome.com — join succeeded.Phase 2 — Configure the SmartScreen GPO
Back on dc, open Server Manager → Tools → Group Policy Management.
- In the GPMC tree, expand Forest: awesome.com → Domains → awesome.com.
- Right-click the
awesome.comdomain → Create a GPO in this domain, and Link it here… - Name the GPO
smartscreen. Click OK. - Right-click the new
smartscreenGPO under the domain → Edit. Group Policy Management Editor opens. - Navigate to Computer Configuration → Policies → Administrative Templates → Windows Components → File Explorer.
- In the right pane, double-click Configure Windows Defender SmartScreen.
- Set the radio to Enabled.
- Click Apply, OK.
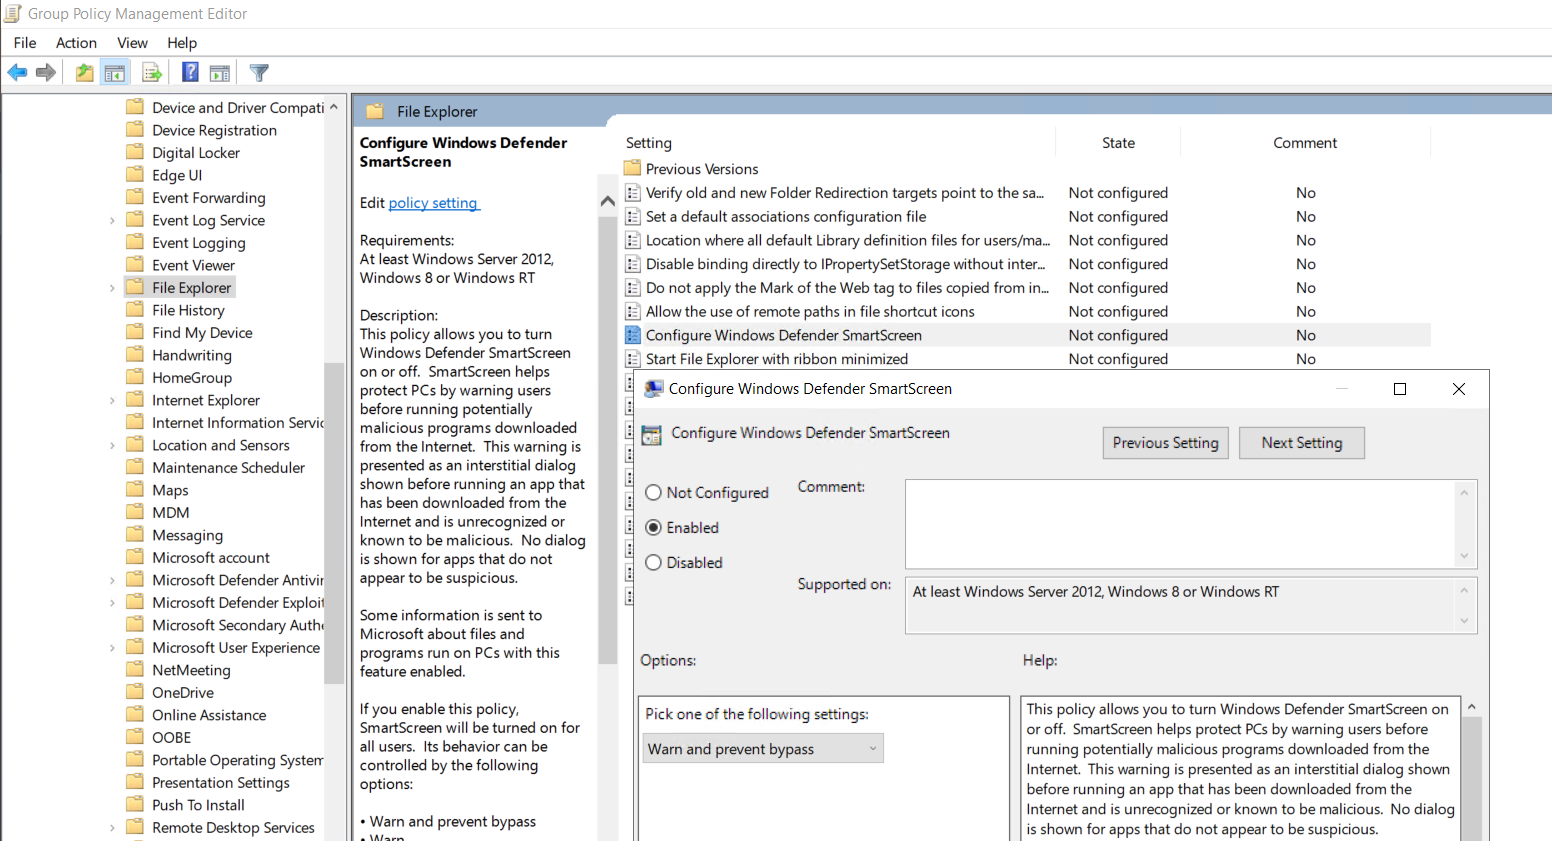
The GPO is now configured. Linked at the domain root, it applies to every domain-joined machine in awesome.com — including the vm we just joined.
Why this specific path
SmartScreen settings live under File Explorer in the Administrative Templates tree (not under Microsoft Defender, which is the more obvious-looking node). The reason is historical — SmartScreen originated as a download-protection feature in Internet Explorer / File Explorer, then expanded to Edge and the OS. The setting’s path stayed under File Explorer for backward compatibility. The newer Edge-specific SmartScreen settings live under Administrative Templates → Microsoft Edge; you may want to enable both depending on your browser footprint.
Phase 3 — Verify the policy applied
RDP into vm. Open Command Prompt and force a Group Policy refresh:
gpupdate /forceWait for the refresh to complete. Then open Windows Security from the Start menu → App & browser control. Under Reputation-based protection, click Reputation-based protection settings.
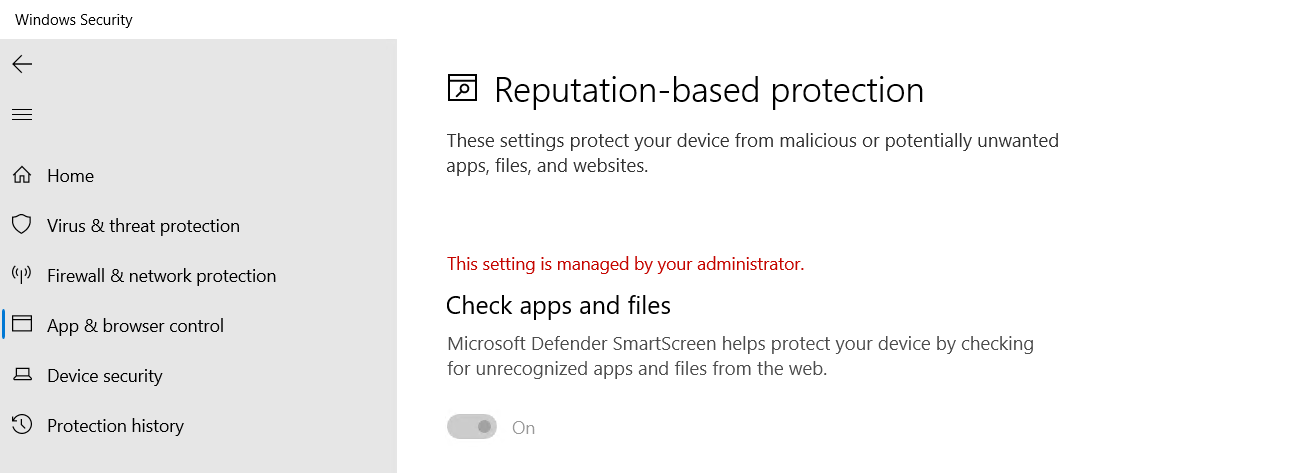
vm after gpupdate /force — the Check apps and files toggle is On AND greyed out, with the “managed by your administrator” banner. Users on this VM can no longer turn the protection off; the GPO enforces it.Two things should be visible:
- The Check apps and files toggle is set to On.
- The toggle is greyed out (cannot be modified by the user). A “This setting is managed by your administrator” banner appears at the top of the section.
That’s the GPO doing its job. The setting is enforced from the domain controller; the user has no path to disable it locally.
What the policy actually controls
The GPO setting maps to the registry value HKLM\Software\Policies\Microsoft\Windows\System!EnableSmartScreen. The values:
- Enabled (Block) — SmartScreen is on; unrecognised downloads are blocked entirely (no override prompt).
- Enabled (Warn) — SmartScreen is on; unrecognised downloads warn the user with a Run-anyway option.
- Disabled — SmartScreen is off; downloads aren’t checked.
The lab uses Enabled (default action: Warn). For tighter security, switch to Block — useful in environments where the cost of a false positive (an unfamiliar but legitimate file blocked) is acceptable. Most general-purpose environments stick with Warn so users can override their way past benign prompts.
Things that bite people in production
SmartScreen requires internet access to do reputation lookups
The whole point of the feature is that it phones Microsoft’s reputation service for every URL/file check. On air-gapped networks or on hosts without internet access, SmartScreen still loads but every check times out. Net effect: every legitimate download triggers a warning, every web visit feels sluggish. Either don’t enable on air-gapped machines or accept the latency cost.
Edge has its own SmartScreen settings, separately
The File Explorer GPO setting controls OS-level SmartScreen for downloads and shell launches. Edge has its own equivalent under Administrative Templates → Microsoft Edge → SmartScreen. Configure both to cover the full surface.
Linking at the domain root is broad — consider OU-scoping
The lab links at the domain root for simplicity. In production, link to a specific OU (e.g., Workstations or Servers\Web) so test machines, jump boxes, or specialised servers can be excluded without touching the GPO content. Inheritance can also be blocked at the OU level if a specific OU needs the protection off.
Enabling SmartScreen Block on developer machines breaks builds
The Block mode flags any unsigned executable as untrusted, including the .exe outputs of internal builds. Developers running cmake or MSBuild against unsigned project outputs will see every build artefact blocked. Either keep developer OUs on Warn mode (or out of the GPO entirely), or get the build outputs signed.
The setting takes effect on next gpupdate, not at policy save time
Saving the GPO doesn’t push the change to clients. Clients refresh on their own schedule (90 minutes by default + a 30-minute random offset for clients, 5 minutes for DCs). Force the refresh with gpupdate /force on each client for immediate effect, or wait for the next scheduled cycle.
Audit the actual state, not just the GPO link
The GPO being linked doesn’t prove every client has it applied — some clients might be offline during the refresh window, some might have NTFS permission problems on SYSVOL, some might fail GPO download for unrelated reasons. Periodically check actual state via Get-MpComputerStatus or by reading the registry value across the fleet. Don’t trust the GPO link as a substitute for verified application.
Where this fits
SmartScreen-via-GPO is one piece of a broader hardened-baseline pattern. For other GPO-driven configurations — AppLocker, Windows Firewall, drive maps, audit policies — see the Group Policy pathway. For broader workstation hardening (UAC, BitLocker, attack-surface-reduction rules), see Windows 10/11 hardening. For the Group Policy Central Store that holds the ADMX files behind these settings, see create the Central Store and refresh with new ADMX packs.