The classic Active Directory admin tools — dsa.msc, dsac.exe, the AD PowerShell module — are powerful but they live on Windows. Anyone managing AD from a Mac, an iPad, or a thin-client kiosk has historically needed an RDP session to a jump server first. Windows Admin Center’s Active Directory extension changes that: a browser-based AD management surface that exposes OUs, users, and groups through the same WAC console you use for everything else. Anywhere you can run a modern browser, you can manage AD.
This walkthrough installs the AD extension in WAC, connects to a domain controller, and walks through the everyday operations: create an OU, create a user inside it, create a Domain Local group, add the user to the group, verify the membership. The extension is officially in preview, so don’t expect every advanced corner of AD to be there — OU delegation editing, fine-grained password policies, AD Sites and Services, all still need the classic tools. But for the day-to-day account management work helpdesk and tier-1 admins do, the extension covers it.
What you need before starting
- Windows Admin Center 2306 or newer (older builds don’t have the AD extension)
- A reachable Domain Controller already added to WAC as a managed server (covered in installing Windows Admin Center)
- Domain Admin credentials (or delegated AD admin rights via the Account Operators group, whatever fits your delegation model)
- Browser at
https://<wac-host>:6516— localhost if WAC is on your workstation, or the gateway server’s FQDN otherwise
Open Windows Admin Center
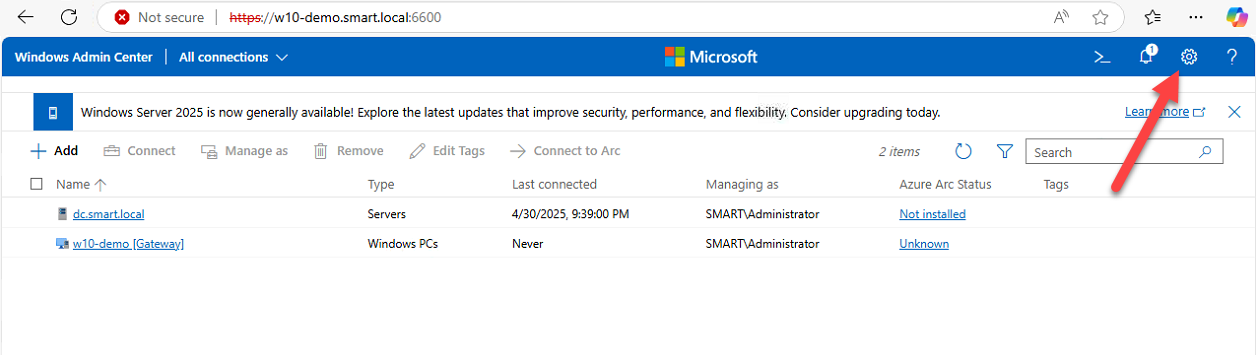
Open your browser and navigate to your WAC URL. For per-workstation installs that’s https://localhost:6516; for gateway installs it’s your gateway’s FQDN on the same port. Sign in with credentials that have rights both to use WAC and to manage AD on the target DC.
Step 1 — Install the Active Directory extension
WAC is modular. The base install gives you a core management surface; AD management comes through an extension you install once.
- Click the Settings gear icon in the top-right corner
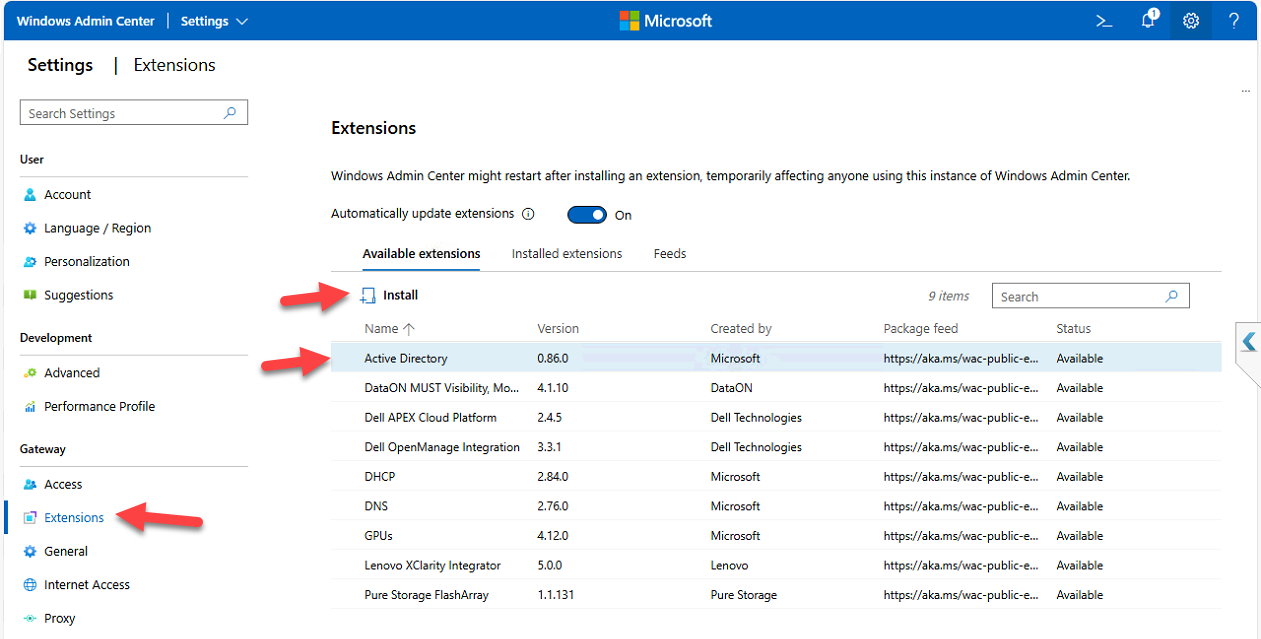
- Under Gateway in the left nav, click Extensions
- Switch to the Available Extensions tab
- Search for Active Directory
- Click the extension to see version, publisher, and description
- Click Install
- Accept any UAC prompt
- WAC auto-refreshes after install completes
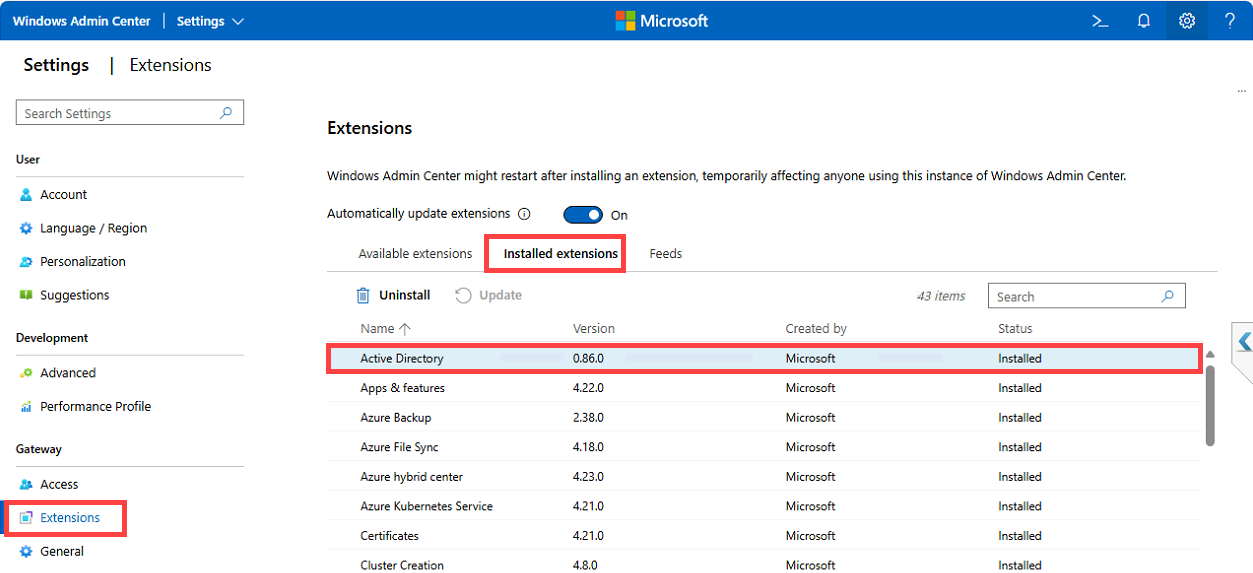
Step 2 — Verify the extension installed
Switch from Available Extensions to Installed Extensions. Confirm Active Directory appears with status Installed. If it isn’t there, the install probably failed silently — usually a UAC reject or a stale browser session; refresh the page and re-check.
Step 3 — Connect to the DC and find the AD tool
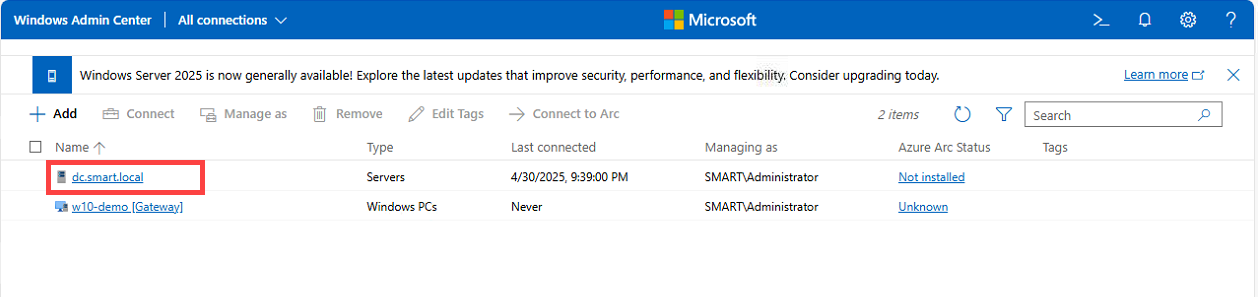
The AD tool only appears in the Tools list when you’re managing a Domain Controller. From the WAC main page, click your DC (e.g. DC.smart.local). After WAC connects, scroll the Tools pane in the left nav and click Active Directory. If you don’t see it, either the extension didn’t install (re-check Step 2) or this server isn’t a DC (try a different one).
What the AD extension actually exposes
Once inside the AD tool you get:
- A search bar for finding users, groups, OUs, and other objects fast
- A tree view of the AD structure for navigating by container
- A Create menu for new AD objects (Users, Groups, OUs)
- Per-object actions: edit, reset password, disable, delete, manage group membership
It’s a focused subset of dsa.msc — covers the daily ~80% of account management work, leaves the more arcane tasks to the classic tools.
Search and manage an existing user
Type Administrator in the search bar and pick the matching result. The user detail view appears with these actions available:
- Disable — deactivate the account without deleting it
- Reset Password — set a new password (with the option to require change at next logon)
- Remove — delete the user (the AD Recycle Bin still applies; recoverable per restore AD objects from the Recycle Bin)
- Edit Properties — SAM account name, full/display name, password options (must change at next logon, never expires, etc.), account expiration, group memberships
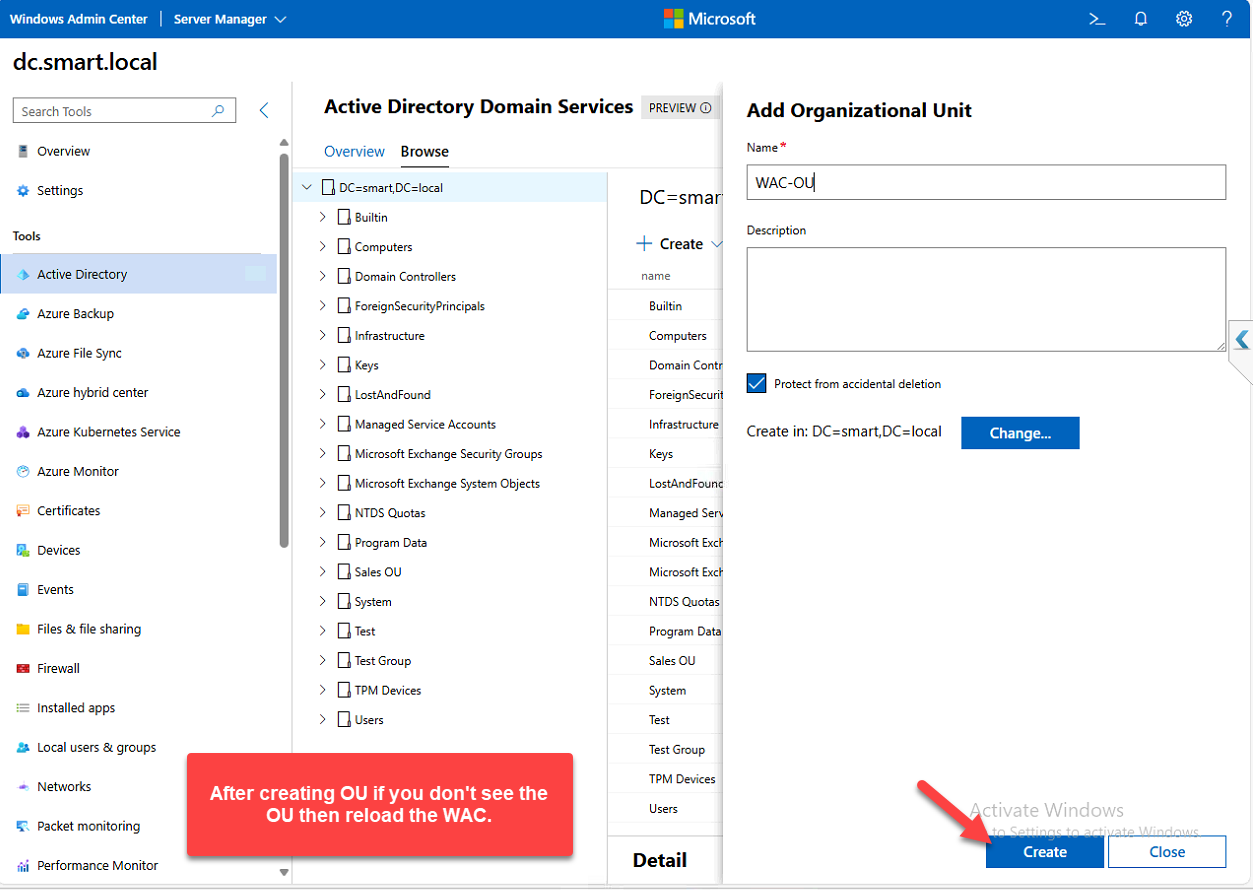
Step 4 — Create an Organizational Unit
OUs are how you organize AD objects for delegation, GPO scoping, and general sanity. The extension makes creating one trivial:
- Click Create > Organizational Unit
- Enter a name — WAC-OU for this walkthrough
- Leave other settings at default
- Click Create
Confirmation appears; the OU shows up in the tree view.

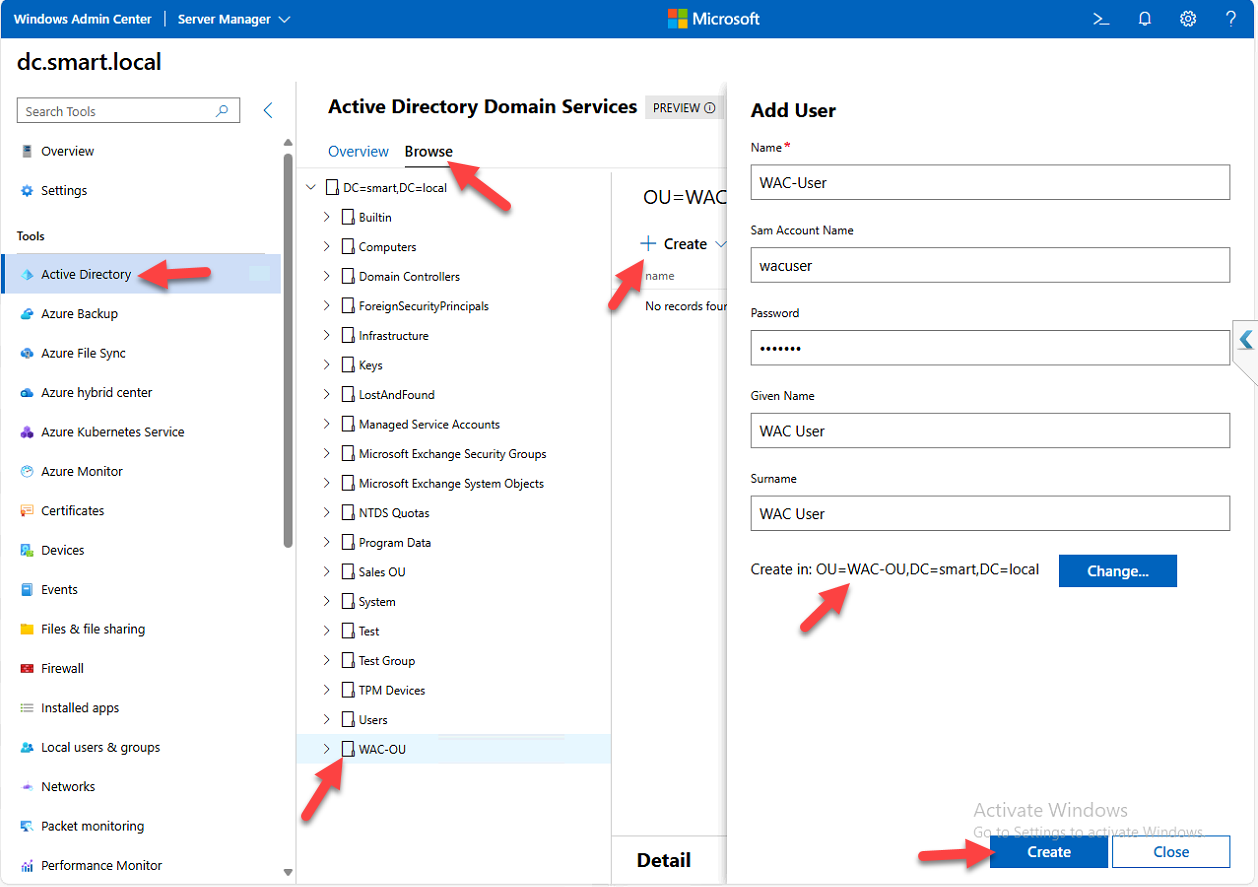
Step 5 — Create a user inside the OU
- Click Create > User
- Fill in:
- Full Name: WAC-User
- SAM Account Name:
wacuser - Password (and pick whether the user must change it at next logon, etc.)
- Given Name: WAC User
- Click Change next to the container field, pick WAC-OU
- Click Create
The user appears under WAC-OU in the tree.
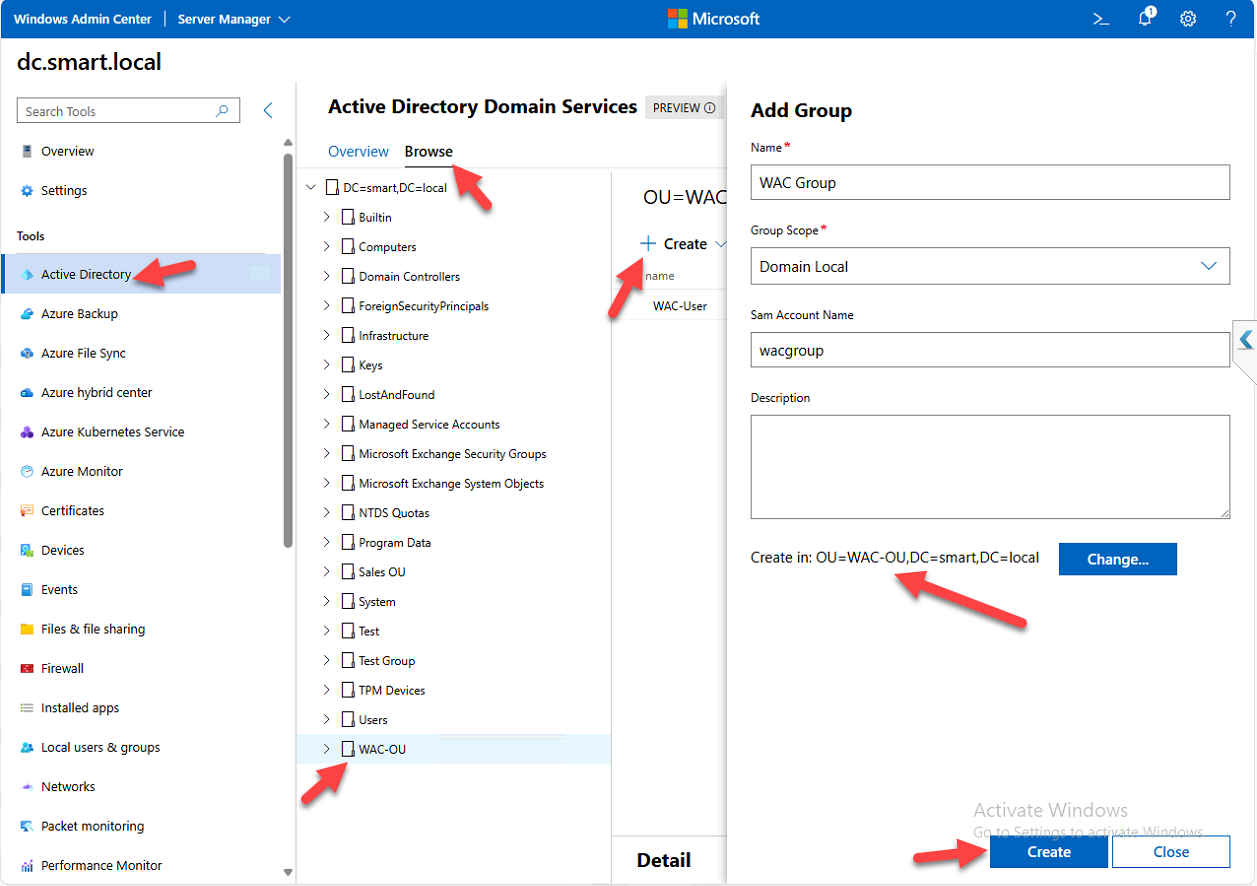
Step 6 — Create a Domain Local group
- Click Create > Group
- Fill in:
- Group Name
- SAM Account Name
- Group Scope: Domain Local (for permissions on local resources; use Global for cross-domain user grouping, Universal for forest-wide use)
- Click Change, pick WAC-OU as the container
- Click Create
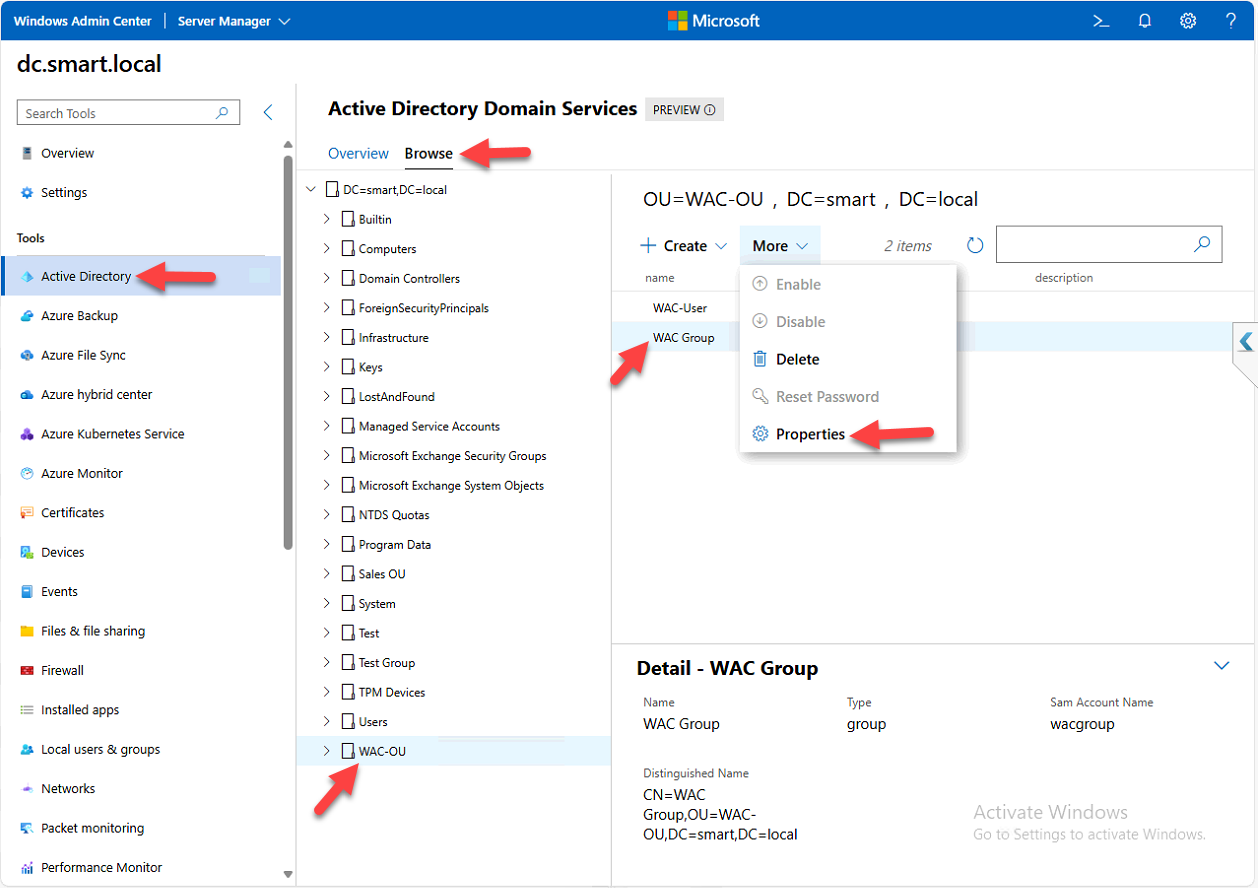
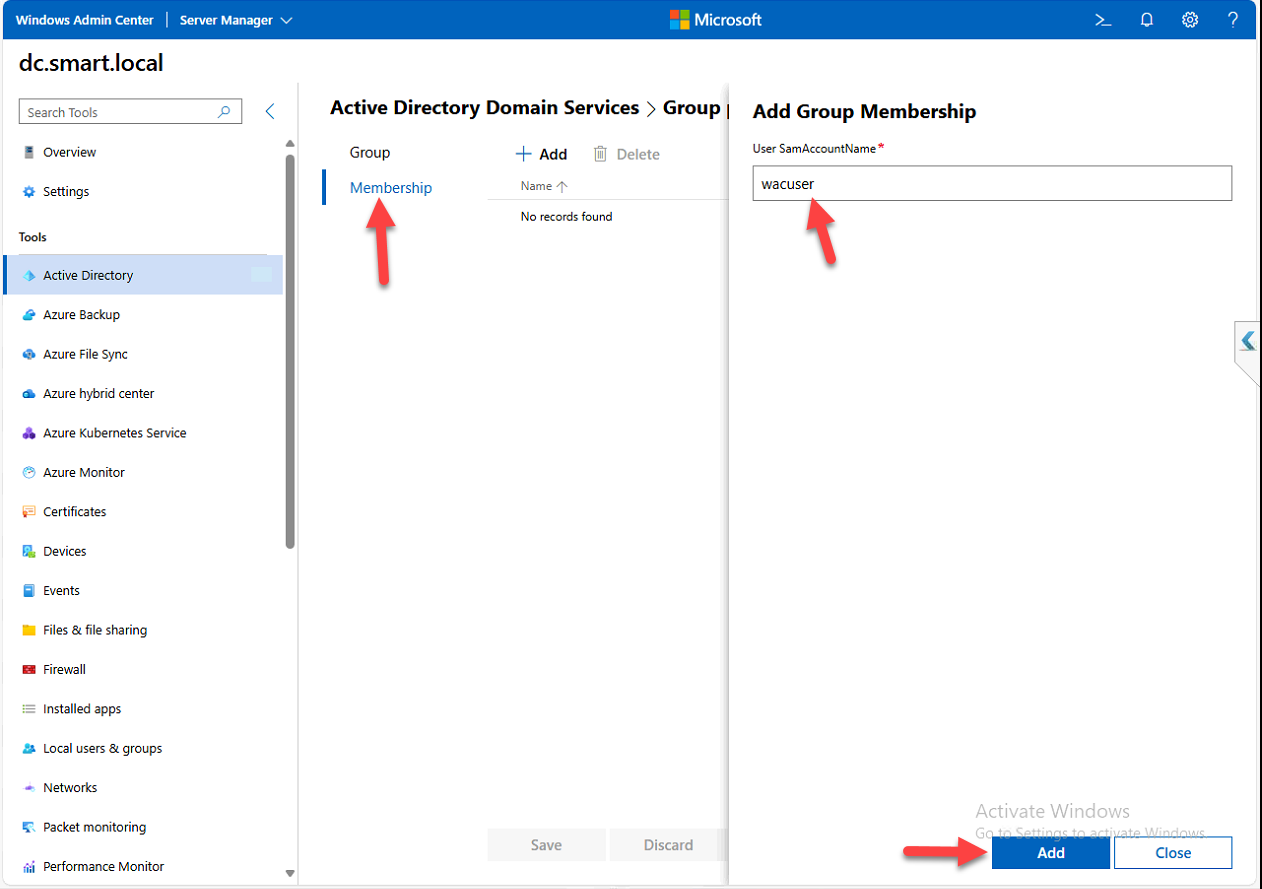
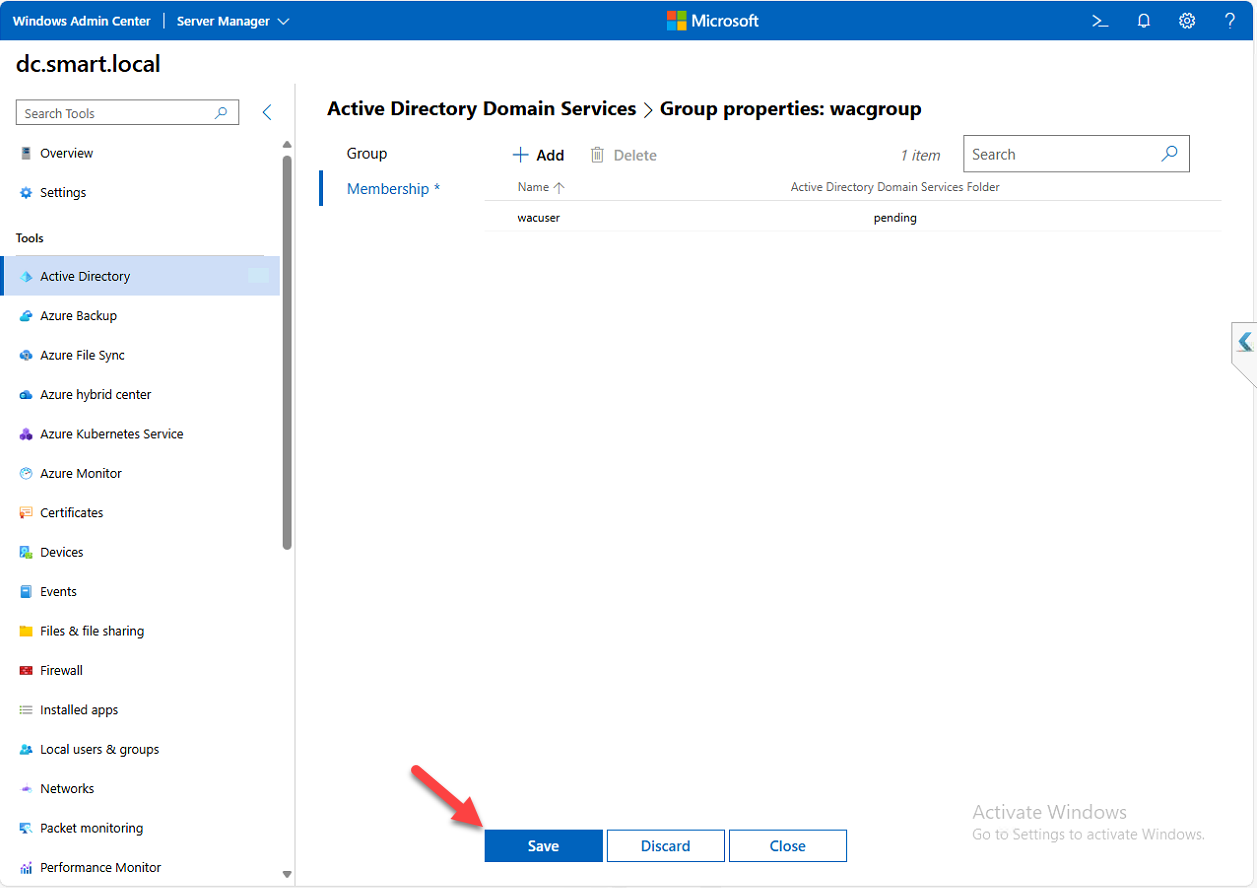
Step 7 — Add the user to the group
The classic AGDLP / AGUDLP membership pattern works the same way through the extension as it does in dsa.msc:
- In WAC-OU, click the group WAC-Group
- Click Properties > Membership tab
- Click Add
- Enter the SAM account name of the user:
wacuser - Click Add > Save
Step 8 — Verify membership from the user side
Group membership is bidirectional in AD — the user object also tracks which groups it belongs to. Verify by going back into the AD tool, finding WAC User, opening the Membership tab. WAC Group should be listed. The same tab lets you add or remove the user from other groups without going through each group’s membership tab.

Things that bite people in production
The extension is officially preview — check what it can’t do
The AD extension covers everyday user/group/OU management well. What it doesn’t cover (yet, possibly ever): OU delegation editing, advanced attribute editing (you still need ADSI Edit or the AD PowerShell module for those), AD Sites and Services management, fine-grained password policies, trust management, AD CS, and most schema operations. Don’t plan to retire dsa.msc entirely — treat the WAC extension as a complement for routine work, not a full replacement.
Audit the WAC user’s own access
WAC runs as the user signed in — if the user has Domain Admin, the AD extension lets them do anything. If you’re using WAC for delegated admin (helpdesk, tier-1), make sure the WAC account’s AD rights match the actual delegation model, or you’re effectively giving everyone full admin access through a friendlier UI.
WAC is a privileged target — treat it like one
The browser session holds the credentials needed to manage AD. A compromised WAC session is a compromised AD admin session. Use HTTPS only, replace the self-signed cert in production, enforce strong authentication on WAC sign-in (smart cards, MFA via Azure AD), and audit who connects to WAC and when.
Per-OU delegation still happens in dsa.msc
If you need to delegate “helpdesk can reset passwords for users in this OU only,” you still configure that delegation through the classic Active Directory Users and Computers MMC. The WAC AD extension doesn’t expose the delegation editor. Once the delegation is configured in classic tools, helpdesk can use their delegated rights from WAC — you just can’t configure the delegation itself there.
Where this fits
The AD extension is one of several WAC server-management surfaces. Companion pieces: installing Windows Admin Center for the WAC install itself, managing the DNS Server role through WAC, and enabling Remote Desktop using WAC. For deeper AD work that the extension doesn’t cover, see configuring AD Sites and Services, group-managed service accounts, and the broader Active Directory pathway.