The DNS Manager MMC console (dnsmgmt.msc) has been the way to manage Windows DNS for two decades. It works fine, but it’s Windows-only, requires a domain-joined client to do anything useful, and forces an RDP-or-management-workstation workflow for anyone working remotely. Windows Admin Center’s DNS extension moves all of that into the browser. Install once into your WAC instance, connect to any DNS-enabled server, manage zones and records from a tablet, a Mac, a thin client — anywhere a modern browser runs.
This walkthrough installs the DNS extension, connects to a DNS server, walks through the day-to-day operations: view existing zones, create a new forward lookup zone with the right defaults (AD-integrated, secure-only updates), add a Host (A) record, edit it, and (optionally) create a reverse lookup zone. The extension is preview-grade like the AD extension — it covers the routine 80%, leaves the more obscure DNS operations (forwarding configuration, root hints, scavenging schedule, advanced delegation) to the classic tools.
What you need before starting
- Windows Admin Center 2306 or newer (covered in installing Windows Admin Center on a domain-joined PC)
- A reachable Windows Server with the DNS Server role installed and added to WAC as a managed server
- The DNS PowerShell module on the target server (installed by default with the DNS role)
- DnsAdmins or equivalent rights on the target DNS server
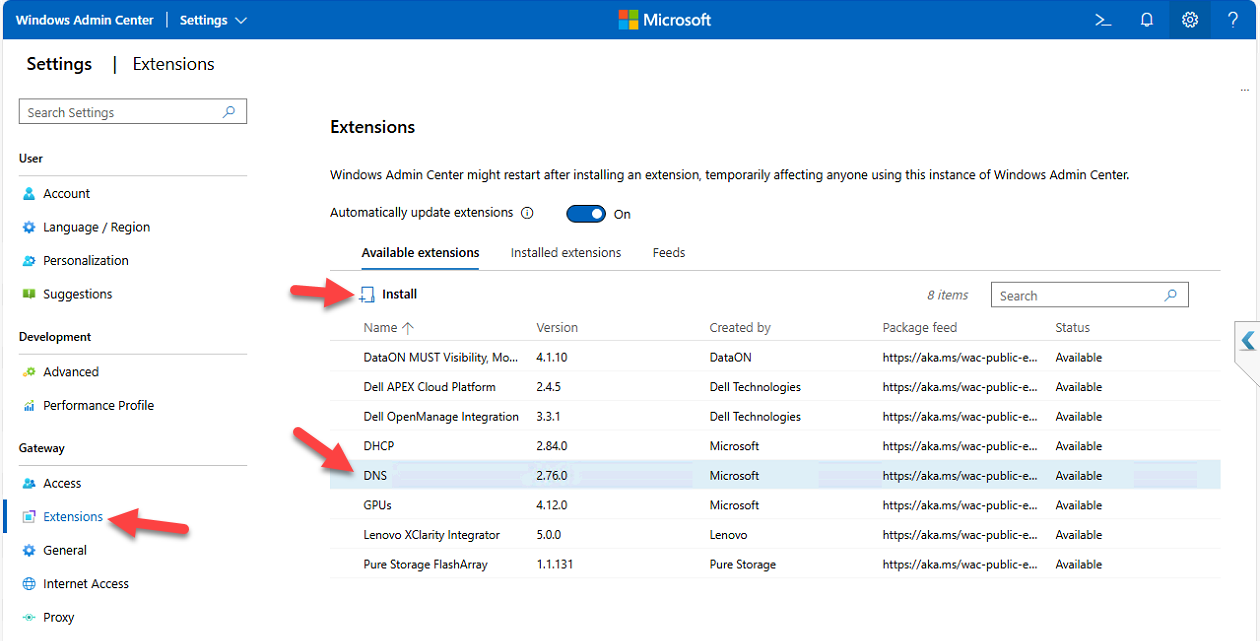
Step 1 — Install the DNS extension
- Open WAC in your browser (typically
https://localhost:6516for per-workstation installs, your gateway FQDN otherwise) - Click the Settings gear in the top-right
- Under Gateway, click Extensions
- Switch to the Available Extensions tab
- Search for DNS
- Click the entry to see version, publisher, and description
- Click Install
WAC installs the extension and auto-refreshes the page when it’s done.
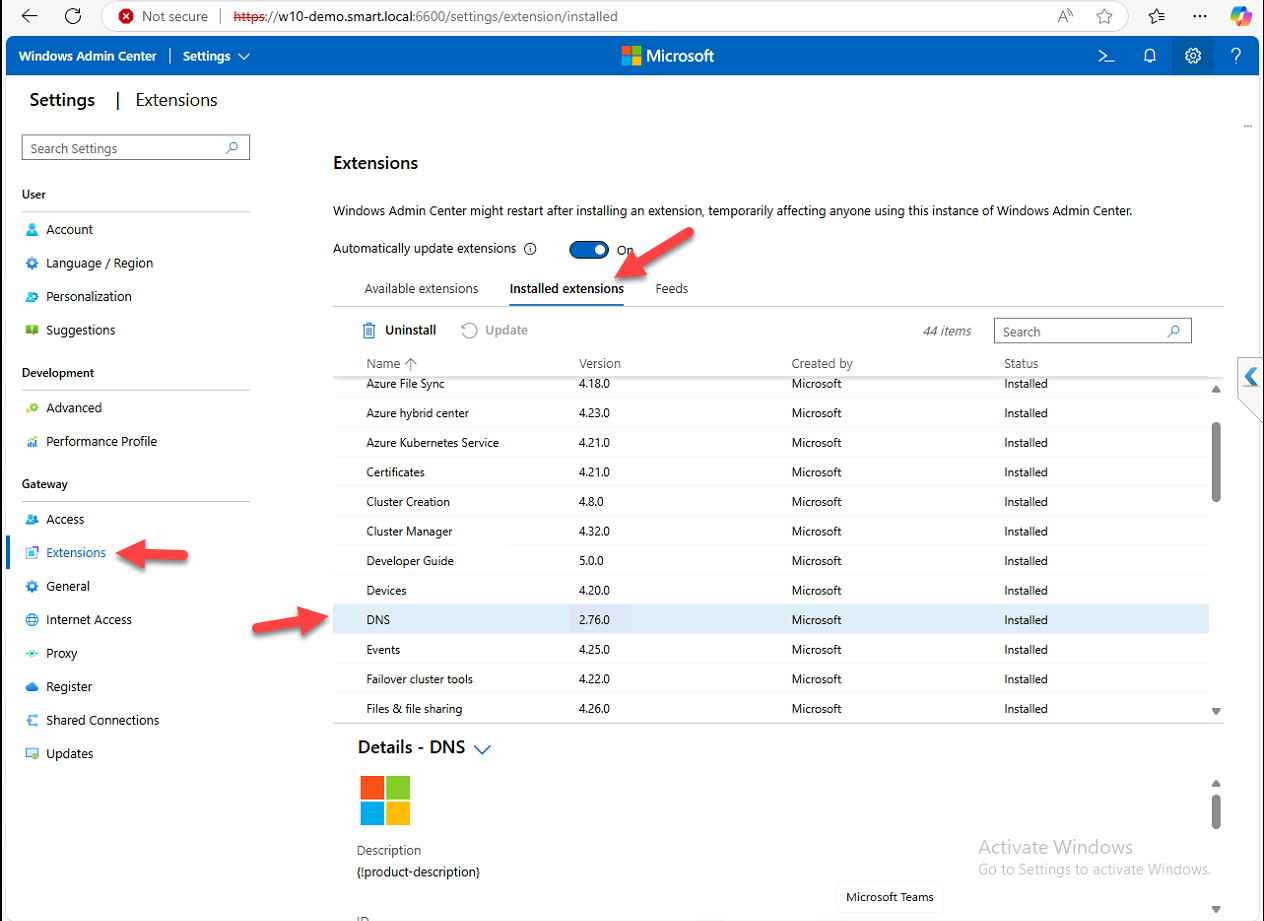
Step 2 — Verify the install
Switch from Available Extensions to Installed Extensions. Confirm DNS appears in the list. The Status column flags any updates available — install them when they appear.
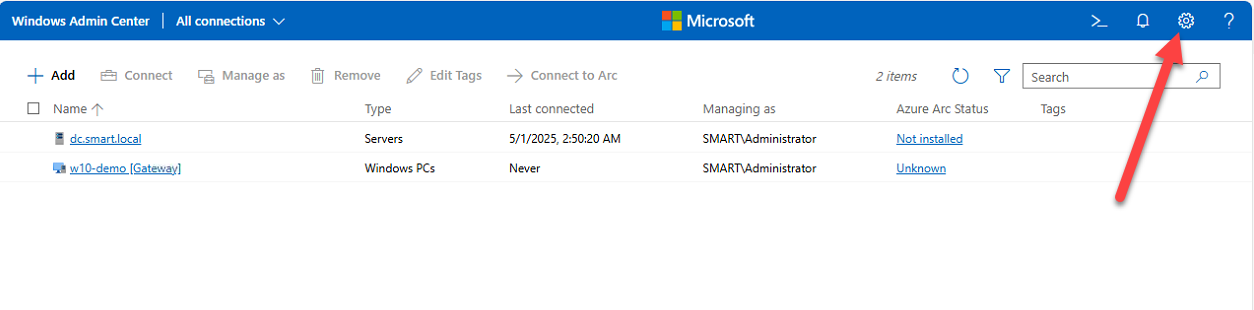
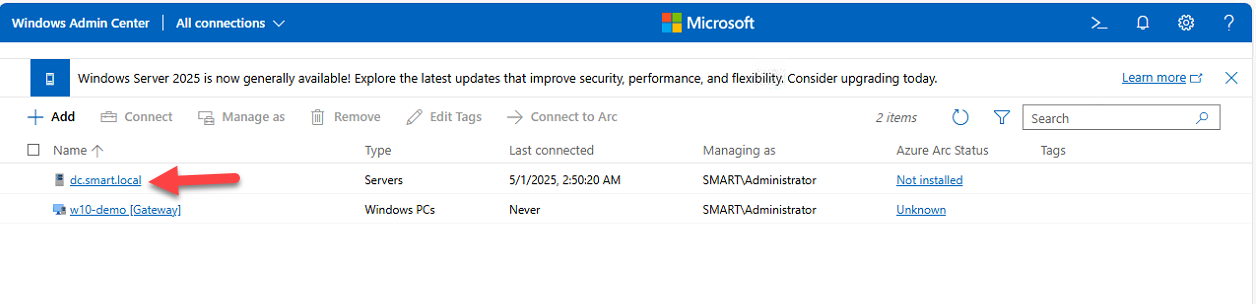
Step 3 — Connect to the DNS server
The DNS tool only appears when you’re managing a server with the DNS role:
- From the WAC home page, click your DNS server (e.g.
DC.smart.local) - Wait for the connection to establish
- Scroll the Tools pane in the left nav, click DNS
If the DNS tool isn’t there, the most likely causes are: extension not installed (re-check Step 2), the target isn’t actually running the DNS role, or the DNS PowerShell module is missing on the target (install with Install-WindowsFeature -Name RSAT-DNS-Server).
Step 4 — Survey existing zones
The DNS tool opens with the existing zones grouped:
- Forward Lookup Zones — FQDN → IP resolution. The everyday stuff:
www.company.com → 10.0.0.5. - Reverse Lookup Zones — IP → FQDN resolution. Used by tools that do reverse lookups (mail servers verifying senders, audit logs that want hostnames instead of just IPs).
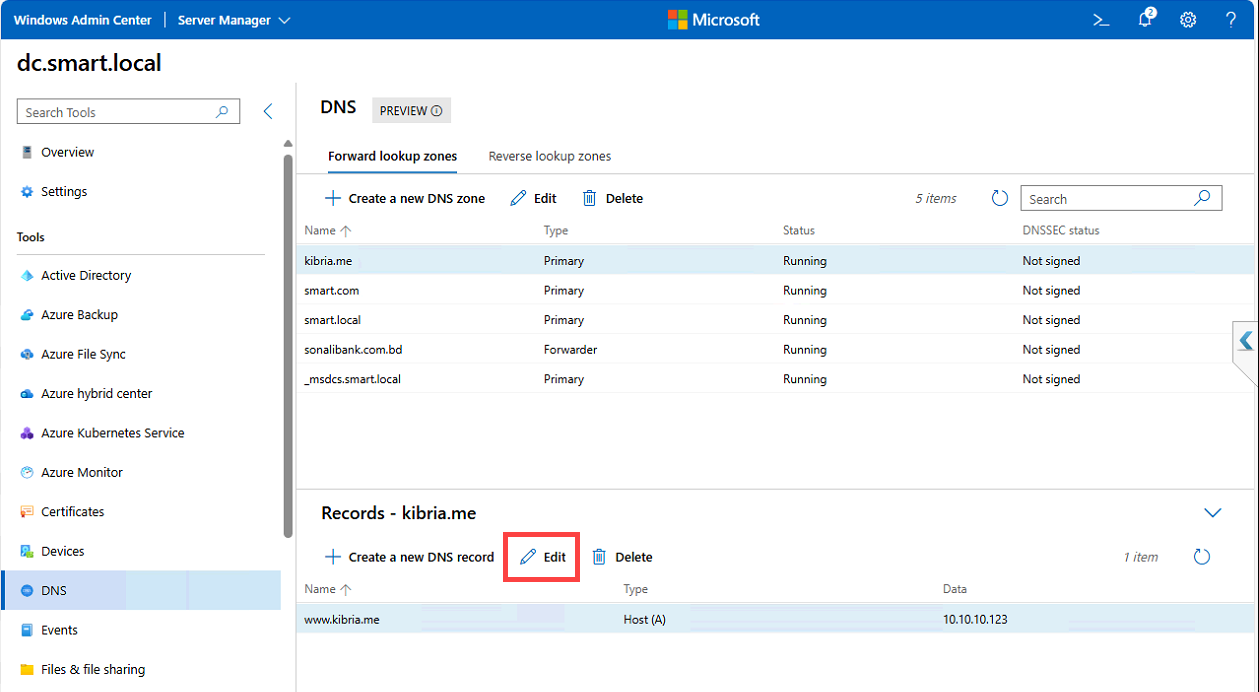
Click any zone to see its records. From the records view you can edit, delete, or add new records.
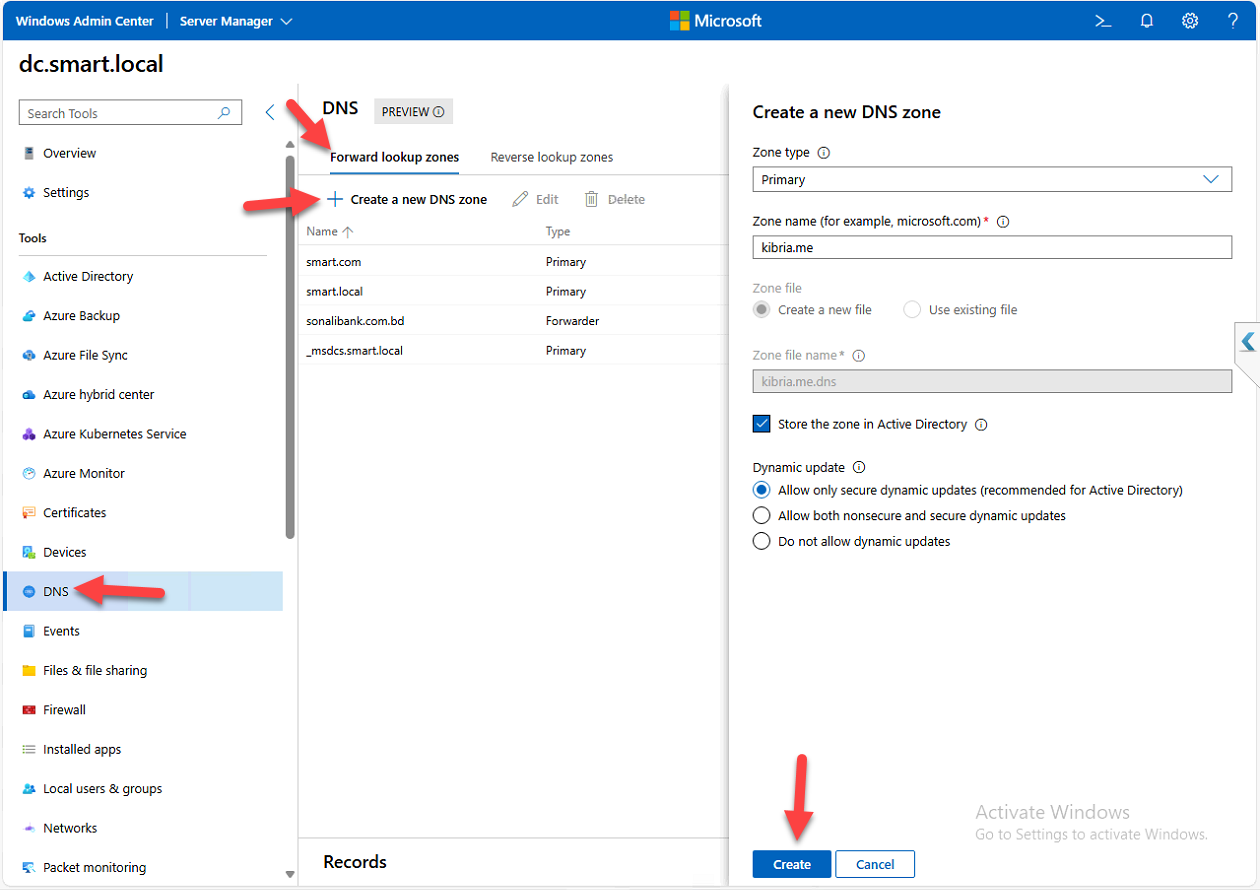
Step 5 — Create a forward lookup zone
- Under Forward Lookup Zones, click + Create new DNS zone
- Pick the Zone Type:
- Primary Zone — main writable zone; what you almost always want
- Secondary Zone — read-only copy of a primary; used for redundancy when you can’t use AD-integrated zones (which are inherently multi-master)
- Stub Zone — just the NS records pointing to a primary elsewhere; used as an alternative to conditional forwarders for some delegation scenarios
- Enter the Zone Name, e.g.
kibria.me - AD integration — if the DNS server is also a DC, you get the option to store the zone in AD. Always tick this on a DC. AD-integrated zones replicate via AD, get multi-master writes, and benefit from AD security. Non-integrated zones require manual zone-transfer configuration and only have one writable copy.
- Dynamic Update — pick Allow only secure updates. This is the right answer in any AD environment — only domain-joined computers with valid Kerberos tickets can register their names. The other options (allow all, none) leave you exposed to spoofed registrations or break AD’s automatic name registration.
- Click Create
Confirmation: “DNS zone created successfully.” The zone appears in the Forward Lookup Zones list.

Step 6 — Add a Host (A) record
The most common DNS record type. Maps a name to an IPv4 address (AAAA records do the same for IPv6).
- Click the new zone (e.g.
kibria.me) - Click + Create new DNS record
- Pick Record Type: Host (A)
- Fill in:
- Record Name: the hostname (e.g.
www) - IP Address: the target IP (e.g.
10.10.10.123)
- Record Name: the hostname (e.g.
- The FQDN auto-populates as
www.kibria.me - Click Create
Step 7 — Edit a record
Click the record > Edit. You can change the IP address, TTL (default is 1 hour for AD-integrated zones; lower it temporarily to e.g. 60 seconds before a planned IP change so the change propagates faster), or the name itself. Save commits.
Step 8 — Reverse lookup zones (optional but recommended)
Reverse zones let DNS resolve IPs back to names. Email servers verify sender legitimacy via reverse DNS; audit logs become much more useful with hostnames instead of just IPs; some monitoring tools require reverse DNS to identify hosts. The setup pattern is the same as forward zones — type, AD integration, dynamic updates — but you specify a network range instead of a domain name.
- Click Reverse Lookup Zones in the left menu
- + Create new DNS zone
- Same Zone Type, AD integration, and dynamic update options as forward zones
- Define the network range (e.g.
192.168.1.x) - Click Create
You can now add PTR records that map IPs back to FQDNs. For deeper coverage of reverse zones and PTR records specifically see DNS reverse lookup zones and PTR records.
Step 9 — Verify with ping
Quickest sanity check: open PowerShell, ping the new record:
ping www.kibria.meThe first line of output should show the IP your record resolves to. The subsequent lines show whether the target is actually reachable — success there means the record is in place AND the target is up; failure with the right IP shown means the record is in place but the target itself is unreachable (a network or host problem, not a DNS problem). For more thorough DNS verification use nslookup or Resolve-DnsName in PowerShell.
Things that bite people in production
Always pick AD-integrated when available
The default file-based zone storage works, but AD-integrated zones get multi-master replication for free, simpler delegation through AD security, and resilience against single-DNS-server failure. The only reasons to skip AD integration: the DNS server isn’t a DC, or you’re building a DMZ DNS server that intentionally shouldn’t replicate to AD.
Secure-only dynamic updates is non-negotiable in AD
The other options — “Allow all updates” or “None” — either let any random network device register a name (spoofing risk) or break AD’s automatic A-record registration for domain-joined computers (operational nightmare). Secure-only is the right answer for AD-integrated zones.
The extension is preview — know what it can’t do
The DNS extension covers zone and record CRUD well. What it doesn’t expose: forwarding configuration (regular and conditional), root hints management, scavenging schedule tuning, zone delegation editing, DNSSEC operations, server-level options (debug logging, recursion settings). For those you still need the DNS Manager MMC or PowerShell DNS cmdlets. The extension complements the classic tools; it doesn’t fully replace them.
Mind your TTL when planning IP changes
The default TTL for AD-integrated zones is 3600 seconds (1 hour). Clients cache resolved names for that long — so an IP change takes up to an hour to propagate to existing clients even after you update the record. For planned IP changes, lower the TTL to 60–300 seconds at least 24 hours before the change so cached records expire quickly during the cutover, then bump it back up afterward.
Reverse zones often get forgotten
Forward zones are obvious — everyone knows they need DNS to reach the file server. Reverse zones tend to be missing or stale, and you only notice when an email server starts rejecting your outgoing mail because your domain has no reverse DNS. Set them up with the forward zones, keep them updated, and verify with nslookup <ip> from time to time.
Audit who has DnsAdmins
The DnsAdmins group is the local admin group on each DNS server — members can configure DNS broadly. In AD environments, DnsAdmins is also part of the “protected groups” family that AdminSDHolder governs. Audit membership periodically; service accounts and helpdesk staff who don’t actually need DnsAdmins shouldn’t have it.
Where this fits
The DNS extension is one of several WAC management surfaces. Companion pieces: installing Windows Admin Center, managing Active Directory through WAC, and enabling Remote Desktop using WAC. For DNS-specific deeper work see configuring DNS forwarding (regular and conditional), DNS reverse lookup zones and PTR records, DNSSEC implementation, and the broader DNS, DHCP & Networking pathway. For DHCP-IPAM-DNS aggregation across many servers, IPAM centralizes the management view.